Hello, hello!
Blessed Monday and start of the week.
I hadn't used my sewing machine for a few months. But on Saturday I went to the next town over and bought a few yards of fabric to make a few pieces of clothing for Danna. Sewing children's clothes is really one of my passions, it's something very entertaining and creative.
In view of that, I wanted to start some sections called "My doll and me", where I make a piece for Danna (my daughter) and another one for her favorite doll.
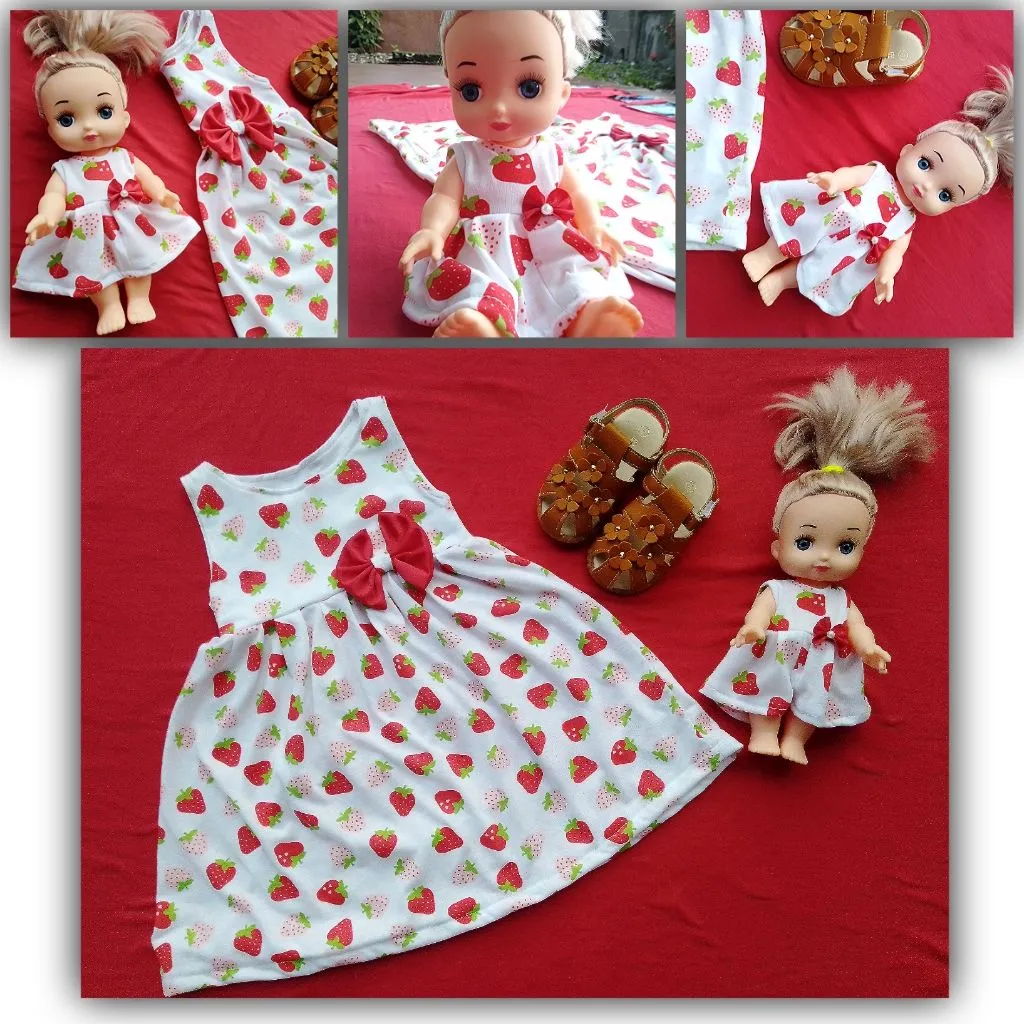
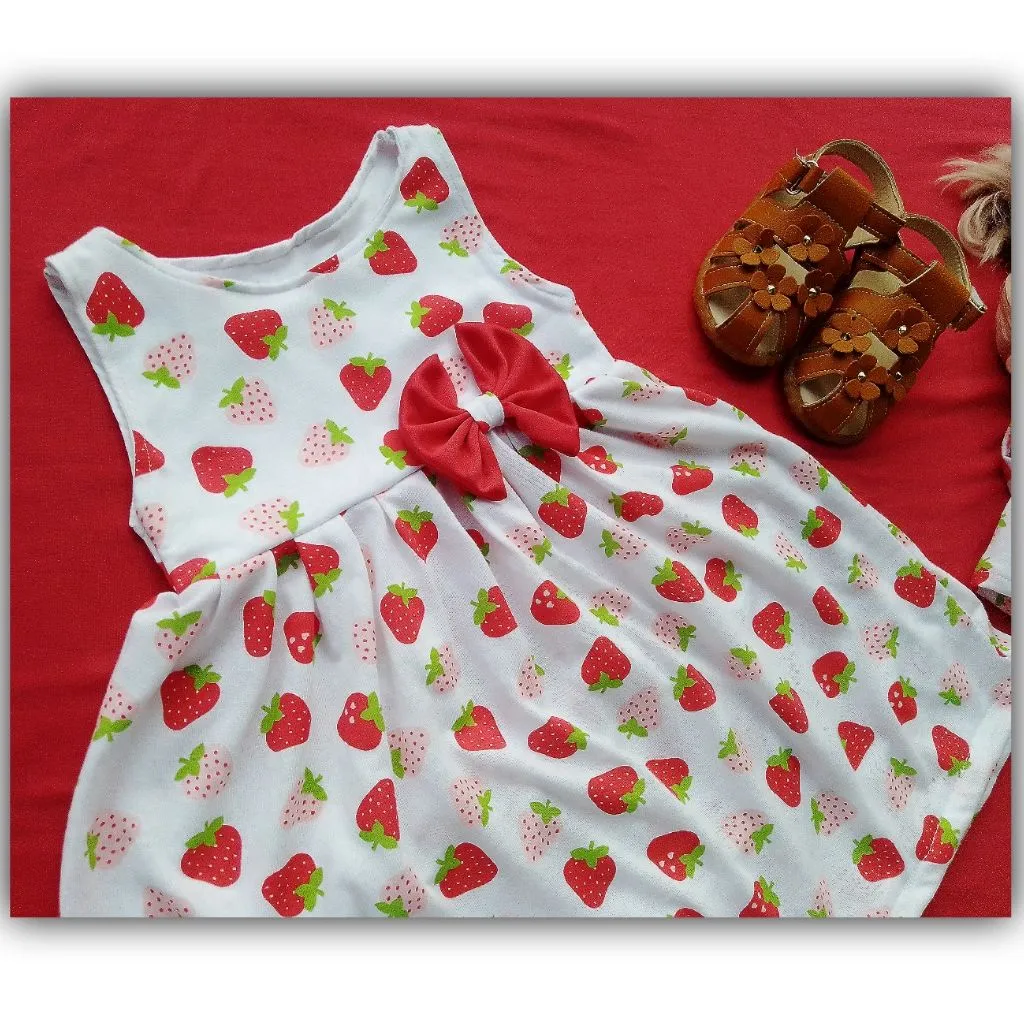
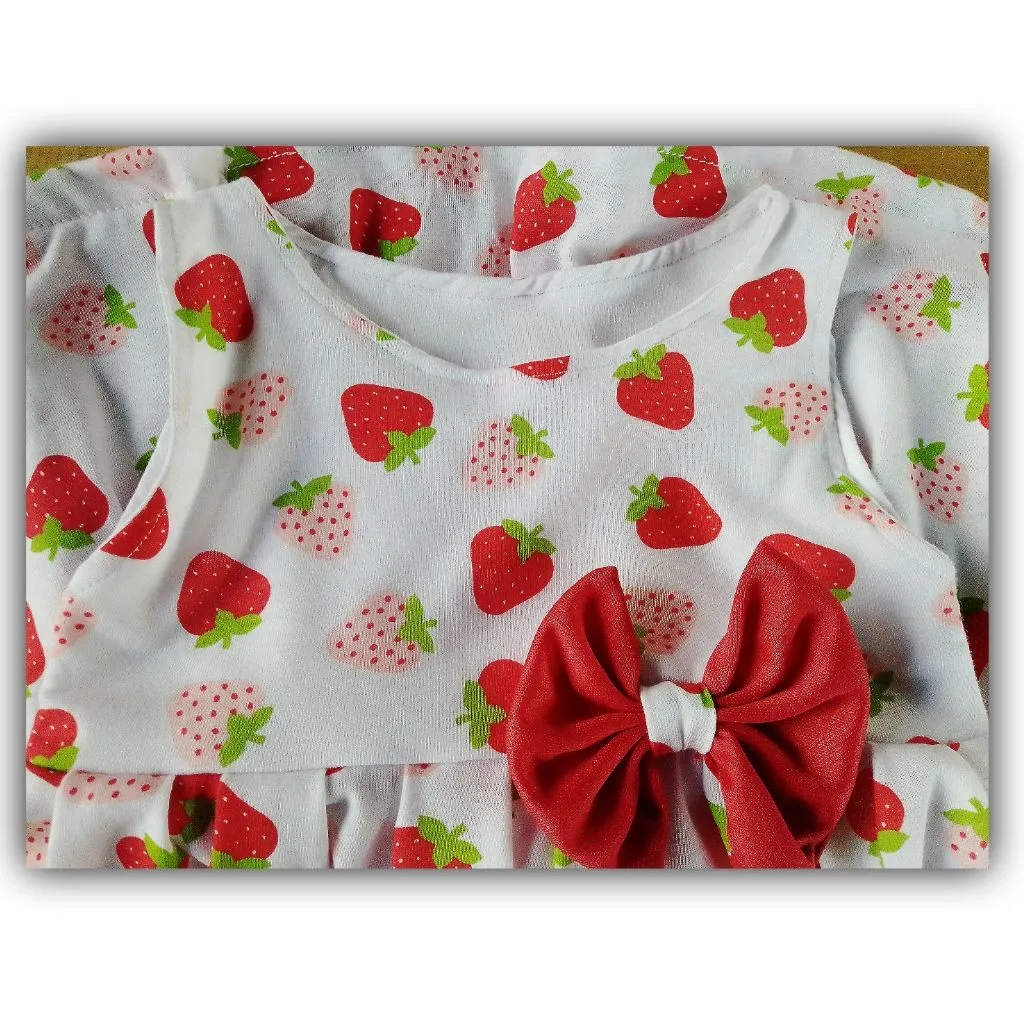
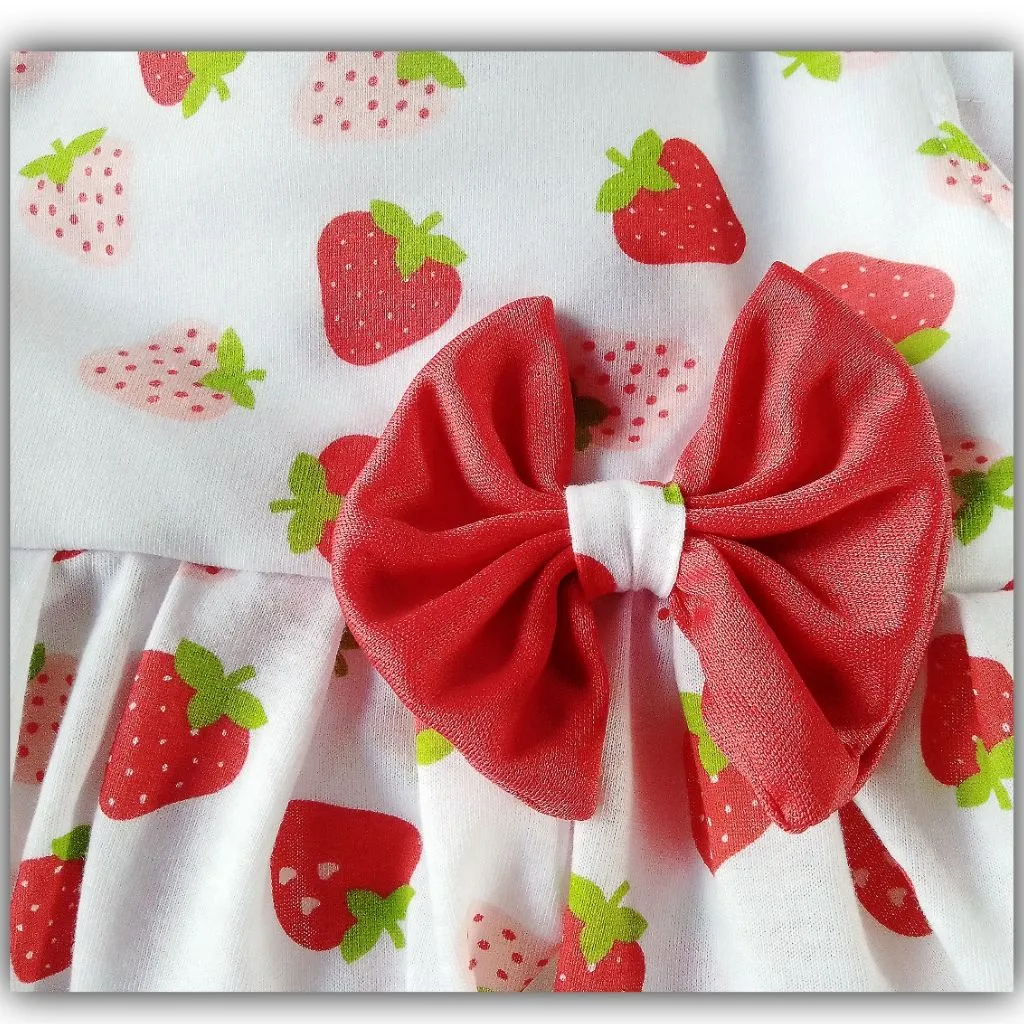
This pair of first pieces, is a dress made of printed cotton fabric. It is a very cool piece and because of the color and print, it becomes very eye-catching and cute.
From the side of the bodice, or top, it is assembled in double fabric, with an interior made in Microdurazno fabric.
Let's go to the step by step!
🙌🙌🙌
✂️✂️✂️✂️✂️✂️
Materials:
- Printed cotton fabric.
- Microdurazno fabric, white.
- Piece of patchwork, red.
- Scissors.
- Pins.
- Sewing machine.
- Matching thread, basic needle.
✂️✂️✂️✂️✂️✂️
Step by step:
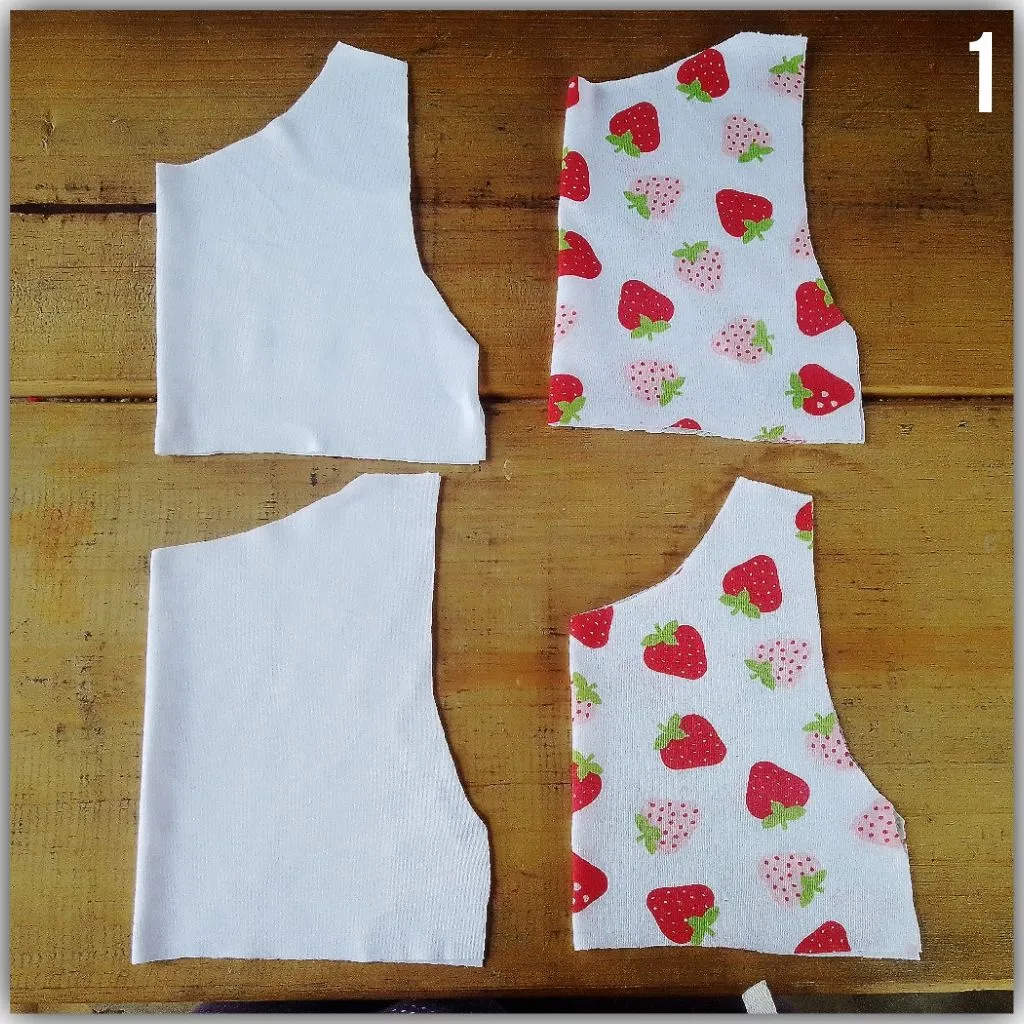
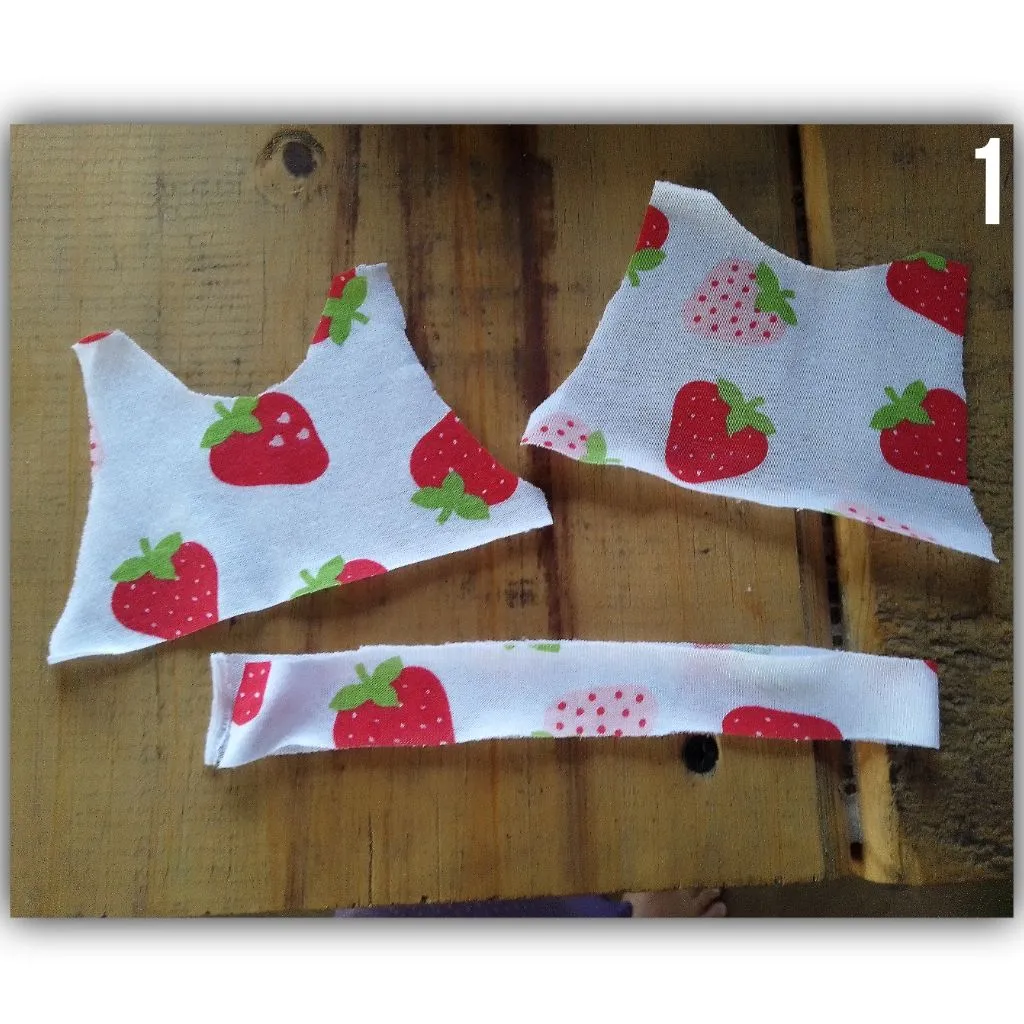
A.- We cut the pieces of the bodice or top. We cut two pieces of printed cotton, one for the front and one for the back. Likewise for the Microdurazno, which would be its inner part. See figure 1.
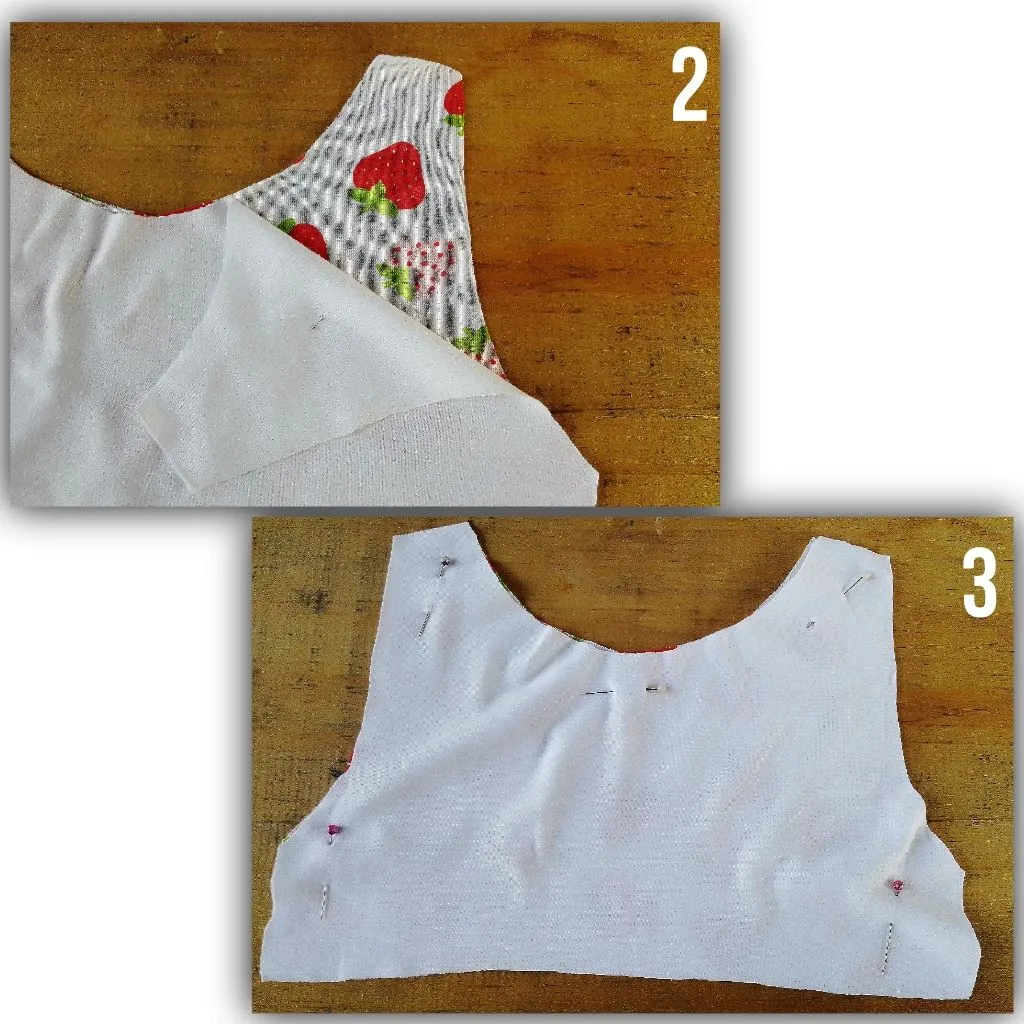
B.- We take a piece from the inside and another one from the outside. We face straight. See figure 2. Then, we place pins, so that the pieces do not move and it is easier when sewing. See figure 3.
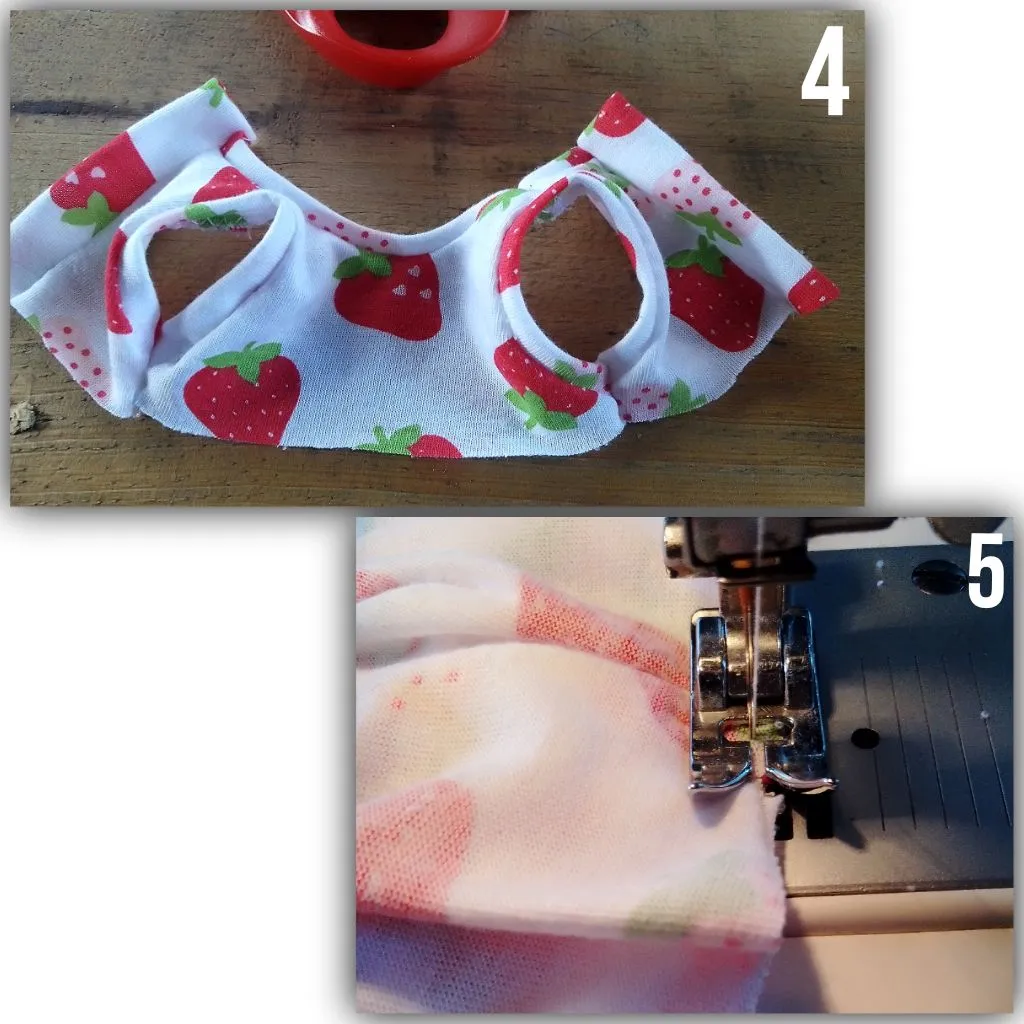
C.- We go to our sewing machine and pass a straight seam all around the contour. Except for the base and the shoulders. See figure 4. We turn over and our piece will look like in figure 5.
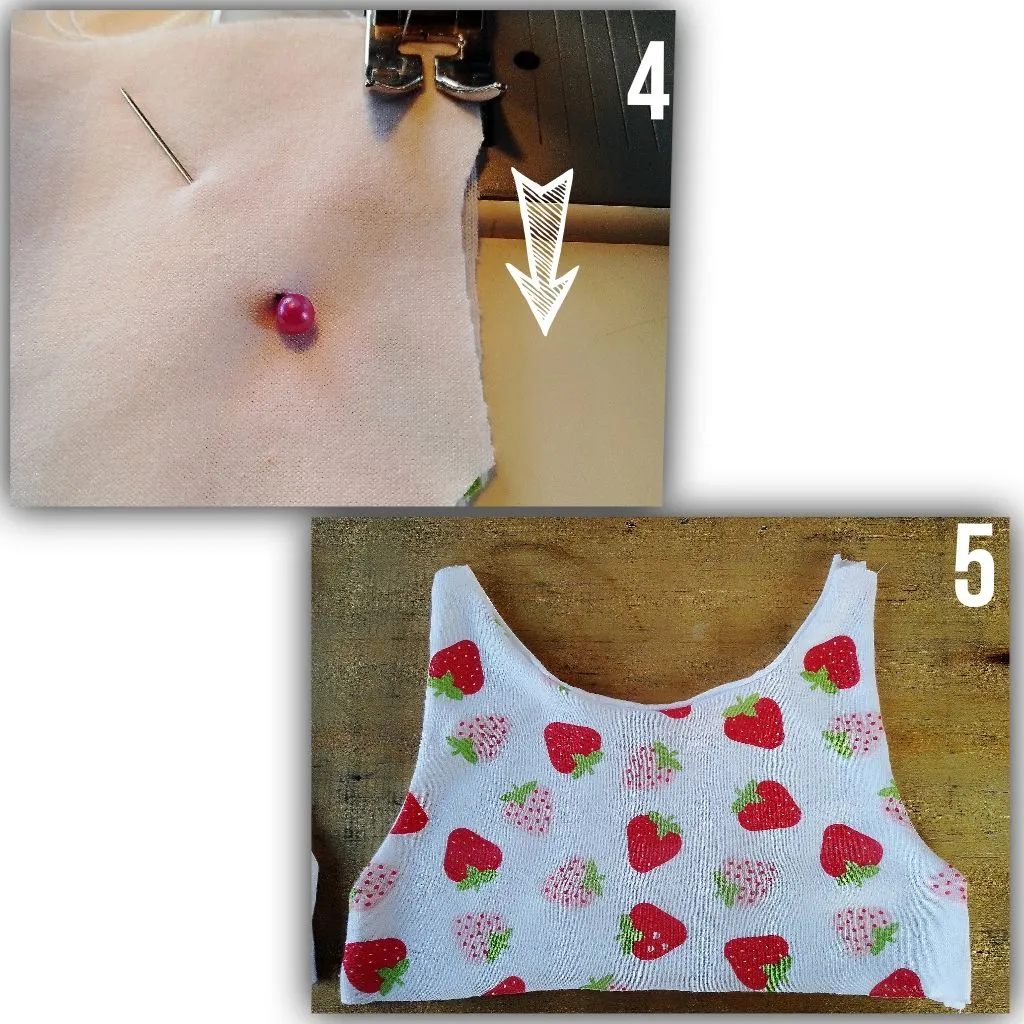
D.- Now, we will pass a seam in the front part of each piece. This, to give better neatness to the piece. See figure 6. We join on one side. See figure 7.
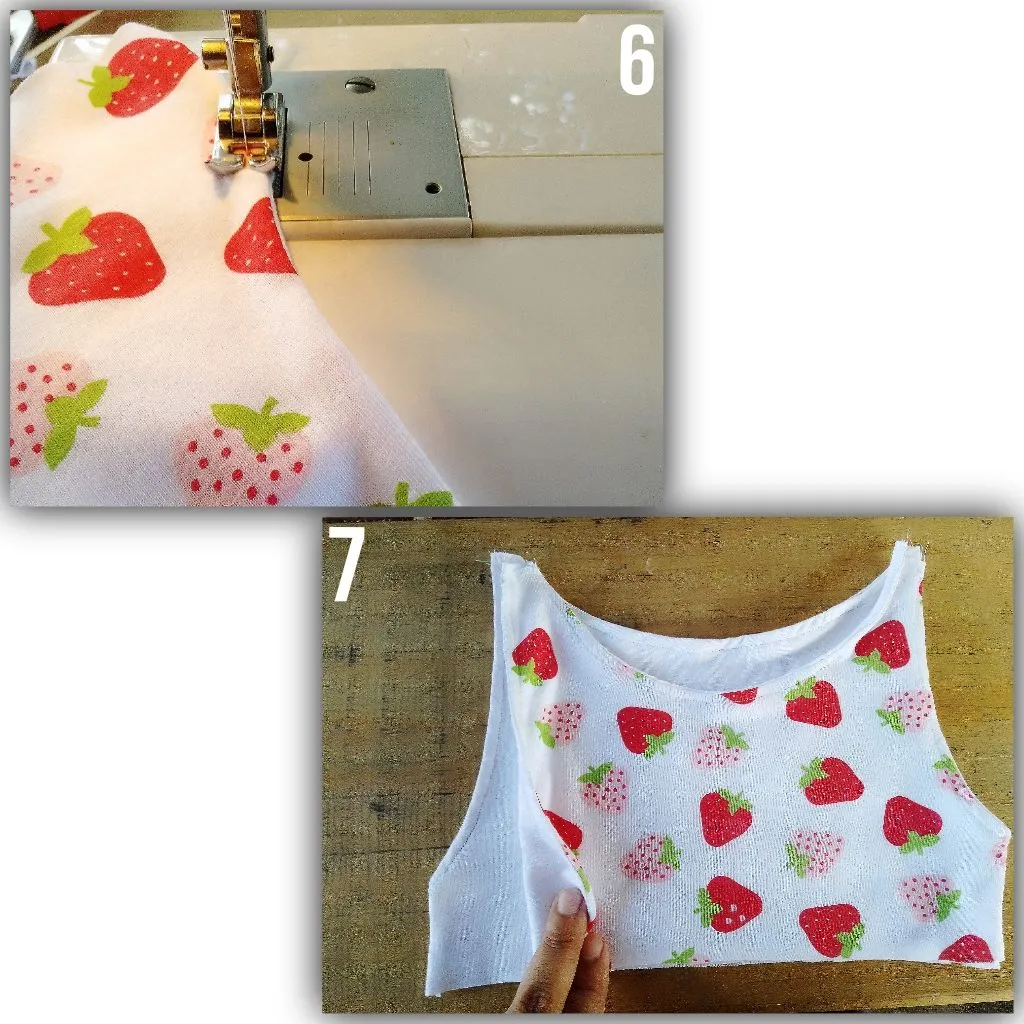
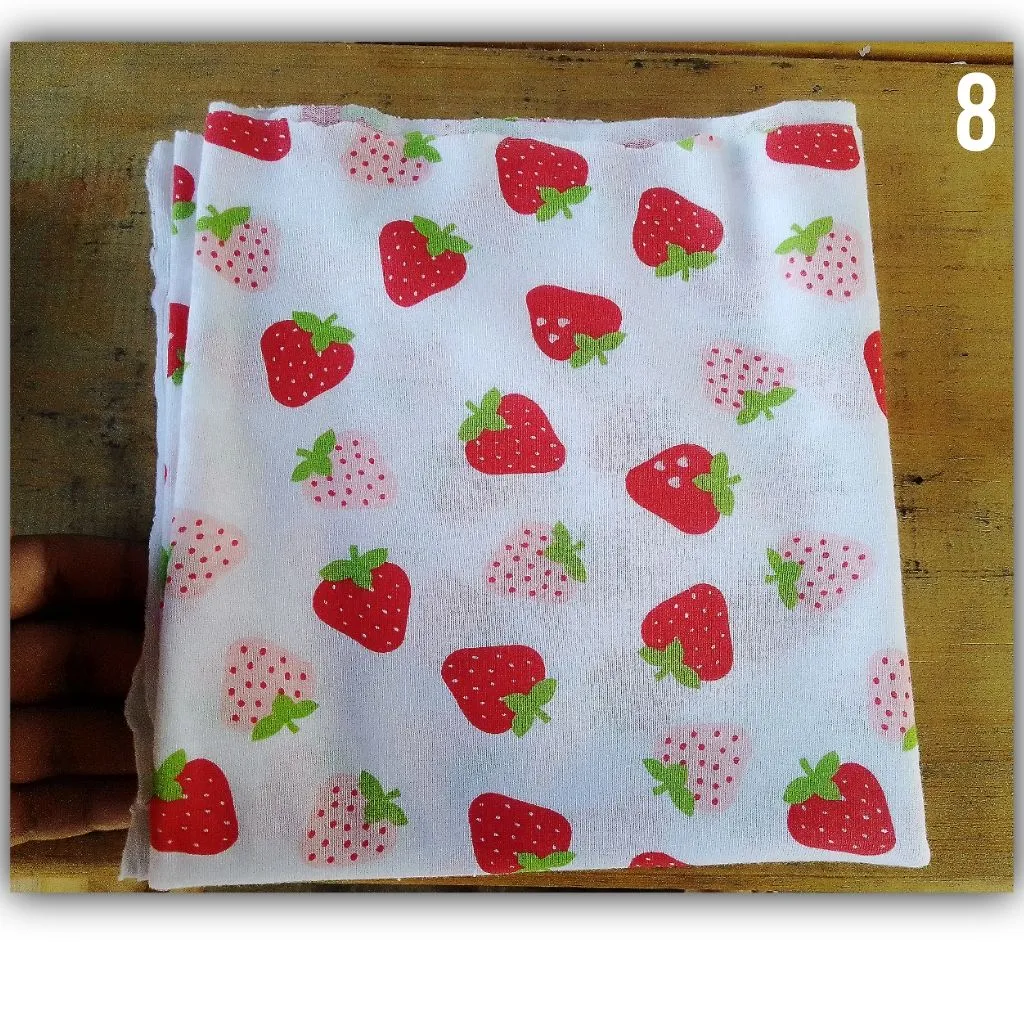
E.- Cut a rectangle, to the full width of the fabric. The height will depend on the height of the girl. I recommend you to measure. See figure 8.
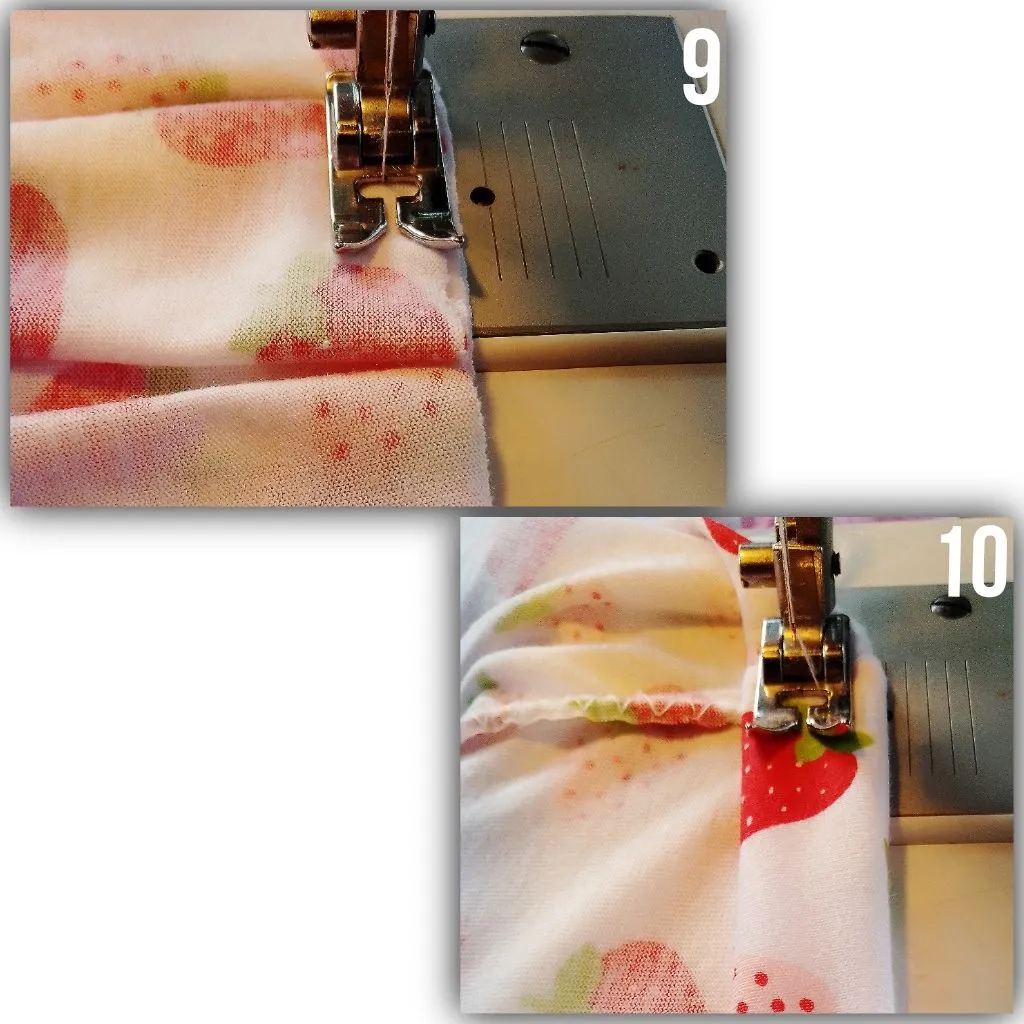
F.- We face right sides together and make pleats as we pass a straight seam. The distance and size of the pleats is to your liking. See figure 9. Now we pass a zigzag seam, to better secure the piece. Close the side of the skirt. We will make a hem at the bottom. See figure 10.
The dress is ready. Now, let's elaborate the decorative ribbon:
A.- Cut a rectangle and sew the outline. Leave a space in the upper middle. Then, flip it over and with needle and thread, manually make a few wide stitches in the middle. Then we gather and tie a knot to hold. Cover the middle with a piece of the same fabric as the dress. See following figures:
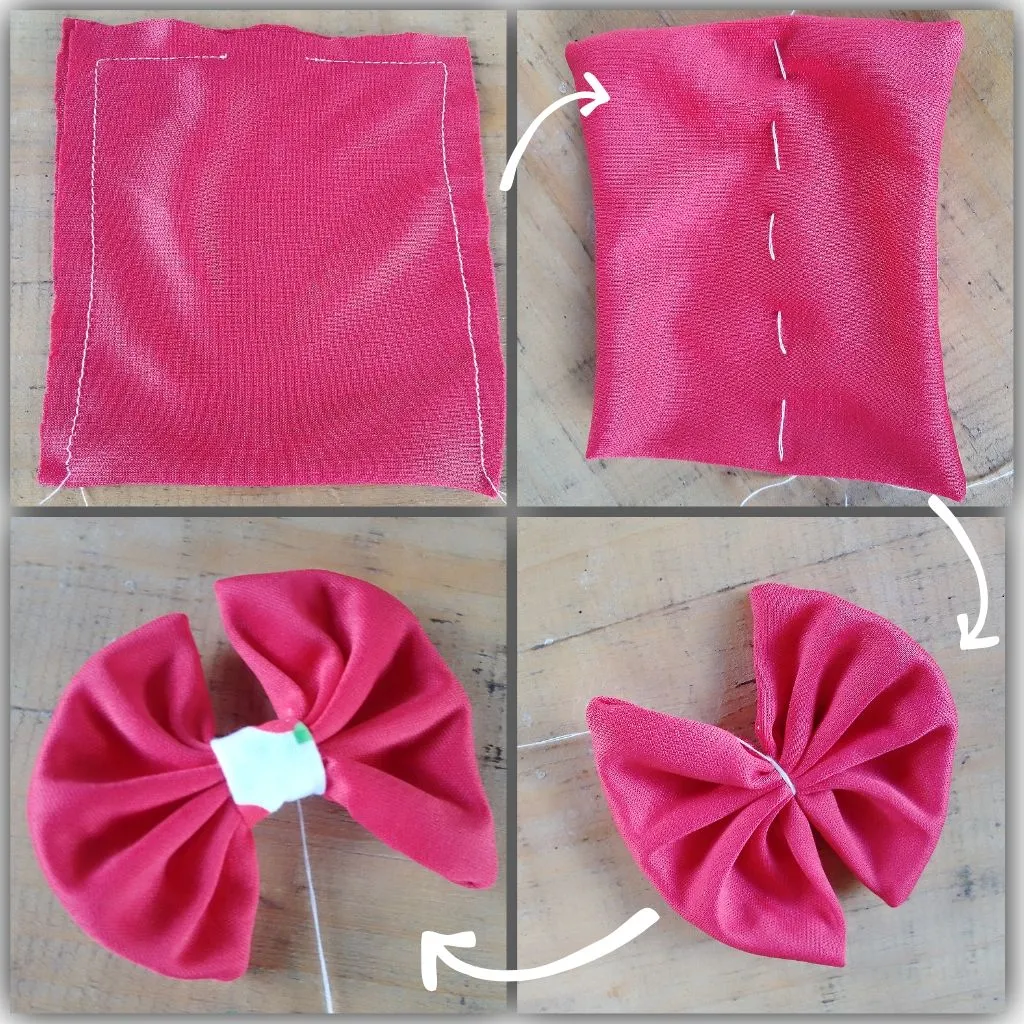
Let's sew the loop at the level of the cut of the bodice on one side at will.
Now, comes the doll's dress:
For the doll's measurements, I used a previous dress I had of hers.
A.- We cut the pieces we need. This time, I have used a small ribbon to place in the armholes and neckline.
B.- We join at the shoulders. We place the ribbon on the neck and shoulders, as well as the back. See figures 2 and 3.

C.- Join sides. Cut the rectangle for the skirt and follow the process of the girl's dress. We also make the bottom hem. See figures 4 and 5.
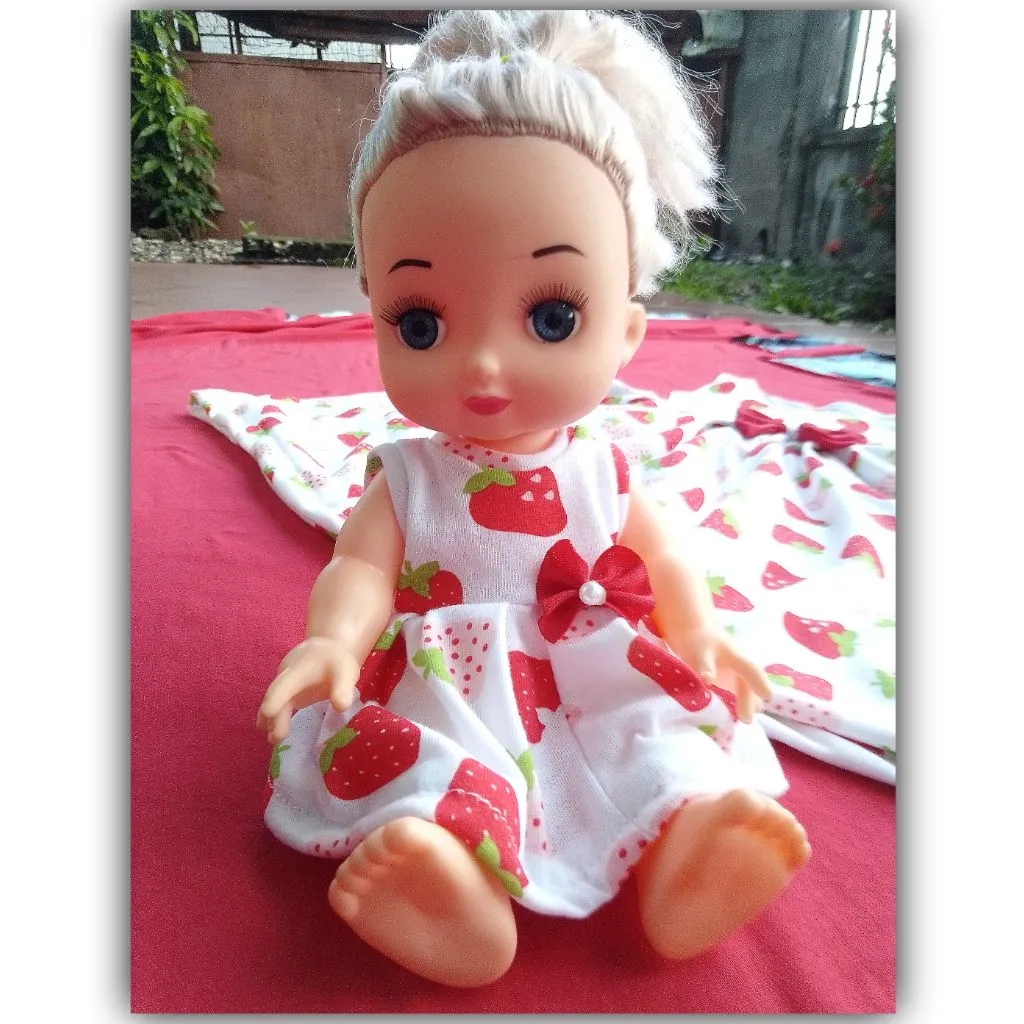
D.- We place magic clasp in the back part. We also place a bow similar to the girl's dress.

Standing ready, take a look:
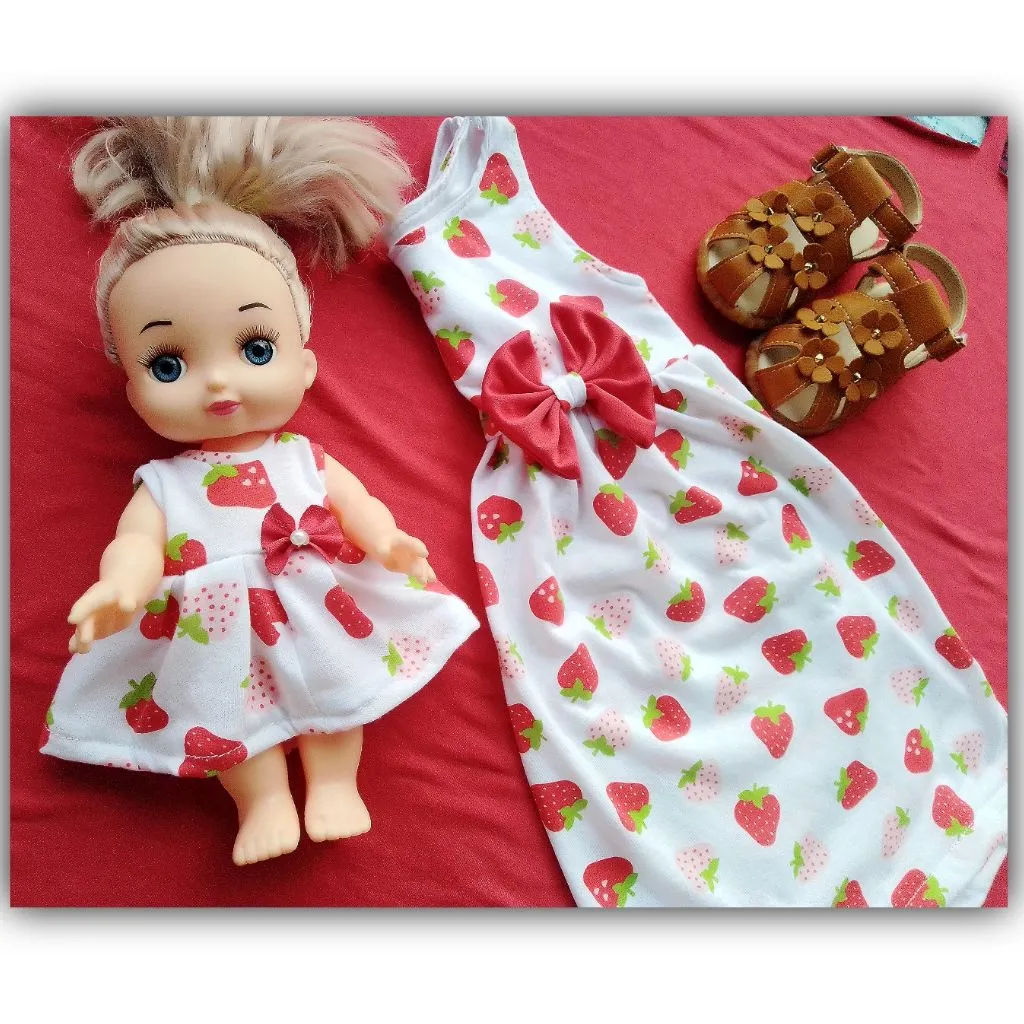
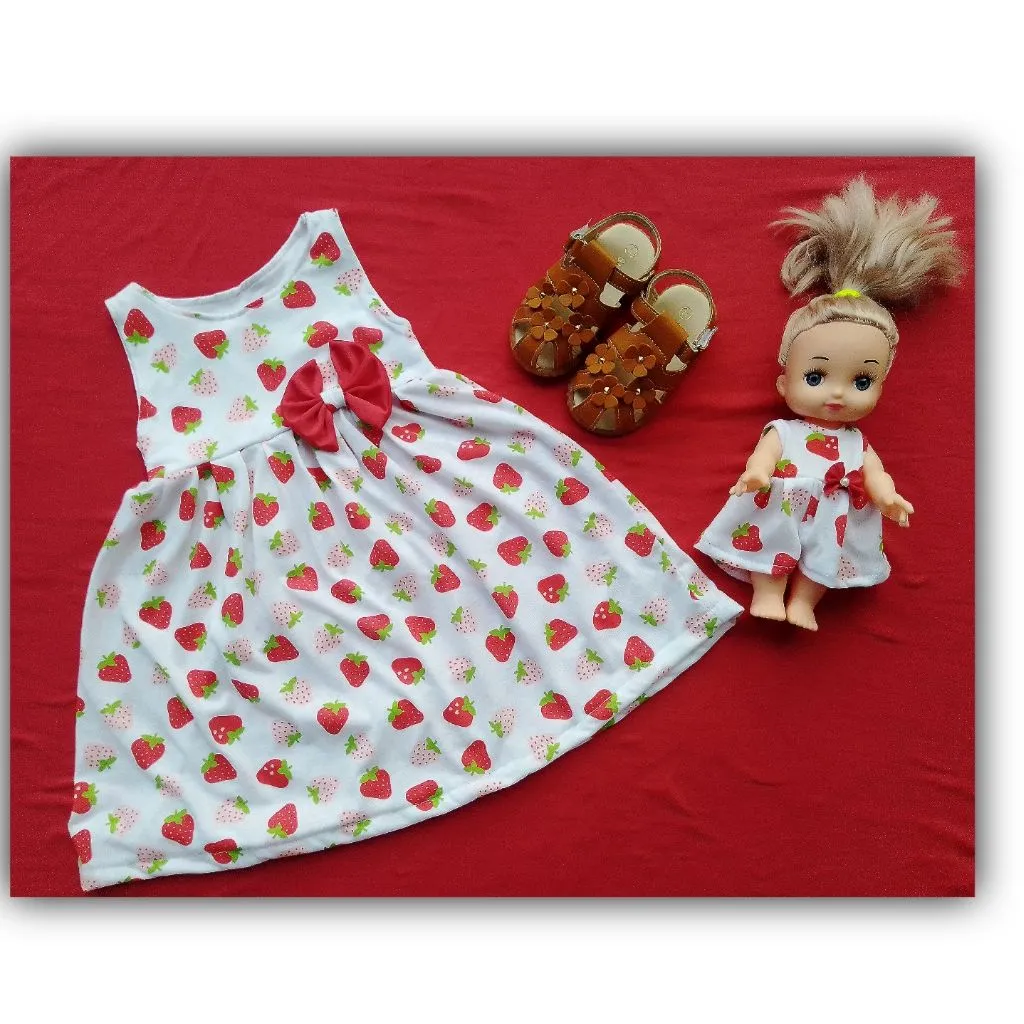
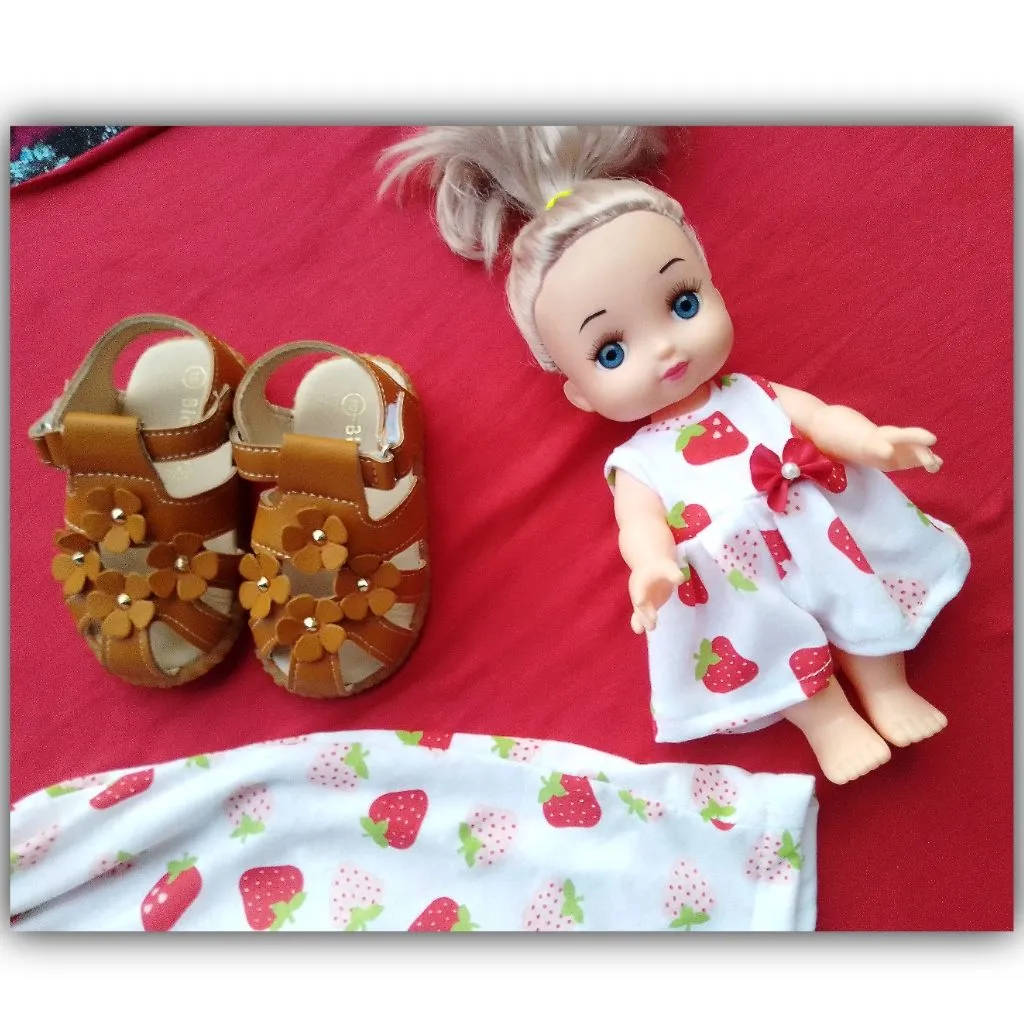
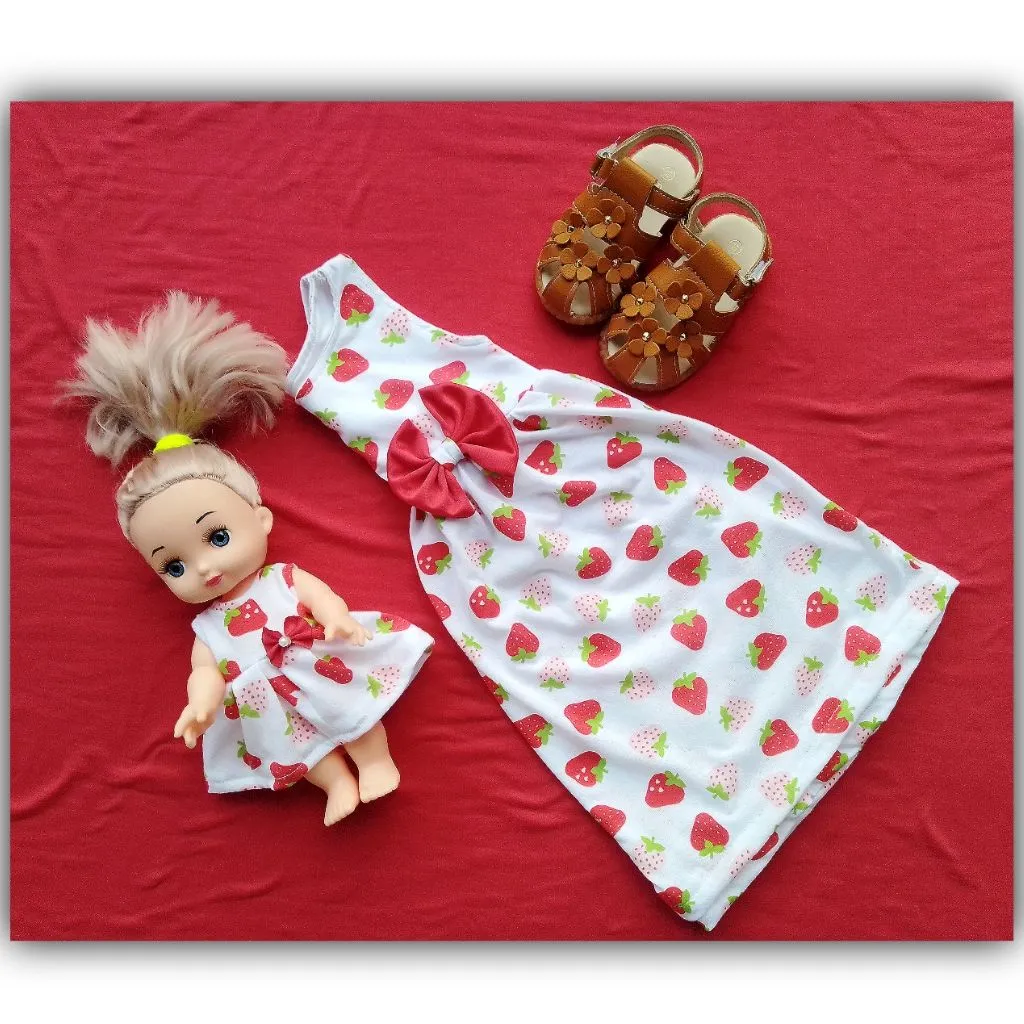
My little girl was very happy with her new dress, plus she was smiling excited to see her doll in the same dress. I think, it is a very fun and creative way to go about forming a line of duo pieces.
Thank you for your attention, kind regards: Ana Pialejo, under my username of : @pialejoana.
🌟🌟🌟🌟🌟🌟🌟🌟
Versión en Español:
¡Hola, Hola.!
Bendecido lunes e inicio de semana.
Tenía unos meses que no usaba mi máquina de coser. Pero el sábado fui a la ciudad vecina y compré algunos metros de tela para hacer unas piezas de ropa para Danna. Realmente la costura de ropa infantil es una de mis pasiones, es algo muy entretenido y creativo.
En vista de eso, he querido iniciar unas secciones llamadas "Mi muñeca y yo", donde elaboro una pieza para Danna (mi hija) y otra para su muñeca favorita.
Este par de primeras piezas, se trata de un vestido elaborado en tela de algodón estampado. Es una pieza muy fresca y por el color y estampado, se vuelve muy llamativo y lindo.
Desde el lado del corpiño, o parte superior, se encuentra armado en doble tela, con un interior elaborado en tela de Microdurazno.
¡Vamos al paso a paso!
🙌🙌🙌
✂️✂️✂️✂️✂️✂️
Materiales:
- Tela de Algodón estampado.
- Tela de Microdurazno blanco.
- Trozo de retazo, rojo.
- Tijeras.
- Alfileres.
- Máquina de coser.
- Hilo a tono, aguja básica.
✂️✂️✂️✂️✂️✂️
Paso a paso:
A.- Cortamos las piezas del corpiño o parte superior. Cortamos dos de algodón estampado, uno para el frente y otro para la parte trasera. Igualmente para el Microdurazno, que sería su parte interior. Ver figura 1.
B.- Tomamos una pieza del interior y otra de la parte exterior. Enfrentamos derechos. Ver figura 2. Luego, colocamos alfileres, para que las piezas no se muevan y sea más fácil al momento de coser. Ver figura 3.
C.- Nos vamos a nuestra máquina de coser y pasaremos una costura recta por todo el contorno. Exceptuando la parte de la base y de los hombros. Ver figura 4. Volteamos y lucirá nuestra pieza como en la figura 5. Repetimos el proceso con la pieza trasera.
D.- Ahora, pasaremos una costura en la parte delantera de la cada pieza. Esto, para dar mejor prolijidad a la pieza. Ver figura 6. Unimos por un costado. Ver figura 7.
E.- Cortamos un rectángulo, a todo lo ancho que da la tela. Lo alto, dependerá de la altura de la niña. Te recomiendo medir. Ver figura 8.
F.- Enfrentamos derechos y haremos pliegues a medida que vamos pasando una costura recta. La distancia y tamaño de los pliegues es a gusto. Ver figura 9. Pasamos ahora una costura de zigzag, para asegurar mejor la pieza. Cerramos el costado de la falda. Haremos un dobladillo en la parte inferior. Ver figura 10.
Estando listo el vestido. Ahora, elaboremos el lazo decorativo:
A.- Cortamos un rectángulo y cosemos el contorno. Dejamos un espacio en el medio superior. Luego, volteamos y con aguja e hilo, manualmente haremos unas puntadas anchas en medio. Después fruncimos y hacemos un nudo para sujetar. Cubrimos el medio, con un trozo de tela de la misma del vestido. Ver siguientes figuras:
Cosemos el lazo a nivel del corte del corpiño en un lado a gusto.
Ahora, viene el vestido de la muñeca:
Para las medidas de la muñeca, he usado un vestido anterior que tenía de ella.
A.- Cortamos las piezas a necesitar. En esta ocasión, he usado un pequeño listón para colocar en las sisas y cuello.
B.- Unimos por hombros. Colocamos el listón en el cuello y hombros,además de la parte trasera. Ver figuras 2 y 3.
C.- Unimos costados. Cortamos el rectángulo para la falda y seguimos el proceso del vestido de la niña. Hacemos también el dobladillo inferior. Ver figuras 4 y 5.
D.- Colocamos cierre mágico en la parte de la espalda. También colocamos un lazo similar al vestido de la niña.
Estando listos, da un vistazo:
Mi niña quedó muy contenta con su vestido nuevo, además de que sonreía emocionada por ver a su muñeca con un mismo vestido. Creo, que es una manera muy divertida y creativa de ir formando una línea de piezas dúo.
Gracias por su atención, atentamente: Ana Pialejo, bajo mi usuario de : @pialejoana.