[Custom Thumbnail]
All the Code of the series can be found at the Github repository:
https://github.com/drifter1/compiler
Introduction
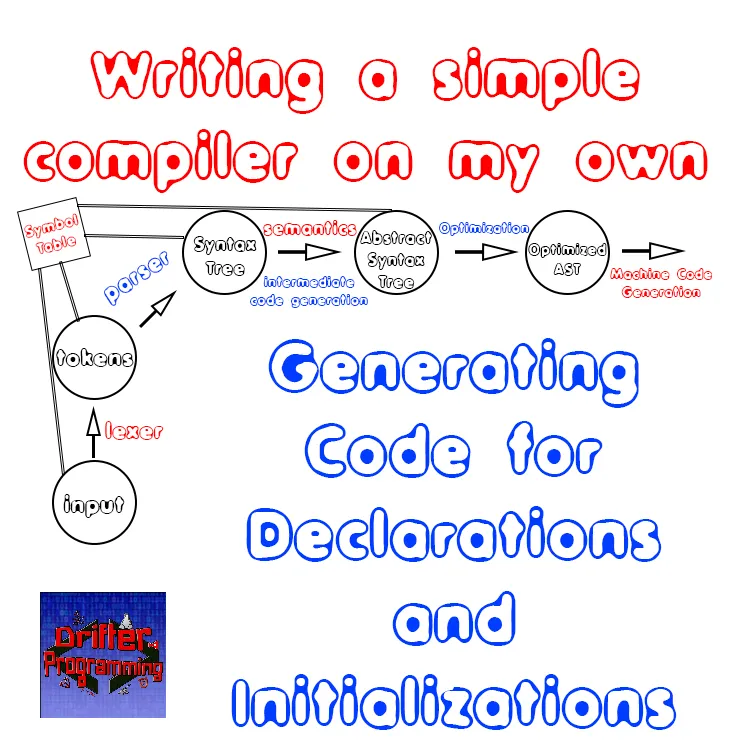
Hello it's a me again @drifter1! Today we continue with my Compiler Series, a series where we implement a complete compiler for a simple C-like language by using the C-tools Flex and Bison. In this article we will generate Assembly Code for Declarations and Initializations.Requirements:
Actually you need to read and understand all the topics that I covered in the series as a whole, as these articles will give you access to knowledge about:- What Compiler Design is (mainly the steps)
- For which exact Language the Compiler is build for (Tokens and Grammar)
- How to use Flex and Bison
- How to implement a lexer and parser for the language using those tools
- What the Symbol Table is and how we implement it
- How we combine Flex and Bison together
- How we can pass information from the Lexer to the Parser
- How we define operator priorities, precedencies and associativity
- What Semantic Analysis is (Attributes, SDT etc.)
- How we do the so called "Scope Resolution"
- How we declare types and check the type inter-compatibility for different cases that include function parameters and assignments
- How we check function calls later on using a "Revisit queue", as function declarations mostly happen after functions get used (in our Language)
- Intermediate Code Representations, including AST's
- How we implement an AST (structure and management)
- Action Rules for AST nodes and more
- The target system's architecture and its assembly language (MIPS)
Difficulty:
Talking about the series in general this series can be rated:- Intermediate to Advanced
- Easy
Actual Tutorial Content
Variable Datatypes and their Sizes
The three basic datatypes of our language are:- Integer - 4 Bytes (1 word)
- Real (Double) - 8 Bytes (Floats are 4 Bytes)
- Char - 1 Byte
To simplify things, we will only use double reals for now!
Those types can further be combined to create:
- Strings - N Bytes of characters (only used as printing parameters)
- Arrays - N*sizeof(datatype), where N = array size
Additionally, our simple c-like language also supports pointers, which are 4 Bytes (1 word) long for any datatype, as they only have to store memory addresses!
So, thinking about the the .data declarations we will use:
- .word for integers and pointers
- .double for reals (which defines 8 bytes of storage)
- .byte for characters
- .space for arrays
Various Fixes and Tweaks
Writing the code for machine generation, I found out lots of bugs that needed to be fixed, those are:Lexer
Instead of returning the character, I returned the ' symbol, making any constant that referred to characters to get the ASCII value 39, which corresponds to the symbol '. So, the {ICONST} rule of the lexer, now returns yytext[1] instead of yytext[0]:{CCONST} { yylval.val.cval = yytext[1]; return CCONST; }Parser
There were also some bugs in the parser. First of all, we should check if we are currently declaring a variable to be able to set the array_size of an array, which can be checked using our flag variable "declare". In other words, the variable rule now looks like this:variable: ID { $$ = $1; }
| pointer ID
{
$2->st_type = POINTER_TYPE;
$$ = $2;
}
| ID array
{
if(declare == 1){
$1->st_type = ARRAY_TYPE;
$1->array_size = $2;
$$ = $1;
}
}
;Without doing that, the value of array_size changed during the compilation process to some weird looking value!
In the variable initialization rule var-init, we casted the wrong sub-rule to AST_Node_Const, losing the constant information. More specifically, we ended up with $$ instead of $3, which refers the constant node. So, this rule now looks like this:
var_init : ID ASSIGN constant
{
    AST_Node_Const *temp = (AST_Node_Const*) $3;
    $1->val = temp->val;
    $1->st_type = temp->const_type;
    $$ = $1;
}
;
Declaration Code
New header and code file
To separate the machine code generating stuff from the previous things that we wrote during this series, we will create two new c-code files, that will take care of machine code generation:- code_generation.h - header file
- code_generation.c - code file
The .c file will have to be included in the parser.y file as following:
%{
    #include "semantics.c"
    #include "symtab.c"
    #include "code_generation.c"
    #include "ast.h"

    ...

%}

...
Doing that we only have to include the code_generation.h header inside of code_generation.c and nothing inside of code_generation.h.
Machine code generation function
To start the machine code generation process, we will define a new function called "generate_code()", that will call various sub-functions and use information from the symbol table and AST. This function will be called after the compilation process is finished and so exactly before the "return flag;" statement of the main function inside of parser.y:int main (int argc, char *argv[]){
...
// code generation
generate_code();
return flag;
}Furthermore, this function will also manage the output file to which we will write the generated code, passing the created file pointer to the various sub-functions. For example, to generate the .data declarations we will define another function called "generate_data_declarations()", that will be called inside of this new function. This function has to take in the file pointer that has been created inside of generate_code().
Eventually, thinking about all this stuff, right now, we only have the following code:
code_generation.h:
/* main assembly code generation function */
void generate_code();

/* generation declaration assembly code */
void generate_data_declarations(FILE *fp);

.........................................................................

code_generation.c:
#include "code_generation.h"

void generate_code(){
    FILE *fp;
    fp = fopen("out.s", "w");

    generate_data_declarations(fp);

    fclose(fp);
}

void generate_data_declarations(FILE *fp){
    ...
}
Generate data declarations
After the quite enormous setup, we finally came to the peak of this tutorial. Thinking about the things that we covered about the datatypes and their sizes, we basically only have to loop through the symbol table's lists and the entries of each of those lists (when the list is not empty). Then checking the st_type entry we know if we are talking about a simple variable of type int, real or char, an array that will also have some inf_type (int, real or char) or finally if the current entry is a pointer to some datatype.For each of those cases we basically print out "name: .type value". The name is stored inside of the st_name variable of the symbol table entry. The type can be deduced from the data type that can be found in st_type and basically is .word (4 bytes), .double (8 bytes) , .byte (1 byte) or .space ("any" number of bytes). The value will either be 0 or the value that the symbol table entry got during the declaration, if the declaration also had an initialization.
We will not talk about array initializations yet...
So, the code for generating data declarations is:
void generate_data_declarations(FILE *fp){
    /* print .data */
    fprintf(fp, ".data\n");

    /* loop through the symbol table's lists */
    int i;
    for (i = 0; i < SIZE; i++){
        /* if hashtable list not empty */
        if (hash_table[i] != NULL){
            list_t *l = hash_table[i];
            /* loop through list */
            while (l != NULL){
                /* Simple Variables */
                if (l->st_type == INT_TYPE){
                    fprintf(fp, "%s: .word %d\n", l->st_name, l->val.ival);
                }
                else if (l->st_type == REAL_TYPE){
                    fprintf(fp, "%s: .double %f\n", l->st_name, l->val.fval);
                }
                else if (l->st_type == CHAR_TYPE){
                    fprintf(fp, "%s: .byte \'%c\'\n", l->st_name, l->val.cval);
                }

                /* Array */
                else if (l->st_type == ARRAY_TYPE){
                    if (l->inf_type == INT_TYPE){
                        fprintf(fp, "%s: .space %d\n", l->st_name, l->array_size*4);
                    }
                    else if (l->inf_type  == REAL_TYPE){
                        fprintf(fp, "%s: .space %d\n", l->st_name, l->array_size*8);
                    }
                    else if (l->inf_type  == CHAR_TYPE){
                        fprintf(fp, "%s: .space %d\n", l->st_name, l->array_size*1);
                    }
                }

                /* Pointer */
                else if (l->st_type == POINTER_TYPE){
                    fprintf(fp, "%s: .word 0\n", l->st_name);
                }

                /* Function (ignore) */
                else if (l->st_type == FUNCTION_TYPE){

                }

                l = l->next;
            }
        }
    }
}
Running the compiler
Let's run the compiler to see what we get for the examples!Simple Example
.data
i: .word 0
val: .double 0.000000
res: .double 0.000000
Simple Example 2
.data
i: .word 0
val: .double 2.500000
res: .space 80
Full Example
.data
c: .byte 'c'
i: .word 0
p: .word 0
val: .double 2.500000
res: .space 48
I guess that you can see how similar the code came to be to what we defined by ourselves in the previous 3 articles! It's still not perfect, but surely something that we can now work with more easily! I hope that this made you even more hyped to what's about to follow...
RESOURCES
References:
No references, just using code that I implemented in my previous articles.Images:
All of the images are custom-made!Previous parts of the series
General Knowledge and Lexical Analysis
- Introduction
- A simple C Language
- Lexical Analysis using Flex
- Symbol Table (basic structure)
- Using Symbol Table in the Lexer
Syntax Analysis
- Syntax Analysis Theory
- Bison basics
- Creating a grammar for our Language
- Combine Flex and Bison
- Passing information from Lexer to Parser
- Finishing Off The Grammar/Parser (part 1)
- Finishing Off The Grammar/Parser (part 2)
Semantic Analysis (1)
- Semantic Analysis Theory
- Semantics Examples
- Scope Resolution using the Symbol Table
- Type Declaration and Checking
- Function Semantics (part 1)
- Function Semantics (part 2)
Intermediate Code Generation (AST)
- Abstract Syntax Tree Principle
- Abstract Syntax Tree Structure
- Abstract Syntax Tree Management
- Action Rules for Declarations and Initializations
- Action Rules for Expressions
- Action Rules for Assignments and Simple Statements
- Action Rules for If-Else Statements
- Action Rules for Loop Statements and some Fixes
- Action Rules for Function Declarations (part 1)
- Action Rules for Function Declarations (part 2)
- Action Rules for Function Calls
Semantic Analysis (2)
- Datatype attribute for Expressions
- Type Checking for Assignments
- Revisit Queue and Parameter Checking (part 1)
- Revisit Queue and Parameter Checking (part 2)
- Revisit Queue and Parameter Checking (part 3)
- Revisit Queue and Parameter Checking (part 4)
- Revisit Queue and Assignment Checking (part 1)
- Revisit Queue and Assignment Checking (part 2)
- Revisit Queue and Assignment Checking (part 3)
Machine Code Generation
- Machine Code Generation Principles
- Writing a simple Compiler on my own - MIPS Instruction Set
- Simple Examples in MIPS Assembly
- full_example.c in MIPS Assembly (part 1)
- full_example.c in MIPS Assembly (part 2)
Final words | Next up on the project
And this is actually it for today's post! I hope that I explained everything as much as I needed to. Next time we will continue with more stuff around Machine Code generation!Next up on this series, in general, are:
- Machine Code generation (MIPS Assembly)
- Various Optimizations in the Compiler's Code
Which are all topics for which we will need more than one article to complete them. Also, note that we might also get into AST Code Optimizations later on, or that we could even extend the Language by adding complex datatypes (structs and unions), more rules etc.
So, see ya next time!
GitHub Account:
https://github.com/drifter1
Keep on drifting! ;)