
¡Hola Chicos!
Para quienes no lo sepan, los túneles son expansiones en el lóbulo de la oreja. Esto se logra introduciendo a presión un objeto en forma de cono, es decir, que va de un grosor pequeño a uno más grande. Existen personas que la idea de tener tan estiradas las orejas les resulta doloroso, feo o hasta desagradable (un poco carentes de cultura y conocimiento), y otras como a mí que nos gusta porque si y punto.
Mi amor por los túneles nació hace más de diez años, cuando comencé a verlos en mi entorno y veía lo genial que lucían. Para ese entonces a mí me encantaba comprarme muchos zarcillos con diseños únicos y coloridos, pero mis orejas solían enfermar con frecuencia por ser alérgica a las prendas de "fantasía".
Es entonces cuando me planteo la idea de expandirme los lóbulos y un amigo me regaló unos pequeños, de apenas 5 mm de diámetro. Este trabajo de expandirme las orejas lo hice yo sola en casa, tomando pequeños palillos de madera que fui lijando y cubriendo con barniz para luego irme expandiendo.
Es un trabajo de meses pues no llegas a estas medidas de la noche a la mañana, a menos que quieras quebrar tu oreja. Se debe permitir a la oreja sanar para poder optar por medidas grandes.
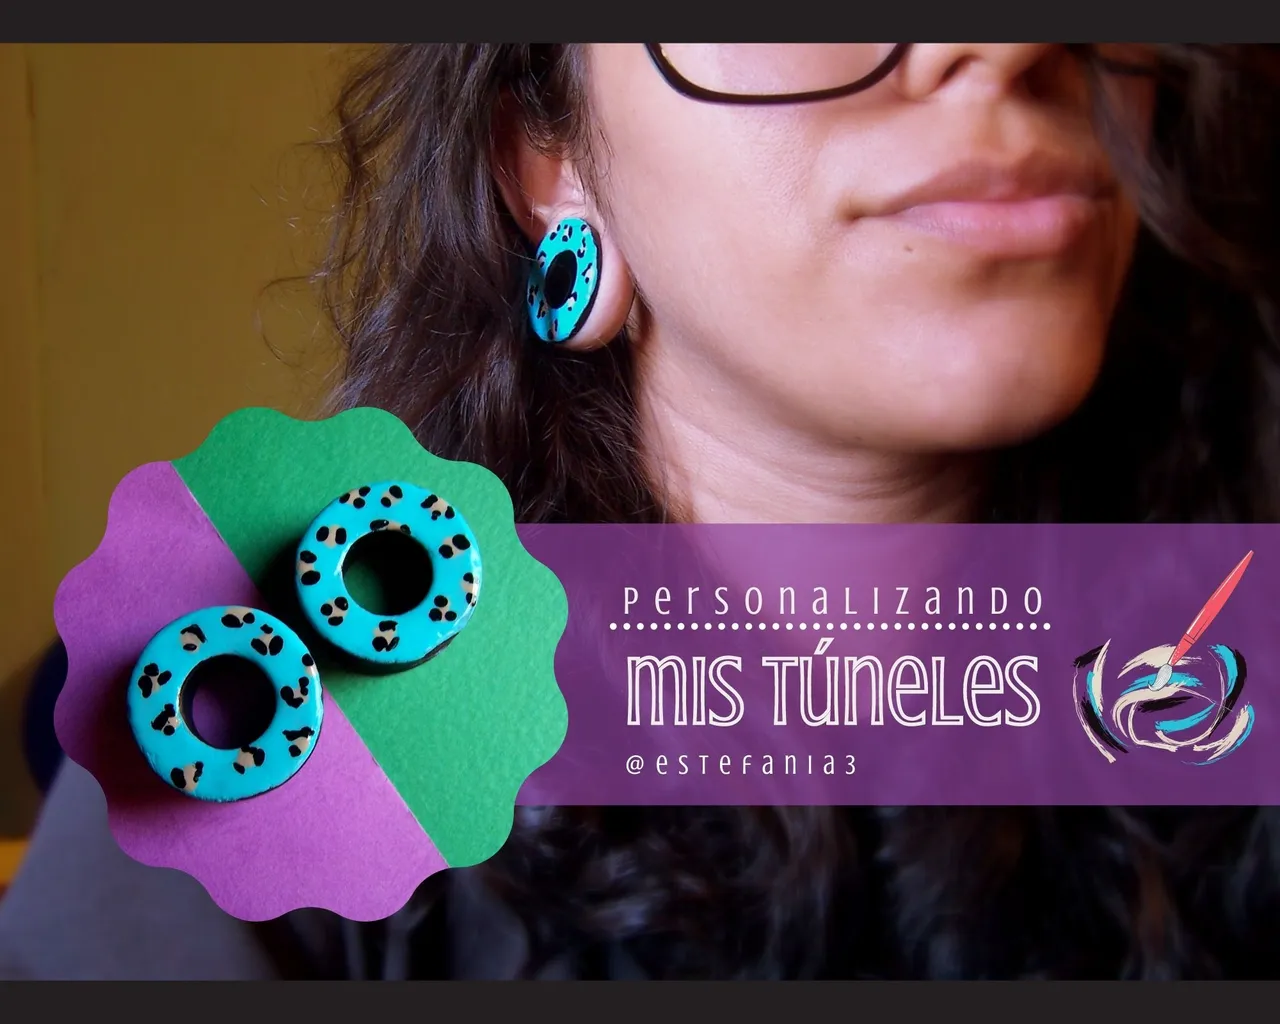
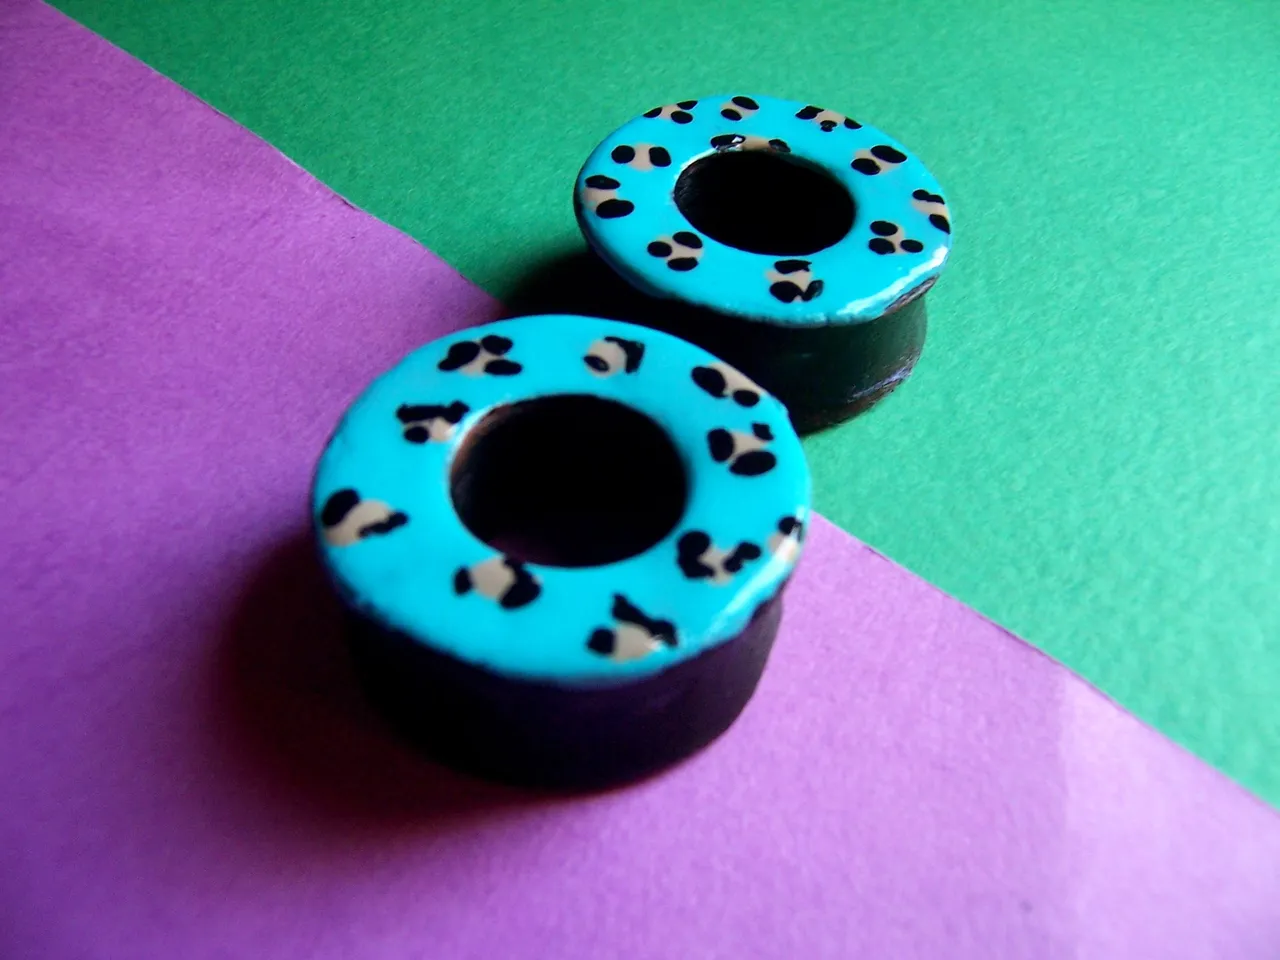
Mis expansiones actuales miden 30 mm, es decir 3 centímetros de diámetro y me encantan. Lo único malo es que debido a los altos costos en estas piezas me he tenido que conformar con estas y otro par que tengo, ambos de madera. Pero como yo no me conformo y siempre busco la manera de variar con las herramientas que están a mi alcance decidí personalizar con un poco de pintura mis actuales túneles.
Esto es genial porque ya luego de un tiempo cuando me aburra del diseño solo debo remover la pintura y crear algo nuevo, así que no creo que este sea en único post pintando a "mis bebés".
Les cuento un poco como he logrado el resultado, ¡acompáñenme!
Hello Guys!
For those of you who don't know, plugs are expansions in the earlobe. This is achieved by pressing an object in the shape of a cone, that is, one that goes from a small thickness to a larger one. There are people who find the idea of having their ears so stretched out painful, ugly or even unpleasant (a bit lacking in culture and knowledge), and others like me who like it, period.
My love for plugs was born more than ten years ago, when I began to see them in my environment and saw how great they looked. Back then I used to love to buy a lot of earrings with unique and colorful designs, but my ears used to get sick frequently from being allergic to 'fancy' earings.
That is when I considered the idea of expanding my lobes and a friend gave me small ones, barely 5 mm in diameter. I did this job of expanding my ears by myself at home, taking small wooden sticks that I was sanding and covering with varnish and then expanding.
It is a work of months because you do not reach these measures overnight, unless you want to break your ear. The ear must be allowed to heal in order to opt for large measurements.
My current expansions are 30mm, or 3cm in diameter, and I love them. The only bad thing is that due to the high costs in these pieces I have had to settle for these and another pair that I have, both made of wood. But since I am not satisfied and I always look for a way to vary with the tools that are within my reach, I decided to personalize my current plugs with a little paint.
This is great because after a while when I get bored with the design I just have to remove the paint and create something new, so I don't think this is the only post painting 'my babies'.
I'll tell you a little about how I achieved the result, join me!
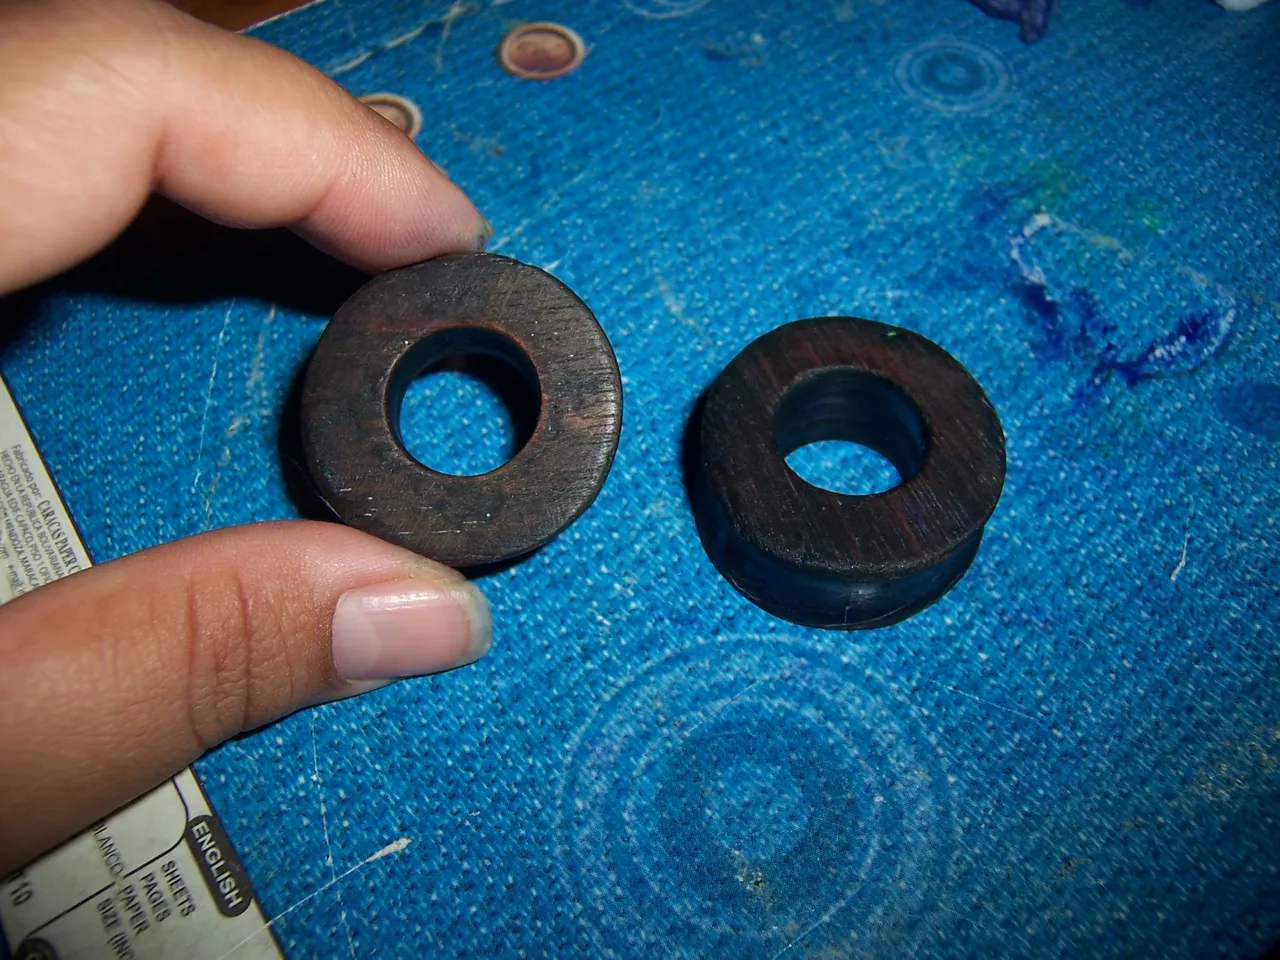
Primero estuve limpiando mis piezas con algodón y un poco de acetona, antes tenían un color desgastado y debían quedar bien limpias para el nuevo diseño.
First I was cleaning my pieces with cotton and a little acetone, before they had a worn color and should be very clean for the new design.
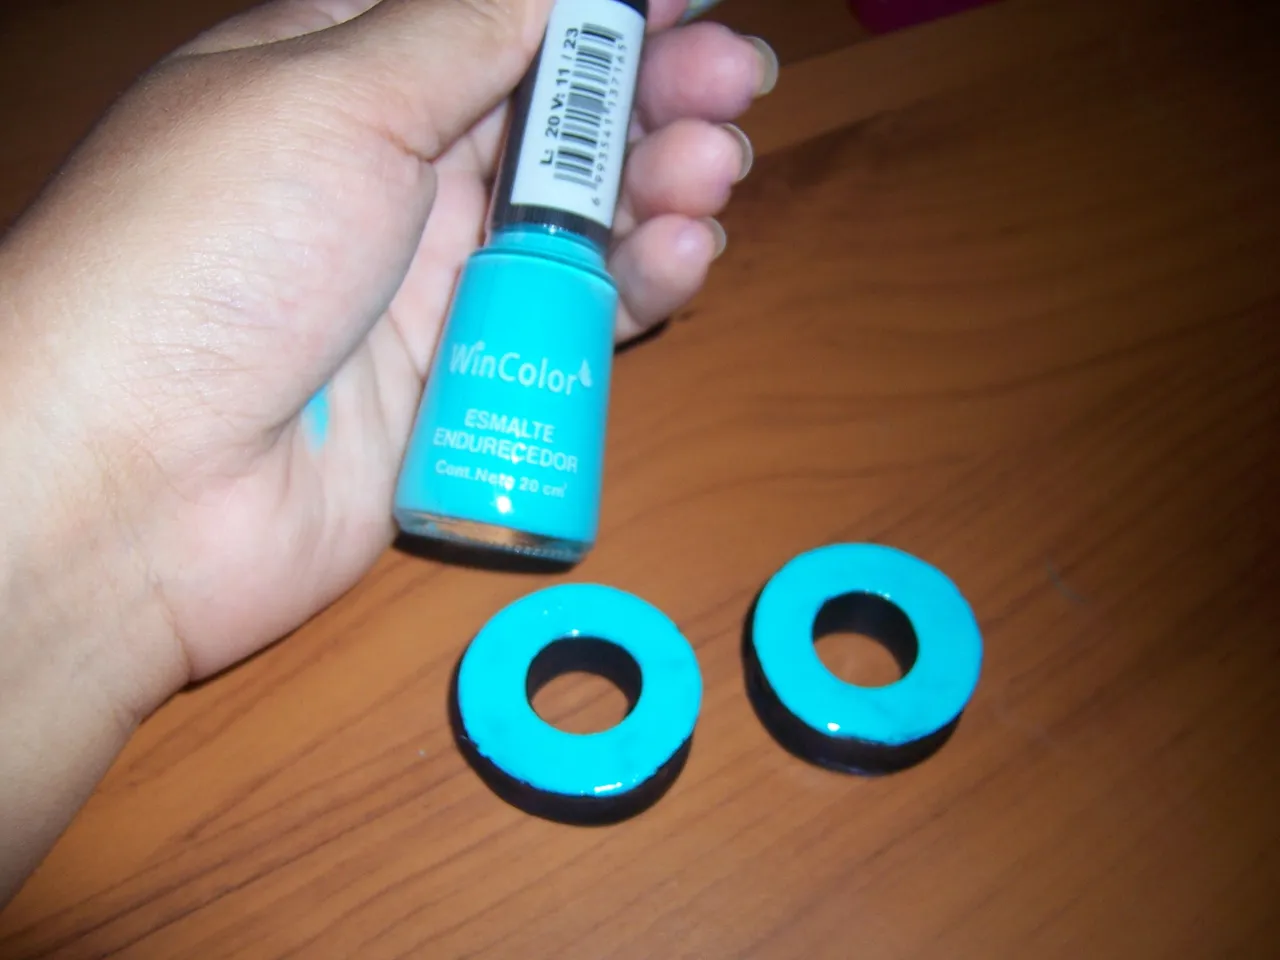
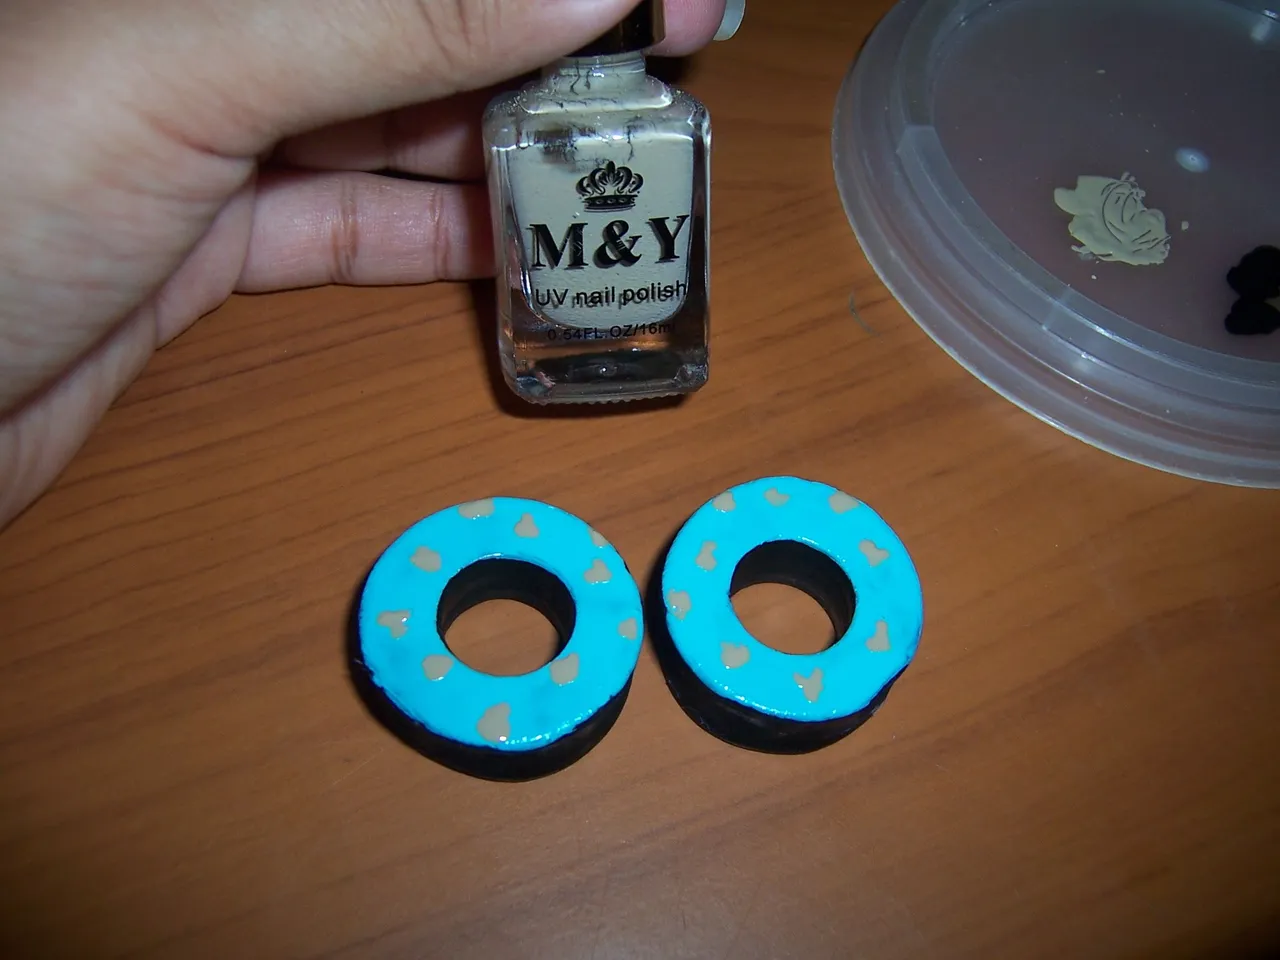
Luego he aplicado una capa uniforme con este lindo color azul turquesa. Es importante dejarlo secar bien antes de aplicar los detalles del diseño.
Los esmaltes de uñas son ideales para pintar pequeñas cosas, aportan colores llamativos y quedan brillantes.
Then I have applied an even coat with this nice turquoise blue color. It is important to let it dry well before applying the design details.
Nail polishes are ideal for painting small things, they provide bright colors and are shiny.
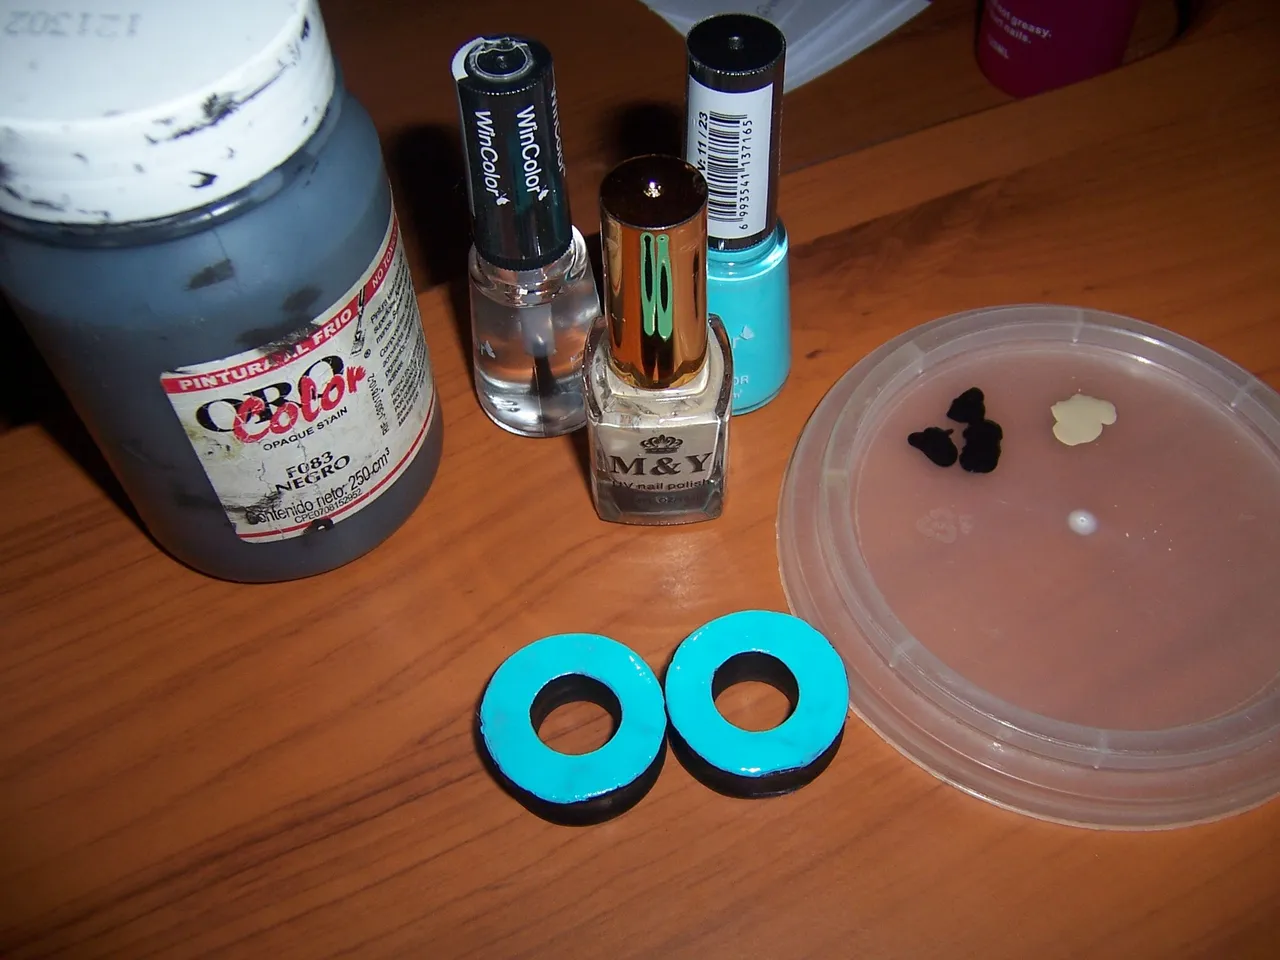
Ahora es momento de crear el diseño, yo he optado por un diseño de leopardo, para ello voy a utilizar un tono crema de esmalte, para los detalles en negro un poco de pintura al frío y esmalte transparente para sellar el diseño.
Now it is time to create the design, I have opted for a leopard design, for this I am going to use a cream tone of enamel, for the black details a little cold paint and transparent enamel to seal the design.
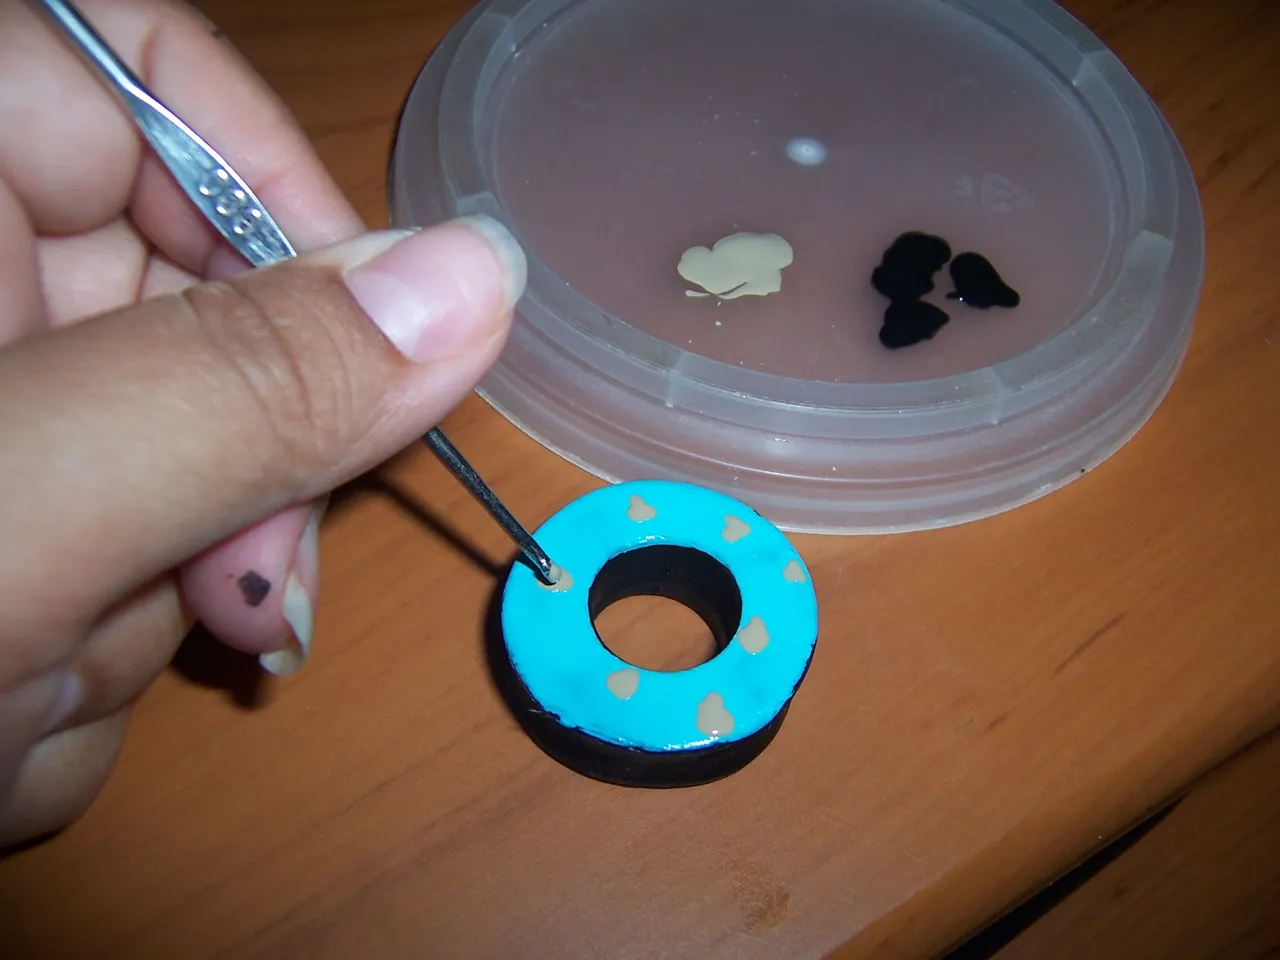
Con un palillo de metal fui haciendo pequeñas manchas. Y luego hice lo mismo con el color negro para crear el diseño de leopardo.
With a metal toothpick I made small spots. And then I did the same with the black color to create the leopard design.
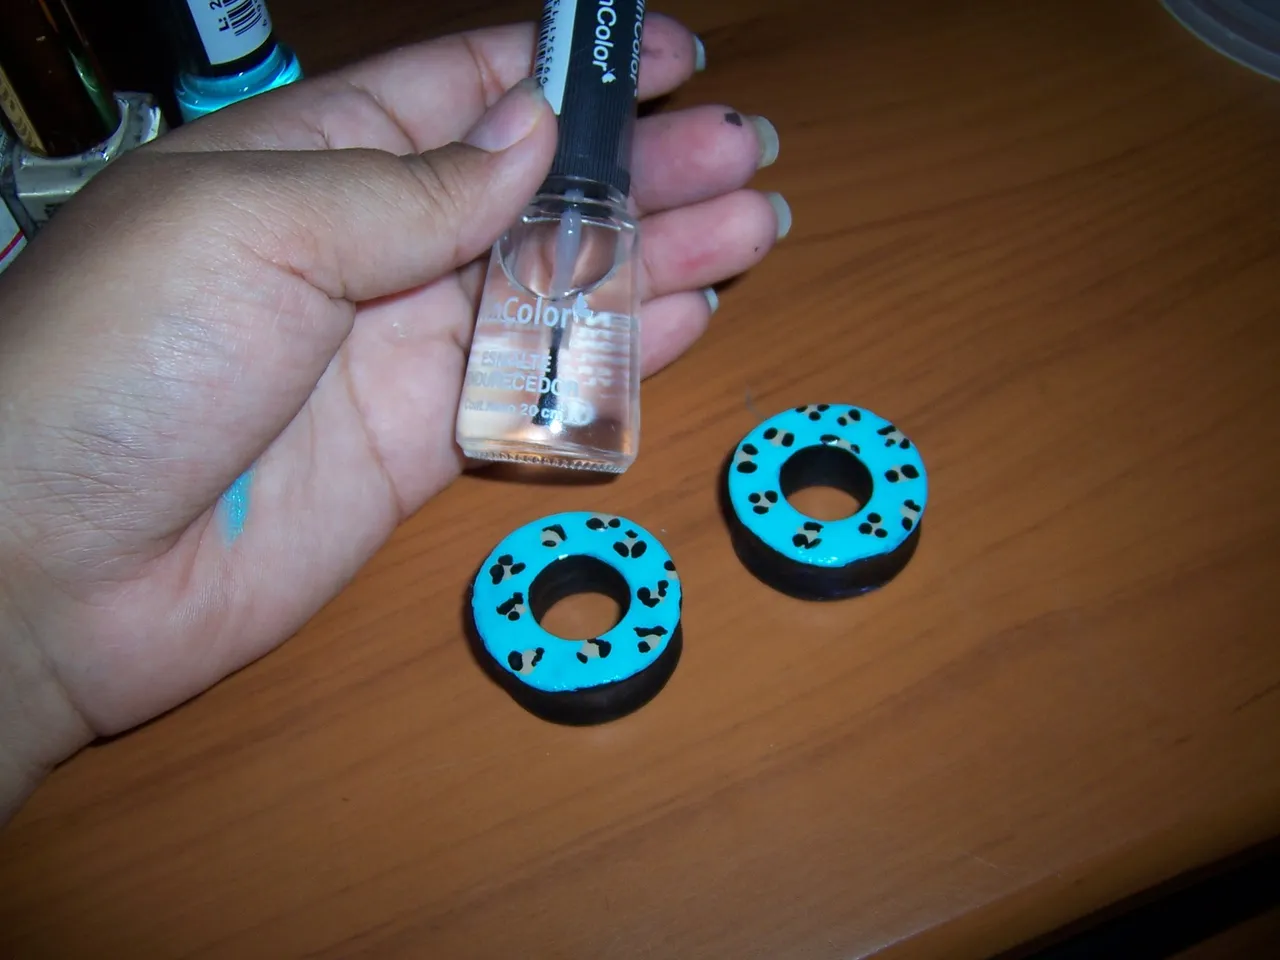
Por último apliqué una capa de esmalte transparente. Los dejé secar por media hora.
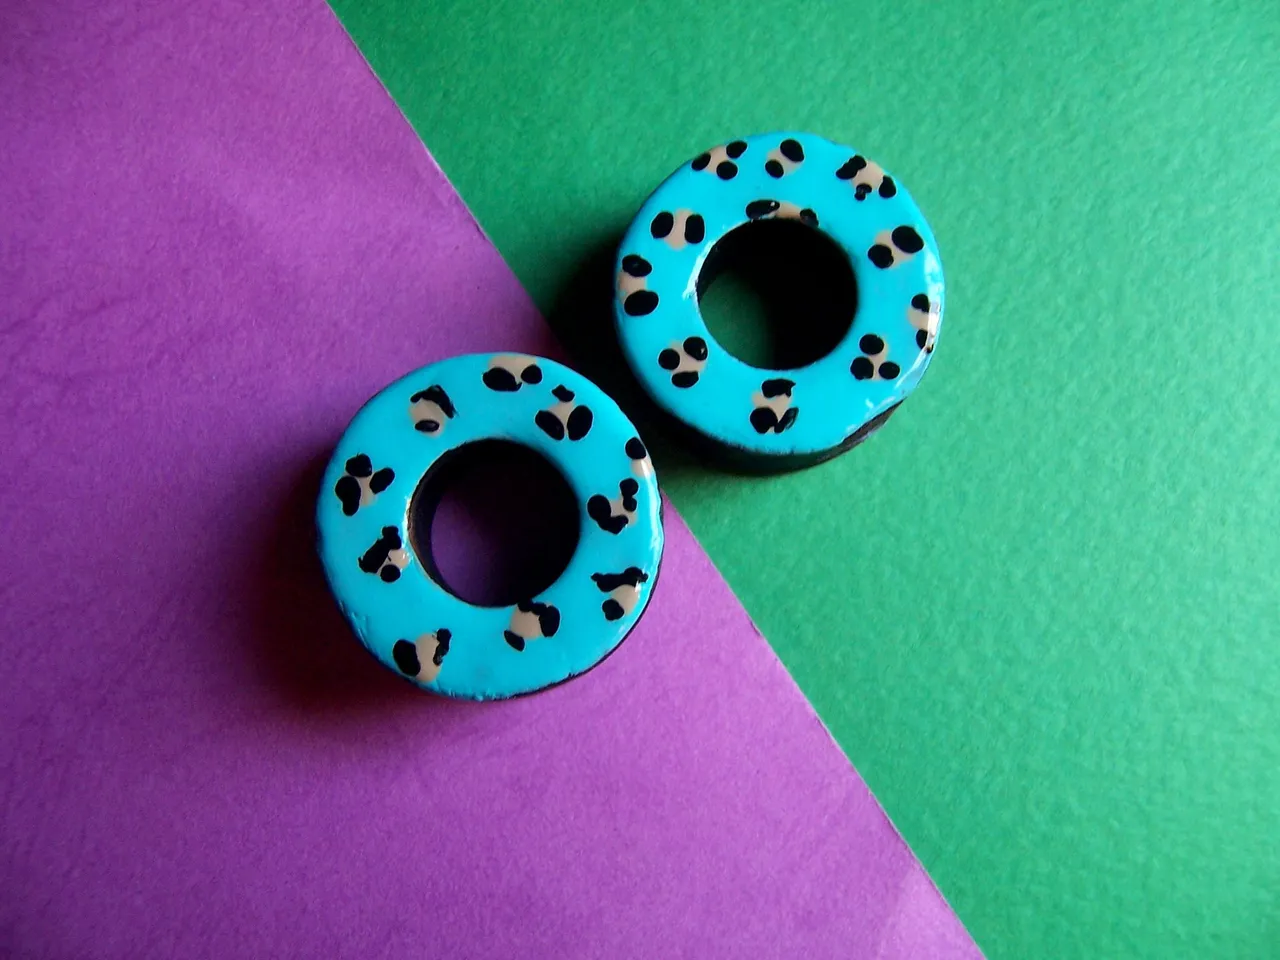
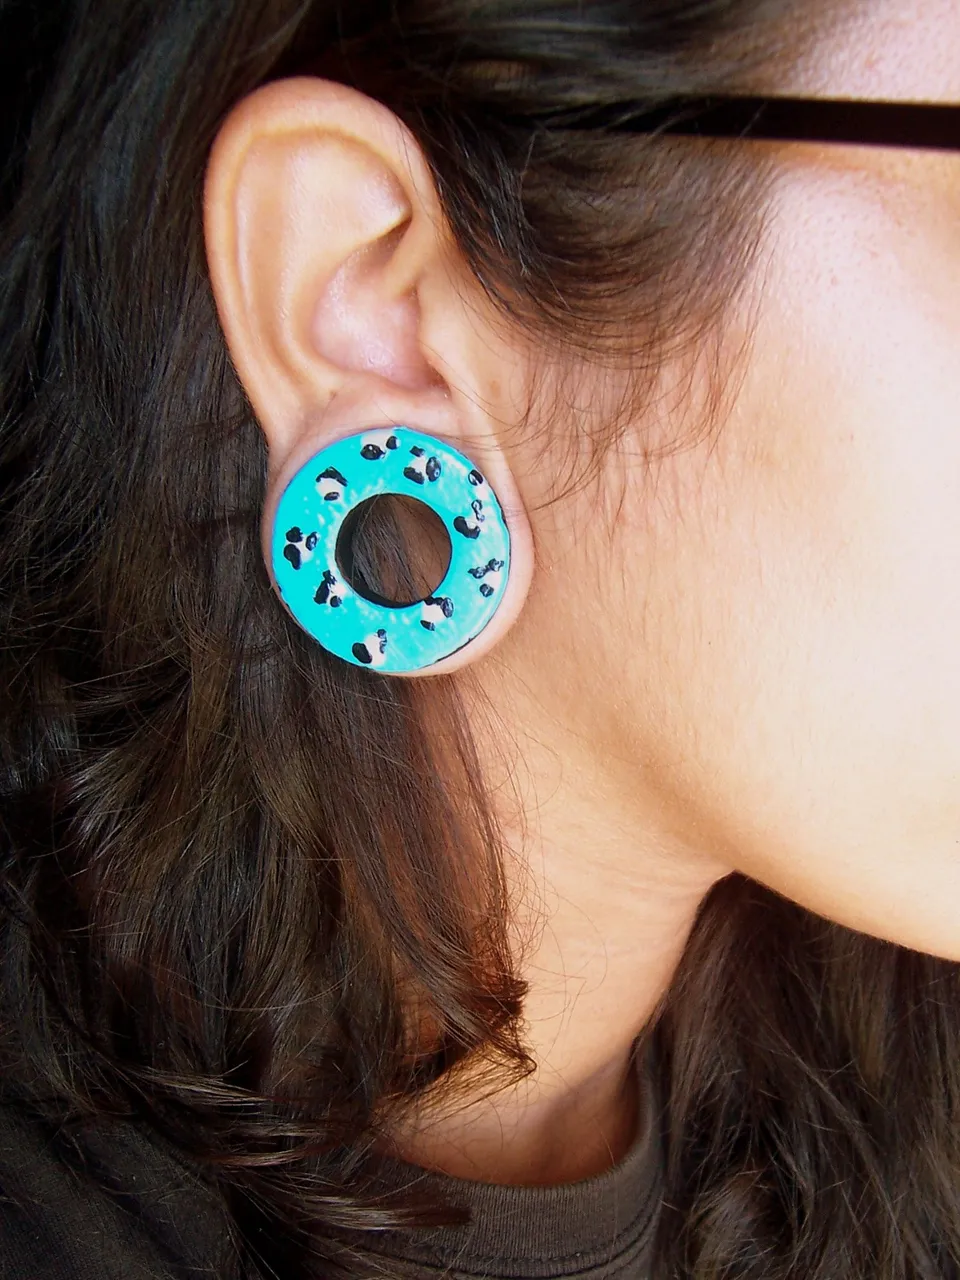
A continuación les muestro como quedaron y como lucen. ♥
Lastly, I applied a coat of transparent enamel. I let them dry for half an hour.
Then I show you how they were and what they look like. ♥

Espero haya sido de tu agrado y provecho.
Un gran abrazo a todos, y nos leemos en un próximo post
• Lakrearte en Hive •
Att: Estefania Garcia ♥
Imágenes y separadores de mi autoría
Portada editada en Canva