I witnessed the construction of a concrete yurt base a few days ago.
I'd like to say I helped out, but I didn't, although I did have lunch with the two people who actually created the base, which counts I think.
I was unable to help due to urgent hive-dicking obligations, but I did pop up to the site with sufficient periodicity (that's actually a word?!?) to learn about the various stages involved, and take some photos...
The materials...
The Yurt is 5.5 metres in diameter and this required this much gravel and sand, nb about a third of the sand had already been used by the time I'd taken this picture!
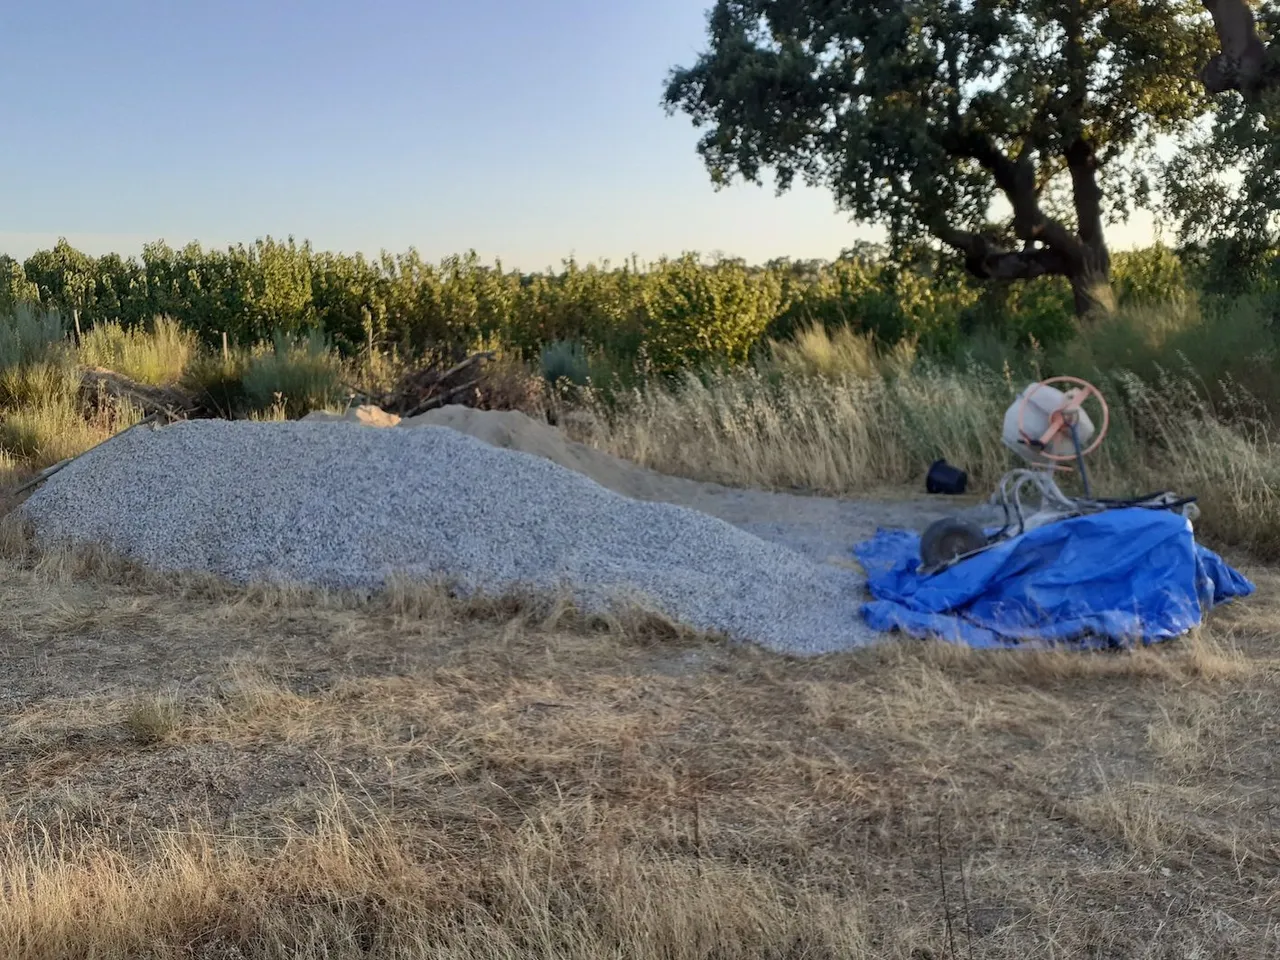
The cement is out of shot, but I could never have got it all in-shot as we bought it in batches - it was somewhere around 500 Kilograms of cement all-in, so around half a tonne!
Naturally a cement mixer too given so much mixing that was required.
Make a level-ish ditch for the brick wall of the base, level it with concrete:
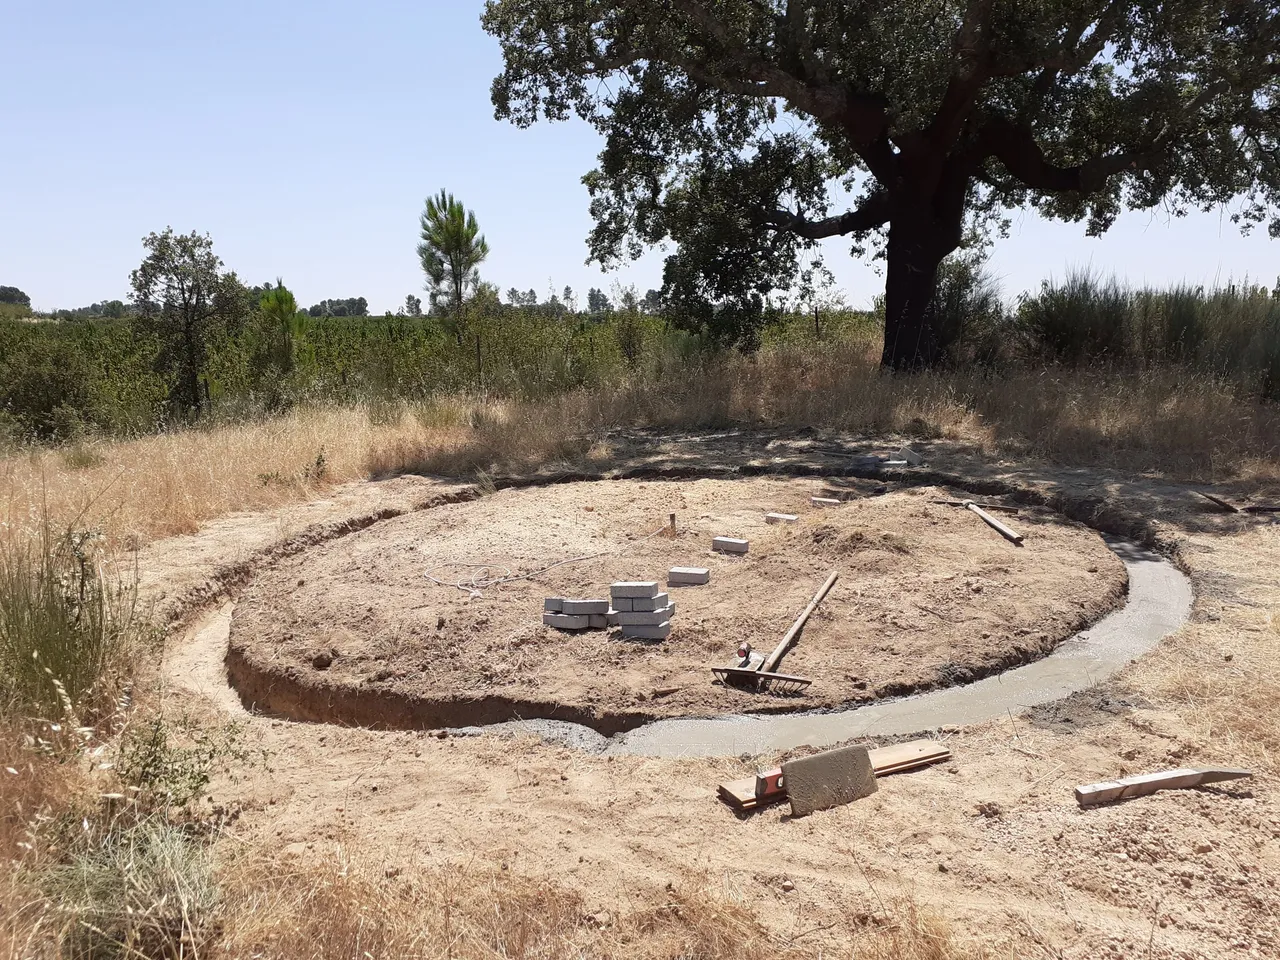
The outer edge of the ditch needs to be the same diameter as the Yurt, easy enough to measure with some string from the middle point.
The ditch is about a foot wide, this is the main support part after all!
You only need to get it level-ish as the concrete poor will do the levelling proper.
This all took about a day, then let the concrete set overnight.
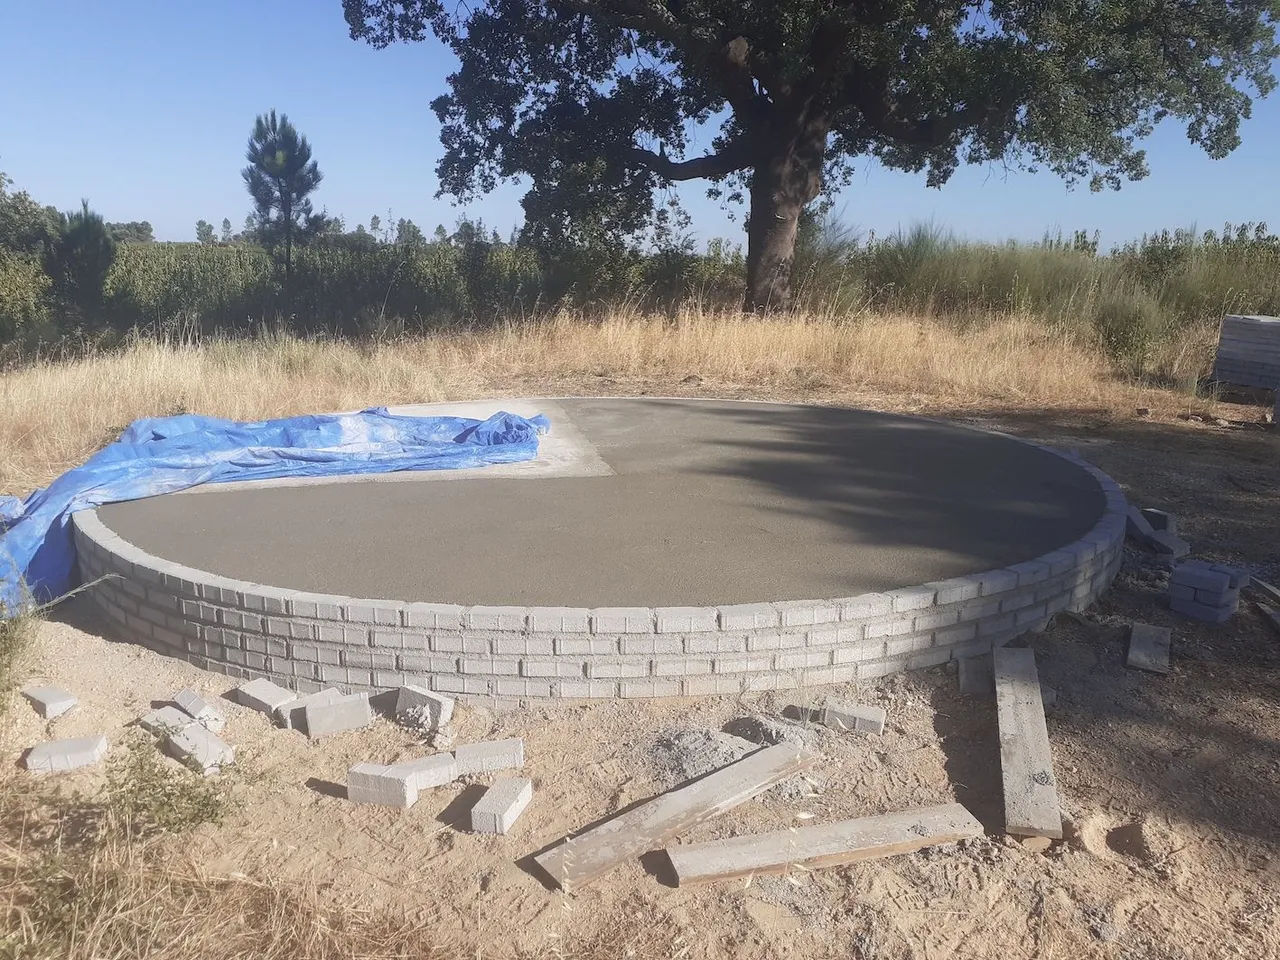
Build a brick wall to frame the base:
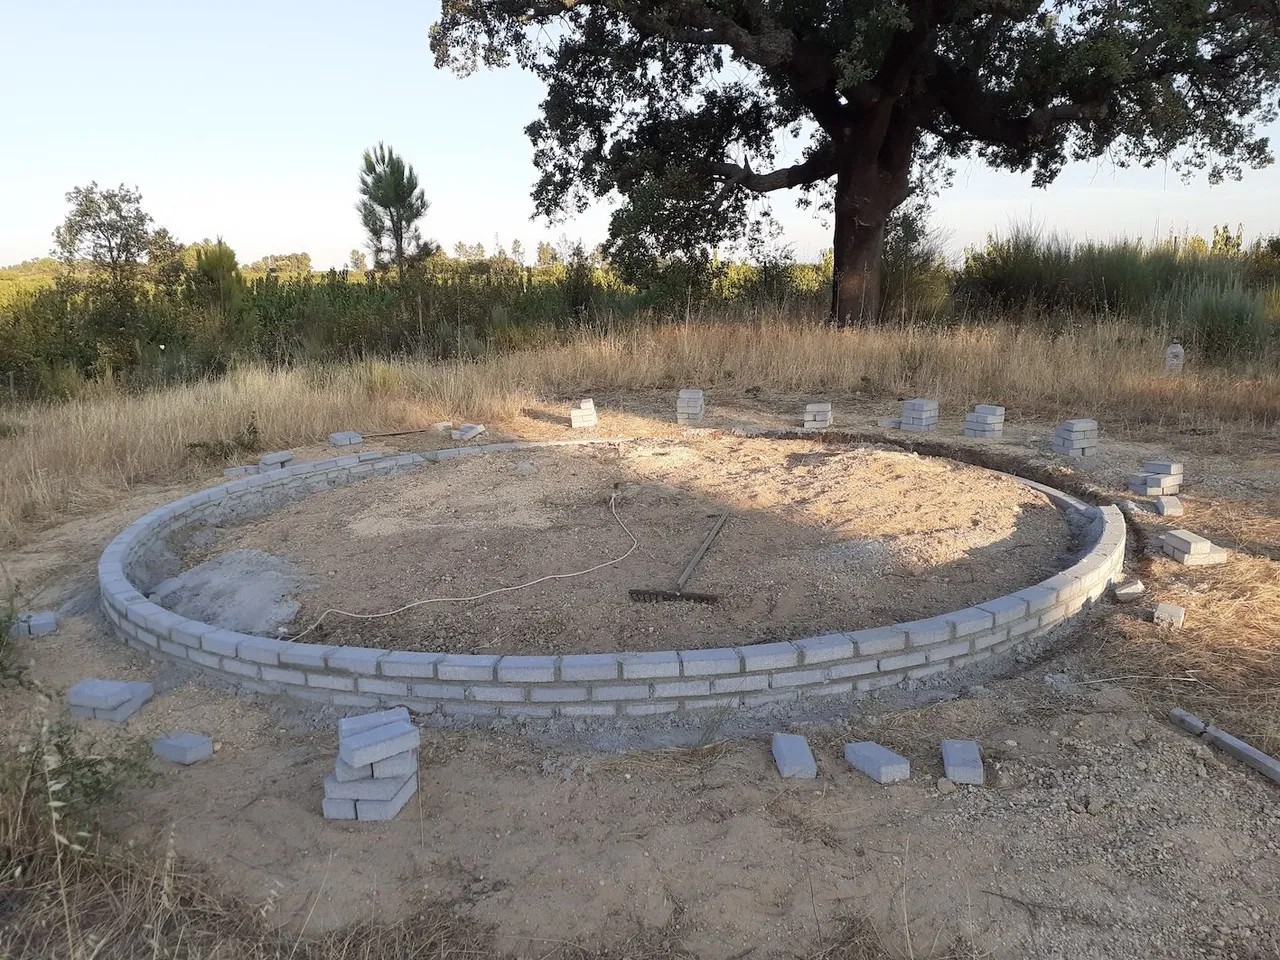
This is where it's handy to have a wider strip of concrete than you need, so you have plenty of room to construct the outer brick base to ever so slightly wider than the diamater as the Yurt Frame (about 0.5 of an inch wider)
The completed base-wall

Five bricks high and level. The Yurt frame will fit onto those bricks.....
This was basically day two: building the brick wall.
Add gravel into the middle
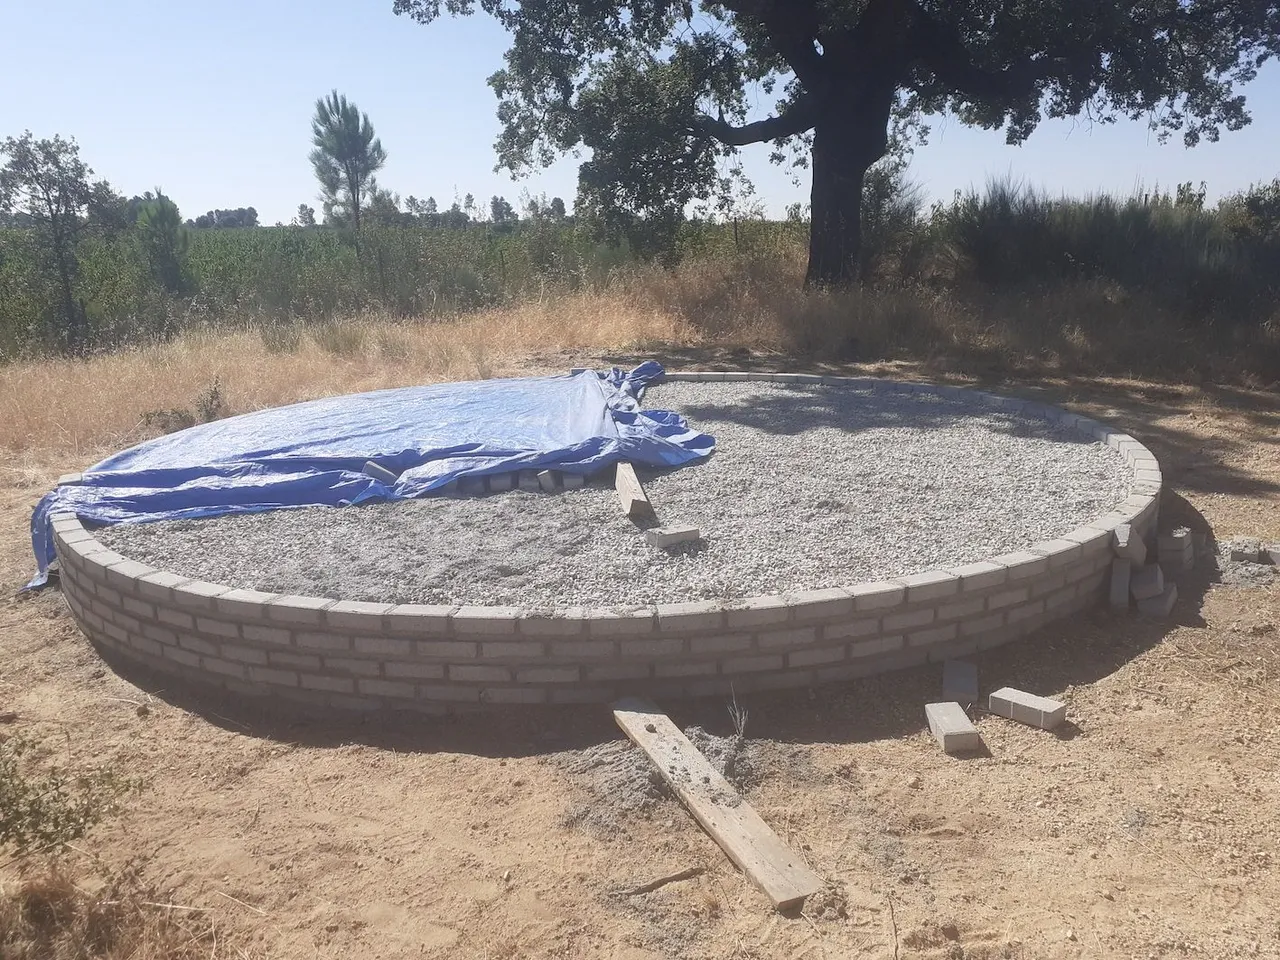
Not a lot to say, just a lot of shovelling, and easier than adding in pure concrete!
Another cement layer on top
This alone took about 10 bags of cement - mix, poor and level. Now just let dry!
And with the Yurt frame on top

I did actually help but this up, the more fun and less taxing bit!
The measurements of the base were bang-on perfect!
The end result
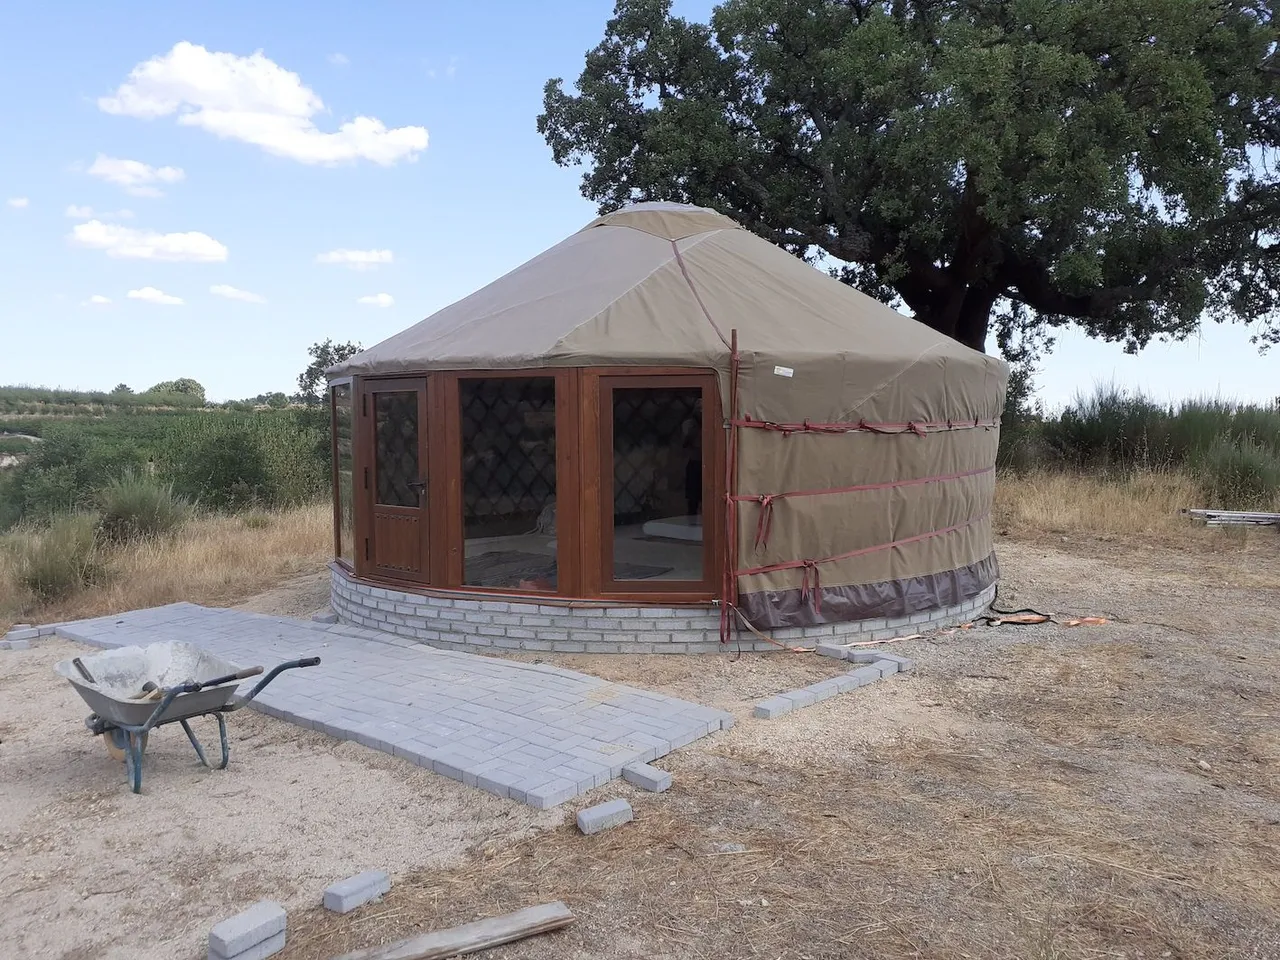
It's a seriously nice Yurt with it's big windows and it's BIG (5.5 metres) and I can stand up in most of it and I'm tall.
Not my Yurt and I'm not staying in it, the plan is to rent it out, but it's a very pleasant space!
It's not quite finished, it needs a patio area - you can clearly see the difference in the DIY approach and the professional approach on the base!
Why concrete?
Well it's a thermal thing - it's better than wood at keeping the heat in during winter and keeping the Yurt cool in summer.
It's also about the same price as wood.
And yes, it's maybe not as ecologically sound, but give that this is going to last for decades, maybe even centuries, I think that's fair enough.
And aesthetically - well, it's a floor, which gets covered for the most part so that doesn't matter and the bricks from the outside I think look OK.
Final thoughts....
It was great to witness the Yurt-Base build and learn how to do it, it was even BETTER to NOT have to get involved with any of the concrete mixing - this job is basically a mixture of measuring and carefully building a wall, which do require some skill, but then just brute force for the rest of it!
I think if I ever need a yurt base doing I'll get the guy in who did this, it only took him 2.5 days which is pretty efficient!
It's sort of hard to justify doing the physical labour yourself when your coining it in with Splinterlands!