[SPN/ENG] Como hacer un Caja de paleta de helado - How to make a Popsicle box! @Sylregne

¡Hola amigos, espero estén muy bien! Mi hermosa amiga Rosmirna estaba de cumpleaños, entonces hice esta cajita para su collar, la verdad disfruté mucho haciéndola. Te recomiendo hacer la cosas con calma y tiempo para que te queden super lindas, además de que puedes agregarle muchos detalles adicionales. ¡Todo está en tu imaginación!

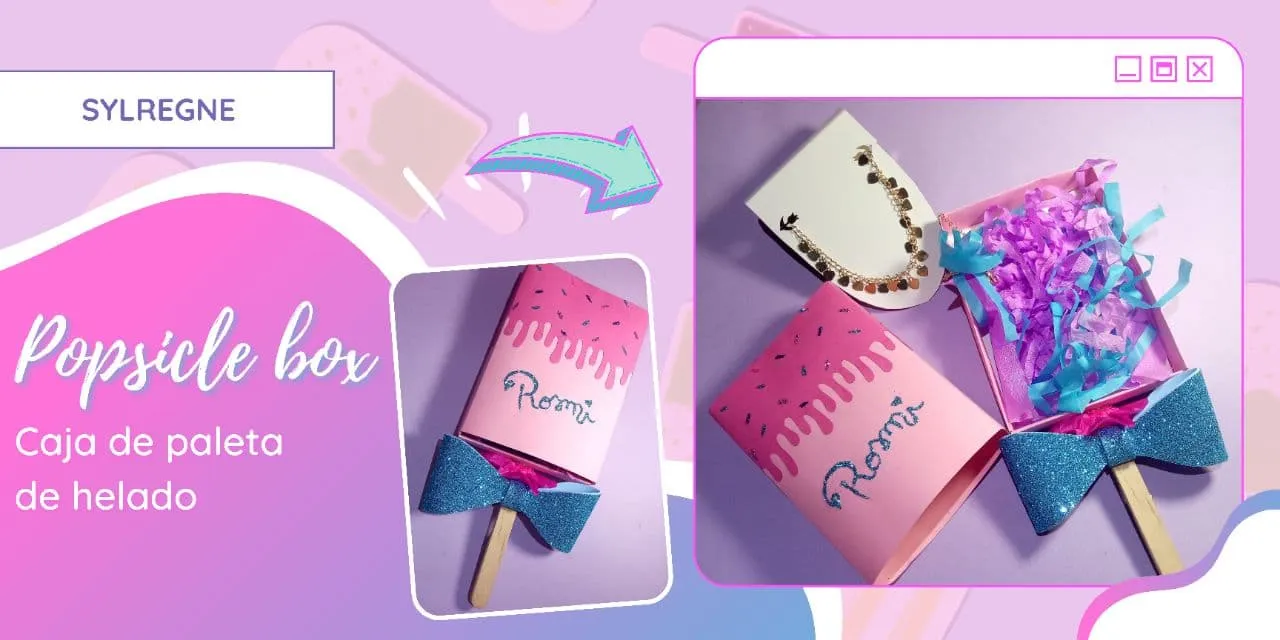
Hello friends, I hope you are very well! My beautiful friend Rosmirna was on her birthday, so I made this box for her necklace, I really enjoyed making it. I recommend doing things calmly and with time so that they are super cute, plus you can add many additional details. Everything is in your imagination!

photo_2021-10-22_03-56-36.jpg

Los materiales que necesitas son:The materials you need are:
• Cartulina rosada• Pink cardstock
• Una paleta• A Popsicle
• Pegamento• Glue
• Silicon caliente• Hot silicon
• Brillantina• Glitter

1- Empezamos por lo más importante, en la imagen puedes observar las medidas que yo utilizé para la cajita. No te agobies si se ve complicado, es más fácil de lo que crees.

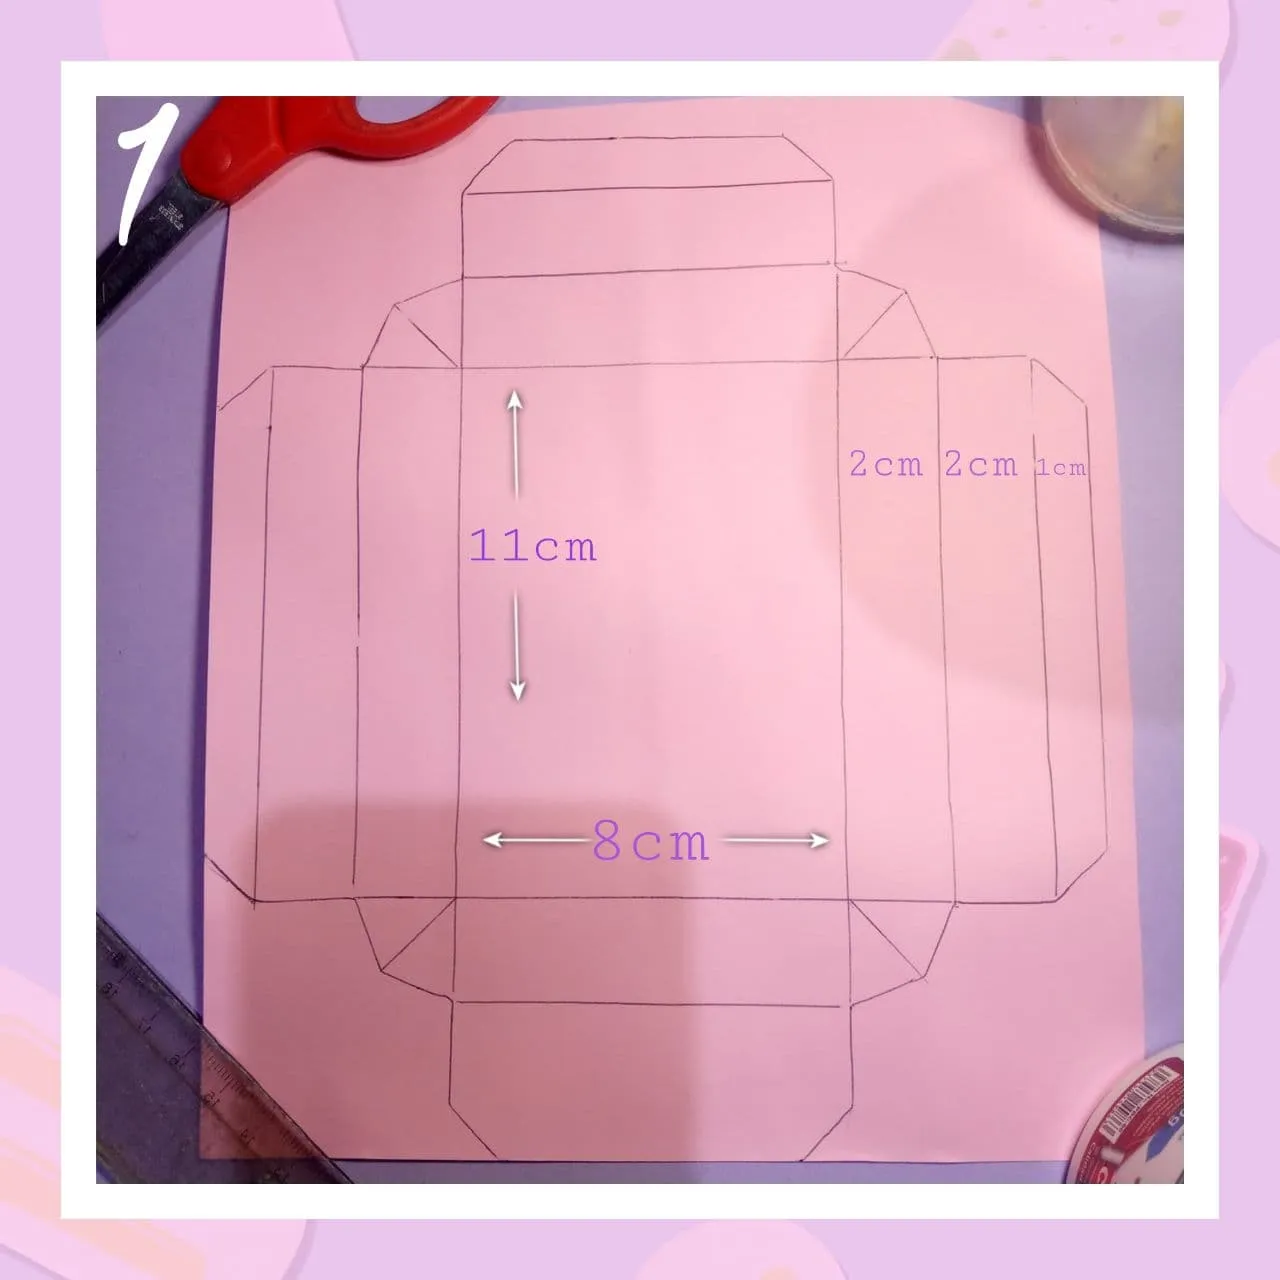
1- We start with the most important, in the image you can see the measurements that I used for the box. Don't be overwhelmed if it looks complicated, it's easier than you think.

photo_2021-10-22_14-58-55.jpg

2- Lo marqué con líneas negras para que puedas ver, simplemente luego de recortar la base, vas a doblar de la siguiente manera.

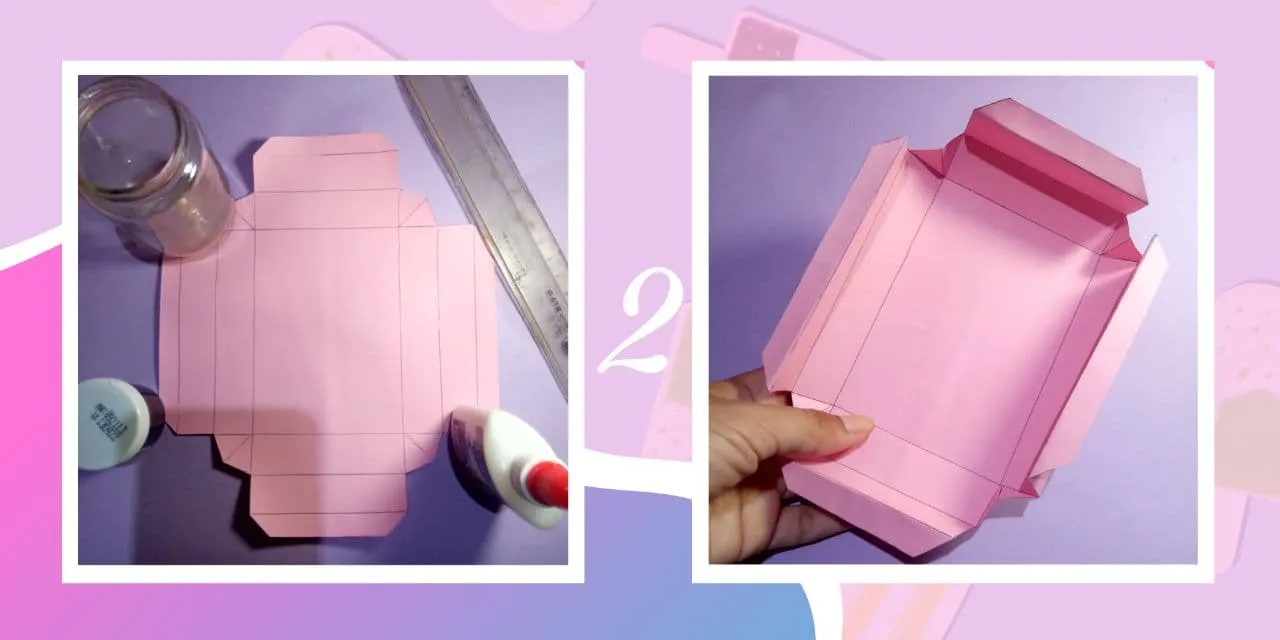
2- I marked it with black lines so you can see, simply after cutting the base, you are going to fold as follows.

photo_2021-10-22_14-59-01.jpg

3- Aquí puedes ver un poco más de cerca.

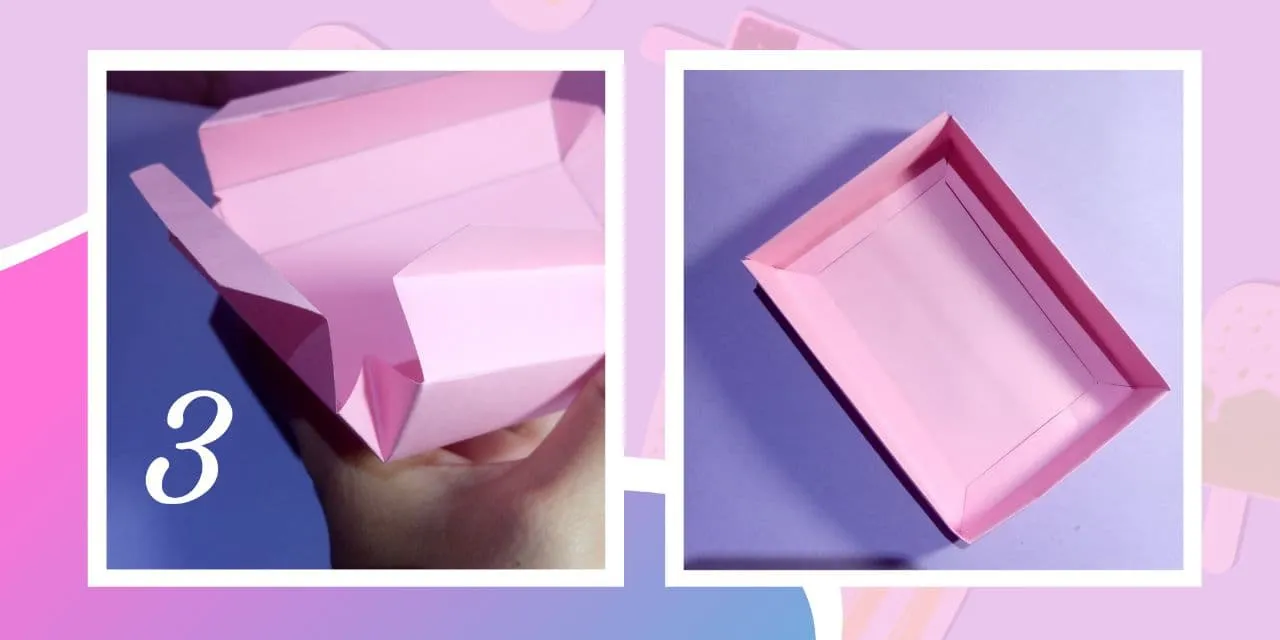
3- Here you can see a little closer.

photo_2021-10-22_14-59-10.jpg

4- A la tapa simplemente de agregas 3 milímetros de ancho y queda perfecta. Adicional en un rectángulo fuscia marqué como si el helado se estuviera derritiendo y lo recorté.

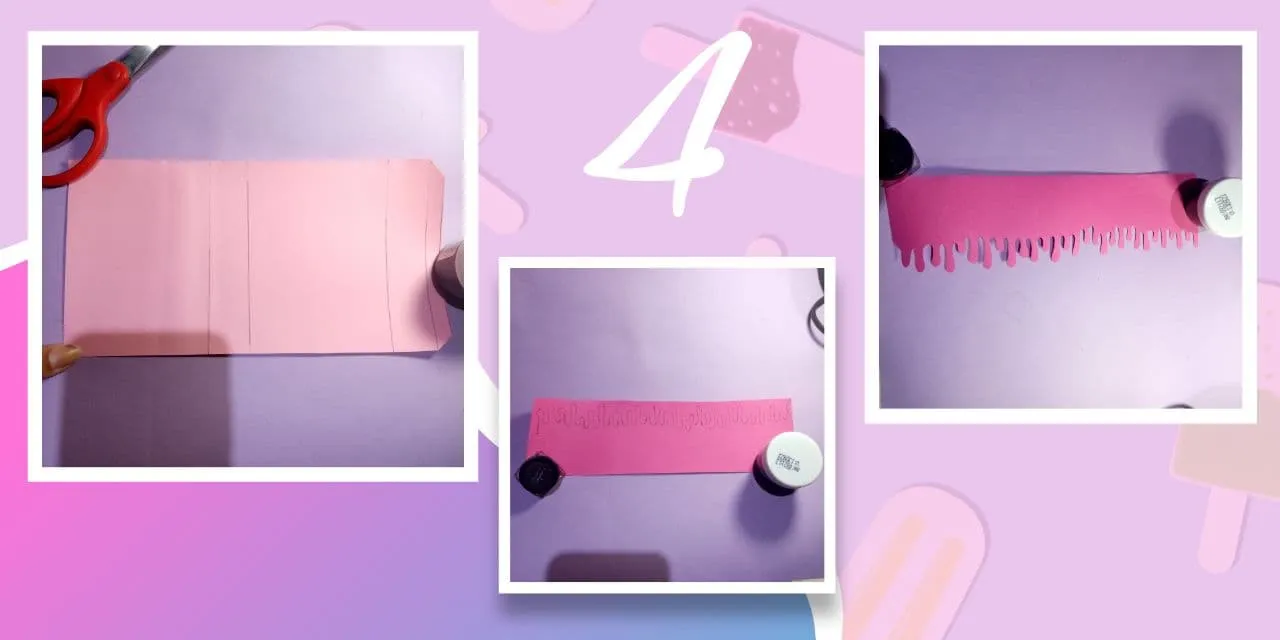
4- You simply add 3 millimeters wide to the lid and it is perfect. Additional in a fuscia rectangle I marked as if the ice cream was melting and cut it out.

photo_2021-10-22_14-59-16.jpg

5- Ya tenemos lista nuestra base, ahora solo tienes que personalizarla.

• Yo escribí "Rosmi" sobre la tapa, lo hice trazando pegamento con un pincel y sobre eso la brillantina.

• También doblé un carton e hice unos agujeros para poner el collar.

• También doblé un carton e hice unos agujeros para poner el collar.

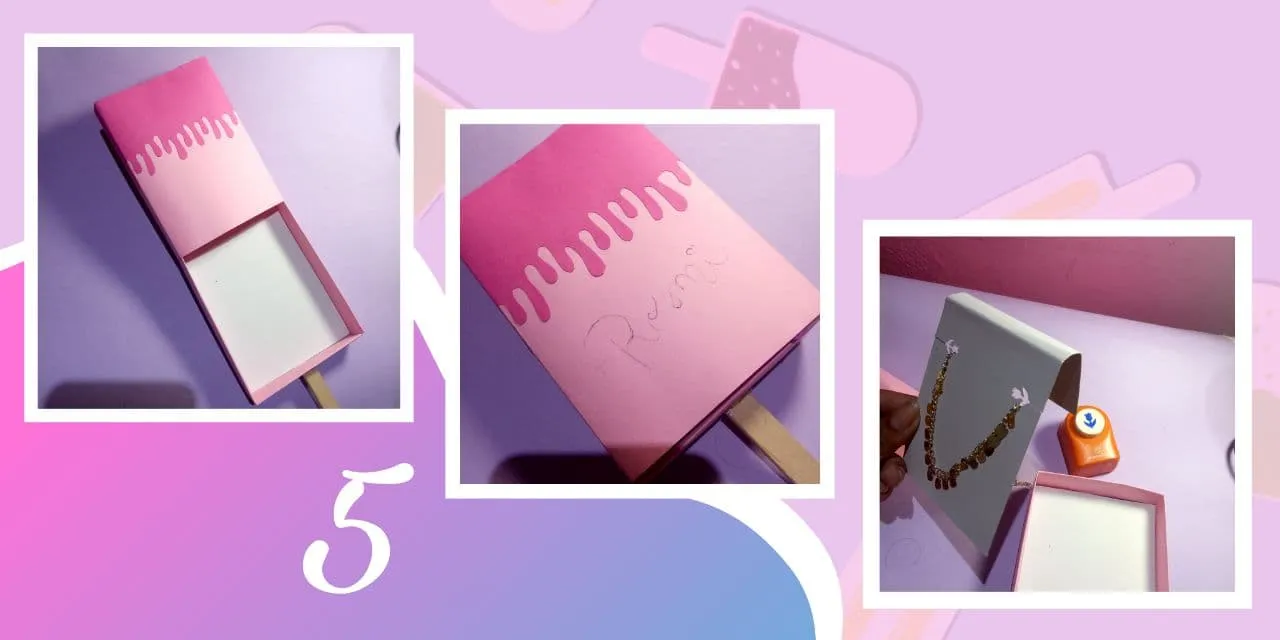
• I wrote "Rosmi" on the lid, I did it by tracing glue with a brush and on top of that the glitter.

• I also folded a cardboard and made some holes to put the necklace.

photo_2021-10-22_14-59-24.jpg

6- Finalmente este es el resultado, conseguí ese lazo entre mis cosas y se lo puse jeje

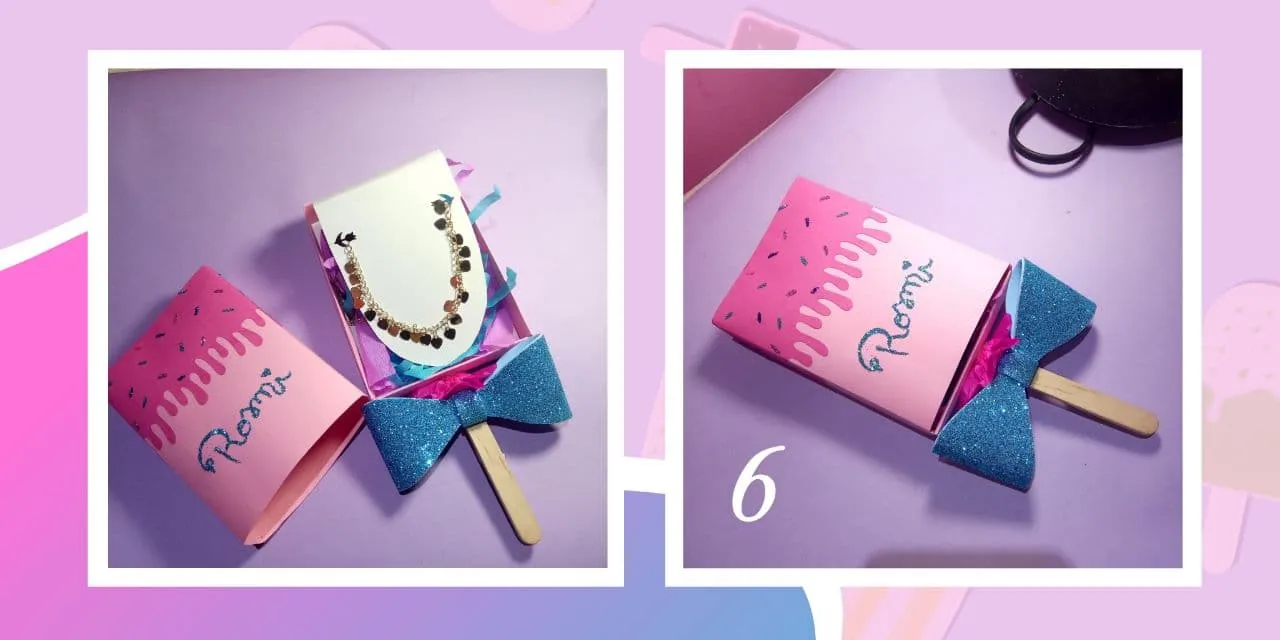
6- Finally this is the result, I got that ribbon between my things and I put it on him hehe

photo_2021-10-22_14-59-31.jpg

Espero te haya gustado mi tutorial, recuerda que puedes hacer cosas igual de bonitas e incluso mejores. Lo mejor de todo es hacer las cosas a tu manera y verás que te quedan increíble.

I hope you liked my tutorial, remember that you can do things just as beautiful and even better. The best of all is to do things your way and you will see that they look amazing on you.

¡Nos vemos pronto!¡Tu puedes!

See you soon!You can!

H2
H3
H4
3 columns
2 columns
1 column
2 Comments
Ecency