English
Helloooooooo! My dear friends from Hive.
Today I bring you the second tutorial on how to make easy and inexpensive personalized envelopes.
This time I am going to explain how to make a conventional envelope ideal for sending letters, invitation cards or any other use that you want to give it.
Without further ado, let's get started.
Spanish
¡Holaaaaaaaa! Mis queridísimos amigos de Hive.
Hoy les traigo el segundo tutorial de cómo elaborar sobres personalizados fáciles y económicos.
En esta oportunidad le voy a explicar como hacer un sobre convencional ideal para enviar cartas,tarjetas de invitaciones o cualquier otro uso que quieras darle.
Sin más, comencemos.
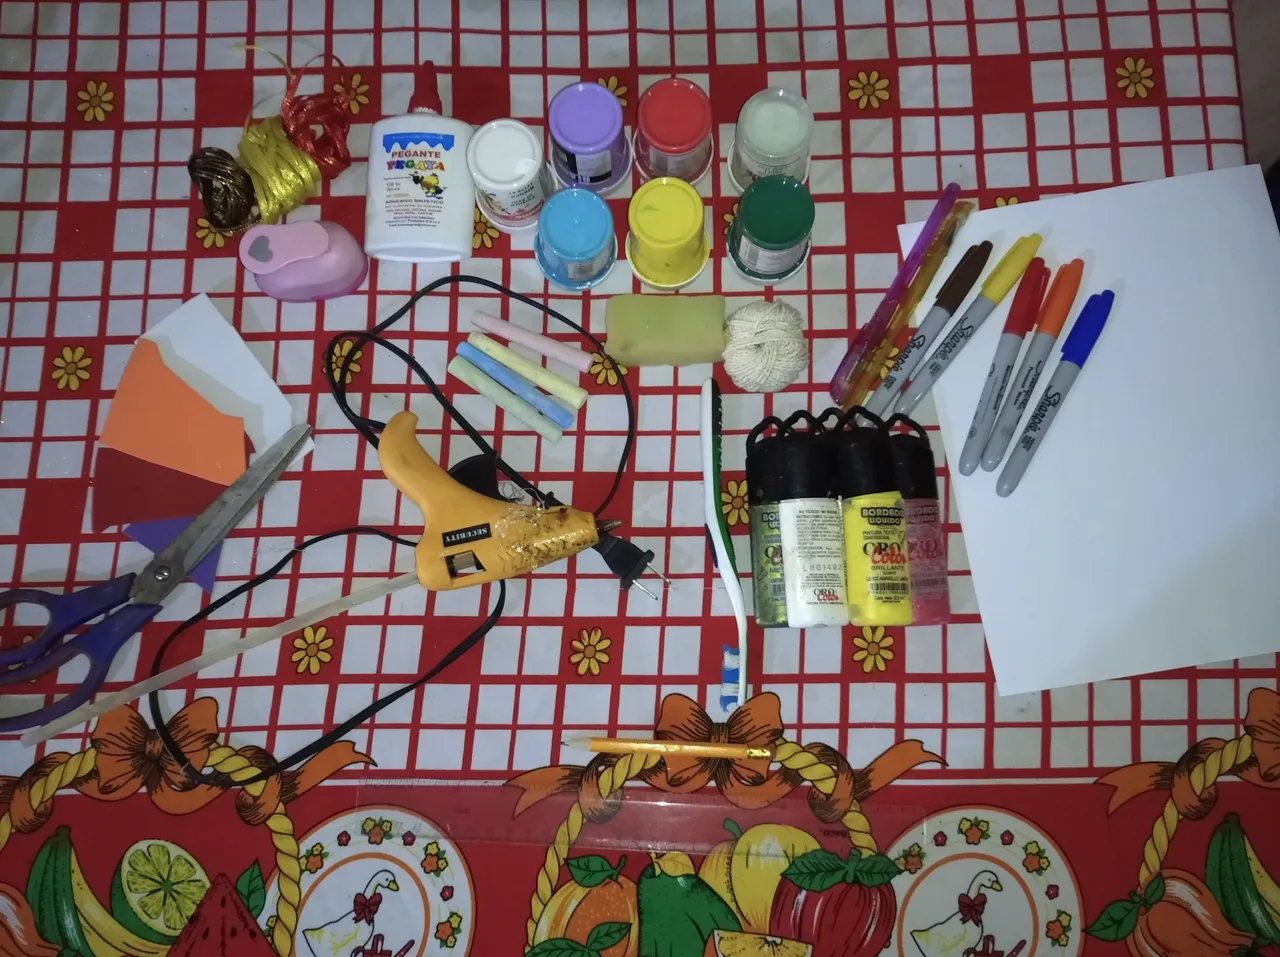
MATERIALS / MATERIALES
English
- Bond paper of the size you need
- Scissor
- White glue or stick preferably
- Cold paints
- Toothbrush
Spanish
- Papel bond del tamaño que necesite
- Tijera
- Pega blanca o en barra preferiblemente
- Pinturas al frío
- Cepillo dental
PROCESS / PROCEDIMIENTO
English
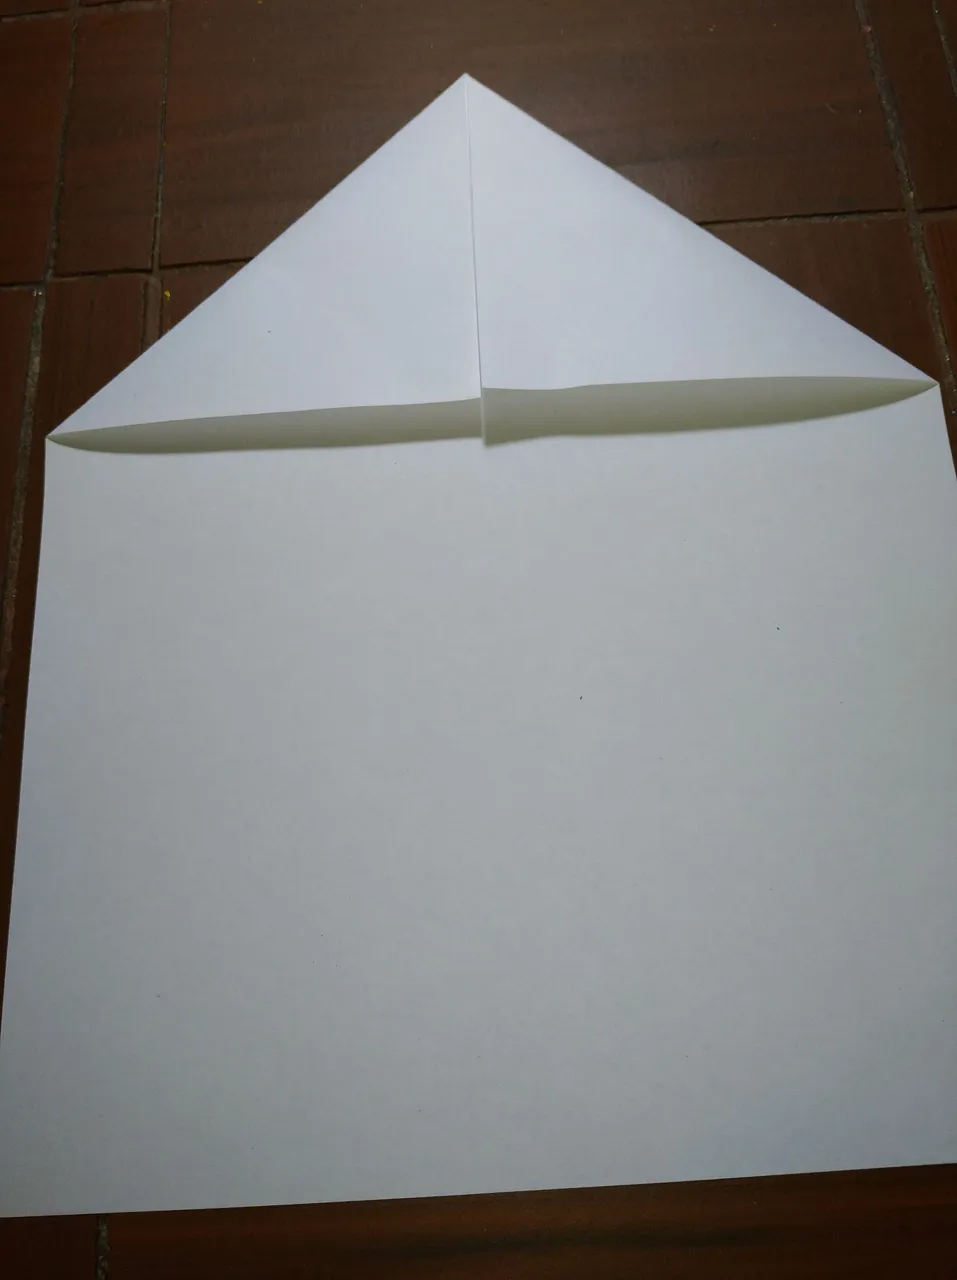
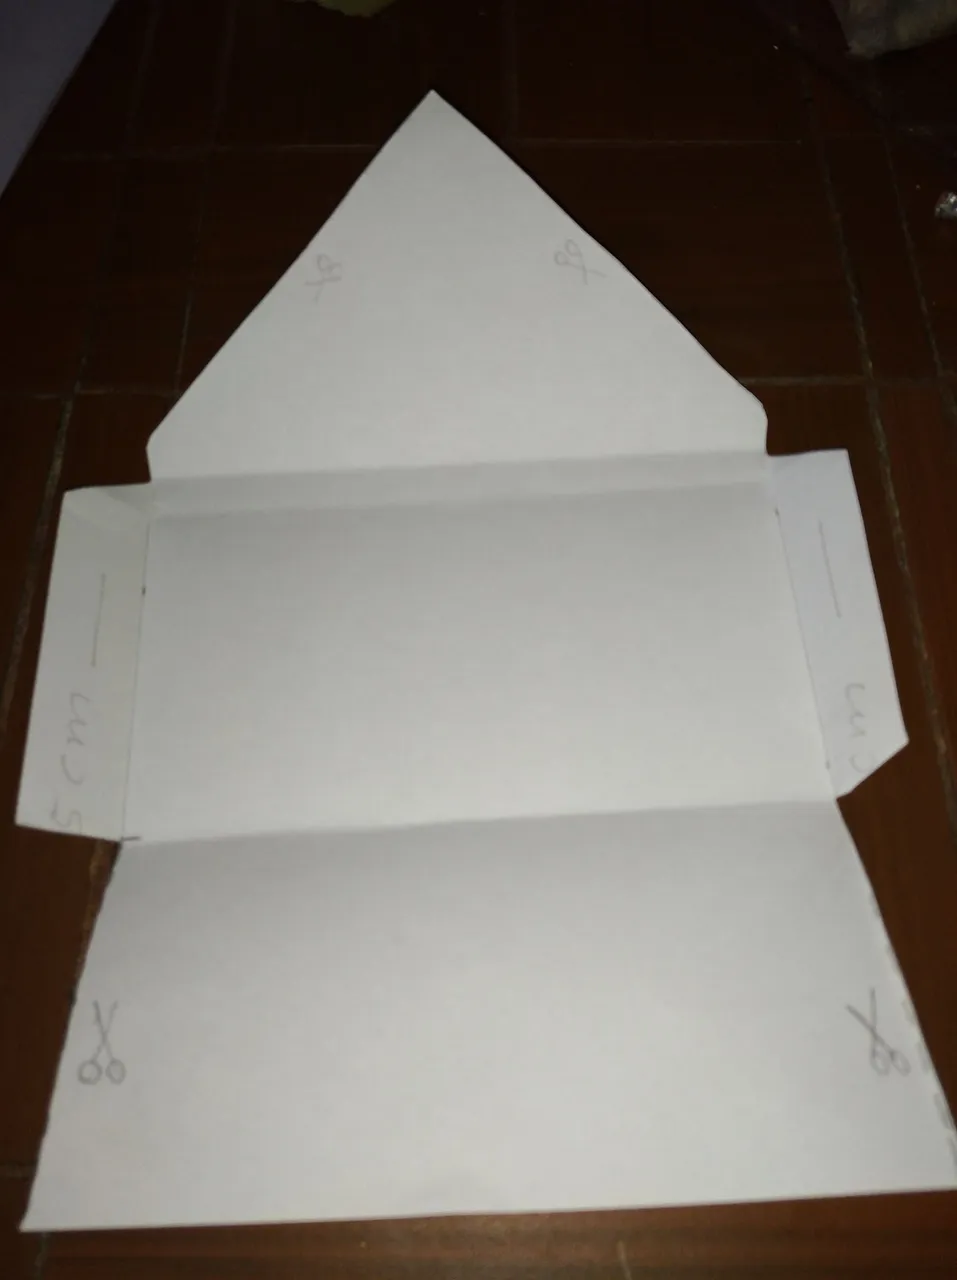
- We fold the upper sides of the sheet to the center.
- Then the bottom to the center of the sheet.
Spanish
- Doblamos los laterales superiores de la hoja al centro.
- Luego la parte inferior al centro de la hoja.

English
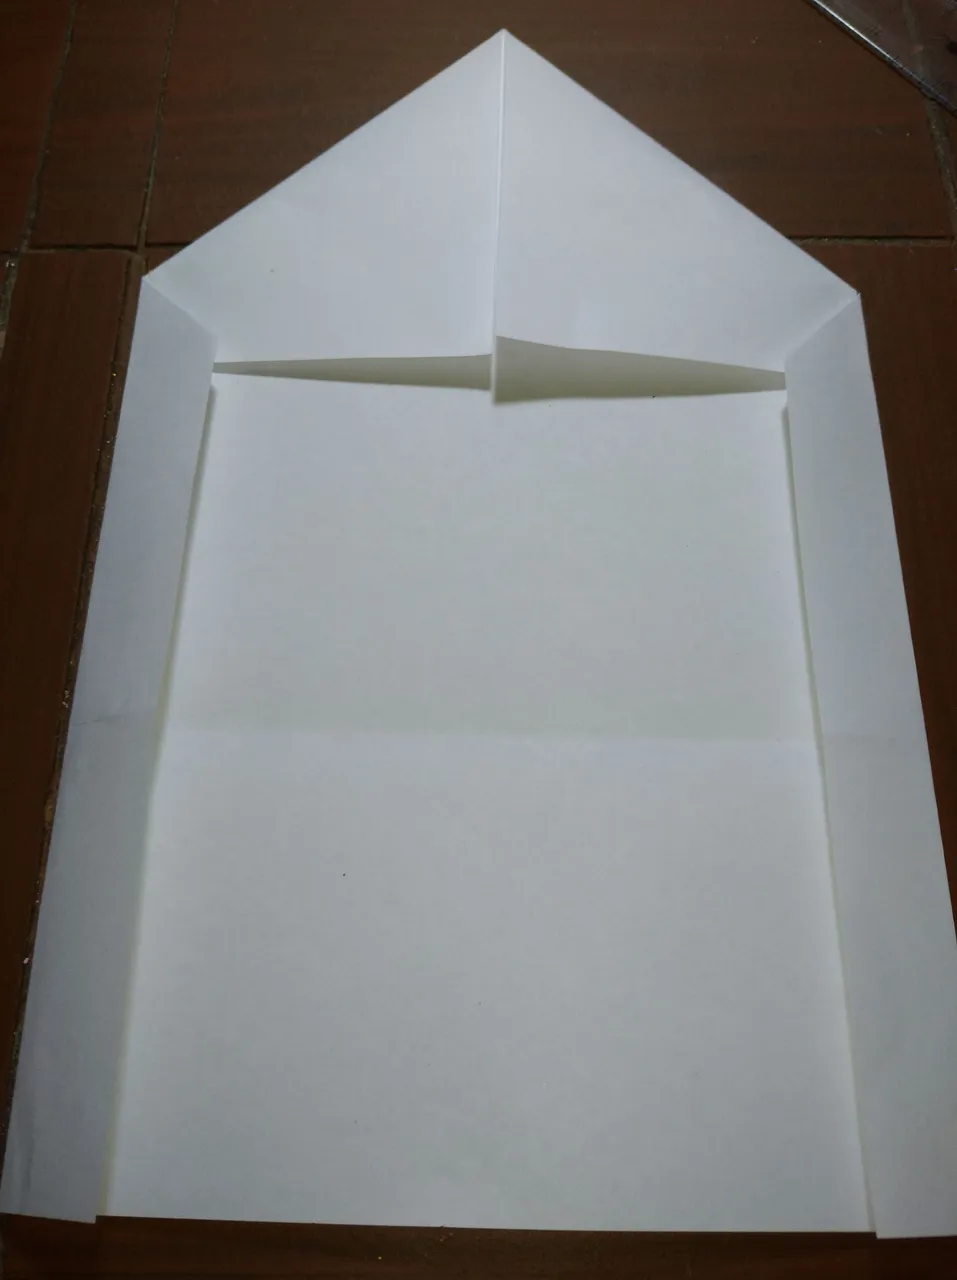
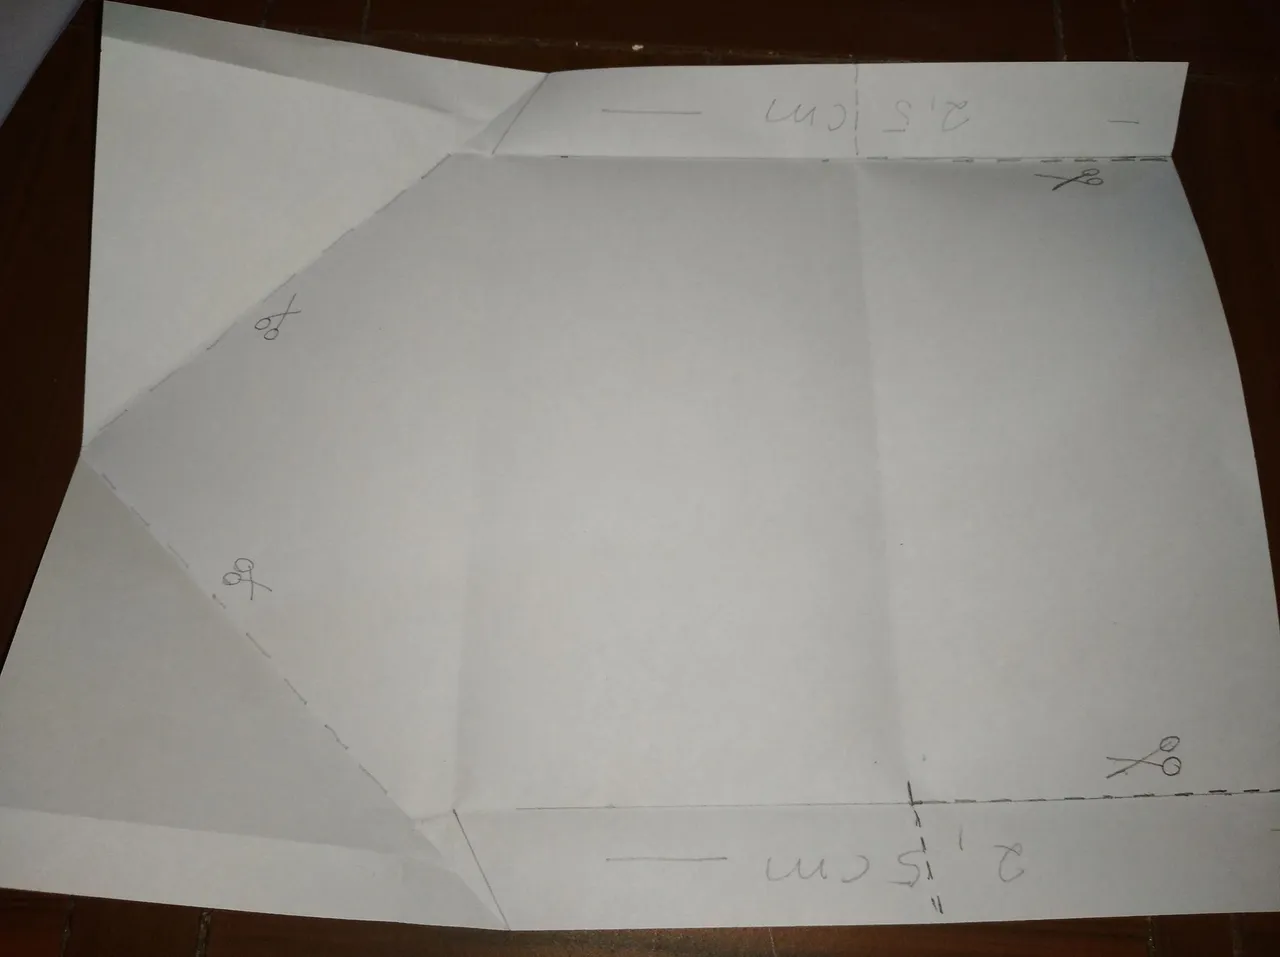
- We mark 2.5 cm on each side of the vertical sheet and make a fold.
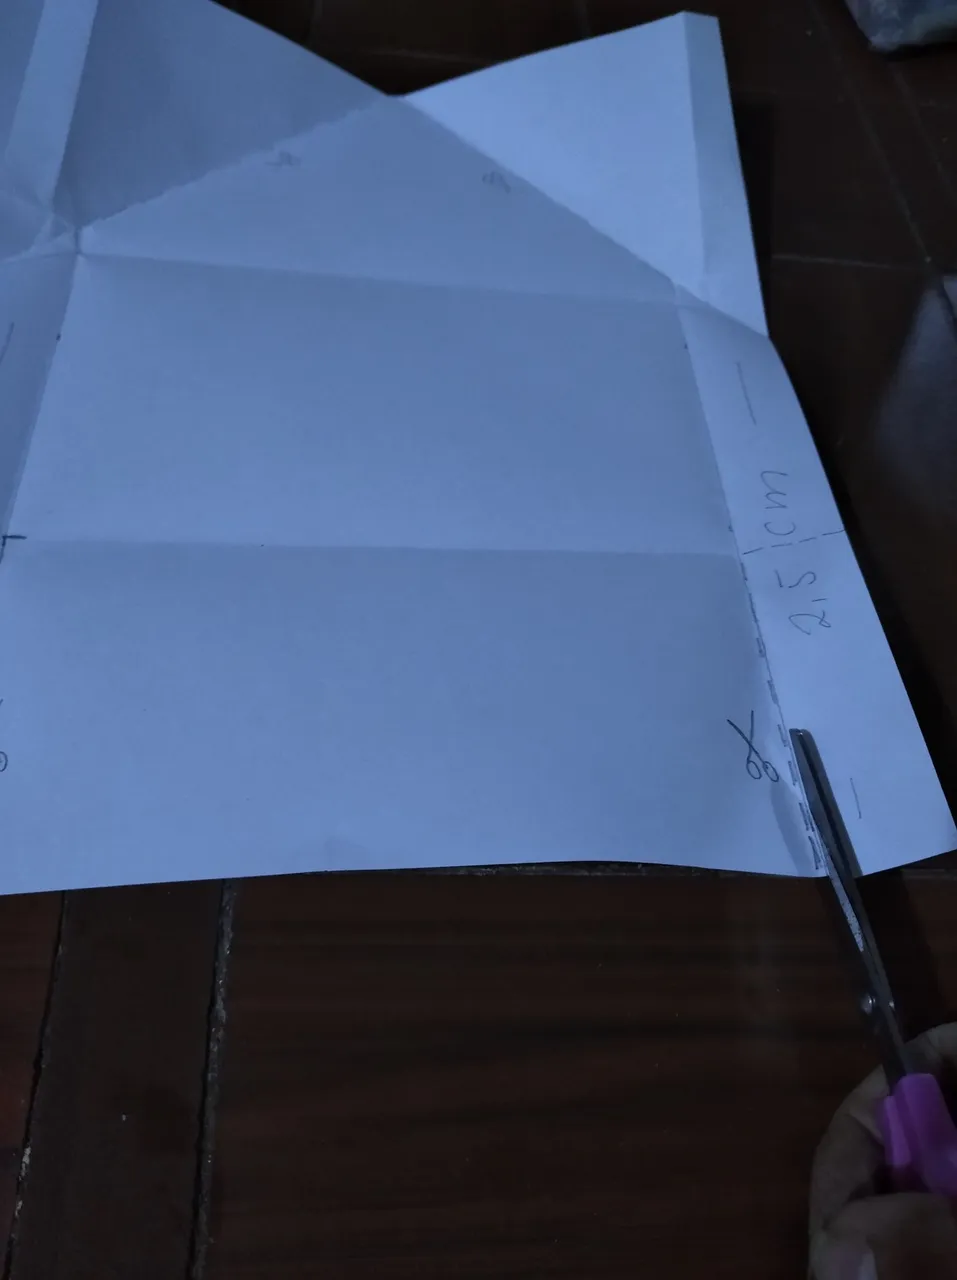
- We proceed to make the cutting lines.
- We cut along the cut lines drawn.
Spanish
- Marcamos 2,5 cm de cada lado de la hoja vertical y hacemos un doblez.
- Procedemos a realizar las líneas de corte.
- Recortamos por las líneas de corte trazadas.
English
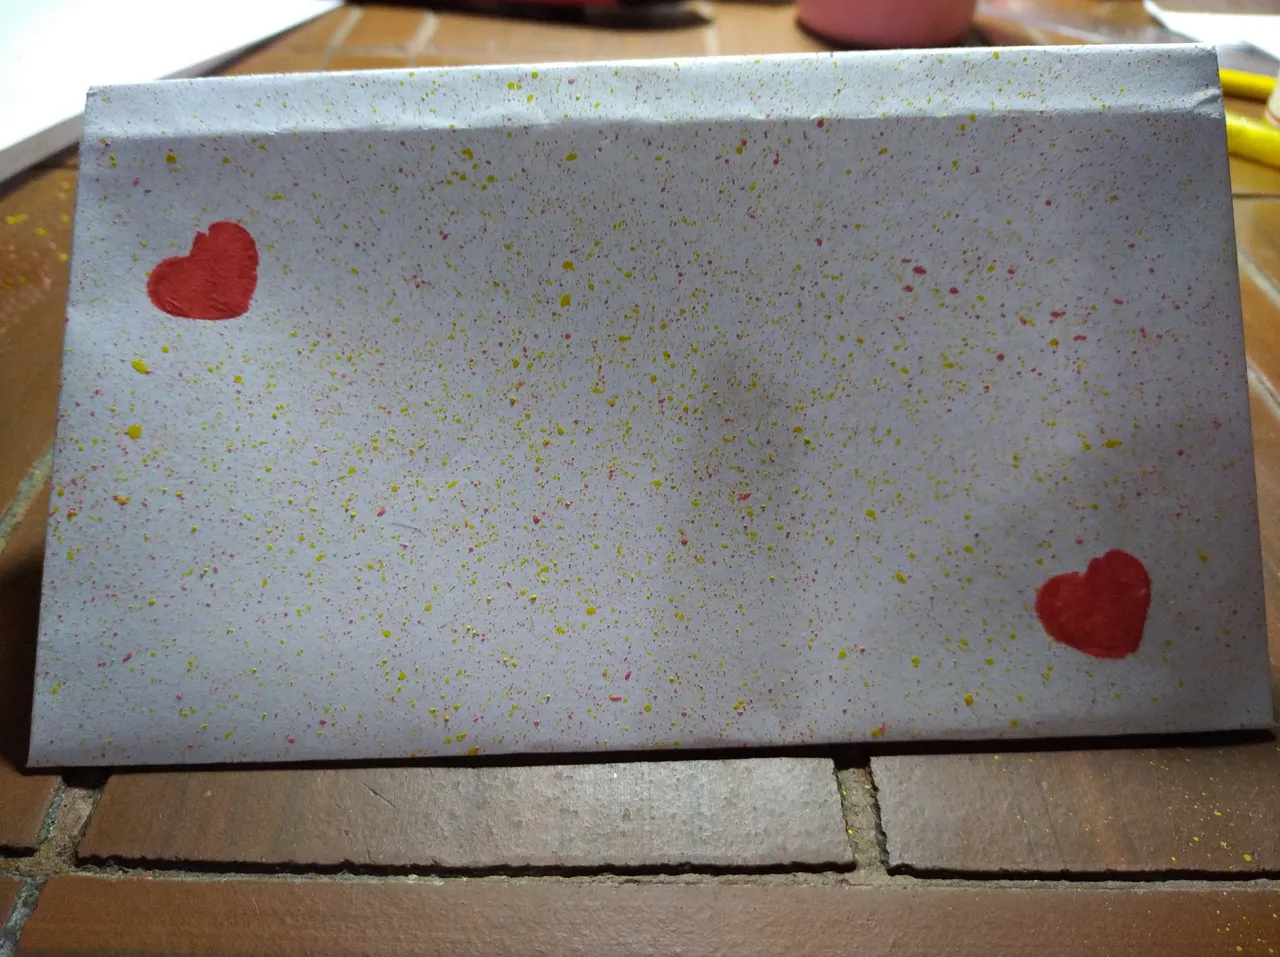
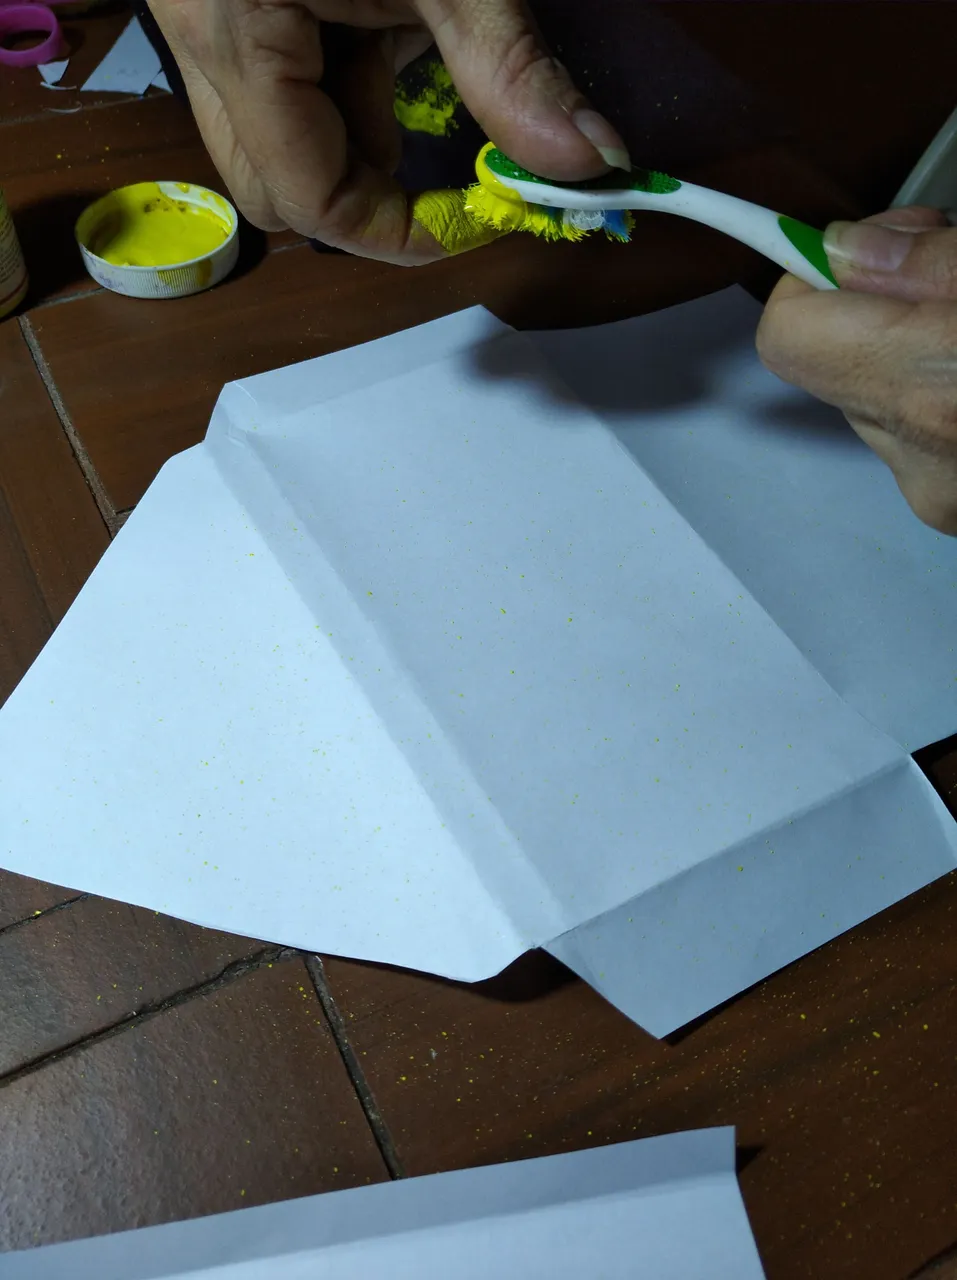
- We personalize our envelope. With the help of the toothbrush and cold paint, we splash the entire surface with the colors we want.
- With a stamp of hearts, we mark the envelope.
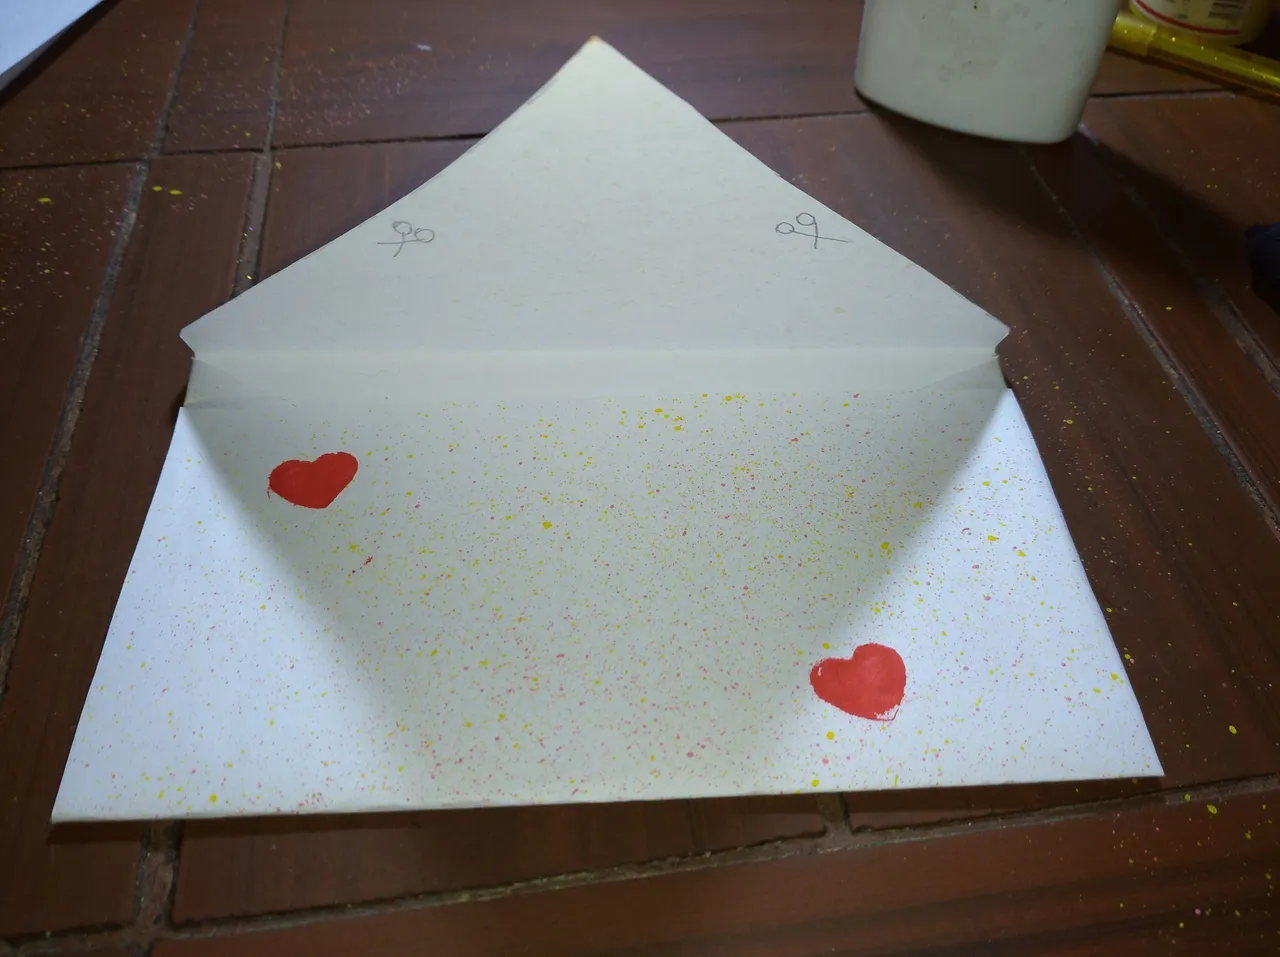
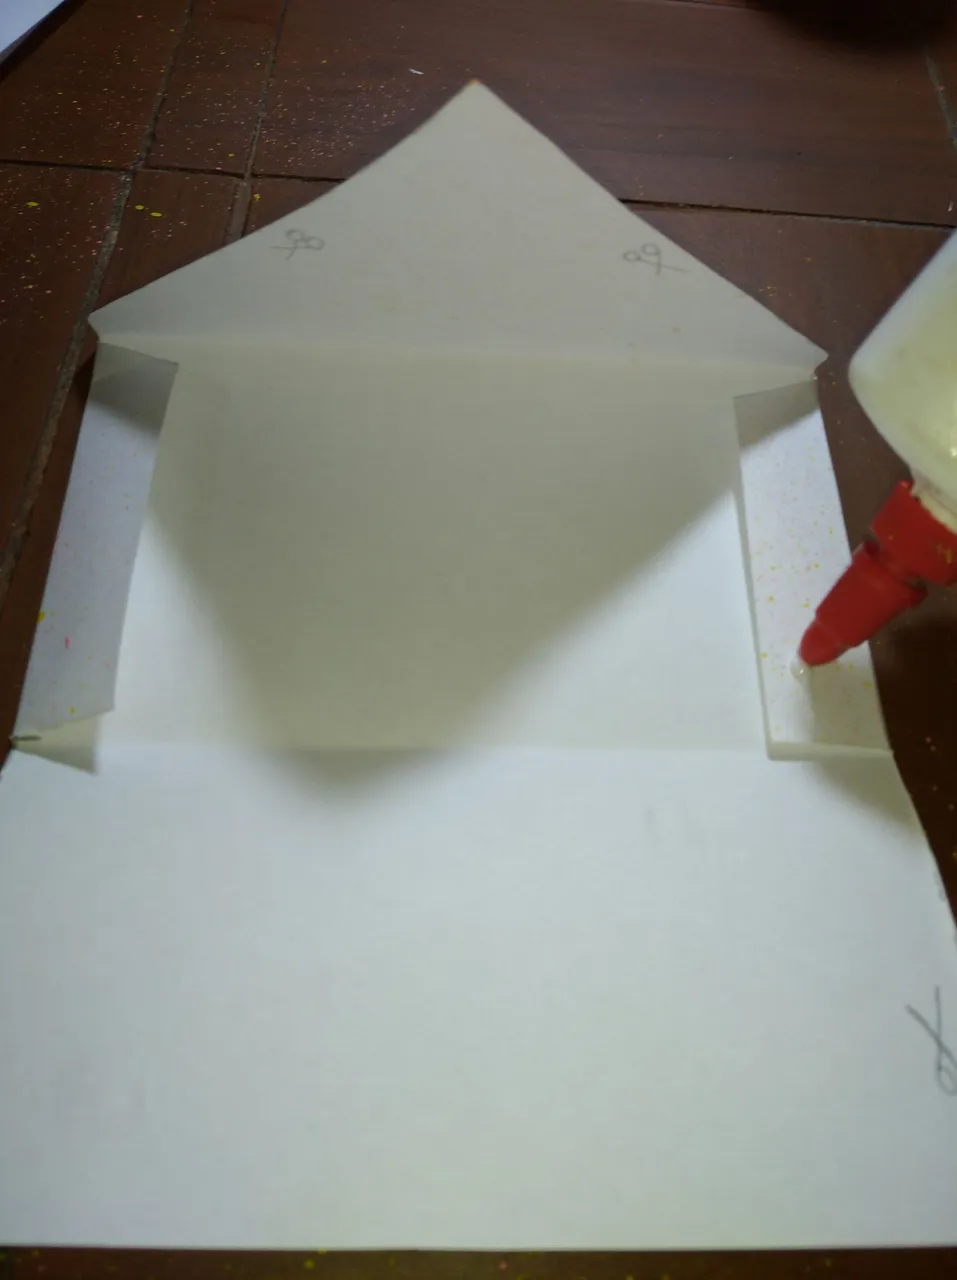
- With the glue we seal the envelope, except the upper flap.
Spanish
- Personalizamos nuestro sobre. Con la ayuda del cepillo dental y la pintura al frío salpicamos toda la superficie con los colores que deseemos.
- Con un sello de corazones, marcamos el sobre.
- Con la pega sellamos el sobre, menos la solapa superior.

English
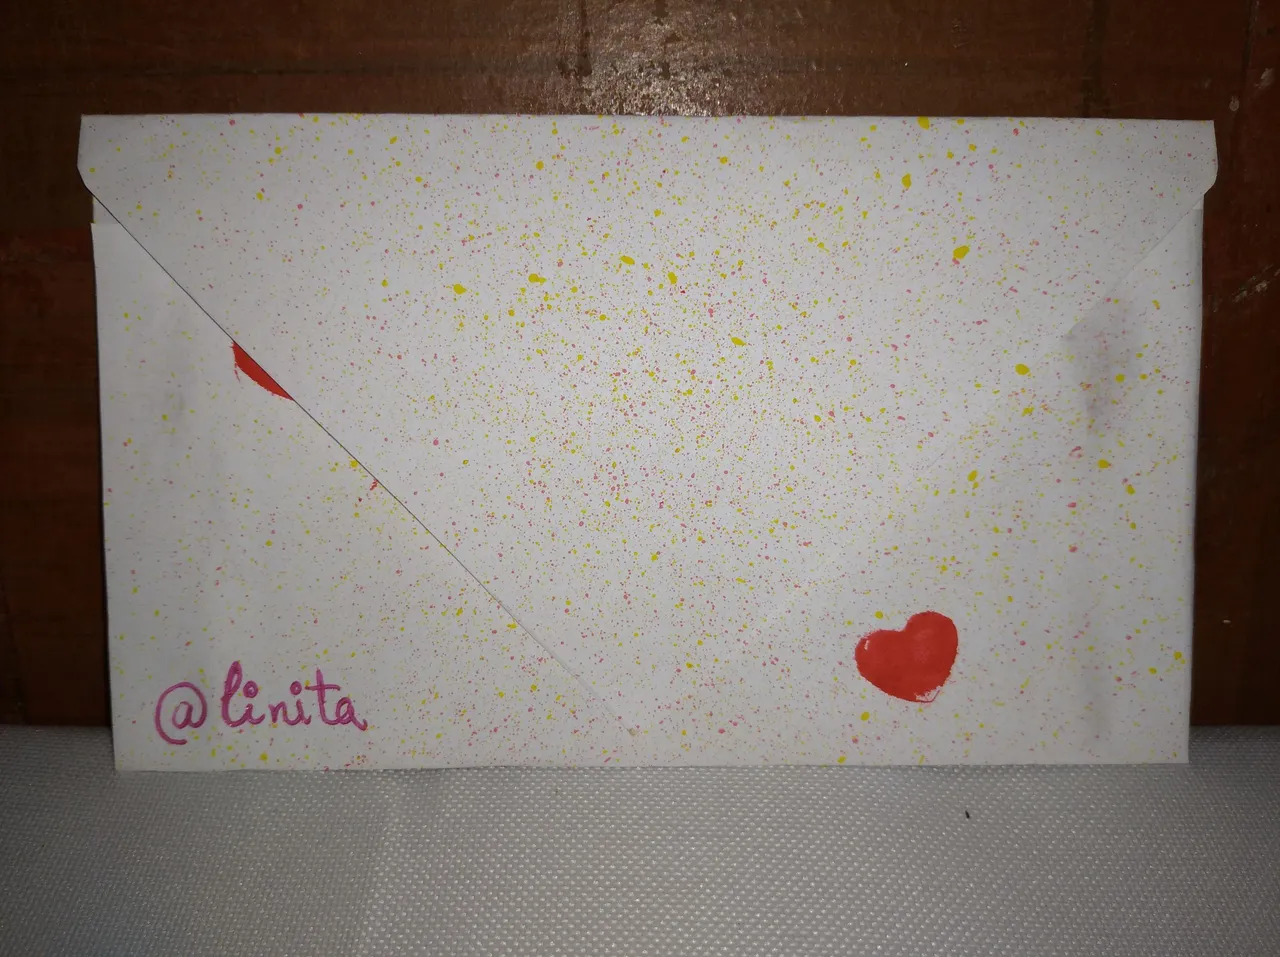
And ready. We already have our second envelope made with our hands for when we need to send letters, an invitation, in short, to give it the use we think is necessary.
I hope it has been very useful to you.
Spanish
Y listo. Ya tenemos nuestro segundo sobre hecho con nuestras manos para cuando necesitemos enviar cartas,alguna invitación, en fin, para darle el uso que creamos necesario.
Espero les haya sido de gran utilidad.