Hello everybody,
I have created an ELK-Monitoring system to observe the money flow with the CHARY coin (Details).
In this and the next posts I will describe how I achieved this:
- How To Install An Amazon Linux Server (This Post)
- Installing Elastic Search, Kibana and Logstash (ELK)
- Configuring ELK for CHARY
For my observing system, I need two Linux servers. One that is tiny (and free of charge) and runs continously to fetch the logfiles and another with the ELK on it, which costs a bit and should run only when I want to evaluate the data (once a month).
Here is described how to order and install the free linux server on Amazon AWS:
Installing an Amazon Linux Server
Amazon Web Services (AWS) allows to install virtuell computers with a few handles.
These servers can be started and stopped as we want. They are reachable from the internet.
It is ideal for testing, because you don't manipulate your local environment.
Registration
You need to have an account on https://aws.amazon.com/de/.
For this you need to give your credit card number. Our server is "free", but there are some small costs that could appear. I have paid between 0 and 5 Dollars a month.
Installation
Go to https://console.aws.amazon.com
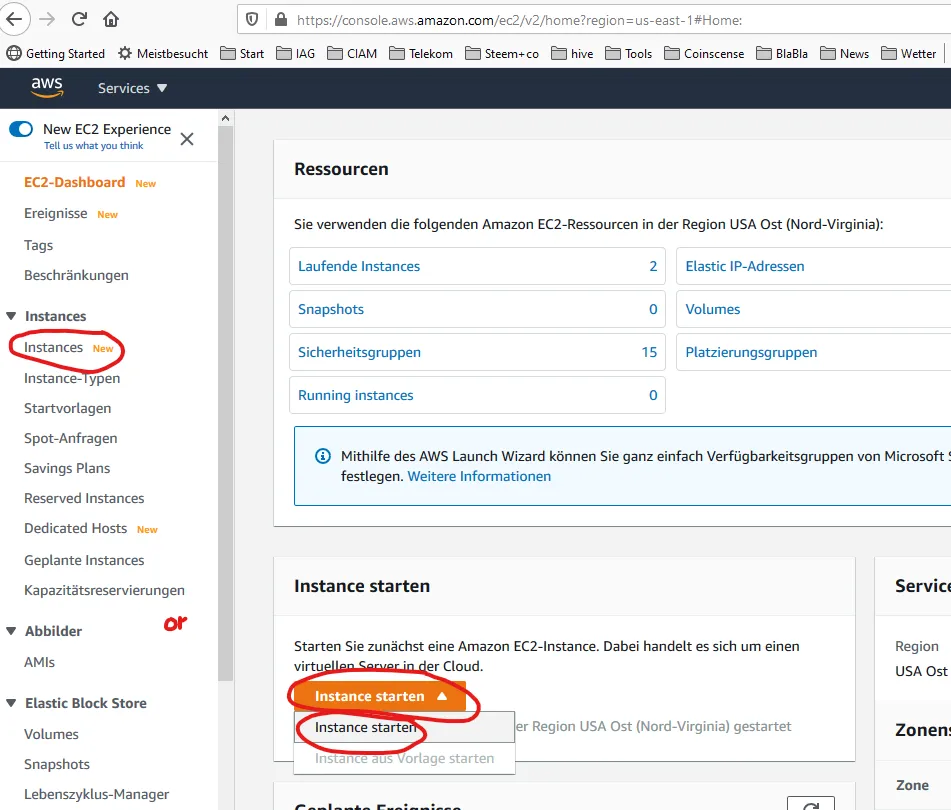
Klick on "EC2"
Klick on "launch new Instance"
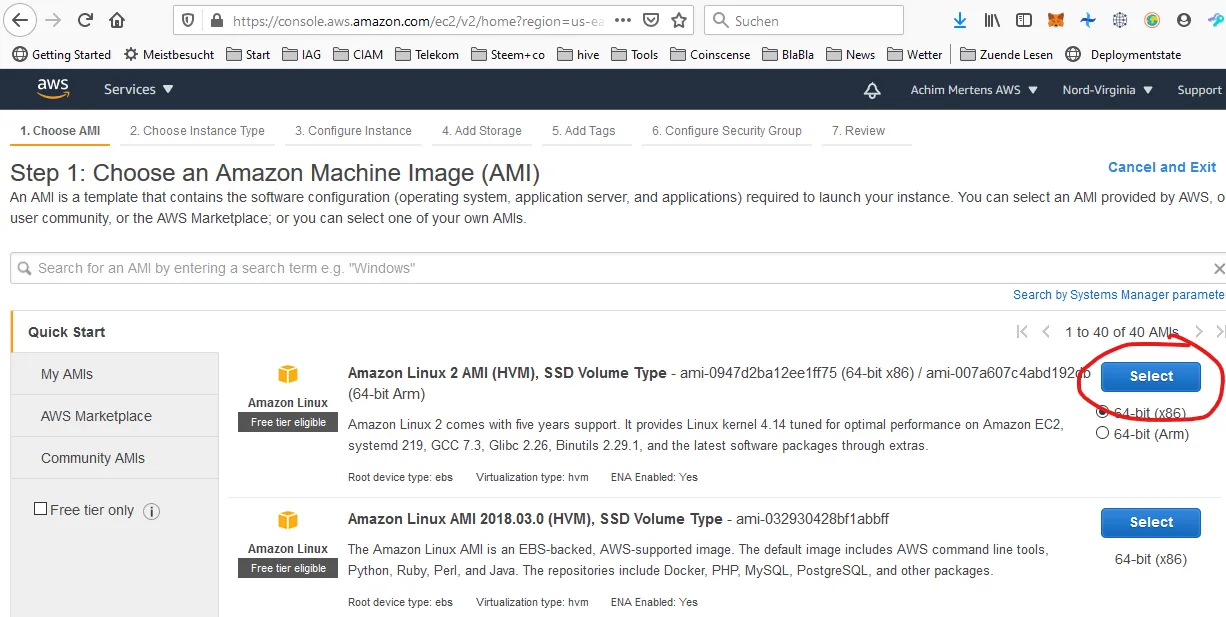
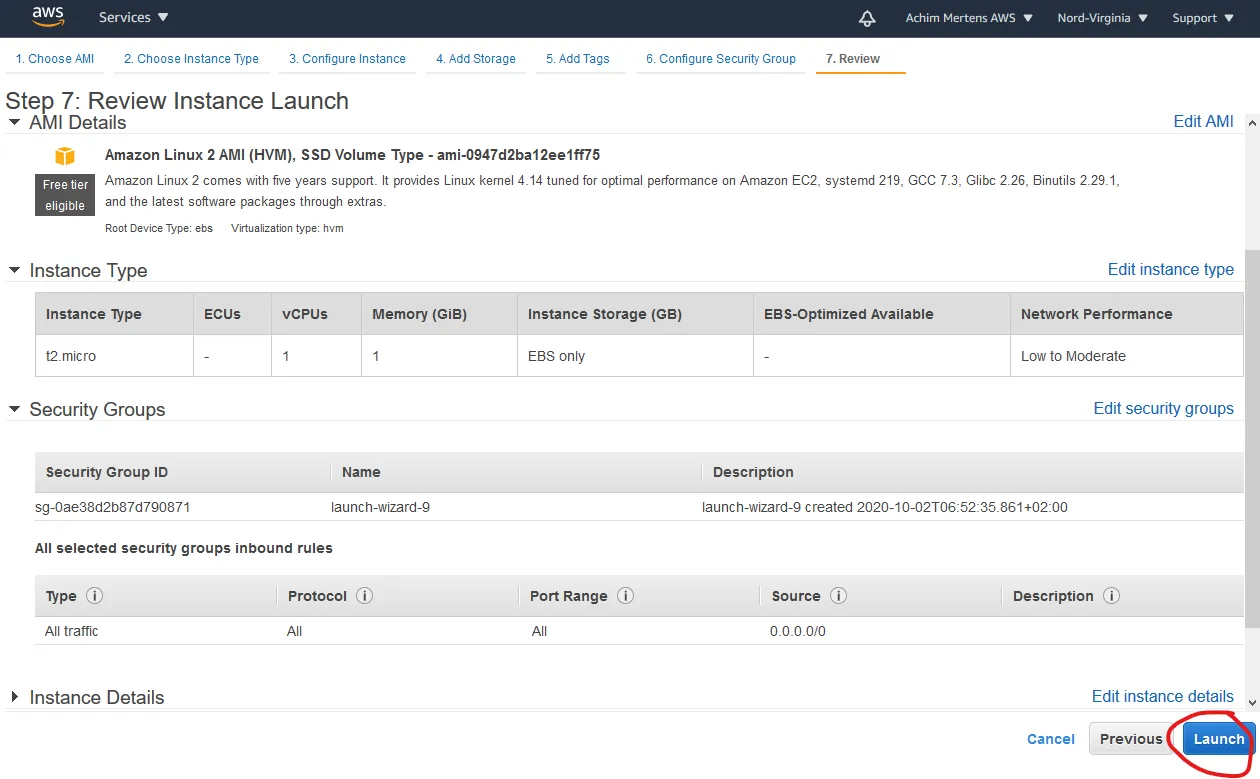
Choose Amazon Linux 2 AMI (HVM), SSD Volume Type (this is enough for a test server, but comes to it's limits, as soon as you start to observe bigger amounts of data)
(It is a RedHat Version which was adapted by Amazon):
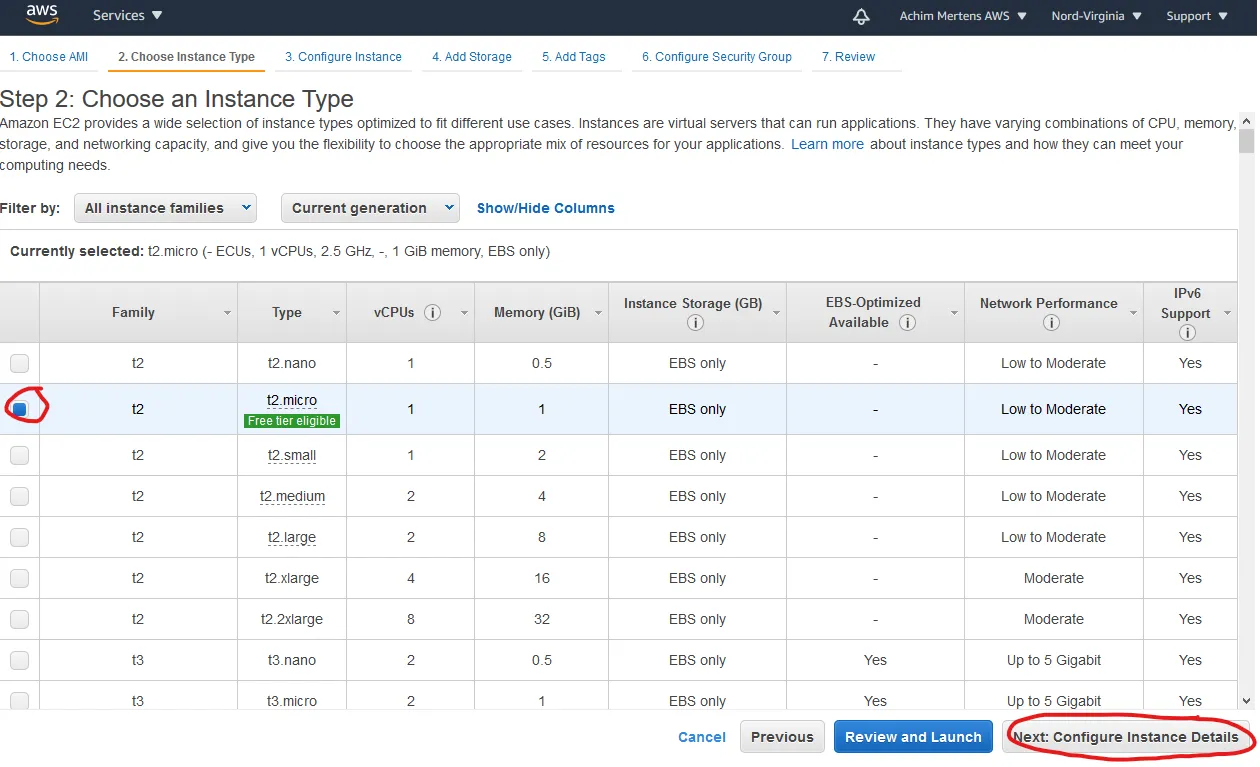
Select t2.micro, the only "free tier eligible" instance type
Click on "Next: Configure Instance Details"
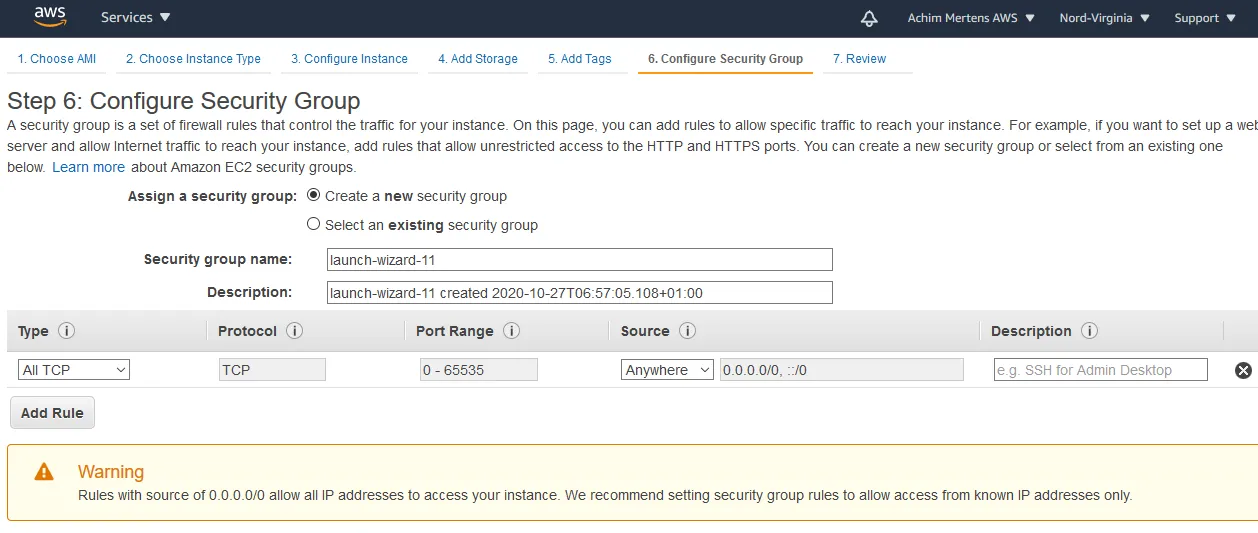
Click on 6. Configure Security Groups, add rule and allow that, what you want (in my testcase: everything):
Click on "Review and Launch" and then on "Launch"
Now you have to create or chose an existing key pair. I already had one. If you don't have a keypair, don't panic, the documentation of amazon is good ;-)
Be aware to keep the key safe.

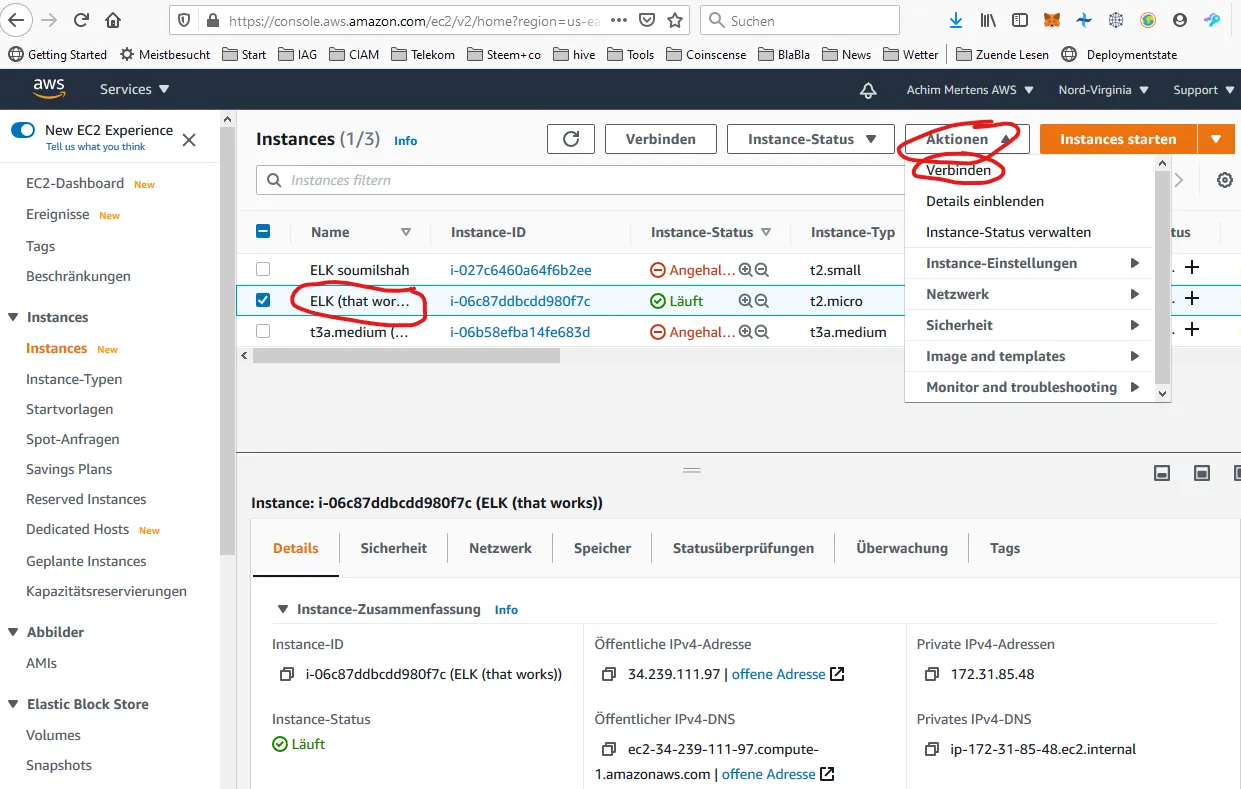
Click on "View Instances"
You are now in the "Instances Console". This is your new start-board to start and stop your instances. You should stop your instances, when you don't use them, because they consume resources and also some money. Even with the free tier I had to pay a few dollars during one month. There was something on it, that was not free.
Now you should give your new server a name.
After that, click on Action/connect:
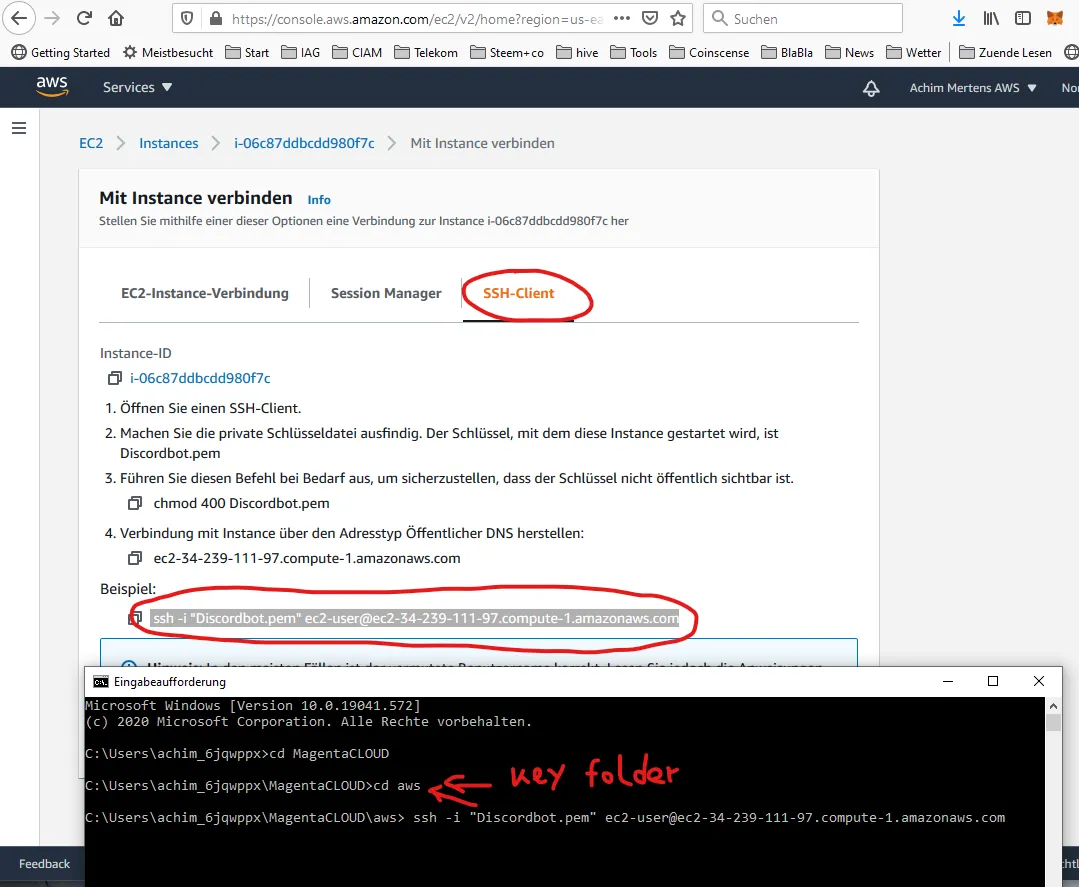
Click on SSH Client. There you get an example, how to connect to the server.
Then open a DOS-Box (command line) and navigate to the folder, where your private key is located.
Copy and paste the example command into the command line and hit enter:
Answer "yes", when asked to continue the connection.
When you see this, then: CONGRATULATION!

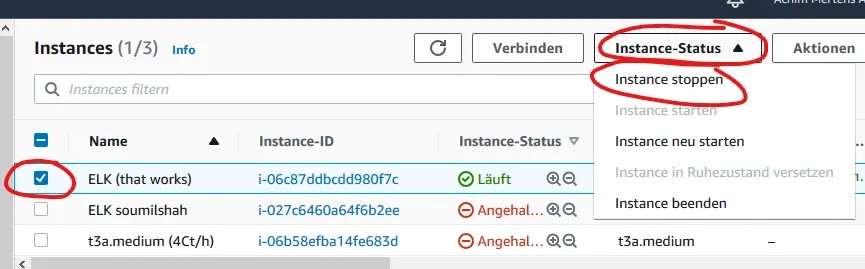
Don't forget to stop your Server after using it (be aware of possible costs):
More Information:
Deploy your Elastic Search and Kibana on AWS EC2 server Tutorial
Learn Elastic Search and Kibana in 75 Minutes 0 to Hero