I distribute daily Hivemind database snapshots. This is a quick tutorial to restore that database into a fresh new server.
I have completed these steps on a fresh Digitalocean droplet (8vcpu, 32gb ram) running Ubuntu 16.04. And all the process took 4 hours.
Installing PostgreSQL (10.6)
$ apt-get update
$ wget --quiet -O - https://www.postgresql.org/media/keys/ACCC4CF8.asc | sudo apt-key add -
$ sudo sh -c 'echo "deb http://apt.postgresql.org/pub/repos/apt/ $(lsb_release -sc)-pgdg main" > /etc/apt/sources.list.d/PostgreSQL.list'
$ apt-get update
$ apt-get install postgresql-10
Important note: This dump is only compatible with PostgreSQL 10.6**
Creating the database and user
$ su - postgres
$ createuser --interactive --pwprompt
Enter name of role to add: hive
Enter password for new role:
Enter it again:
Shall the new role be a superuser? (y/n) y
$ psql
$ create database hive;
$ \q
Note: Make sure you remember the role(user) name and password and set the user as hive.
Download the dump
$ wget -c http://hivemind.emrebeyler.me/dumps/hive_latest.sql.gz
Wait until it finishes. It should take around 10-15 mins. (Make sure you check the state.txt. If it says, backup in progress, you need to wait.)
Decompress the file
$ apt-get install pigz
$ apt-get install pv
$ pv hive_latest.sql.gz | pigz -d -p 8 > hive_latest.sql
This will decompress the file with 8 threads and gives a nice progress bar.
It should take 15-20 minutes. You can choose thread count with the -p parameter. I have aligned it with core count.
Restore the database
$ vim /etc/postgresql/10/main/pg_hba.conf
Find that line:
local all all peer
Replace peer with md5, then do a restart:
$ service postgresql restart
Import the database:
$psql -U <username> <database_name> -f hive_latest.sql
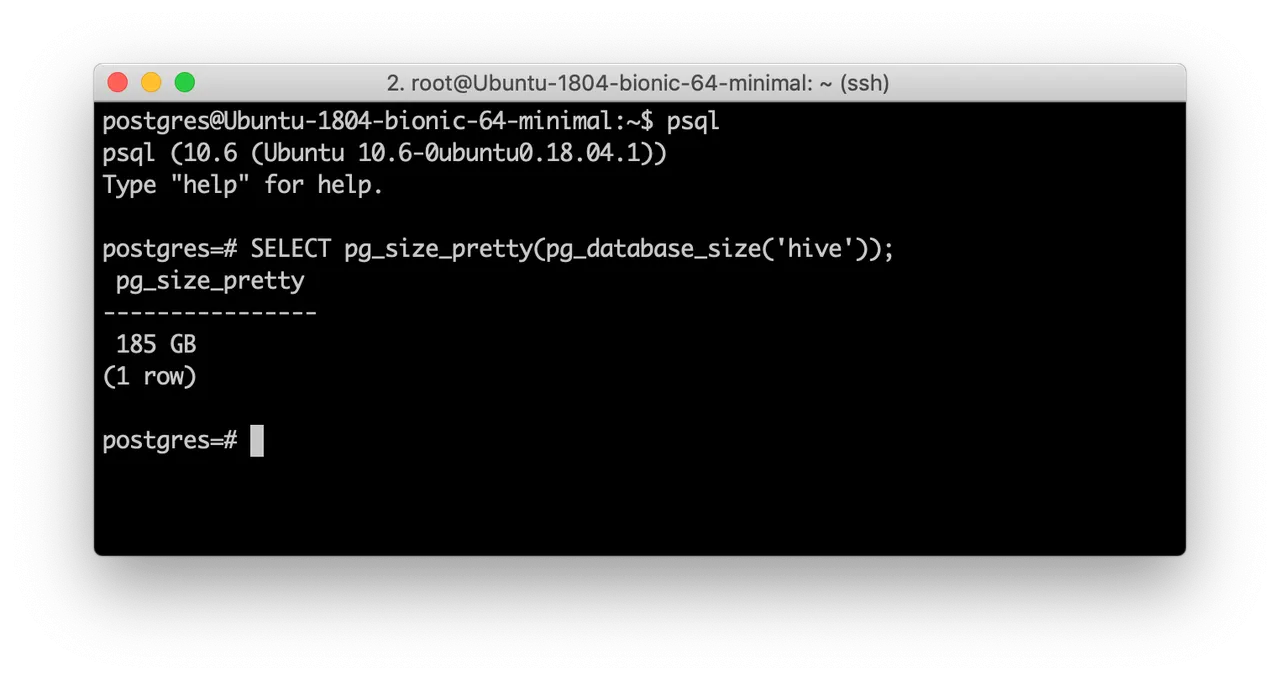
Watching the progress:
$ su - postgres
$ psql
SELECT pg_size_pretty(pg_database_size('hive'));
This will show the database size of hive. It should be around 180-200 GB when the import is done.
Install Python3.6 & Hivemind
These steps are required for manual installation of Hivemind. If you use docker installation, you can skip.
$ add-apt-repository ppa:jonathonf/python-3.6
$ apt-get update
$ apt-get install python3.6 python3.6-dev virtualenv build-essential
$ virtualenv -p python3.6 hivemind-env
$ source hivemind-env/bin/activate
$ git clone https://github.com/steemit/hivemind.git
$ cd hivemind
$ pip install -e .
Congrats! Hive is installed.
Sync process
(Make sure you activated the virtual environment)
$ hive sync --database-url postgresql://hive:hive@localhost:5432/hive
This will sync the missing blocks and catch-up with the block production fast. It's recommended to run this with a process manager (like Supervisor) to make sure the process is always up and running.
Server process
(Make sure you activated the virtual environment)
$ hive server --database-url postgresql://hive:hive@localhost:5432/hive
Notes
This tutorial is opinionated on some steps and gives a simple start to setup a Hivemind. For the best results, always follow the official repository for the instructions.
For example, the recommended way to install Hivemind is the Docker way. I patch and hack things on my Hivemind setup, so I prefer a manual install. Also, it's always preffered to execute apps in a normal user instead of root. I skipped this to keep the tutorial simple.
Also, if you don't have SSD in your setup, restoring process may take more time. Some users reported long waiting times on decompressing, importing, etc.
Troubleshooting
If you encounter any issues while trying this, you can join #hivemind channel at Steemdevs discord and ask for help.
Vote for me as a witness
I do my best to support the blockchain with my skills. If you like what I do, consider casting a vote on via Steemconnect or on steemit.com.