After cutting my teeth on a crucible of cob and fire, it was time to finally build something I could actually use. Unfortunately, I was so focused on building, that I hardly took any pictures. Because of that, this post will have an accompanying video. It won't help make things much clearer, but it's something. It will also be even less cohesive than usual, since most of the pictures I do have to use were taken as it was being demolished.
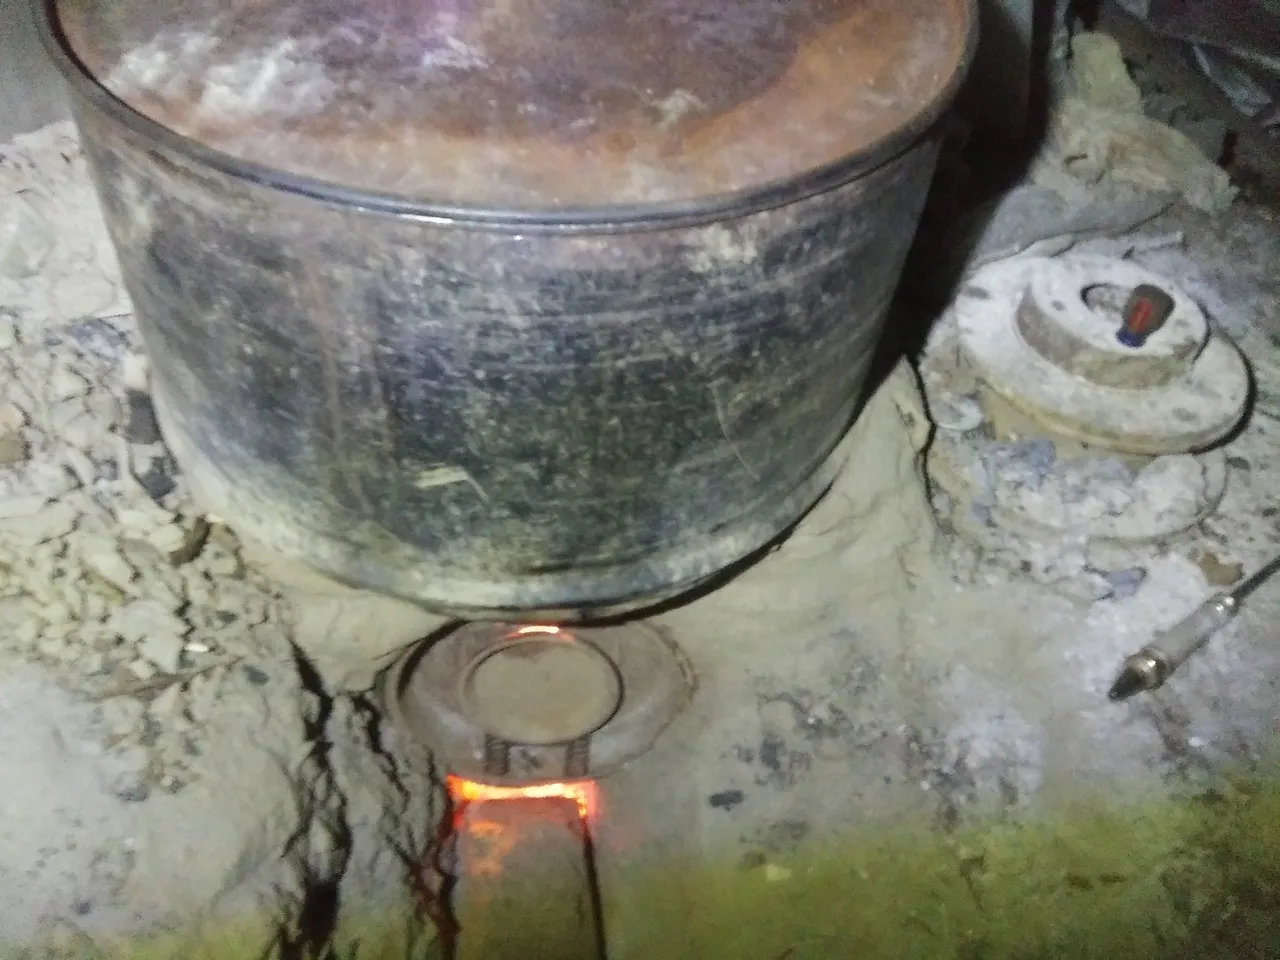
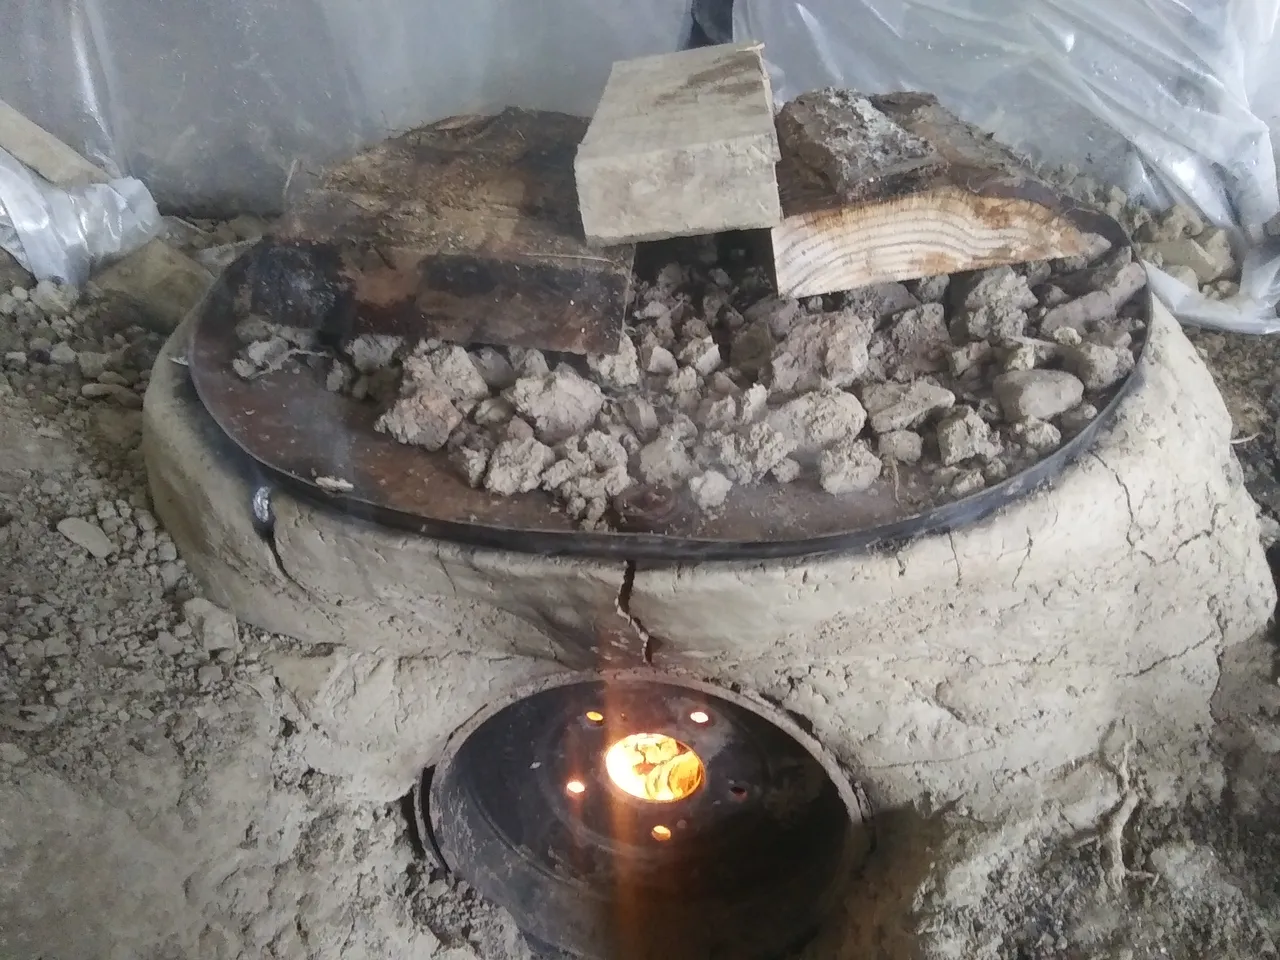
Let's get our nice attention-getting post profile pic taken care of. The pic below shows burn chamber and 'hopper' section of the stove. The orange glowing bits are the air intake and view port, the partial barrel on top is the hopper. The fire burns at the bottom, and is pulled out of this section and into a heat exchanger, where all the smoke is burned.
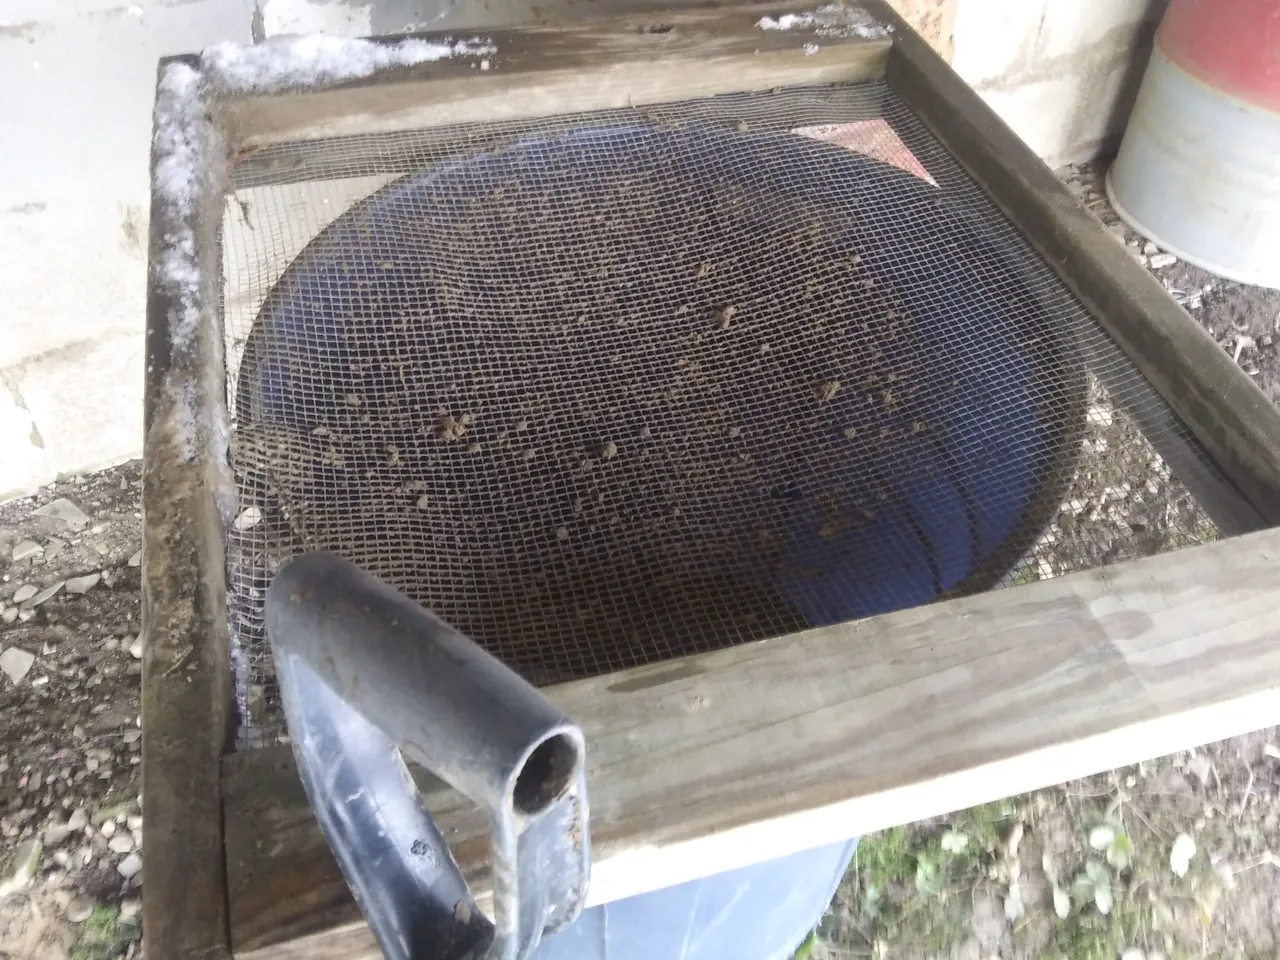
Like most big projects, this one started with some excavation. If the hole dug into hardpan that already has a large tree root in the way isn't enough to put you off, this was dug underneath my deck, next to the foundation, with a ceiling height of about 4'. The material is being put on the garbage can lid because everything I dig here will be screened as used as material for the build.
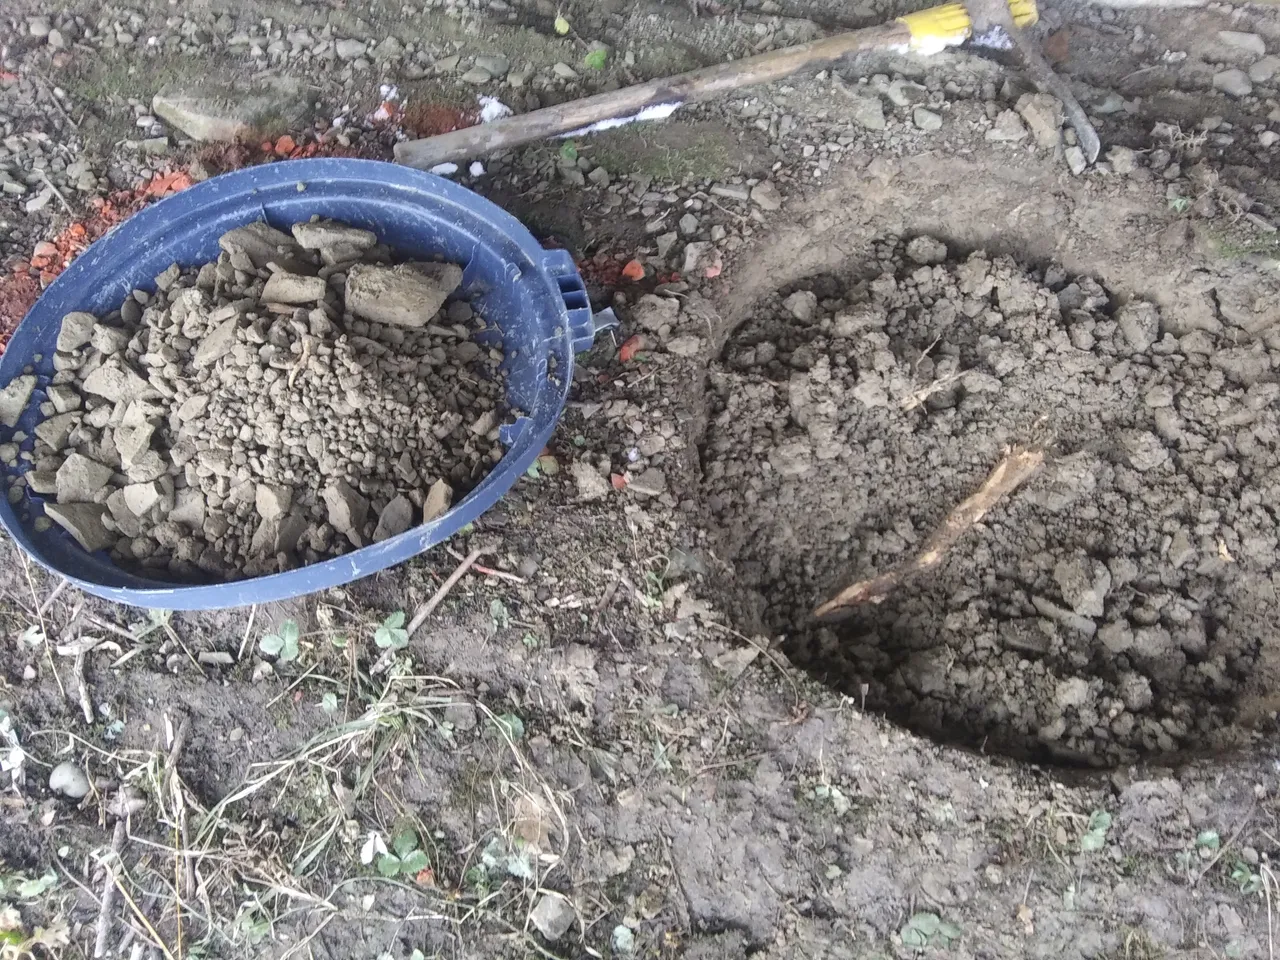
The rest of that garbage can gets used to hold my screened clay. I need this to keep the clay dry until I'm ready to use it, because this time of year some kind of water drips from the deck above pretty much all the time.
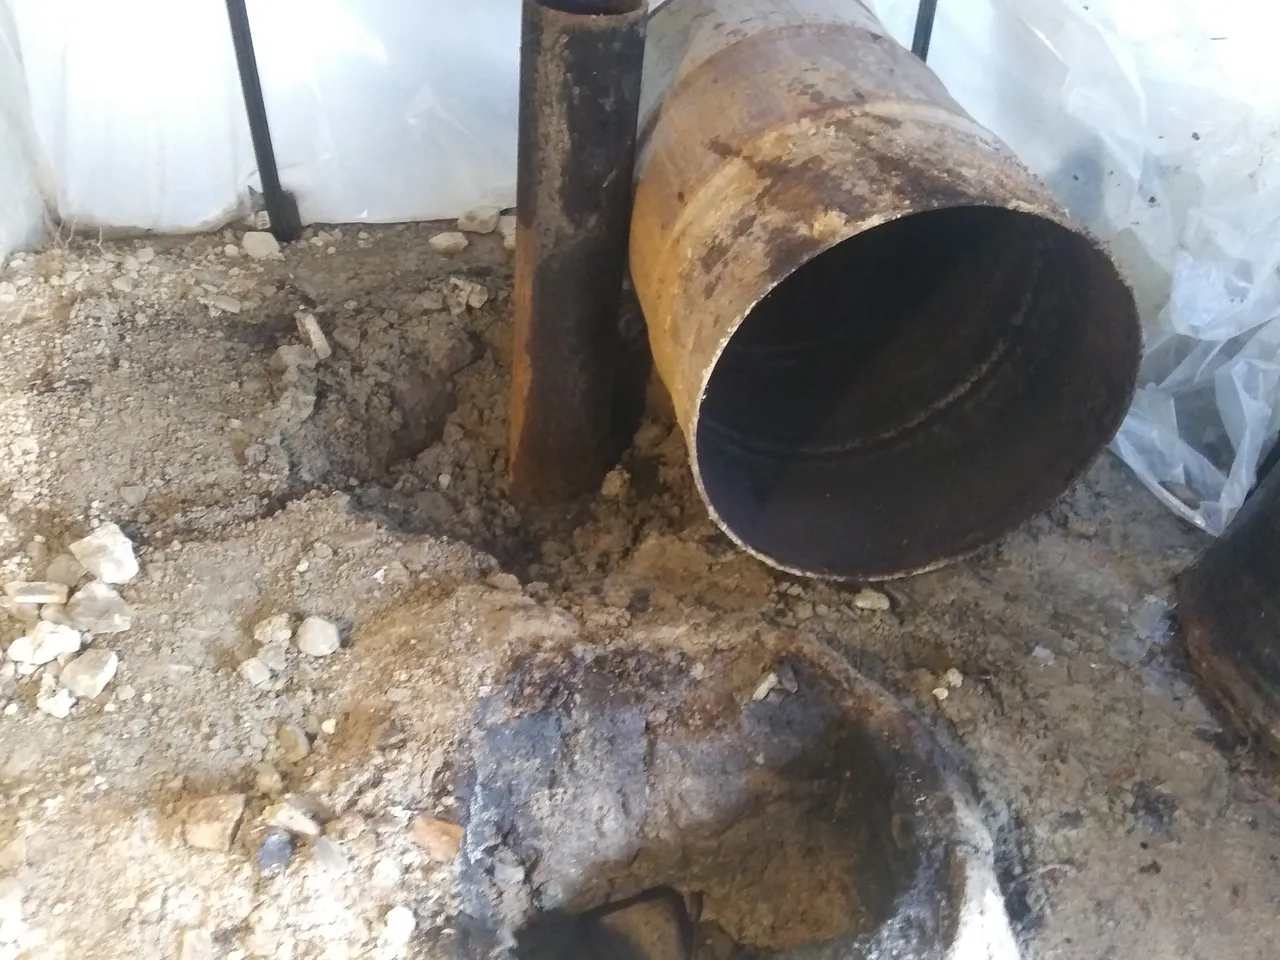
It is generally recommended not to use steel for your burn chamber and heat riser, because it is expensive and deteriorates pretty rapidly in the extreme heat. I was able to get this piece from work for free. It has a 6" inside diameter, and is made of 1/4" thick steel. Of course I didn't get any good picture of putting the 'L' shape into it. Basically I just cut a 90° notch in the pipe at 36" then bent the pipe to close the opening I had cut. Keep in mind that even steel this thick will deteriorate pretty quickly. At the burn chamber end the steel lost about 20% of its thickness after just one season. The 55gal drum you see lying next to the heat riser goes over the top, and works as the main heat exchanger.
For a grate, I used an old front brake rotor that I had laying in the scrap pile. I use front, rather than most rear rotors because they will be vented. This just means basically that there are two layers of steel where the brakes contact, with an airspace in between. This will not only help feed air to your fire, but it will help keep the grate cooler, so it won't deteriorate quite as quickly. This did require weekly cleaning to clear ash out of the vents, so on the upgrade build I will be trying a more traditional grate for the bottom.
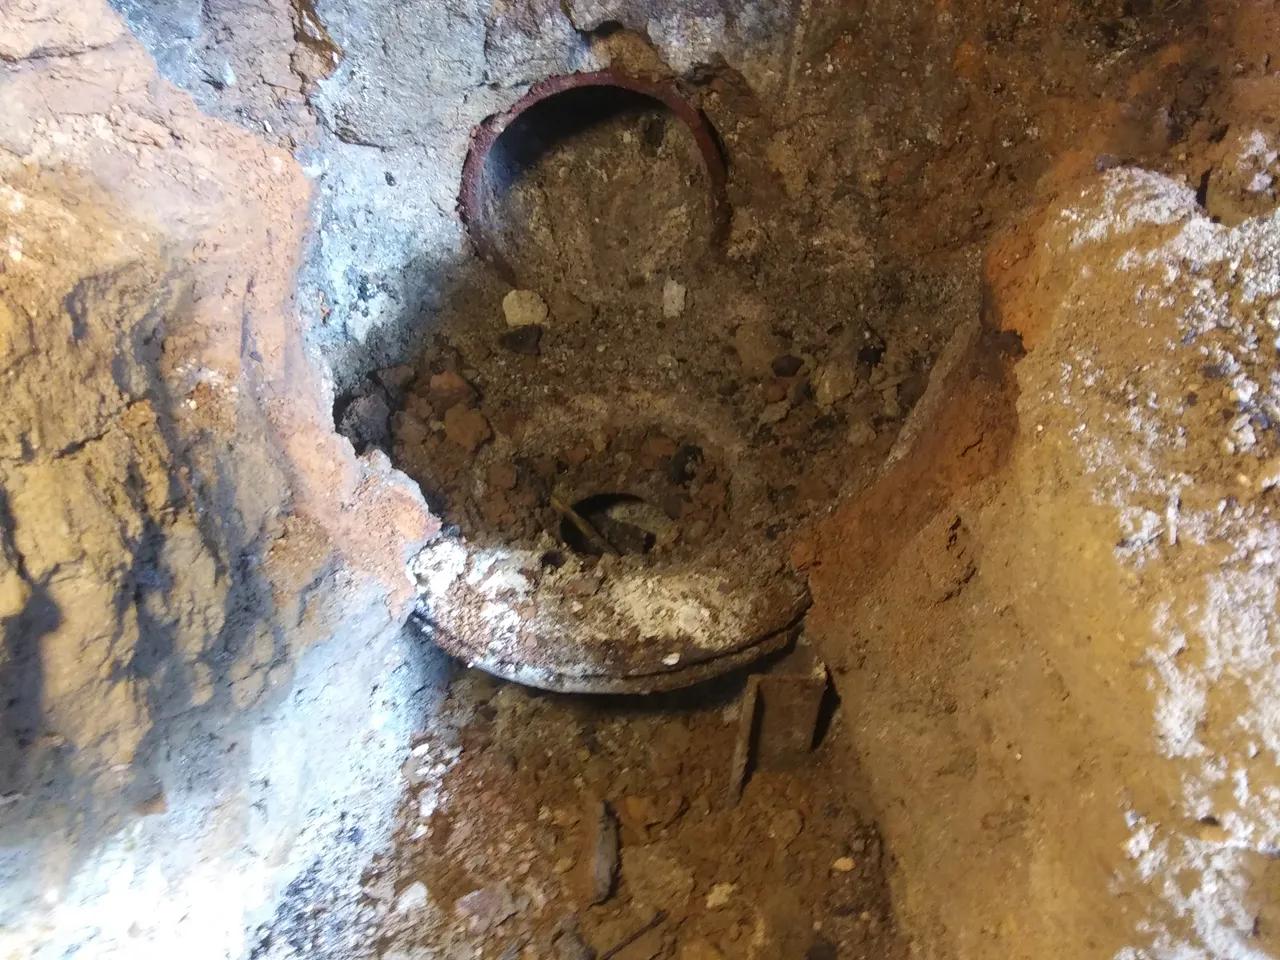
I used this brake drum for an access hole to the fire area, so I could monitor and poke the fire. This also worked as an extra air intake when lighting the stove, which helped quite a bit getting it warmed up quickly. In the upgrade design, I hope to have this be completely removable, so it functions like a more traditional firebox door.
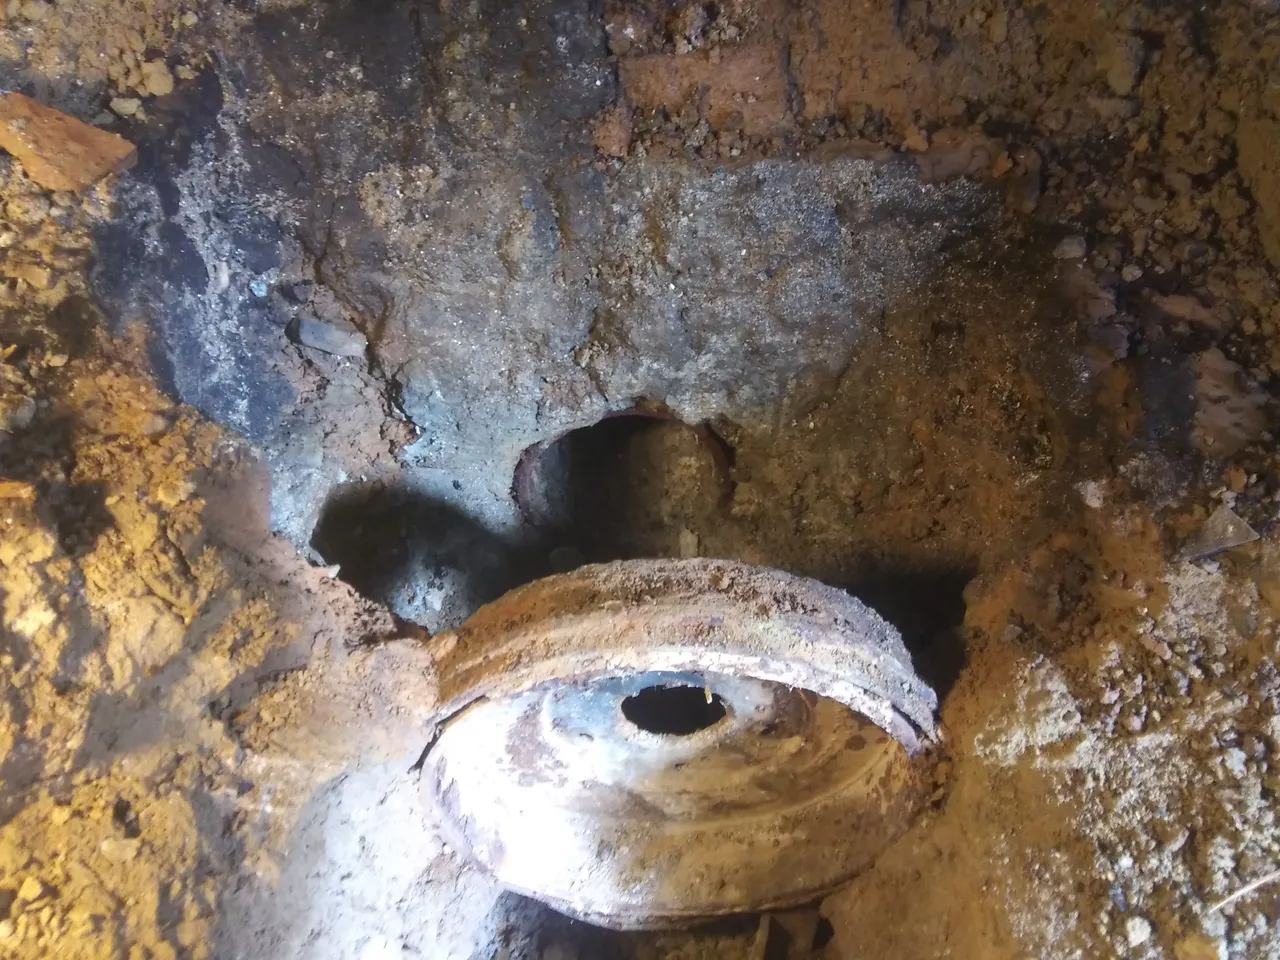
Here you can see the spot where I put the bend in the pipe. The other pipe you see is the exhaust. By forcing the exhaust out of the bottom, much more heat is drawn out of the exhaust before it goes out your chimney. The exhaust runs along the foundation of my house, which it also heats slowly over time. This puts the build in a category that many would call a rocket mass heater instead of a rocket stove, but I seldom draw distinctions between the two. When I see enough of them that they come up in discussion every day, I'll worry more about the semantics.
Below you see the burn chamber, or 'firebox' before the extra hopper space was added. At this point, I've only been firing the stove for a couple weeks, and already you can see there are some very large cracks. I learned after this that mixing ashes in with my clay helped reduce this cracking quite a bit, and also made the clay 'set' more like cement, so that is was less prone to erosion by dripping water. The dirt on the lid is there for weight and insulation, and the wood on top is just there to dry out. The plastic you see behind the firebox is the room I built around the heat exchanger so I could blow the heat in through my basement window.
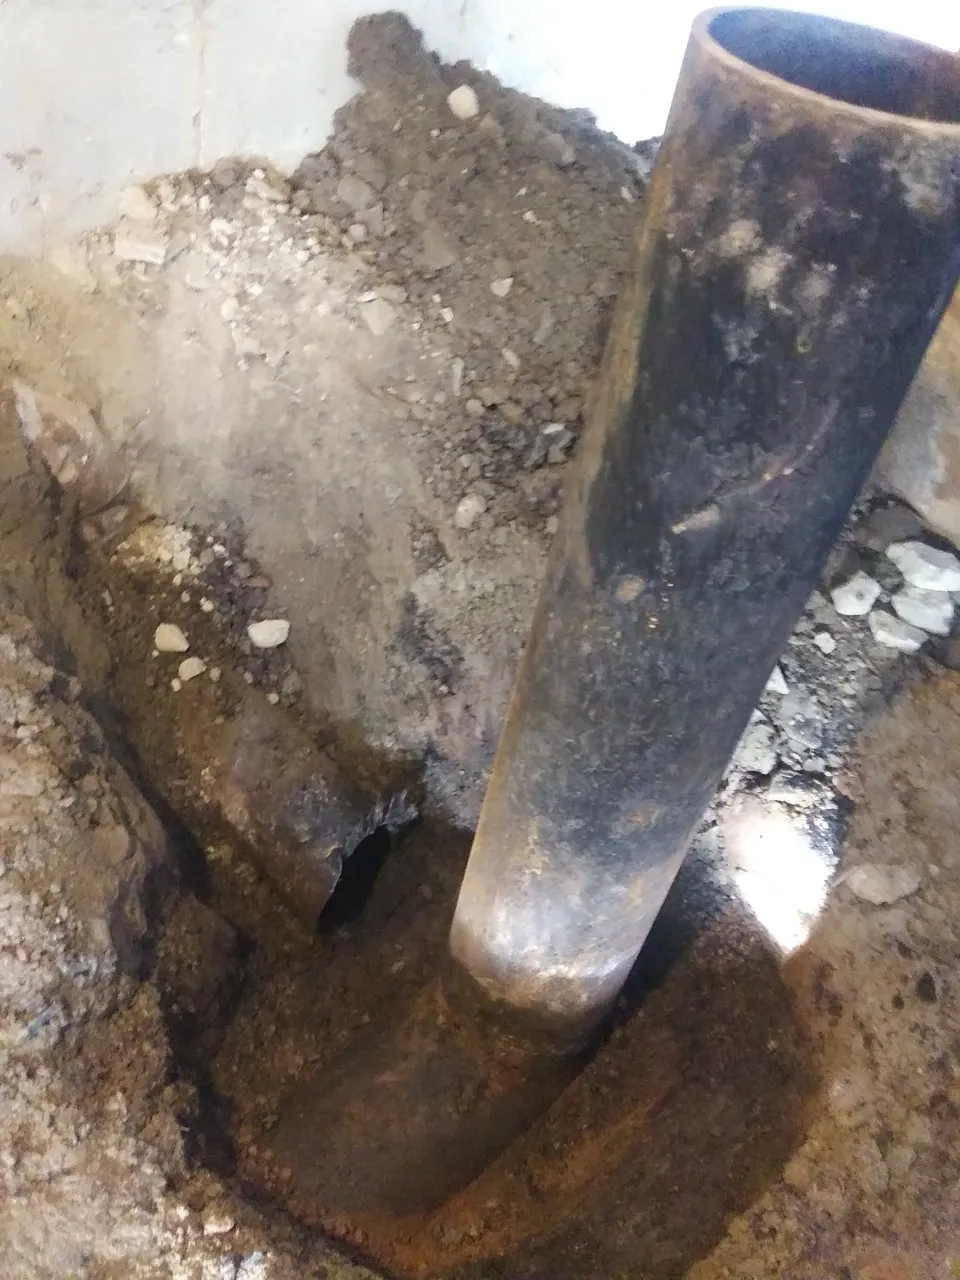
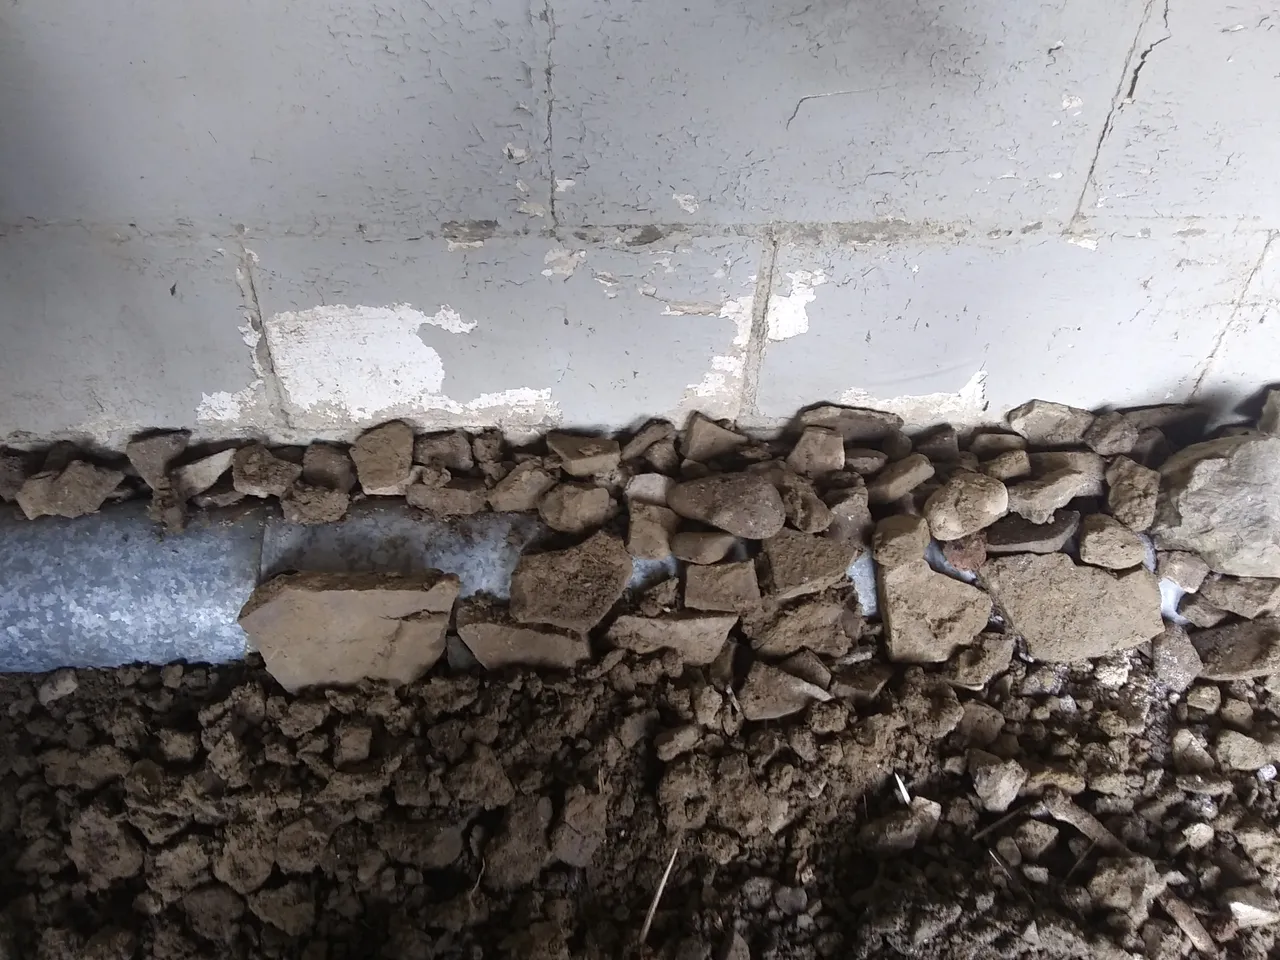
This is the pipe the exhaust travels through before venting outside. I cover it with these large stones to create many air spaces for the heat to travel outward from the pipe. After a few inches of large stone, I will cover it with smaller stones and a few inches of cob, to hold the heat against the house. Even with just this half-finished job, after running the stove for a few days this wall gets up to around 70°, which make my whole house quite a bit more comfortable. This also gives me about 6 hours after the fire goes out before the house starts to cool noticeably.
Well, that's enough for the preliminaries. The rest of my rocket stove posts will be about the final build, more or less as it's happening. I'll go into a lot more detail with clay mixes, and talk more about my particular design considerations.
I put together some video clips I had of this unit in operation, and added some subtitles that describe a little about what's going on. It can be found on 3Speak, here.
I hope you enjoyed this horribly disjointed post. If it makes you feel any better, I suffered too, both berating myself for not taking more pictures, and steaming my noggin trying to make some sense of what I had. Stick with me, it'll get better. 😉
Hope you are well, and hope you all come back for more.