English Version
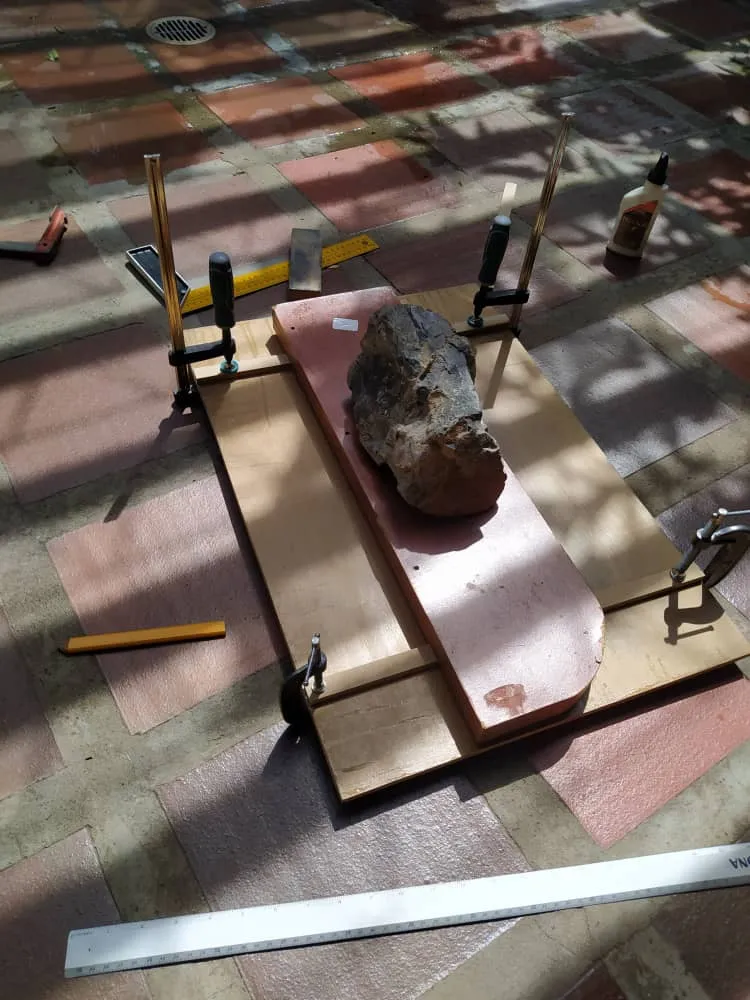
Hello my dear DIY Hivers. It's been a long time since my last post around here. I've been working on some other jigs for my workshop and today I finished this roof that along with my solera mold create a Go-Bar press.
The function of this jig is gluing the struts and other reinforcements to the sound board and back on the instruments. It it helps to apply the right amount of pressure. The other added benefits is being able to clean the excess glue without much trouble.
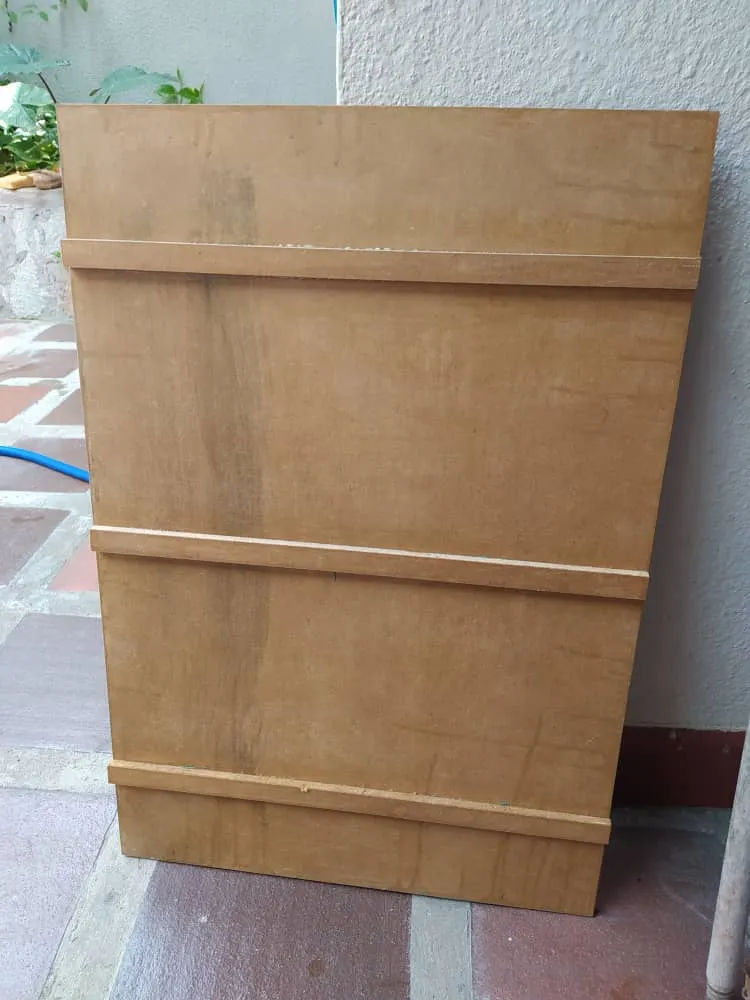
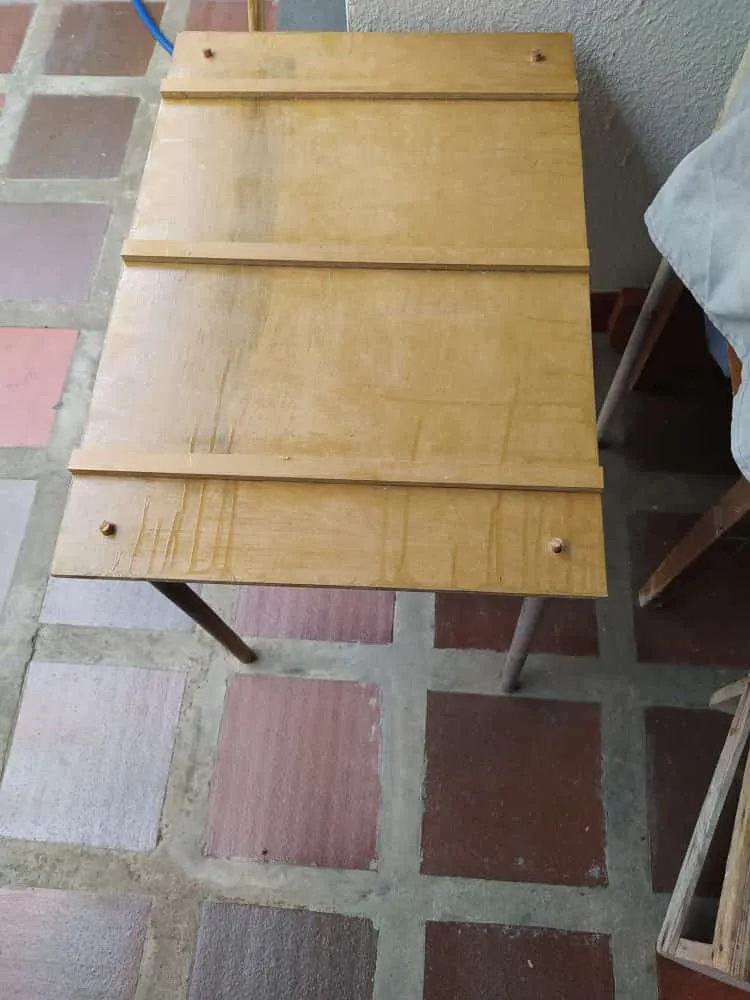
It was a simple build. I had a piece of MDF from some cuts I've previously made. I reinforced the top with some other pieces of the same material. Afterwards, drilled holes at 4cm inside the piece (this is a measure in height and width). Then, I took two broomsticks, cut them to size and made curved tenons on one side. This was my first attempt at this joinery, but I've seen plenty of videos explaining how to make this. It pretty easy.
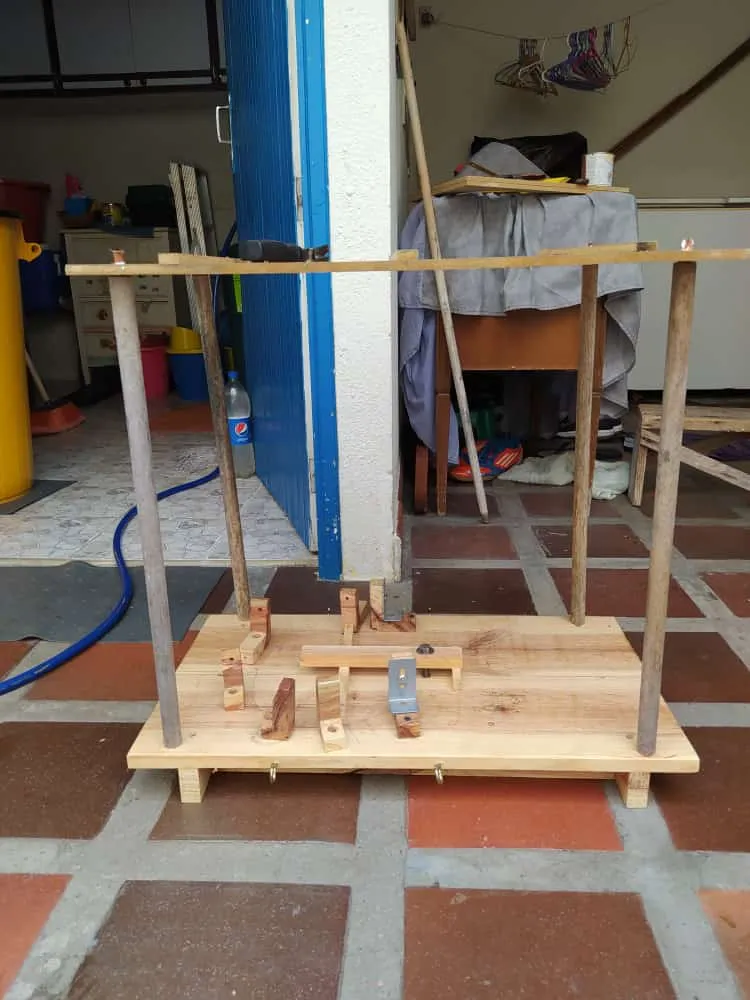
Once the tenons were done, I cut them in half. This way, I can put them in holes and use a wedge to make it expand. Thus, getting a tight feet and firm legs for this roof. With this new jig, I'll be able to get cleaner glue works around. It isn't only for sound boards and backs. It can be used for any kind of gluing that requires minimum pressure. The best part of it is that I can disassemble it and store it. A pretty nice trick for someone with not a lot of space for jigs and tools.

Spanish Version
Buen días mis estimados artesanos de HIVE. Ya ha pasado algún tiempo desde la útlima vez que publiqué algo por acá. He estado trabajando en más útiles para mi taller y hoy terminé este techo que junto a mi solera, completan mi prensa Go-Bar.
Este útil sirve para pegar los refuerzos de la tapa armónica y el fondo de un instrumento. Ayuda a aplicar la cantidad necesaria de presión. El otro beneficio de usarla es poder limpiar el exceso de pegamento.
Fue una construcción simple. Utilicé un pieza de MDF que me había sobrado de un proyecto anterior. La reforcé con unas tiras del mismo material. Luego, abrí unos hoyos a 4x4cm de cada esquina. Después, tomé dos palos de escoba que había de sobra, los corté a la medida y saqué una espiga en uno de extremos de cada trozo. Esta fue la primera que intenté hacer un encastre de este tipo, pero ya había visto varios videos donde se explica cómo se hace. Fue muy simple.
Después terminar las espigas, se cortan por la mitad (a lo largo). Así, se al ponerlas en los hoyos, se usa un trozo de madera para expandir la espiga. Con esto, se logra una unión más fuerte. Dándole a este techo piernas fuertes y firmes. Con este útil nuevo, podré realizar pegados más limpios. Aunque no es solo para piezas de instrumentos. Se puede utilizar para cualquier tipo de pegado que no necesite demasiada presión. Lo mejor de esto es que una vez se haya terminado de utilizar, se puede desmontar y guardar. Algo muy bueno para alguien con poco espacio para herramientas y otras cosas.