In recent years this effect has become increasingly popular in photography. I love it too. Because happy little things just make happy little people. :-)
The tild-shift effect can be used on various kinds of photos to simply simulate the look of a miniature photo.
In example, you can apply the effect to a photo of a real rail station. Afterwards it will look a little like a photo of a toy rail station.
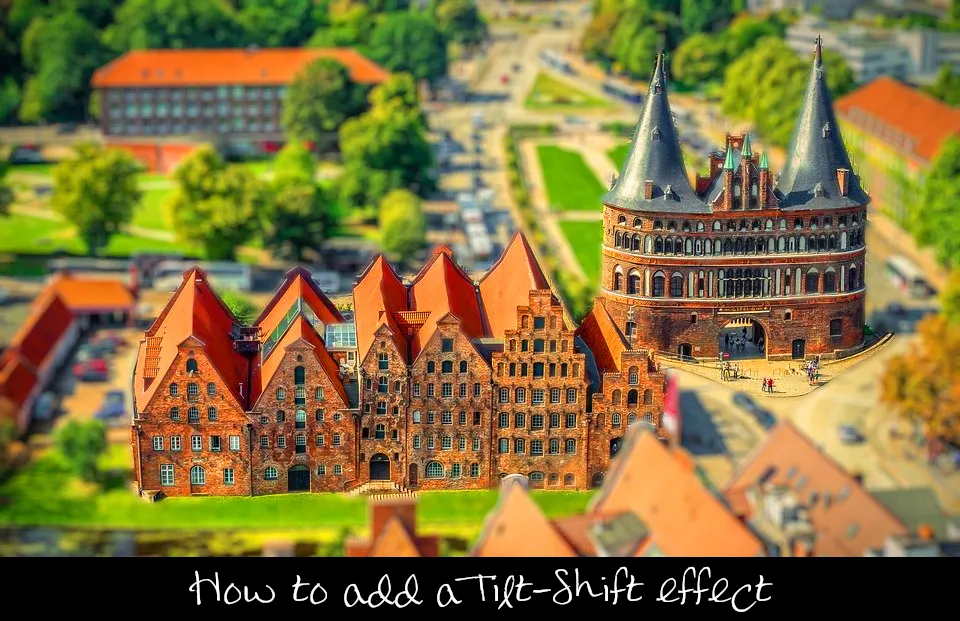
LMAC School - How to add a tilt-shift effect
1. Requirements
You may need to have a copy of the GIMP software to understand this tutorial. GIMP is a free, open source tool for image processing of all kinds. Lots of people say GIMP is the open source Photoshop. I agree with this statement at least for the functionality I personally need.
You can download GIMP here: Click
I created this tutorial for GIMP version 2.10.20 (and higher).
We will work with layers in this tutorial. If you do not know how to work with layers, just take a look into the LMAC School - How to work with layers post.
Since this tutorial is for advanced users in the GIMP, I won't explain every tool in the examples.
2. Basics
2.1. The principles of the tild-shift effect
Once upon a time, you had to invest in expensive camera lenses to create tilt-shift images. However, thanks to modern image editing software like GIMP, such expensive purchases are a thing of the past.
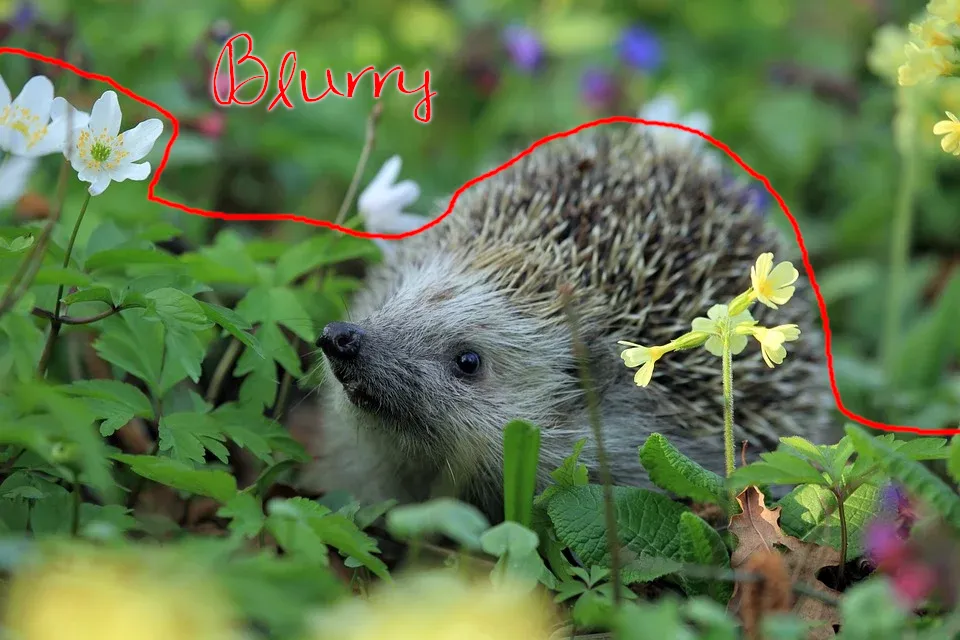
Creating miniature images from normal photos is child's play in GIMP. This is because the miniature impression is created primarily by an artificial blur, as typically occurs in close-up photos.
This means that the background and all objects that are not in focus must be blurred.
Increasing the colour saturation can also contribute positively to the effect. Models and toys often have very intense colours.
For the effect to work, it is also important that the image has a lot of spatial depth. It works best with photos taken from an elevated position.
A visible horizon or sky usually interferes with the effect quite a bit.
3. Example
3.1.1. Step by step
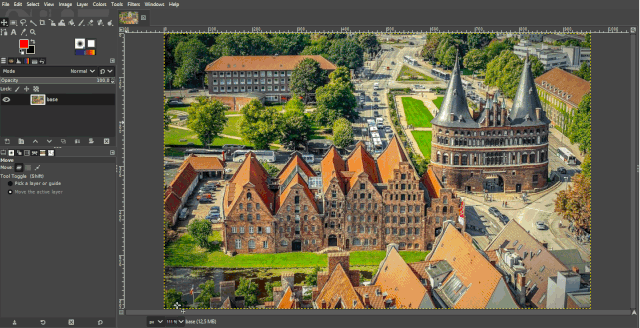
- Load an image as new image in GIMP
- Open the "Saturation" dialog box by clicking on the "Saturation" menu item of the "Colors" menu.
- Once it is open, change the color intensity with the slider upwards by moving the slider to a position on the Right side.
- Duplicate the base layer of the image and arrange it in front of the base layer.
- Add a "White (full opacity)" layer mask to the duplicate.
- Activate the paint brush tool.
- Set black as the foreground color.
- Make sure the layer mask is active for receiving input by clicking on the small white icon (preview image of the mask) to the right of the layer preview image.
- Set a round standard brush for the Paint Brush tool and then set the "Hardness" to around 60%, the opacity to 100%.
- Open the "Lens Blur" dialog box by clicking on the "Lens Blur" menu item of the "Filters/Blur" menu.
- If your image is smaller than 2000x2000 pixels, select a radius of no more than 2.5 pixels in the dialog box. For larger resolutions you can try a larger radius.
- Set a size for the Paint Brush tool that allows you to draw effectively within the object(s) you want to give focus to.
- Use the Brush tool to draw with the black foreground color on the layer mask of the blurred image, within the boundaries of the objects you want to set the focus to.
3.1.2. All steps in one animated GIF
Best regards
QuantumG
PS: 33% of the rewards for this post go to LMAC as beneficiary ( #supportlmac ).
You will have noticed that I am not a native English speaker. Therefore, there are probably a few linguistic bumps in my texts. If there are any passages that could trigger accidently a world war or something similar, please let me know so I can change it. :-)
Of course, I am also very interested in making the text easier to understand if it is partly necessary.
╭━━⋞ ☙ My NFT artworks ≻≺ ♖ My dCity ⋟━━╮
╰━━━━⋞ ♫ My Rising Star(s) ⋟━━━━╯