
Hello dear HIVE community, greetings!
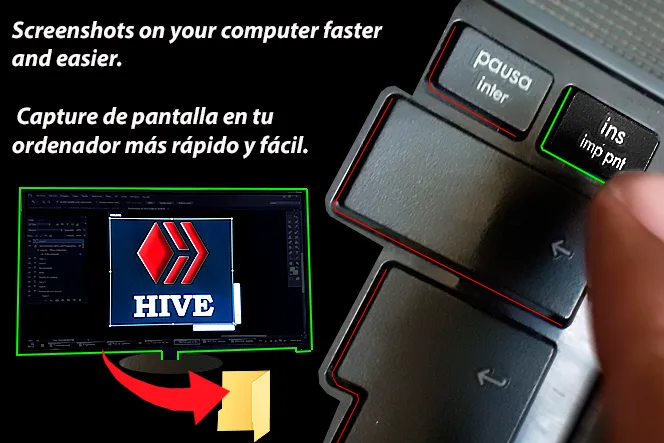
Today I bring you a useful post for our computers, very convenient for those of us who are working on our PCs every day. It is an application to take screenshots quickly and easily.
We program it according to our needs, the two most important options for me; 1 (immediate saving of the entire screen) and 2 (selecting the specific area to be copied on the screen itself), in both ways they save the capture in the space chosen by you. It is easy to install.
I previously used the one that originally comes with the computer on the keyboard (imp pnt) but when you often work with video editing and you need agility to do this procedure several times it is not as effective, since in addition to doing the Screenshots it is going to a secondary editor to be able to hit and save which this delays you, creating a distraction from the main work, so I investigated and downloaded several options until I found an application that I thought was great lightshot, which I started using recently and has gone very well with her and wanted to share them so that they get a lot out of it.
I liked this application because unlike others, it is super light, has no advertising and is zero invasive. So I will facilitate how to install and program it as simple as possible so that they make good use of it.
¡Hola querida comunidad de HIVE saludos!
Hoy les traigo un post de utilidad para nuestros ordenadores, muy conveniente para los que estamos trabajando a diario en nuestros PC. Se trata de una aplicación para hacer captures de pantalla de manera rápida y sencilla.
La programamos según nuestra necesidad, las dos opciones más destacadas para mí; 1 (guardado inmediato de la pantalla completa) y 2 (seleccionar en la propia pantalla el área específica a copiar), de ambas maneras guardan el capture en el espacio elegido por usted. Es de fácil instalación.
Yo anteriormente utilizaba la que trae originalmente el ordenador en el teclado (imp pnt) pero cuando trabajas a menudo con edición de videos y necesitas agilidad para hacer este procedimiento varias veces no es tan eficaz, ya que además de hacer el Screenshots (capture de pantalla) es dirigirte a un editor secundario para poder darle pegar y guardar lo cual esto te demora, creando una distracción del trabajo principal, por eso investigue y baje varias opciones hasta que di con una aplicación que me pareció genial “lightshot”, Que empecé a utilizar hace poco y me ha ido muy bien con ella y quería compartírselas para que le saquen mucho provecho.
Esta aplicación me gusto porque a diferencia de otras, es súper ligera, no tiene publicidad y es cero invasiva. Así que le facilitare como instalarla y programarla lo más sencillo posible para que hagan un buen uso de ella.
We start;
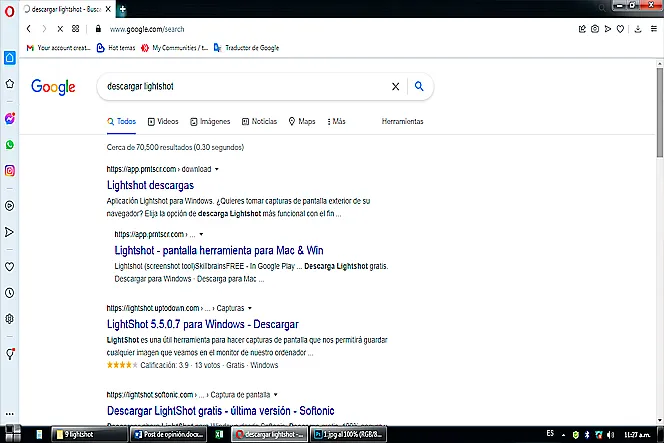
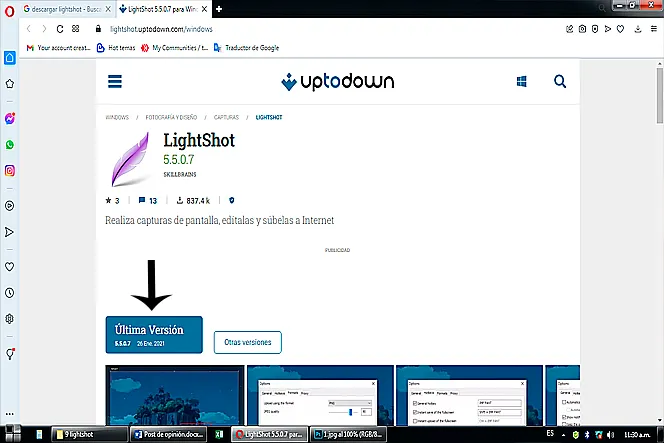
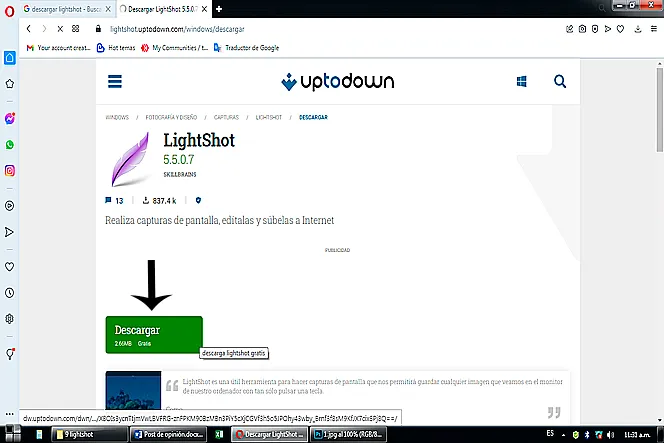
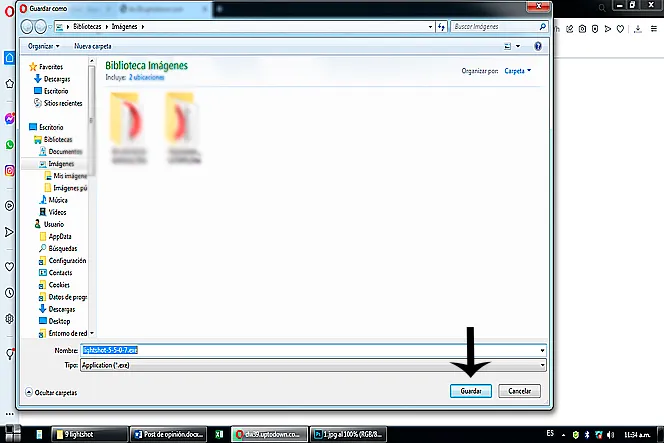
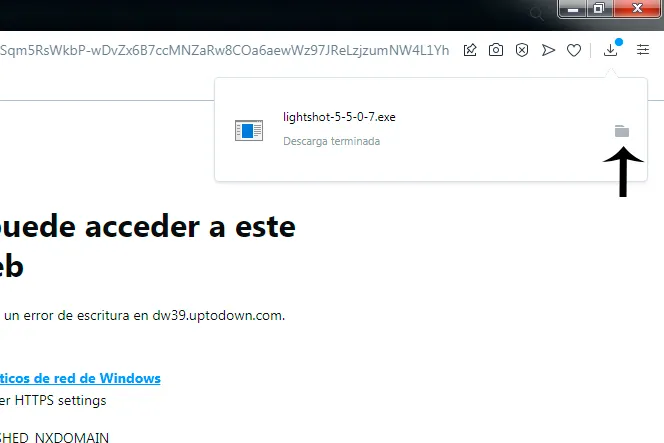
We go to the web, we proceed to google; download "lightshot" I tell you that there are many pages to download these applications use the one you prefer, in this case I use "Uptodown" there we proceed to click on the latest version then Download. note: you can download it from the computer applications page of your choice.
Comenzamos;
Nos vamos a la web, procedemos a googlear; descargar “lightshot” les comento que existen muchas páginas para descargar estas aplicaciones usen la de su preferencia, en este caso yo utilice “Uptodown” allí procedemos a cliquear última versión luego Descargar. nota: lo pueden descargar de la página de aplicaciones de ordenador que ustedes deseen.
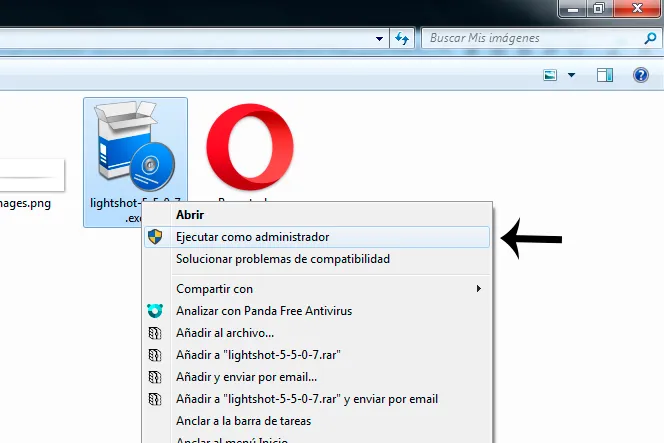
We place the application on the home desktop, on the right side in notifications; here we proceed to adjust the program.
Ubicamos la aplicación en el escritorio de inicio, del lado derecho en notificaciones; acá procedemos ajustar el programa.
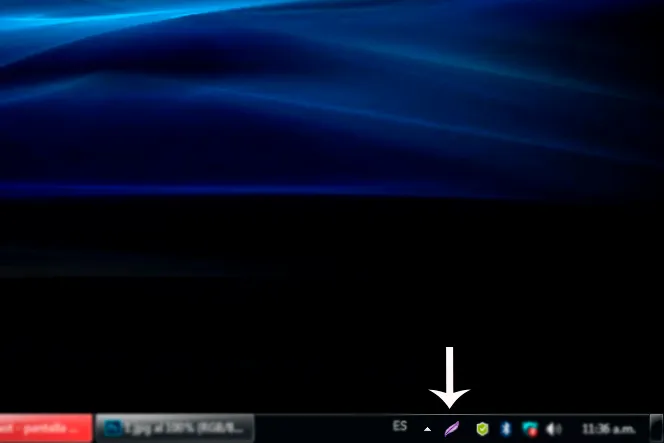
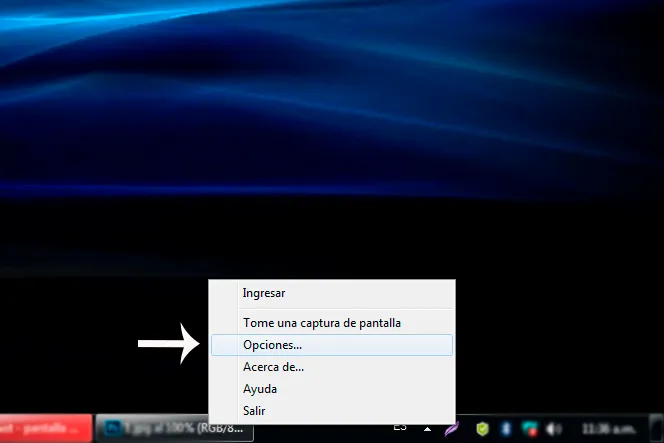
We right click the application, and we go to "options"; we get a box of options.
Cliqueamos la aplicación botón derecho, y nos vamos a “opciones”; nos sale un recuadro de opciones.
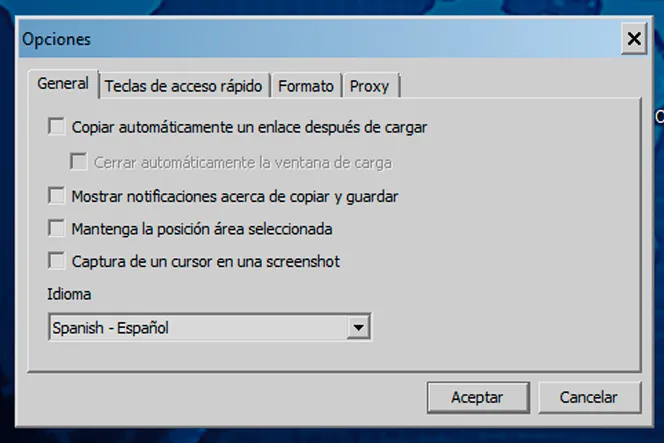
In the first cell "General" it shows us various behavior and language options. Personally I have all the boxes unchecked, only with my selected language.
En la primera celda “General” nos muestra varias opciones de comportamiento e idiomas. Personalmente tengo desactivadas todas las casillas, solo con mi idioma seleccionado.
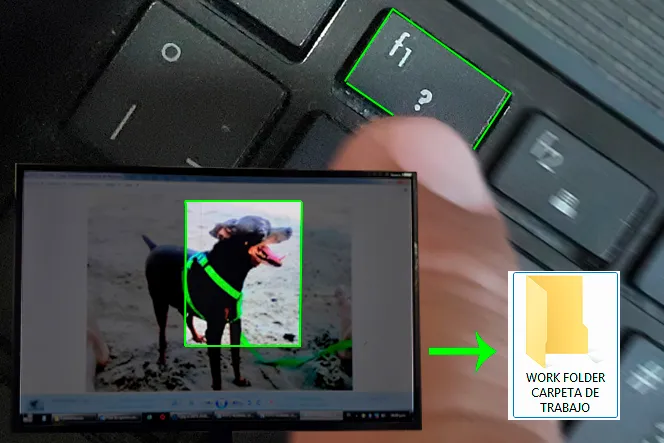
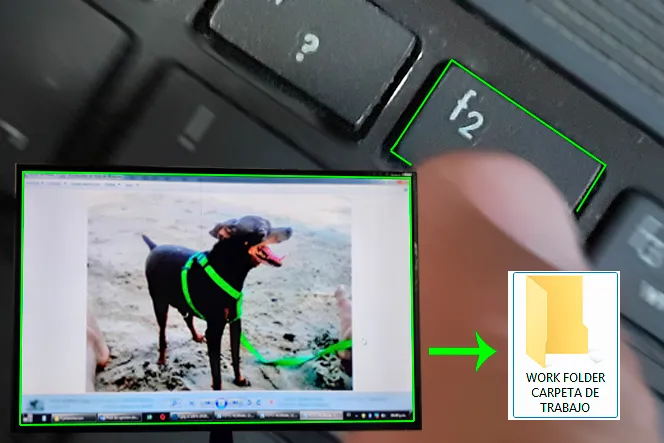
In the second cell "Hot keys" the keys for the use of the program are programmed. Personally I have the first 2 options activated, with the f1 key that captures a specific area of the screen and f2 that captures the entire screen. Either way they are saved directly to the working folder you have selected.
En la segunda celda “Teclas de acceso rápido” se programa las teclas para el uso del programa. Personalmente tengo activadas las 2 primeras opciones, con la tecla f1 que realiza un capture de una zona específica de la pantalla y f2 que captura la pantalla completa. De las dos maneras se guardan directo a la carpeta de trabajo que haya seleccionado.

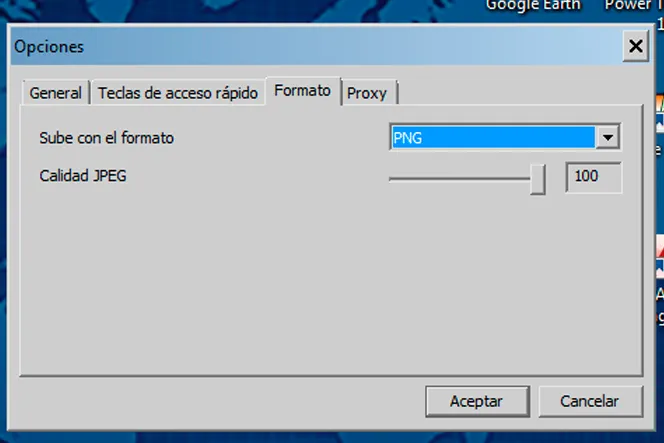
In the third cell "Format" I chose 100% PNG quality.
En la tercera celda “Formato” elegí el 100% de calidad PNG.
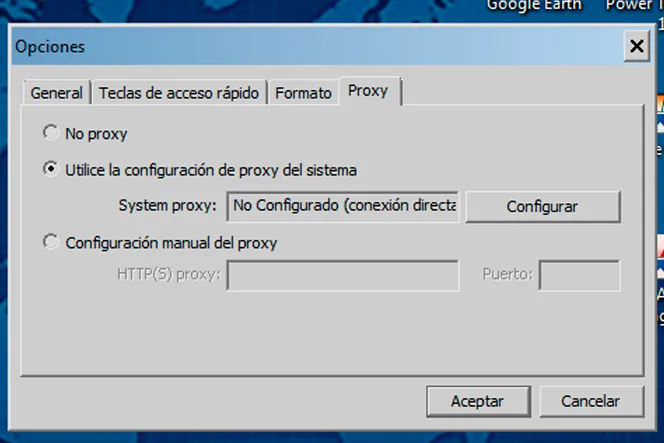
fourth cell "Proxi" of the system.
cuarta celda “Proxi” del sistema.
Well friends until next time, I hope you liked this post, I do it for you thanks for your support, greetings!
Bueno amigos hasta la próxima ocasión, espero les haya gustado este post, lo hago para ustedes gracias por su apoyo, ¡saludos!