Hello! My name is Hira Karmachela a.k.a BABE ODED. In this post I will share my experience using Clip Studio Paint for mobile. There are two versions that you can use depending on the device you have, iPad or Galaxy. And for me, this application has been long awaited for android even though it can only be downloaded exclusively by Galaxy devices but it's still good. That's awesome.
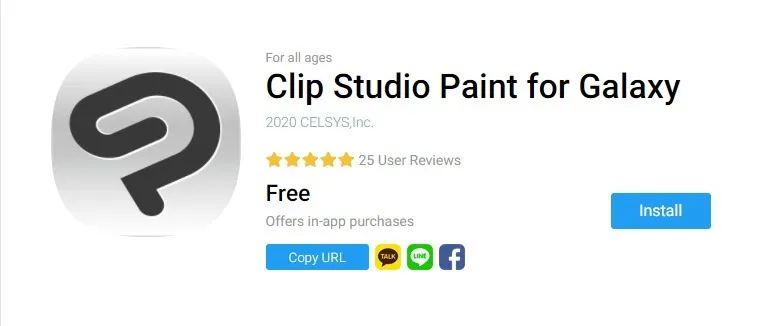
Downloading Clip Studio Paint for Galaxy
Let's get started. Maybe you are confused because you don't find this application on the Play Store. To download Clip Studio Paint on a Galaxy device, you must access the Galaxy Store.
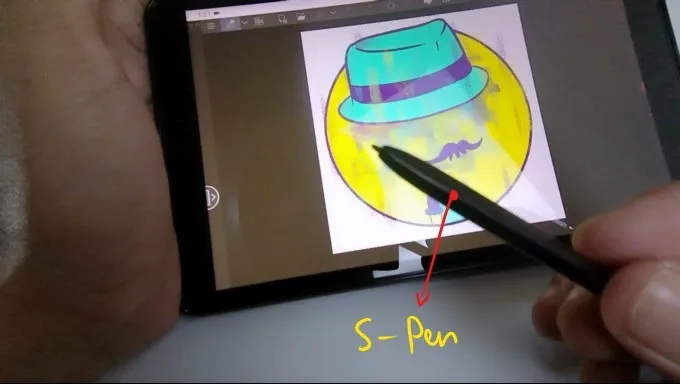
OK then, here I am using an 8 inch Galaxy Tablet with S-Pen. You can use any Galaxy series phone or tablet as long as it has Android 9/10 OS and has 3GB or more of memory. So, let's download and install the application first.
Synchronizing Works on Mobile and PC
Mobile work is an alternative when we have to travel and leave our workstations for a while. So it is very important to always synchronize our work on the PC with the mobile devices that we carry on trips.
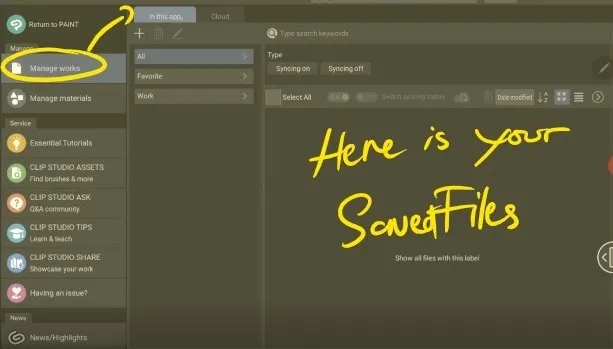
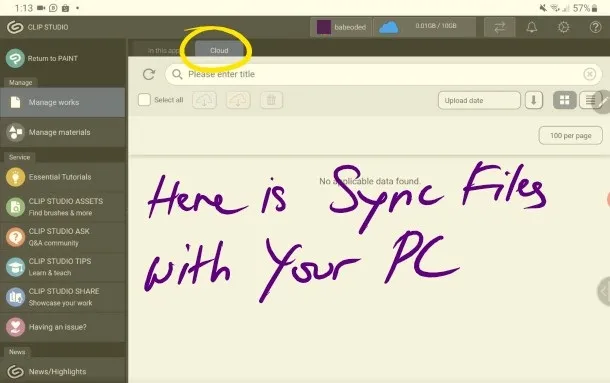
In CSP for Galaxy, you can find an icon with a red sign in the top command bar. Click on it, then our CSP account dashboard will appear.

This display is very similar to the PC version. Currently the open tab is the "Manage works" section and there are two content tabs in the middle that we can customize.
The tab "In this app" is a place where we can access all the works that we created on our mobile device. At the moment we haven't created anything so it's still empty.
Next, it is the "Cloud" tab and it is the most important part that we should make good use of. Here you can find and access work files that you create on your PC and open them on your mobile device.
Let's give it a try. This is the CSP account dashboard on my PC. We go to the "Manage works" tab. In the "This device" tab I can find the work that I created on the PC then I will sync this work so I can access it on my mobile device.
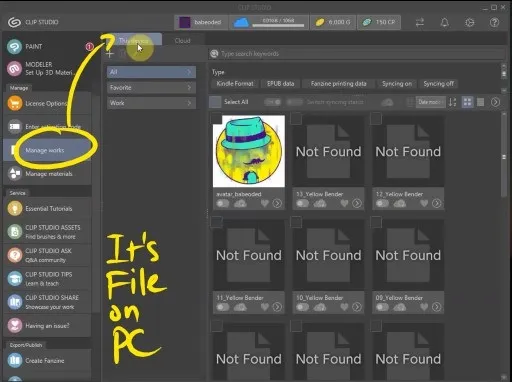
Check the work you want to sync. Then click "Switch syncing" as shown below.

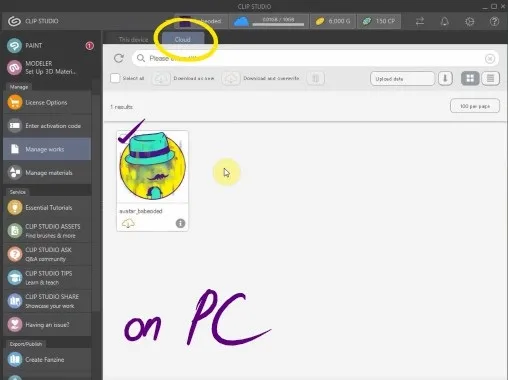
After the synchronization process is successful you can check it in the "Cloud" tab on both your PC and mobile device.

Setting Up The Workspace on Mobile Version
Now let's organize the workspace on our mobile device. Of course, our workspace feels narrower than the PC version. But we need to know that workspace does not affect the quality and dimensions of our work. Even with a tiny device we can still create as great work as on a PC.
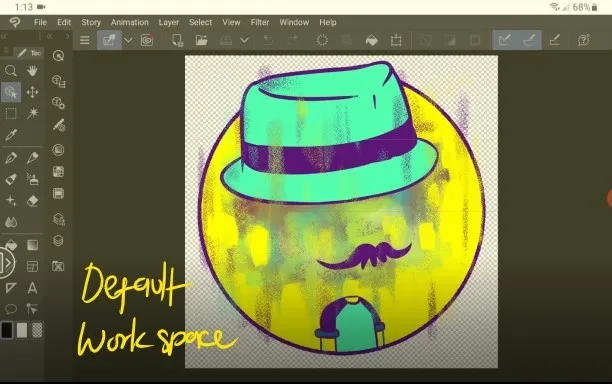
This is the workspace displayed by default. I think if you want to experience a mobile work that feels like a small PC version you don't need to change anything because CSP really brings all the advantages of the PC version to mobile devices. This is really cool.
Setting Up S-Pen and Alternatives
To use CSP on a mobile device, ideally we need an S-Pen. There are many special features that can be done with the S-Pen in this application. The coolest feature is Air Action, which is a feature to move the S-Pen in the air or without having to touch the nib to the screen.
Alternative: If your device doesn't have an S-Pen or you have one but are not comfortable using it then you can use a pen tablet. Nowadays, some of the newer pen tablets have been compatible for mobile devices. You need an additional on the go (OTG) USB to connect the pen tablet with a mobile device.
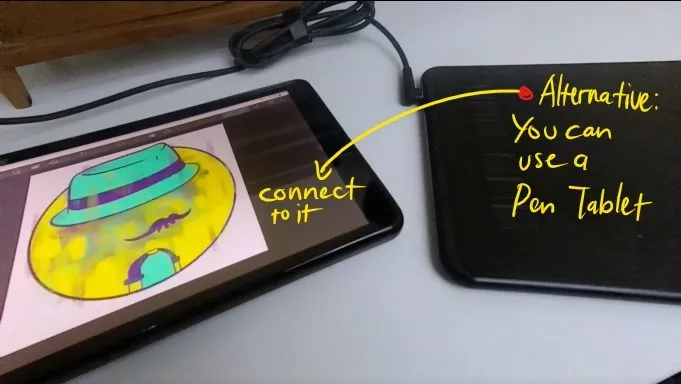
Some pen tablets only need to be connected to a mobile device and can be used immediately without installing drivers. Very practical and comfortable.
Using Camera on a Mobile Device
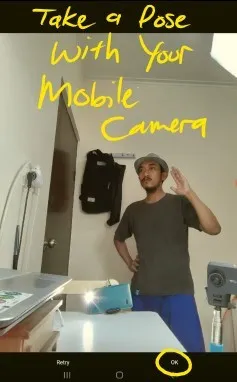
The advantage of CSP on mobile devices is the integration of a camera function to support drawing needs. When working on a mobile, then we need a pose reference for our work so we can easily use the camera to take pictures. Maybe from the results of the image you can open it and then do tracing.
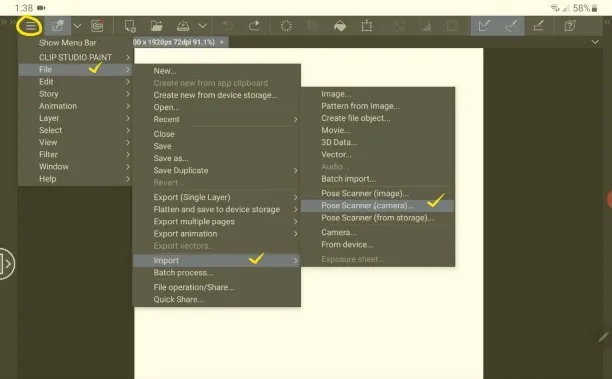
But your mobile version of the CSP feature can do things more efficiently. Open the "burger" icon in the command bar then choose File> Import> Pose Scanner (camera).
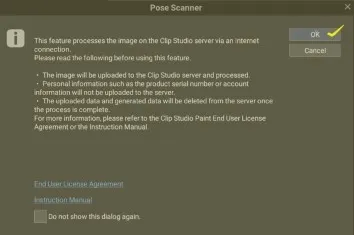
Click "OK" when a pop-up dialog appears. Then the camera application will open. Then you can take a selfie with a certain pose or take other people's poses around you. Click "OK" to confirm the pose you took.
Next, the options window will appear to select a 3D model that suits your needs (Male or Female). Click "OK" to confirm.
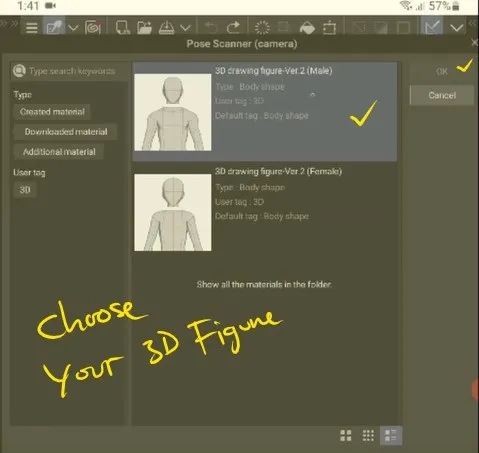
If successful, a 3D model with the same pose as the camera pose will appear on the canvas. It's so amazing and useful. Then you can trace this model on a new layer as needed.

Saving and Exporting Works in Mobile Storage
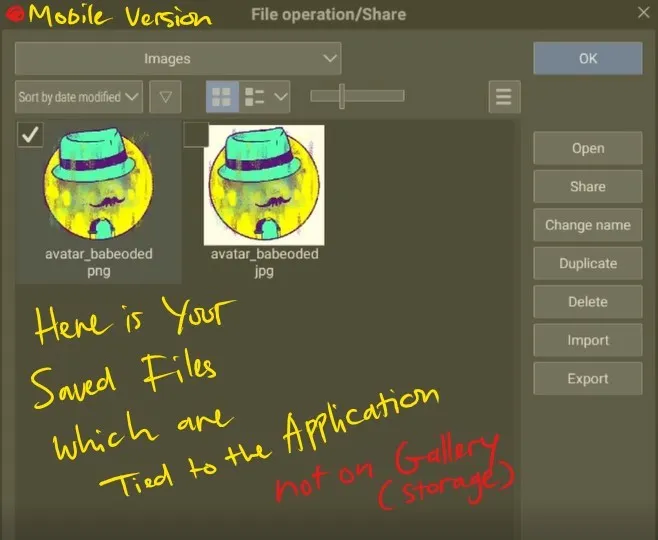
Using a mobile device means binding all activities to the application in it. Likewise with CSP, when we save our work with the command "Save" or "Export" it means saving our work to be tied to the application.
Unlike the PC when we save our work, the file will be stored in storage on the PC so that we can access the file and then open it through the file (not opening the application first). On mobile devices, saved files can be accessed via the application dashboard in the "Manage works" tab.
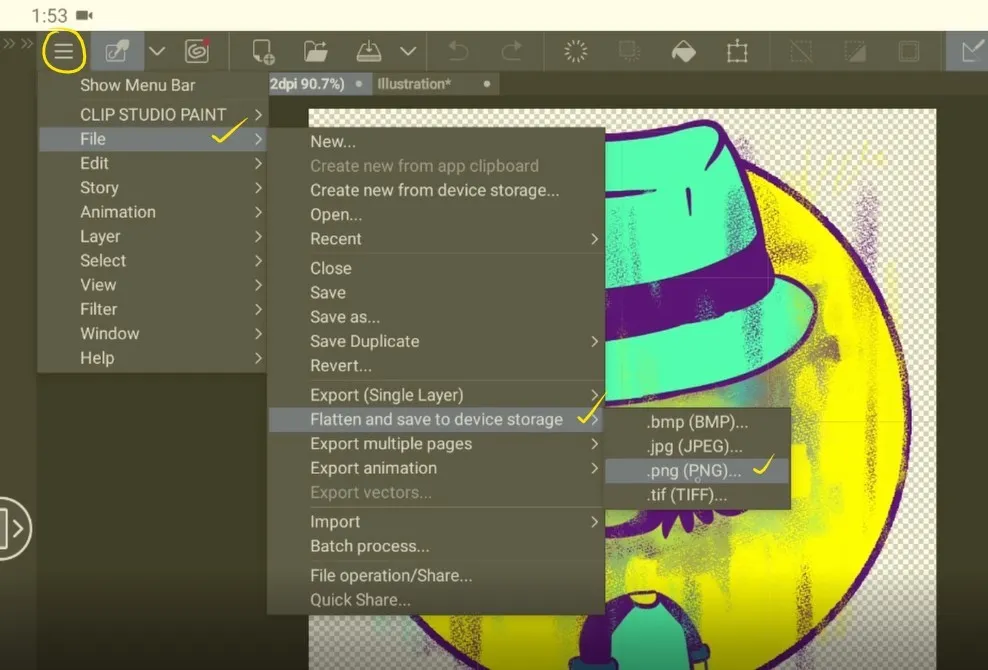
So, synchronizing works on mobile devices and PCs is highly recommended for data storage security. However, if you want to save the rendering of your work on a mobile device, you can do the following. Open the "burger" icon in the command bar then select File> Flatten and save to device storage> Select the required format [BMP / JPEG / PNG / TIFF].
Publishing and Sharing Works on Social Media
After we set up the workspace and the S-Pen or alternatives on a mobile device, we can start working as freely and comfortably as using a PC. Then, if we have finished creating the work besides being saved, we can also publish and share the render of our work quickly to social media. This is the advantage of working on a mobile device.
After our work is done, open the "burger" icon in the command bar then choose File> Quick Share.

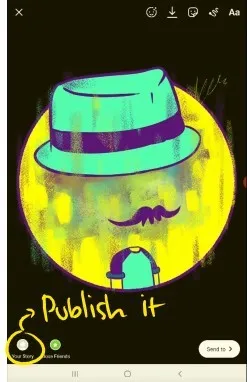
The media sharing options window will appear. Please select the desired media. For example: I will share my work to Story on Instagram.
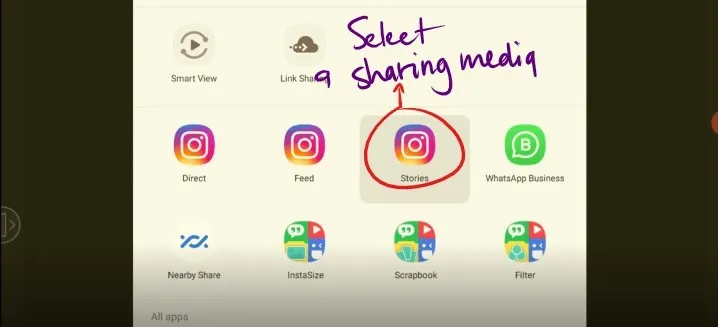
Our work will be directly connected to the social media application we choose, then just publish it.
Thank you for visiting this post. Look forward to my next works.
Visit My Gallery:
Twitter | Instagram | Henext | Opensea | NFT Showroom | Foundation