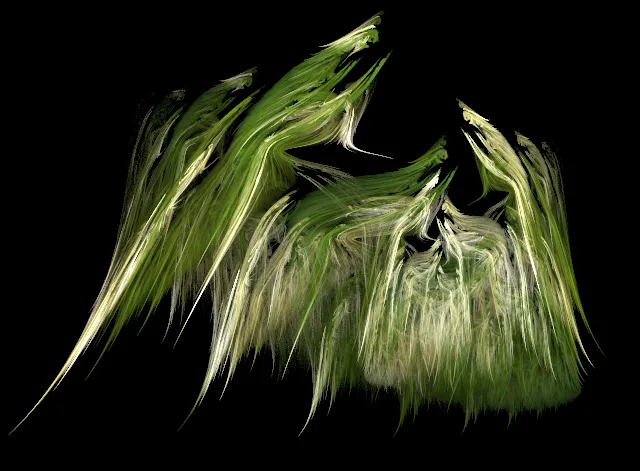
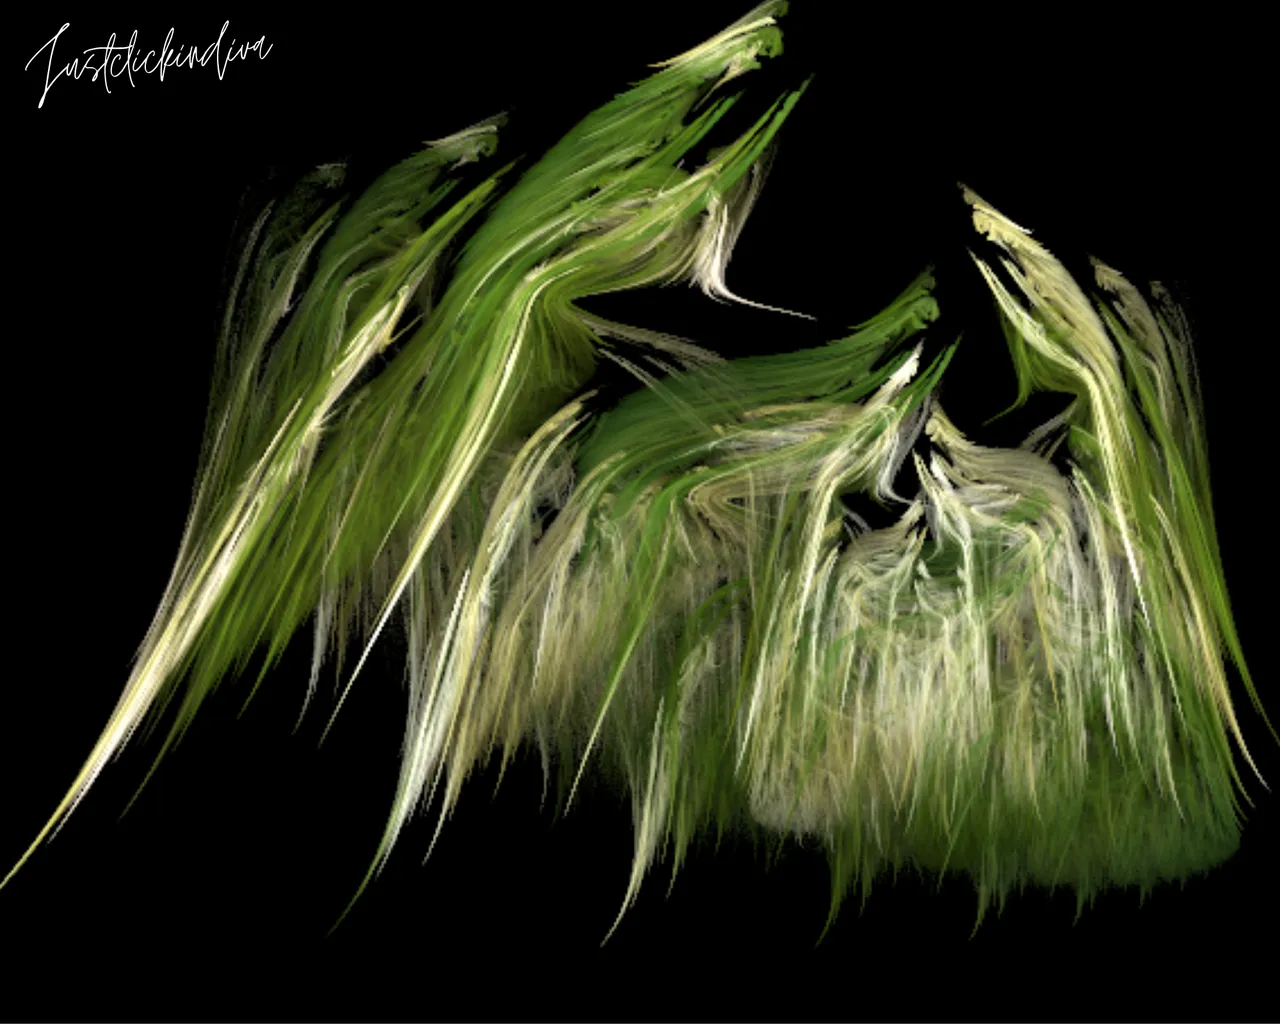
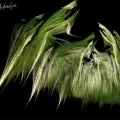
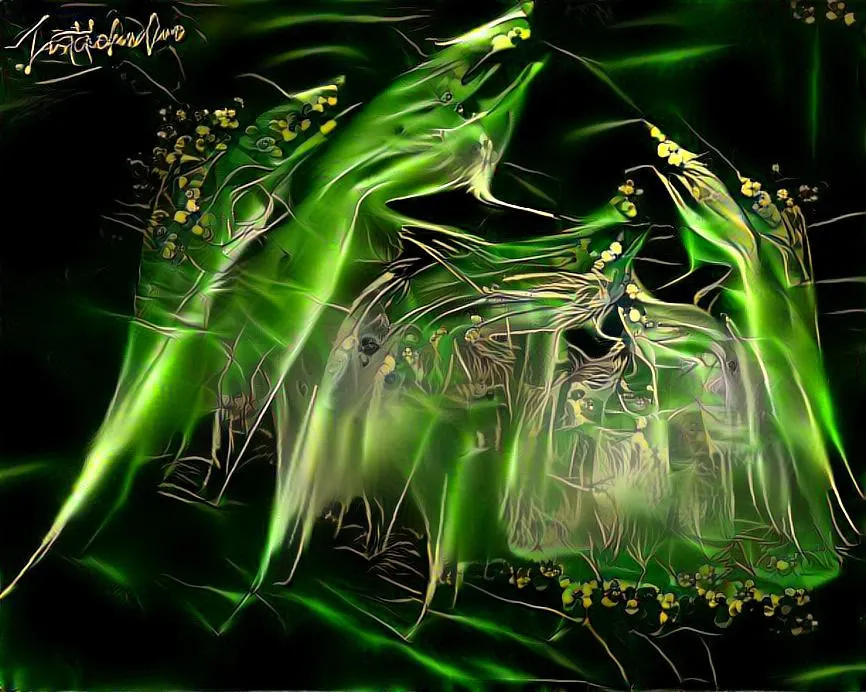
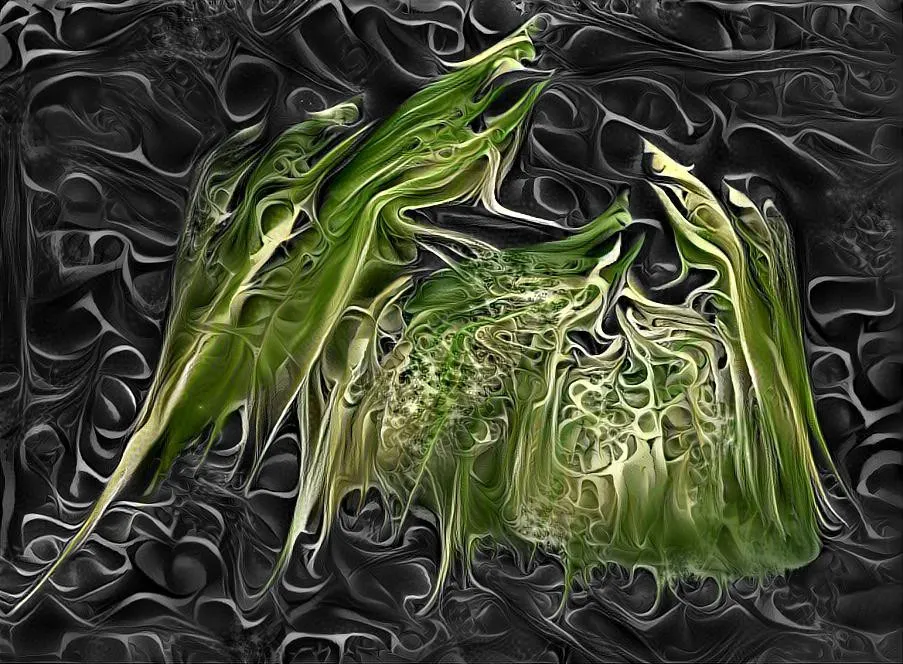
Hello everyone and welcome back. This week I wanted to share with you my latest fractal rendering. This beautiful digital drawing I titled "Attack of the Corn Husks".
The color combination contained in the image is beautiful green and yellow. It looked subdued. The arrangement looked like corn shucks in which each seem to be clamoring to rise to the top. When I see an image, my imagination takes over.
Here's how I created my Alien Art project:
I combined three digital programs. I often utilize more than one program to achieve the effect I'm looking for. Not all programs give you the same result. The first program I utilized was to create the image.

1. Apophysis 2.09 Fractal Rendering Program
First, a fractal is an infinite mathematical shape that is represented by coordinates. To complete my fractal drawing, I utilized the program Apophysis 2.09. In designing a fractal, you can set parameters for different shapes. However, you never know exactly what type of image you'll create.
As I previously discussed, Apophysis 2.09 is a Windows application that is open sourced and utilized for rendering fractal flames. This program can also design and edit the drawing before rendering.
I also provided directions on how to create fractal drawings. To see complete instructions on maneuvering and manipulating the triangles, see my how-to post here.
With this current fractal, I chose to have a black background instead of rendering it transparent.
If you'd like to try the coordinates I used to reproduce the fractal, you're free to try these below, otherwise continue to learn how to manipulate the triangle coordinates and produce your own unique fractal:
| Triangle | X Coordinate | Y Coordinate | 0 Coordinate |
|---|---|---|---|
| 1 | 0.109979 (box 1) | -0.250981 (box 1) | -0.565616 (box 1) |
| 0.335942 (box 2) | 0.414649 (box 2) | -0.166784 (box 2) | |
| 2 | 0.0994024 (box 1) | 0.432666 (box 1) | 0.648194 (box 1) |
| -0.306192 (box 2) | 0.570676 (box 2) | j-0.140835 (box 2) | |
| 3 | 0.110375 (box 1) | 0.273716 (box 1) | -0.0749509 (box 1) |
| 0.651813 (box 2) | 0.553324 (box 2) | 0.179157 (box 2) | |
| 4 | 1.26262 (box 1) | 0.155943 (box 1) | 0.303389 (box 1) |
| -0.349912 (box 2) | 0.394203 (box 2) | -0.3600663 (box 2) | |
| 5 | 0.236167 (box 1) | -0.408708 (box 1) | -0.428222 (box 1) |
| -0.286922 (box 2) | 0.66535 (box 2) | -0.0952264 (box 2) |
THE DRAWING GRID
To begin, you start with a blank drawing grid. Just open the program; then Open the TRANSFORM EDITOR.
To better see your design, I recommend utilizing a standard black background. The array of colors look amazing once they're finalized against the black backdrop. You can also see your grid lines better when adding or moving around your triangles.
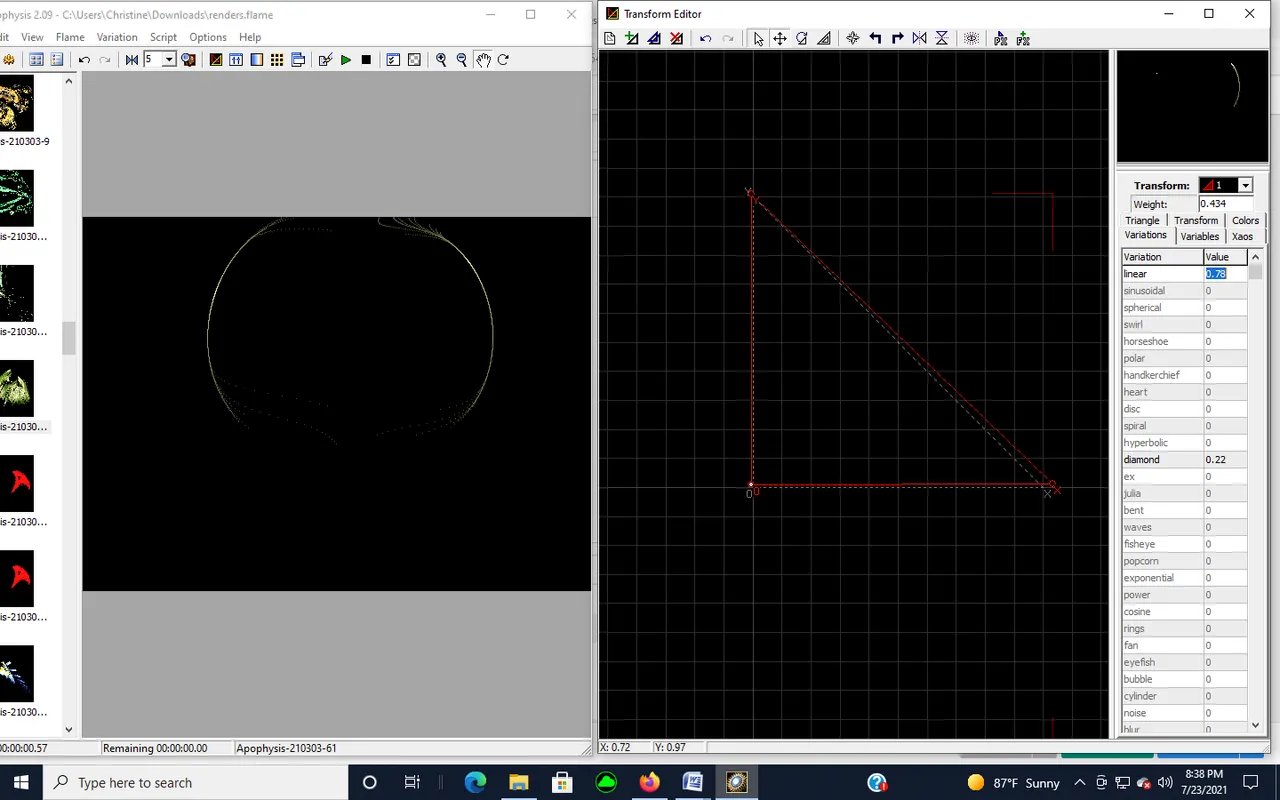
The grid line contains an anchored WHITE-colored triangle. This triangle can't be moved or deleted. The reason is to allow you to find your coordinates' distances from the original grid.
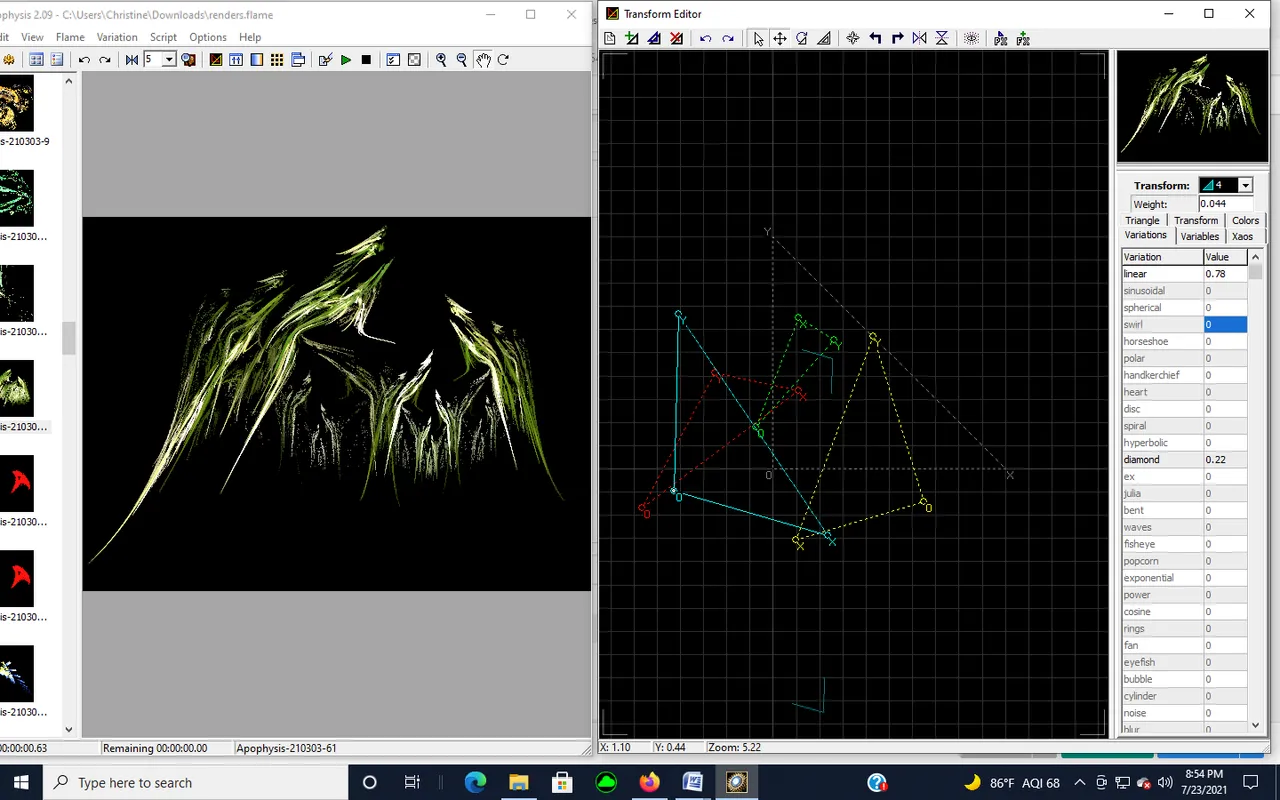
To get you started, the grid also contains your first triangle colored RED. It rests on top of the anchored white triangle. This Red Triangle is your 1st coordinates, and can be moved. Below is a screenshot of the 1st RED Triangle:
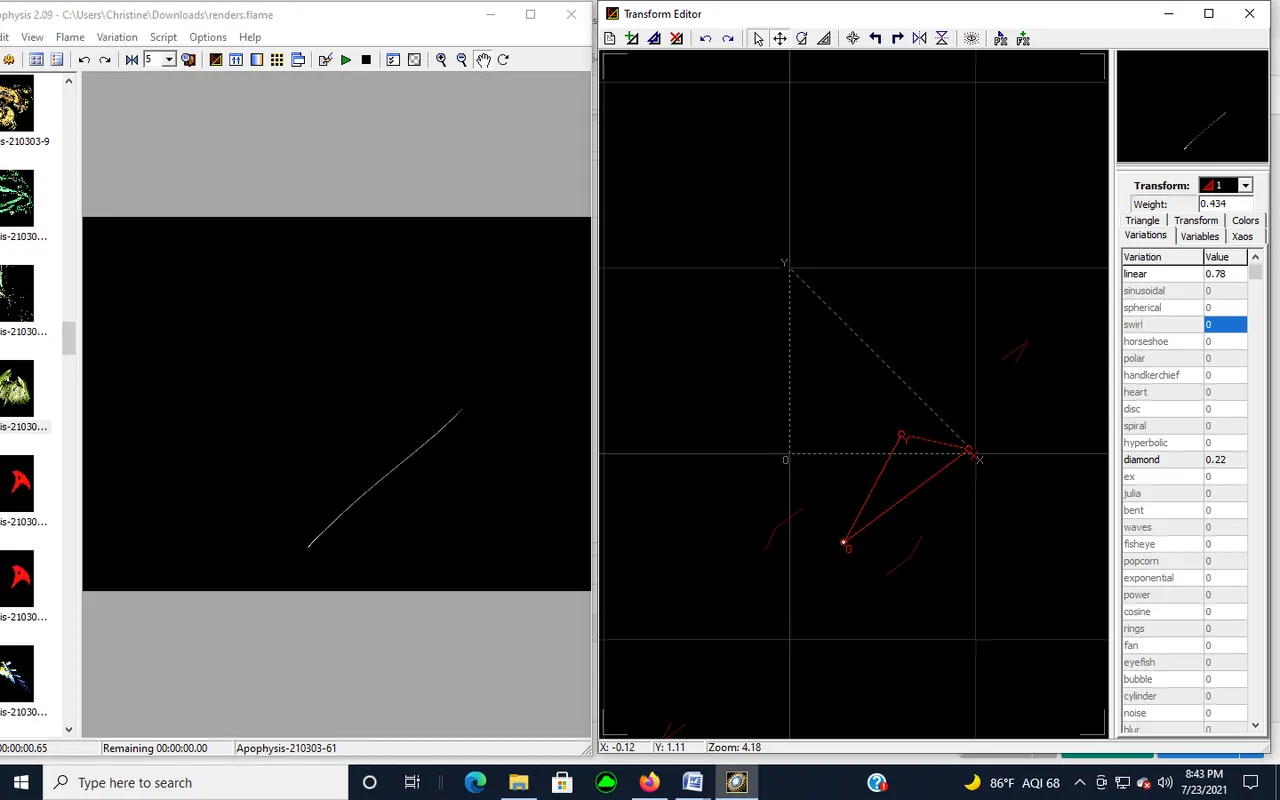
Let's start finding an image on the grid. Click on the circle near the X and Y coordinates of the RED triangle. I moved the coordinates of the RED triangle to see what image the movements would produce.
You can check the image in the screen on the upper right hand side. It will coordinate with image shown on the left hand large screen as you move the coordinates.
You can also change the shape of the image by using the Variations drop down menu in the TRANSFORM EDITOR. Feature shapes, such as circles, bubbles, cylinders, blurs, and hearts are a few of the variations. The features I chose in the Transform Editor to produce the shape I was hoping to achieve were:
Triangle 1: linear - 0.78 ; diamond - .22

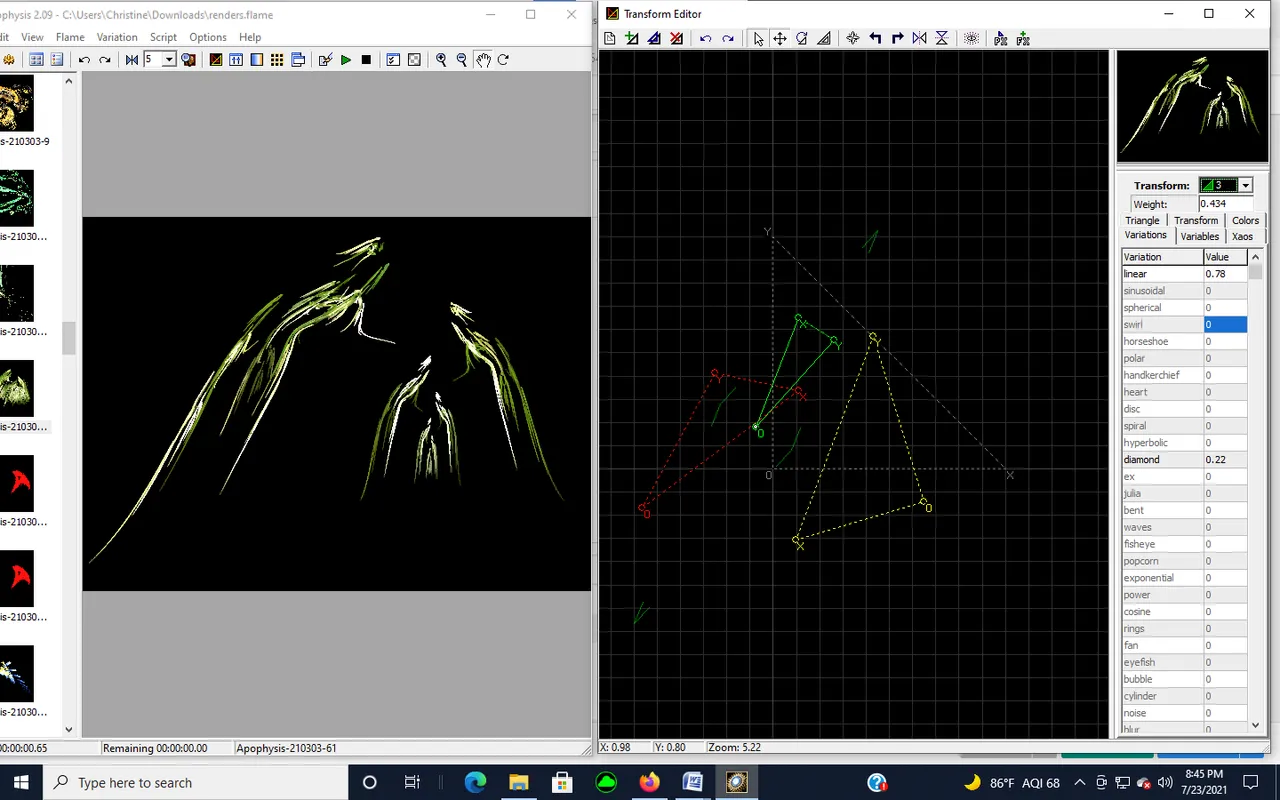
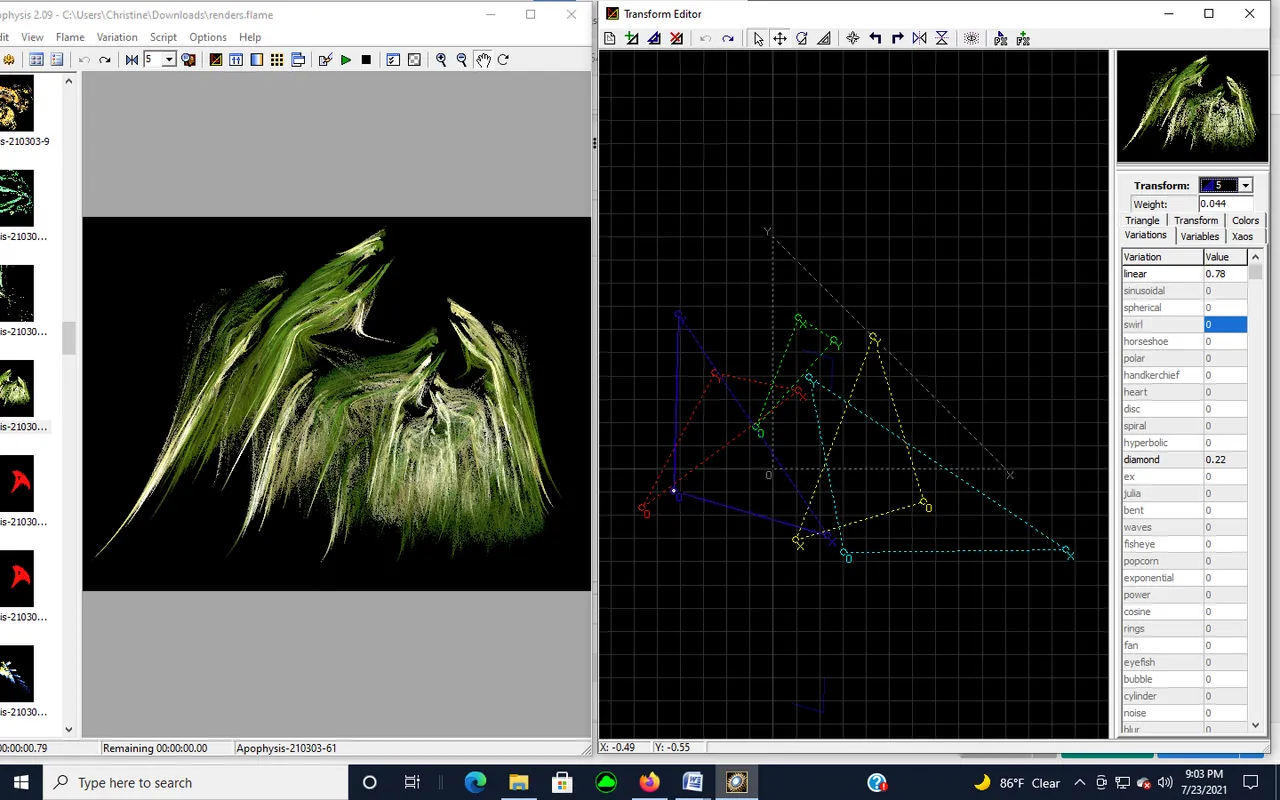
I added my second triangle in YELLOW and moved the coordinates. You'll note later that each triangle has it's own color so that it can be distinguished from each other. The color coordinates with Triangle 1, Triangle 2, and so forth in the Transform box on the Transform Editor.
You can see in the view box on the left hand side how the image will look as you move either coordinate. The movement seemed to give my image form and shape. I like the direction my image is headed. Looks like it will be some type of wavy line shaped figure.

Next, I wanted more depth and fullness, so I added a third triangle in GREEN. I left the same features in place. However, you can try each of the features underneath the TRANSFORM EDITOR screen to see how it will affect the image. You can always click the UNDO button if you don't like how your image appears, or if you don't get an image to appear on the screen.
I added another triangle, my fourth one, in TEAL, keeping the same features of linear and diamond shape. I can see the beginning of an image that looks like the inside and outside of a group of corn husks that have been freshly plucked from ears of corn.
But the image seems to be missing the fluffiness that you usually see from the inside of the corn husk. The fine strands that's sometimes stuck between the kernels. So I added a fifth triangle, colored BLUE. This final triangle has now added the right amount of blur needed to resemble the inside strands of the corn husk.
This is the final version. I love the way it turned out. It certainly does look like the corn husks are fighting for position and fighting each other for some reason.
I was now ready to SAVE my drawing. Saving the elements of a fractal drawing means you have to RENDER the Flames that were used to create the image.
To Save your image to disk:
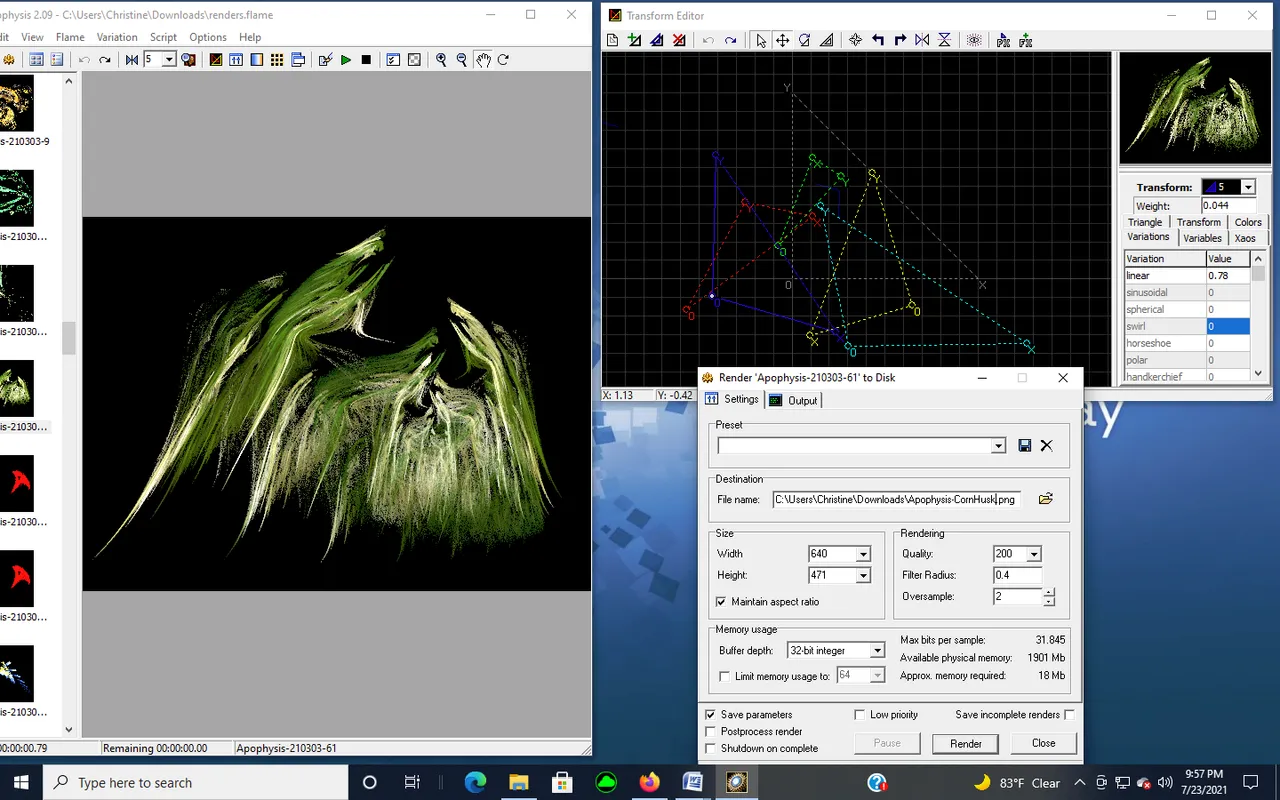
- Click the FLAME Tab:
- Select: the File Name. Since you choice are a series of numbers, you may want to replace the Apophysis 2.09 numerical digits with a name that will distinguish it from other fractals you create. I replaced the digits with "Corn Husks".
- Select: Size (typically 640 size x 427, unless your drawing is tall)
- Click: Render to Disk
I hope you like my Fractal Rendering image. The only item left was to add my signature.
Canva
In order to sign my fractal, I needed to uploaded it into Canva so I could some add some text. This time, I opted to place my signature in the upper left hand corner of the drawing. Luckily, I found a font that looked like a signature:
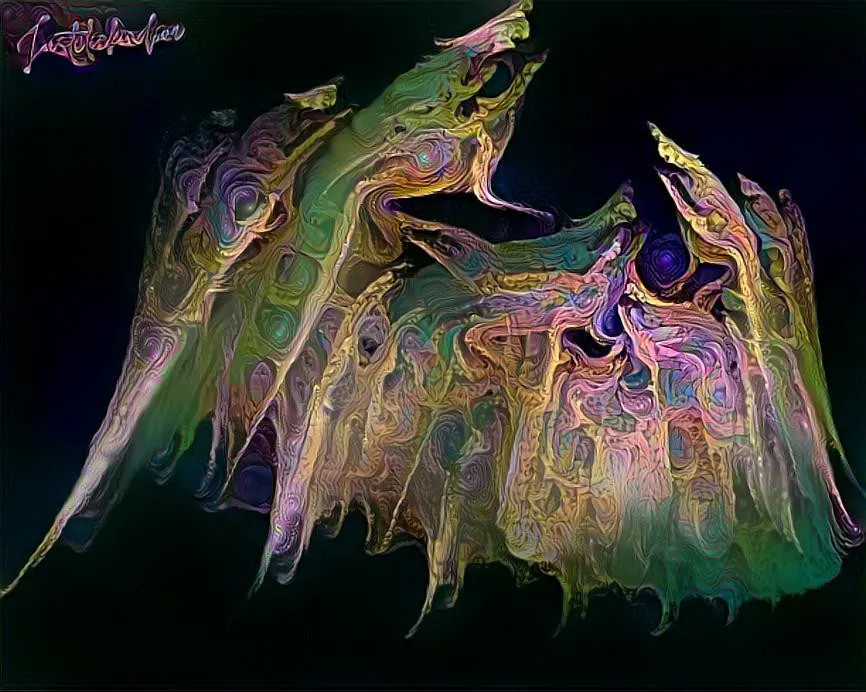
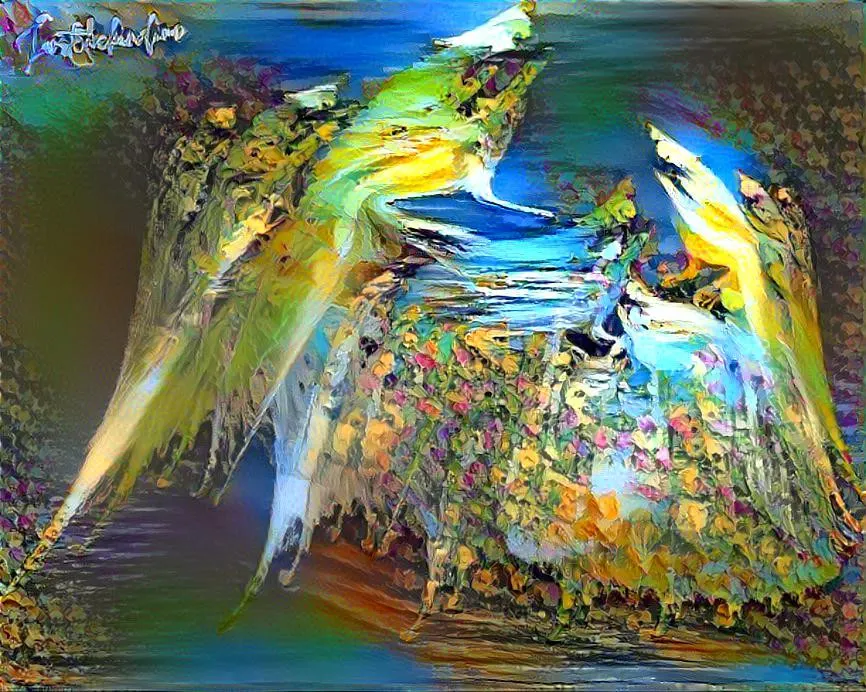
After adding my signature, I felt that my drawing needed a glossy finish to counteract the dull look. The actual drawing looked like a soft yellow and green. I decided to upload my signed fractal into another online program that enhances images:
DeepDreamGenerator
Deep Dream Generator is an awesome photo editing program that allows you to upload your photo. It contains numerous filters from thin, deep, and deep dream with features under each category to give you a unique look to your images.
Here are the parameters and style I used to create my deep dream image:
Type:
Deep Style 2
Settings:
Enhance: None
Resolution: 0.6MP
Iterations Boost: x1
Style Weight: 50%
Style Scale: 100%
Preserve Original Colors: No
Below are three other filtered versions I'd like to share with you. I felt it lent an entirely different perspective to the fractal.
Let me know below which version you prefer, the original fractal or the enhanced ones. If you'd like to know more about any of the program I use, just let me know in the comments.
@flaxz initiative #iamalivechallenge (Published my Fractal Rendering Drawing "Attack of the Corn Husks" post today)
Thanks,
@justclickindiva
Happy rest of the week everyone with whatever your endeavors.


SOURCES:
a) JustClickindiva's Footer created in Canva utilizing its free background and images used with permission from discord admins.
b) Unless otherwise noted, all photos taken by me with my (i) Samsung Galaxy 10" Tablet, (ii) Samsung Phone, & (iii) FUJI FinePix S3380 - 14 Mega Pixels Digital Camera
c) Purple Butterfly part of purchased set of Spiritual Clip Art for my Personal Use
d) All Community logos, banners, page dividers used with permission of Discord Channel admins.
e) Ladies of Hive banner used with permission of and in accordance with the admin's guidelines.
f) Thumbnail image created by me in Apophysis 2.09 Fractal Rendering Program.
g) All other images and screenshots were taken from the various digital drawing programs I utilized to create my fractal image.