~ Zip WiP Origins ~
Back in January of 2019, when i was in Sweden, i decided to carve my own quill feather pen from a Goose feather i found out on a walkabout. I had been gearing up to go back to an old technique that used to be one of my favorites... INK drawing. Not with just any old ink pen but with a dip pen.
So naturally, i decided to make my own! hahaha I figured i would try to make my own before finding a local art store that would have an overpriced supply option or ordering online. Fortunately, i did have some ink on deck.
My ink endeavors, as far as the quill went, ultimately failed. You can read my tiny shitpost from back in the day by clicking the image below.


I didn't let my failure in creating tools deter me from getting back into the swing of inking. In fact, i think it spurred me to get the ball rolling. So, after a week or so later of fiddling with my handmade quill pen, i broke down and bought a metal nib set and a generic handle from the only art supply store in the area. Yes, it was overpriced!
I started inking a few different unplanned sketches and artworks. Mostly just to get the feel for it once again since it had been so long since giving it a go.
For those that may not know, (i didn't know myself until way after i should have been well aware) W.I.P stands for Work In Progress.
The artwork featured in this post was started a couple of years ago and it's still an unfinished WiP! You can read about the genesis of this work here in my post from January 2019, Ink Dip W.I.P.
~ Analog Ambitions to Digital Dreams ~
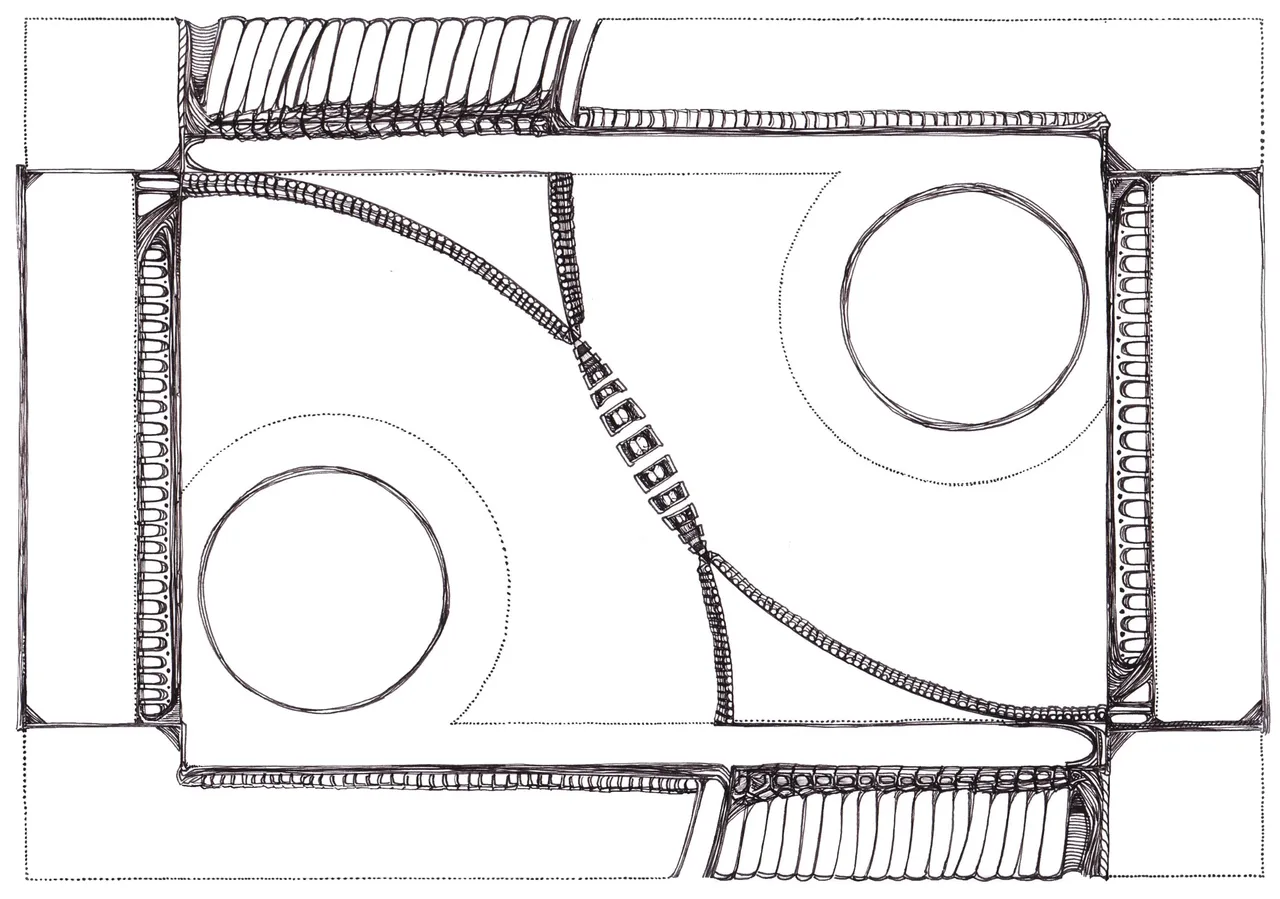
After a long drawing session, i created something i was quite proud of. I usually enjoy a bit of abstraction mixed with some symmetry and this artwork embodied both qualities. I got to a point that i didn't want to mess up the whole thing since ink can be extremely unforgiving. So, my solution was to scan this bad boy!
I happened to procure a Canon MG6100 printer/scanner that was on it's way to the trash. I was super happy to have saved this awesome hardware from being scrapped and i knew just for the scanner alone it was well worth the price of zero! To think it was being scrapped because of not having any ink.
Unfortunately, after having made my way back to Texas i had to leave the hardware and some art behind. I never ended up finishing the inking on this piece. But having a high-resolution scan... i decided to digitize it and see what i could do. I have always preferred traditional mediums and analog processes... but in this digital age it's time to hybridize my approach. You can read about some of the process by clicking the image above which will take you to an update post from last October.
~ Progressive Permutations ~
As the artwork stands now, a lot of work and accomplishment has been achieved... but there is still a tremendous amount of work to do to achieve my digital dream with this piece.
It may come as a mild surprise to many of the digital artists out there that i have done a majority of the work on this one with Microsoft Paint. For those that know what that means... i hope you get a good laugh at my expense!
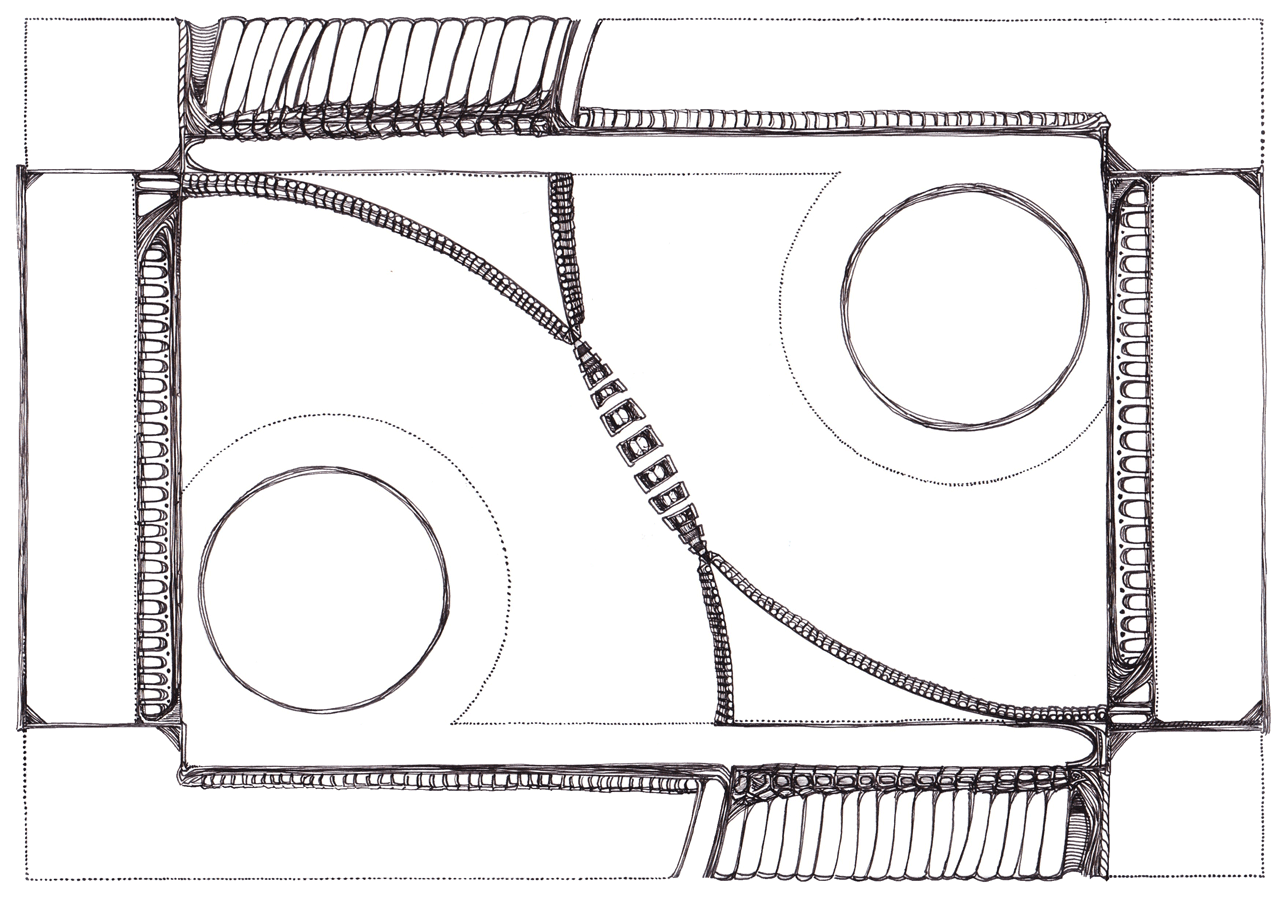
The image above is the base layer. When i tried to color fill the white areas and experiment with color i realized the scanner picked up all the pixel variants in the white of the paper. I didn't think of that and what issues that would pose moving forward.
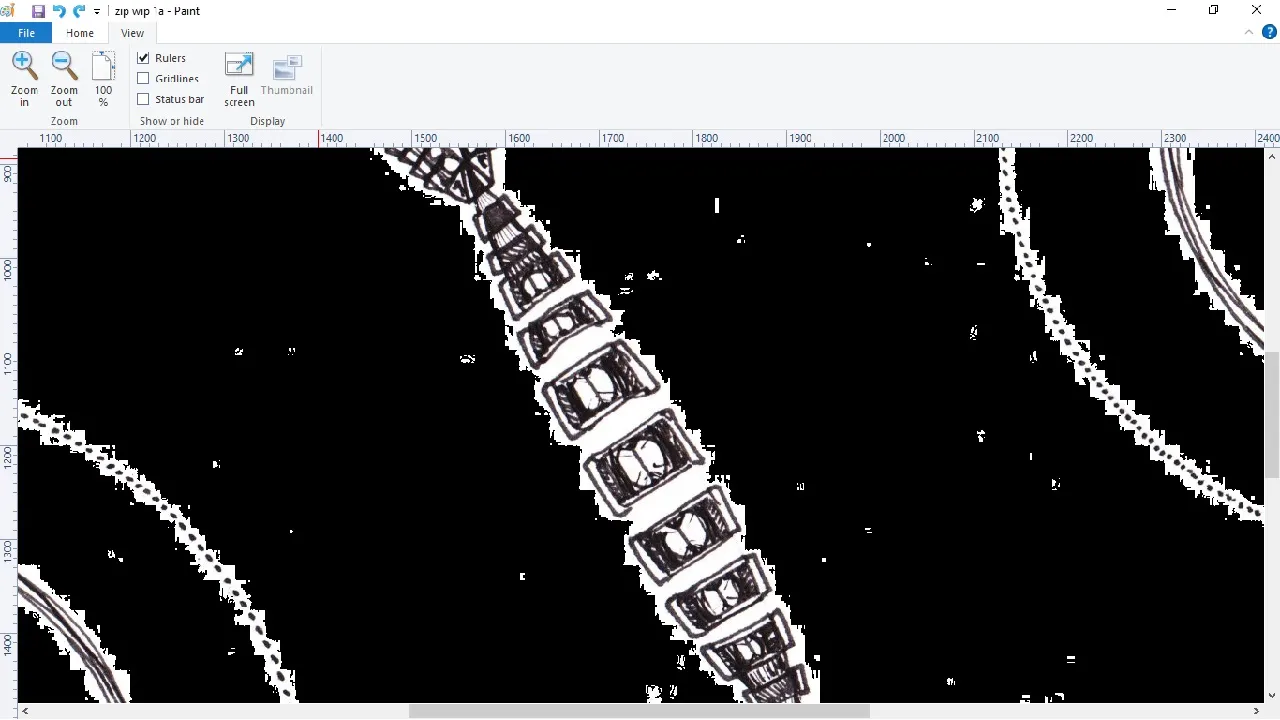
In the series of images below, i will be demonstrating what kind of work went into cleaning this artwork up. You can see how clean those edges are and how pixelated the color fills were.
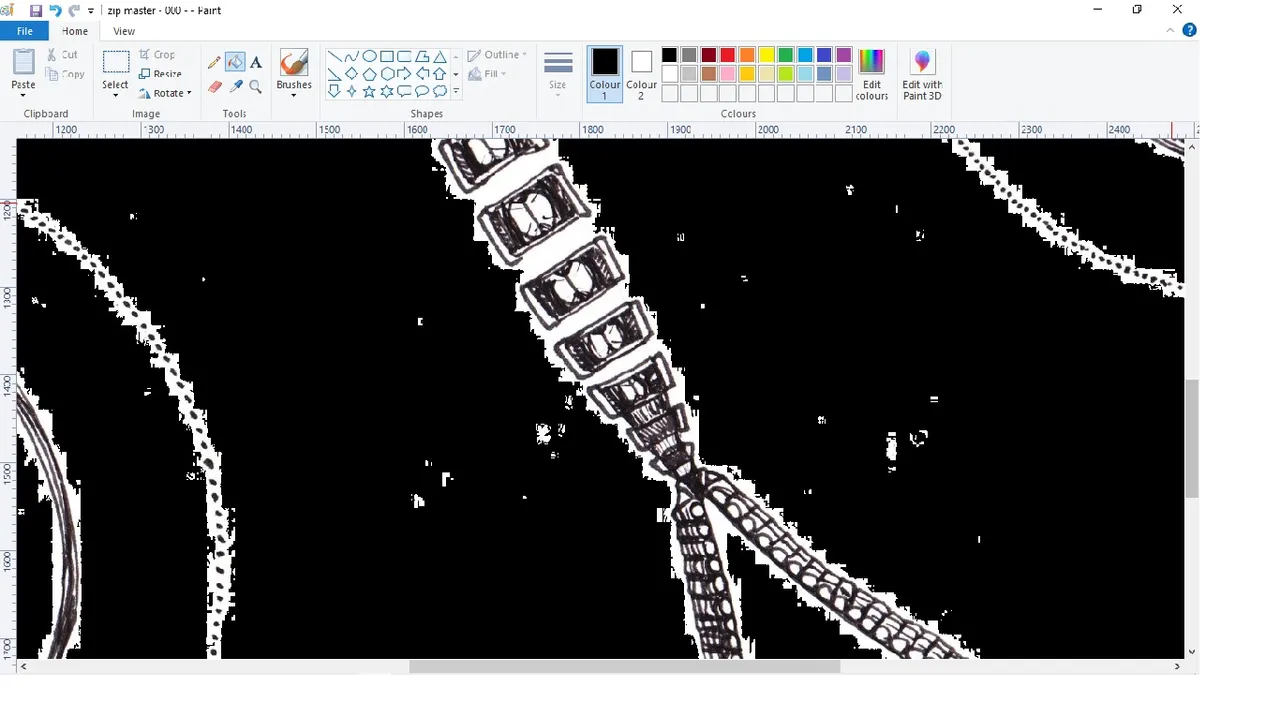
I took some screenshots to show you how far i zoomed in and what the process looked like for just one small area.
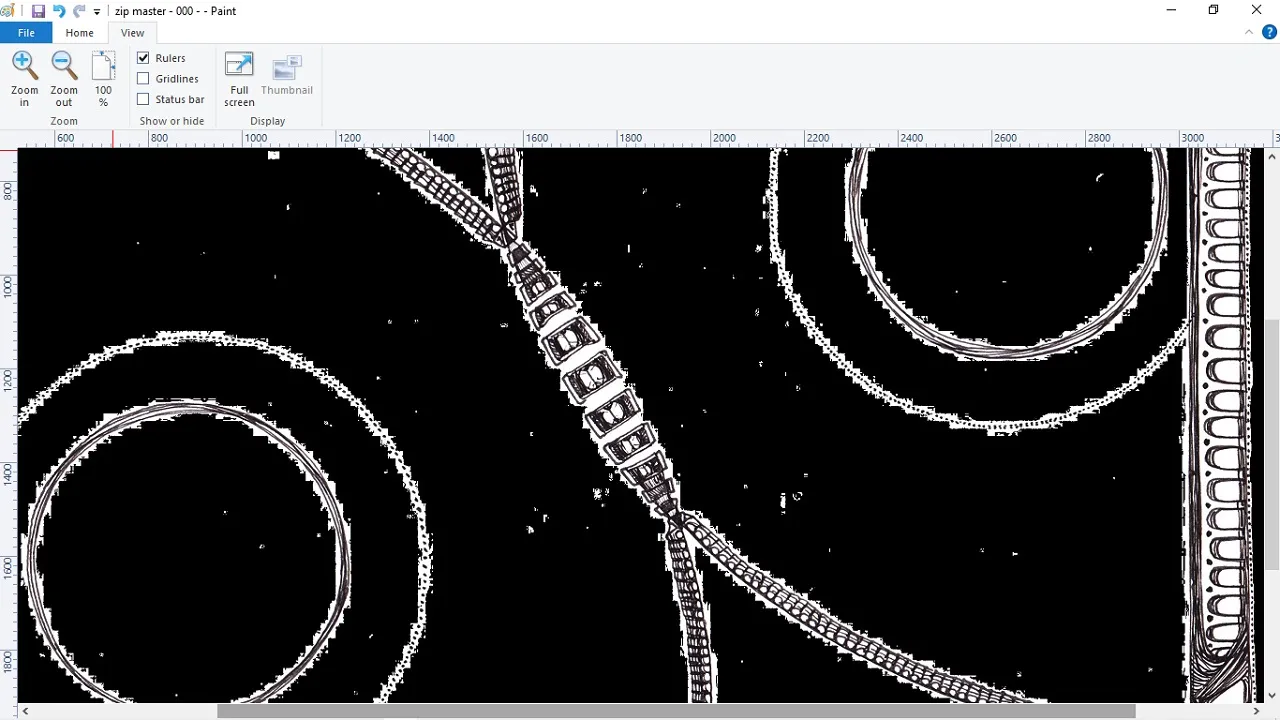
If you factor that in for the whole of the piece then it's not hard to realize how time-consuming and meticulous this process became!
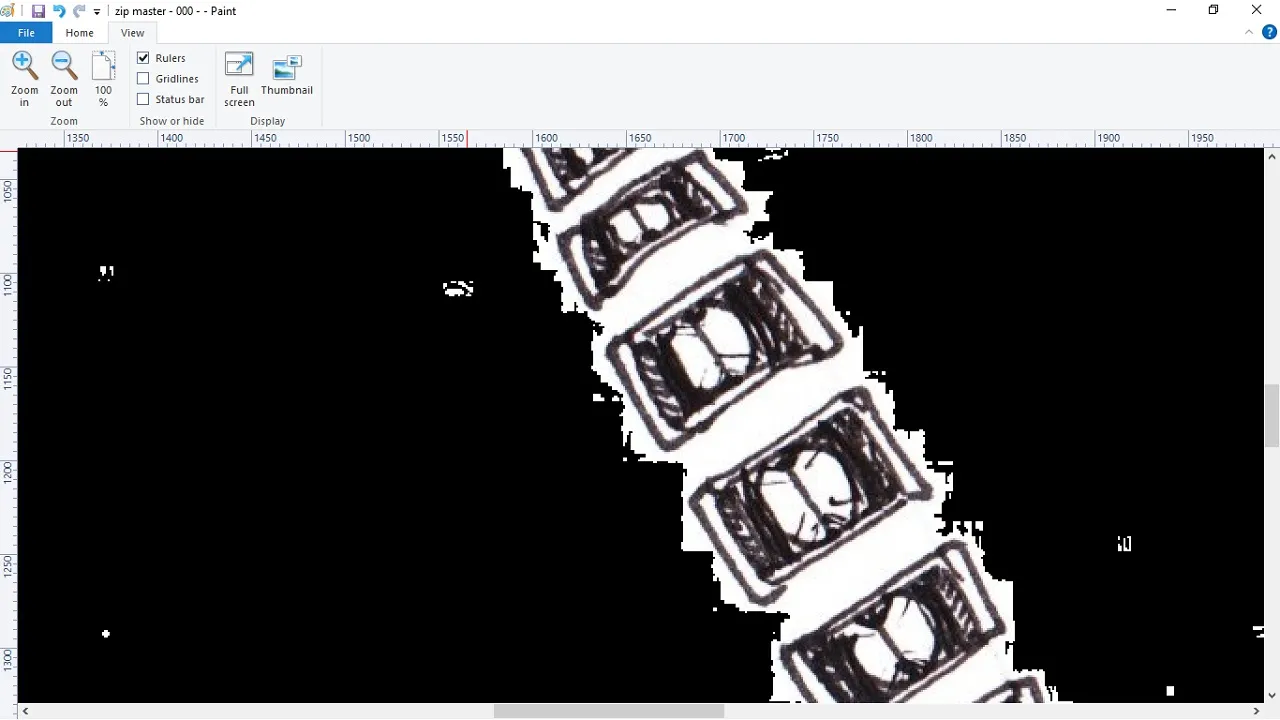

In order to get cleaner edges for my color fills i used the eraser tool. I circled it in red to show you what it looks like and where i would be erasing.

It took me a while to not use white for my erasing. I realized it was much easier to fill black and then erase in black to get right into where the ink had been laid down.

That is the largest eraser size... and you will see how zoomed-in things are to even make it seem large at all! To be honest, much of this whole process was more error than trial.
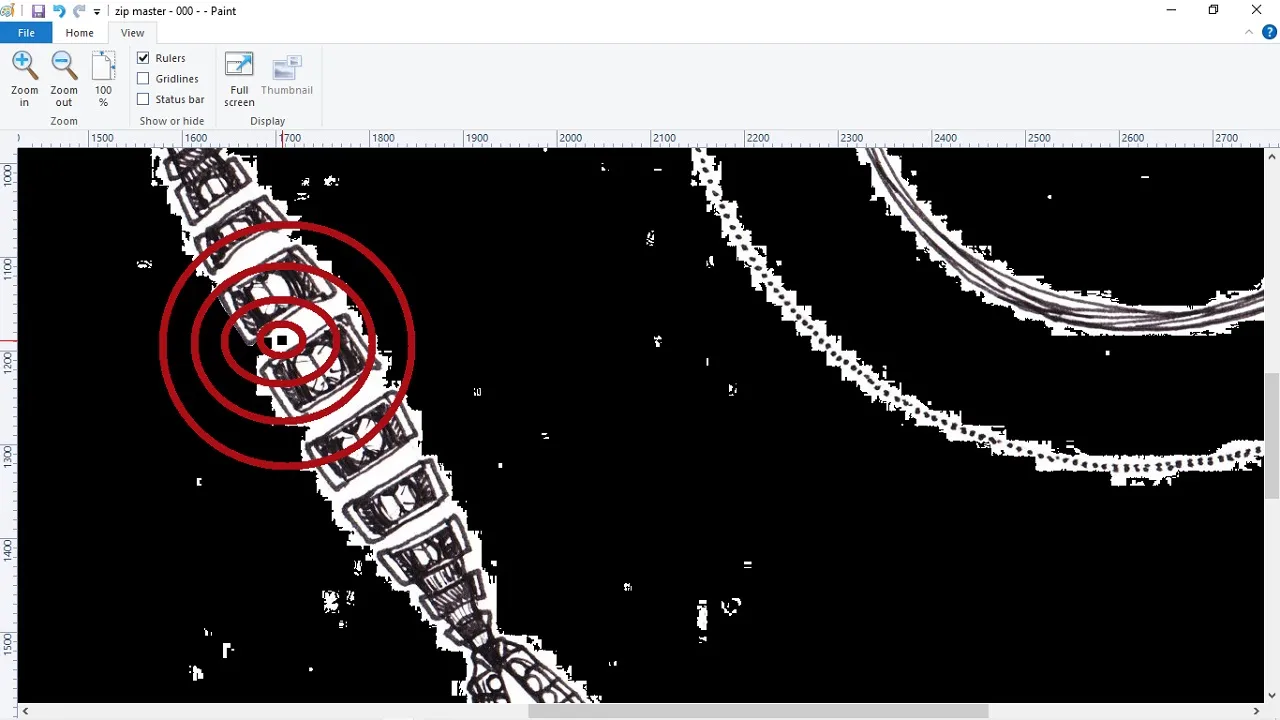
Even that last shot is zoomed in compared to the high-resolution full-scale image i was working with. I don't know why i can't just cut corners and realize that nobody is going to see on the pixel level or notice the tiny minutia as i do. I am no Da Vinci but i do appreciate his sentiment.
"Details make perfection, and perfection is not a detail." - Leonardo Da Vinci
I don't think my attention to detail on this one is going to surmount to perfection... but it's a nice goal to aim for.
~ Zip Master ~
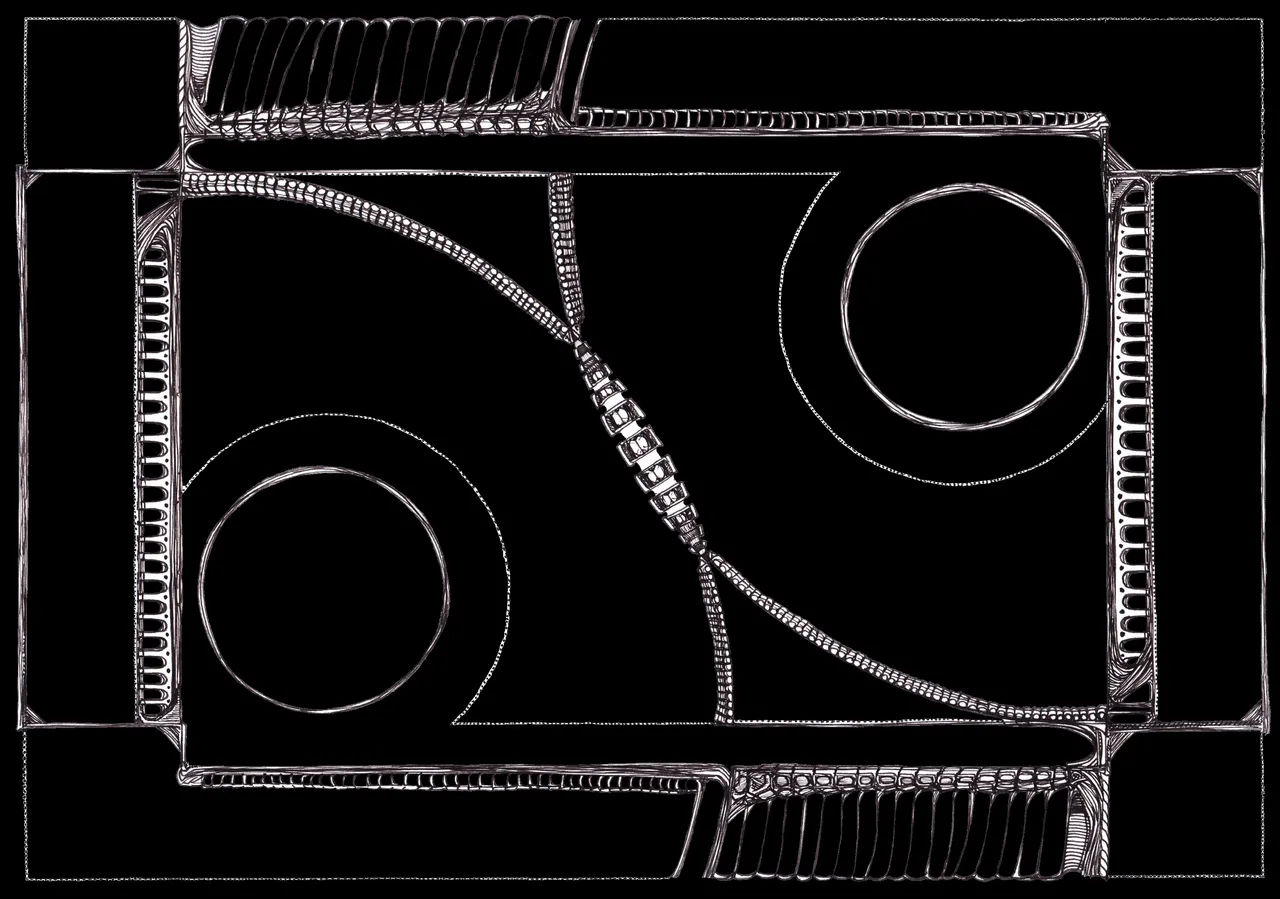
Now that the edges have all been cleaned up and the color fills work i can finally begin my experimentations with color! For the rest of this post though, i will be showing you all the step-by-step progression of each section as it got cleaned up and filled with black. Albeit, i didn't work on this nonstop, it did take an excruciating amount of time and eyeball endurance to get it to where it's at now!

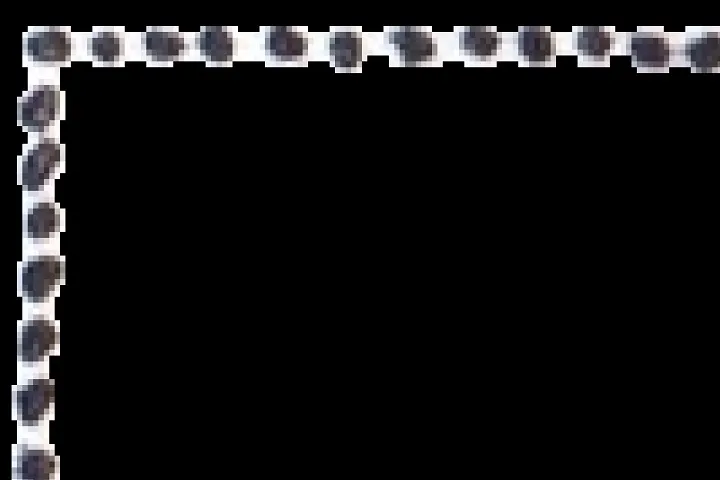
I put these progress images in sequential order. Make sure and click on any images that interest you and zoom in! Many of the borders are made of dots as you see in the image above!
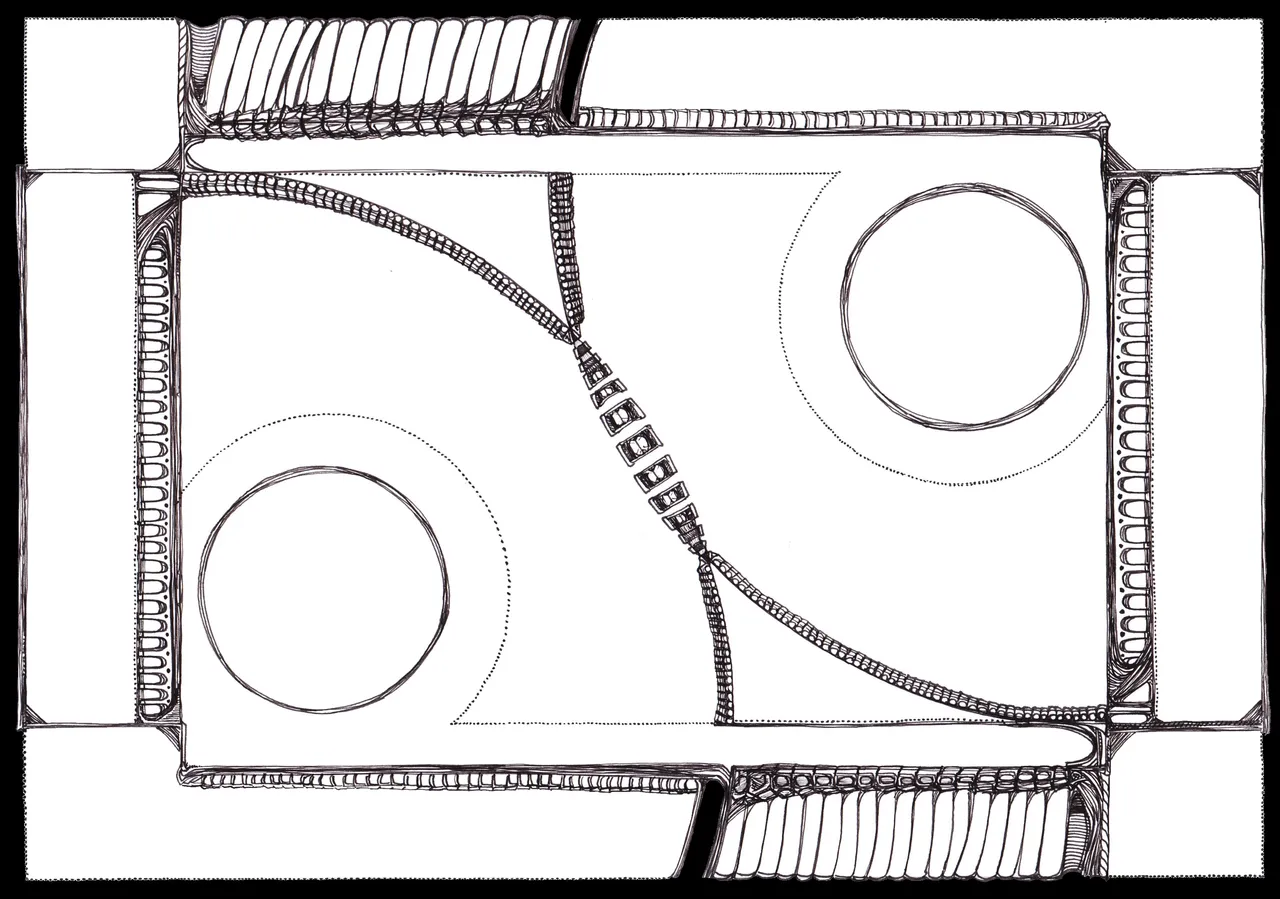
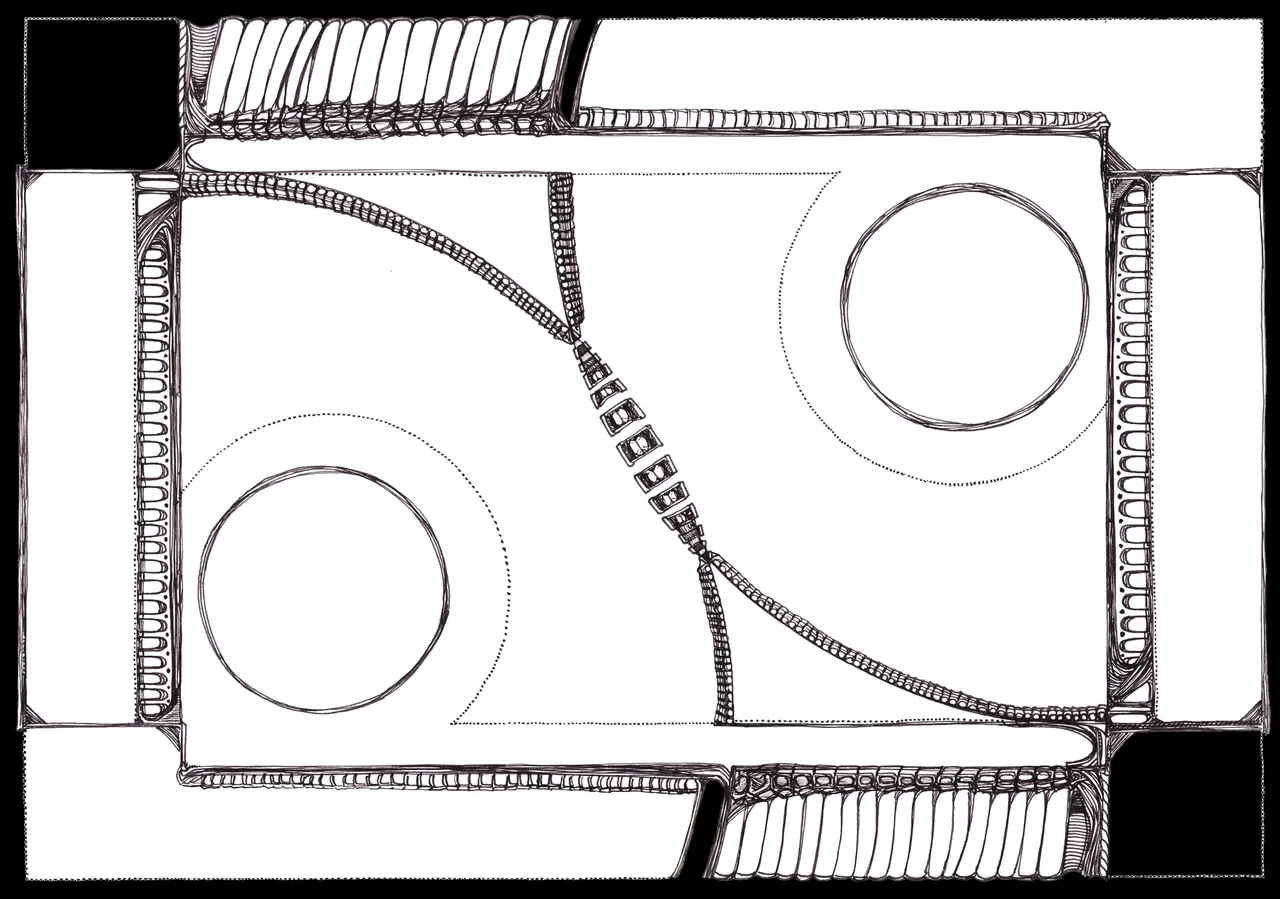
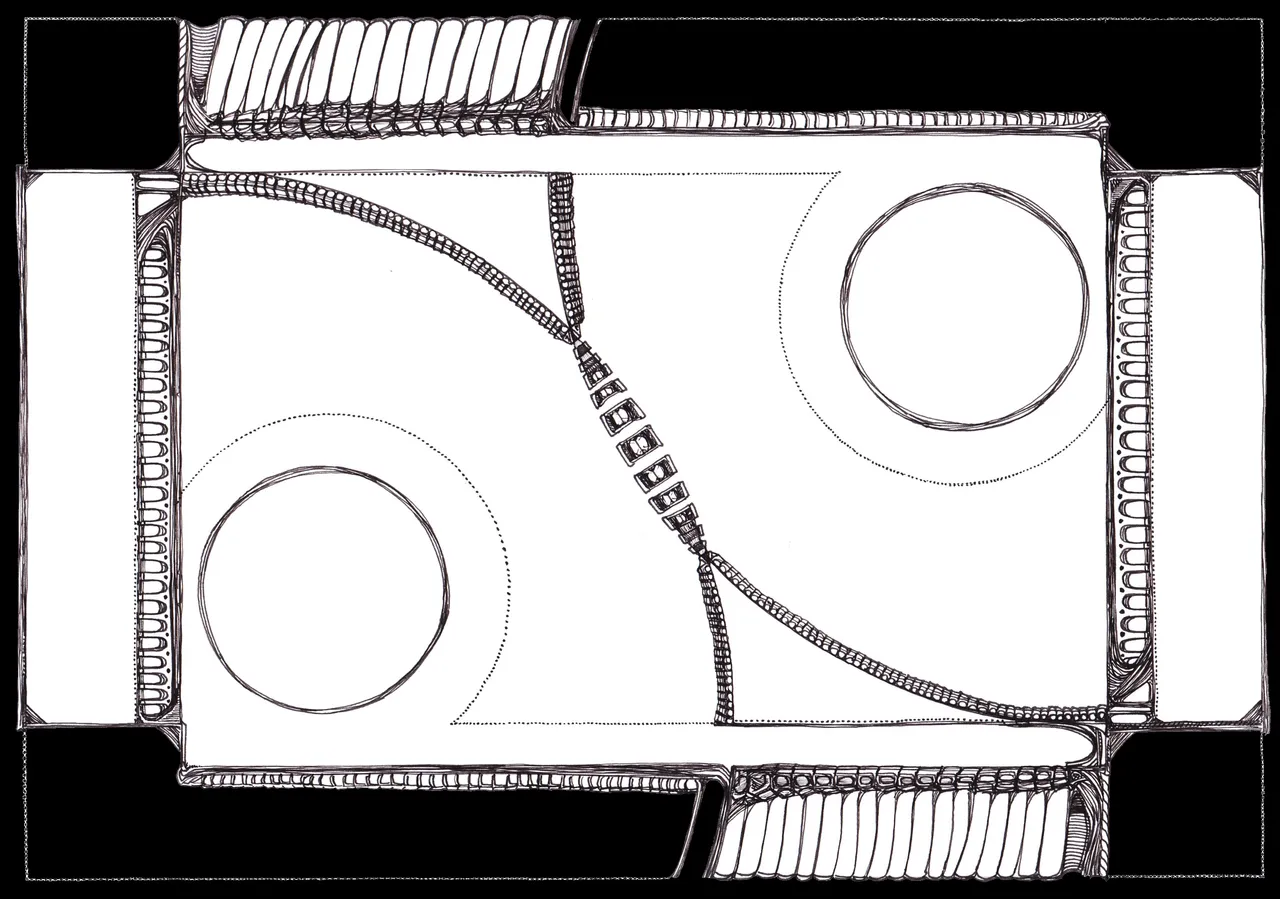
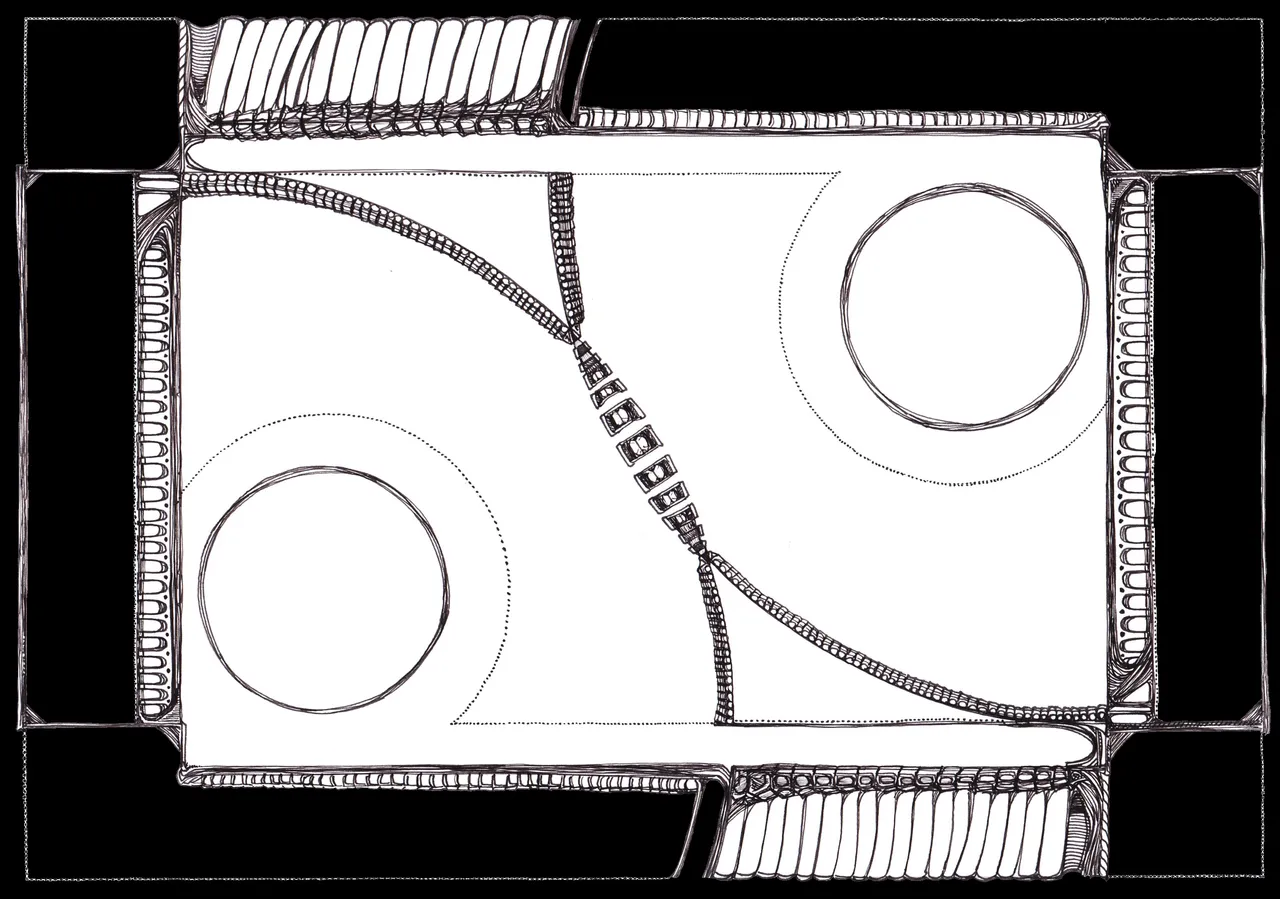
Now that i cleaned up the border i could focus on the internal workings of getting this artwork malleable to my desires of design! The more i worked on this the more i had visions of color and coalescence.
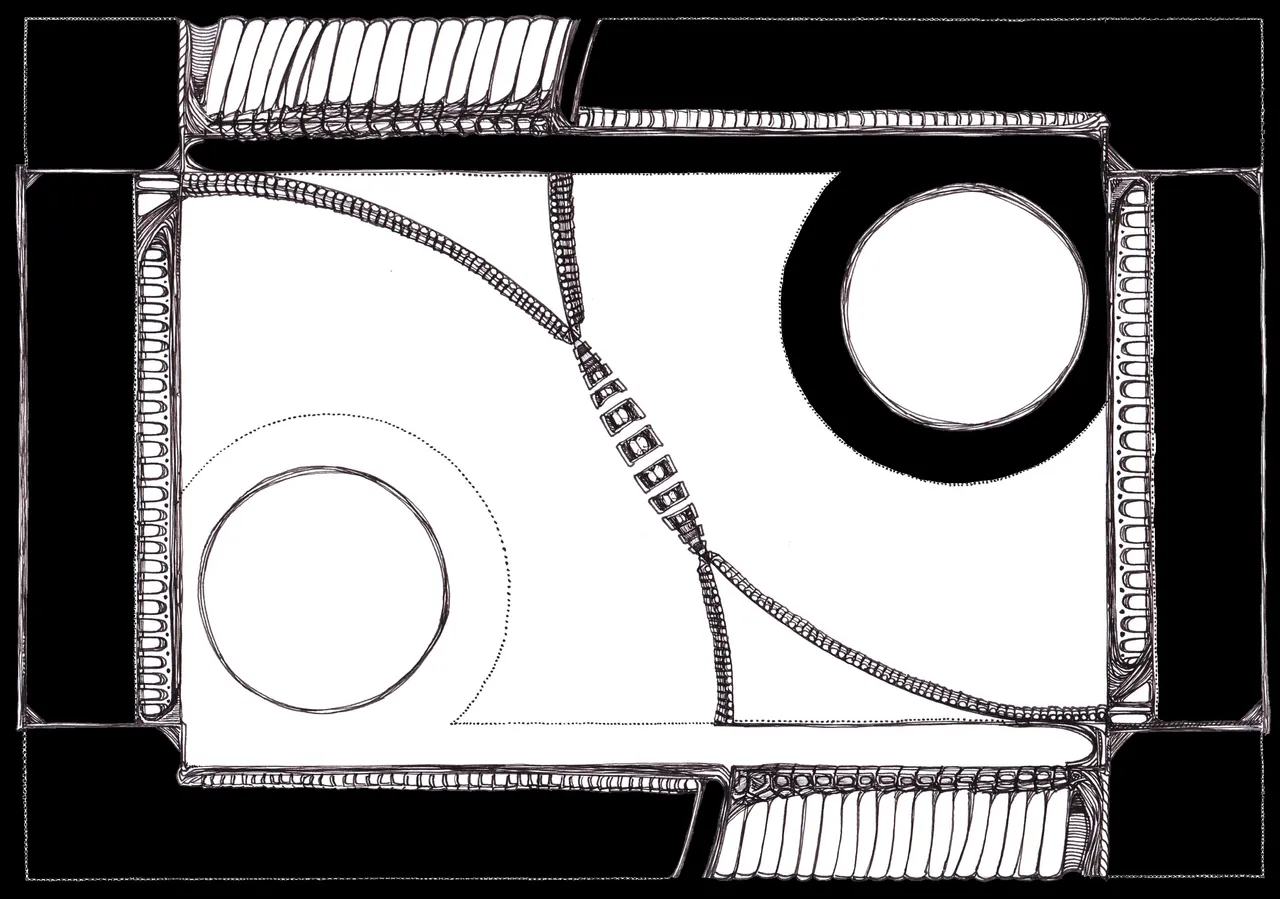


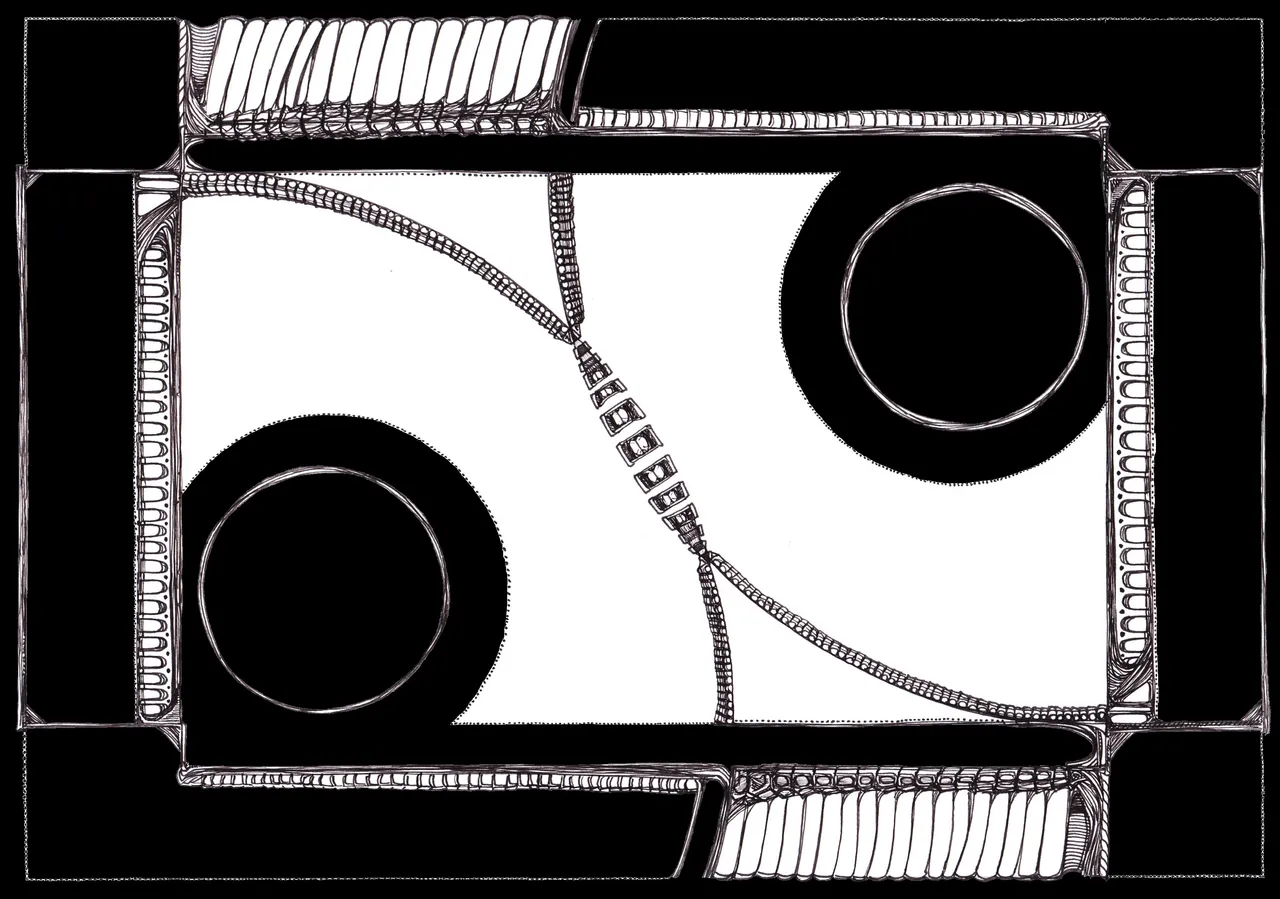
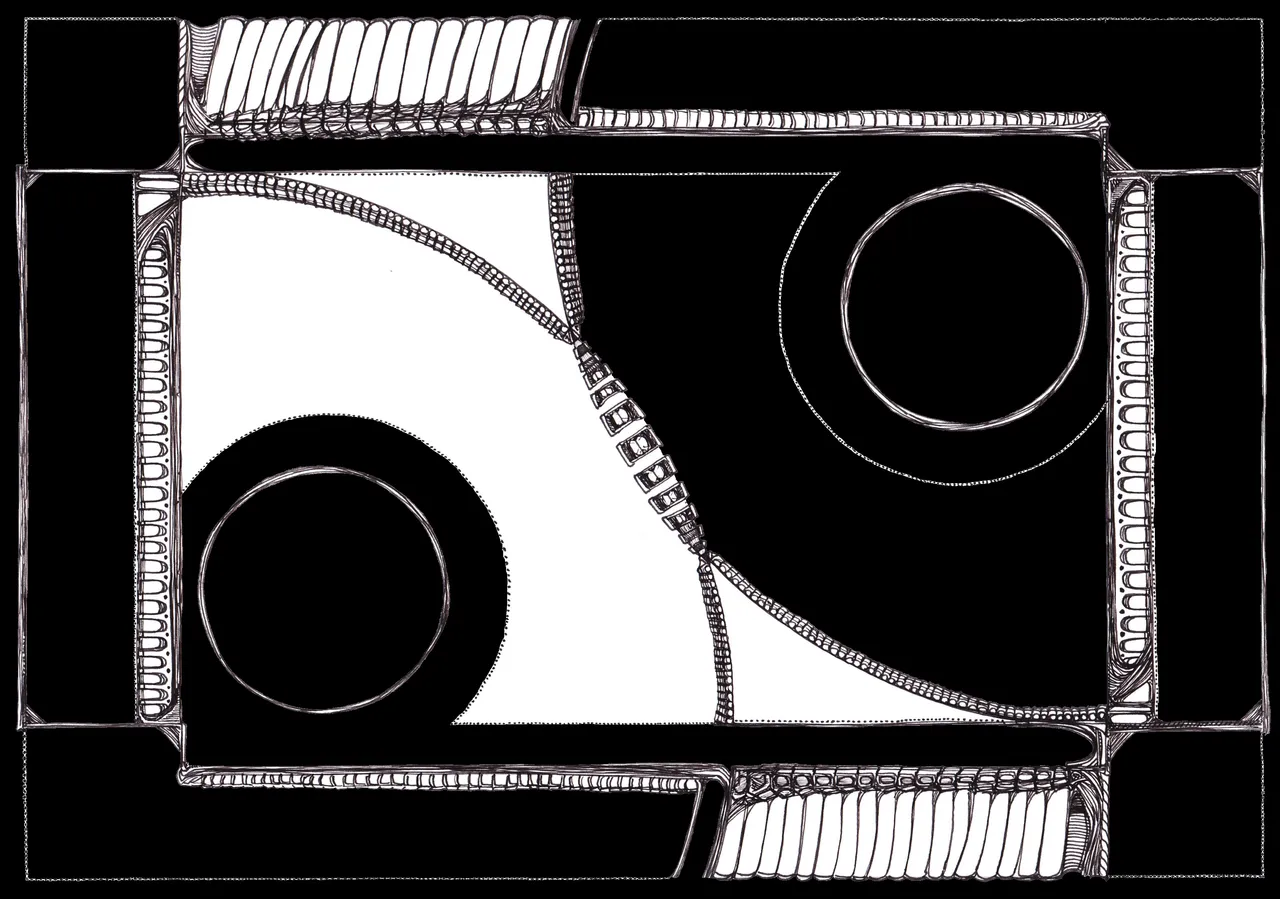
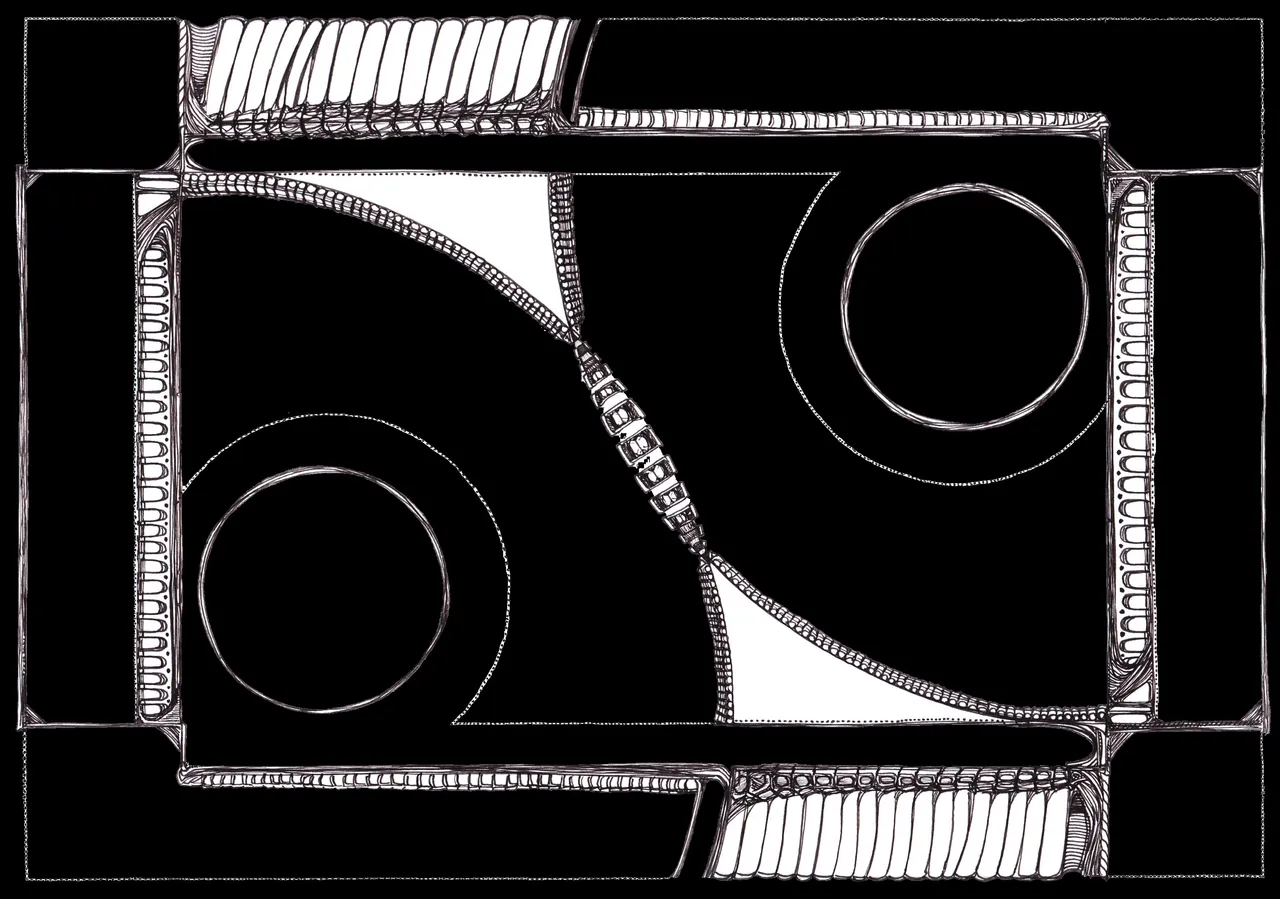
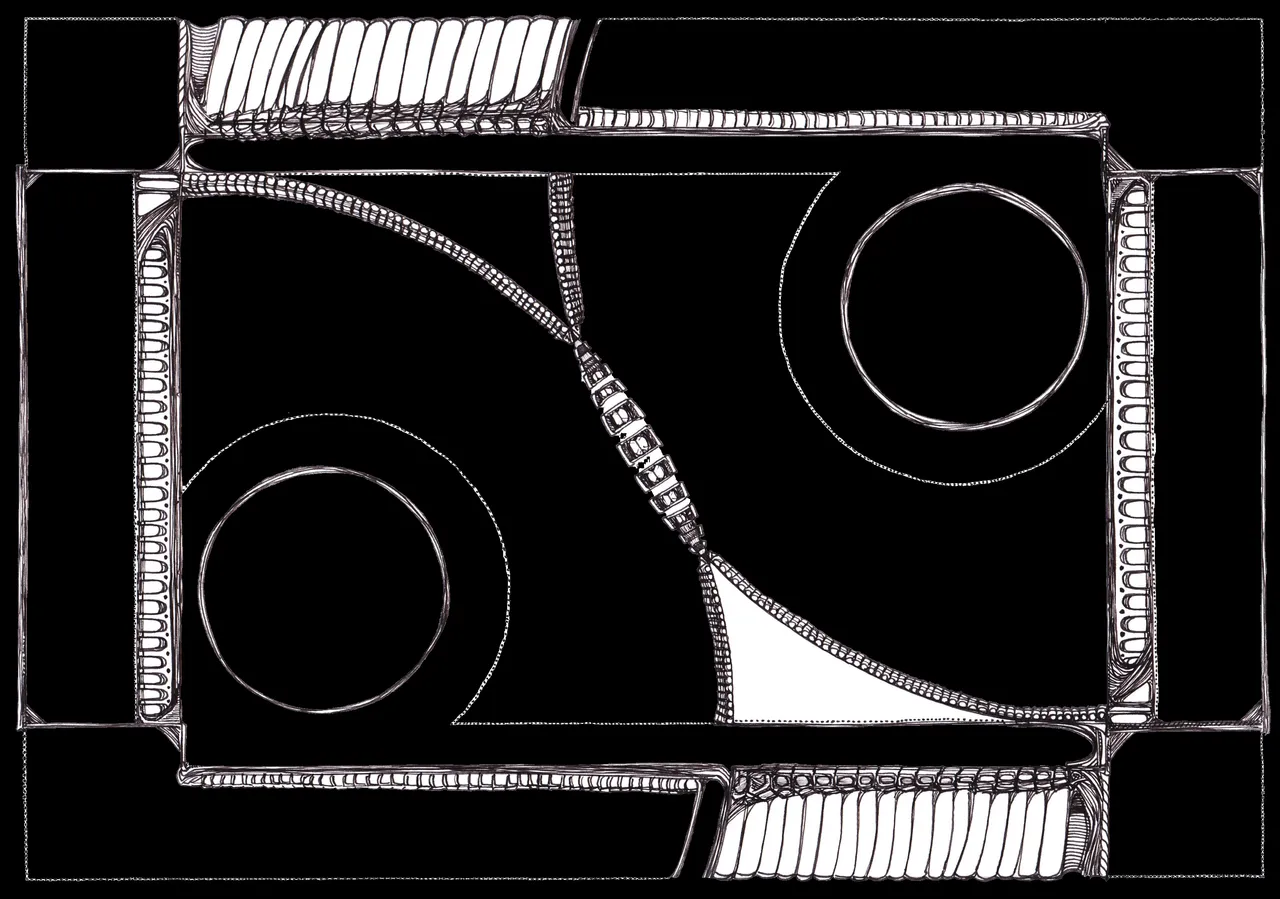
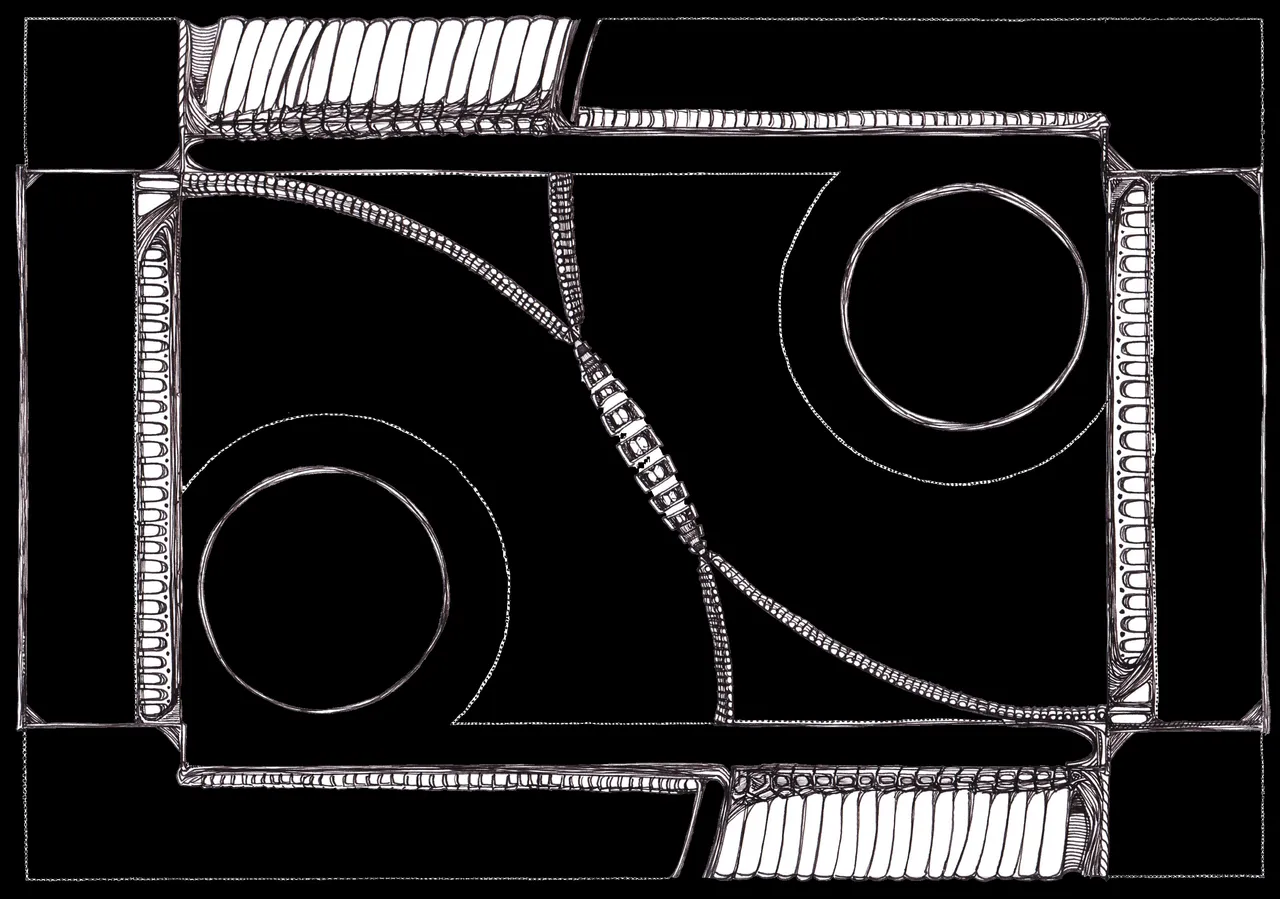
Now that the inner workings are edged up and cleaned out and filled to as close to perfection as possible.... it was time to address the inner borders and areas of more particular detail! I started with the internal areas of the arches on the left side if you can call them that.
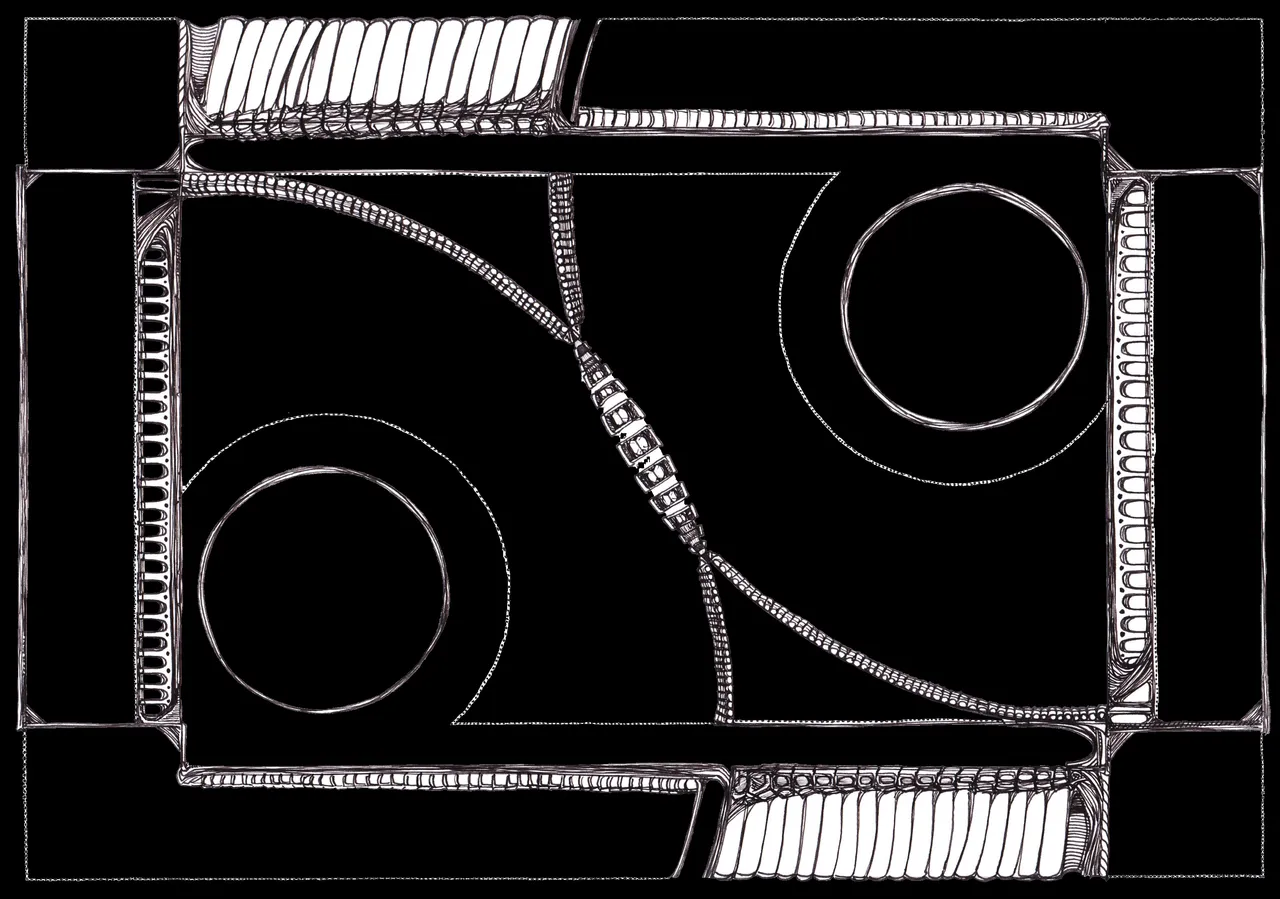
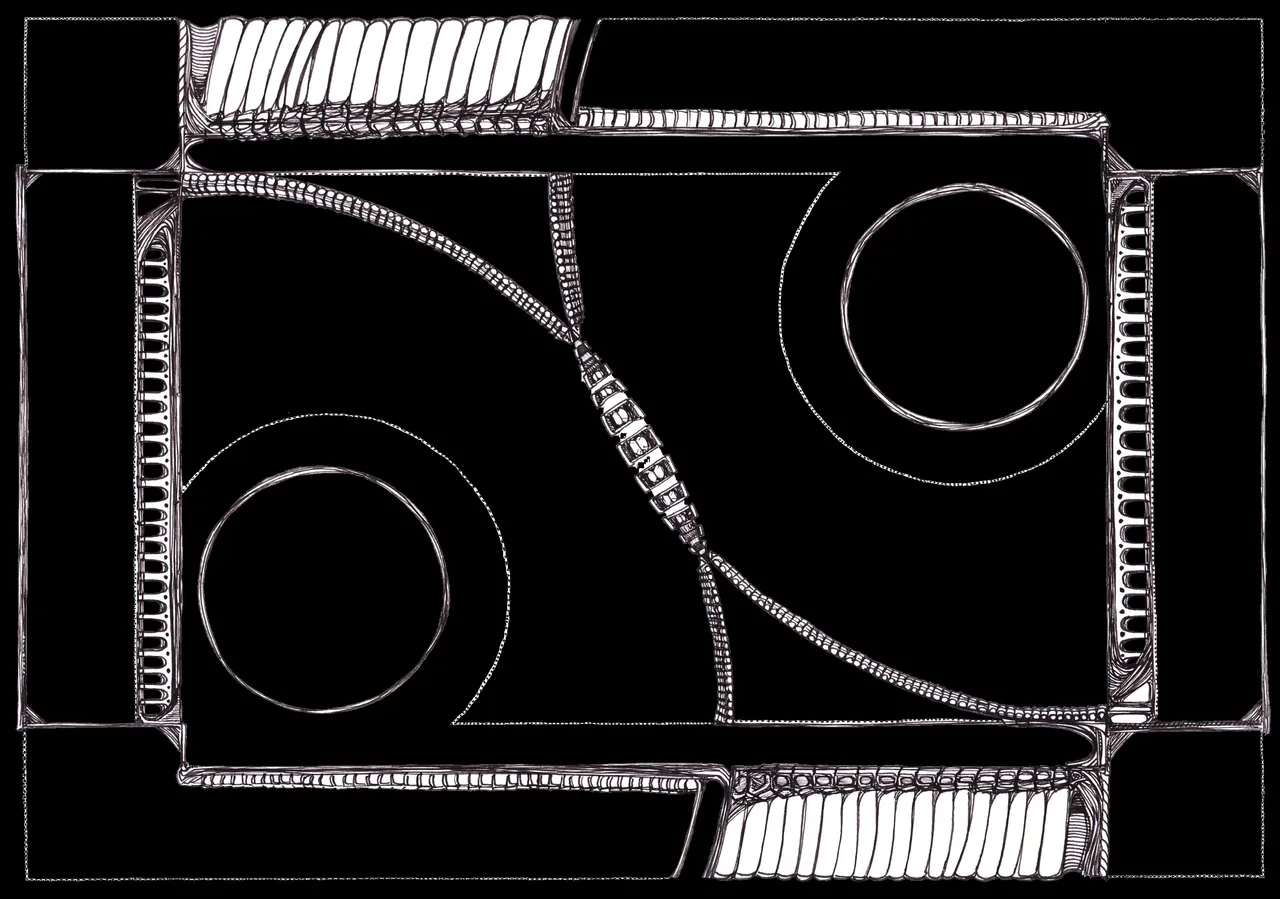
Now on to the ribbed areas above and then below.

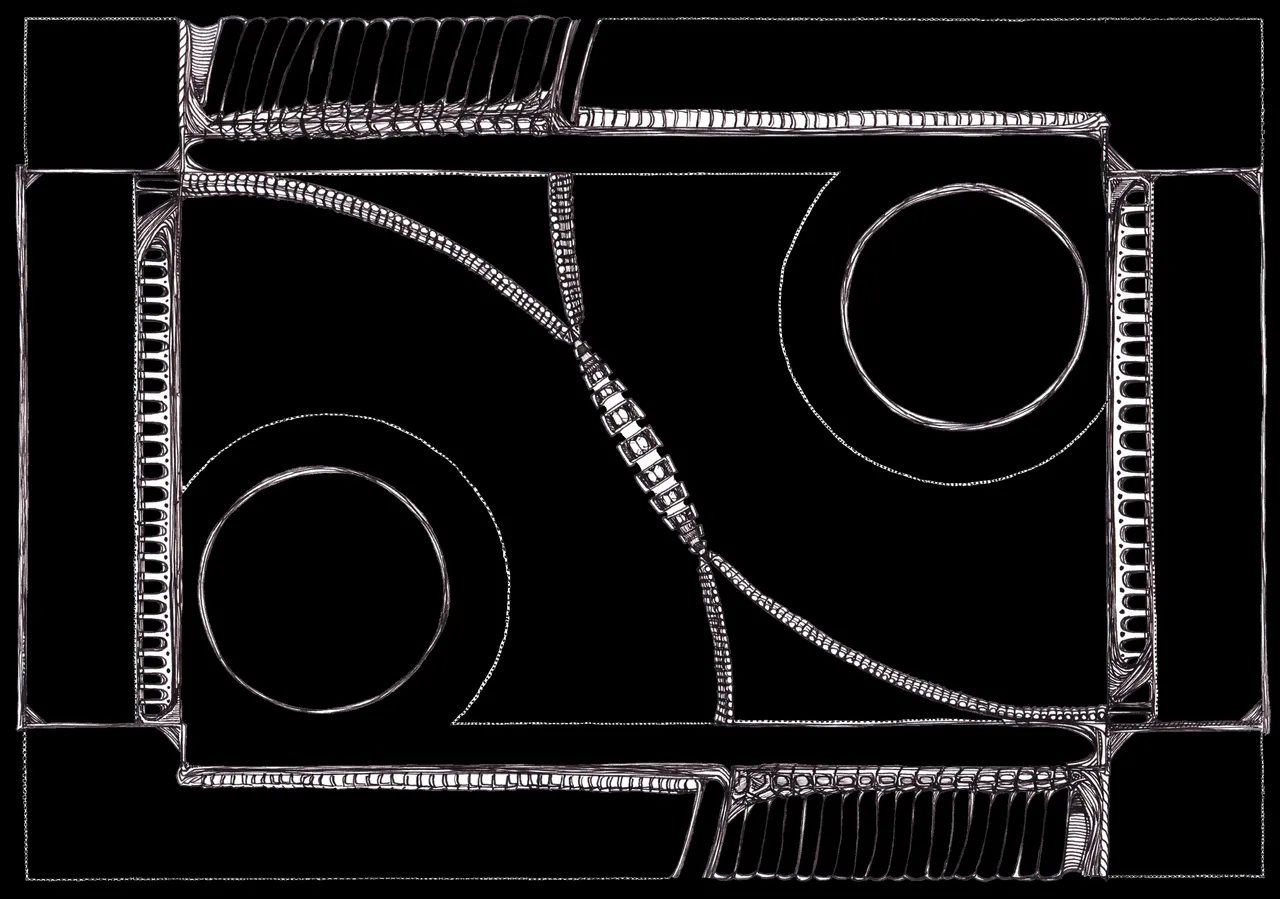
Lastly, the vertebral columns that run alongside the ribbed areas. This was one of the more tedious elements of the entire cleanup process along with the dot border. I am not sure which element was more painstaking to refine?!
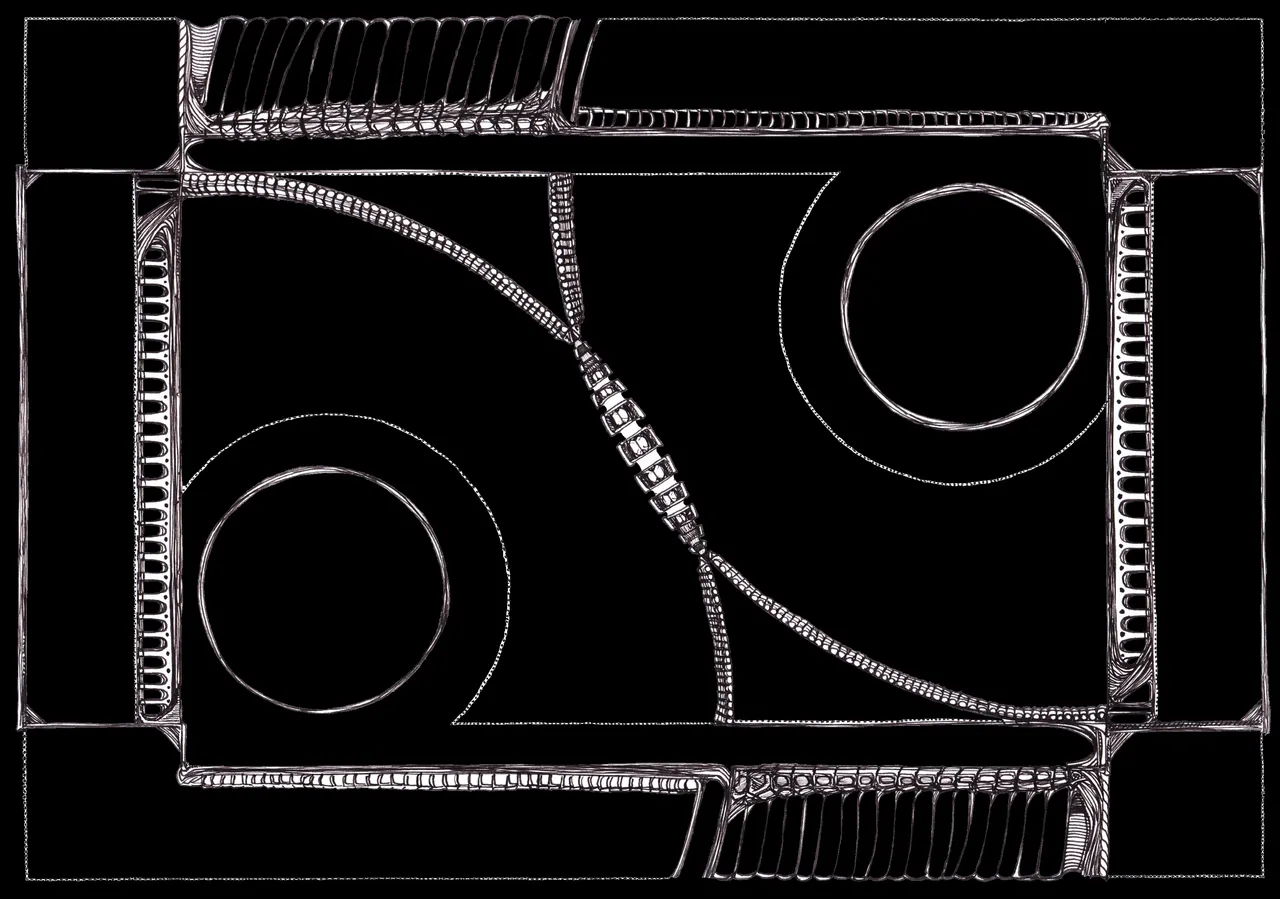
Having made it to this stage of the WiP i am beginning to get more imaginative as to what this can become. It's not my intention to leave things this black. I can imagine how color will enhance this artwork. I can also imagine how a mild amount of animation will make this piece have a life of it's own.
I can picture a green glow tracing within the inner border areas. I can imagine a red tracing the green to lead the viewer's eyes all around this artwork. I know i will make this into an NFT at some point and put it up for grabs at my NFT Showroom Gallery. Click that link to see what i already have minted for your viewing and purchasing pleasures!
In fact, now is a great time to collect as the prices are much lower with the dip in the market. Essentially, everything is on sale at the moment! But i am sure that won't last long.
~ End of the Beginning ~
Usually, it would be the Beginning of the End... but in this artwork's case, it's the End of the Beginning! I just now really feel like i can get started on turning this thing into what i have envisioned since i scanned this piece and started to play with color fills. Who knows what it will become in it's final form!
Either way, i have included a gif of the process to give a taste of things to come and to reward you for making this far into my post! I am becoming less apologetic for having so much to see and read within my posts. If you compare this post to that shit post from a few years ago i think you will see what i mean. I guess, just like this artwork, it can take a while to make preparations and get comfortable creating content you really feel happy with at the end.
So now, without further ado....
I really do appreciate the time you have taken to stop by, read and check out my post, appreciate the visuals, and hopefully comment with some feedback. It's always a pleasure to share my art here.
I hope this post has encouraged and inspired you all to use what you have and not worry about special programs and expensive software. If i can do this with MS Paint... just imagine what you could do to make your analog art and digital dreams come true?

Thanks Again For Stopping By!
