¡Un gran saludo a toda la comunidad de Hive!
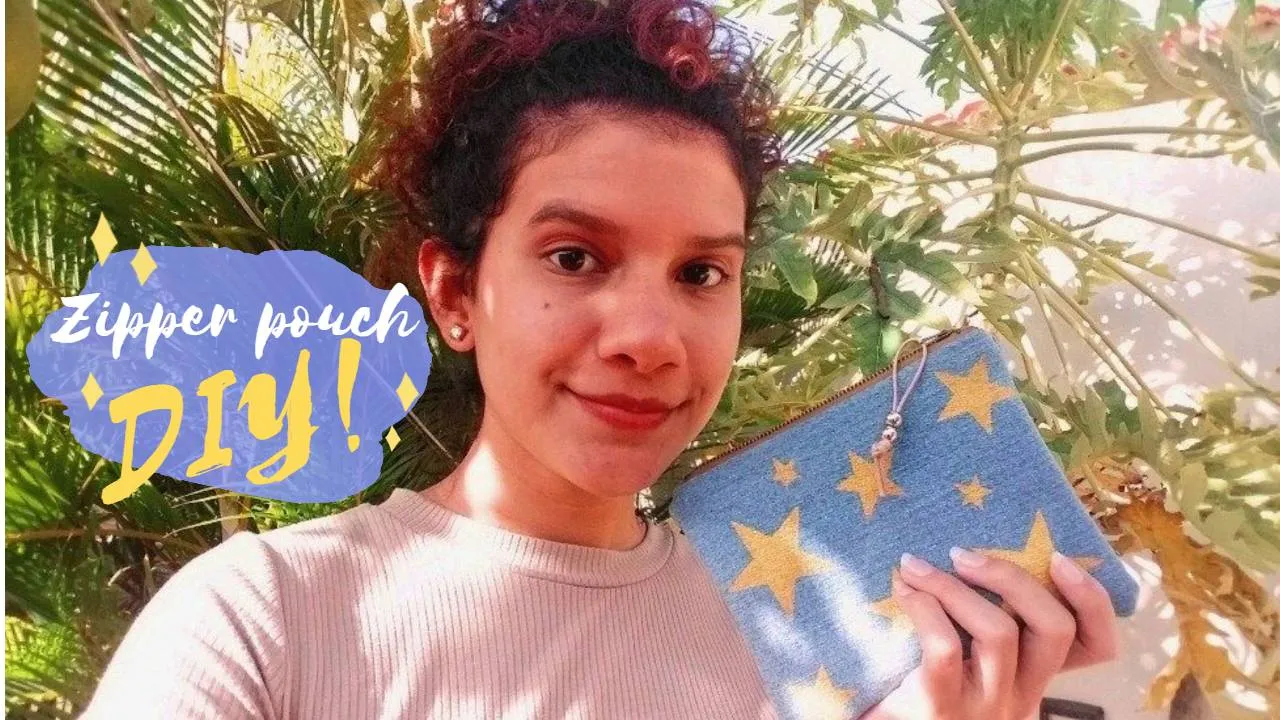
Hoy traigo para ustedes un tutorial fácil y rápido de hacer. Les mostraré cómo realizar un Zipper Pouch con materiales que de seguro tienes en casa y lo mejor es que para esto no necesitarás máquina de coser.😄
Big shout out to the entire Hive community!
Today I bring you an easy and quick tutorial to do. I will show you how to make a Zipper Pouch with materials that you surely have at home and the best thing is that for this you will not need a sewing machine.😄
Materiales // Materials:
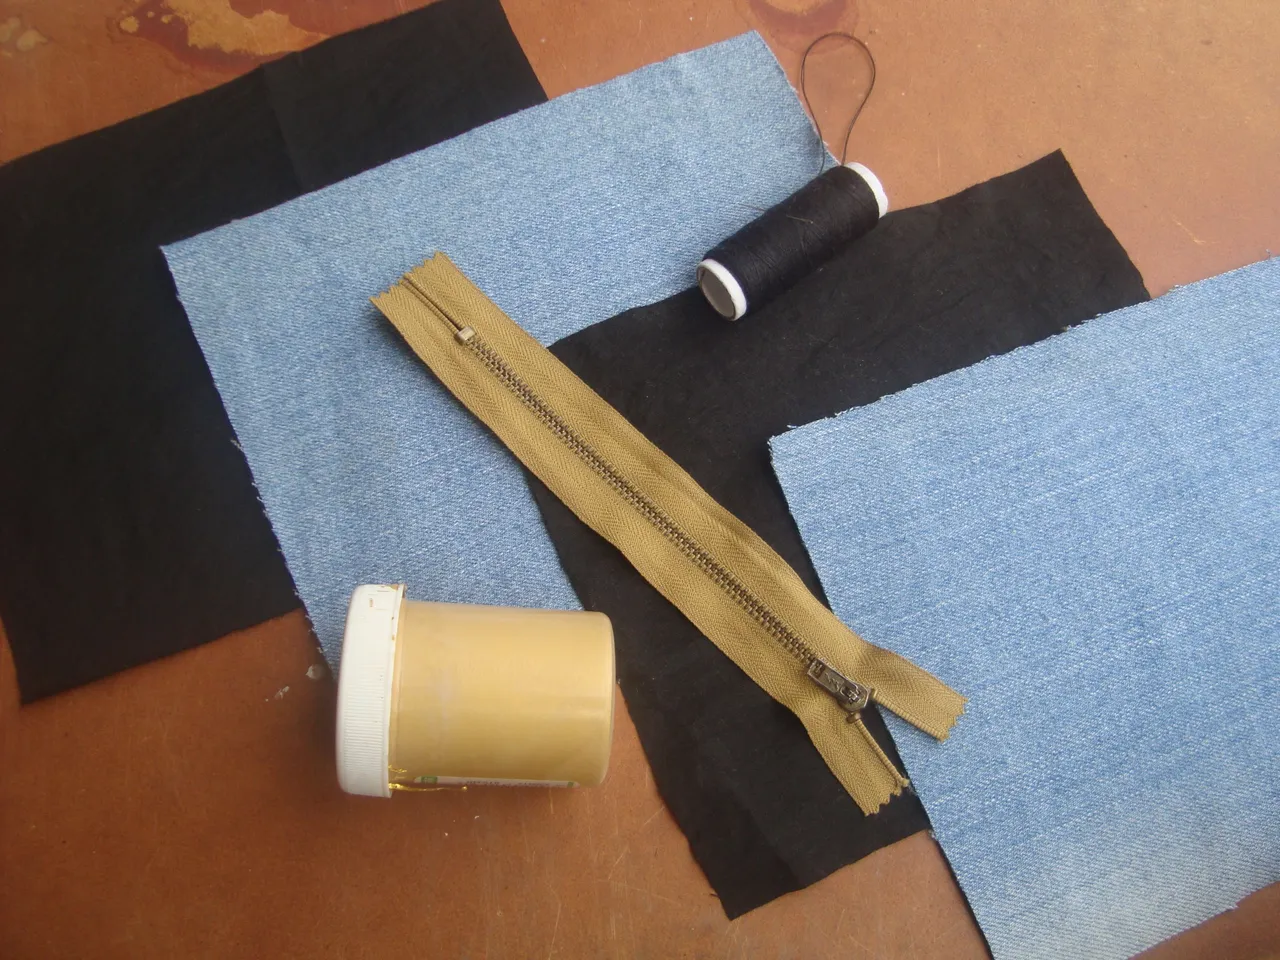
Los materiales que ocuparemos son muy pocos 😄 Vamos a necesitar:
- Una cremallera (las venden en cualquier mercería y son bastante económicas)
- Hilo y aguja
- 4 Trozos de Tela. 2 para el exterior y 2 que usaremos para el interior como forro.
- Pintura
- Un trozo de cartulina
- Pincel
En el caso de las telas: puedes usar cualquiera que tengas. Para la parte exterior recomiendo una gruesa (como jeans) y para el interior cualquier tela delgada servirá.
El ancho debe ser del mismo tamaño que la cremallera y el largo puede ser de tu preferencia.
The materials that we will use are very few 😄 We will need:
- A zipper (they are sold in any haberdashery and are quite cheap)
- Thread and needle
- 4 Pieces of Cloth. 2 for the exterior and 2 that we will use for the interior as a lining.
- Paint
- A piece of cardboard
- Brush
In the case of fabrics: you can use whatever you have. For the outside, I recommend a thick one (like jeans) and for the inside, any thin fabric will do.
The width should be the same size as the zipper and the length can be your preference.
Paso 1 // Step 1
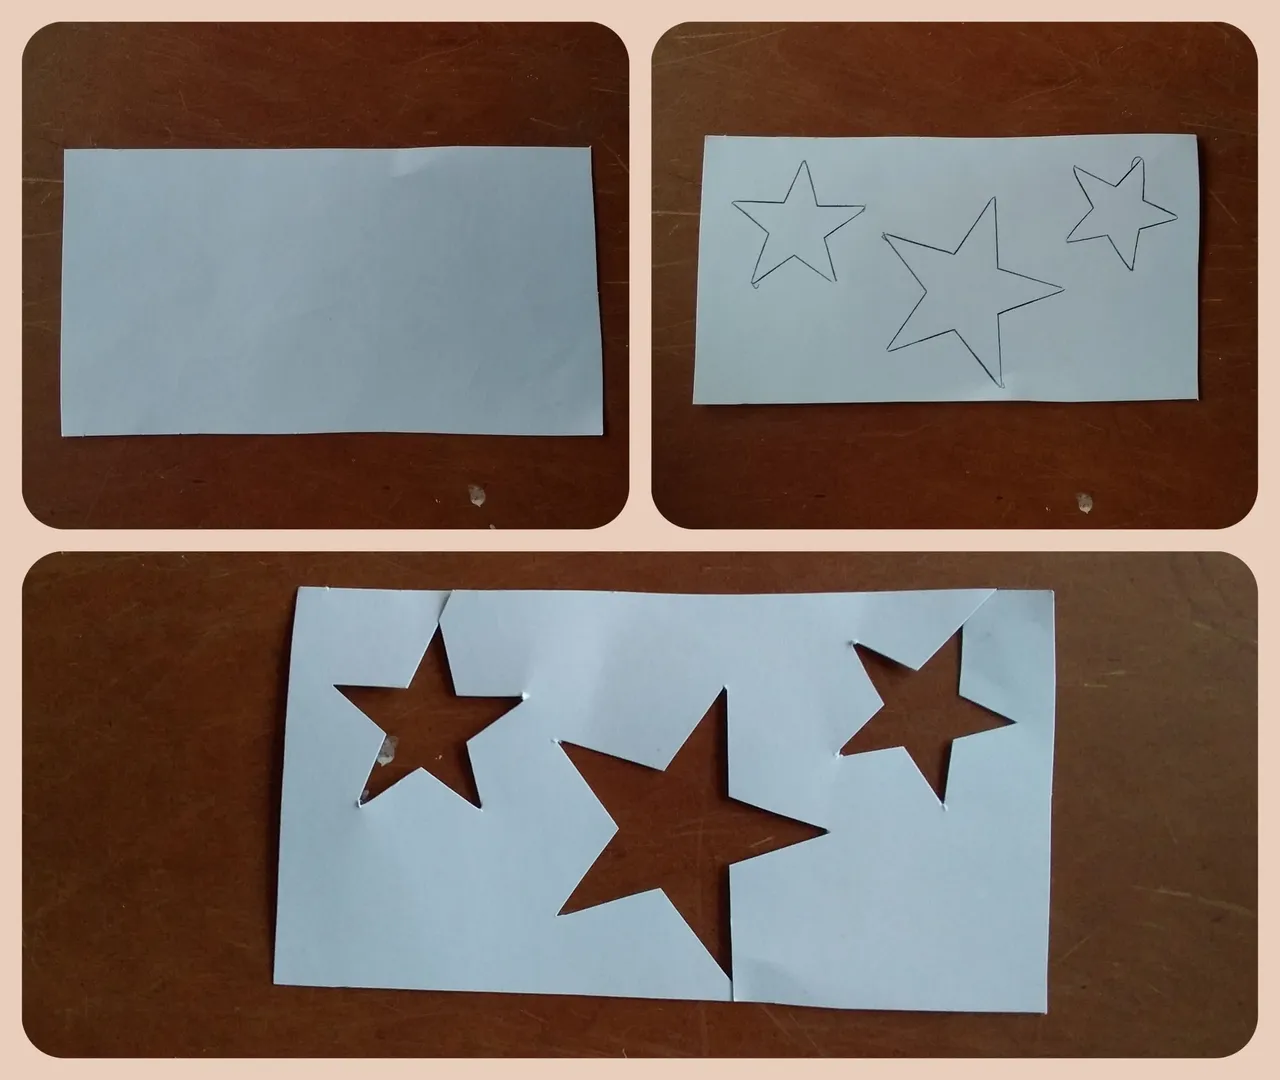
Lo primero que hice fue tomar la cartulina y hacer una especie de plantilla. Le dibujé una figura (en este caso unas estrellas) y corté con mucho cuidado.
The first thing I did was take the cardboard and make a kind of template. I drew a figure (in this case some stars) and cut very carefully.
Paso 2 // Step 2
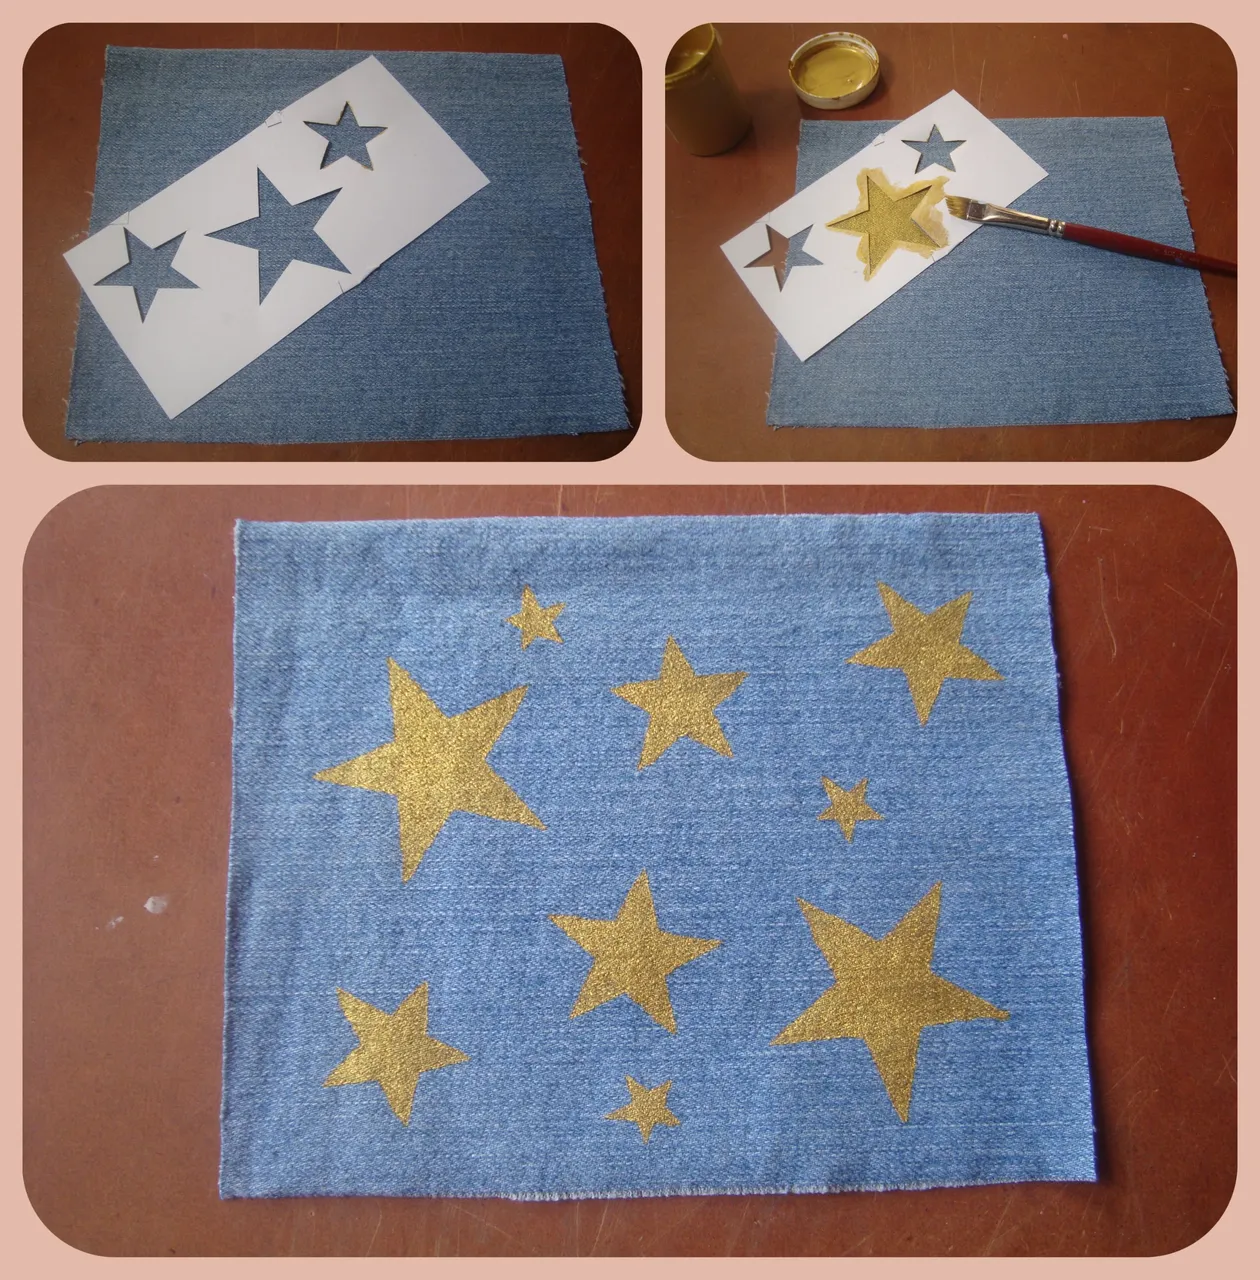
Ya con nuestra plantilla lista, tomaremos nuestra tela y empezaremos a pintar, en mi caso solo pinté una, pero si prefieres puedes pintar las dos piezas. Luego dejaremos secar muy bien.
With our template ready, we will take our fabric and start painting, in my case I only painted one, but if you prefer you can paint both pieces. Then we will let it dry very well.
Paso 3 // Step 3
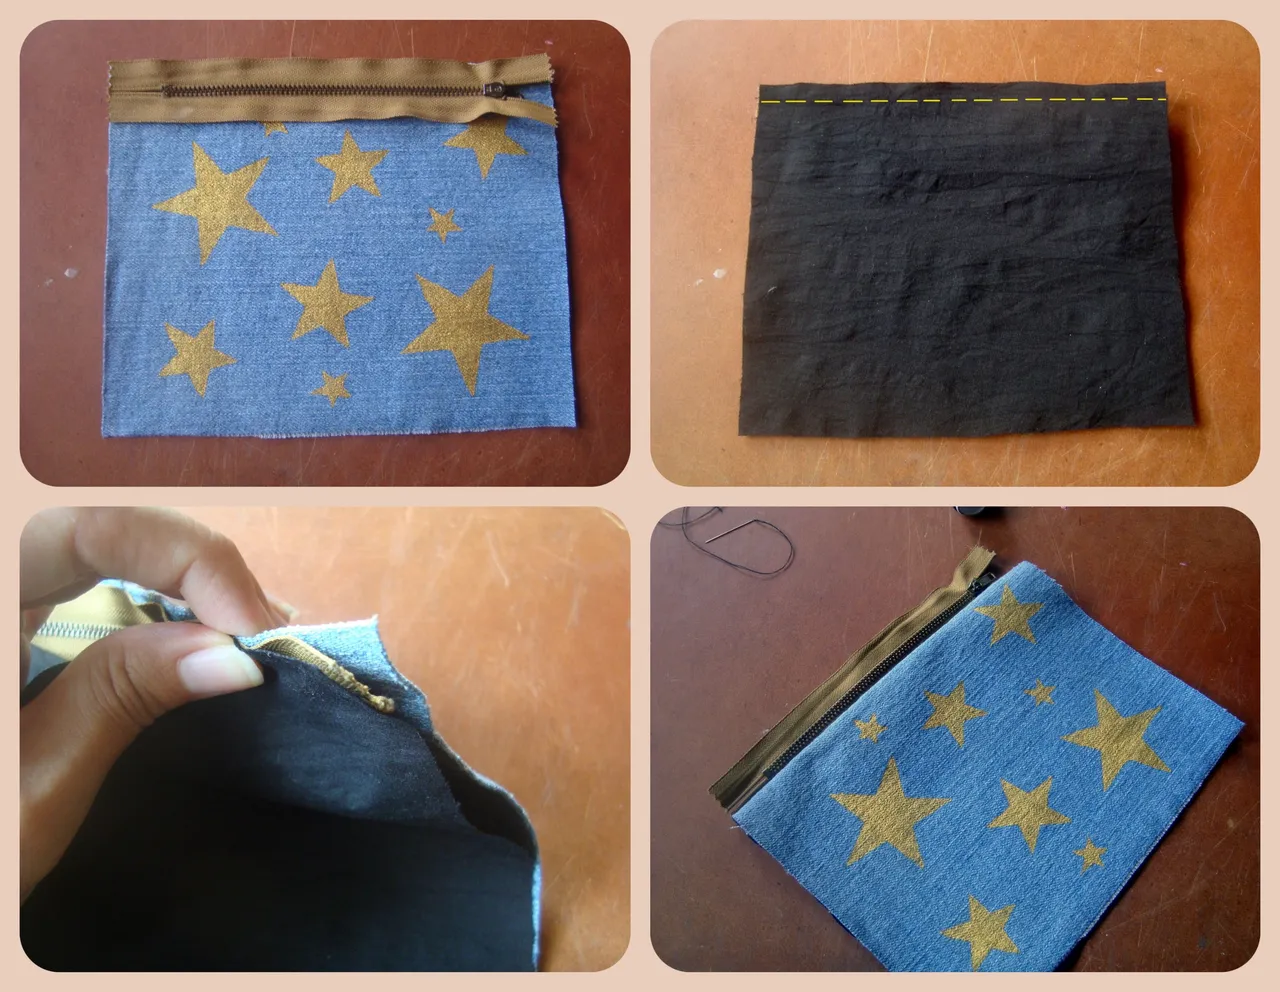
Lo siguiente será colocar la tela viendo hacia nosotros y encima irá nuestra cremallera, pero boca abajo. Por último, pondremos nuestro forro, formando como una especie de Sandwich.
Al terminar de coser, debe quedar como en la última foto.
The next thing will be to place the fabric facing us and our zipper will go on top, but upside down. Finally, we will put our lining, forming a kind of Sandwich.
When you finish sewing, it should look like the last photo
Paso 4 // Step 4
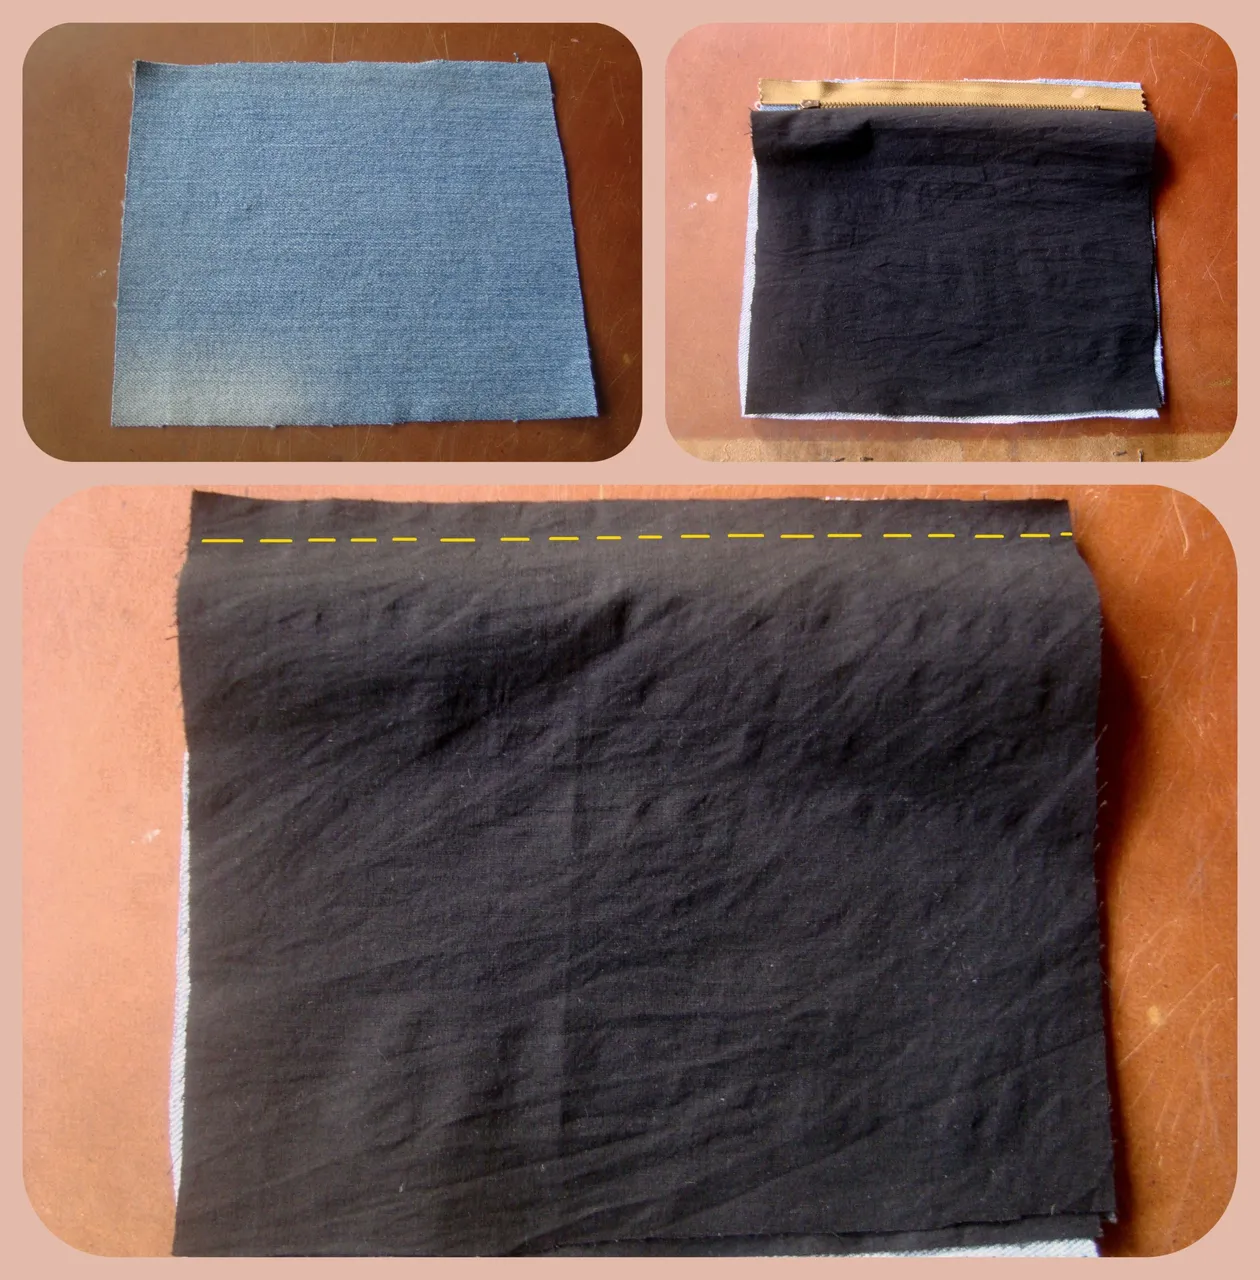
Ahora haremos lo mismo que en el paso anterior, solo que del otro lado. Tela viendo hacia nosotros, cremallera boca abajo, encima el forro y a coser.
Now we will do the same as in the previous step, only on the other side. Fabric facing us, zipper upside down, the lining on top and to be sewn.
Al terminar, se verá así:
When finished, it will look like this:
Paso 5 // Step 5
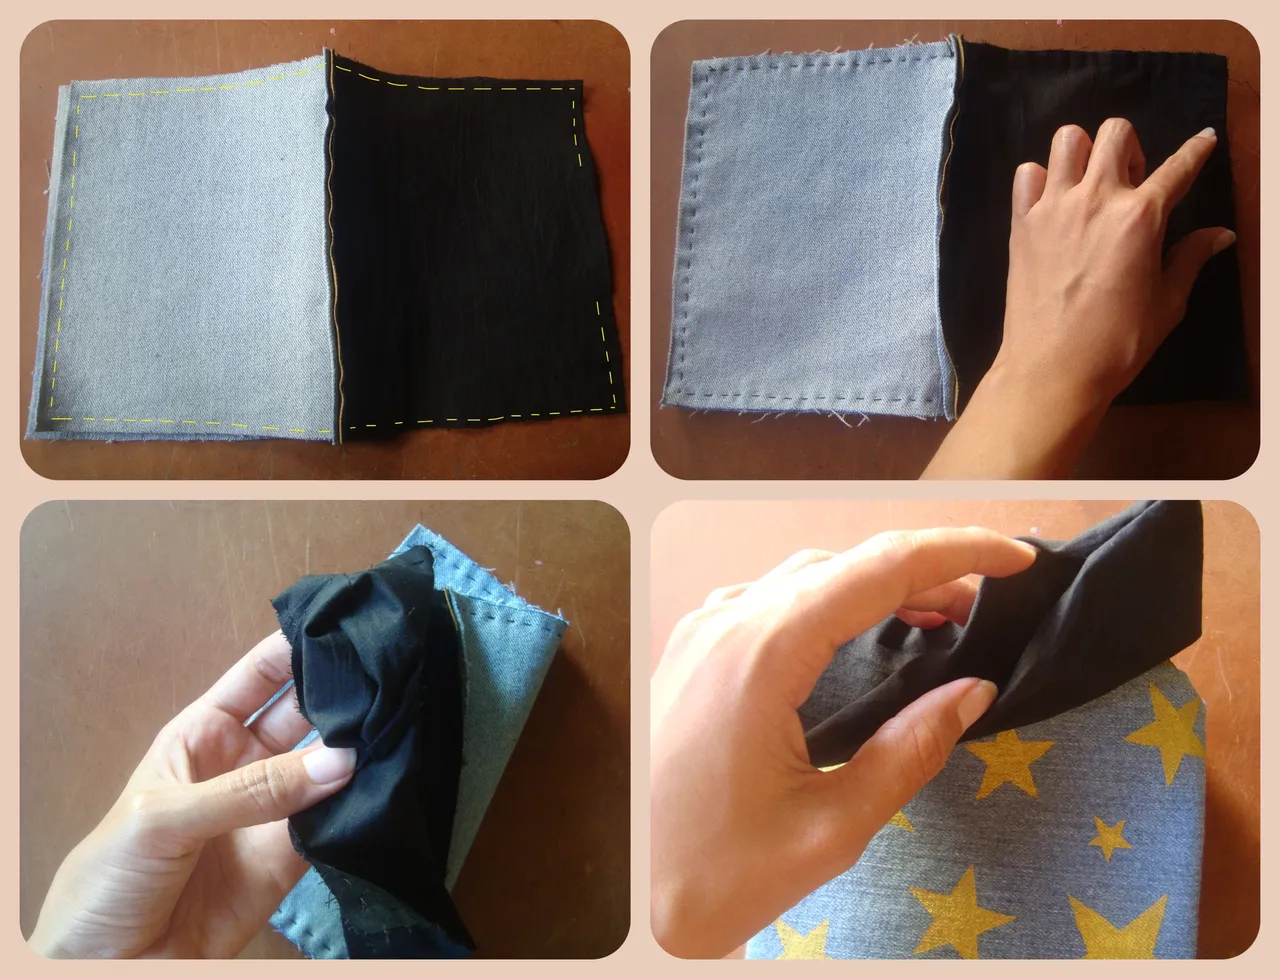
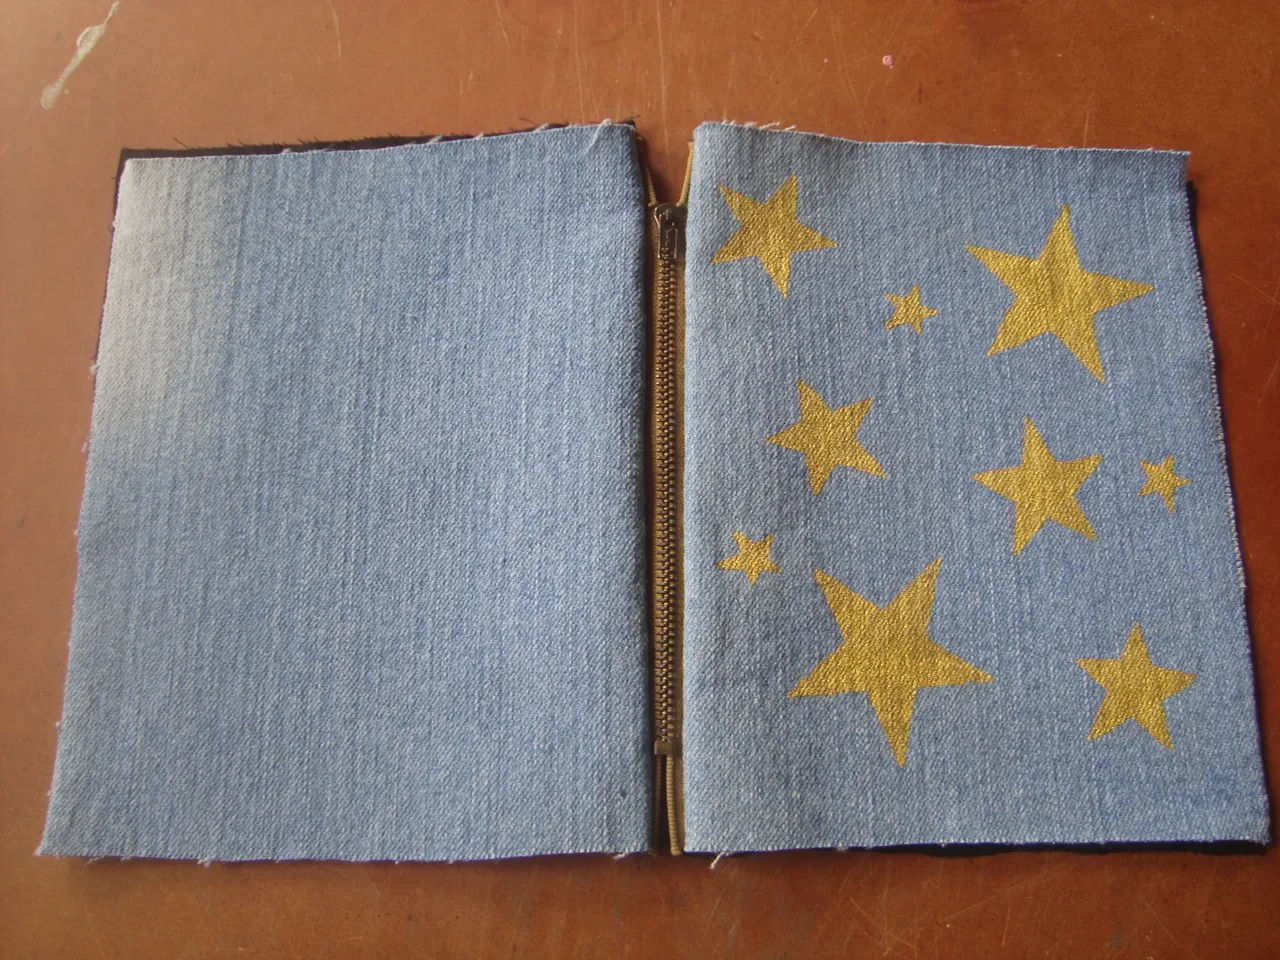
Solo queda juntar las 2 piezas externas y las 2 internas. Cosemos como se ve en las imágenes, dejando unos 7cm de abertura y con mucho cuidado pasamos la bolsa por allí para darle la vuelta. Finalmente, cerramos, ¡y listo!
It only remains to put together the 2 external pieces and the 2 internal ones. We sew as seen in the images, leaving about 7cm of opening and very carefully we pass the bag there to turn it over. Finally, we close, and voila!
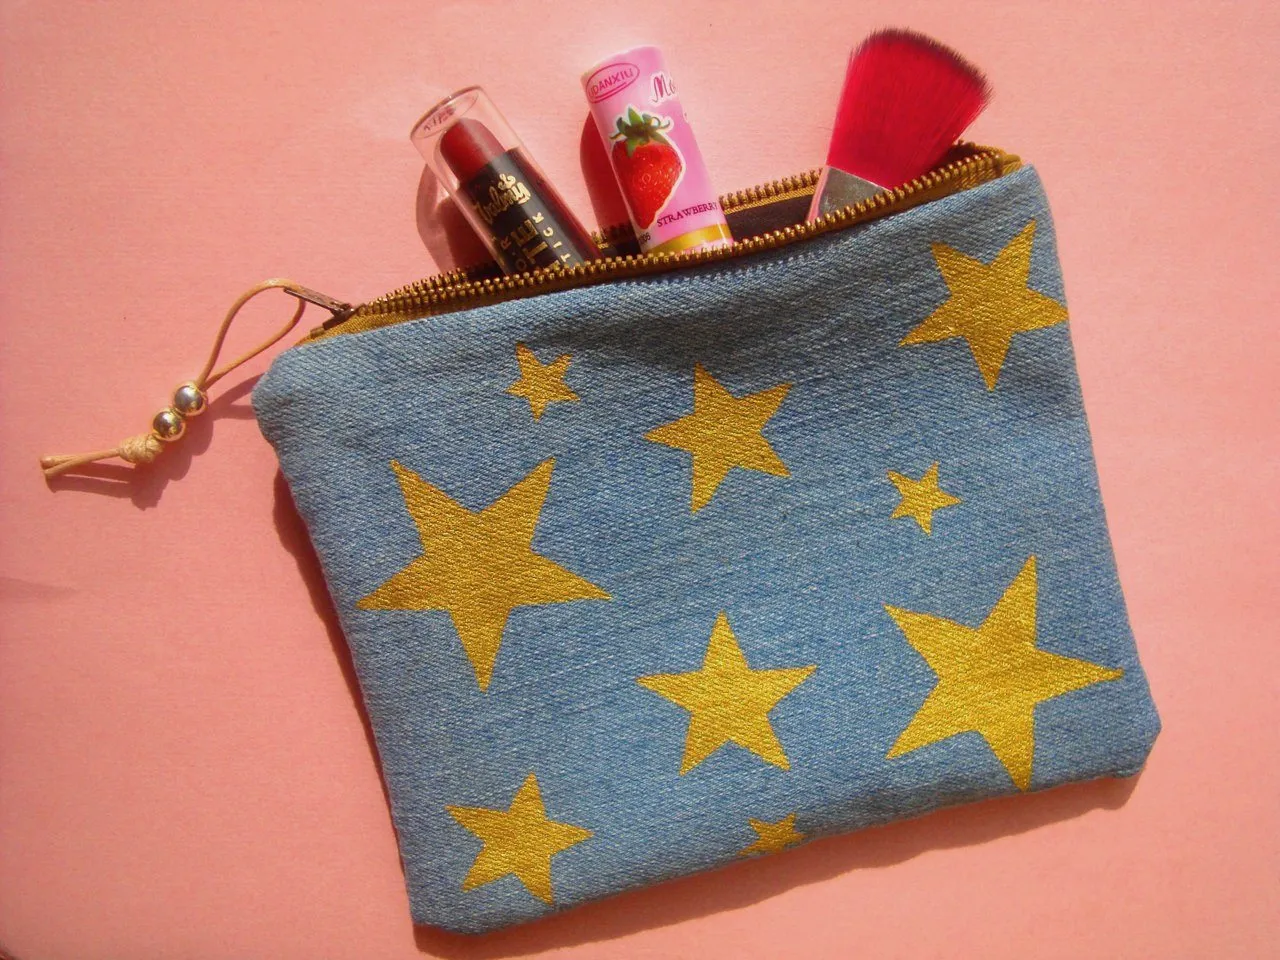
Amé el resultado y lo práctico que es. Puedes usarlo para guardar tu maquillaje, dinero, tu teléfono o cualquier cosa que quieras. Incluso puedes hacer de varios tamaños, formas, estampados u otro tipo de telas,solo hay que atreverse ✨
Espero les haya gustado este diy, lo hice con mucho cariño para ustedes. <3 :)
I loved the result and how practical it is. You can use it to store your makeup, money, your phone, or anything you want. You can even make various sizes, shapes, prints, or other types of fabrics, you just have to dare.✨
I hope you liked this DIY, I did it with a lot of love for you.<3 :)