¡Un placer saludarles, amigos!
A pleasure to greet you, friends!
Hola amigas muchas veces les he comentado que me encantan tejer y disfruto esta manualidad al máximo, en estos días estaba algo ansiosa porque el internet ha sido el gran ausente, la señal está verdaderamente caótica. Resulta que agarre una de mis blusas para embellecerla con un apliqué que tejí especialmente con este propósito.
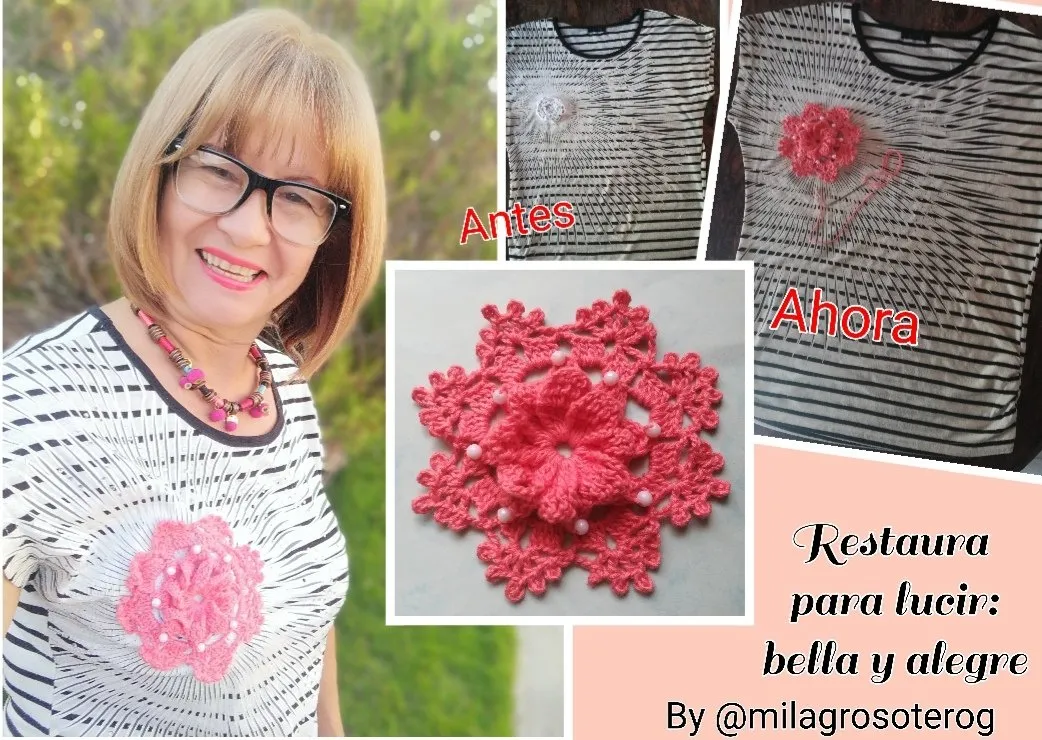
Hello friends I have told you many times that I love knitting and I enjoy this craft to the fullest, these days I was somewhat anxious because the internet has been the great absentee, the signal is truly chaotic. It turns out that I grabbed one of my blouses to embellish it with an appliqué that I knitted especially for this purpose.
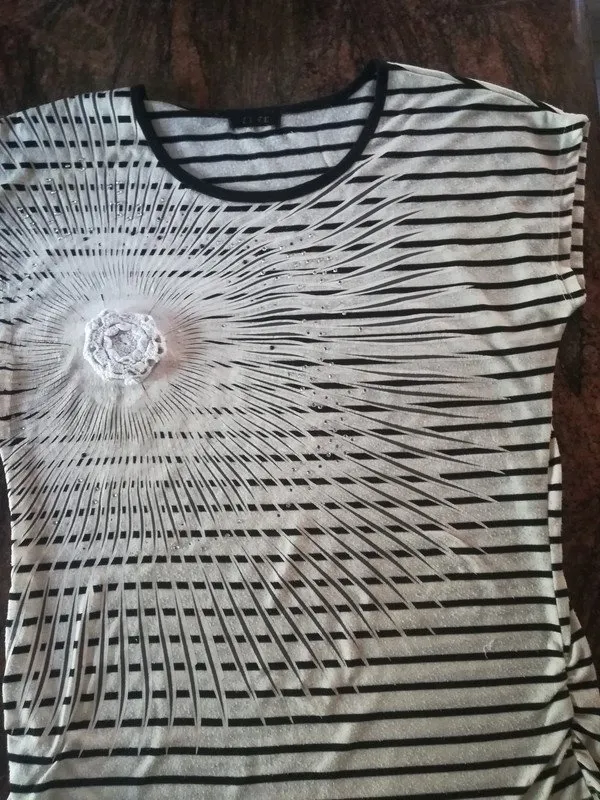
La idea de restaurar se me ocurrió porque en los últimos años los venezolanos hemos hecho verdadero alarde con nuestra creatividad, buscando alternativas para renovar nuestro vestuario. Esta franela originalmente tenía un diseño muy lindo pero con el pasar del tiempo la pintura ha perdido su encanto al igual que la flor que la complementaba. Bueno les cuento que tomé acción y tejí una atractiva flor en color naranja, acá les enseñó el paso a paso del tejido a crochet y cómo logré esta pequeña pero preciosa transformación en mi prenda de vestir.
The idea of restoring occurred to me because in recent years, Venezuelans have made a real show of our creativity, looking for alternatives to renew our wardrobe. This flannel originally had a very cute design but over time the painting has lost its charm as well as the flower that complemented it. Well I tell you that I took action and knit an attractive flower in orange, here I showed you the step by step of crocheting and how I achieved this small but beautiful transformation in my garment.
Materiales // Materials
- Hilo anaranjado
- Aguja para tejer
- Aguja lanera (no indispensable)
- Orange thread
- Knitting needle
- Wool needle (not essential)

Paso a paso // Step by Step
Aplique para una blusa // Applique for a blouse
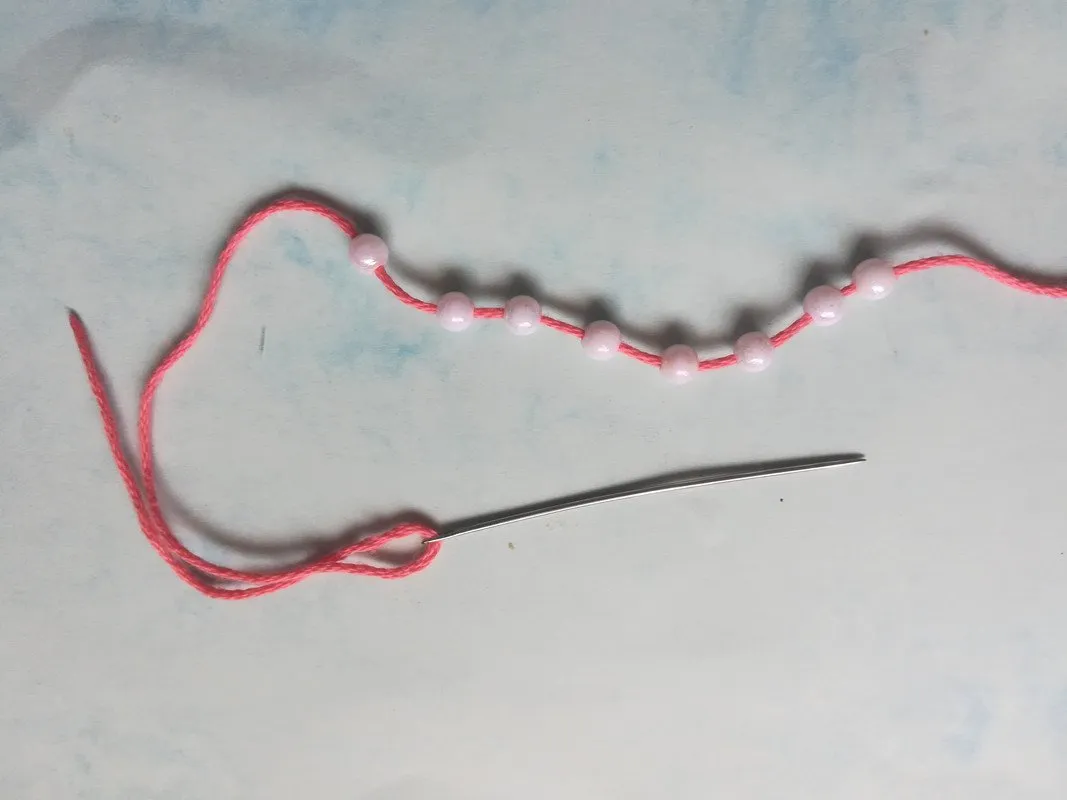
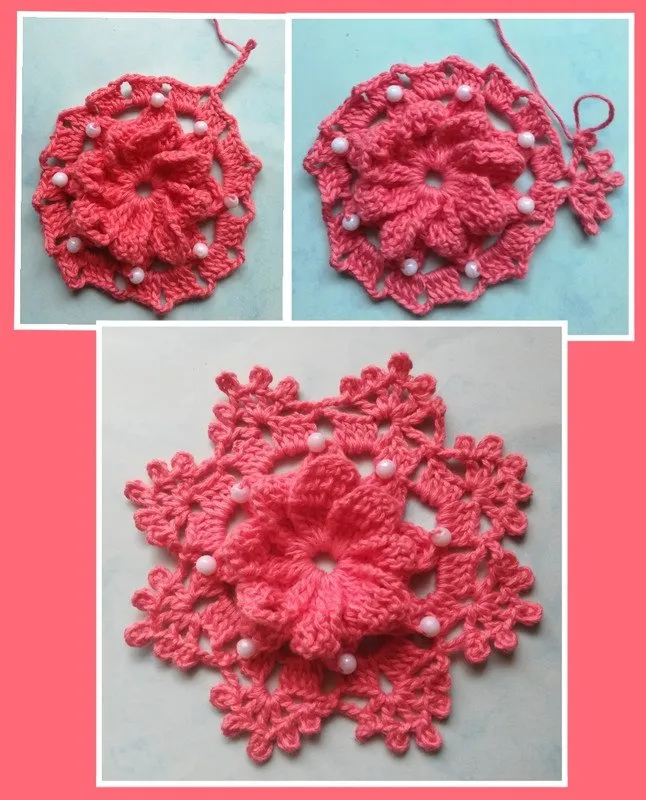
Empezaremos utilizando una aguja lanera incorporamos 8 perlas al hilo de tejer y las dejamos en reservas para su uso posterior.
We will start by using a wool needle, we will add 8 pearls to the knitting thread and we will leave them in reserves for later use.
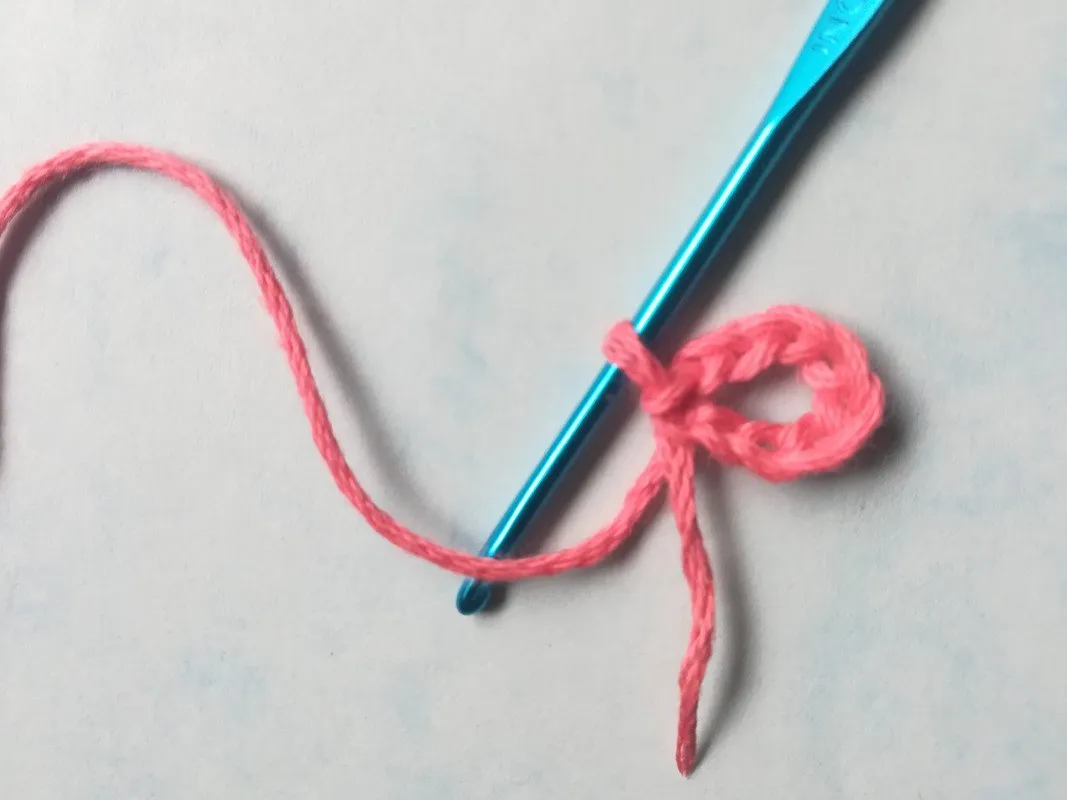
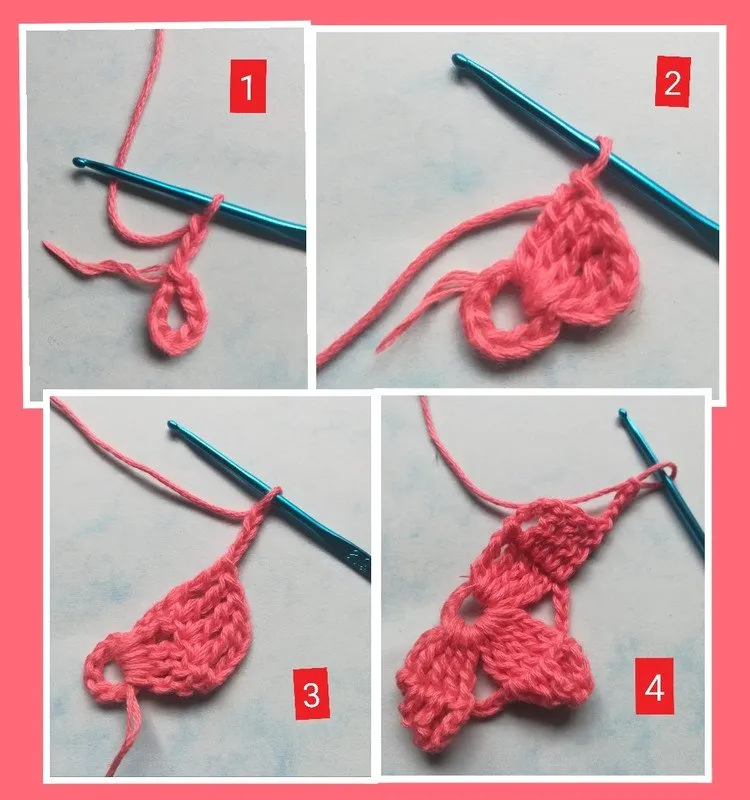
1° vuelta: Iniciamos montando 8 cadenas, cerramos el anillo introduciendo el canchillo en la primera cadena y hacemos un punto deslizado.
1st round: We start by mounting 8 chains, close the ring by inserting the bobbin in the first chain and make a slip stitch.
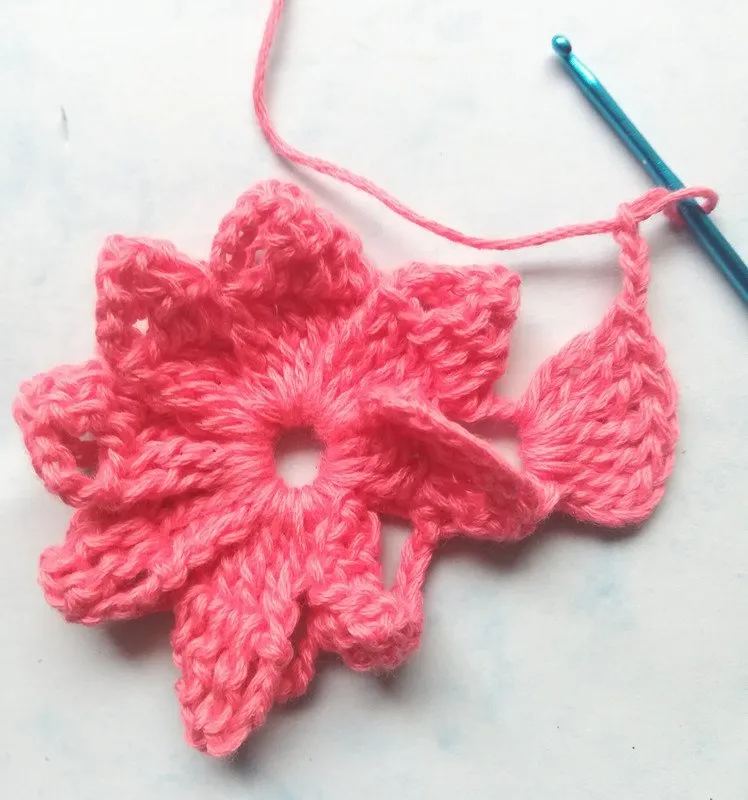
2° vuelta: Tejeremos el primer pétalo para lo cual levantaremos 4 cadenas, luego introduciendo la aguja por debajo de la anilla trabajaremos 4 puntos altos dobles y así completaremos 5 puntos altos dobles, ahora tejemos 4 cadenas y volteamos el tejido para tejer 4 puntos altos dobles sobre los puntos que habíamos efectuado. Así obtenemos 5 puntos dobles altos en la primera fila y 5 en la segunda fila, seguidamente tejemos 4 cadenas y volteamos nuevamente la labor bajando e insertando el ganchillo en la base para repetir la misma secuencia hasta obtener 8 pétalos. Al final haremos 4 cadenas y cerramos en la tercera cadena del inicio de esta vuelta.
2nd round: We will knit the first petal for which we will raise 4 chains, then inserting the needle under the ring we will work 4 double treble crochets and thus complete 5 double treble crochets, now we knit 4 chains and turn the fabric over to knit 4 double double crochets over the stitches that we had made. Thus we obtain 5 double double stitches in the first row and 5 in the second row, then we knit 4 chains and turn the piece again by lowering and inserting the crochet at the base to repeat the same sequence until we obtain 8 petals. At the end we will make 4 chains and close in the third chain from the beginning of this round.
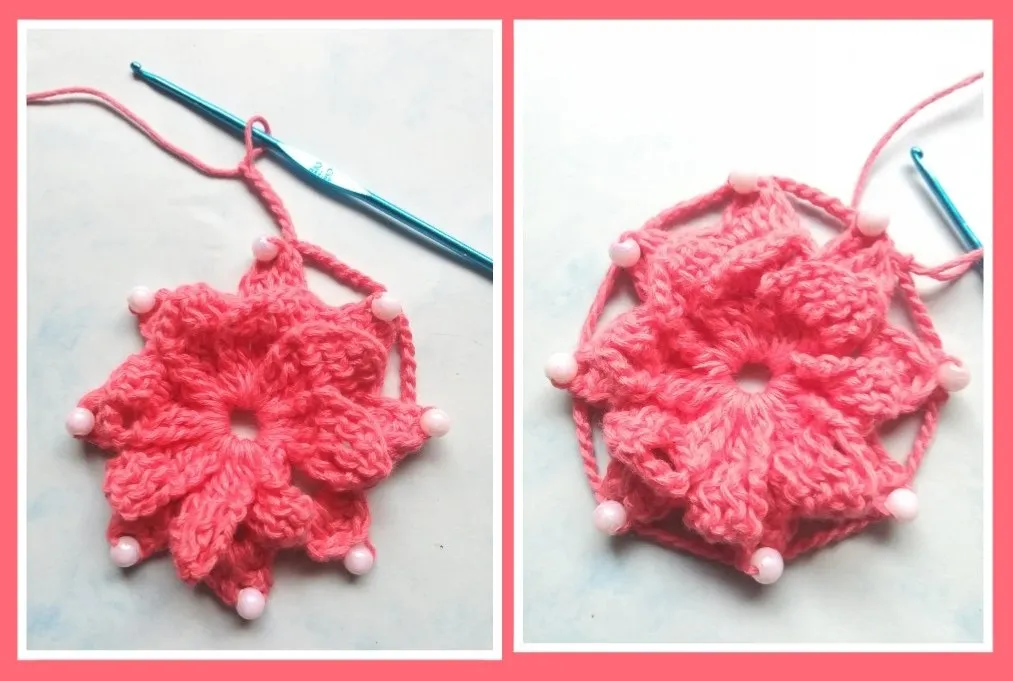
3° vuelta: Tejemos 2 cadenas y nos vamos a la enlazar en el espacio que está detrás del primer pétalo. Allí tejemos 2 cadenas, luego un punto alto y un punto alto doble en ese mismo espacio traemos una perla y la anudamos para continuar con un punto doble alto, seguido de un punto alto y luego un punto bajo, aquí terminamos y trabajamos 2 cadenas para irnos al espacio que está en la parte posterior del segundo pétalo y repetiremos el mismo patrón hasta completar 8 sépalos con una perla en el centro de cada uno.
3rd round: We knit 2 chains and we are going to link them in the space behind the first petal. There we knit 2 chains, then a double crochet and a double double crochet in that same space we bring a pearl and knot it to continue with a double high crochet, followed by a double crochet and then a single crochet, here we finish and work 2 chains to go to the space at the back of the second petal and repeat the same pattern until we complete 8 sepals with a pearl in the center of each one.
4° vuelta: A continuación haremos 7 cadenas y enlazamos en el vértice del primer pétalo (justo detrás de la perla), volvemos a tejer 7 cadenas para enganchar en la punta superior del siguiente pétalo. Finalizamos la ronda cerrando con un punto deslizado.
4th round: Next we will make 7 chains and we will link at the vertex of the first petal (just behind the pearl), we will weave 7 chains again to hook on the upper point of the next petal. We finish the round closing with a slip stitch.
5° vuelta: Levantamos 3 cadenas más 3 puntos altos, seguidos de 3 cadenas y nuevamente 4 puntos altos en el mismo espacio. Tejeremos 3 cadenas y avanzamos hacia el siguiente espacio de las 7 cadenas en donde repetiremos el mismo procedimiento hasta cerrar la vuelta con punto deslizado.
5th round: We pick up 3 chains plus 3 double crochets, followed by 3 chains and again 4 double crochets in the same space. We will knit 3 chains and move towards the next space of the 7 chains where we will repeat the same procedure until the round is closed with a slip stitch.
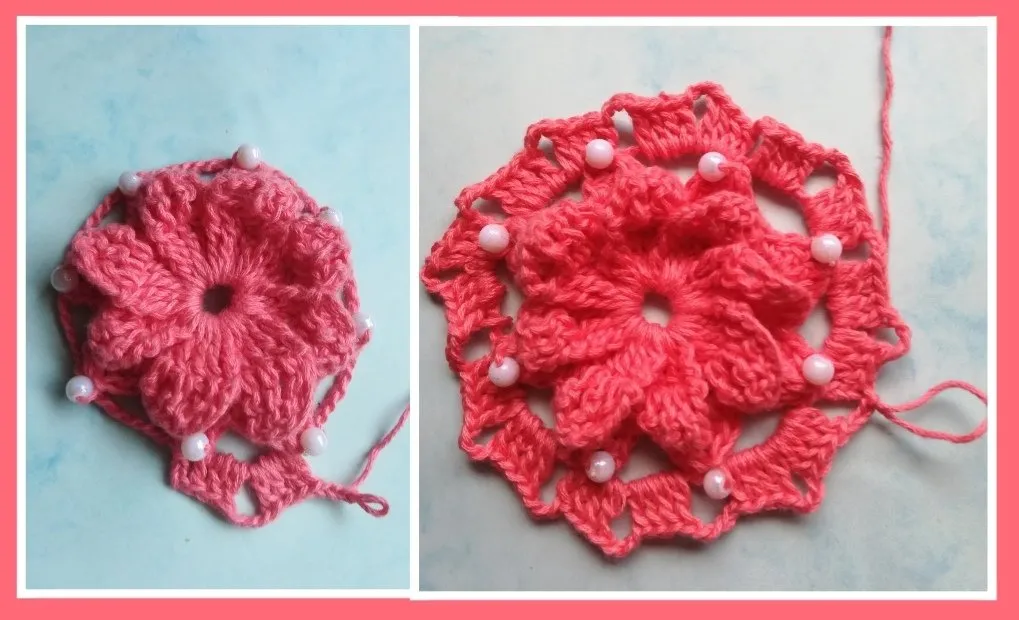
6° vuelta: En esta última ronda tejemos 3 cadenas y luego 4 cadenas para insertar el ganchillo en la tercera cadena del primer grupo para formar un picort, continuamos con una cadena e inmediatamente un punto alto, más 4 cadenas para formar un picort encima de ese punto alto. Debeos completar 5 puntos altos con picort. Seguidamente trabajamos 3 cadenas para posesionarnos en el siguiente espacio de la vuelta anterior, nuevamente 3 cadenas proseguir a la abertura siguiente y allí repetiremos 5 puntos altos con picort. Repetiremos este patrón al final cerramos con punto deslizado en el primer picort de la vuelta, anudamos y perdemos discretamente el hilo entre el motivo.
6th round: In this last round we knit 3 chains and then 4 chains to insert the crochet hook in the third chain of the first group to form a picort, we continue with a chain and immediately a double crochet , plus 4 chains to form a picort above that high point. You must complete 5 treble crochets with picort. Then we work 3 chains to get into the next space of the previous round, again 3 chains continue to the next opening and there we will repeat 5 treble crochets with picort. We will repeat this pattern at the end, we close with a slip stitch in the first picort of the round, knot and discreetly lose the thread between the motif.
Finalmente enhebramos del mismo hilo de tejer en una aguja de coser y con puntadas adaptaremos el aplique a la blusa.
Finally we thread the same knitting thread on a sewing needle and with stitches we will adapt the appliqué to the blouse.
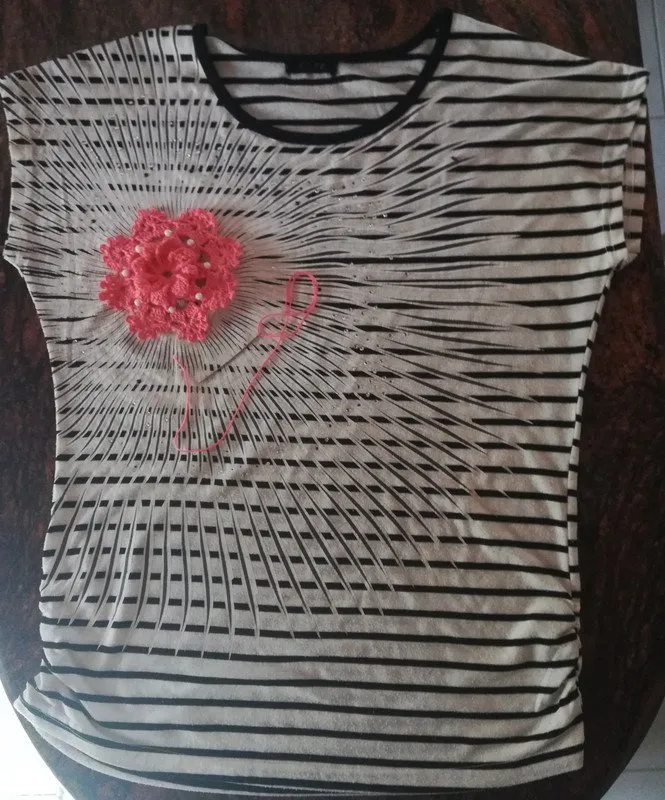
¡Mira que linda quedó mi blusa! // Look how beautiful my blouse was!

¡UN ABRAZO CARGADO DE BUENAS VIBRAS! // A HUG LOADED WITH GOOD VIBRES!
Fotos propias. Imágenes editadas por mí en FotoCollage.
Own photos. Images edited by me in FotoCollage.