Hola hermosos lectores el post de hoy va a tratarse de una de mis técnicas favoritas, la técnica Samurai⚔️. El paso a paso es tedioso, me tomo 4h hacerlo, más que todo por lo detallado que es este maquillaje, en otros post ya les había hablado de el y mi experiencia, pero esta vez es mucho más grande e intente traer cada paso que realice. Fue difícil, pero lo logré. Como siempre, espero les guste ♥️♥️
Hello beautiful readers, today's post is going to be about one of my favorite techniques, the Samurai⚔️ technique. The step by step is tedious, it took me 4h to do it, mostly because of how detailed this makeup is, in other post I had already told you about it and my experience, but this time it's much bigger and I tried to bring every step I did. It was difficult, but I did it. As always, I hope you like it ♥️♥️

PASO A PASO | STEP BY STEP

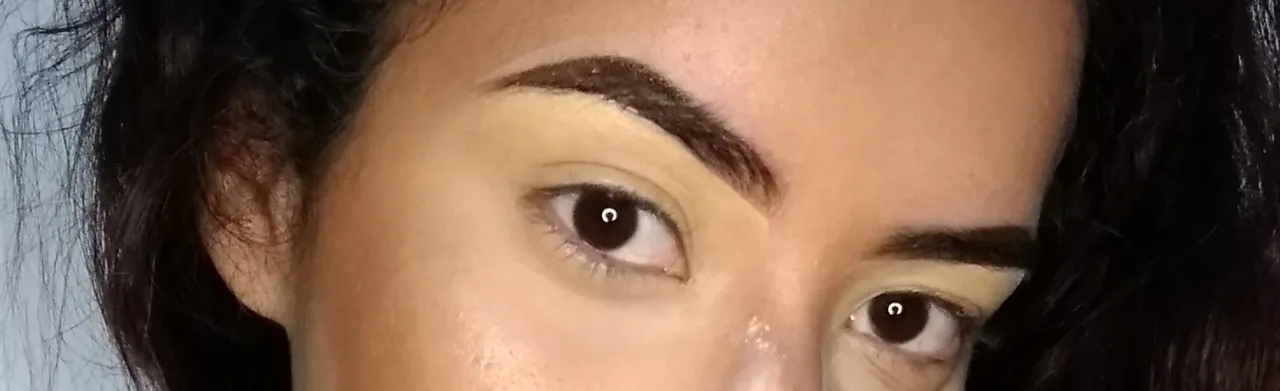
| Primero preparar el párpado con corrector y sellar con muy poco polvo traslúcido | First prepare the eyelid with concealer and seal with very little translucent powder |
|---|
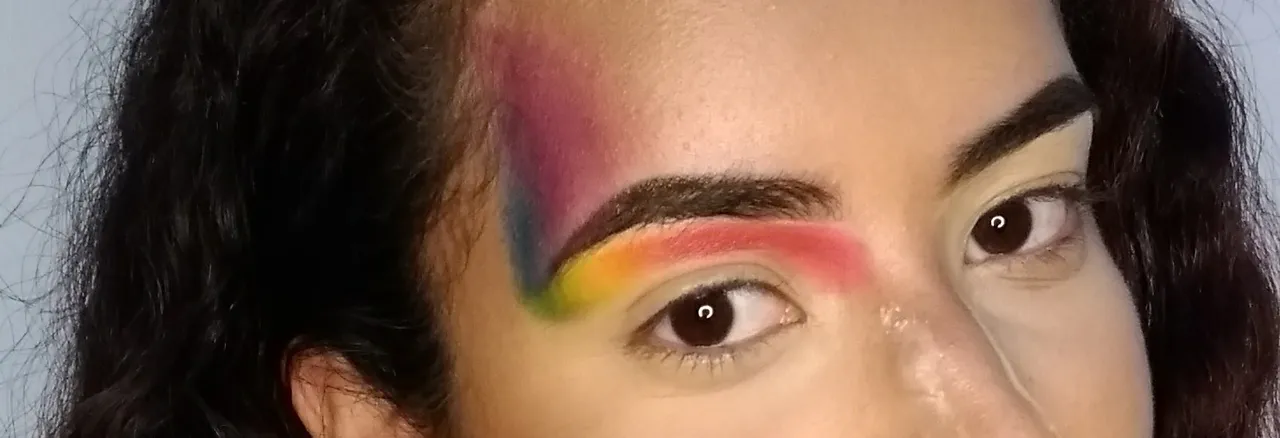
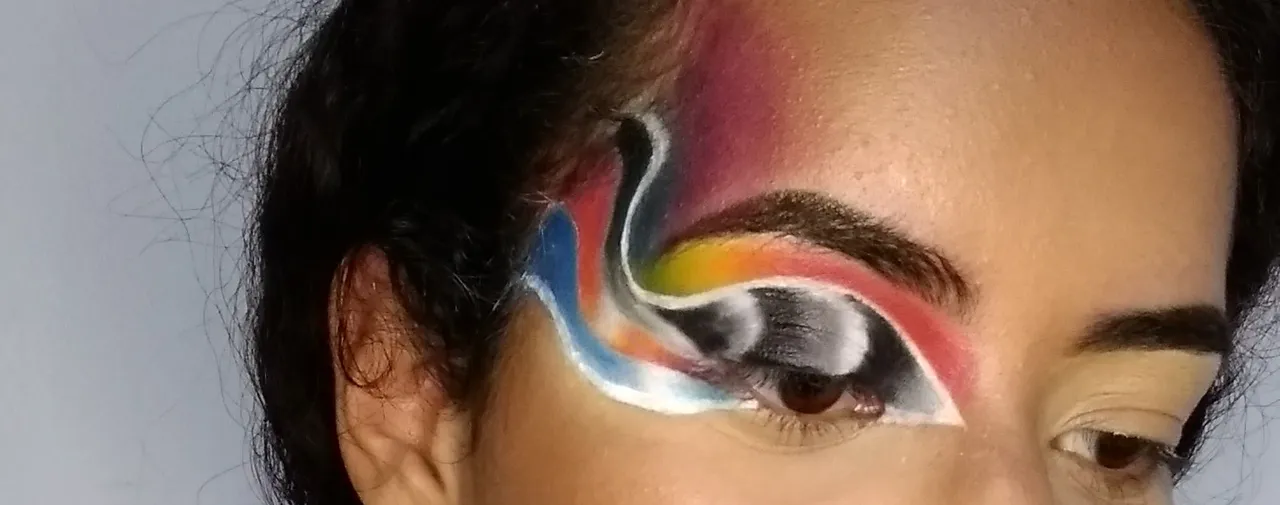
| Seguido, en dirección desde el lagrimal hasta el nacimiento de la ceja se colocará sombra rosada, roja, naranja, amarilla, verde, azul y finalizar con sombra morada bien difuminada | Next, in the direction from the tear trough to the eyebrow line, apply pink, red, orange, yellow, green, blue and finish with a well blended purple shadow. |
|---|
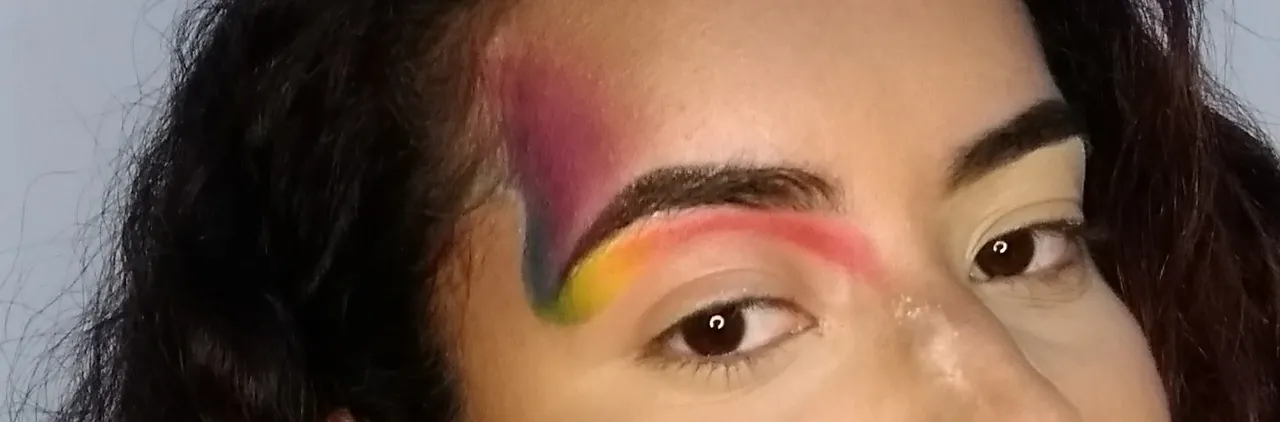
| Con el desmaquillante de tu preferencia y un poco de algodón daremos forma al corte y limpiaremos, esto es útil ya que cuando se aplique el corrector blanco este no se manche | With the make-up remover of your choice and some absorbent cotton we will shape the cut and clean it, this is useful because when applying the white concealer it will not stain. |
|---|
| Colocar corrector blanco y luego ir haciendo pequeños trazos con negro que estén en forma de degradé | Apply white concealer and then make small black strokes in the form of a gradient. |
|---|
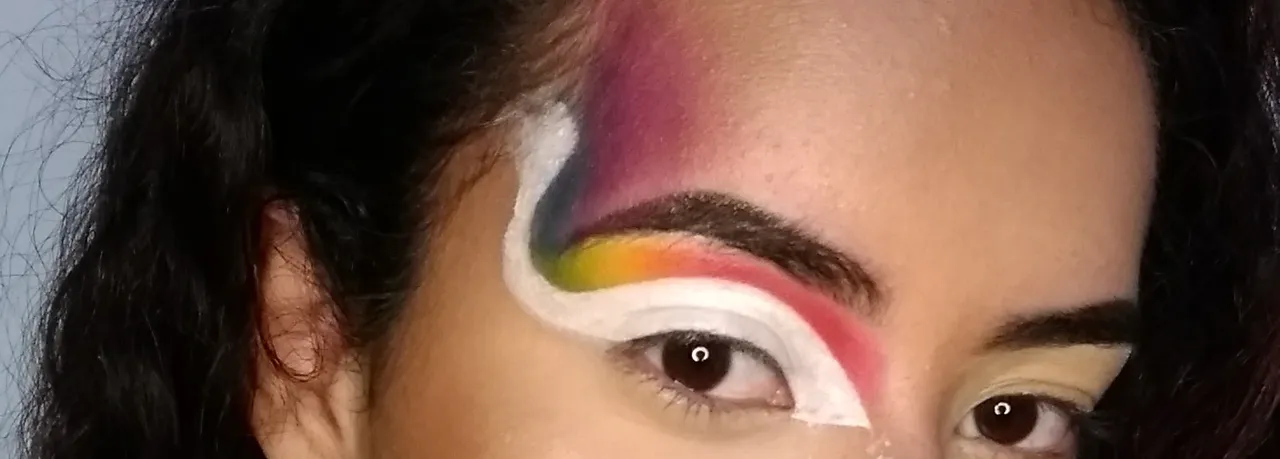
| En la zona blanca restante, también se hará un efecto degradado desde el nacimiento del cabello hasta donde termine la "v" externa del ojo | In the remaining white area, a gradient effect will also be made from the hairline to the end of the external "v" of the eye. |
|---|
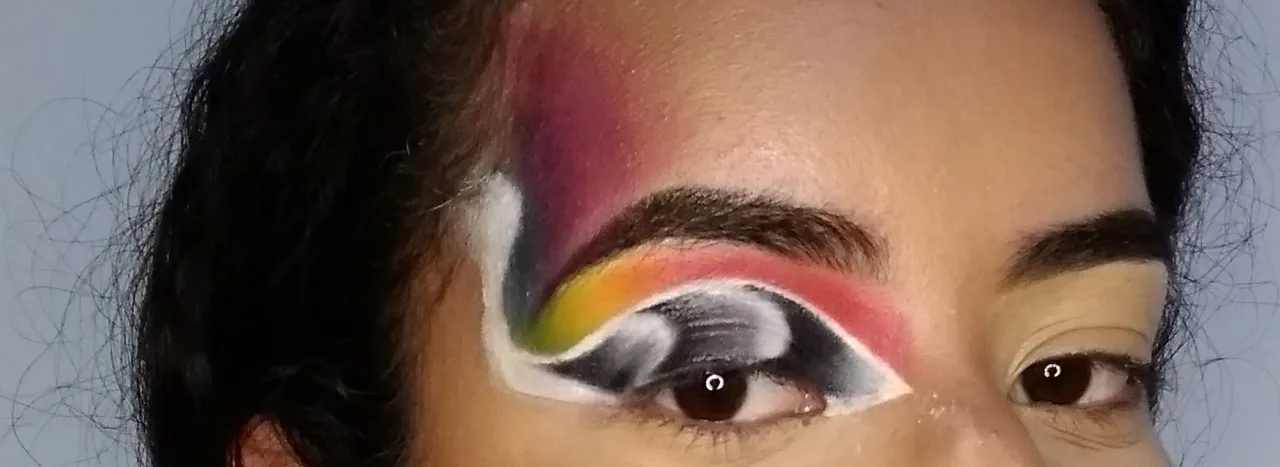
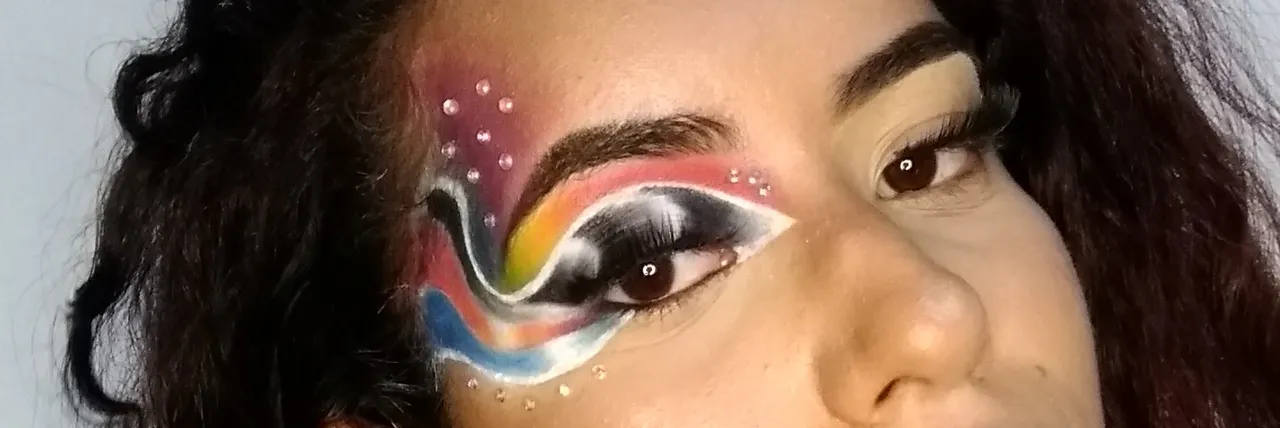
| Debajo de esa figura, se hará otra con efecto degrade pero dejando el espacio de la luz justo en el medio de ella, y la zona oscura en sus extremos | Below this figure, we will make another one with a degrade effect but leaving the light space right in the middle of it, and the dark area at its ends |
|---|
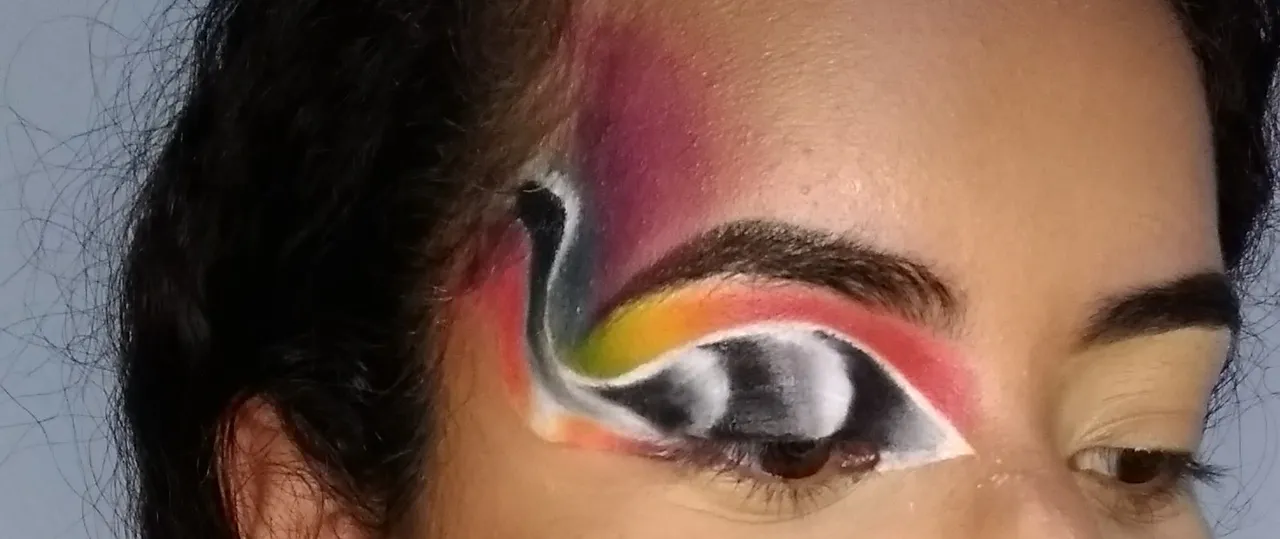
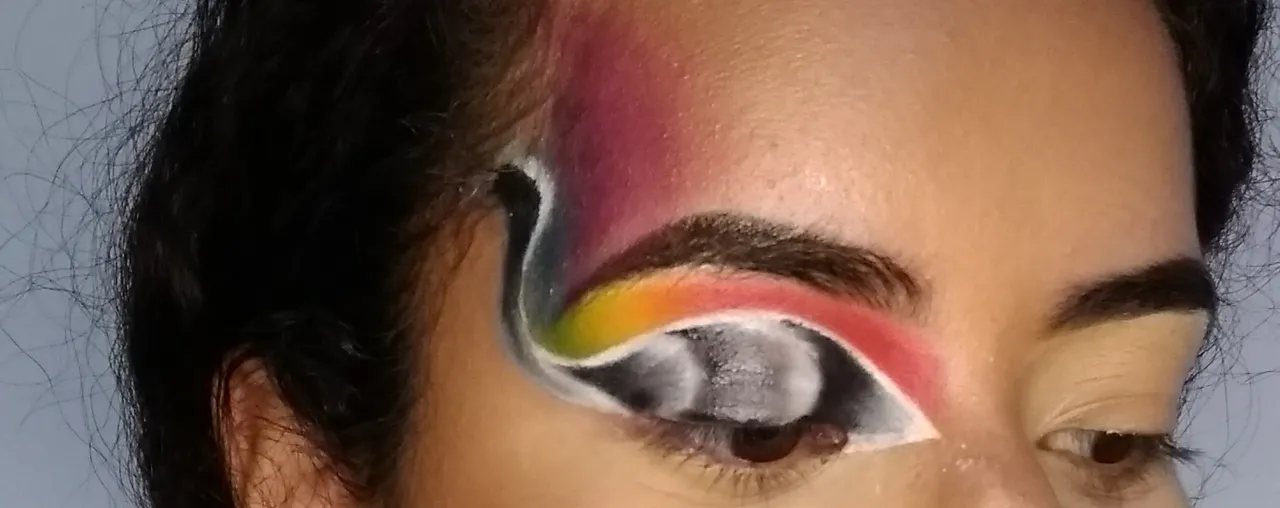
| Y debajo de esta, otra figura con la luz más hacia un extremo | And below this one, another figure with the light more towards one end. |
|---|
| Agrega algo de pedrería y pestañas postizas para finalizar | Add some rhinestones and false eyelashes to finish off the look |
|---|
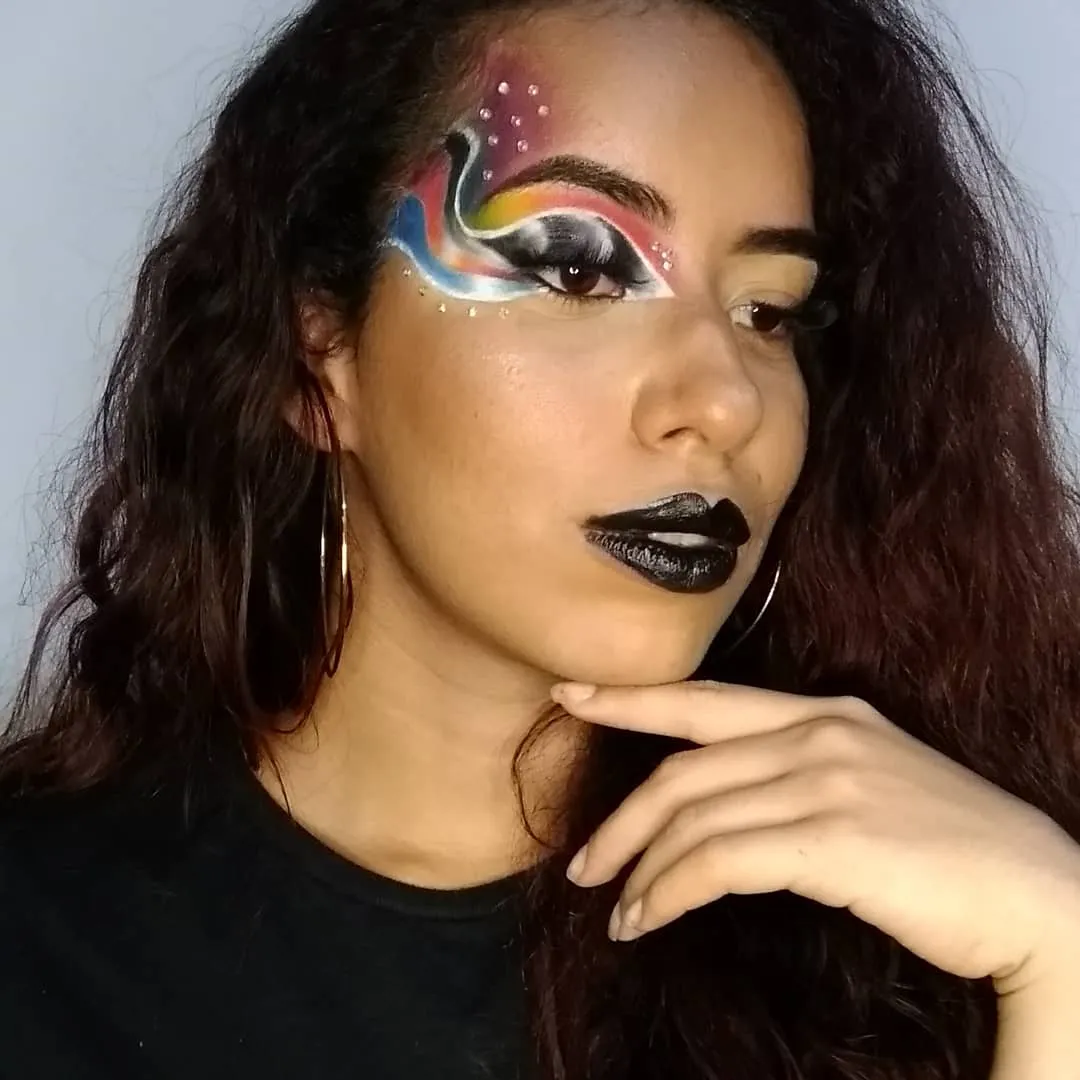
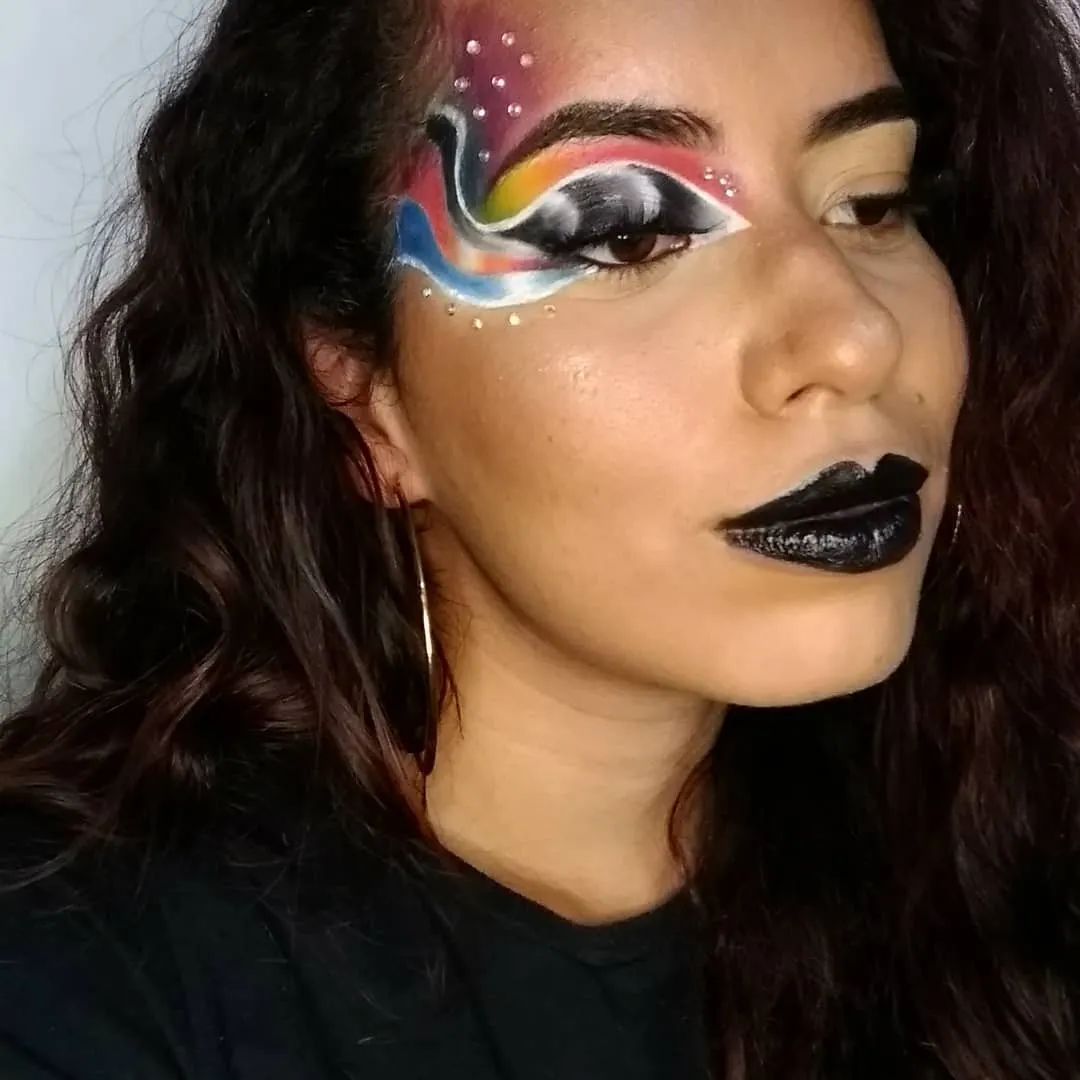
| Y listo, así es como queda | And that's it, this is how it looks like |
|---|---|
 |  |
Recuerden que nada es imposible, los límites los colocas tu♥️ nos vemos en un próximo post

Gifs made on Canva.com
Translator DeepL.com
Photos of my property until proven otherwise
Credits to whom it may concern