
¡Hola Chicos!
Tengo varios pasatiempos y me gusta dedicarle temporadas a cada uno de ellos. Me gusta pintar, dibujar, escribir, amo hacer manualidades, artesanías y tejer a crochet.
Pero no es que hago todo al mismo tiempo, le dedico días o semanas a una sola actividad para luego pasar con otra pero sin olvidarme de ellas.
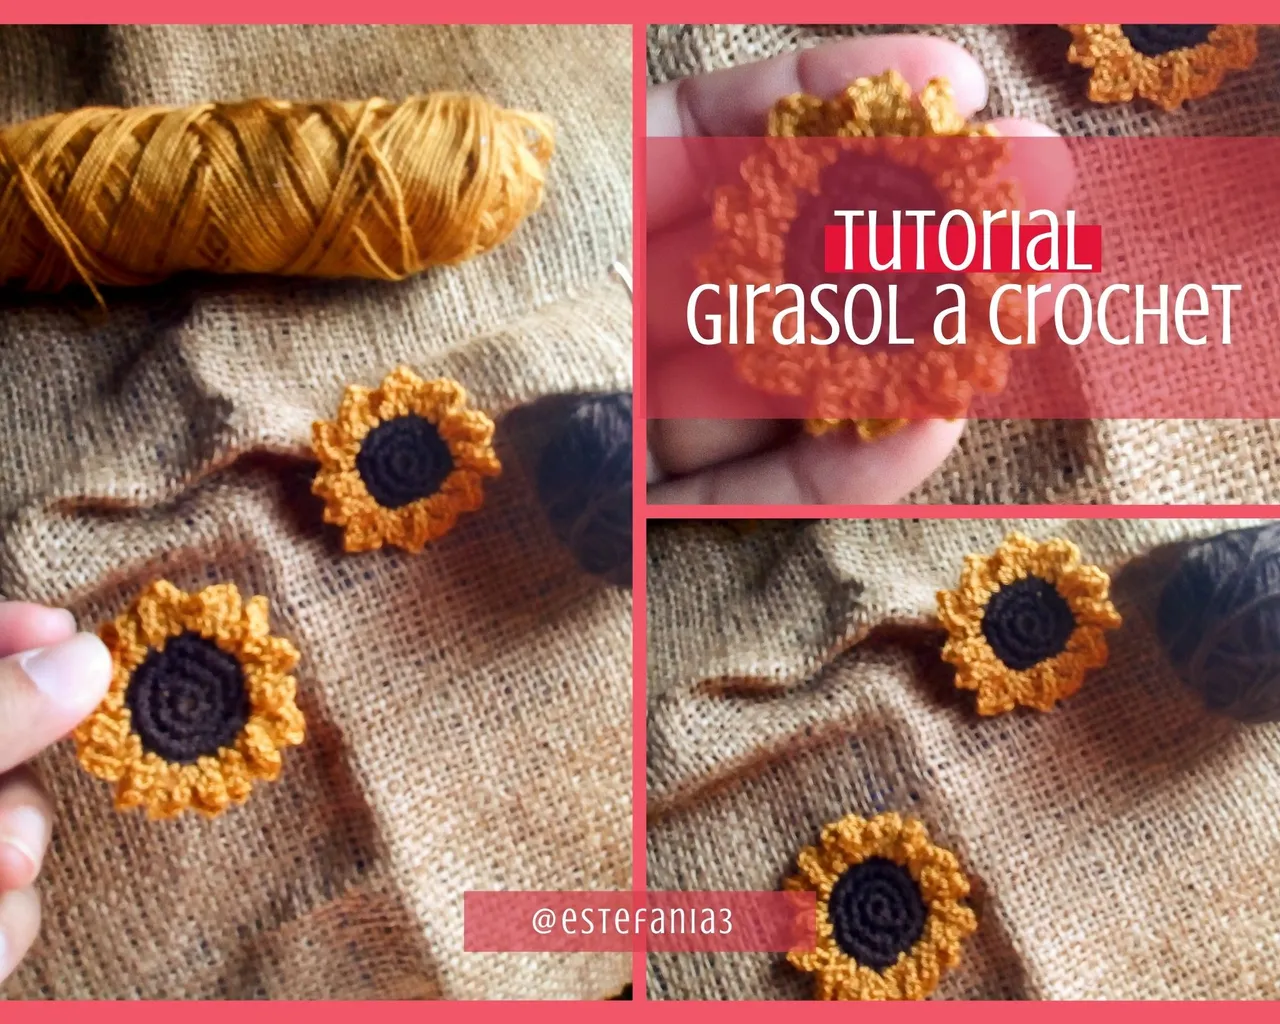
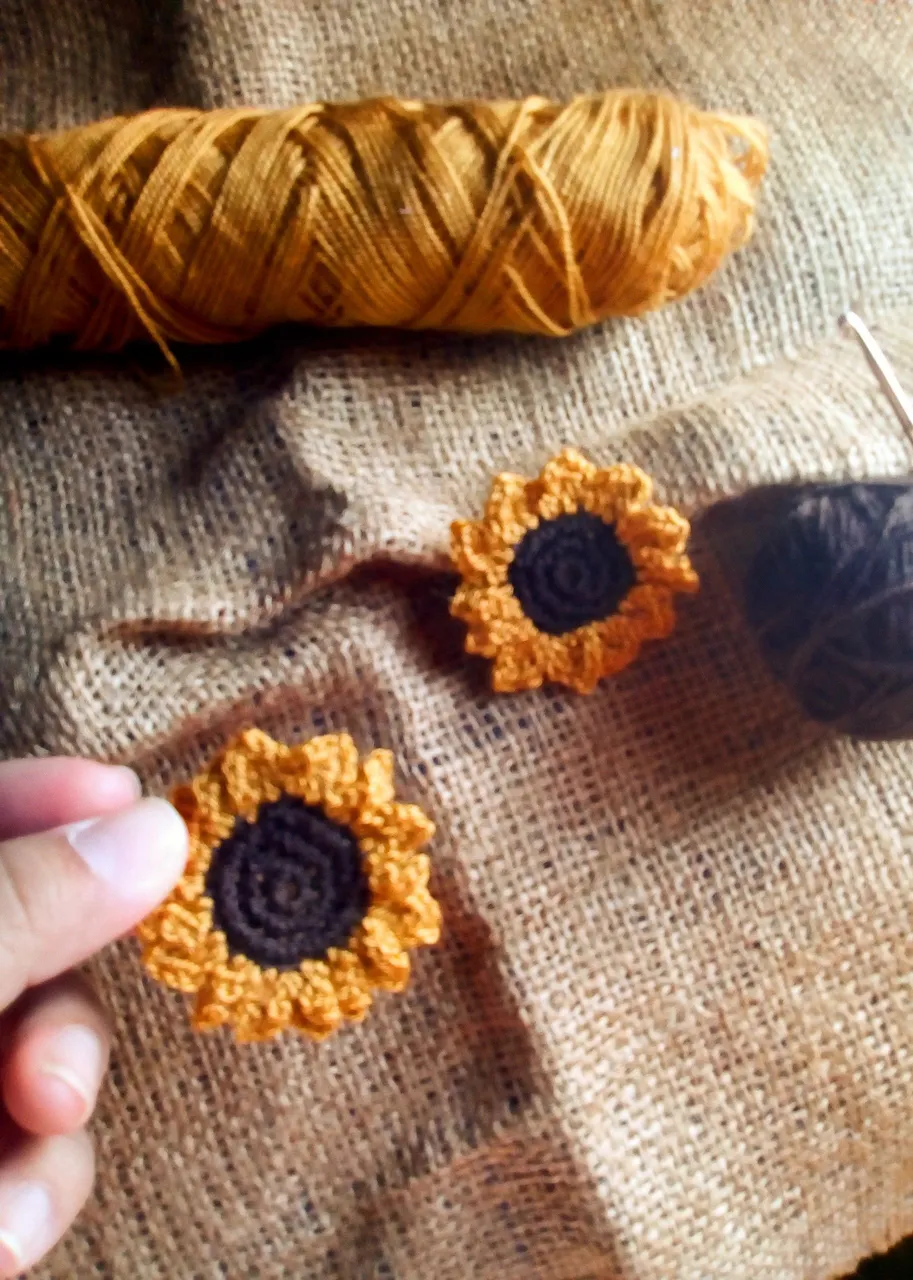
He vuelto nuevamente al crochet y quiero compartir con ustedes unos girasoles que estoy tejiendo para hacer una cinta floreada para una amiguita muy especial de mi hijo que pronto va a cumplir años y el motivo con el que quiere celebrarlo es "Girasoles" 🌻.
Son bien fáciles de hacer y puedes hacer con ellos un montón de cosas, dependiendo del tamaño que los hagas o que cantidad vayas a hacer.
Te cuento a continuación como iniciar con estos lindos girasoles. 😊
Hello Guys!
I have several hobbies and I like to dedicate seasons to each of them. I like to paint, draw, write, I love doing arts and crafts, and crocheting.
But it is not that I do everything at the same time, I dedicate days or weeks to a single activity and then move on to another but without forgetting them.
I have returned to crochet again and I want to share with you some sunflowers that I am knitting to make a flowered ribbon for a very special friend of my son who will soon have his birthday and the reason she wants to celebrate it is 'Sunflowers' 🌻.
They are very easy to make and you can do a lot of things with them, depending on the size you make them or how much you are going to make.
I will tell you below how to start with these beautiful sunflowers. 😊
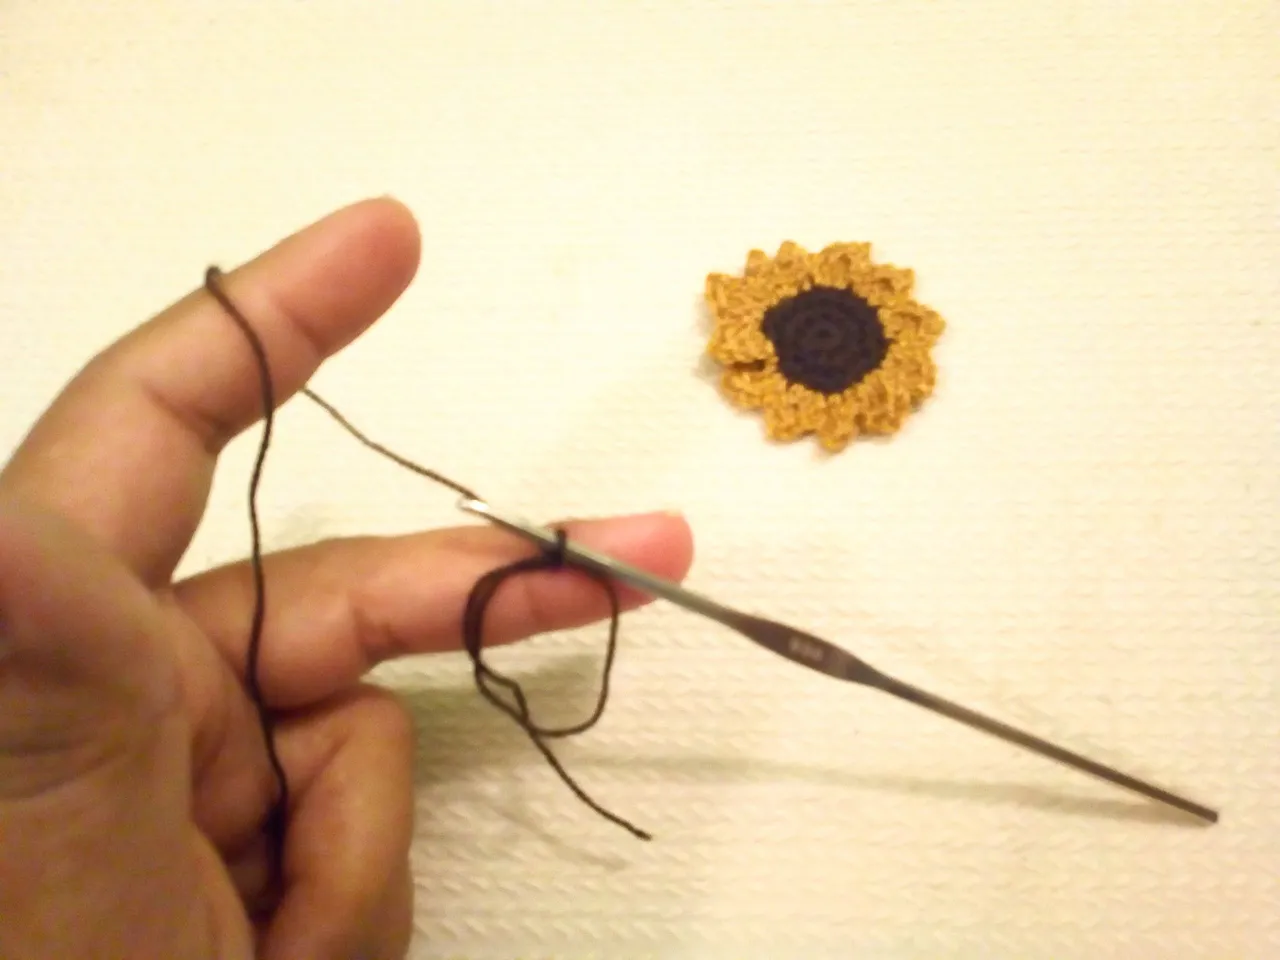
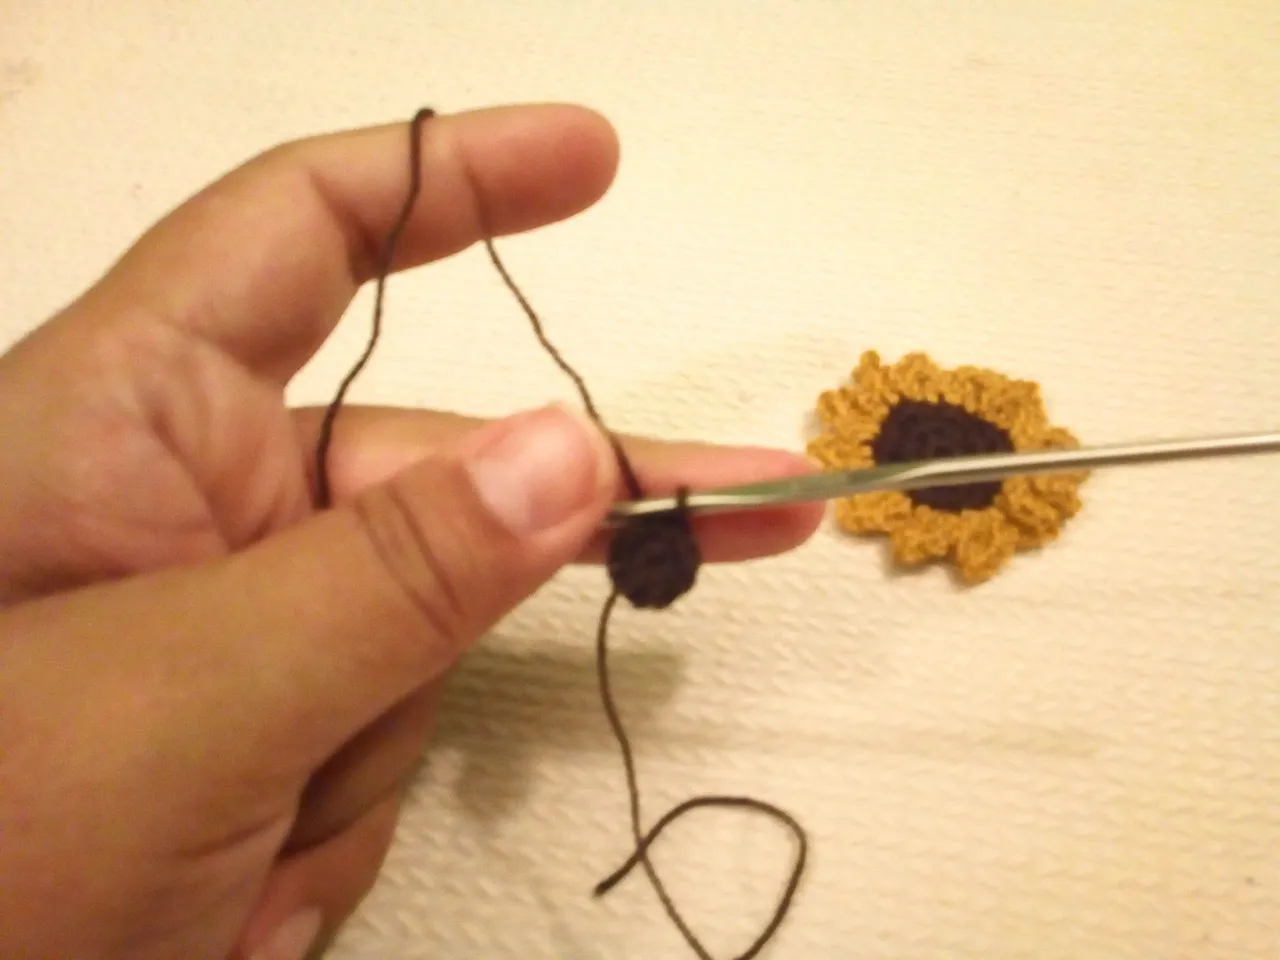
Primero vamos a hacer un anillo mágico, sobre el cual vamos a tejer 2 cadenetas para levantar la vuelta, 7 puntos bajos y finalizamos con un punto raso para cerrar la vuelta.
Yo he elegido un color marrón oscuro para el centro del girasol, pero si lo deseas puedes hacerlo de otro color y crear una flor totalmente distinta. 😊
First we are going to make a magic ring, on which we are going to knit 2 chains to lift the round, 7 single crochets and finish with a slip stitch to close the round.
I have chosen a dark brown color for the center of the sunflower, but if you wish you can make it in another color and create a totally different flower. 😊
Tejemos nuevamente dos cadenetas para levantar la vuelta y sobre ese mismo punto vamos a tejer un punto bajo. Continuamos la ronda tejiendo dos puntos bajos por cada uno de los puntos base, creando un total de 16 puntos bajos.
En la próxima vuelta vamos a elevar nuevamente con dos cadenetas y tejemos nuevamente 2 puntos bajos por cada punto de base.
Tendremos en total 32 puntos bajos, los cuales cerraremos con un punto raso. Así completamos el centro del girasol, puedes continuar haciendo aumentos hasta lograr el tamaño ideal, pero como esto será para una cinta, no es necesario hacerlo tan grande.
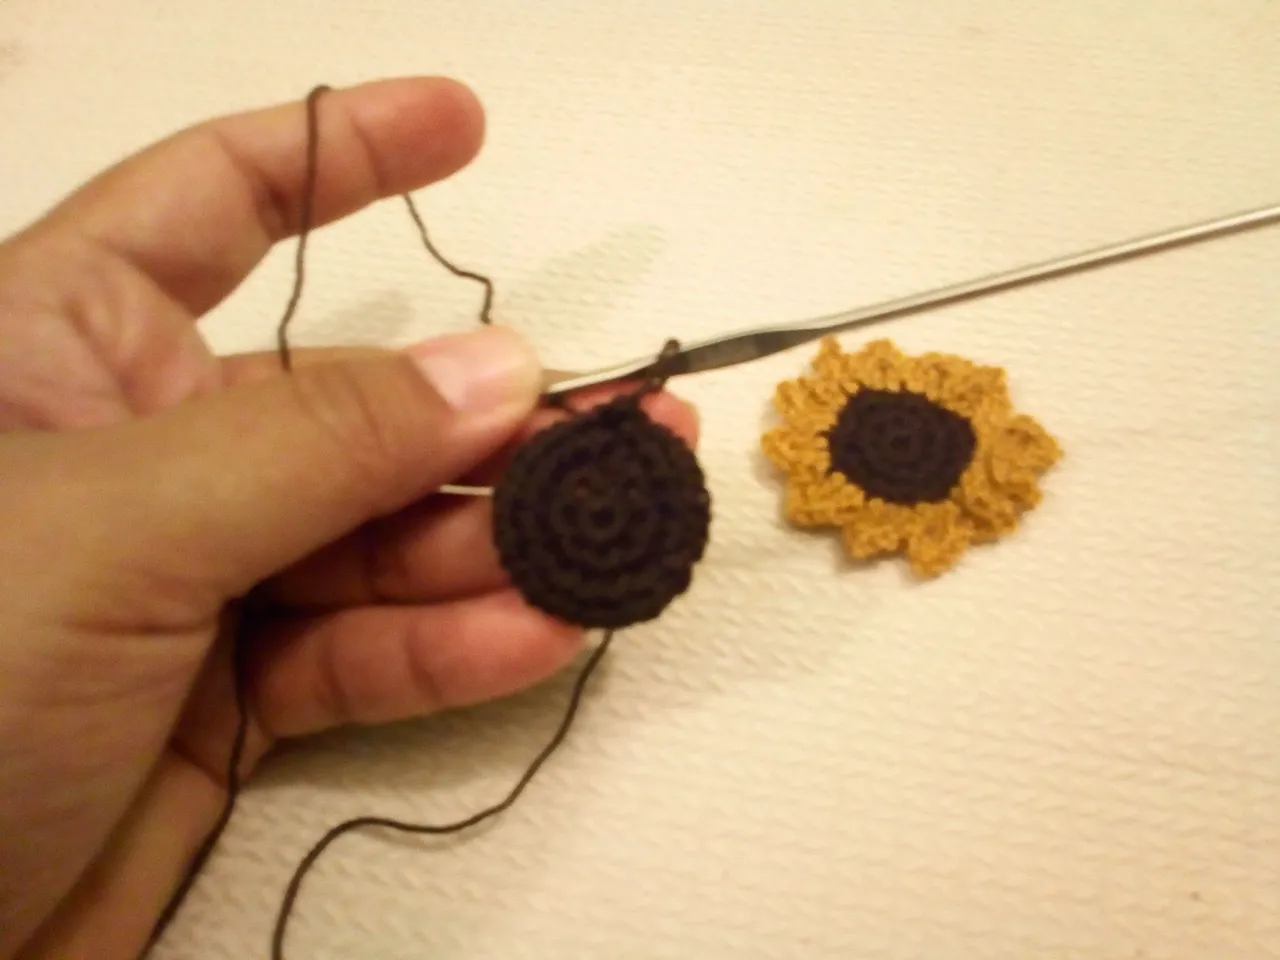
We work two chains again to lift the round and on that same point we are going to knit a single crochet. We continue the round by knitting two single crochets for each of the base stitches, creating a total of 16 single crochets.
On the next round we are going to raise again with two chains and we knit again 2 single crochets for each base stitch.
We will have a total of 32 single crochets, which we will close with a slip stitch. So we complete the center of the sunflower, you can continue making increases until you achieve the ideal size, but since this will be for a ribbon, it is not necessary to make it that large.
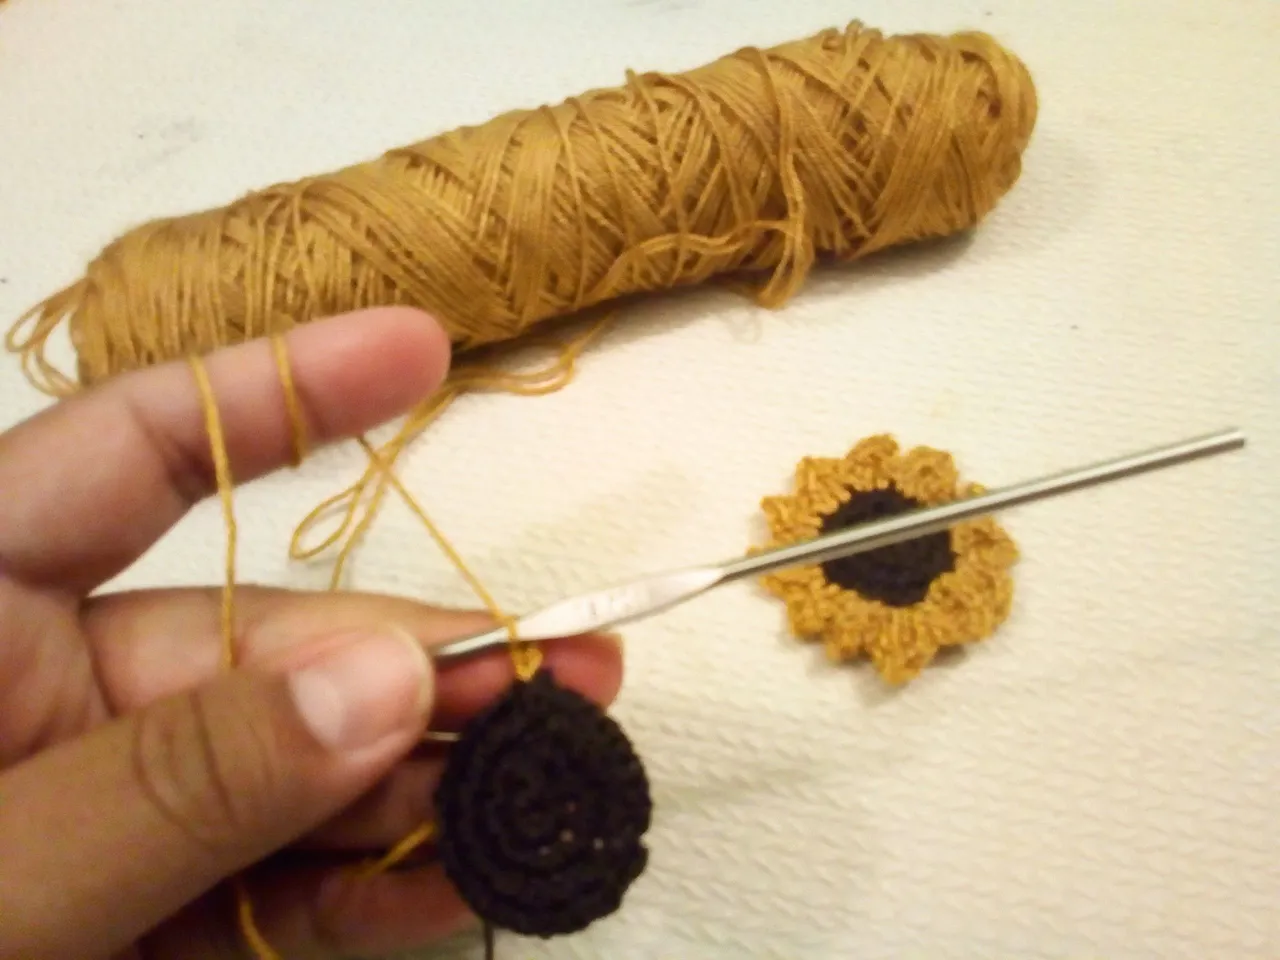
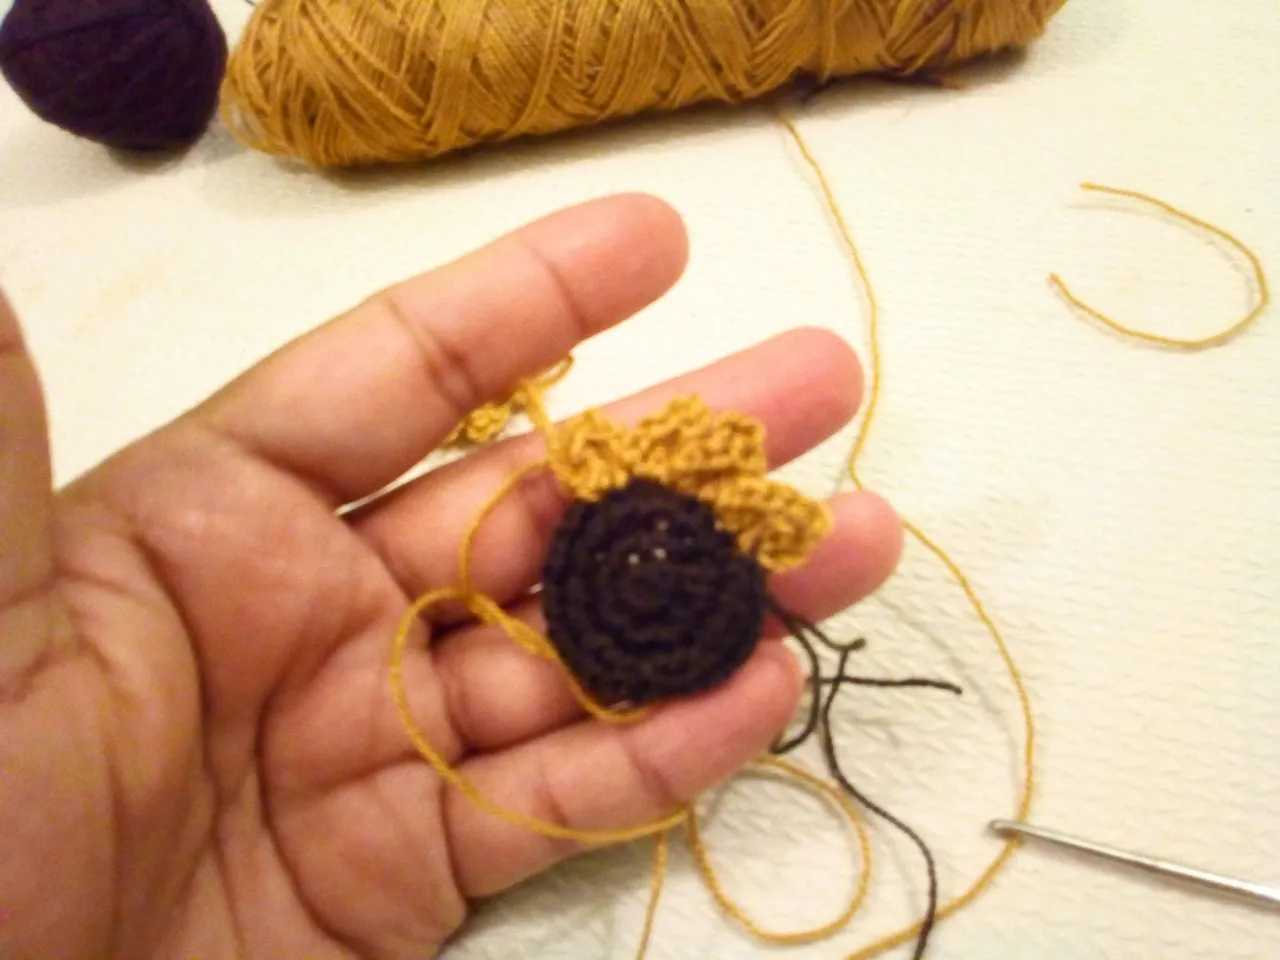
Ahora vamos con los pétalos del girasol, iniciamos con dos cadenetas, luego sobre el mismo punto tejemos un punto alto.
En la unión de las cadenas y del punto alto vamos a tejer un punto bajo, es decir que vamos a retroceder un punto para utilizarlo como base para nuestro punto bajo.
Esto nos ayudará a dar ese pequeño pico al pétalo. Luego en el siguiente punto tejemos un punto alto, luego dos cadenetas y sellamos con un punto raso sobre el mismo punto.
Para iniciar con un nuevo pétalo tejemos dos cadenetas y sobre el siguiente punto continuamos la misma secuencia hasta obtener 16 pétalos. Ocuparemos dos puntos de base para cada pétalo.

Now we go with the sunflower petals, we start with two chains, then on the same point we knit a double crochet.
At the union of the chains and the high crochet we are going to knit a single crochet, that is, we are going to move back a stitch to use as the basis for our single crochet.
This will help us to give that little peak to the petal. Then in the next stitch we work a double crochet, then two chains and seal with a slip stitch on the same stitch.
To start with a new petal we knit two chains and on the next stitch we continue the same sequence until we get 16 petals. We will occupy two base points for each petal.
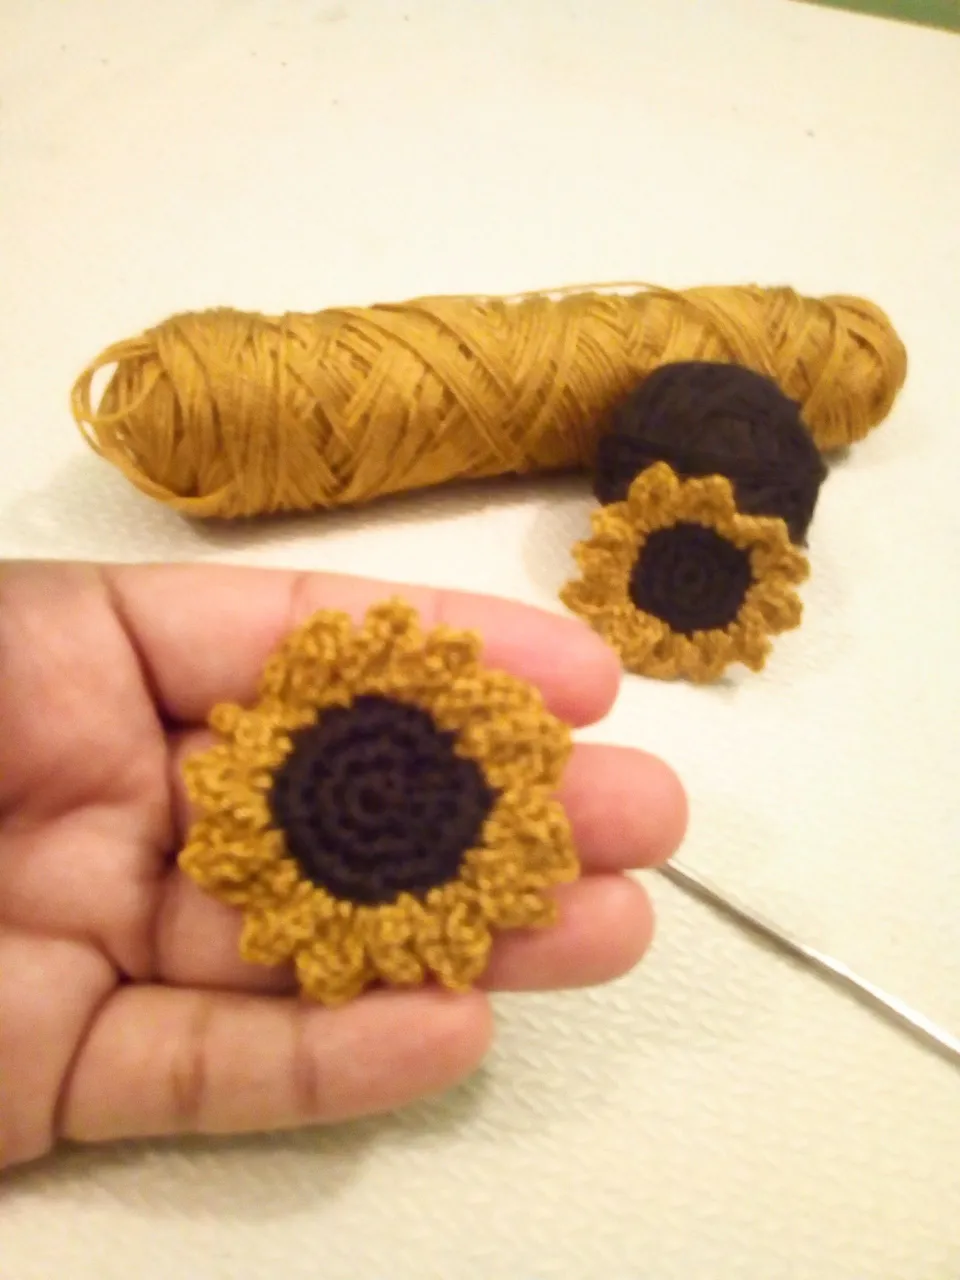
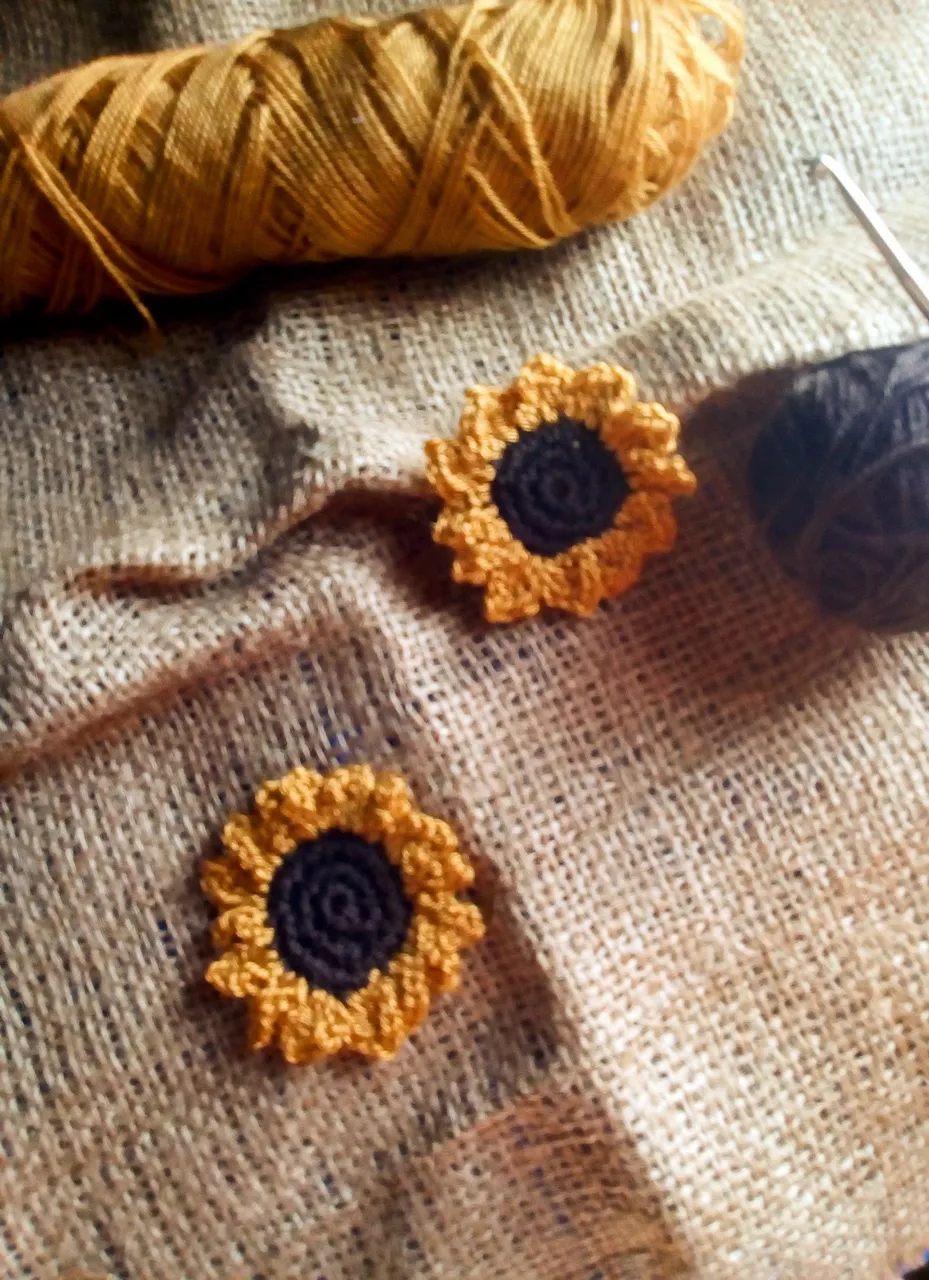
Para finalizar hacemos un punto raso y luego ocultamos los hilos en la parte posterior haciendo unos nudos y cortando el excedente.
Así iremos creando las flores que sean necesarios de acuerdo al proyecto que desees hacer.
Yo las amé y aunque no son del amarillo exacto de los girasoles, quedan bien lindos. Luego les enseñaré el armado de la cinta en un próximo post, espero les haya gustado la propuesta. 😊🌻
To finish we make a slip stitch and then we hide the threads in the back by making knots and cutting the excess.
So we will create the flowers that are necessary according to the project you want to do.
I loved them and although they are not the exact yellow of sunflowers, they are very beautiful. Then I will show you the assembly of the tape in a future post, I hope you liked the proposal. 😊🌻


Espero haya sido de tu agrado y provecho.
Un gran abrazo a todos, y nos leemos en un próximo post
• Lakrearte en Hive •
Att: Estefania Garcia ♥

Imágenes y separadores de mi autoría
Portada editada en Canva