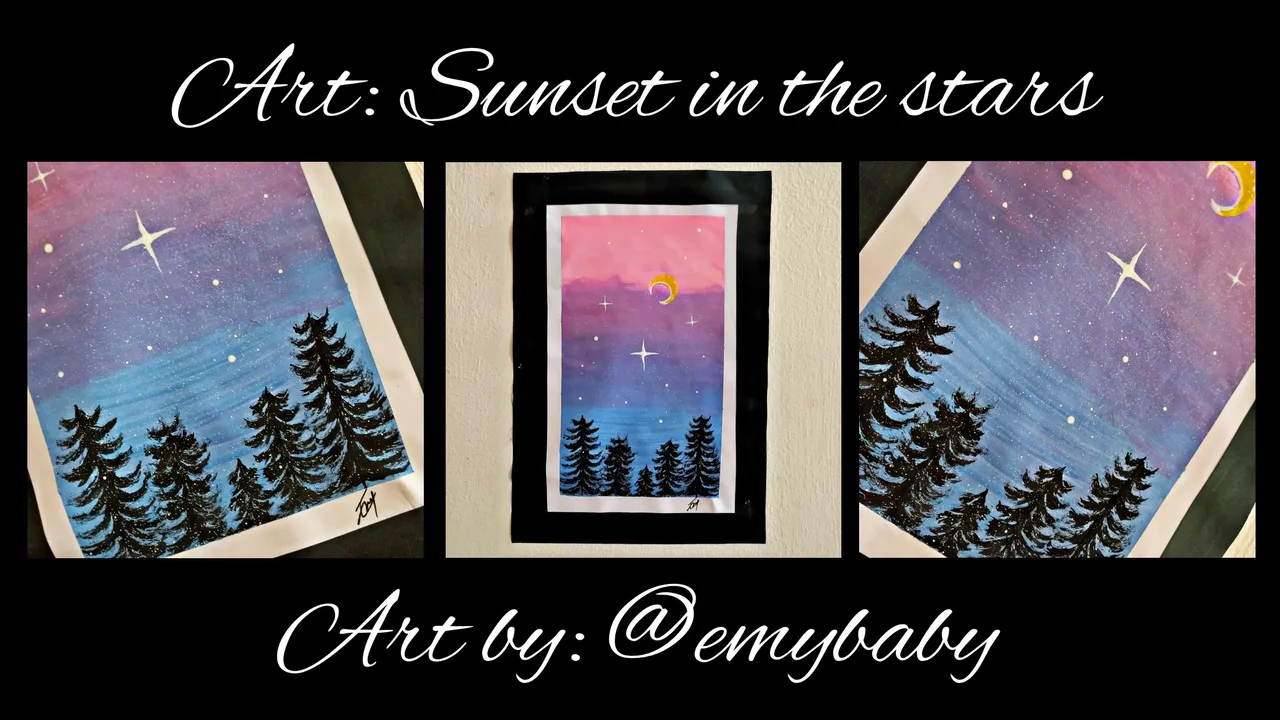

Hola amigos 🌌✨
Hoy vengo a enseñarles el paso a paso de esta pintura que realicé inspirada en un atardecer estrellado.
Los materiales que utilicé fueron:
- 1 hoja de papel
- Pintura amarilla
- Pintura roja
- Pintura azul
- Pintura blanca
- Pintura negra
- Pincel grueso
- Pincel finito
- Lápiz
- Cartulina negra
- Silicón
- Tijera
- Adhesivo
Hello friends 🌌✨
Today I come to show you the step by step of this painting I made inspired by a starry sunset.
The materials I used were:
- 1 sheet of paper
- Yellow paint
- Red paint
- Blue paint
- White paint
- Black paint
- Thick brush
- Thin brush
- Pencil
- Black cardboard
- Silicone
- Scissors
- Adhesive
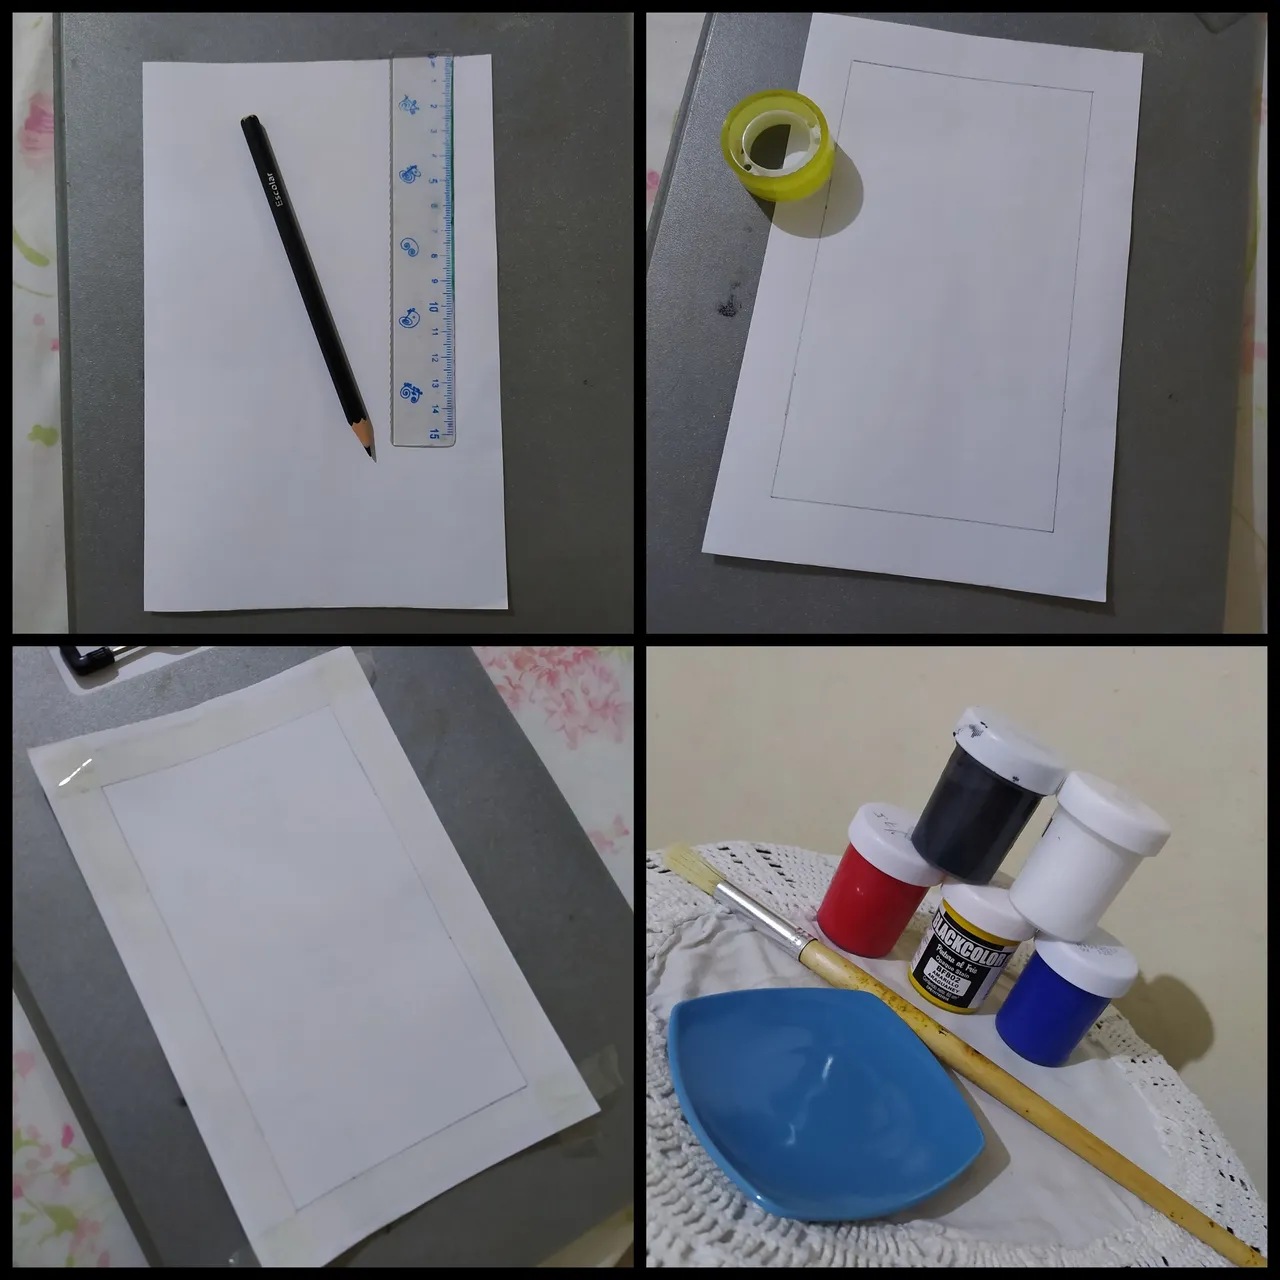
Lo primero que hice fue trazar un margen de 2 cm en cada lado de la hoja. Y preparé mis pinturas para mezclar los colores.
The first thing I did was to trace a 2 cm margin on each side of the sheet. And I prepared my paints to mix the colors.

Coloqué adhesivo en toda la linea trazada como margen.
Y para pintar el atardecer mezclé tres partes de pintura blanca con unas gotas de pintura roja. Porque quería un tono rosa muy claro.
Empecé pintando de arriba hacía abajo, para crear un efecto degradado en el lienzo. Y luego, a ese mismo tono rosa le agregué unas gotas de pintura azul.
I placed adhesive on the entire line drawn as a margin.
And to paint the sunset I mixed three parts of white paint with a few drops of red paint. Because I wanted a very light pink tone.
I started painting from top to bottom, to create a gradient effect on the canvas. And then, to that same pink tone I added a few drops of blue paint.

Al agregar las gotas de pintura azul, obtuve un color lila que empecé a agregar poco a poco de arriba hacía abajo de manera que al llegar al centro crear el degradado con ambos colores.
Cuando estaba totalmente seco, tracé el tallo de los pinos con el lápiz.
When I added the drops of blue paint, I obtained a lilac color that I started to add little by little from top to bottom so that when I reached the center I created the gradient with both colors.
When it was completely dry, I traced the stem of the pine trees with the pencil.
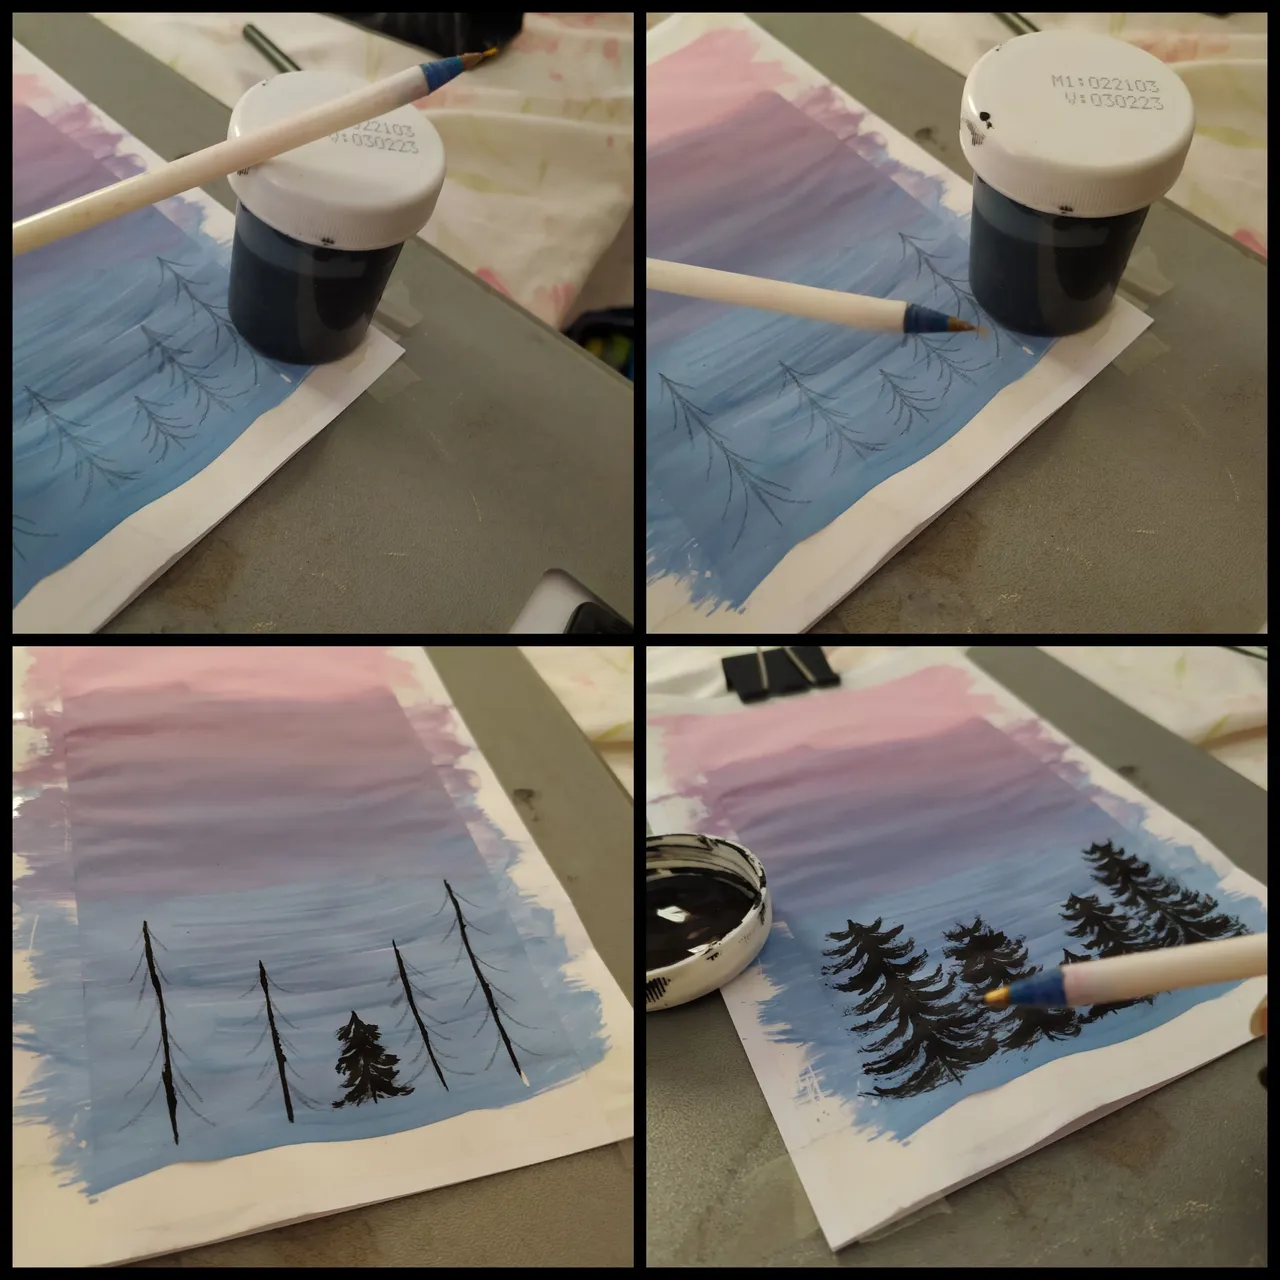
Con el pincel más delgado empecé a crear trazos de cada lado con curvatura para dar el efecto que tienes los árboles de pino en las sombras.
With the thinner brush I started to create strokes on each side with curvature to give the effect that you have the pine trees in the shadows.
Con la pintura amarilla, pinté la luna.
Y con ayuda de un cepillo de dientes viejo, salpicando pintura blanca hice el efecto estrellado.
With the yellow paint, I painted the moon.
And with the help of an old toothbrush, splashing white paint, I made the starry effect.
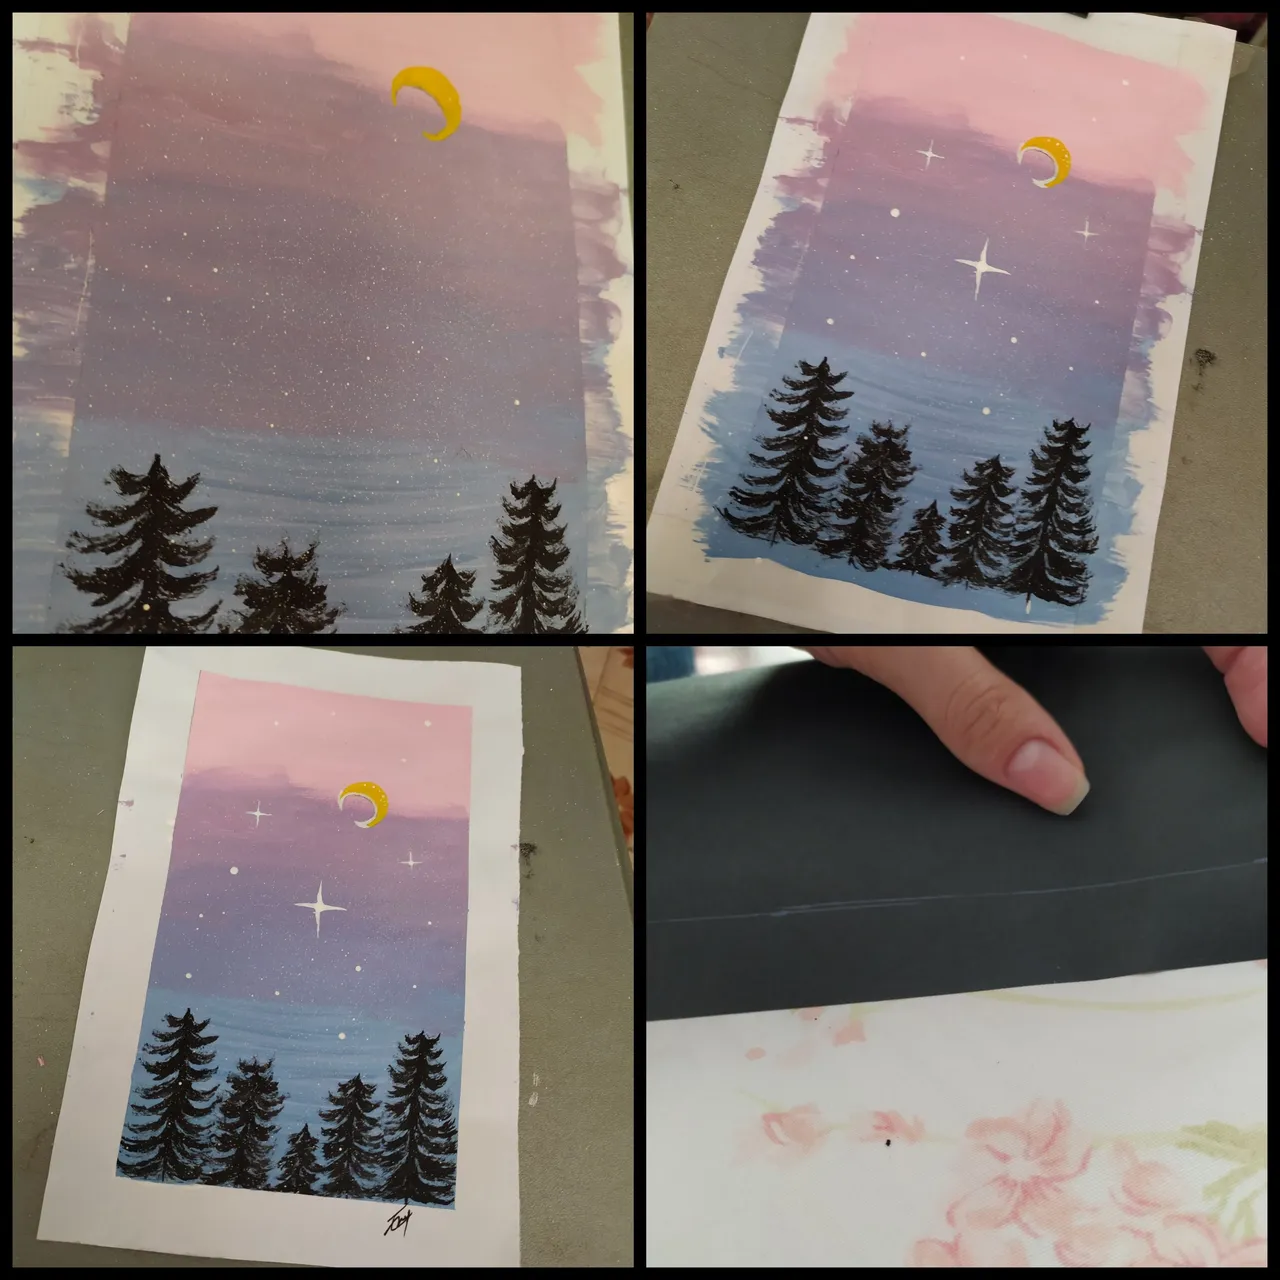
Con el mismo pincel delgado cree el efecto del brillo de las estrellas con líneas sutiles en dirección horizontal y vertical.
Con la cartulina negra recorté tiras de 2 cm para enmarcar.
With the same thin brush create the effect of the shimmering stars with subtle lines in horizontal and vertical direction.
With the black cardboard I cut out 2 cm strips for framing.

Finalmente, quité los adhesivos y coloqué los marcos.
Eso fue todo el proceso creativo de mi cuadro, espero les haya gustado!🌌✨
Finally, I removed the stickers and attached the frames.
That was the whole creative process of my painting, I hope you liked it!🌌✨
🌌✨🌌✨🌌✨🌌✨🌌✨🌌✨🌌✨
Todas las fotografías son de mi autoría 🌌
Ediciones y retoques fotográficos con Picsart
Traducido por DeepL ✨🤍
All photographs are my authorship 🌌
Photo edits and retouching with Picsart.
Translated by DeepL ✨🤍