Hola amigos de hive, hoy quiero compartir con ustedes como hice unos pequeños envases de cartón para colocarle adentro los sobres de azúcar, té o café, me pareció super sencillo de hacer y quedan muy lindos, lo mejor es que podemos hacerlo del tamaño que se prefiera y colocarle cualquier cosa que queramos eso ya depende de las necesidades de cada persona.
Hello friends of hive, today I want to share with you how I made some small cardboard containers to put inside the sugar, tea or coffee sachets, I found it very easy to do and they are very nice, the best thing is that we can do it the size you prefer and put anything we want, it depends on the needs of each person.

Materiales – Materials
- Cartón
- Tijera
- Silicón
- Lápiz
- Regla
- Papel
- Foami
- Cardboard
- Scissors
- Silicone
- Pencil
- Ruler
- Paper
- Foami

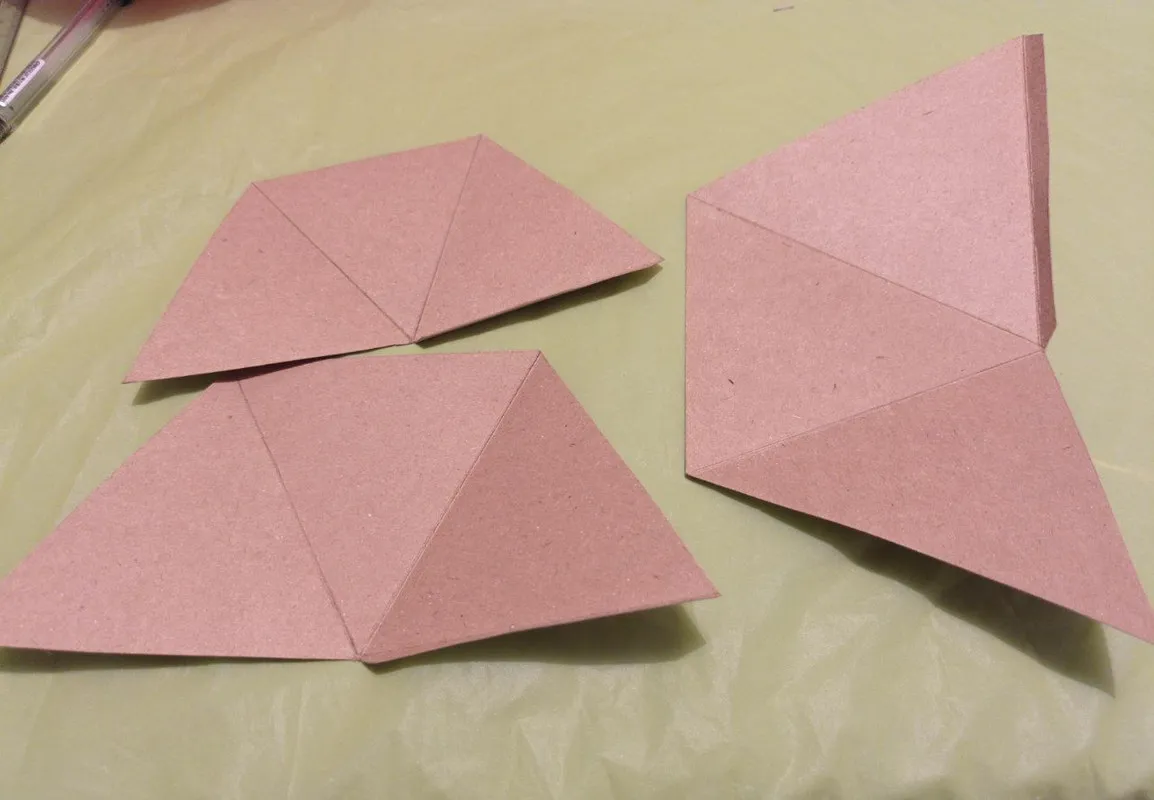
Primero lo que hacemos es comenzar hacer los patrones de los envases, para eso agarramos papel y empezamos hacer 3 triángulos de diferentes tamaños el primero 21 cm x 21 cm, otro de 18 x 18 cm y el último de 16 x 16 cm, después medimos la mitad horizontal y vertical de cada uno cuando ya hayamos divido en la parte superior de cada patrón se marcan 3 triángulos y en uno de ellos se coloca una pequeña pestaña abajo, luego de eso recortamos e ignoramos la parte superior solo cortamos de la mitad hacia abajo que será lo que necesitamos.
First what we do is to start making the patterns of the containers, for that we grab paper and start making 3 triangles of different sizes the first 21 cm x 21 cm, another of 18 x 18 cm and the last of 16 x 16 cm, then we measure the horizontal and vertical half of each one when we have already divided at the top of each pattern 3 triangles are marked and one of them is placed a small tab down, after that we cut and ignore the top just cut from the middle down that will be what we need. Ahora cuando tengamos listos todos los moldes podemos empezar a calcar en el cartón cada uno de los diferentes tamaños que tenemos, luego de eso comenzamos a recortar todos y con ayuda de un lapicero sin tinta marcamos las líneas que ya hicimos previamente esto es para poder doblar con más facilidad y no tener ningún tipo de inconveniente.
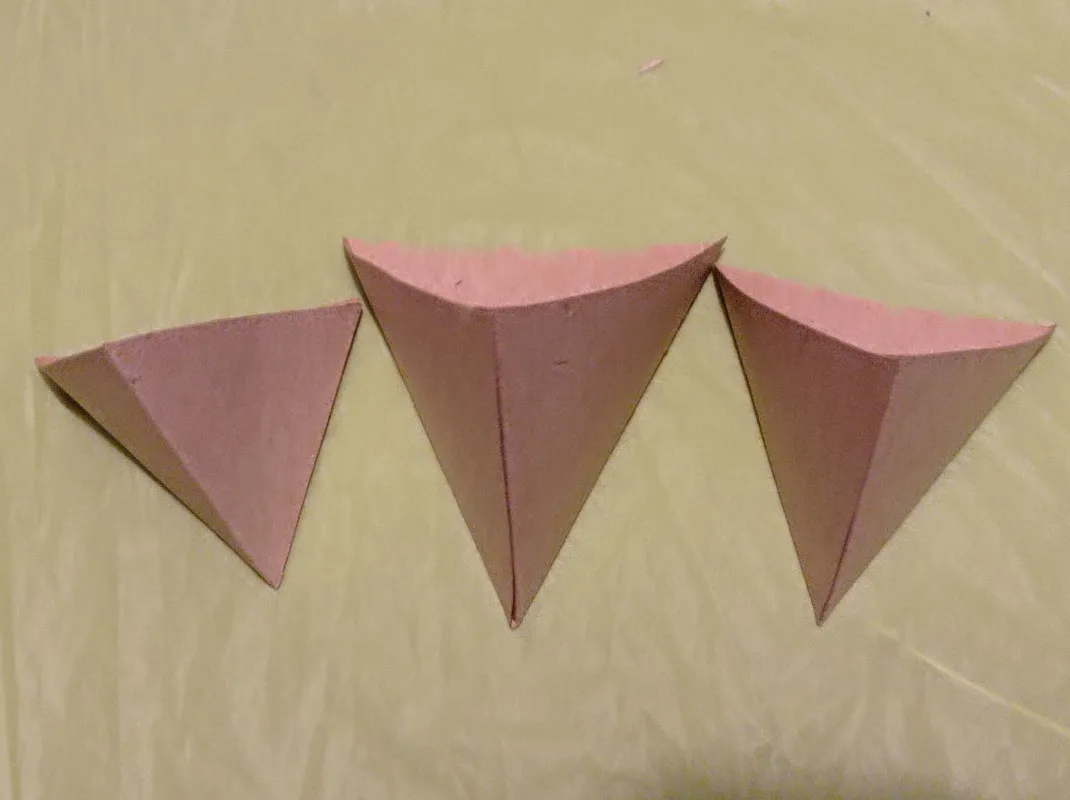
Now when we have all the molds ready we can begin to trace on the cardboard each of the different sizes we have, after that we begin to cut them all and with the help of a pencil without ink we mark the lines that we have already made previously, this is to be able to fold more easily and not have any kind of inconvenience. Luego lo que hacemos es pegar cada uno con silicón por el lado que tiene la pestaña esto es para que se pegue mejor en el borde, pero pegamos la pestaña hacia adentro para que no se vea ya que no se va a forrar el cartón si no que se dejará así al natural.
Then what we do is to glue each one with silicone on the side that has the tab this is to stick better on the edge, but we glue the tab inward so that it is not seen as it will not be lining the cardboard but it will be left as natural. Por último lo que hacemos es la parte decorativa para eso agarramos el foami escarchado y hacemos varios corazones de diferentes tamaños eso es dependiendo de cada envase, este es el toque final ya que así estarán listos los envases triangulares de cartón. Espero les guste. I hope you like it. Gracias por Leer. Thanks for reading. Fotos de mi propiedad. Camara: Telefono Xiaomi Redmi note 9


Finally what we do is the decorative part for that we take the frosted foami and make several hearts of different sizes that is depending on each container, this is the final touch as this way the triangular cardboard containers will be ready.

