Imagen disenada en Canva
Saludos comunidad :)
Antes yo decía que las manualidades eran difíciles y no entendía, o al menos no me tomaba el tiempo de aprender el como de un papel podían hacer algo increíble... Pero todo tiene su explicación y una vez que puse de mis ganas he ido aprendiendo poco a poco a hacer manualidades con papel y con lo más básico que tenemos a la mano en casa.
Greetings community :)
Before I used to say that crafts were difficult and I didn't understand, or at least I didn't take the time to learn how to make something incredible out of a piece of paper.... But everything has its explanation and once I put my desire I have been learning little by little to make crafts with paper and with the basics that we have at hand at home.
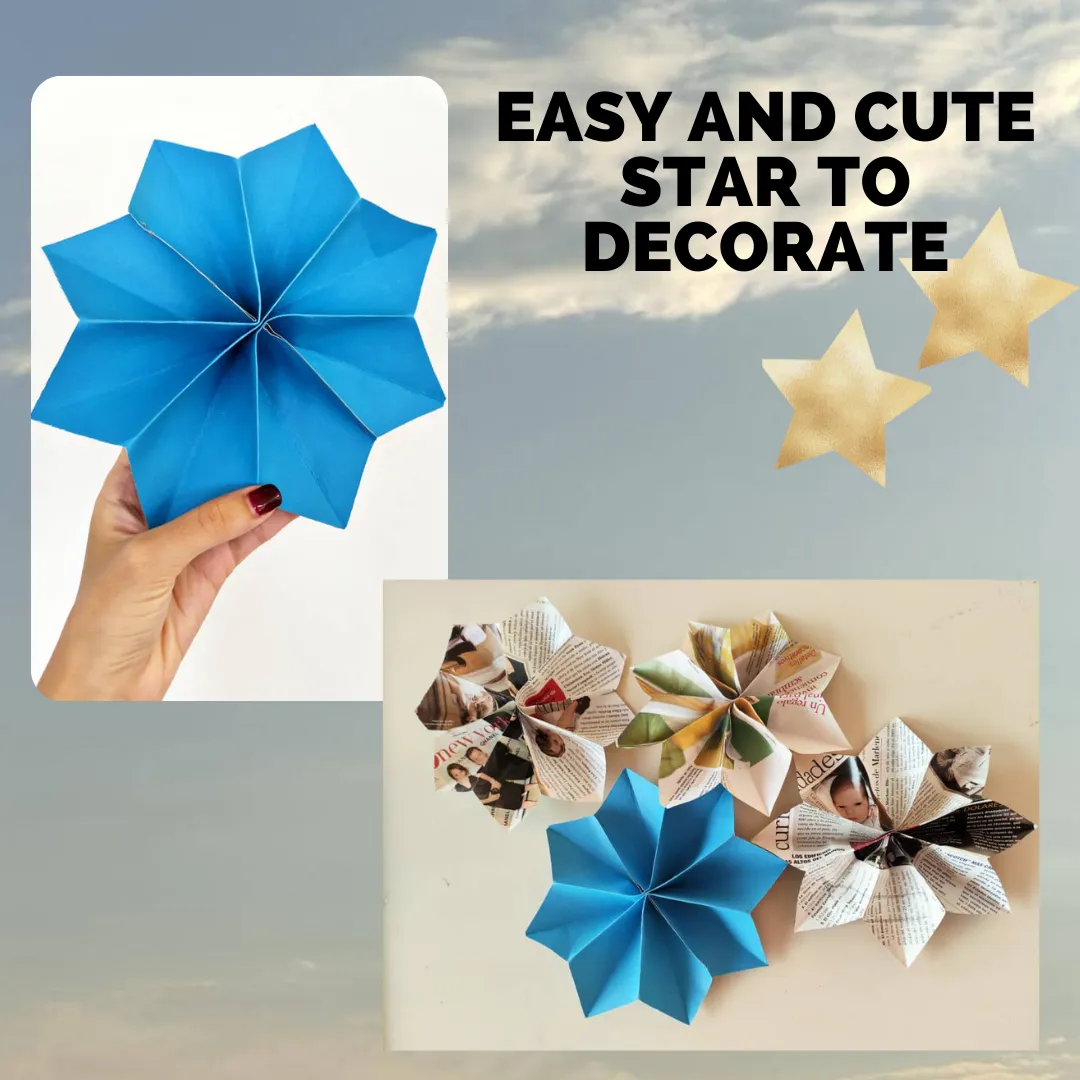
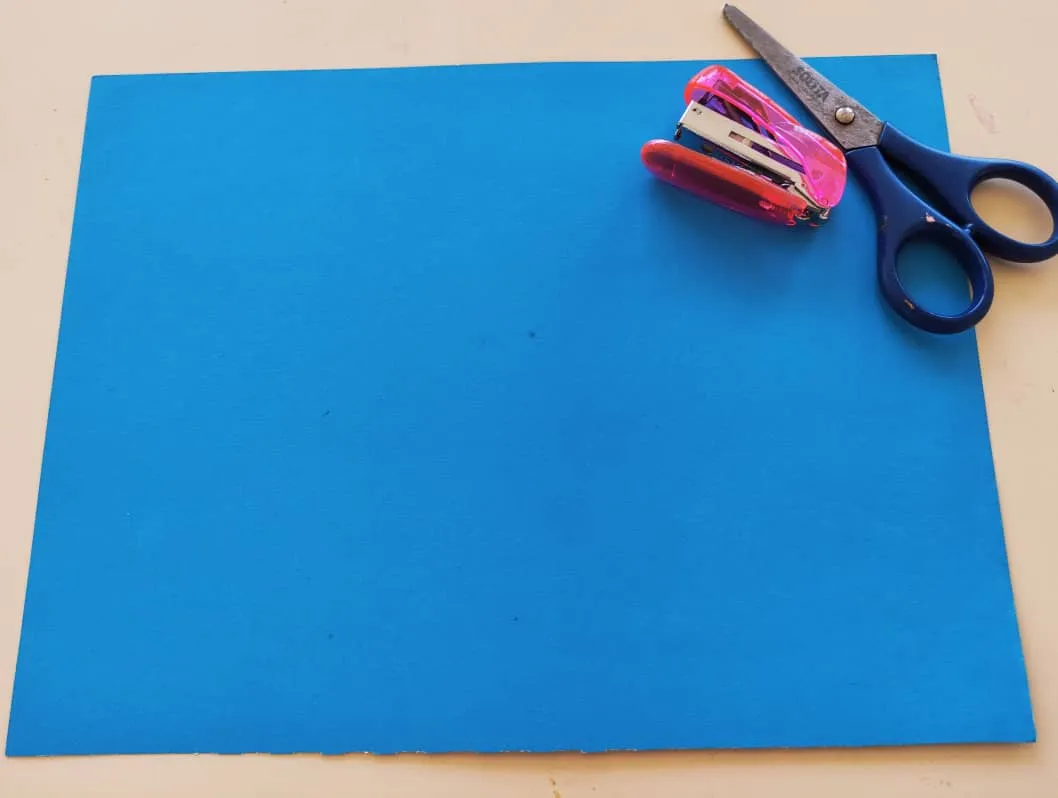
En esta ocasión les quiero mostrar cómo hacer una estrellas con tan sólo cartulina, tijeras y una grapadora. Es muy sencillo, a mi me encantó el resultado y se pueden hacer varias y usarlas como decoración para una fiesta!
This time I want to show you how to make a star with just cardboard, scissors and a stapler. It's very simple, I loved the result and you can make several and use them as decoration for a party!
Empecemos:
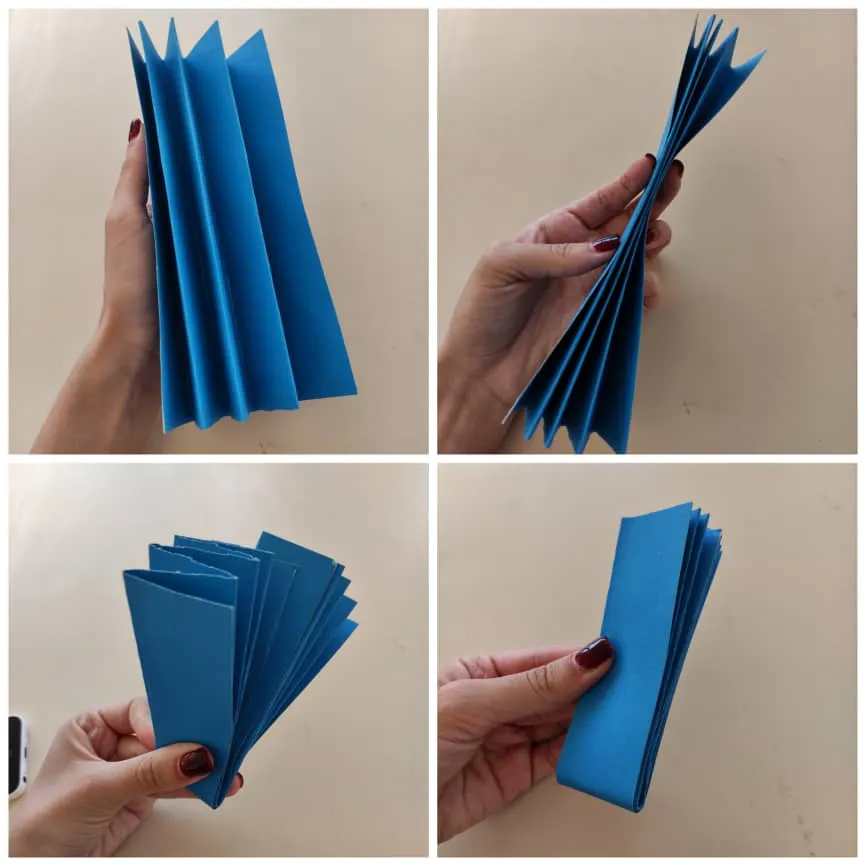
Primeramente la cartulina la colocamos verticalmente y doblamos justo a la mitad. Luego, repetimos el paso y volvemos a doblar.
Let's start:
First we place the cardboard vertically and fold it right in half. Then, repeat the step and fold again.
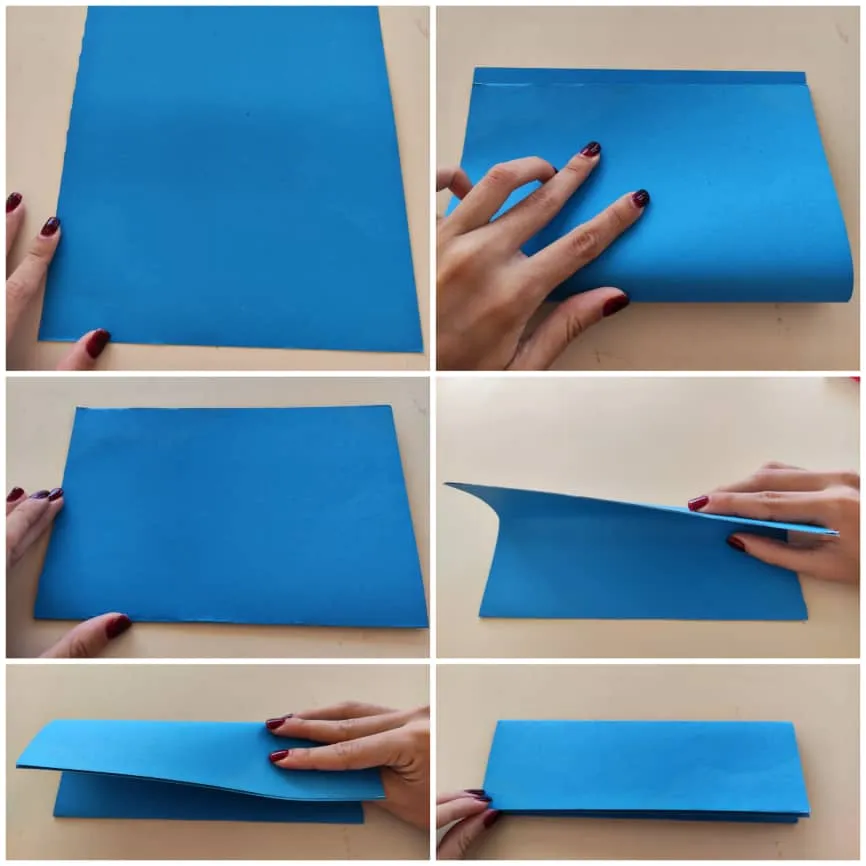
Una vez que tengamos la cartulina como un rectángulo, doblaremos una pestaña de la hoja hacia arriba y la otra pestaña hacia el otro lado.
Once we have the cardboard as a rectangle, we will fold one flap of the sheet upwards and the other flap to the other side.

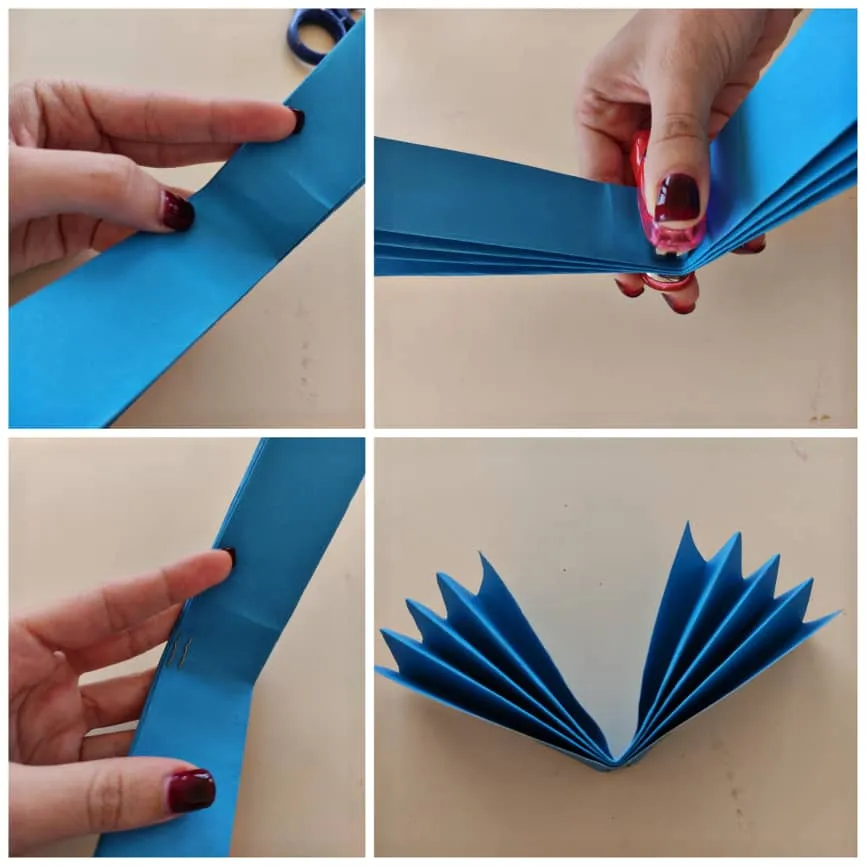
Luego de esto, desdoblaremos la cartulina y empezaremos a doblarla estilo abanico, un doblez hacia el frente y otro hacia atrás.
After this, we will unfold the cardboard and start folding it fan style, one fold to the front and one to the back.
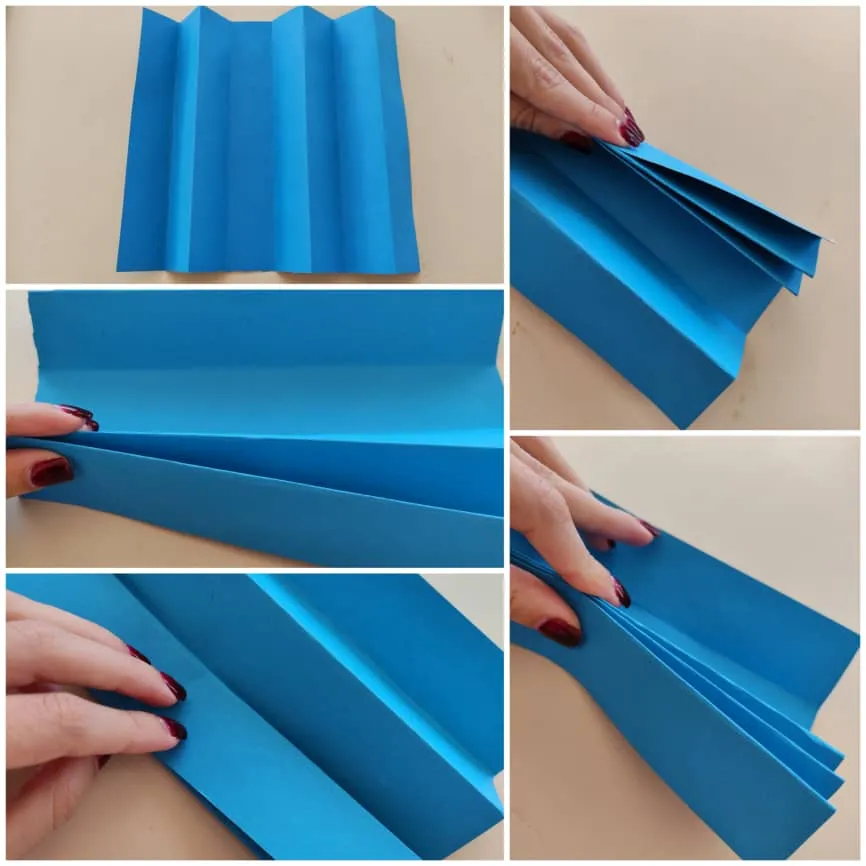
Una vez listo, nos quedara estilo acordeón. Presionamos y doblaremos justo a la mitad.
Once ready, it will look like an accordion. Press and fold right in half.
Después de doblar, justo en la marca que queda, colocamos dos grapas.
After folding, just at the remaining mark, we place two staples.
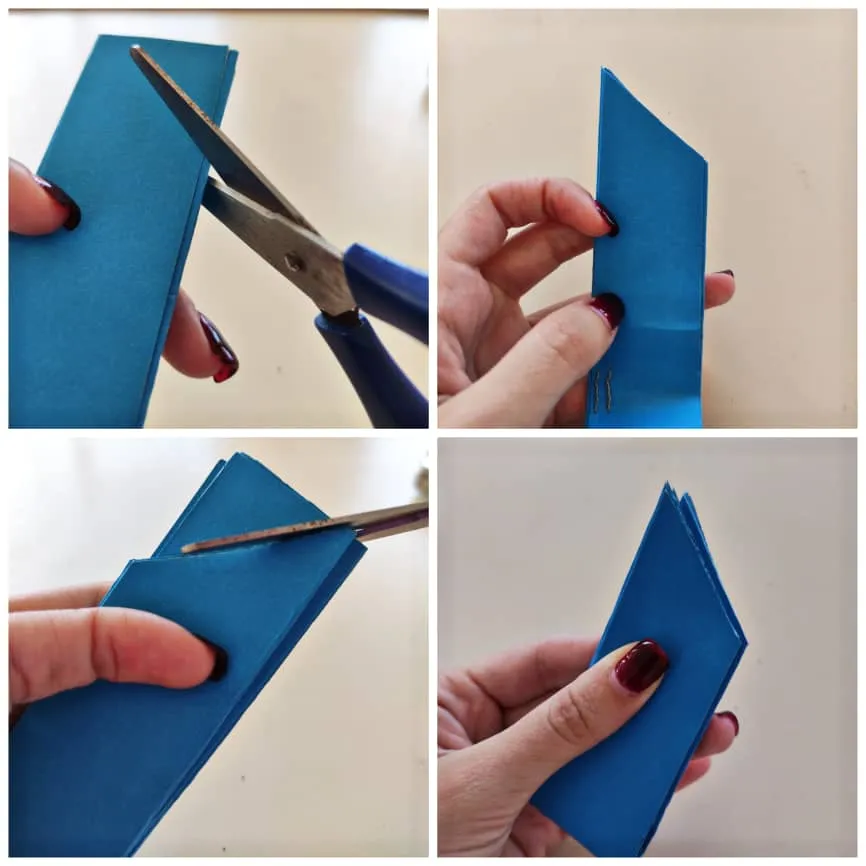
Luego de esto, contaremos en diagonal uno de los lados. Volvemos a doblar a la mitad y con el lado anterior recortado nos guiamos para que queden del mismo tamaño y recortamos el lado faltante.
After this, we will count diagonally one of the sides. We fold again in half and with the previous side cut out we guide ourselves so that they are the same size and cut out the missing side.
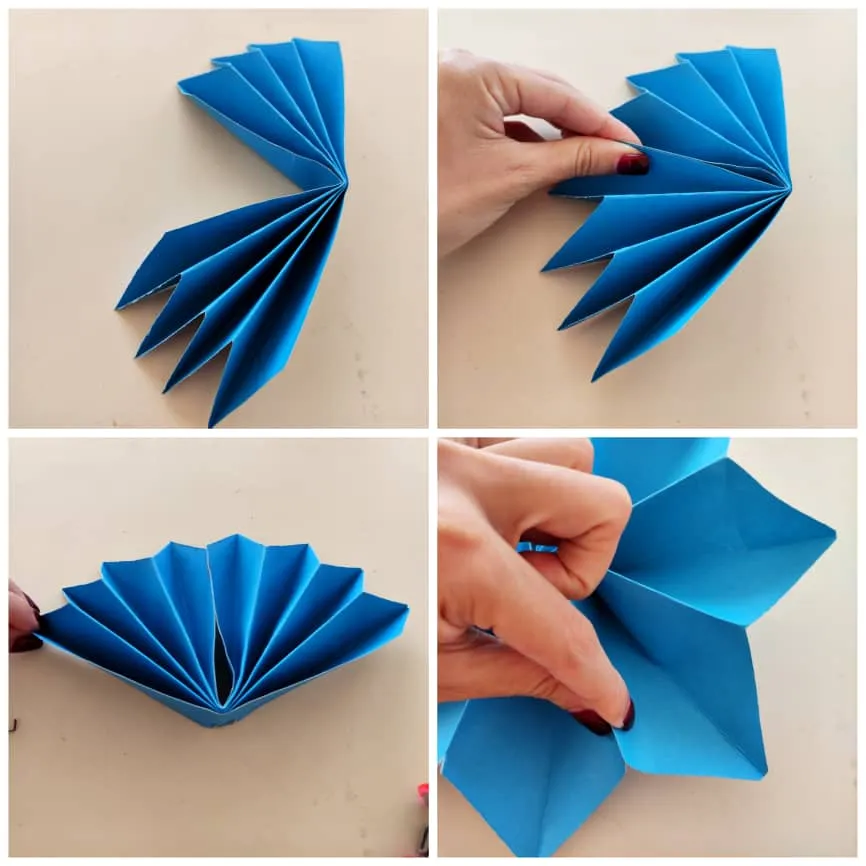
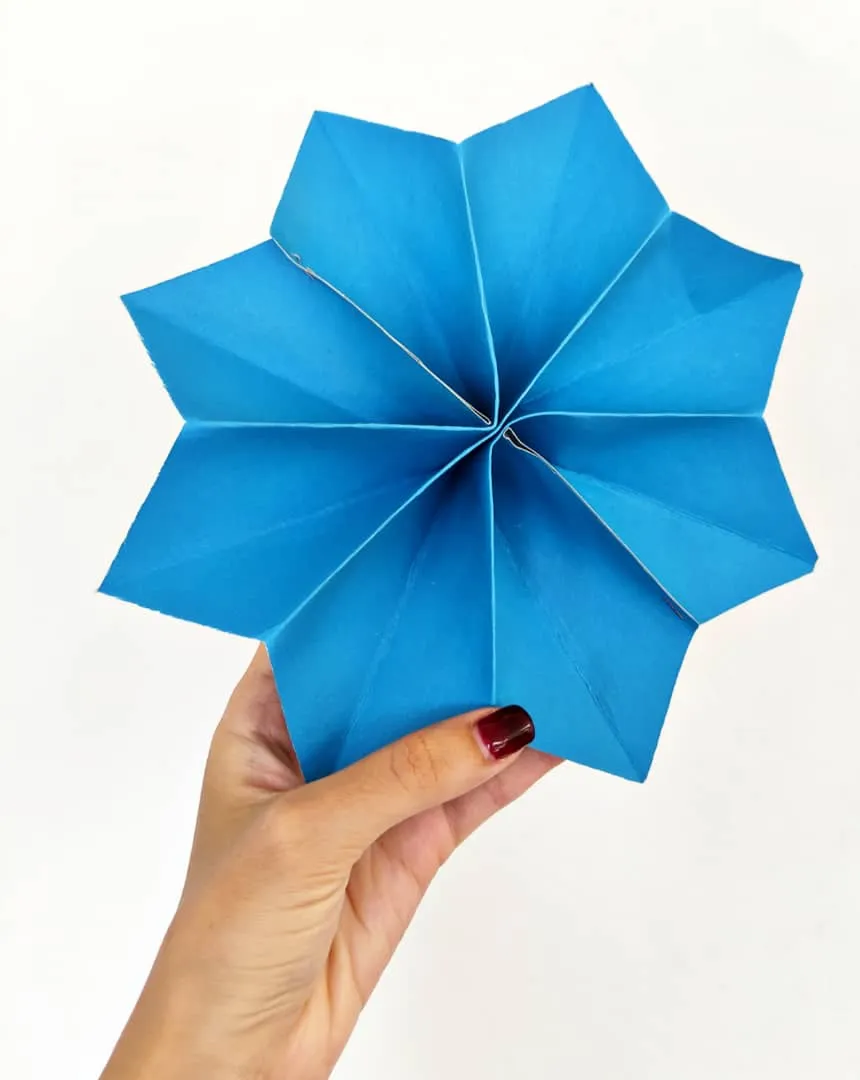
Una vez listo, vamos a unir las pestañas de ambos lados con una grapa. Y listo! ! Así nos queda nuestra estrella lista para decorar
Once ready, we are going to join the tabs on both sides with a staple. And that's it! ! Here is our star ready to decorate
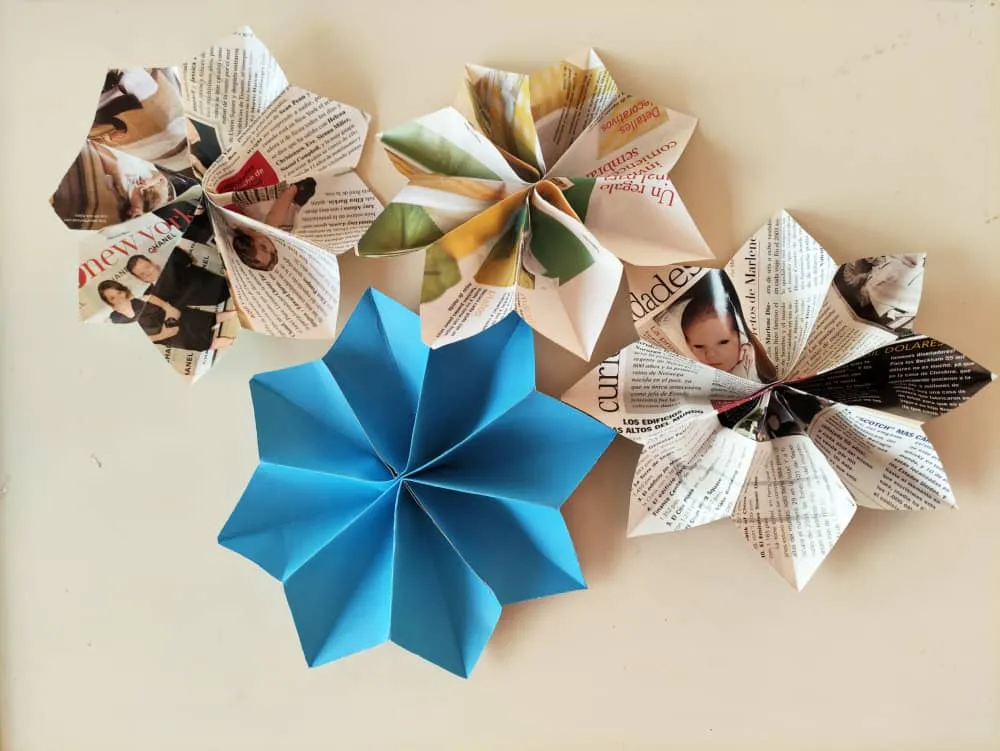
También pueden hacer este modelo en papel del revista y se ve genial, pueden jugar con los colores y tener una decoración ideal.
You can also make this model in magazine paper and it looks great, you can play with colors and have an ideal decoration.
Todas las fotos son de mi propiedad / All photos are my property