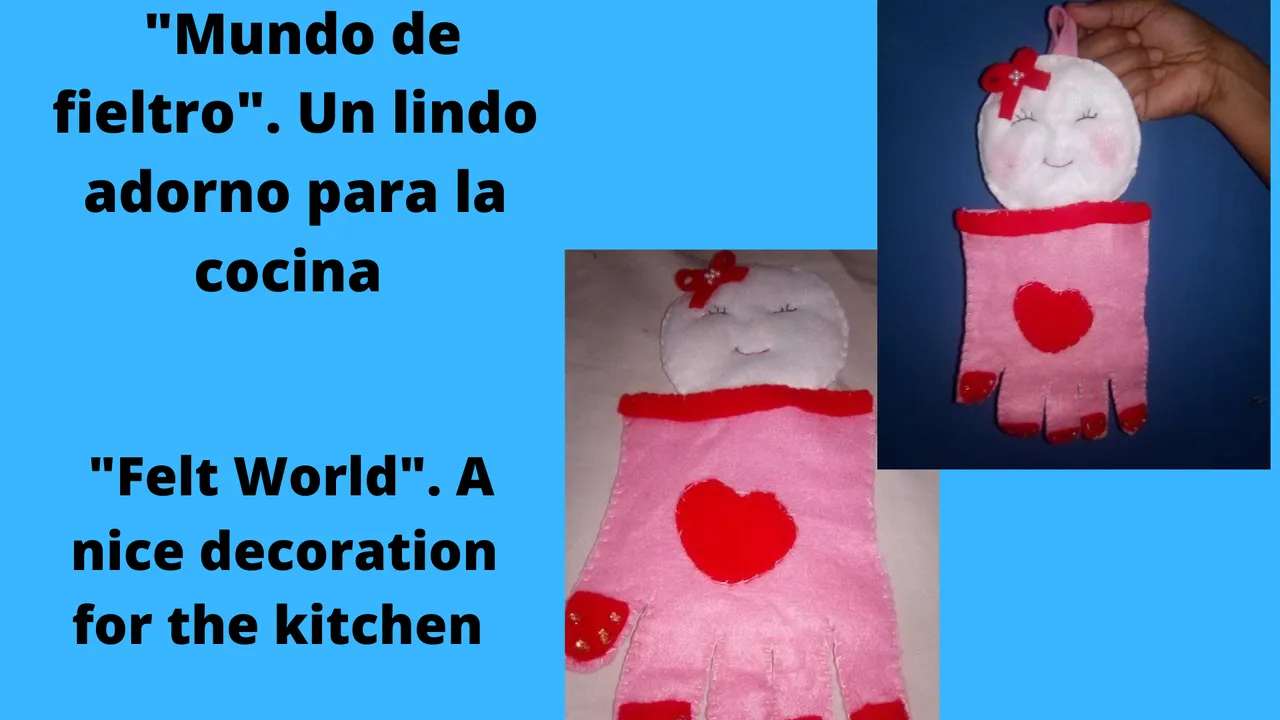
Hello dear and appreciated friends of Hive Diy. Hoping you are well, may each day we undertake be filled with many blessings. I am pleased to participate in this contest, where every week there is something innovative to elaborate. This week it will be with a beautiful and delicate material such as Felt.

El fieltro es un material muy usado en las manualidades, donde podemos diseñar bellas decoraciones, desde un lindo detalle para la nevera, decoraciones de navidad, motivos de cumpleaños, entres otros.
Felt is a material widely used in crafts, where we can design beautiful decorations, from a nice detail for the fridge, Christmas decorations, birthday motifs, among others.
Estaré participando con un lindo adorno para la cocina. Les invito a ver los materiales a utilizar y el paso a paso.
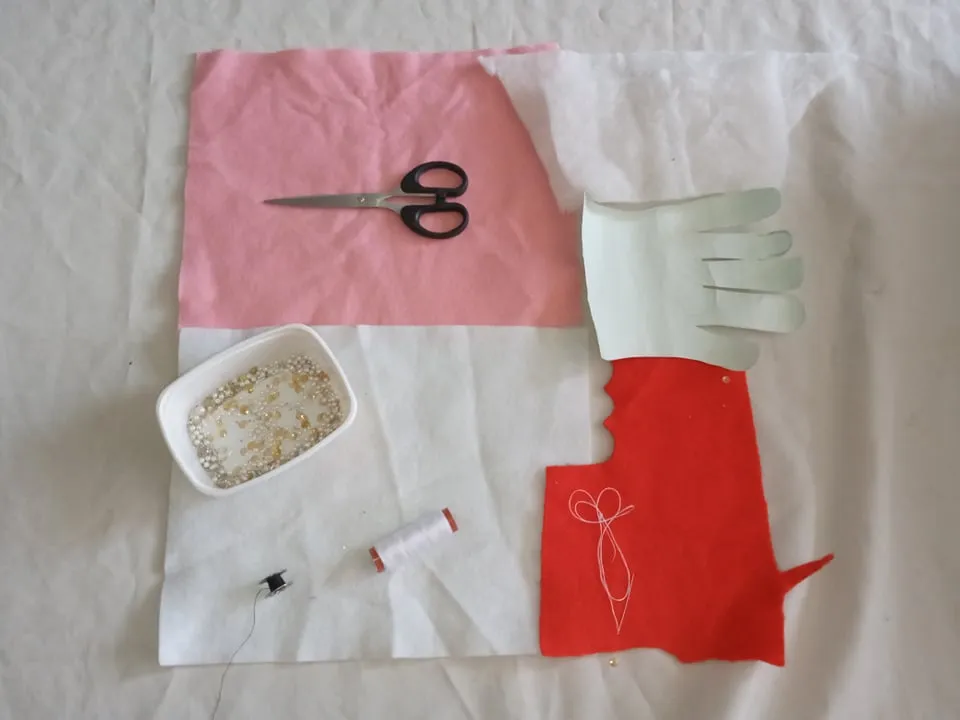
Materiales
- Fieltro de color rosado, blanco y rojo.
- Hilo de coser, blanco, negro, rosado.
- Tijera.
- Guata(relleno).
- Patrón del guante.
- Canutillo pequeño.
I will be participating with a nice ornament for the kitchen. I invite you to see the materials to use and the step by step.
Materials
- Pink, white and red felt.
- Sewing thread, white, black, pink.
- Scissors.
- Wadding (stuffing).
- Pattern of the glove.
- Small canutillo.
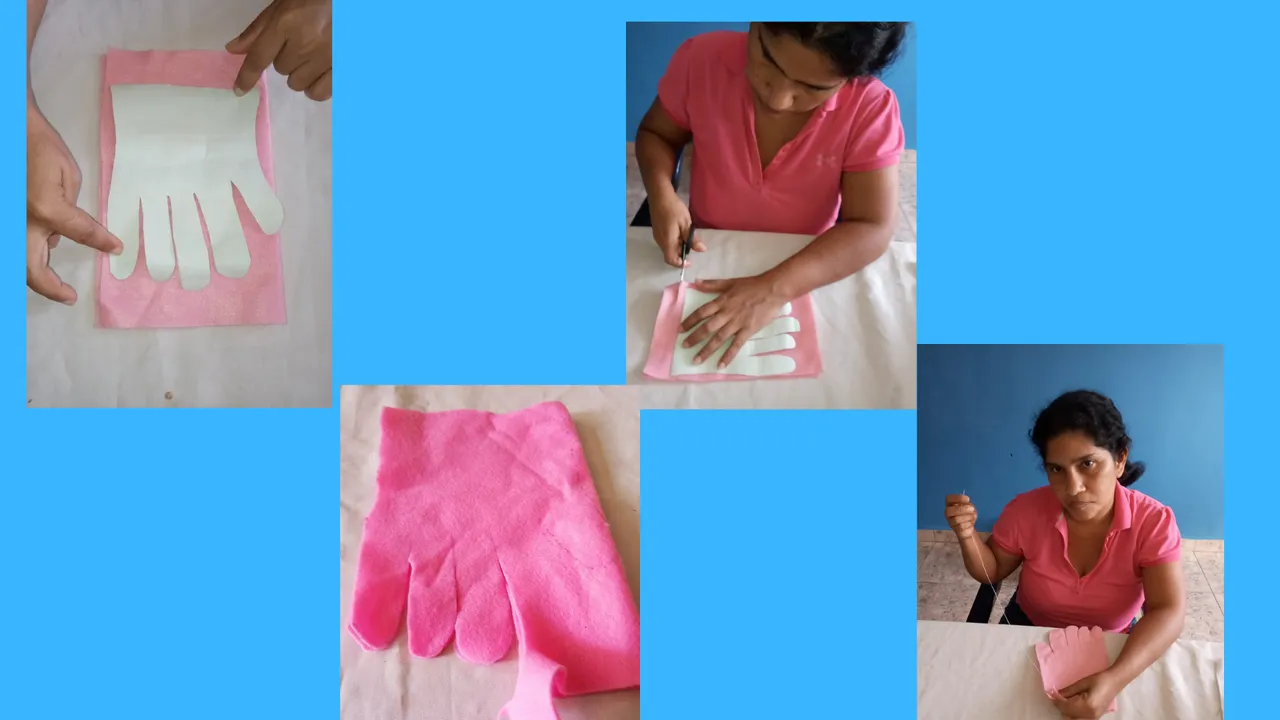
Primeramente el patrón del guante, lo marcamos en el fieltro color rosado, va doble, por el lado de atrás del fieltro. Lo recortamos y luego procedemos a coser con el hilo blanco aplicando el punto festón que es a los lados, que va como un remate, por la orilla del guante.
First we mark the pattern of the glove, we mark it on the pink felt, it goes double, on the back side of the felt. We cut it out and then proceed to sew with the white thread applying the scalloped stitch that is on the sides, which is like a top, along the edge of the glove.
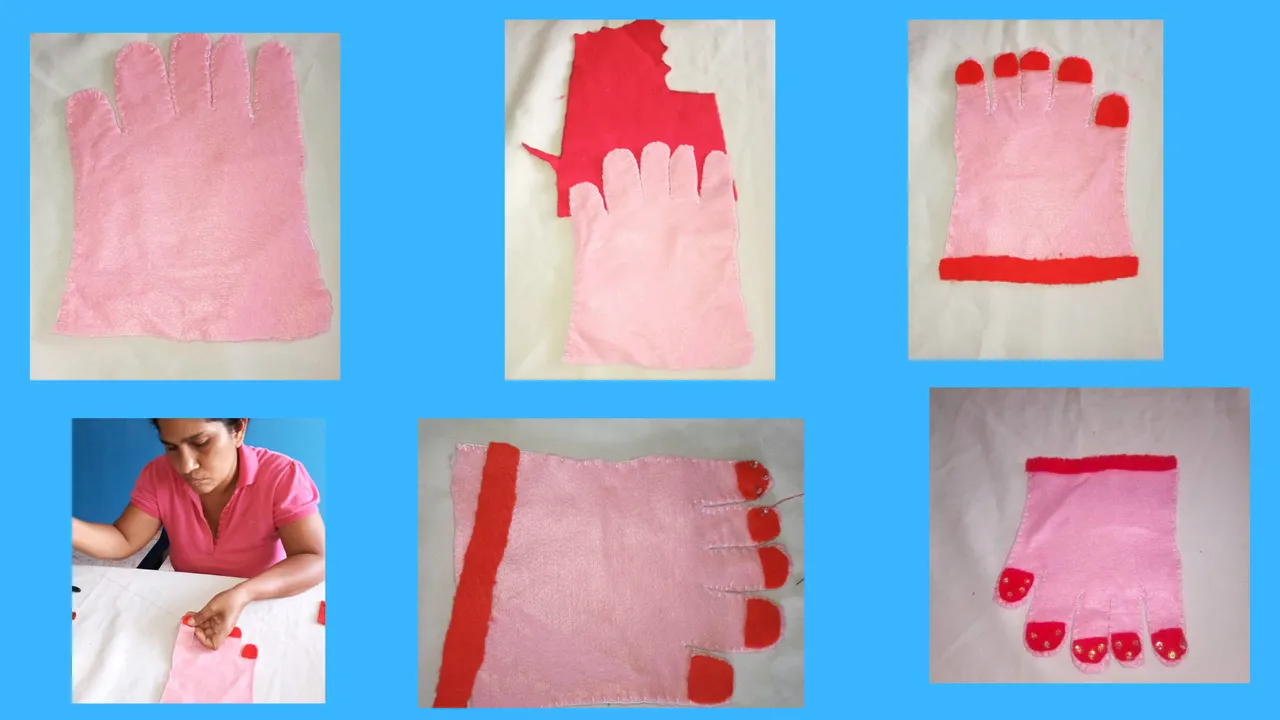
Después de estar cosido por completo el guante, procedemos a marcar con el fieltro color rojo parte de la punta del guante. Una vez ya marcados y cortamos., vamos a coser con el hilo rosado, en esta costura vamos a colocar lentejuela con canutillo, lo colocamos en el hilo y lo pasamos en el orificio de la lentejuela y sacamos la aguja. Cosemos y pegamos la lentejuela con el canutillo. Para decorar en la parte de arriba, se corto y se cosió una tira del fieltro color rojo con hilo blanco.
After the glove is completely sewn, we proceed to mark with the red felt part of the tip of the glove. Once already marked and cut, we are going to sew with the pink thread, in this seam we are going to place the sequin with the sequin, we place it in the thread and we pass it in the hole of the sequin and we take out the needle. We sew and glue the sequin with the sequin. To decorate the top, we cut and sewed a strip of red felt with white thread.
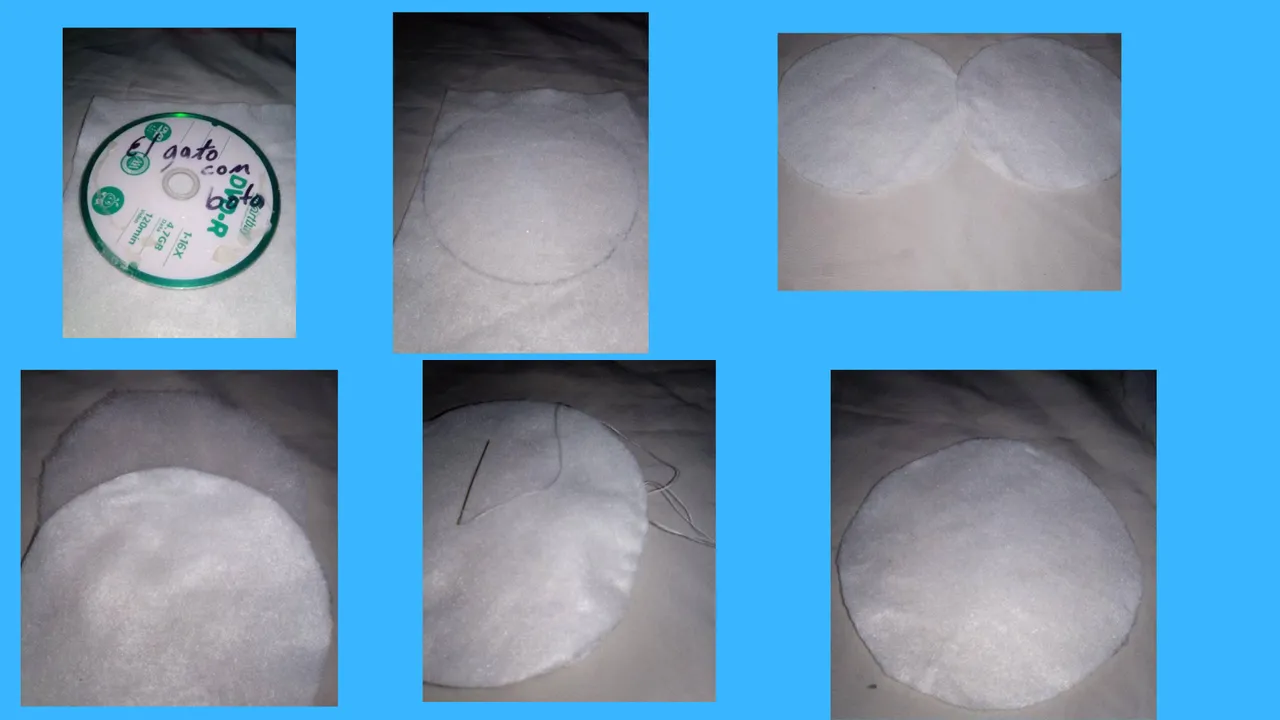
Tomamos el fieltro color blanco y con ayuda de un C.D, marcamos y recortamos dos piezas. Luego marcamos y cortamos la guata (relleno), del mismo tamaño del fieltro blanco. Procedemos a coser con el hilo blanco con el punto festón.
We take the white felt and with the help of a C.D, we mark and cut out two pieces. Then we mark and cut the wadding (stuffing), the same size as the white felt. We proceed to sew with the white thread with the scallop stitch.

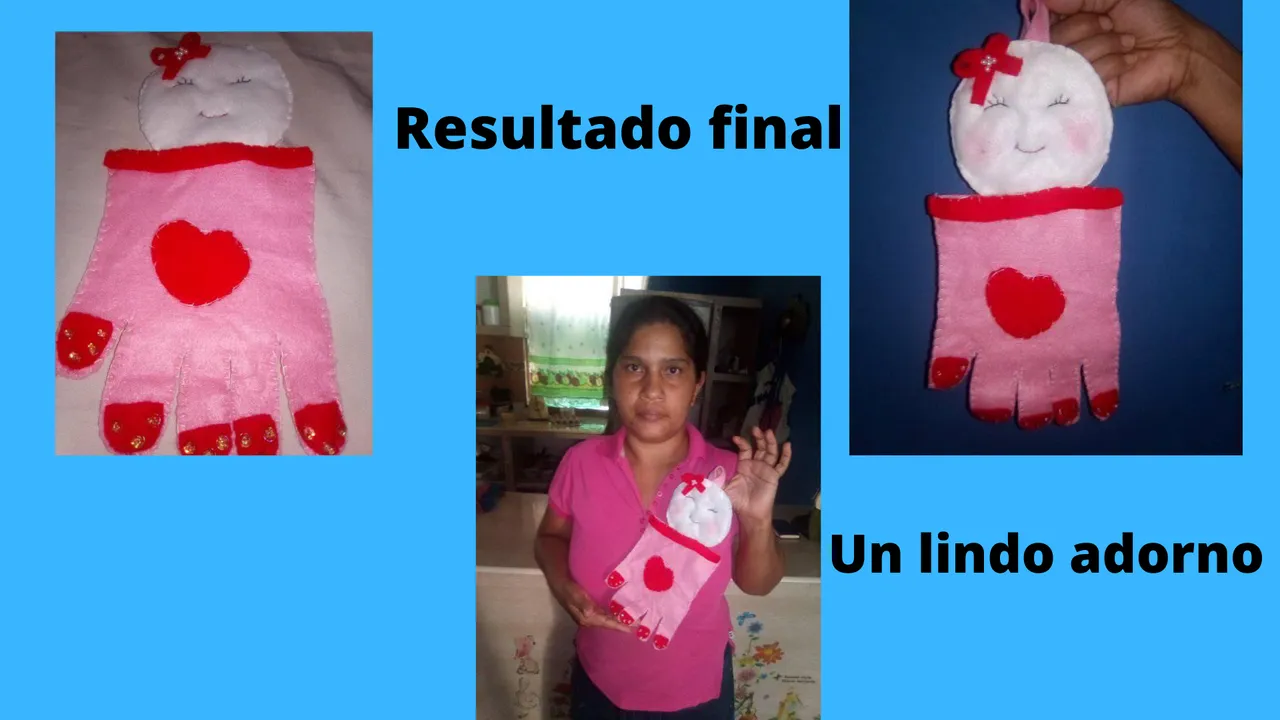
Luego de coser completo la carita, procedemos a marcar los ojos y la boca. Después con el hilo negro vamos a rellenar los ojos, pestaña con el punto atrás. Después cosemos la boca con el hilo color rosado con el punto atrás. Le colocamos unos detalles como son una un lacito, con unas perla y con tiza rosada le damos color. Por ultimo unimos las dos partes.
After sewing the whole face, we proceed to mark the eyes and mouth. Then with the black thread we will fill in the eyes and eyelashes with the back stitch. Then we sew the mouth with the pink thread with the back stitch. We place some details such as a bow, with a pearl and with pink chalk we give it color. Finally we join the two parts together.
I invite @omaira74, @andreina57to participate in this beautiful contest.