Good Morning! My Creative Neighbors Hivers, my optimistic greetings to all of you. Today I will tell you the Step by Step of how to make an ornament for the kitchen where to hang small cups. A Steaming Cup Of Gourmet Coffee.
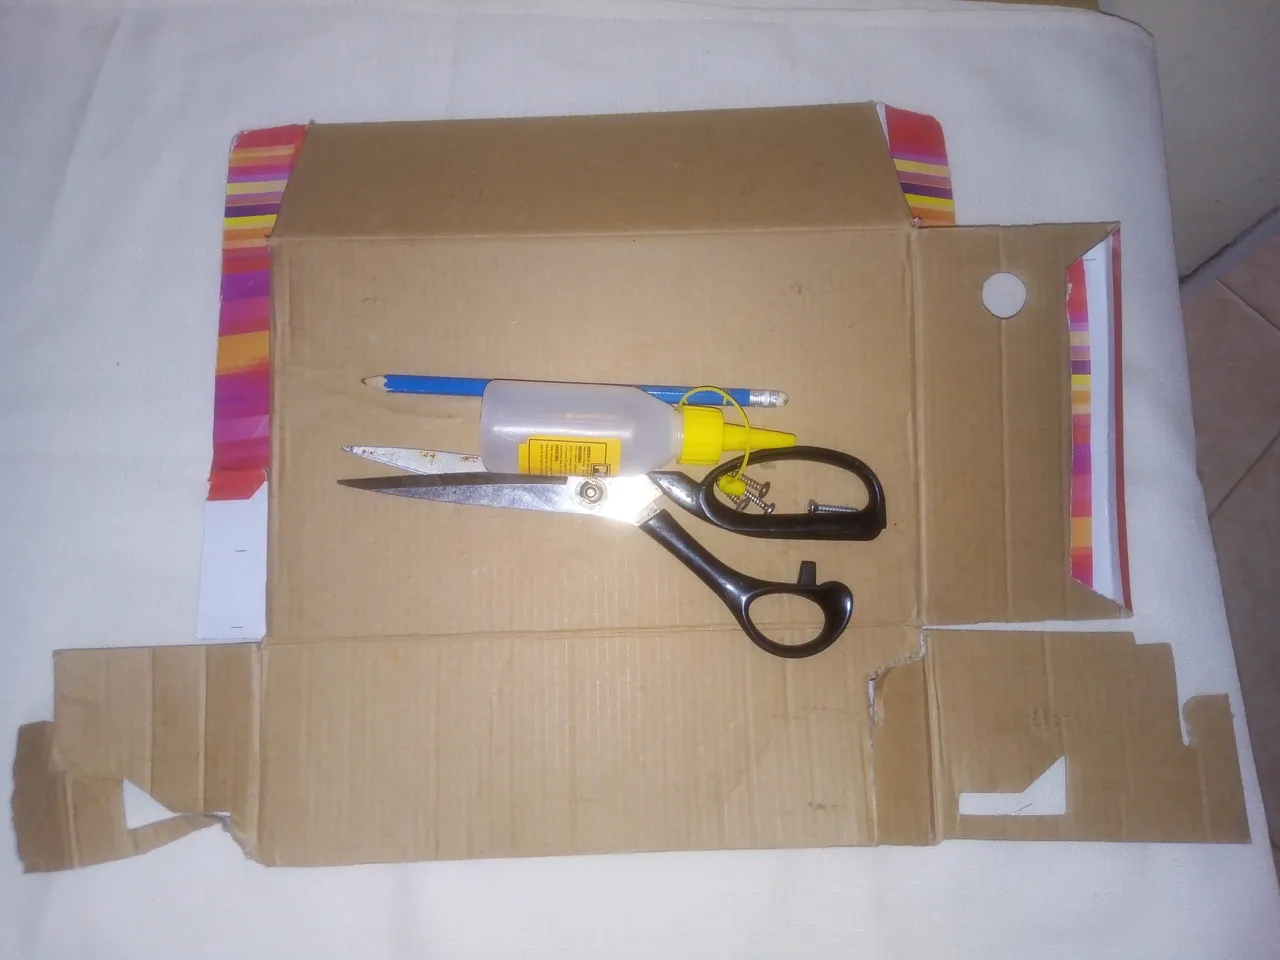
Materiales:. Una cajita de cartón, silicón, tijeras, lápiz, dos ganchos para colgar.
Materials:. A cardboard box, silicone, scissors, pencil, two hooks for hanging.
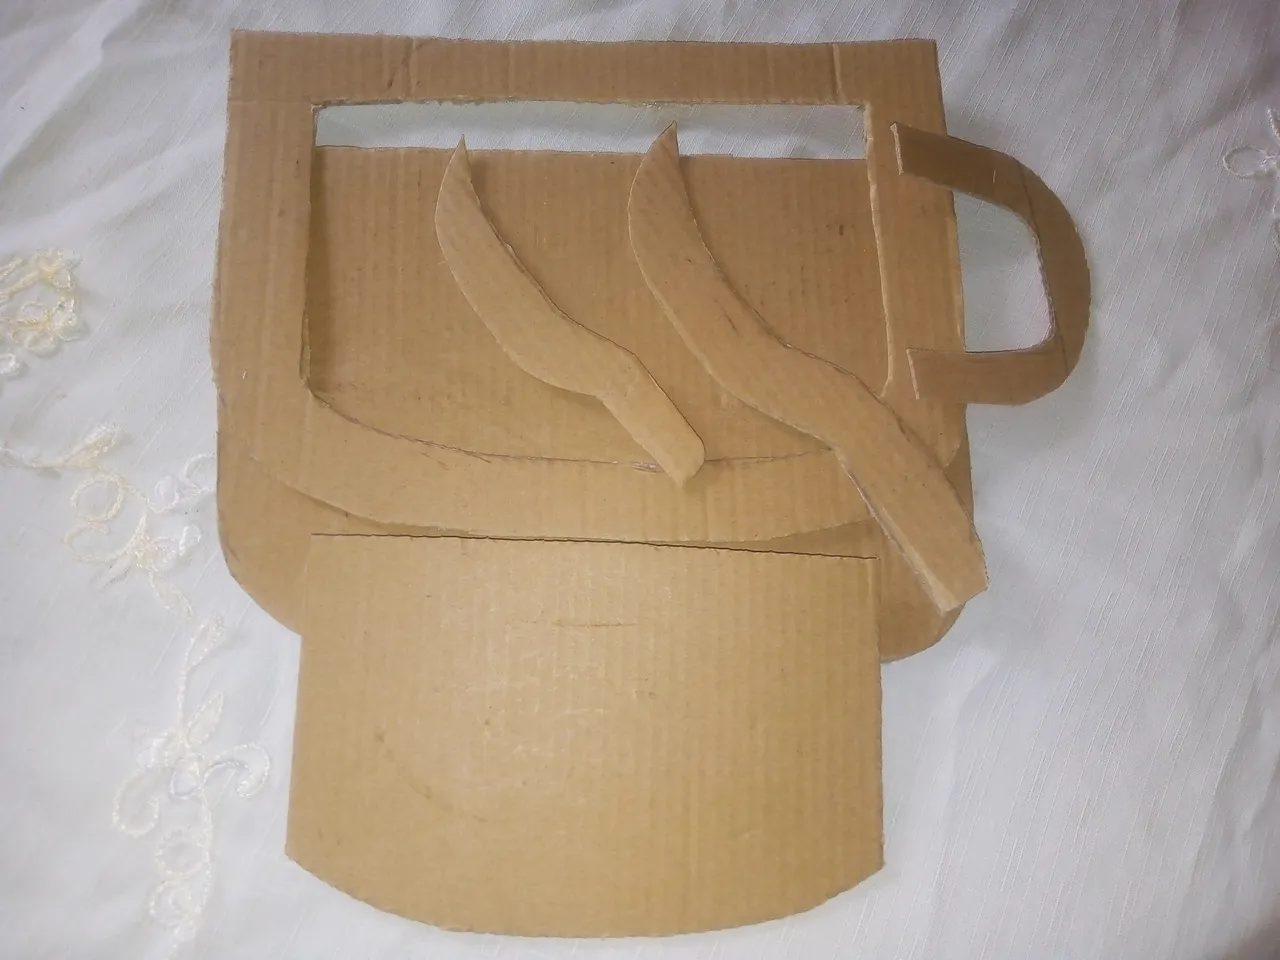
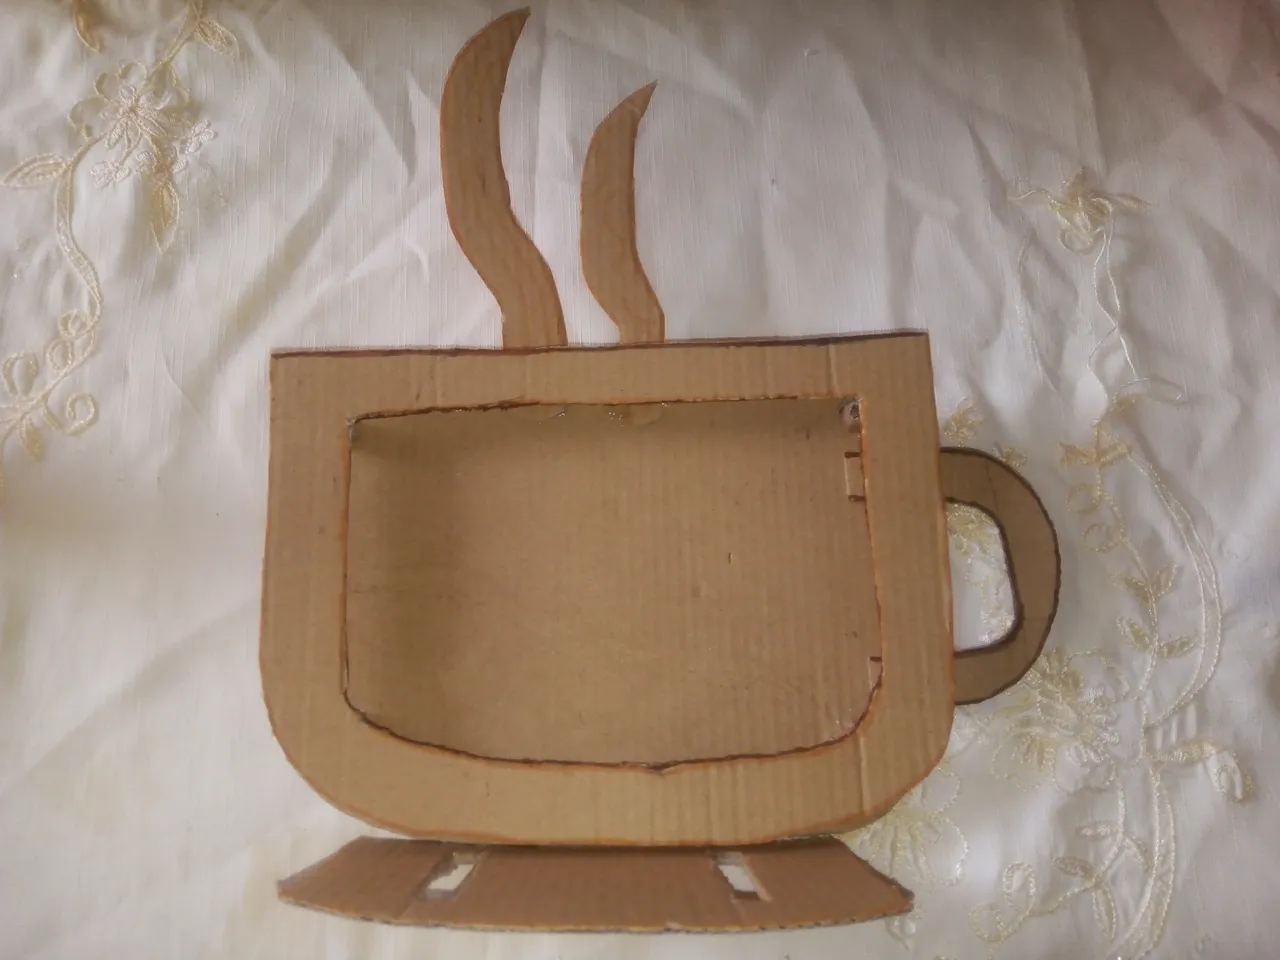
Primer Paso: en la caja de cartón marqué con el lápiz los
Moldes del proyecto a realizar, después los corté con las tijeras: la figura de una taza, un cuadro también con la forma de la taza, una asa, y dos formas de humo, como están en las fotos.
First Step: on the cardboard box I marked with the pencil the
Molds of the project to be made, then I cut them with scissors: the figure of a cup, a picture also with the shape of the cup, a handle, and two forms of smoke, as they are in the photos.
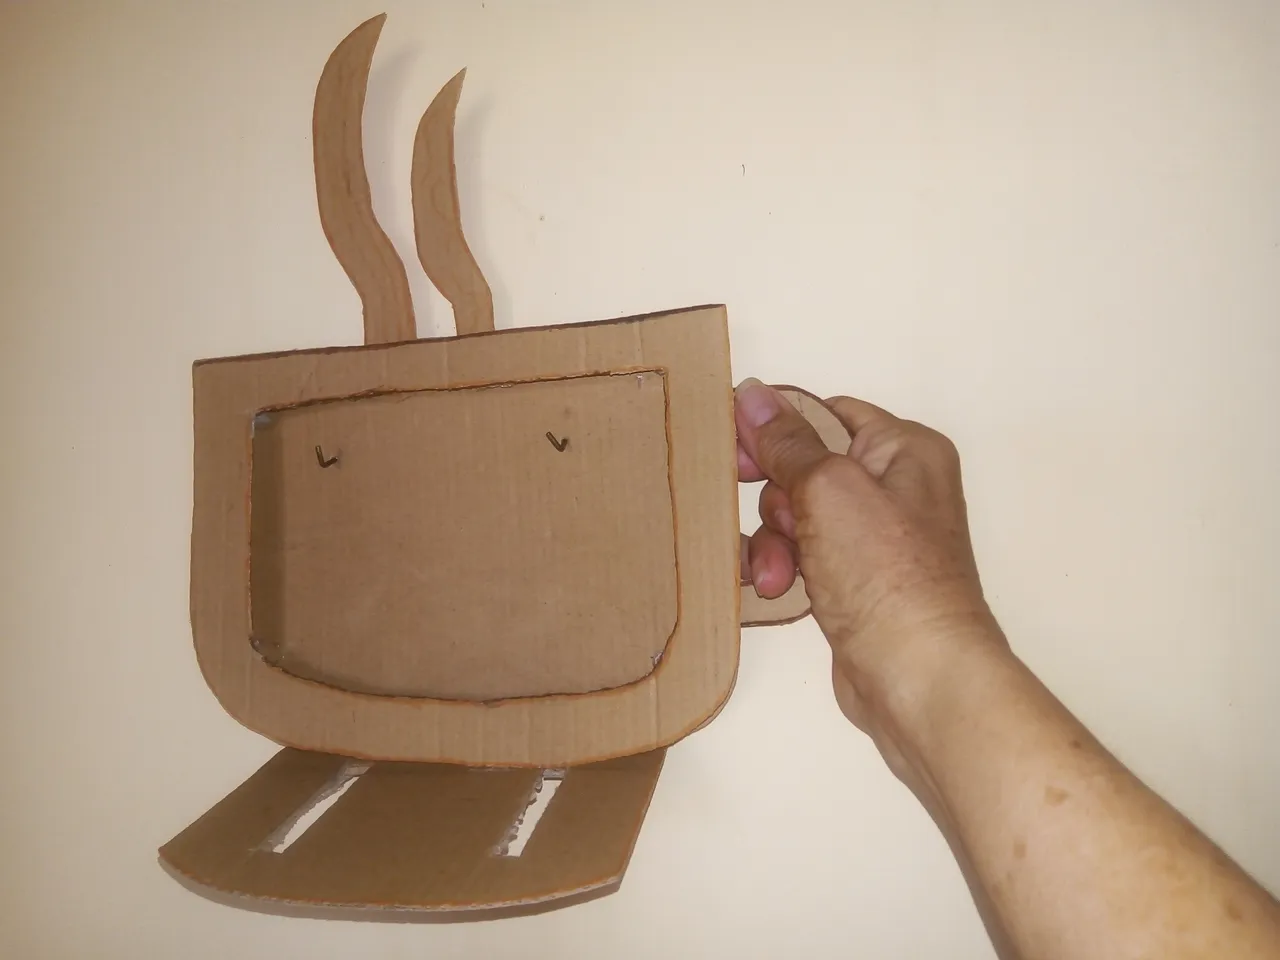
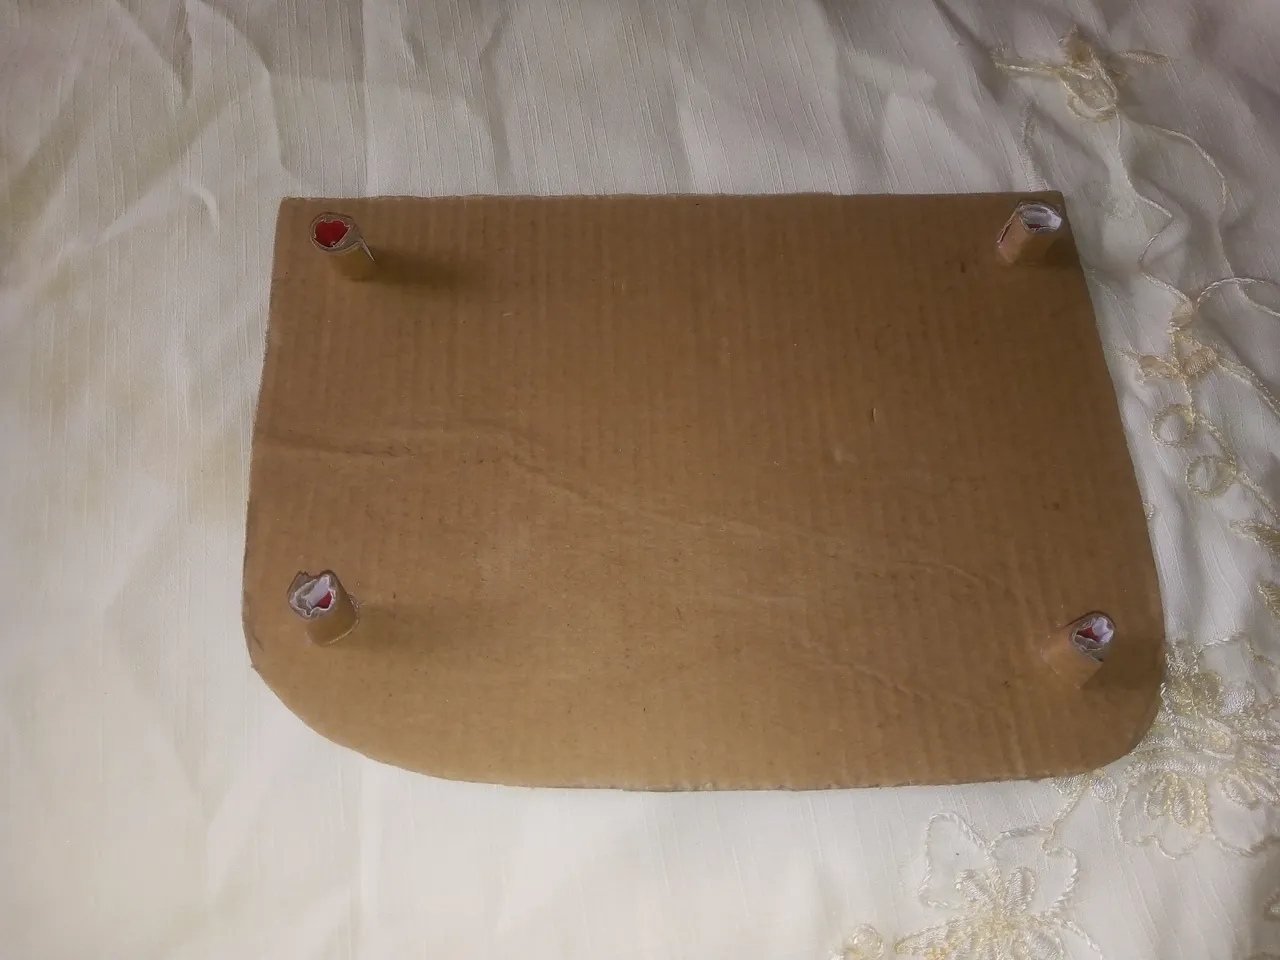
Segundo Paso:. En la forma de la taza coloqué el asa , puse
cuatro pines uno en cada esquina para dar efecto de profundidad al colocar el marco, después puse las formas de humo , pegando todo con silicón (ver las fotos).
Second step:. In the shape of the cup I placed the handle, I put
four pins, one in each corner to give depth effect when placing the frame, then I put the smoke shapes, gluing everything with silicone (see photos).
 .
.
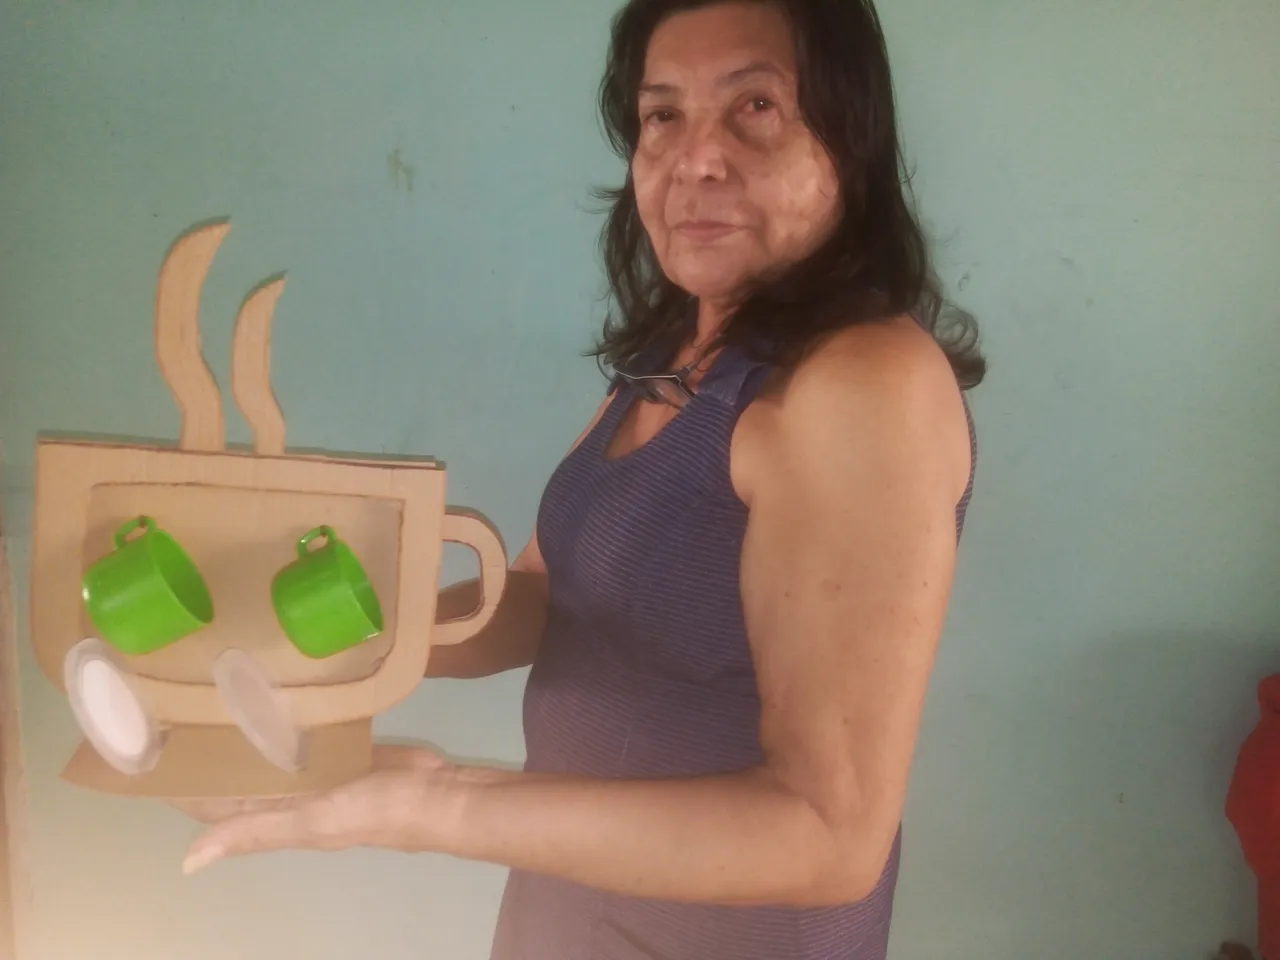
Tercer Paso:. Una vez realizado el segundo paso, para finalizar , coloqué en la parte de abajo de la taza una figura simulando una bandejita ,que sería como el plato de la taza y en el centro de la misma dos herrajes para colgar las tazas. ( Ver fotos.
Third step:. Once the second step was done, to finish, I placed a figure simulating a tray at the bottom of the cup, which would be like the plate of the cup and in the center of it two fittings to hang the cups. ( To see photos).
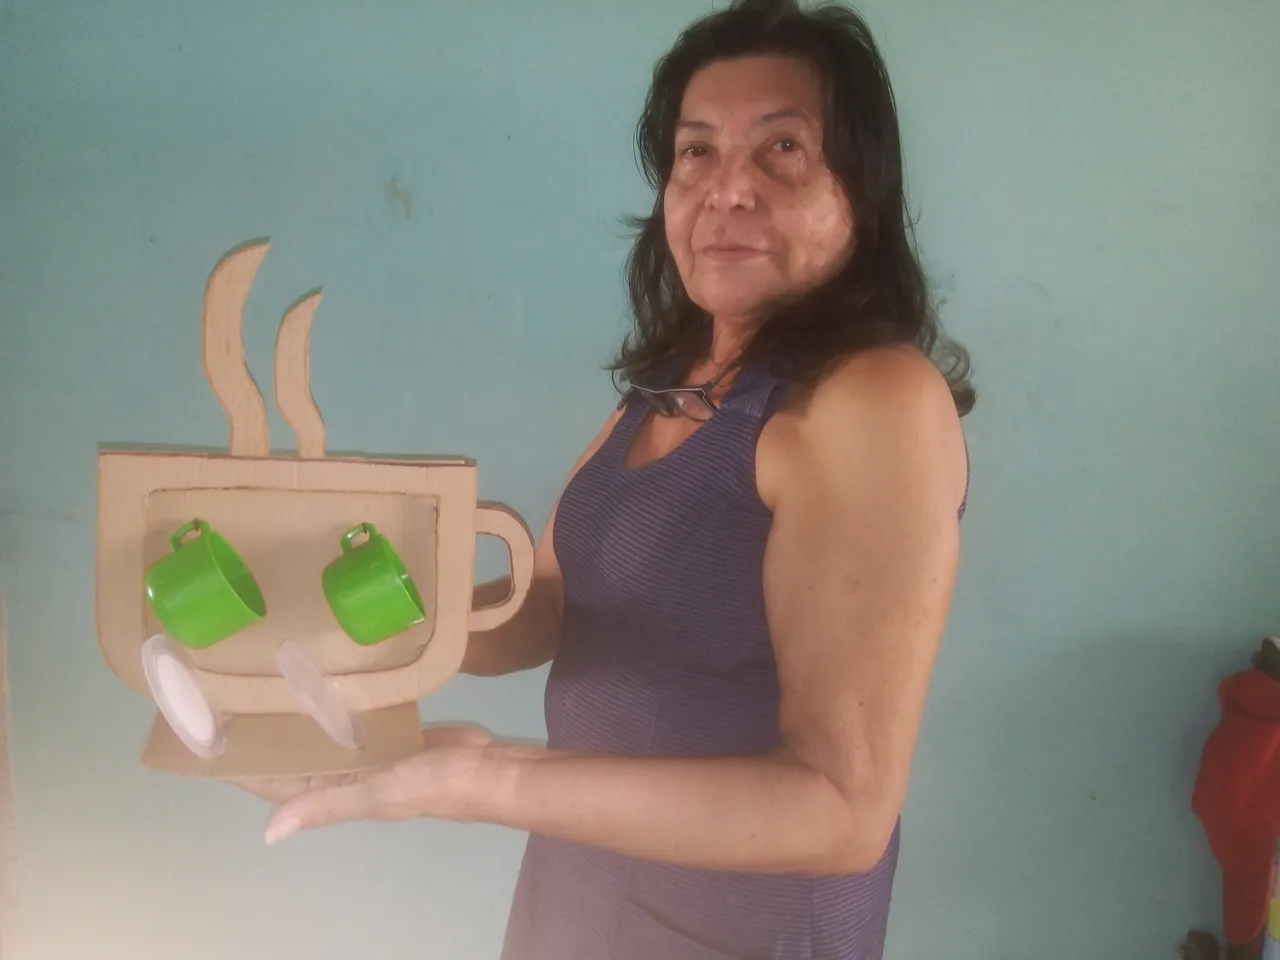
Amigos, como siempre espero que les guste esta manualidad de hoy , la hice reciclando una caja donde vienen los zapatos y la dejé del color natural para hacerlo más artesanal, ustedes pueden decorarla a su gusto y seguro les va encantar sigan viendo mis Creativos Post y nos vemos en la próxima
.Friends, as I always hope you like this craft today, I made it by recycling a box where the shoes come from and I left it in the natural color to make it more handmade, you can decorate it to your liking and you will surely love to keep looking at my Creative Post and See you next time.