¡Hola!
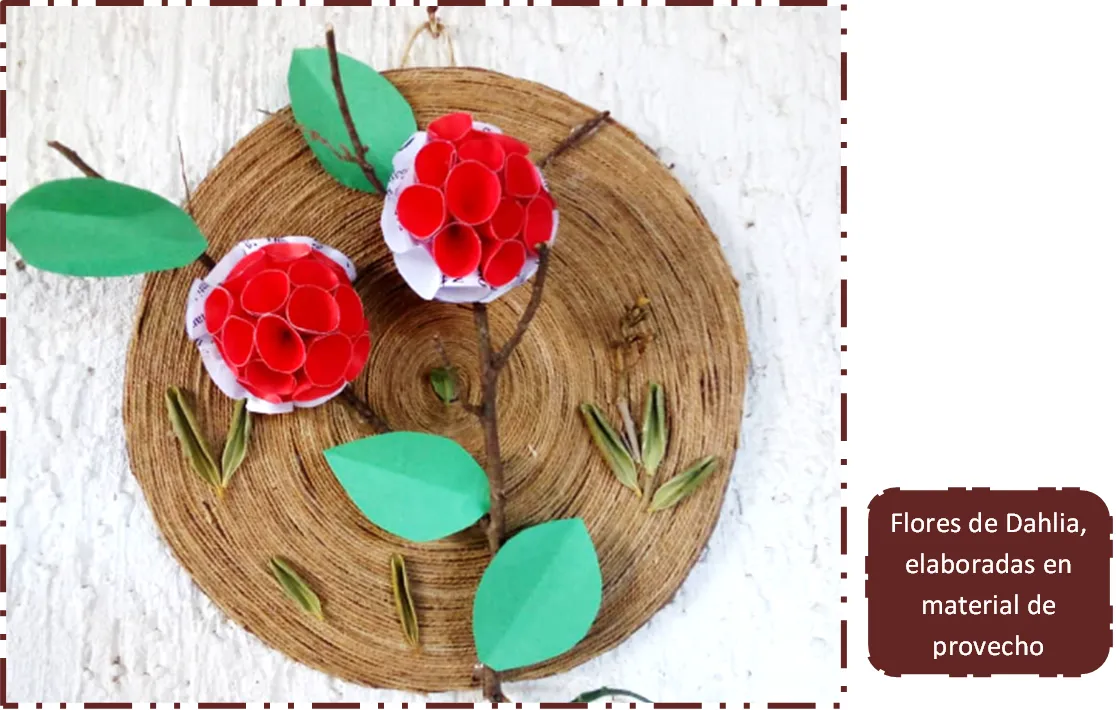
Hoy les saludo con mucho cariño a toda da comunidad del Hiver, espero estén bien, en este día les traigo un paso a paso de un Lindo adorno de flores de Dahlia, elaborada con material de provecho, son muy linda y fácil de hacer. Manitas a la obra.
Hi there!
Today I greet all the Hiver community with much affection, I hope you are well, on this day I bring you a step by step of a cute Dahlia flower ornament, made with useful material, they are very cute and easy to do. Handyman at work
Materiales a utilizar:
Cartón
Papel reciclado
Cartulina
Rama seca
Hojas seca
Mecatillo
Pega
Tijera
The materials to use:
Paperboard
Recycled paper
Cardboard
Dry Branch
Dry leaves
Mecatillo
Job
Scissor

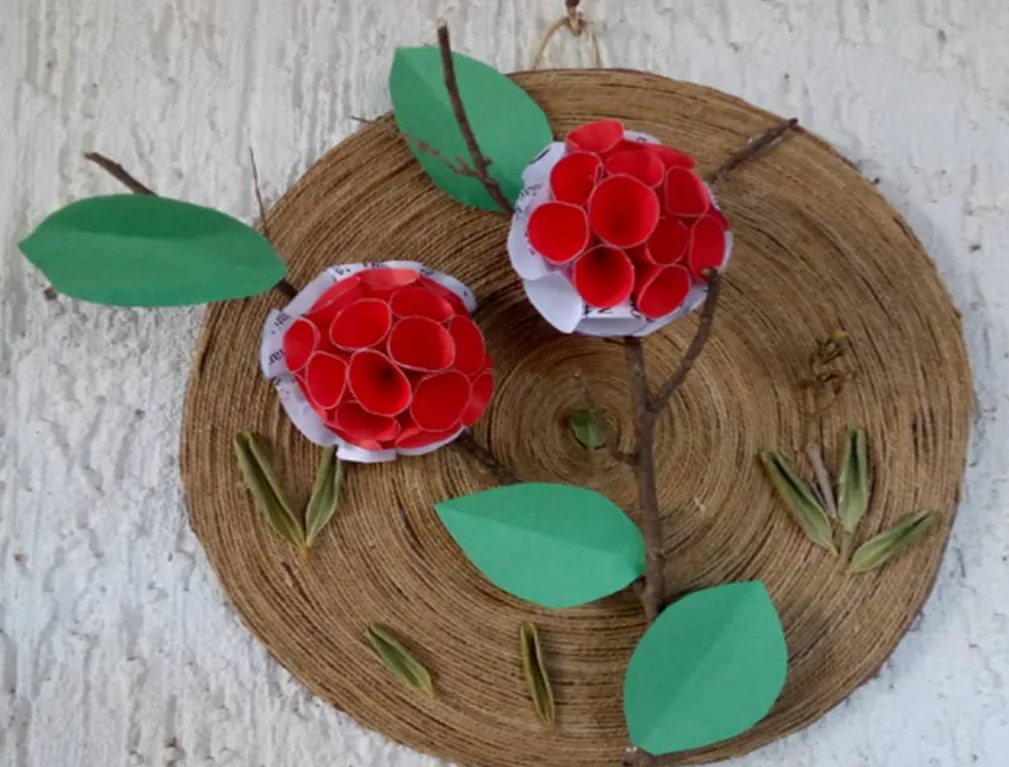
Los Pasos a seguir son los siguientes:
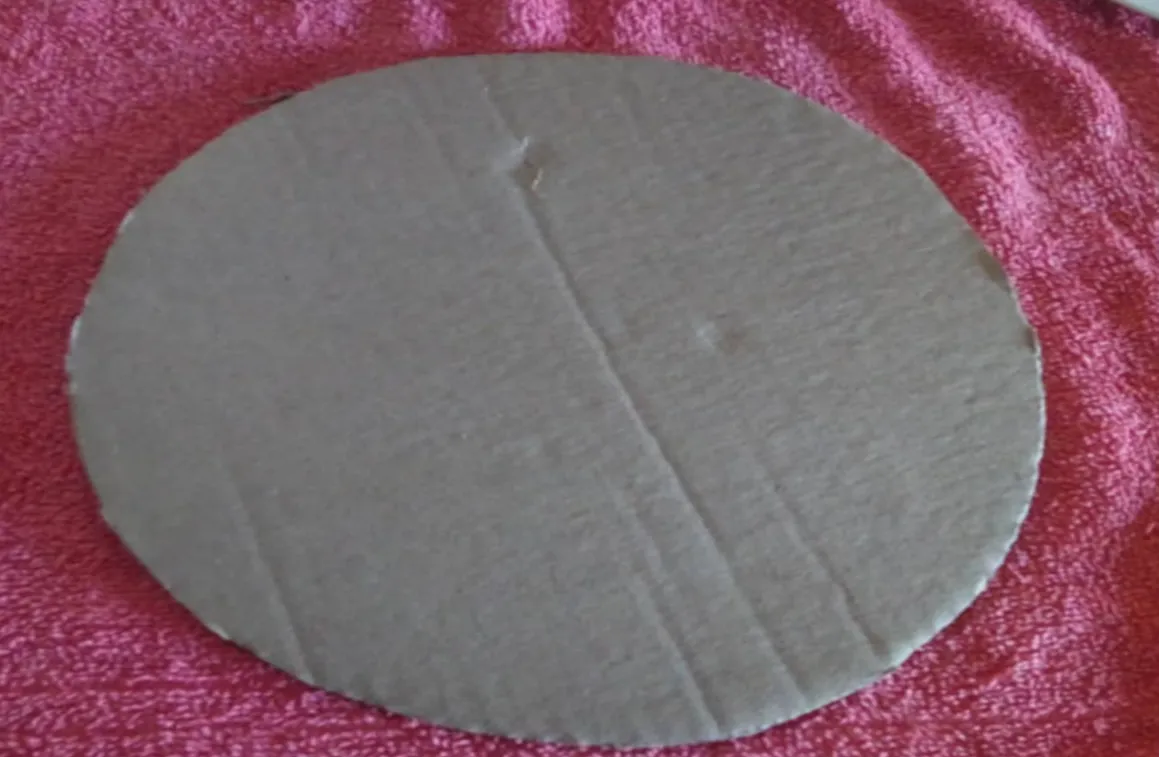
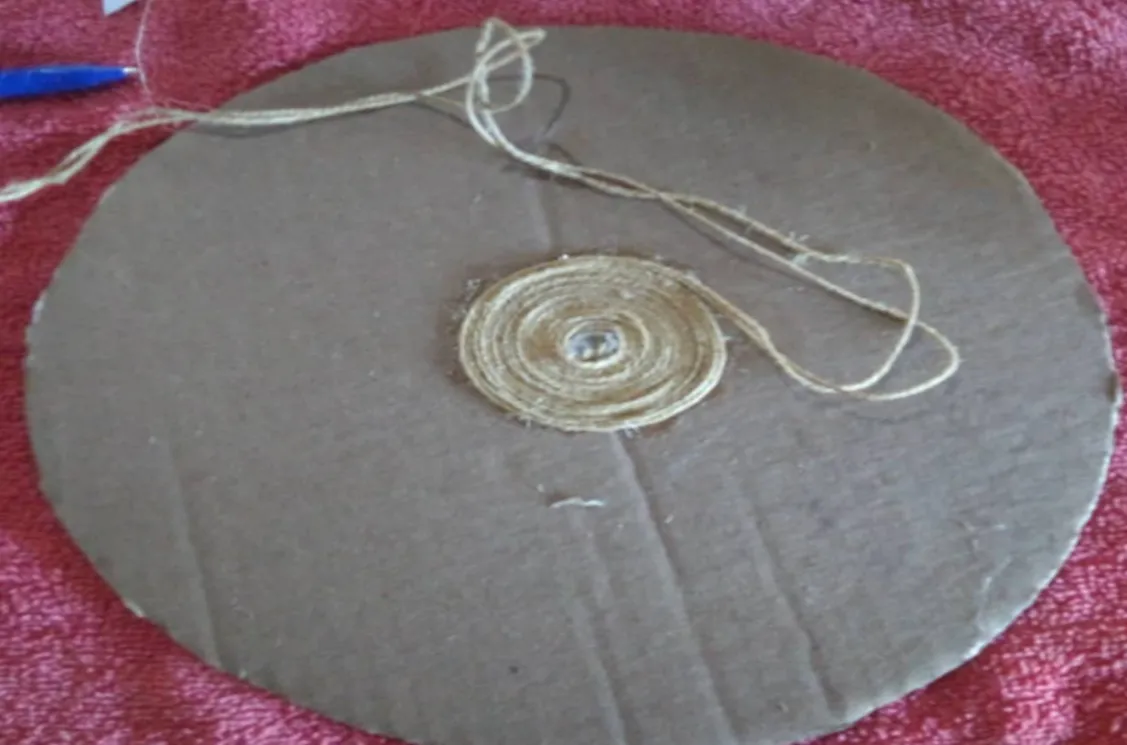
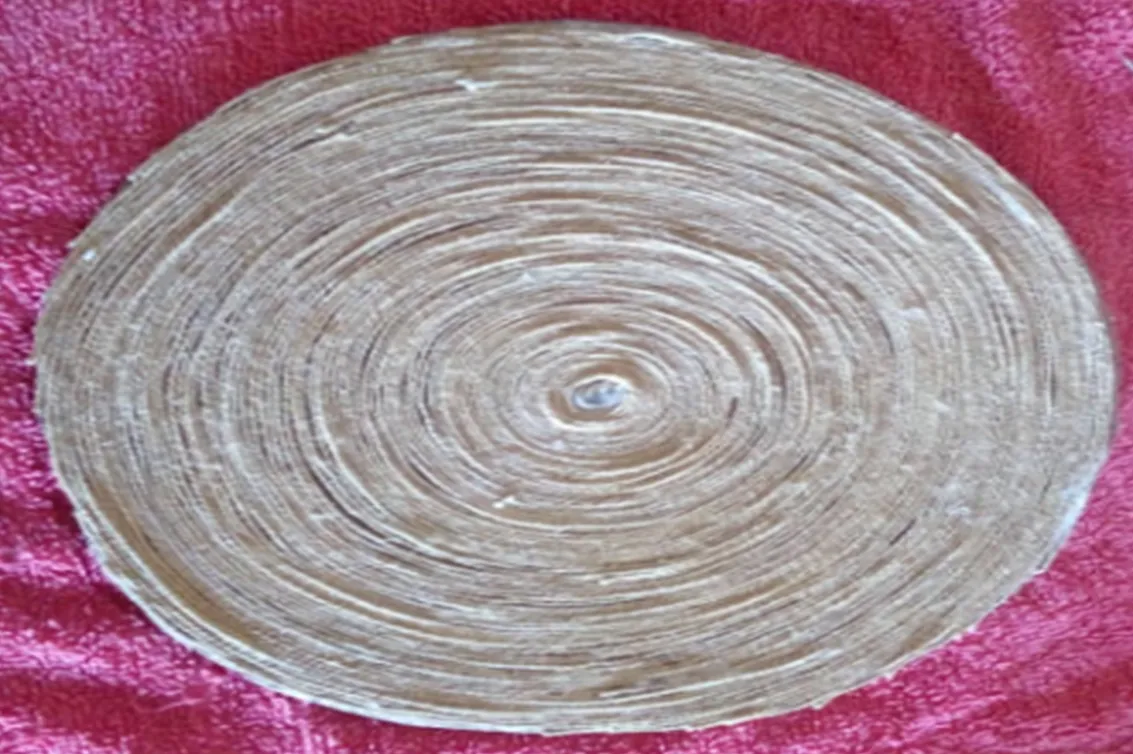
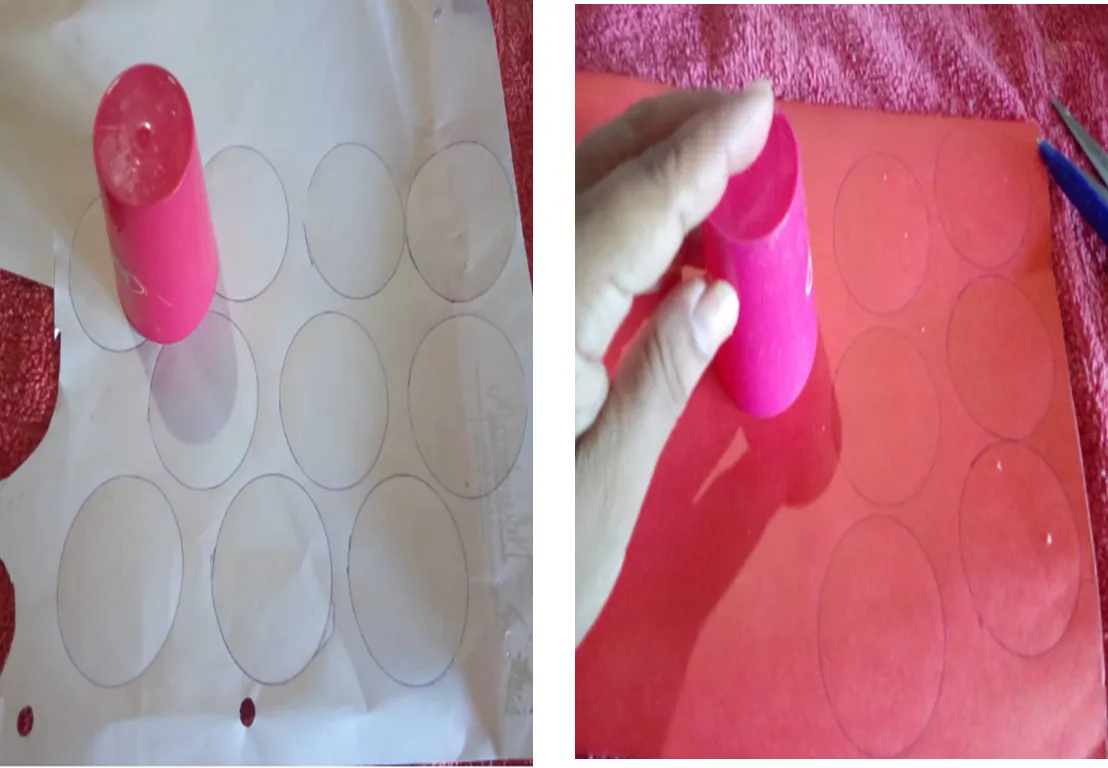
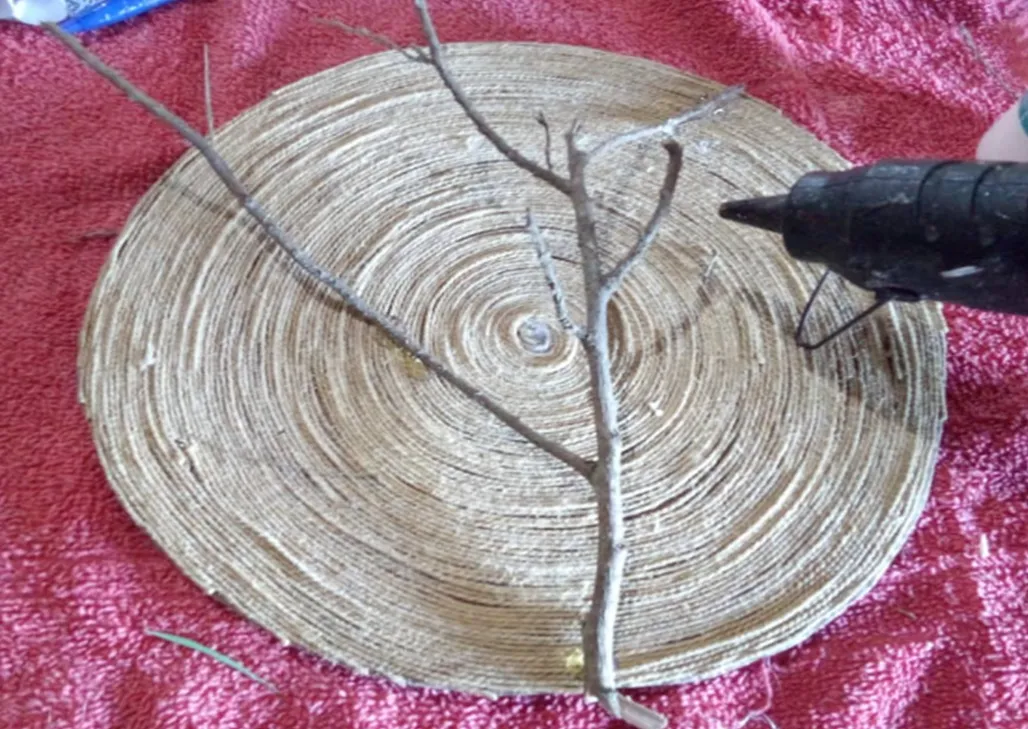
1.- Con un plato medimos el tamaño que va a tener nuestro adorno, en un pedazo de cartón lo dibujamos, lo recortamos y luego con el mecatillo le colocamos pega en el centro del circulo y vamos a ir enrollando desde adentro hacia fuera hasta forrar todo el cartón.
The steps to follow are those:
1.- With a plate we measure the size that our ornament is going to have, on a piece of cardboard we draw it, cut it and then with the wick we place glue in the center of the circle and we are going to roll from the inside out until we cover the entire cardboard.


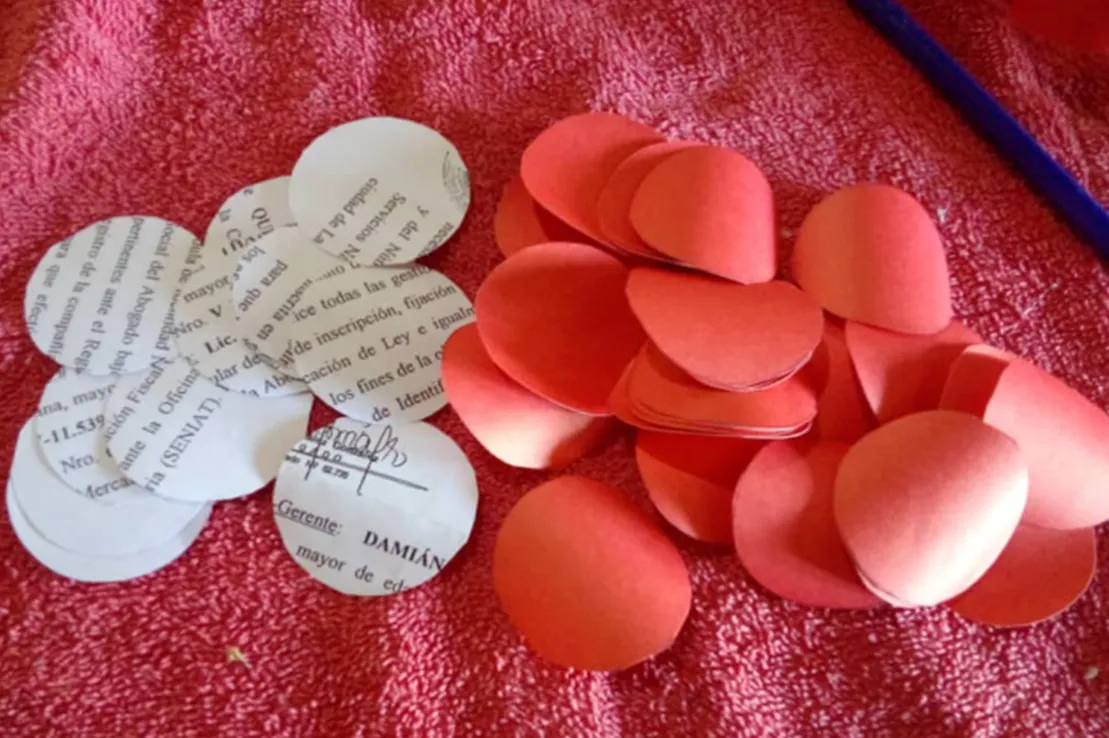
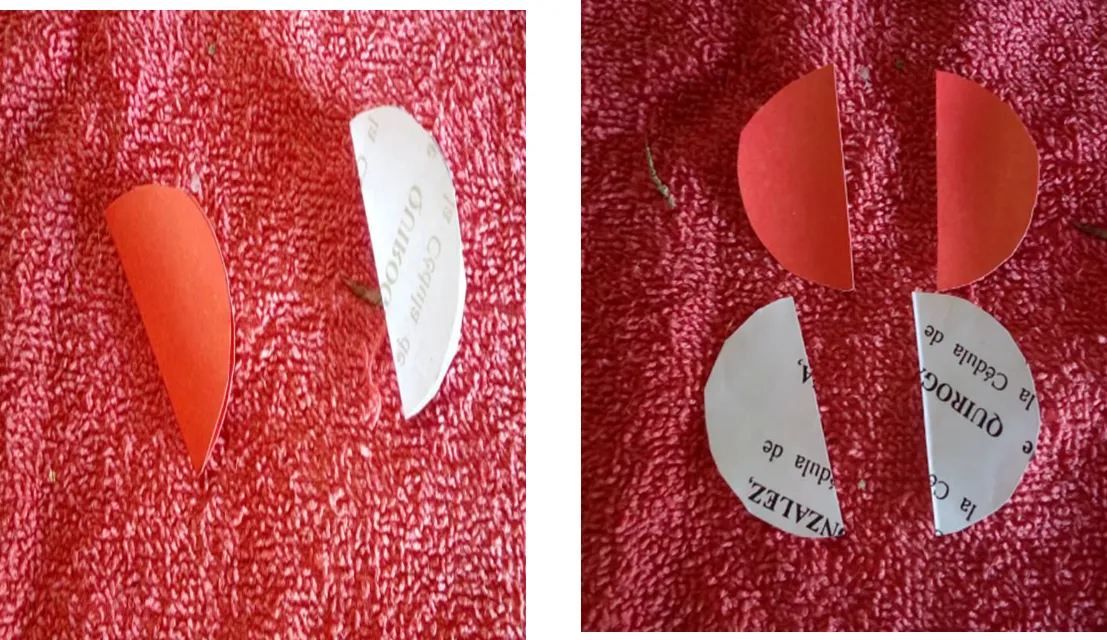
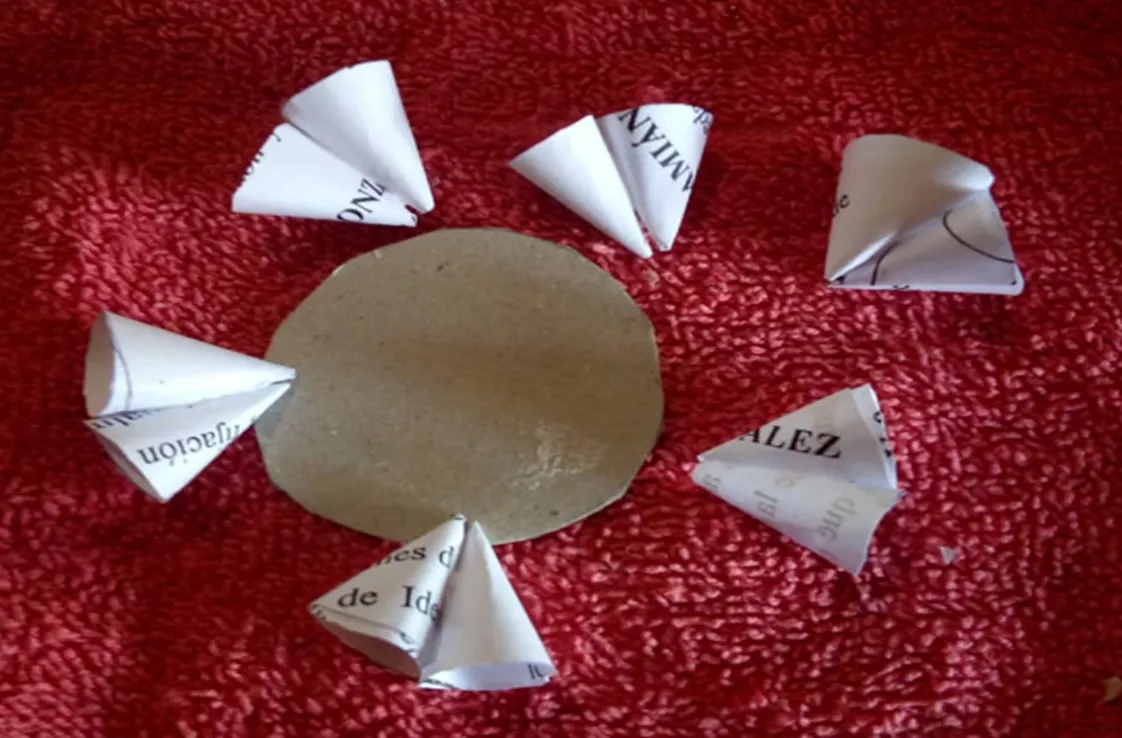
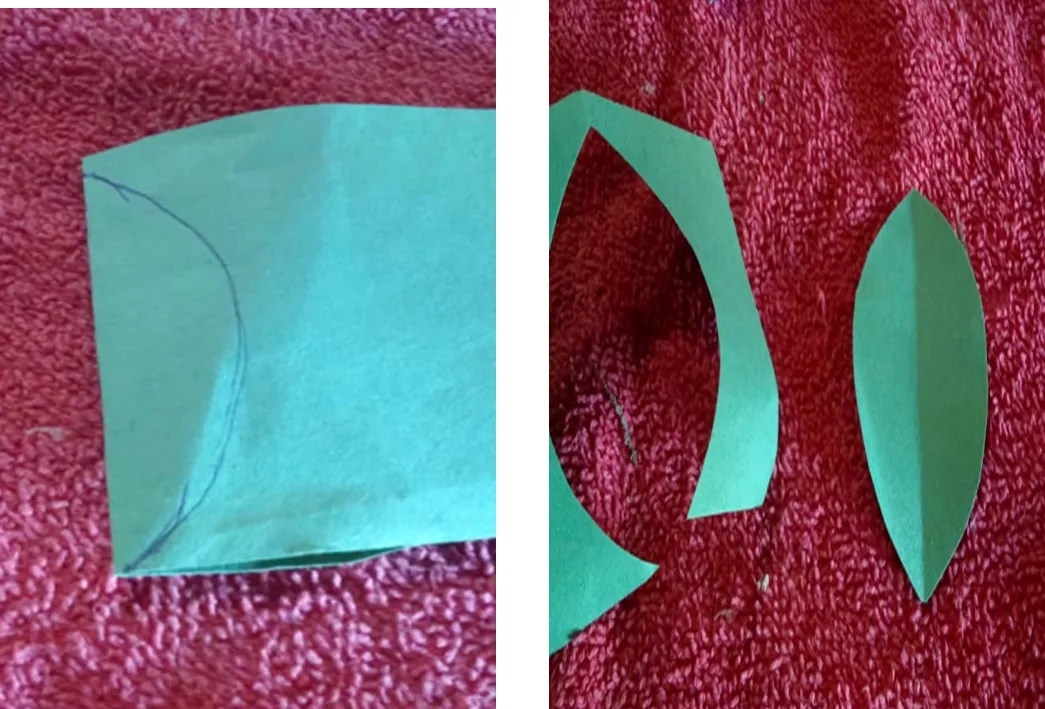
2.- Para hacer las Dahlias procedemos a cortar circulos de 4 diametros con las hojas de papel reciclado y de cartulina; lo doblamos a la mitad y lo recortamos en dos parte, luego hacemos unos conos como les muestro a continuación:
2.- To make the Dahlias we proceed to cut 4-diameter circles with the sheets of recycled paper and cardboard; We fold it in half and cut it in two parts, then we make some cones as I show you below:


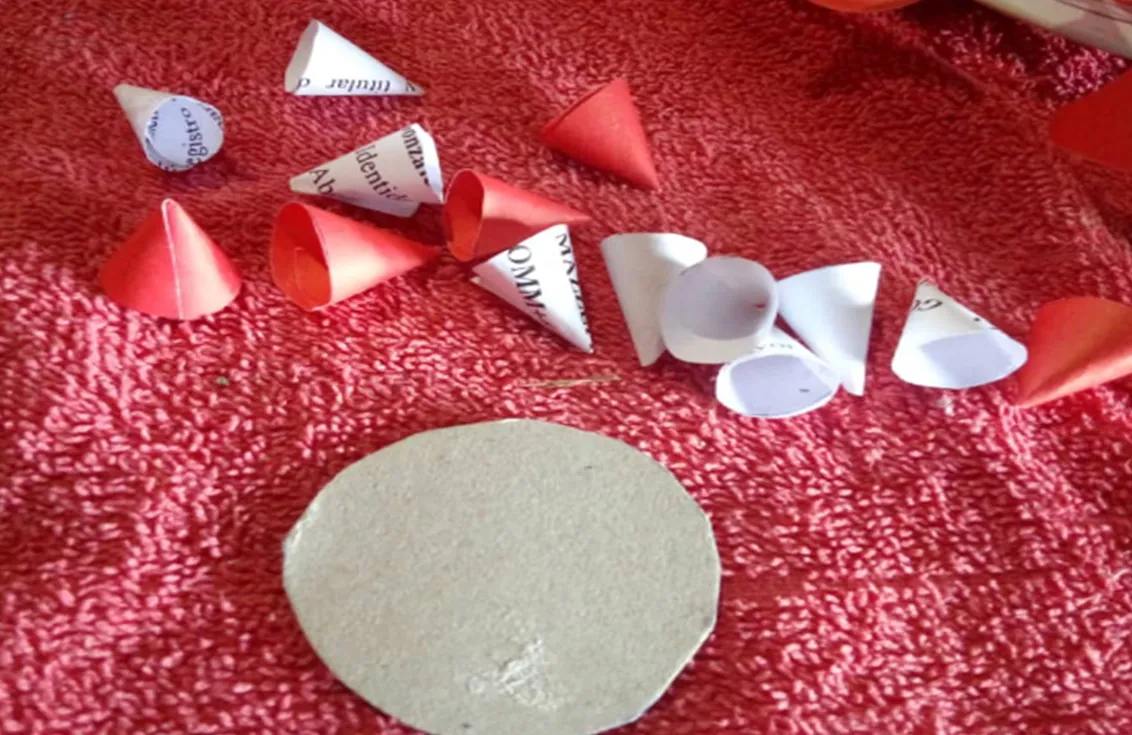
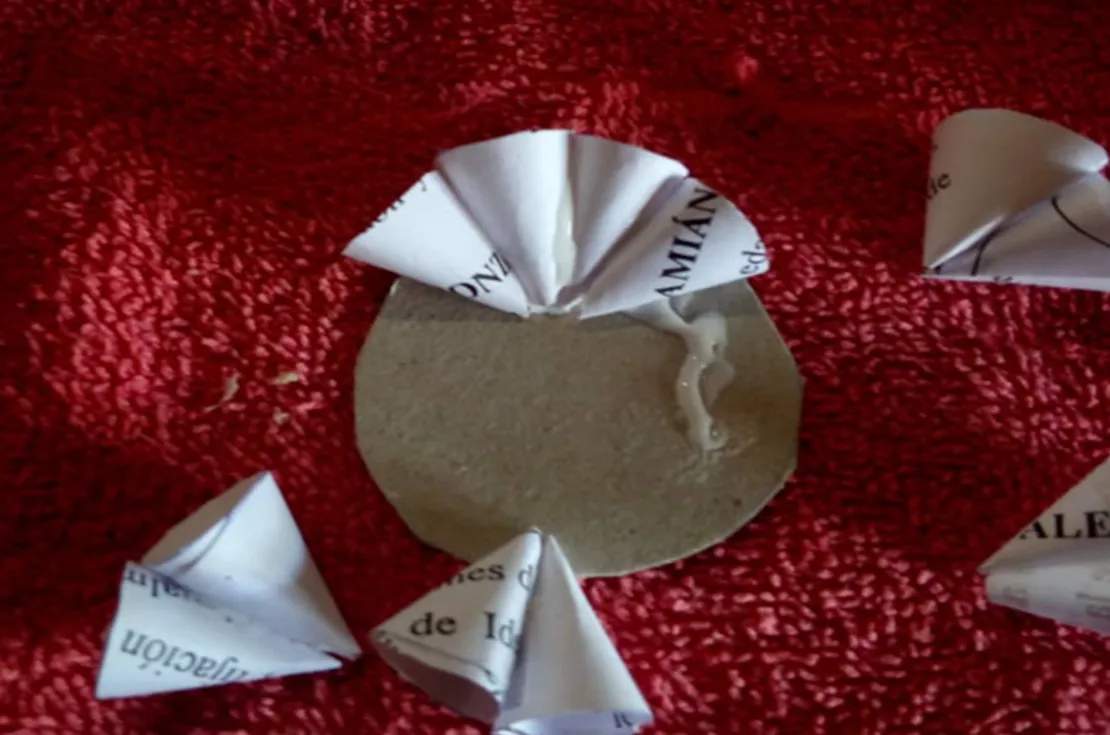
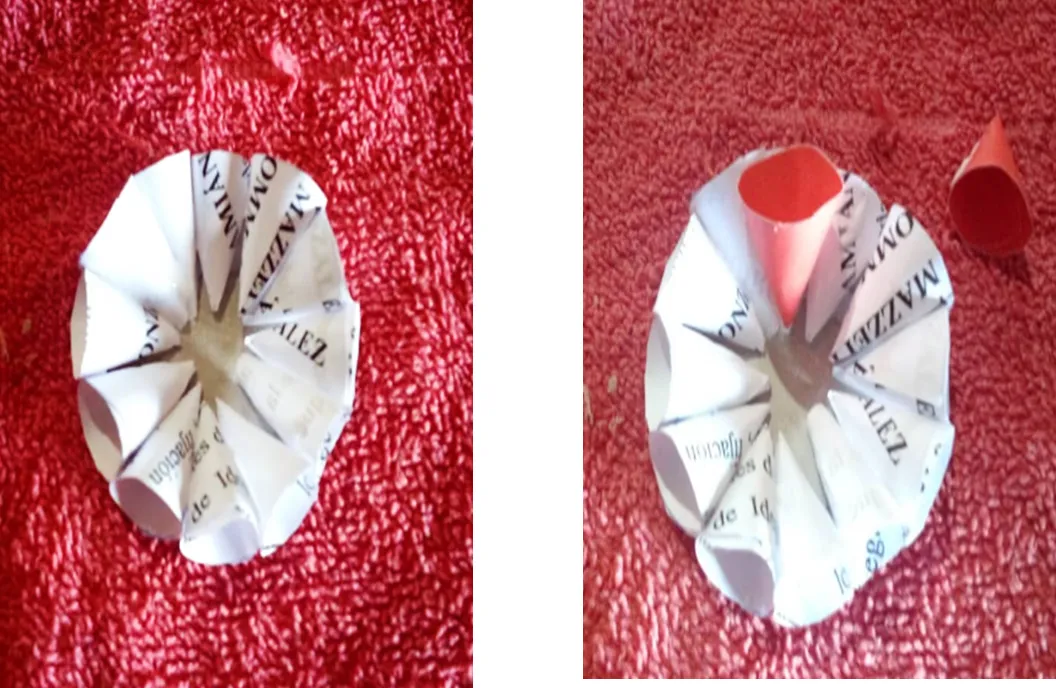
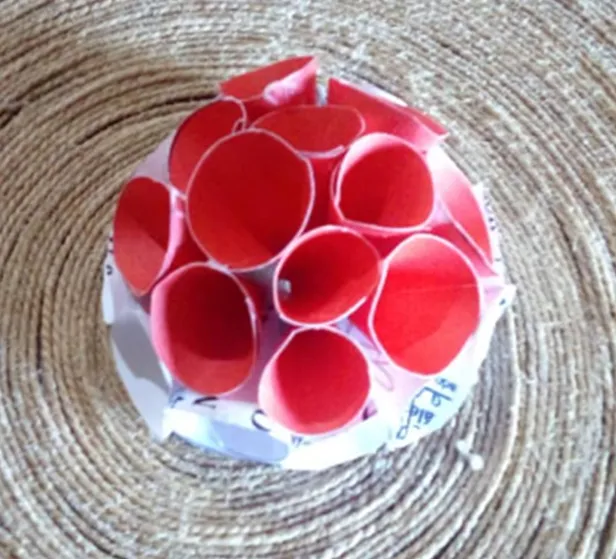
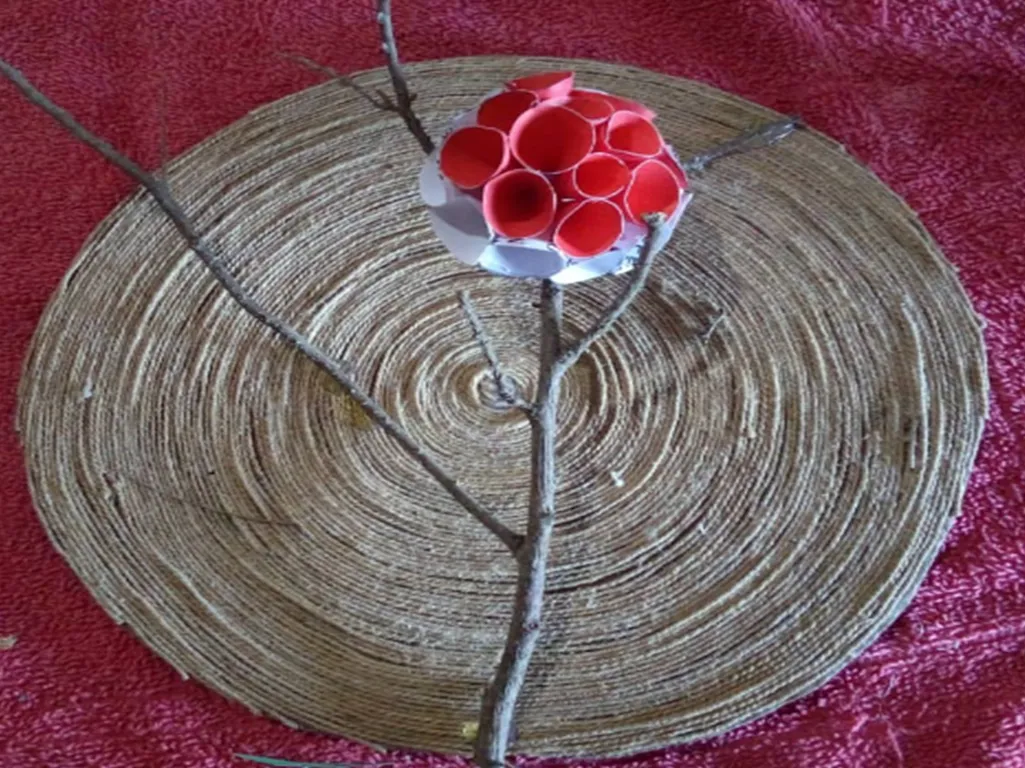
3.- Ahora en un circulo de 6 diámetro procedemos a pegar los conos, primero se pegan de dos en dos, lego encima de ellos vamos pegando uno a uno hasta formar la Dahlia,
3.-Now in a circle of 6 diameter we proceed to glue the cones, first they are glued two by two, on top of them we are gluing one by one until forming the Dahlia,
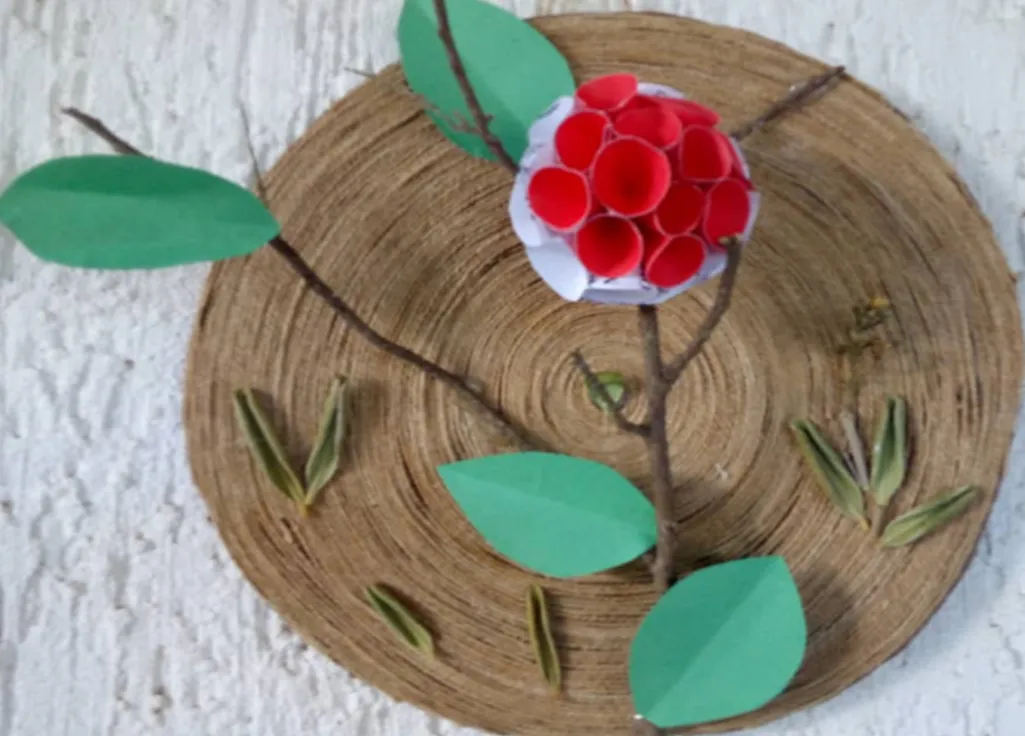
4.-Finalmente dibujamos y recortamos algunas hojas , tomamos la rama seca y la pegamos a nuestro circulo de cartón y mecatillo, pegamos nuestras Dahlia y la hojas, también le coloque algunas hojas de olivo secas que tenia en casa.
4.-Finally we draw and cut out some leaves, we take the dry branch and glue it to our cardboard circle and wicker, we glue our Dahlia and the leaves, I also put some dry olive leaves that I had at home.
Listo terminado mi proyecto del día de hoy, espero les haya gustado. !Hasta la próxima!
Ready finished my project today, I hope you liked it. ! until next time!
Las fotografías fueron tomadas con un teléfono inteligente HUAWE Y5, el texto fue traducido al inglés con el traductor de Google.
The photographs were taken with a HUAWE Y5 smartphone, the text was translated into English with the Google translator.