Hola a todos!
Hello everyone!
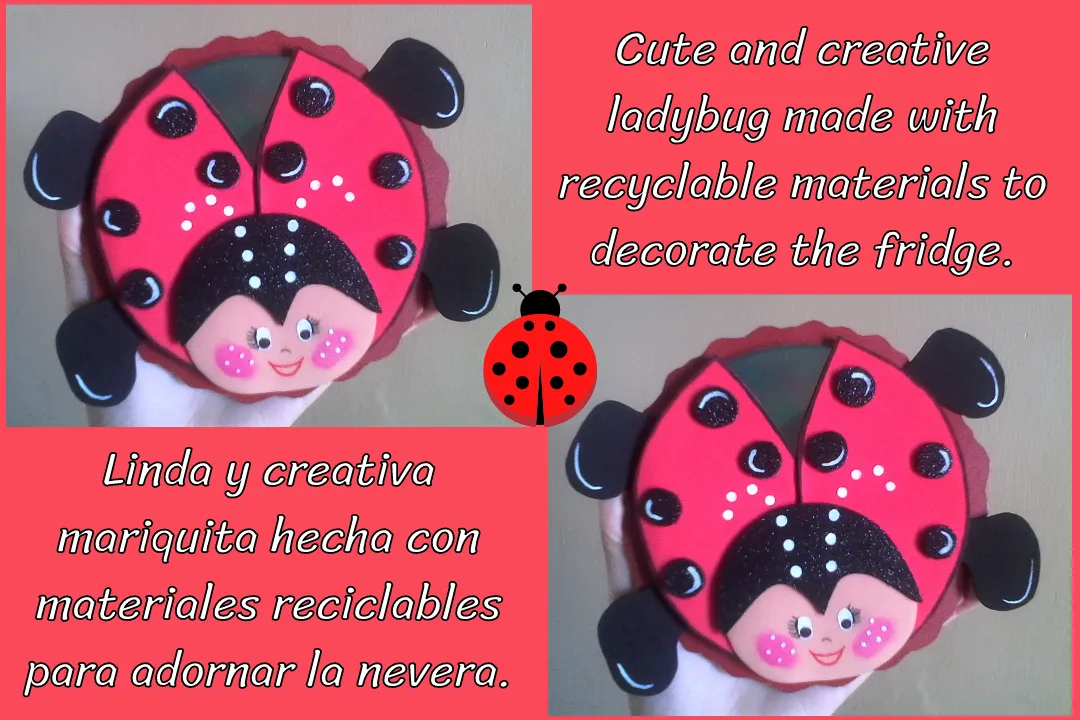
Espero estén bien, en esta oportunidad les presento esta linda mariquita para adornar la nevera que realicé con materiales reciclables, también la podemos usar como decoración para fiestas, a mí me gustó mucho como quedó espero que a ustedes también, y sin más nada que mencionar, a continuación les indicaré los materiales y el paso a paso:
I hope you are well, this time I present this cute ladybug to decorate the fridge that I made with recyclable materials, we can also use it as a decoration for parties, I really liked how it looked I hope you do too, and with nothing more to mention, then I will tell you the materials and the step by step:
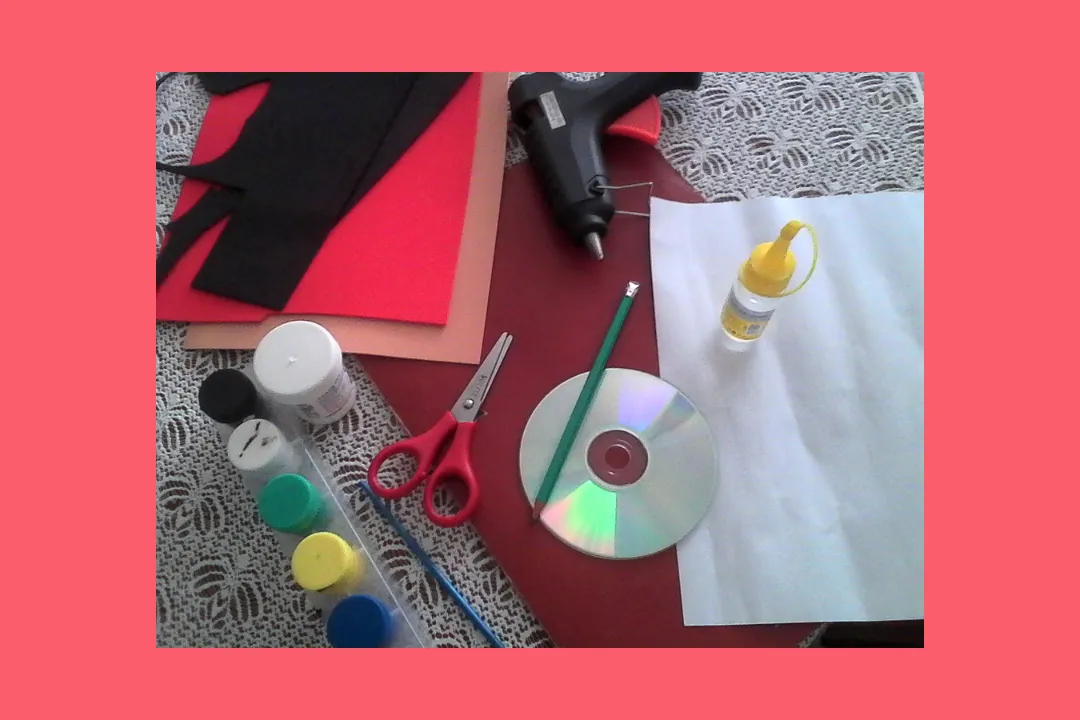
Materiales:
- CD viejo.
- Carpeta color marrón.
- Foami (goma eva), varios colores.
- Pintura, colores: blanco, negro y rojo.
- Pincel.
- Tijera.
- Papel blanco.
- Lápiz.
- Silicón.
- Imán pequeño.
Materials:
- Old CD.
- Brown folder.
- Foami (eva rubber), various colors.
- Paint, colors: white, black and red.
- Paintbrush.
- Scissors.
- White paper.
- Pencil.
- Silicone.
- Small magnet
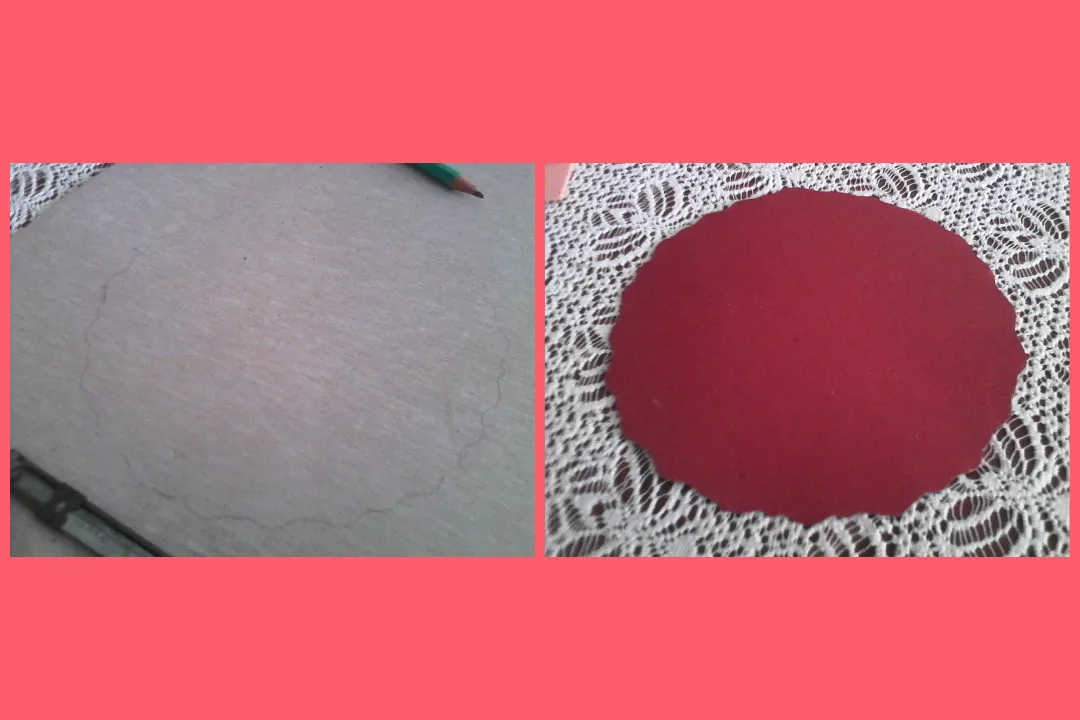
Primero dibujé un círculo en la carpeta marrón con distintas formas en las orillas, y corté.
First I drew a circle on the brown folder with different shapes on the edges, and cut out.
Luego, marqué la silueta de la patitas de la mariquita en el foami negro, las corté, y las en pegué varias partes del CD.
Then, I traced the silhouette of the ladybug's little legs on the black foami, cut them out, and glued them to various parts of the CD.
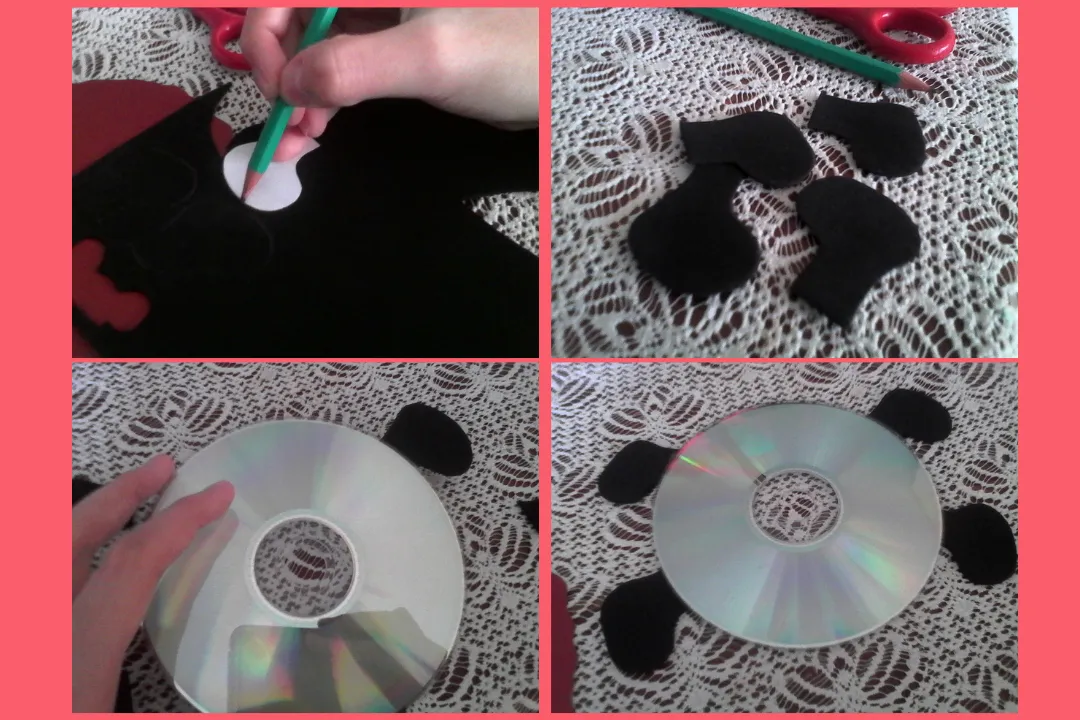
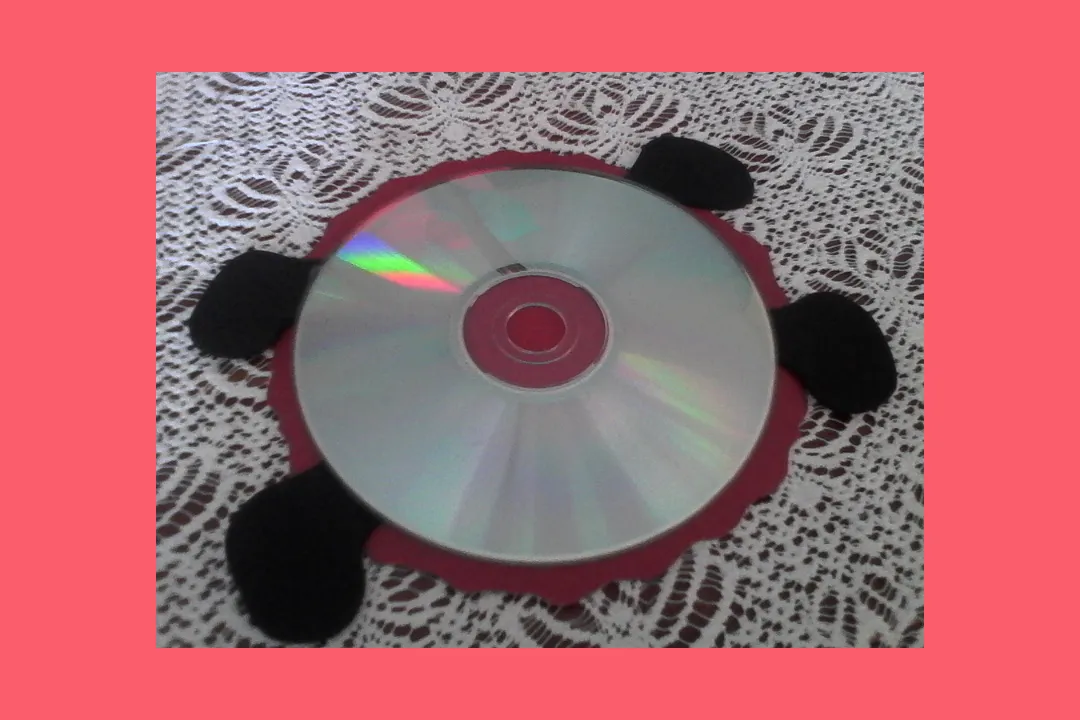
Luego pegué el CD a la pieza de cartón.
I then glued the CD to the cardboard piece.
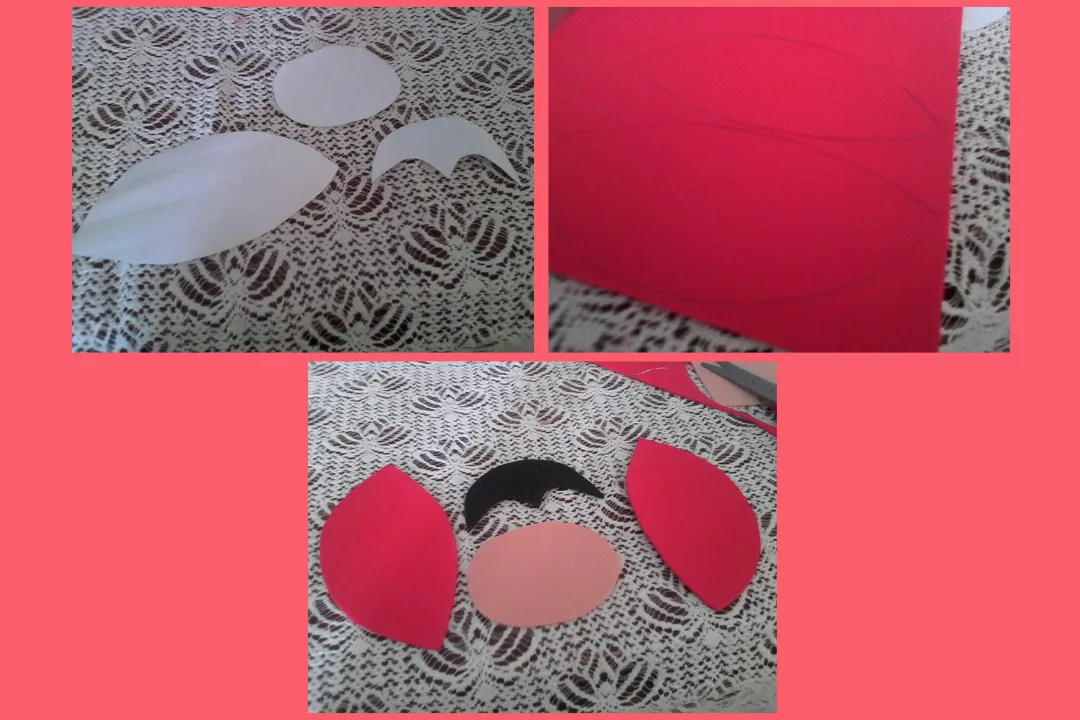
Marqué las partes de la mariquita en los otros colores de foami, y corté.
I marked the parts of the ladybug on the other colors of foami, and cut.
Luego pegué todas esas piezas al CD, con mucho cuidado para no quemarme.
I then glued all those pieces to the CD, being very careful not to burn myself.
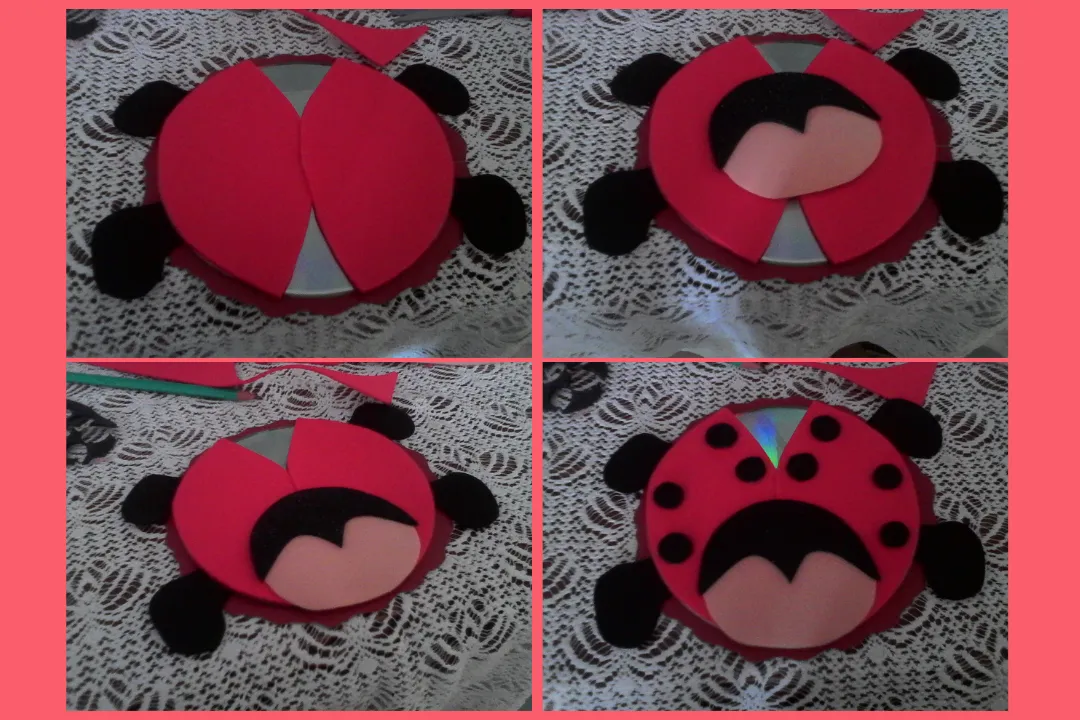
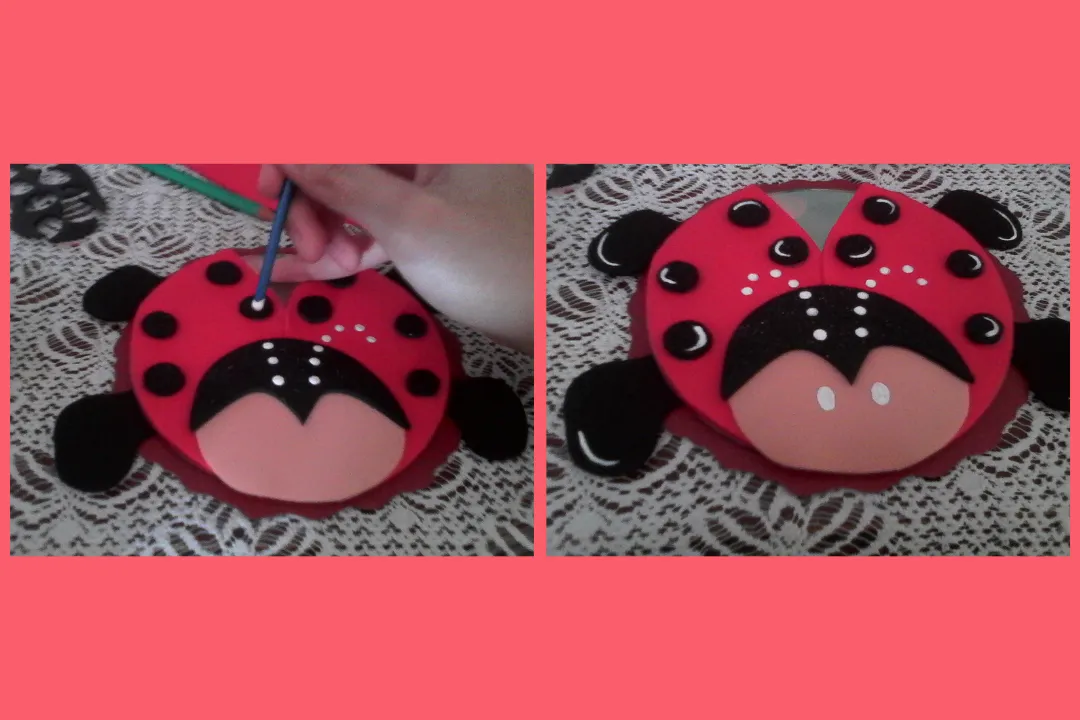
Para finalizar, realicé los últimos detalles, marqué varios puntitos para hacer las antenas e hice los ojos.
To finish, I made the last details, I marked several dots to make the antennas and made the eyes.
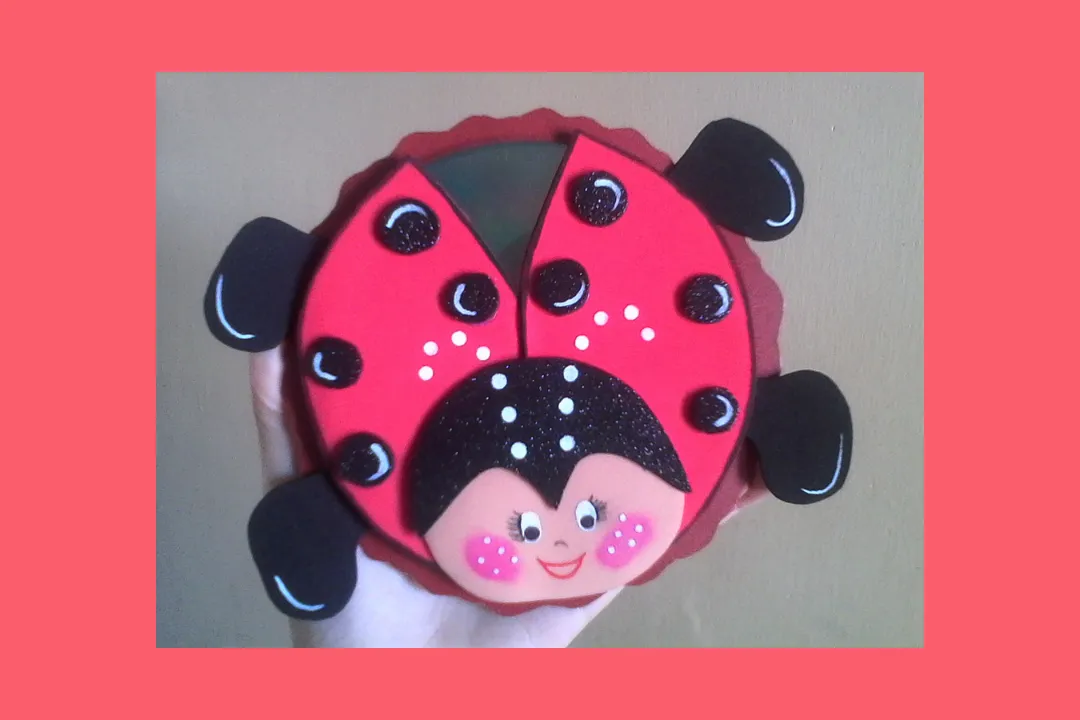
🐞Este fue el resultado, espero que les haya gustado tanto como a mí. Gracias por leer. Hasta un próximo post!!🐞
🐞This was the result, I hope you liked it as much as I did. Thanks for reading. See you next post!🐞
Todas las imágenes son de mi autoría @mariamglow, tomadas con mi teléfono, editadas en Canva, texto traducido en DeepL.
All images authored by me @mariamglow, taken with my phone, edited in Canva, text translated at DeepL.