
Hola hace unos días hice este anillo ajustable simple pero bastante llamativo desde mi punto de vista, que podría ser usado tanto por hombres o mujeres, igualmente esta es una prueba, por lo tanto, no tenía una ruta predeterminada para elaborarlo, más allá de que fuera un proceso fácil y rápido, entonces lo primero que realice fue agarrar y evaluar el material y herramientas que tenía a mano, que fue el siguiente:
Cable de cobre de 1.3 mm.
Soldadura Harris 5% plata.
Limas y lijas número 280, 369 y 400.
Dremel con eje flexible.
Soplete.
Pinza joyería.
Mandril de anillo
Martillo
Motor de banco, disco de pulir y pasta de pulir
PROCESO

Corte el alambre de cobre de 1.3 mm en dos pedazos de 6.5 cm.

Aquí agarré con la mano cada pedazo y levemente lo doble por la mitad para que se generara ese pequeño arco.

Junte las puntas y en cada una de ellas soldé con la soldadura, siento que no corrió como me hubiera gustado, andaba como apurado para hacer esto, por lo que en este paso recomiendo limar las puntas y quizás aplanar un poco los extremos con ayuda de un martillo y algo que sirva de yunque.

Con el mandril de anillo se va ajustando la pieza soldada para darle la medida que se desea. Como es un anillo ajustable para hombre o mujer y que es medianamente grande, lo puse en talla 8, que es una medida promedio y que se puede ajustar para arriba o abajo si es necesario.
Después de esto, golpeé el anillo con el martillo sobre el mismo mandril para darle una textura simpática y leve, después lime las puntas para perfilarlas y ganar en estética.
Ya una vez con el anillo a la medida y corregidas las puntas, empece a pasar lija con el Dremel para avanzar rápido, así que empece con la lija 280, 360 y 400, posterior a esto metí el anillo en el mandril y pulí en el motor de banco con el disco de algodón aplicando un poco de cera para pulir, el resultado es el de la foto.


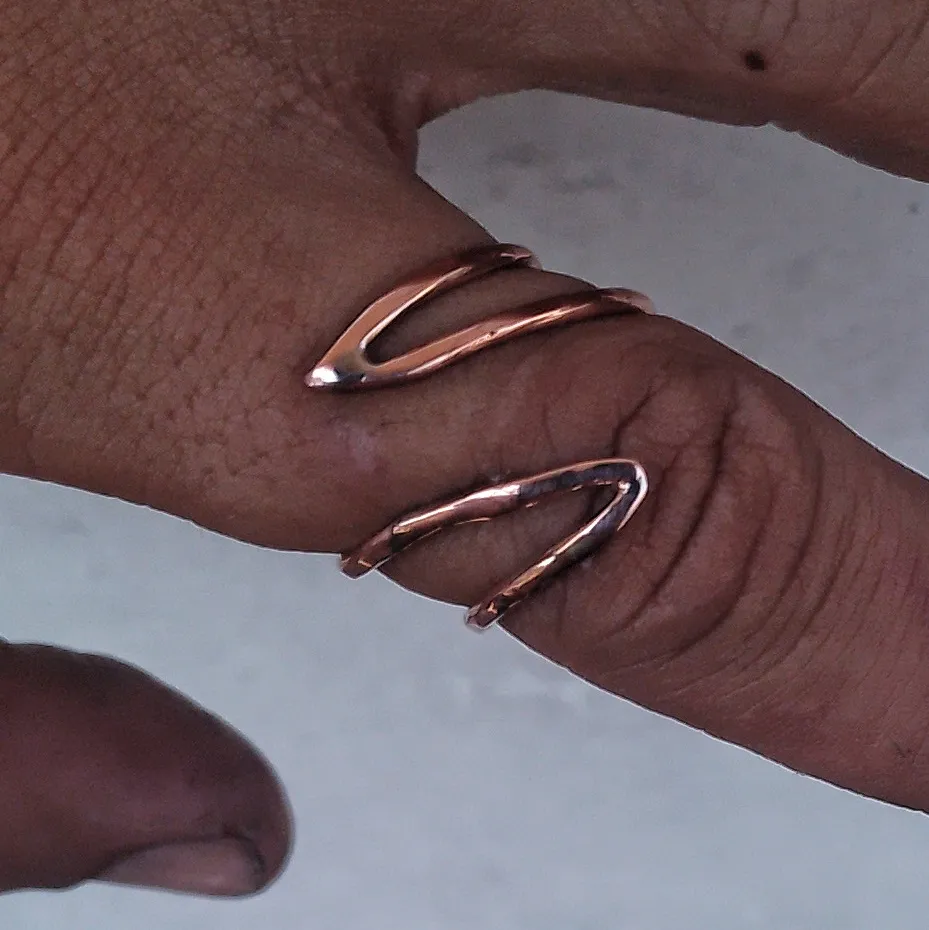
Ya terminada la pieza, mandé a que se le diera un baño de plata, quedando así de elegante.

En este GIF de arriba se puede apreciar cómo luce en nuestro dedo por dentro y por fuera.
A pesar de que quizás no se note o se aprecie visualmente todo el proceso, espero que la explicación les haya ilustrado un poco de cómo se elaboró este anillo. Lo que sí me gustaría es tener su opinión de que tal luce o si tienen alguna idea para que yo pueda probar o experimentar.

Si gusta y quieres conocer más de mi trabajo, te invito a visitar mi IG en la siguiente dirección:
https://www.instagram.com/m16ueljoyas?igsh=bHVzMW9xd3Bnc2xr
Notas:
Imágenes tomadas por mí con mi tfno. Samsung A03
Edición de imágenes: Snapseed y Picsart
Gif: Caput
ENGLISH / Google Translator
Hello, a few days ago I made this simple but quite striking adjustable ring from my point of view, which could be worn by both men and women. This is also a test, therefore, I did not have a predetermined route to make it, other than that It was an easy and quick process, so the first thing I did was grab and evaluate the material and tools I had on hand, which was as follows:
- 1.3 mm copper cable.
- Harris 5% silver solder.
- Files and sandpaper numbers 280, 369 and 400.
- Dremel with flexible shaft.
- Blowtorch.
- Jewelry clamp.
- Ring mandrel
- Hammer
- Bench motor, polishing disc and polishing paste
PROCESS
Cut the 1.3 mm copper wire into two 6.5 cm pieces.
Here I grabbed each piece with my hand and slightly folded it in half so that that small arch was generated.
I put the tips together and on each of them I soldered with the solder, I feel that it did not run as I would have liked, I was in a hurry to do this, so in this step I recommend filing the tips and perhaps flattening the ends a little with the help of a hammer and something to serve as an anvil.
Using the ring mandrel, the welded piece is adjusted to give it the desired size. Since it is an adjustable ring for men or women and it is medium large, I put it in size 8, which is an average size and can be adjusted up or down if necessary.
After this, I hit the ring with the hammer on the same mandrel to give it a nice and light texture, then filed the tips to profile them and gain aesthetics.
Once I had the ring to size and the tips corrected, I started sanding with the Dremel to advance quickly, so I started with the 280, 360 and 400 sandpaper, after this I put the ring in the mandrel and polished it on the bench motor with the cotton pad applying a little polishing wax, the result is as shown in the photo.
Once the piece was finished, I had it given a silver bath, making it look elegant.
In this GIF above you can see how it looks on our finger inside and out.
Although the entire process may not be noticed or appreciated visually, I hope that the explanation has illustrated a little about how this ring was made. What I would like is to have your opinion on what it looks like or if you have any ideas so that I can try or experiment.
If you like it and want to know more about my work, I invite you to visit my IG at the following address:
https://www.instagram.com/m16ueljoyas?igsh=bHVzMW9xd3Bnc2xr
Grades:
- Images taken by me with my phone. Samsung A03
- Image editing: Snapseed and Picsart
- Gif: Caput