Helloooooo! My dear friends from Hive Diy
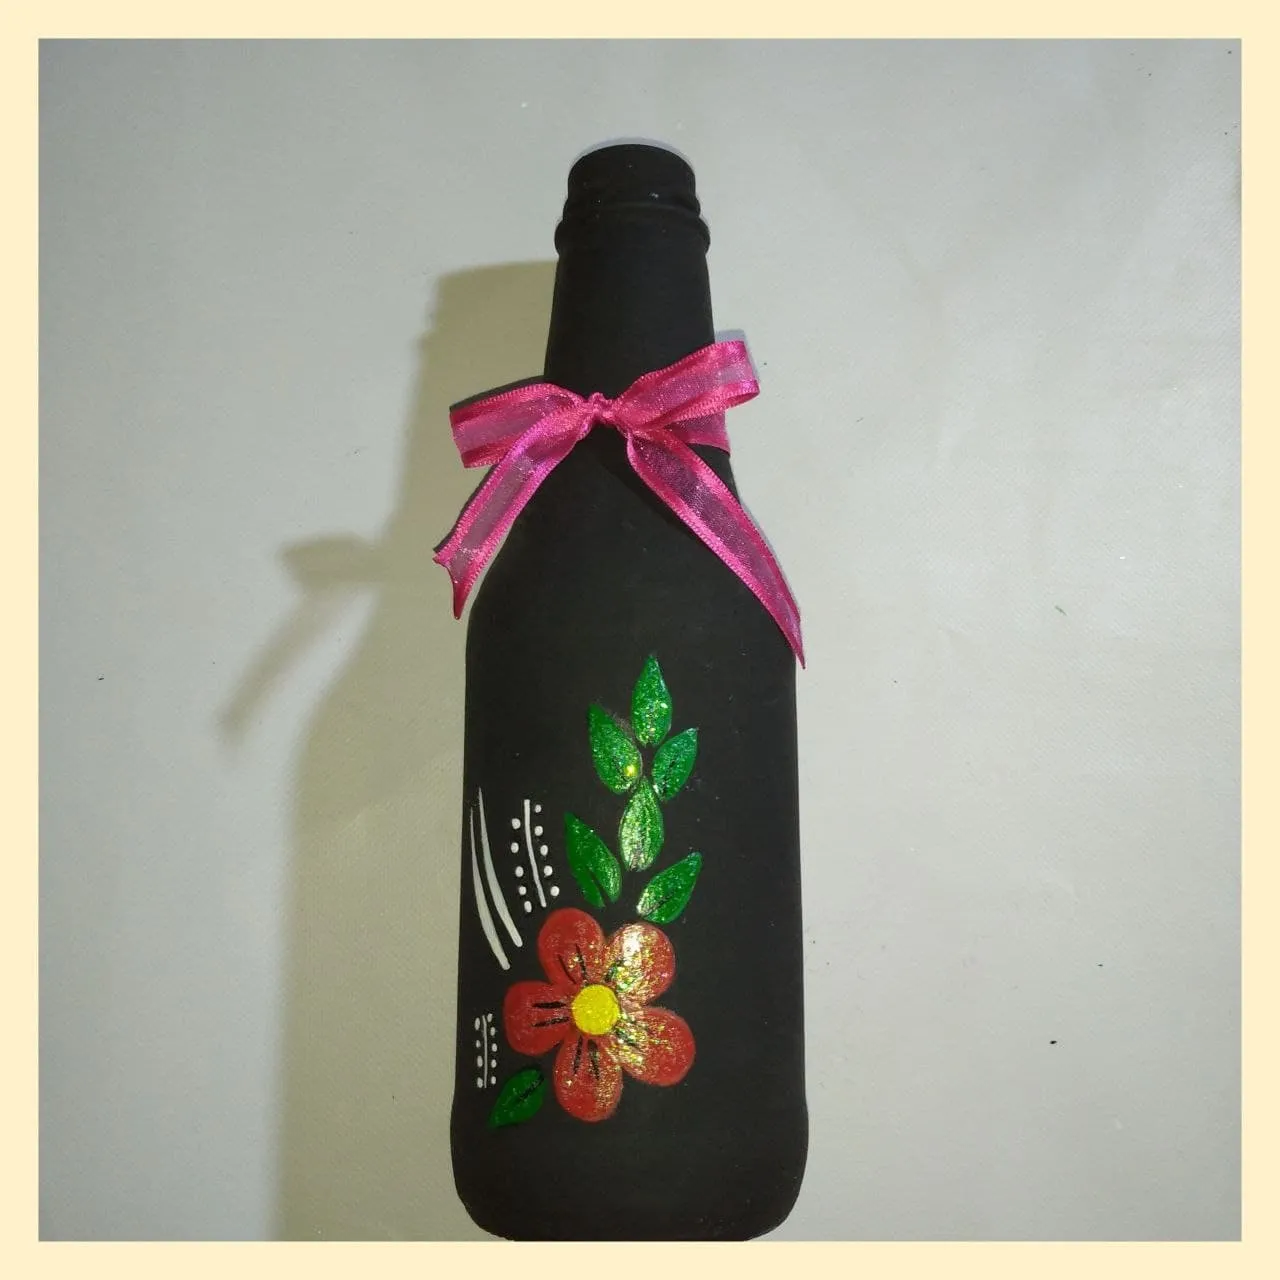
I am very pleased to participate in this contest where the ingenuity of creatives and the great talent for transforming materials that we believe we cannot reuse are put to the test and yet we get the best out of it when we let our imagination fly. Working on glass is not an easy task and more in bottles due to the cylindrical shape that most of them present, but it is not an impossible task. On this occasion, I made a simple art that we can use to decorate a centerpiece, a space on our desk or any other where it is appreciated.
¡Holaaaaaaa! Mis queridísimos amigos de Hive Diy
Me es muy grato participar en este concurso donde se pone a prueba el ingenio de los creativos y el gran talento para transformar materiales que creemos no podremos reutilizar y sin embargo le sacamos el mejor provecho cuando dejamos volar la imaginación. Trabajar sobre vidrio no es una tarea fácil y más en botellas debido a la forma cilíndrica que presentan la mayoría, pero no es un imposible. En esta oportunidad, hice un arte sencilla la cual podemos utilizar para decorar un centro de mesa, un espacio en nuestro escritorio o cualquier otro dónde sea apreciado.

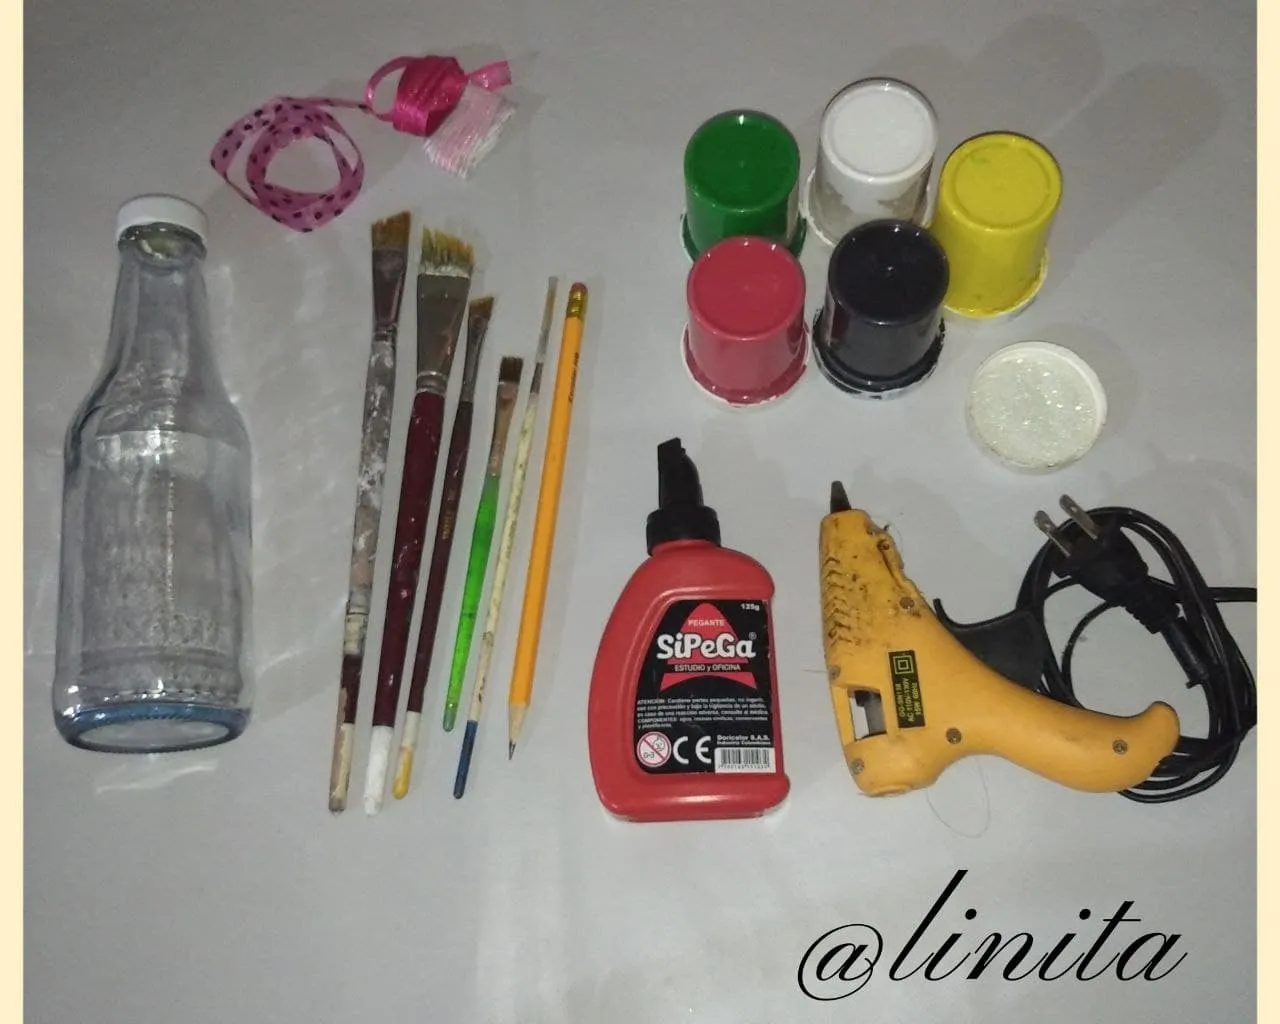
MATERIALS:
- Glass bottle
- Brushes
- Cold paints assorted colors
- White glue
- Frost
- Fabric ribbon
- Graphite pencil
MATERIALES:
- Botella de vidrio
- Pinceles
- Pinturas al frío colores variados
- Pega blanca
- Escarcha
- Cinta de tela
- Lápiz de grafito

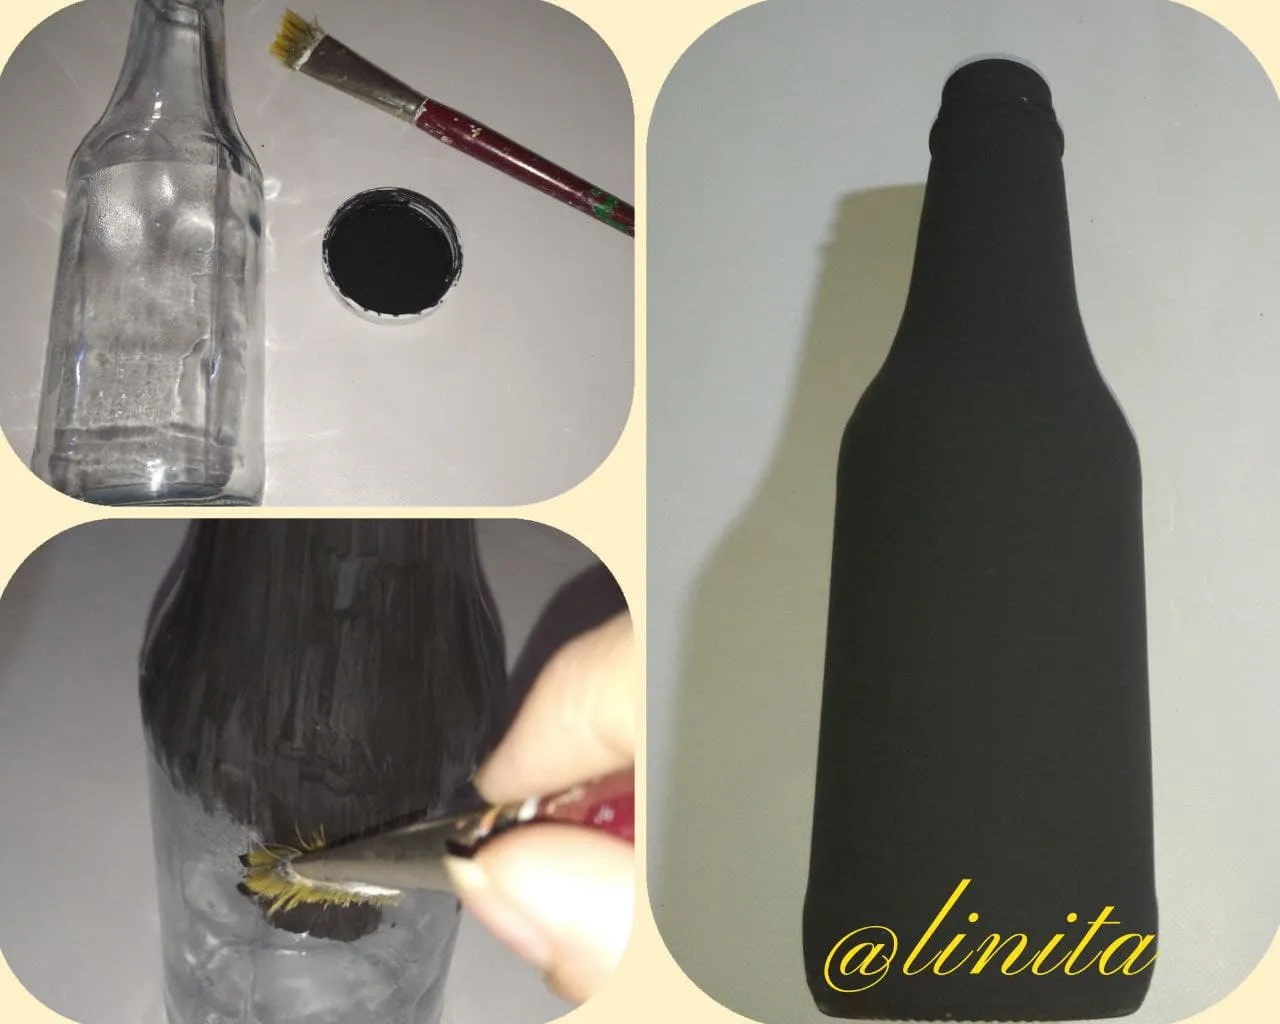
STEP 1
We remove all material or dirt that the bottle contains. We wash and let it dry very well. Then we paint the entire bottle as many layers as necessary to cover it completely and let it dry well.
PASO 1
Eliminamos todo material o suciedad que contenga la botella. Lavamos y dejamos secar muy bien. Luego pintamos toda la botella cuantas capas sean necesarias hasta cubrir totalmente y dejamos secar bien.
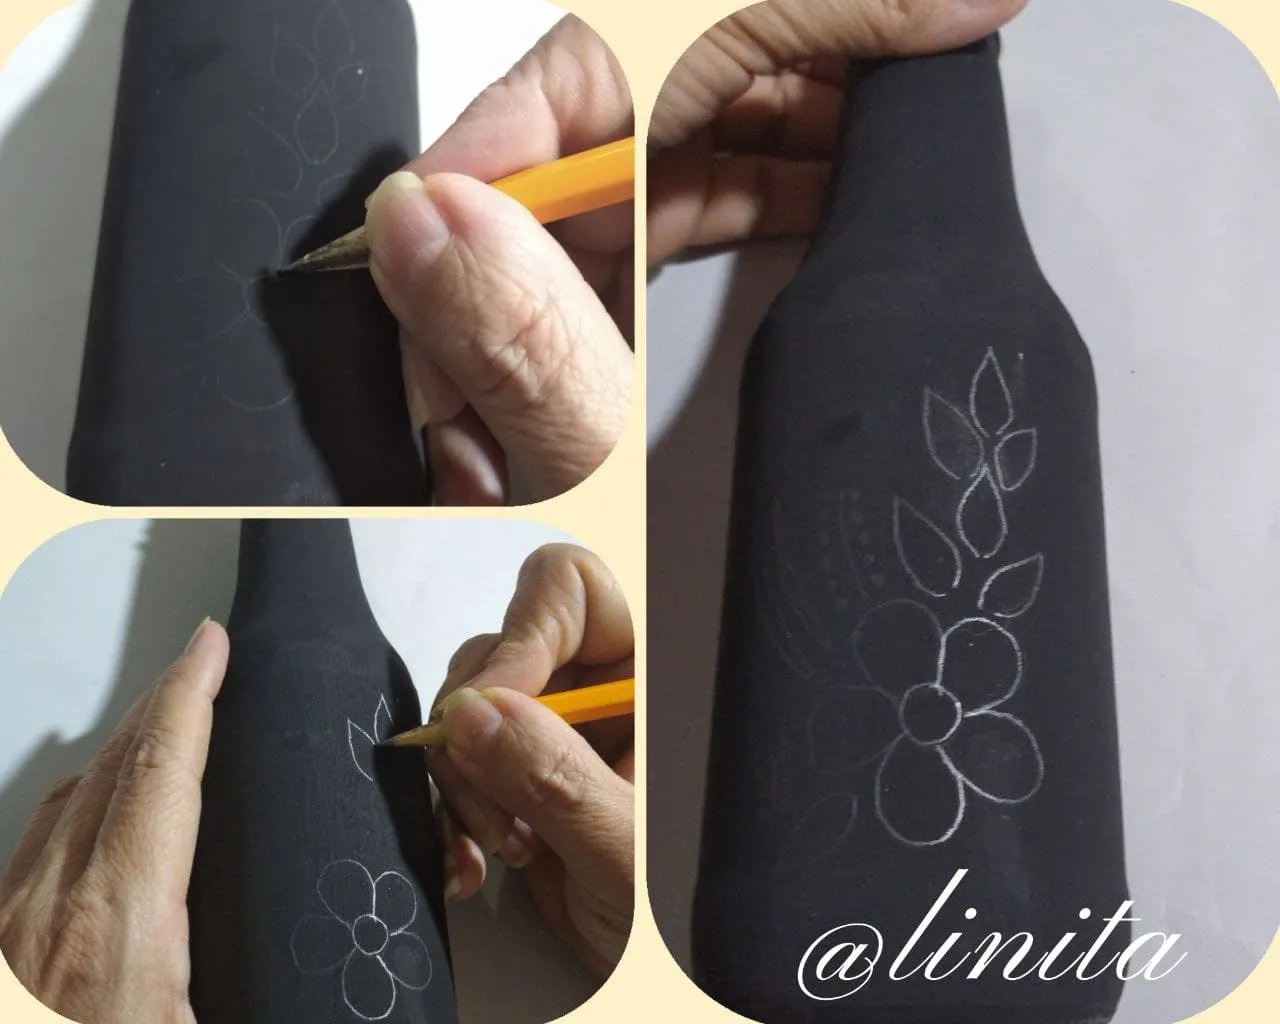
STEP 2
With the graphite pencil we draw the design that we want to capture on our bottle.
PASO 2
Con el lápiz de grafito dibujamos el diseño que queremos plasmar en nuestra botella.
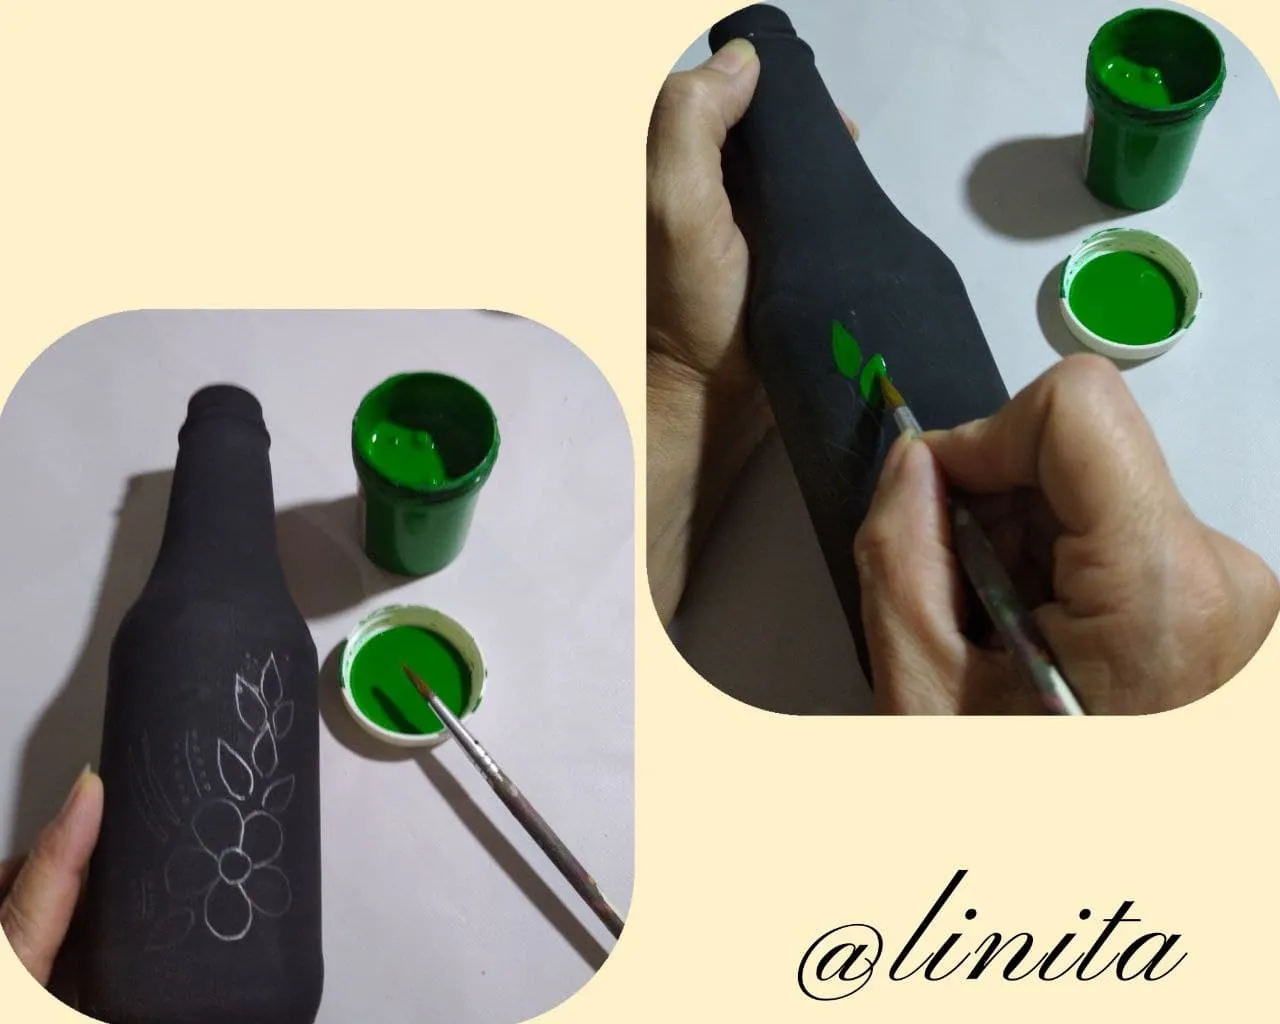
STEP 3
We proceed to paint our design with cold paints of the desired color. I used green to paint the leaves of my design and I used a round brush.
PASO 3
Procedemos a pintar nuestro diseño con las pinturas al frío del color deseado. Yo utilicé verde para pintar las hojas de mi diseño y utilicé un pincel redondo y le puse dos capas de pintura.
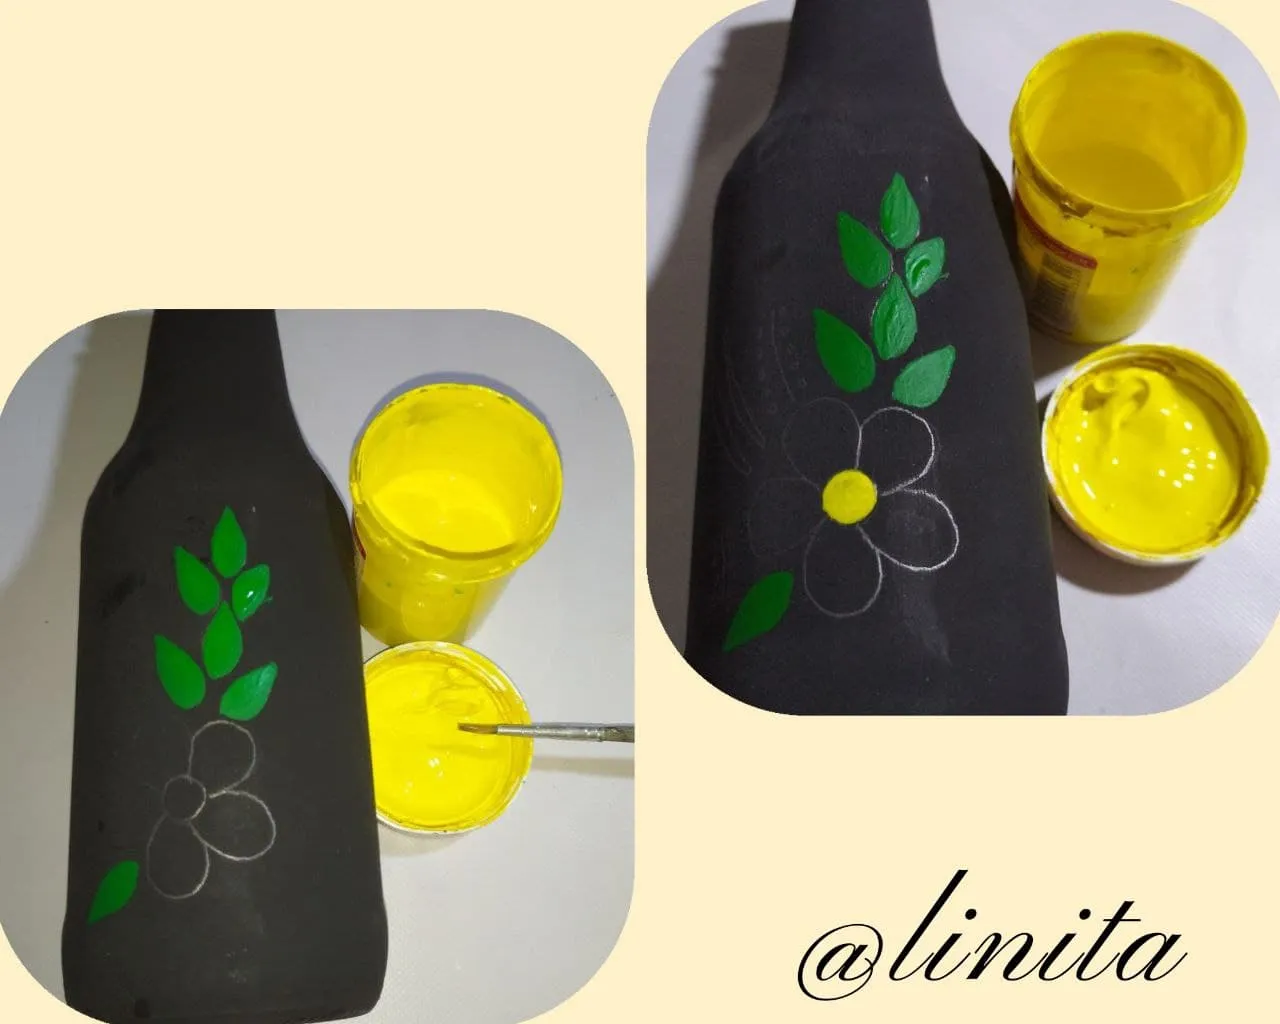
STEP 4
Now we continue painting the center of the flower with cold yellow paint and a round brush. I also gave it two coats of paint.
PASO 4
Continuamos pintando ahora el centro de la flor con pintura al frío amarillo y pincel redondo. Igualmente le di dos capas de pintura.
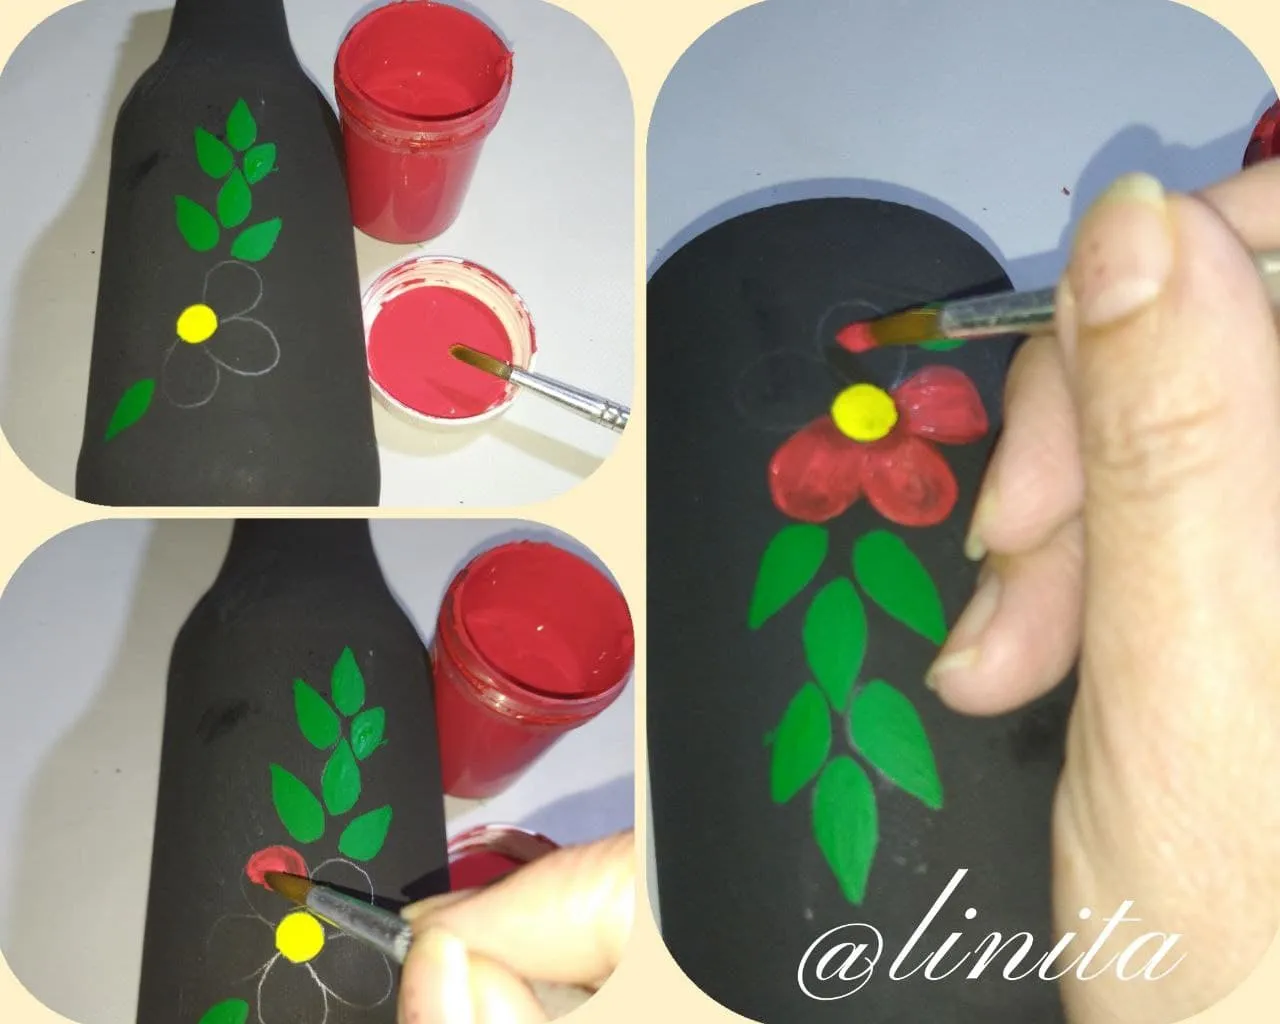
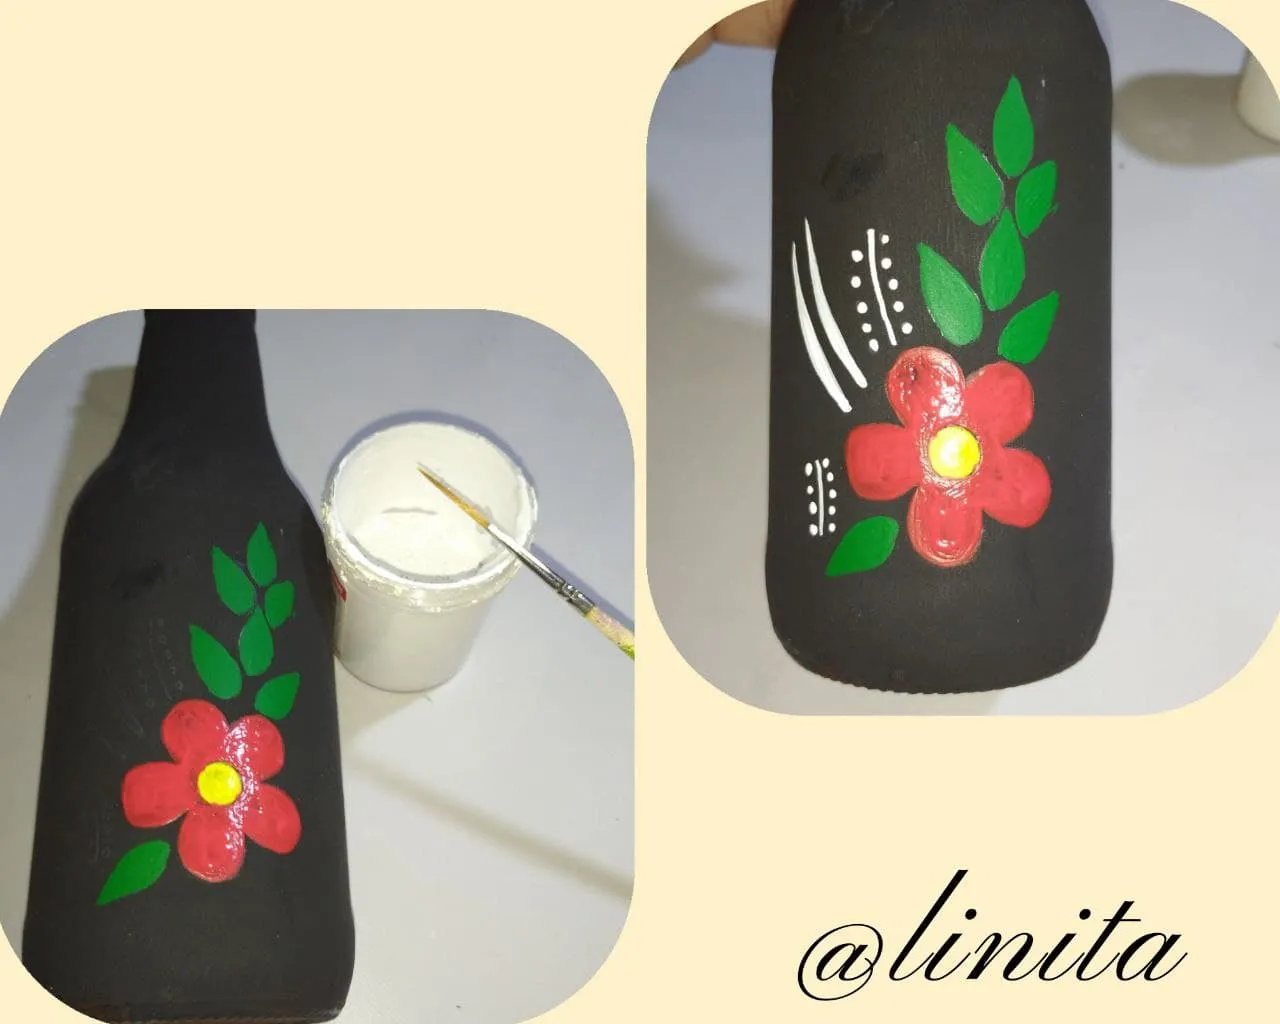
STEP 5
Now we paint the petals of the flower with red paint and a round brush, this time I gave it three layers of paint.
PASO 5
Ahora pintamos los pétalos de la flor con pintura roja y pincel redondo, esta vez le di tres capas de pintura.
STEP 6
With the white paint and the liner brush I made some designs to highlight the color of the flower.
Let it dry very well to proceed to the next step, since we will use white glue and we could run the risk of running the paint if it is not dry.
PASO 6
Con la pintura blanca y el pincel liner realicé unos diseños para resaltar el color de la flor.
Dejamos secar muy bien para proceder a realizar el siguiente paso, ya que utilizaremos pega blanca y podríamos correr el riesgo que se corra la pintura se no está bien seca.
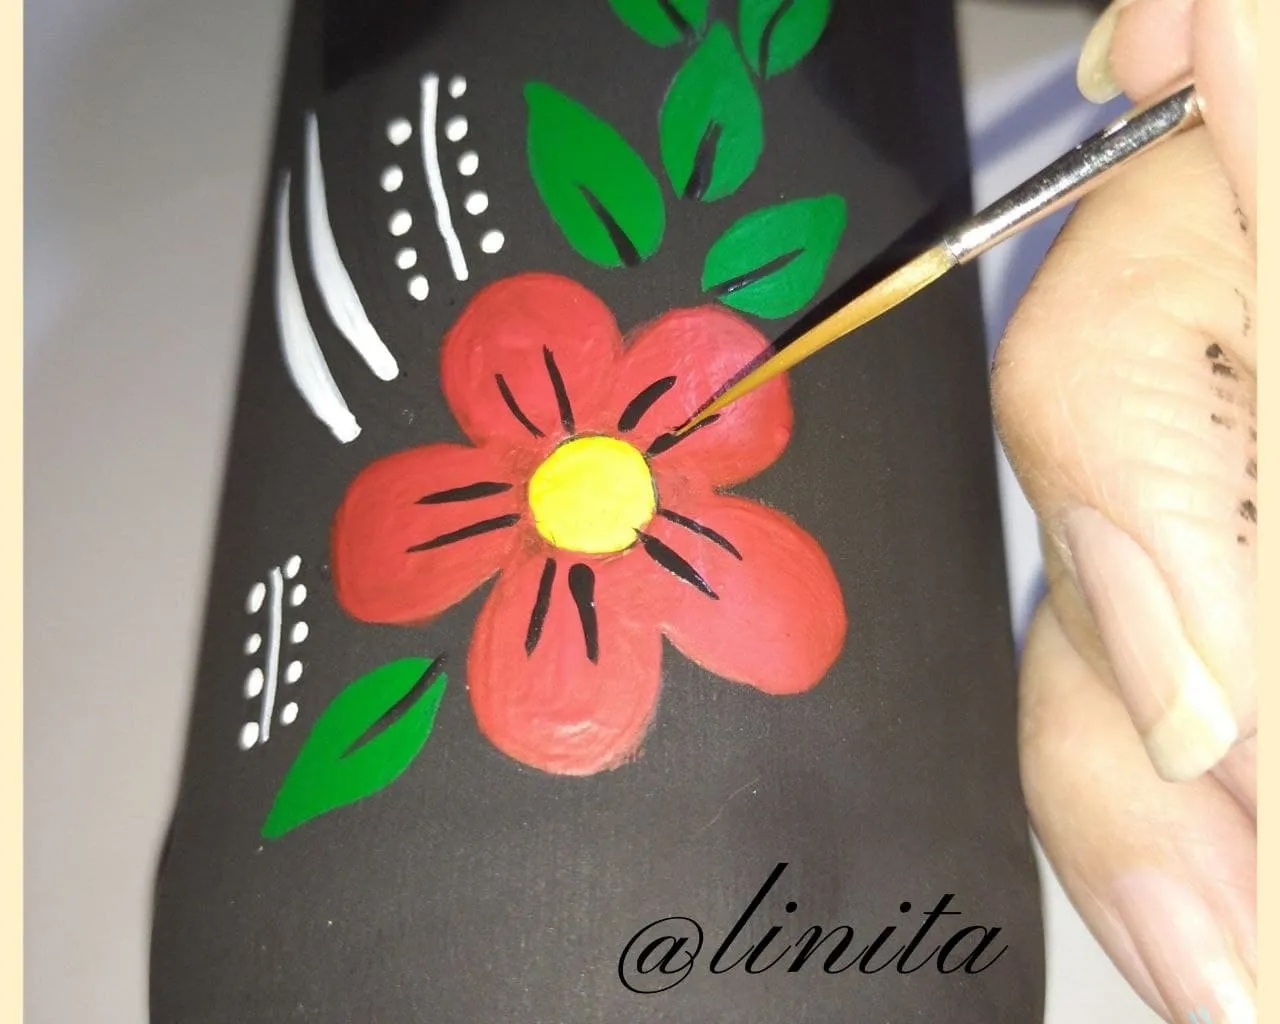
STEP 7
With the liner brush and the black paint we make the shapes to the leaves and the petals of the flower.
PASO 7
Con el pincel liner y la pintura negra realizamos las formas a las hojas y a los pétalos de la flor.
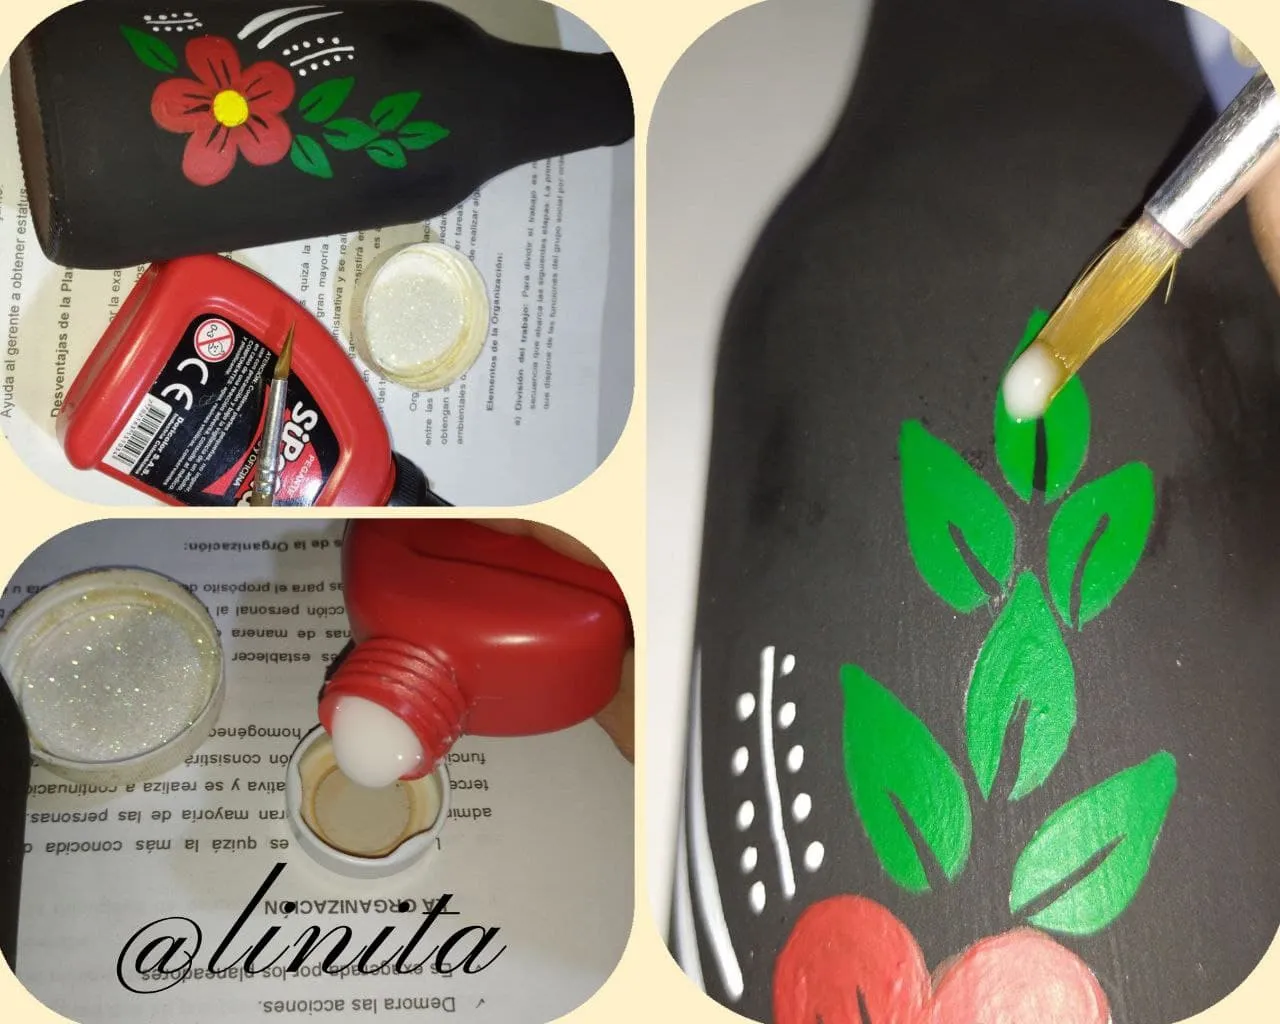
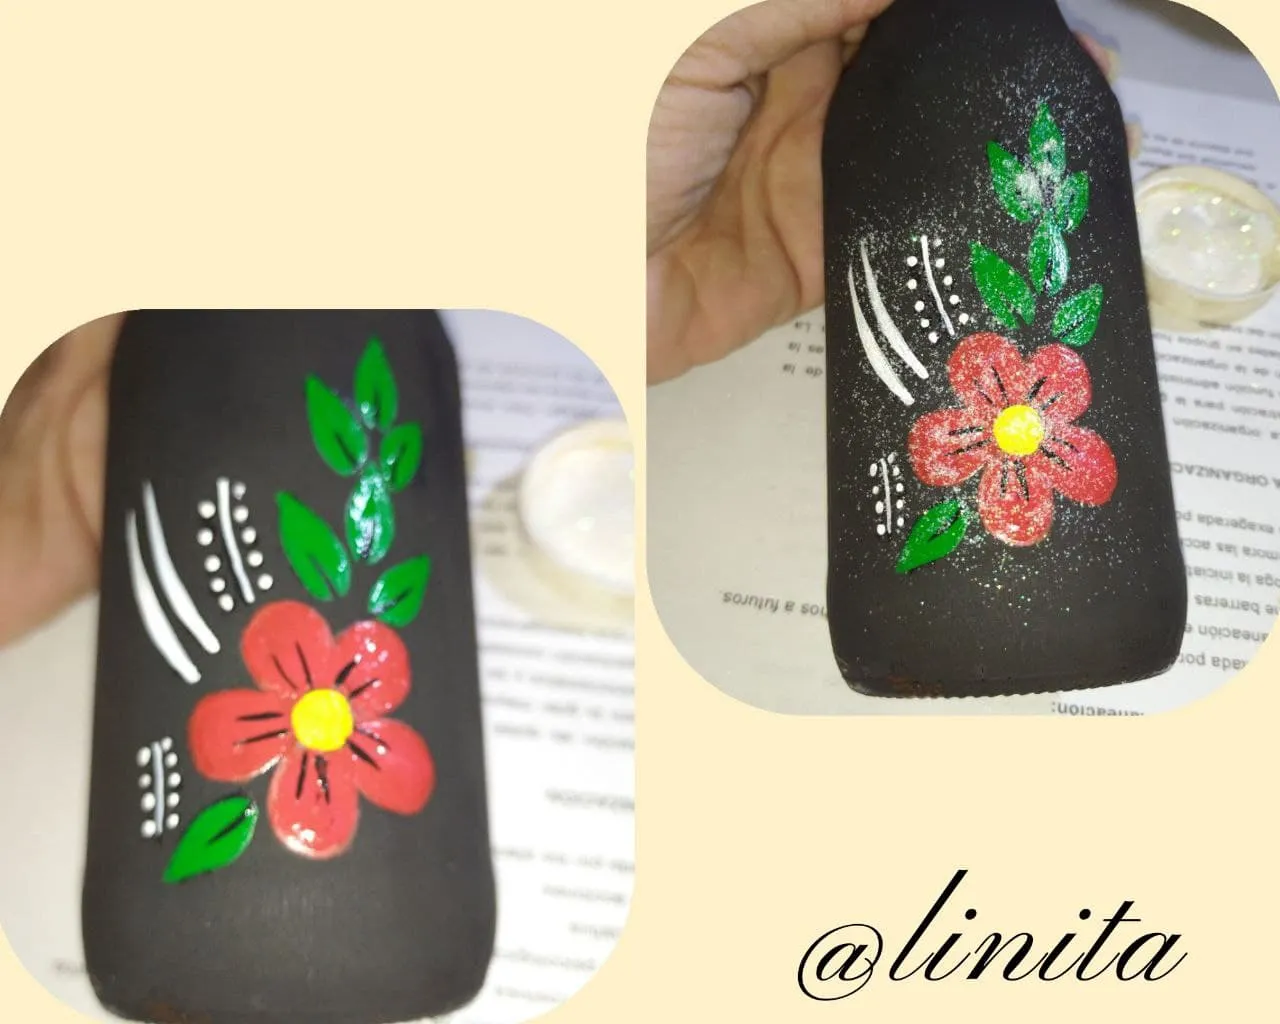
STEP 8
Once the paint dries, we proceed to frost the design. For this we will use the white glue and a brush. we add a little glue and paint each part. Without letting the glue dry, spread the frost.
Once well dry, with a dry brush we remove the excess frost.
PASO 8
Ya seca la pintura procedemos a escarchar el diseño. Para ello utilizaremos la pega blanca y un pincel. agregamos un poco de pega y pintamos cada parte. Sin deja secar la pega esparcimos la escarcha.
Una vez bien secar, con un pincel seco retiramos el exceso de escarcha.
STEP 9
And the last and not least step is to give it that elegant touch and for this we will make a bow on the neck of the bottle.
PASO 9
Y el último y no menos importante paso es darle ese toque elegante y para ello realizaremos un lazo en el cuello de la botella.
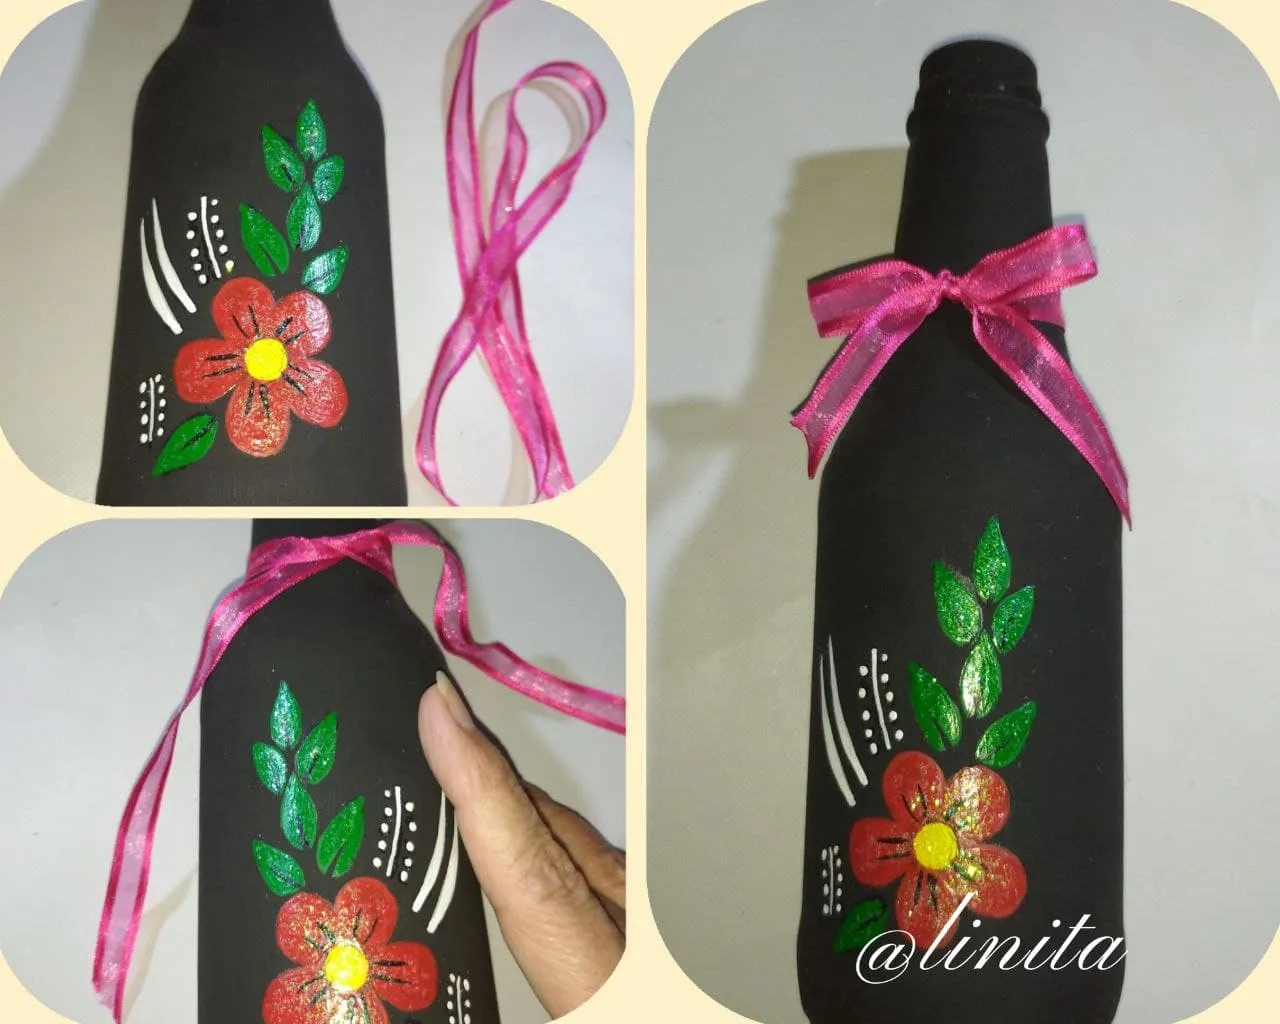
And in this simple way we transform a bottle of tomato sauce into a beautiful vase to decorate some space in our house, office, etc., while at the same time helping to protect our ecosystem by recycling all the necessary materials, in this case packaging. of glass. I take the opportunity to invite my friends @vicmito74, @marytp20 and @kattycrochet to participate with their great ideas.
See you in the next installment.
Y de esta forma sencilla transformamos una botella de salsa de tomate en un lindo florero para decorar algún espacio de nuestra casa, oficina, etc, a la vez que contribuimos a proteger nuestro ecosistema reciclando todos los materiales que sean necesario, en este caso los envases de vidrio. Aprovecho la oportunidad para invitar a mis amigas @vicmito74, @marytp20 y a @kattycrochet a participar con sus grandiosas ideas.
Nos vemos en la próxima entrega.