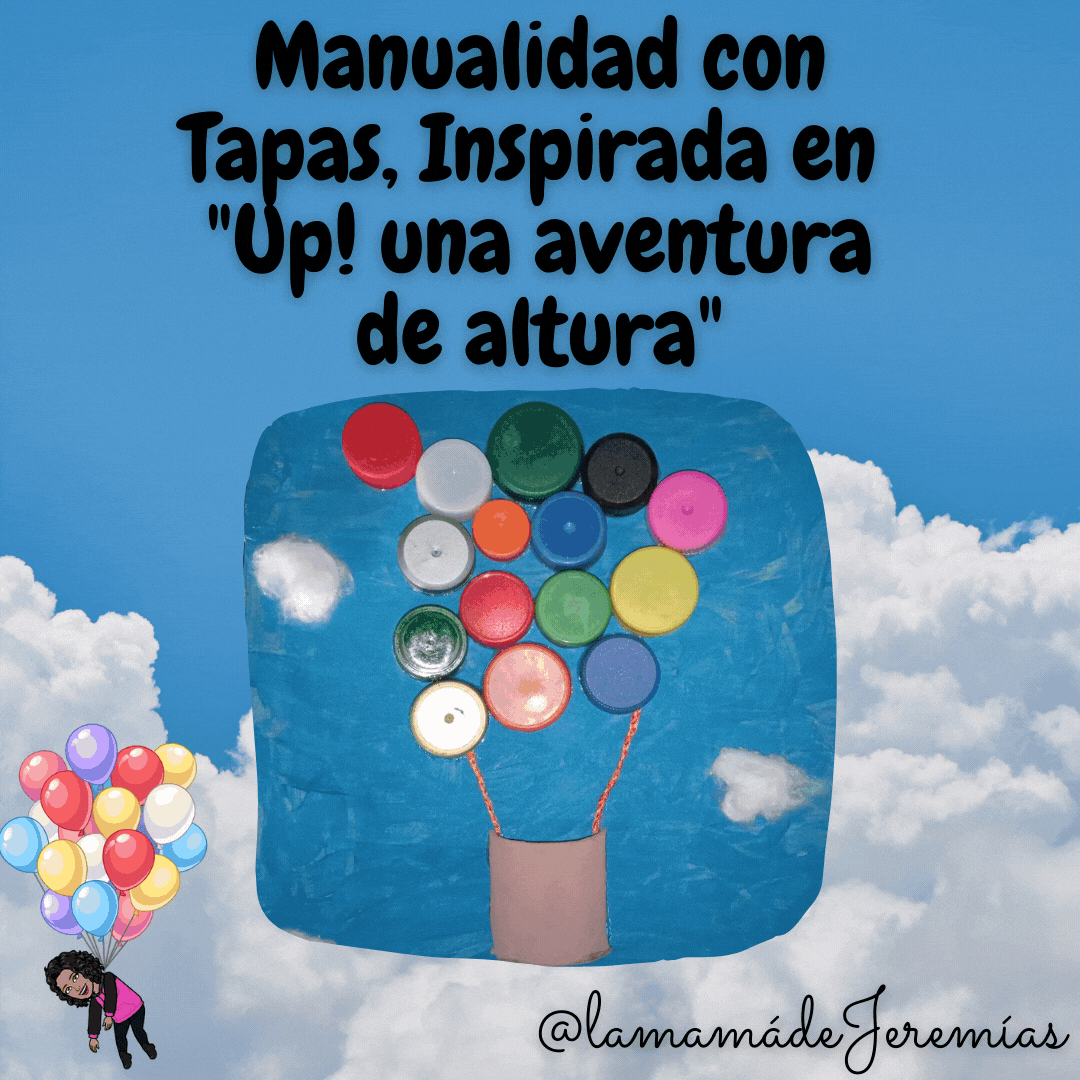
Saludos amigos de Hive Diy, feliz inicio de semana. Está es nuestra participación en el concurso World of Love, manualidades con los niños.
Durante esta cuarentena he tratado de realizar semanalmente actividades didácticas y divertidas con mi hijo Jeremías, El día de hoy les traigo una manualidad que hicimos el fin de semana reciclando tapas de botellas, nos divertimos bastante.
Espero les guste.
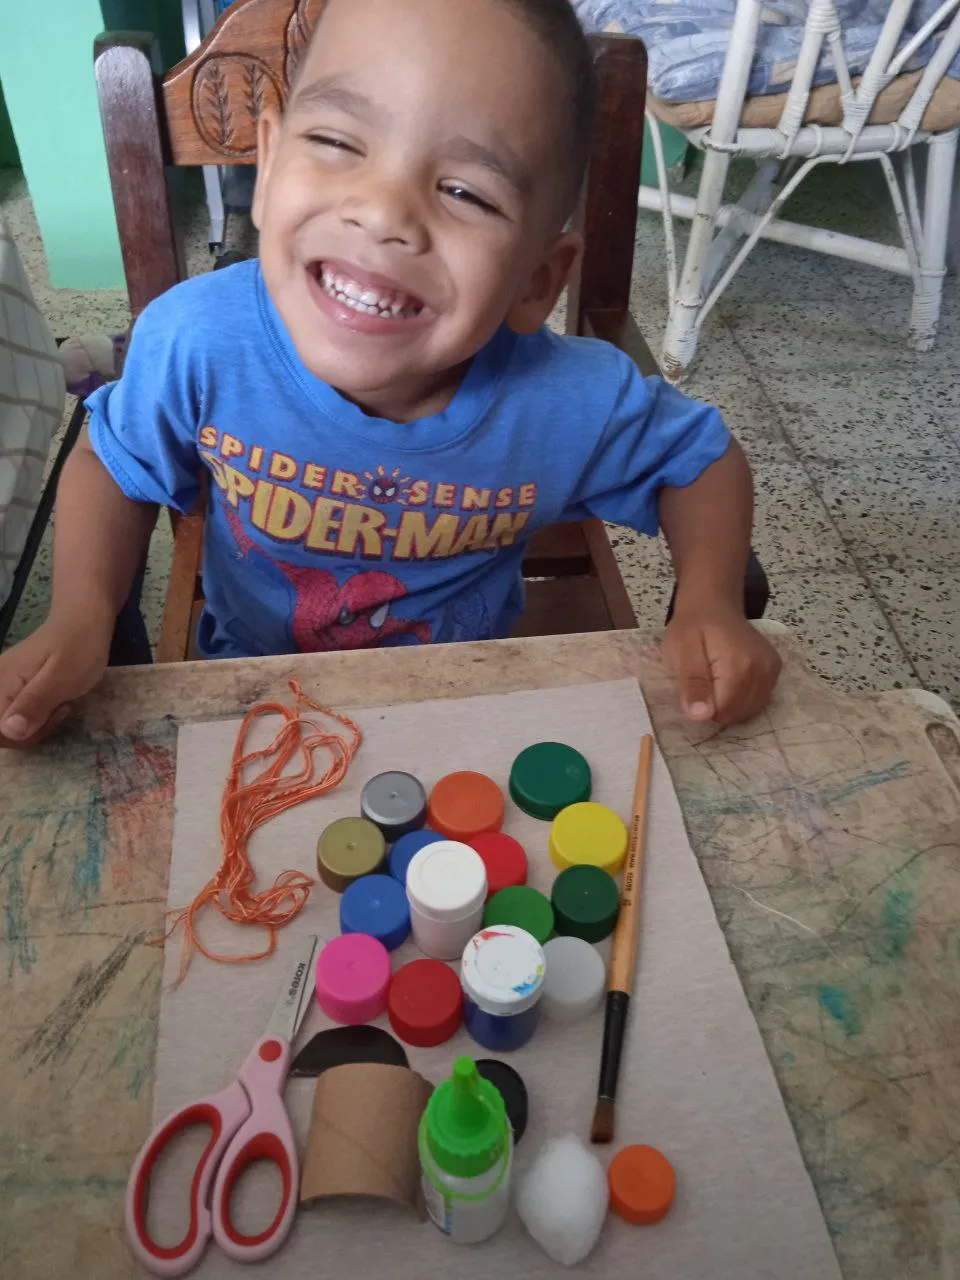
Materiales
Tapas de botellas de diferentes colores.
Cartón
Tubo de papel higiénico
Témperas
Silicón frío
Algodón
Estambre o pavilo
Tijera y Pincel.
Procedimiento
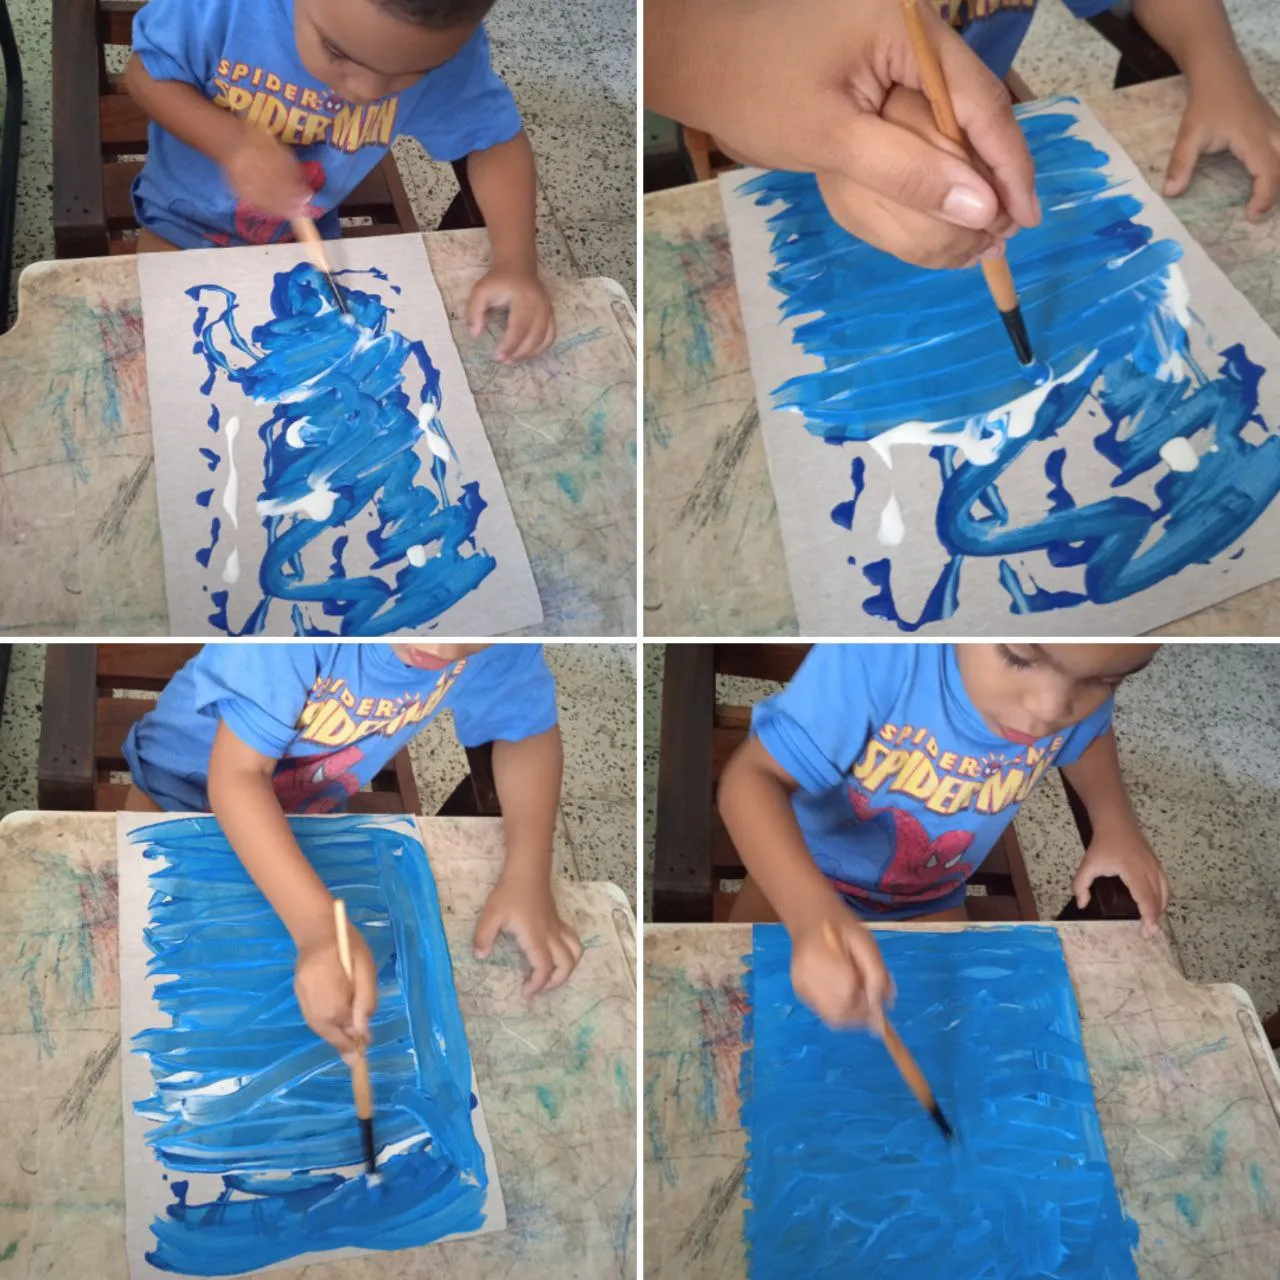
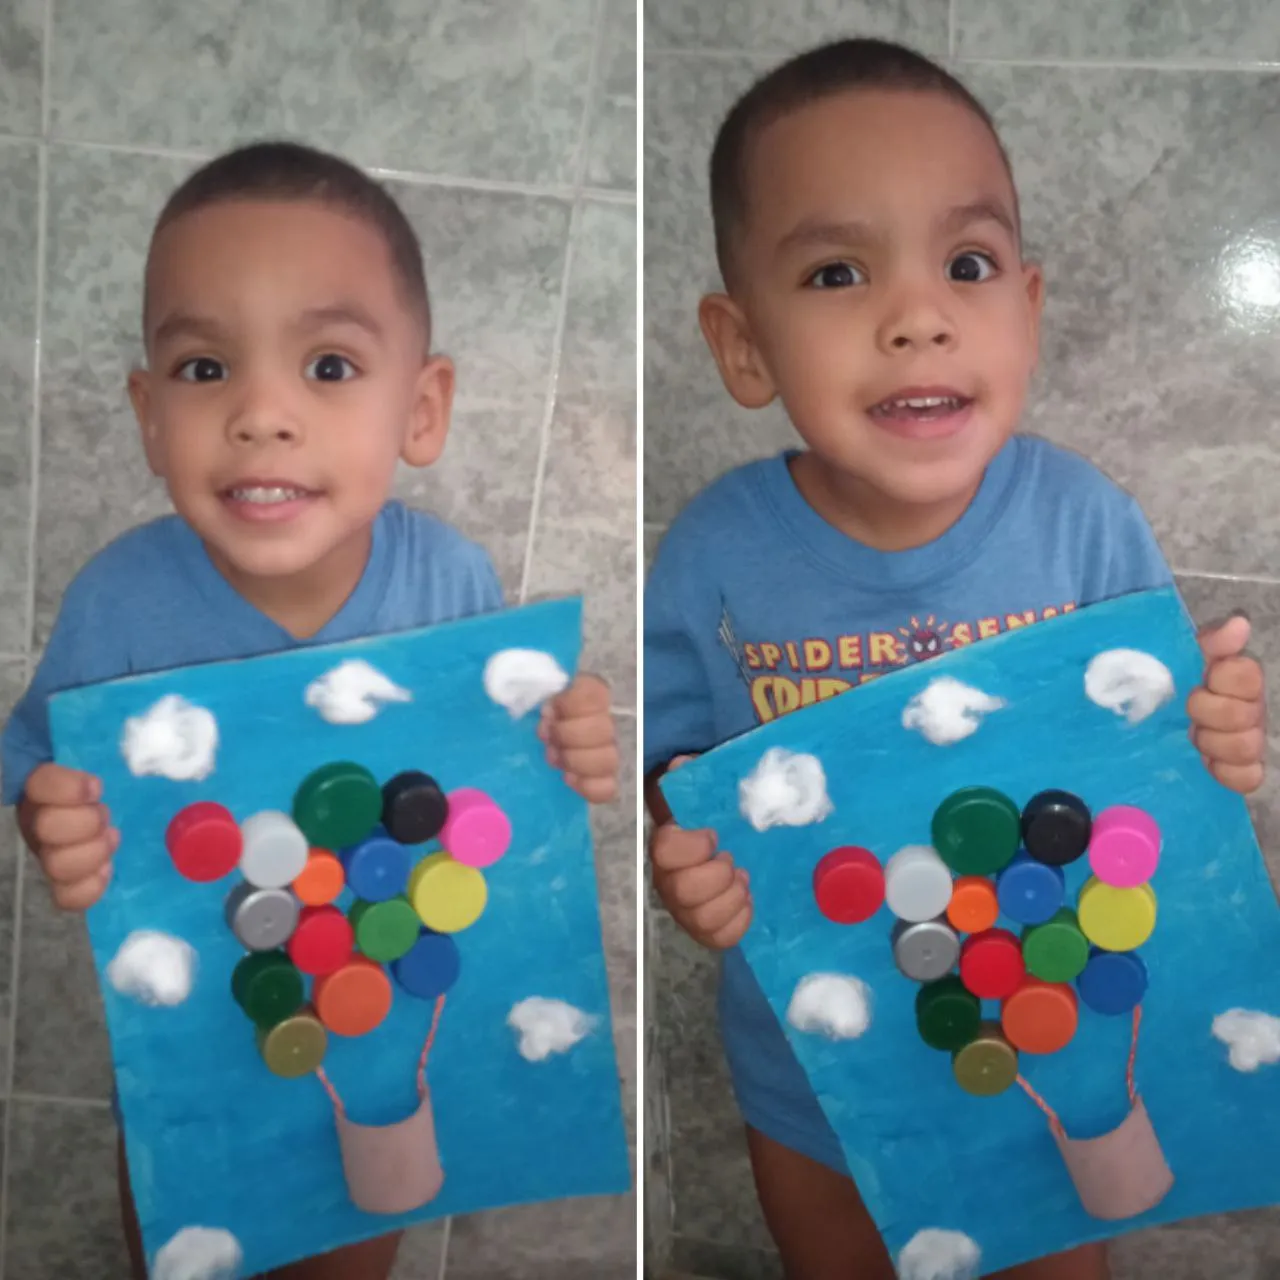
Lo primero que hicimos fue pintar la pieza de cartón con témperas azul y blancas, lo que vendría siendo el cielo.
Aquí le enseñé a Jeremías ha agarrar bien y con suavidad el pincel y pintar es dos direcciones, de derecha a izquierda, le expliqué que no es un creyón que hay q afincar, más bien pintar con acuarela es como acariciar.
Después de esperar que la acuarela seque, empezamos a pegar con silicón frío las tapas. En este paso yo le echaba el silicón al borde de la tapa y Jeremías la pegaba en el cartón. Al principio fue un poco desordenado, pero al decirle que las pegará todas juntitas, quedaron bien.

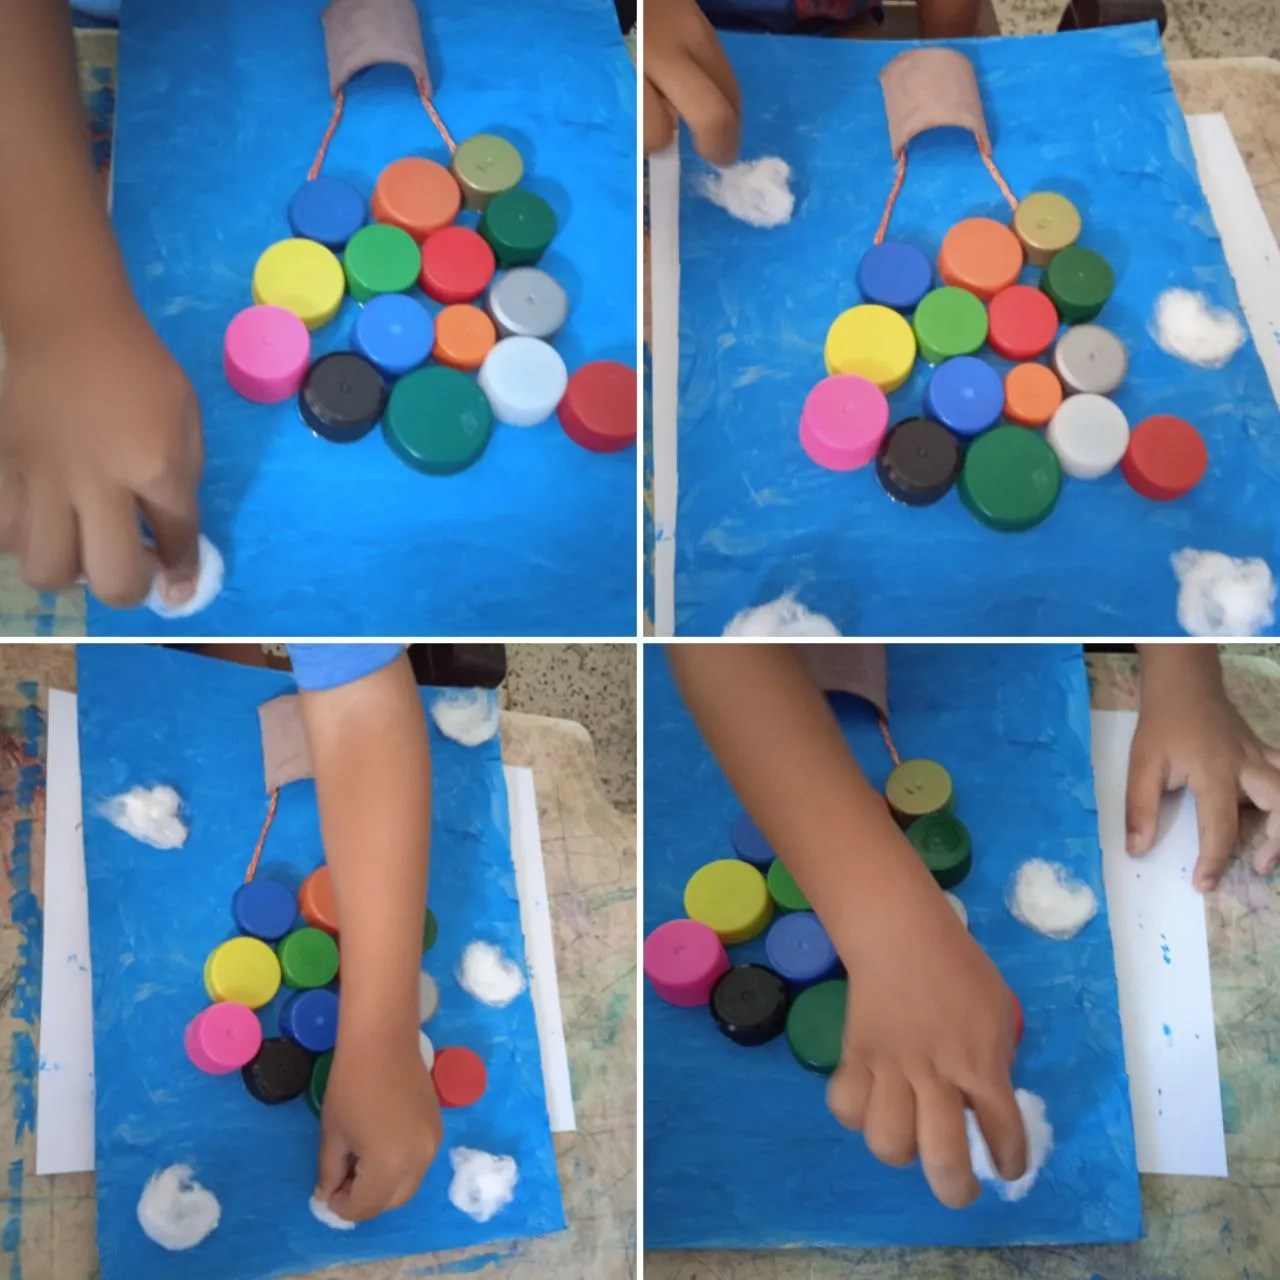
A continuación pegamos la mitad de un tubo de cartón de papel higiénico, que ya Jeremías había pintado de marrón, este sería la canasta, y pegamos también las cuerdas de pabilo. A esta parte del procedimiento no pude tomarle fotos.
Ahora toca el turno de crear las nubes. Las hicimos con algodón, le coloqué el silicón en el cartón y Jeremías pegó pedazos de algodón en los alrededores del globo.
Y listo, ya tenemos nuestra manualidad, Jeremías estaba muy feliz, se lo mostró a la Mimi (la abuela).
Pero al pedirle que lo sostuviera para tomarle fotos me puso cara de que "ya, hazlo rápido" jejeje.
Lo último fue pegar el cuadro en una pared de su habitación.
Nos divertimos, y cada vez que hacemos manualidades noto que Jeremias está más atento a seguir las instrucciones.
Espero les haya gustado y se animen a reciclar también. Gracias por leer mi publicación. Hasta luego.
Fotos de mi propiedad editadas en Canva y Layout.

Greetings friends of Hive Diy, happy start of the week. This is our participation in the World of Love contest, crafts with kids.
During this quarantine I have tried to make weekly didactic and fun activities with my son Jeremiah, Today I bring you a craft that we did over the weekend recycling bottle caps, we had a lot of fun.
I hope you like it.
Materials.
Bottle caps of different colors.
Cardboard
Toilet paper tube
Tempera
Cold silicone
Cotton
Straw or pavilion
Scissors and brush.
Procedure
The first thing we did was to paint the cardboard piece with blue and white tempera, which would be the sky.
Here I taught Jeremias to hold the brush well and gently and paint in two directions, from right to left, I explained to him that it is not a crayon that you have to sharpen, rather painting with watercolor is like caressing.
After waiting for the watercolor to dry, we started to glue the lids with cold silicone. In this step I put the silicone on the edge of the lid and Jeremias glued it to the cardboard. At first it was a little messy, but when I told him to glue them all together, they turned out well.
Next we glued half of a cardboard toilet paper tube, which Jeremias had already painted brown, this would be the basket, and we also glued the wick strings. I couldn't take pictures of this part of the procedure.
Now it was time to create the clouds. We made them with cotton, I put the silicone on the cardboard and Jeremias glued pieces of cotton around the balloon.
Jeremiah was very happy, he showed it to Mimi (the grandmother).
But when I asked him to hold it to take pictures of it, he made a face like "go ahead, do it quickly" hehehehe.
The last thing was to stick the picture on a wall in his room.
We had fun, and every time we do crafts I notice that Jeremias is more attentive to follow the instructions.
I hope you liked it and are encouraged to recycle too. Thanks for reading my post. See you soon.
Photos of my property edited in Canva and Layout.
Translated with www.DeepL.com/Translator (free version)