Español
Hola mis estimados lectores, gusto saludarles nuevamente.
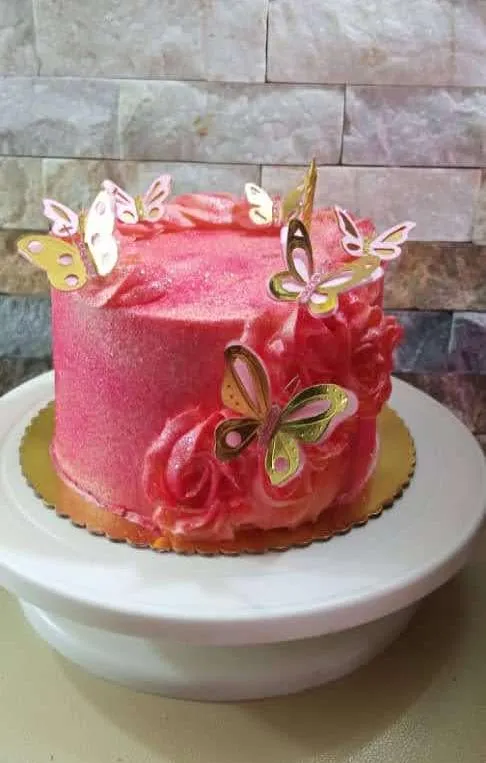
La decoración de pastel que hoy quiero enseñarles, y motivarlos a que realicen, es súper fácil y queda realmente bien en cualquier pastel.
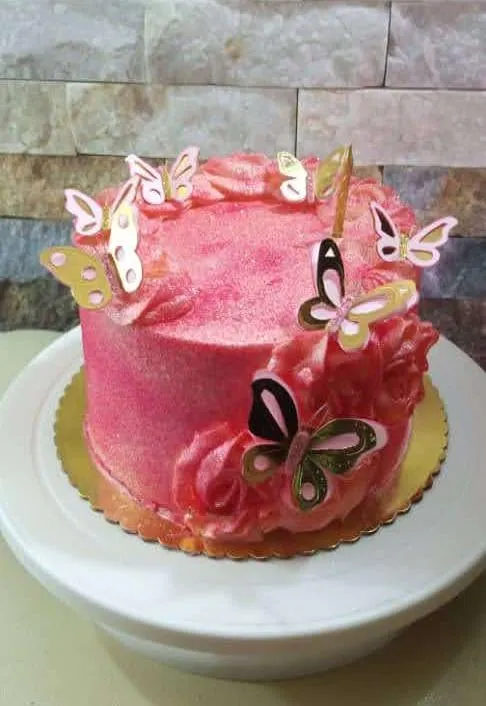
Este topper se hizo con mucho amor para una chica amante a las mariposas y como los cumpleaños son días mágicos, se le obsequió éste pastel sorpresa decorado con sus animalitos preferidos. Este fue sin duda otro gran pastel de mi súper pastelera favorita Mayda quién siempre me toma en cuenta para hacer decoraciones muy especiales y personalizadas.
Sin más y esperando disfruten del trabajo realizado con amor, les dejo los materiales utilizados, el proceso y las imágenes del trabajo.
- Cartulina rosada clara
- Cartulina dorada.
- Foami rosado claro escarchado.
- Hilo grueso y resistente.
- Palitos de madera.
- Cinta adhesiva transparente.
- Silicón frío.
- Silicón caliente.
- Cutter.
- Tijera.
- Lápiz.
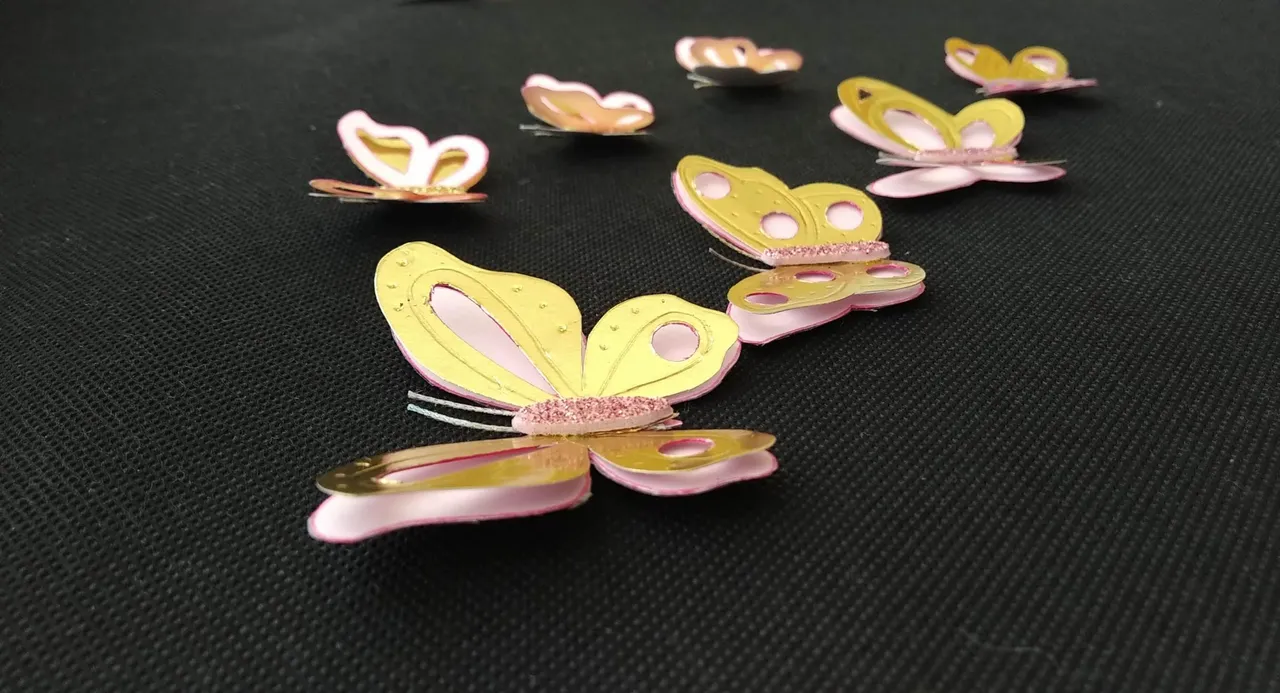
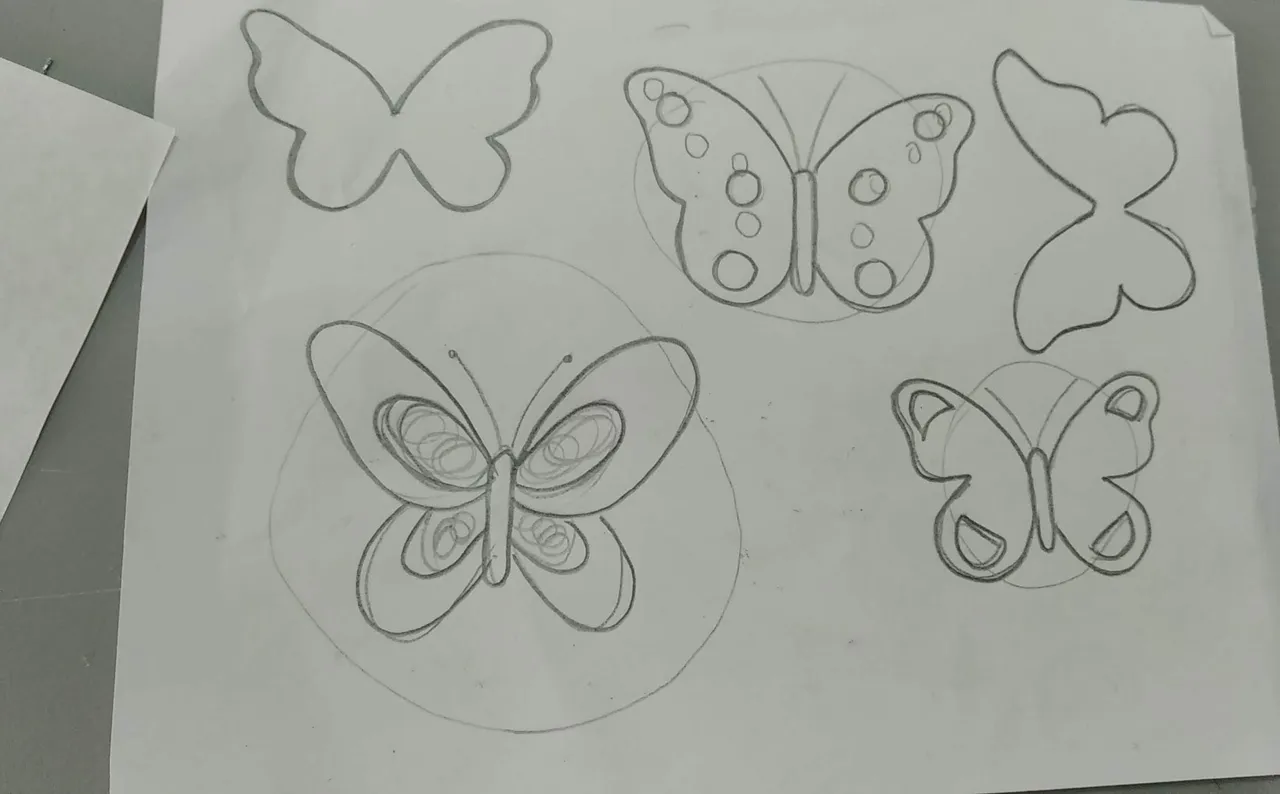
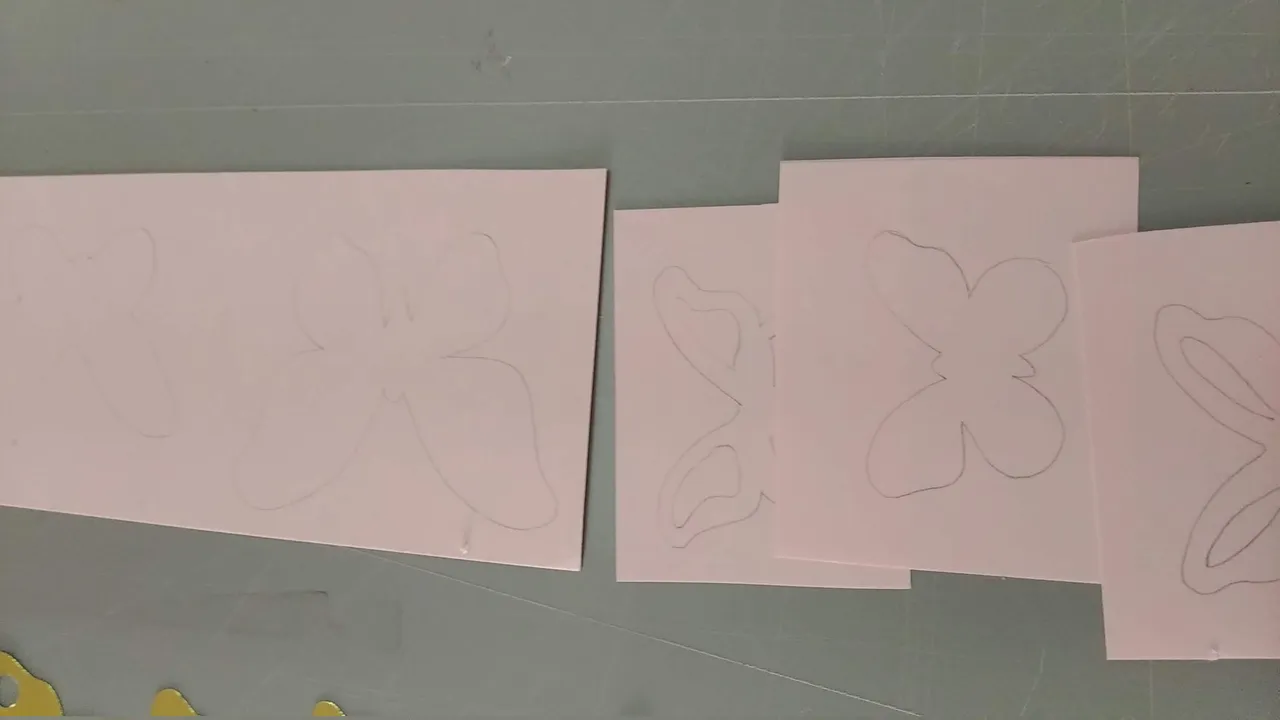
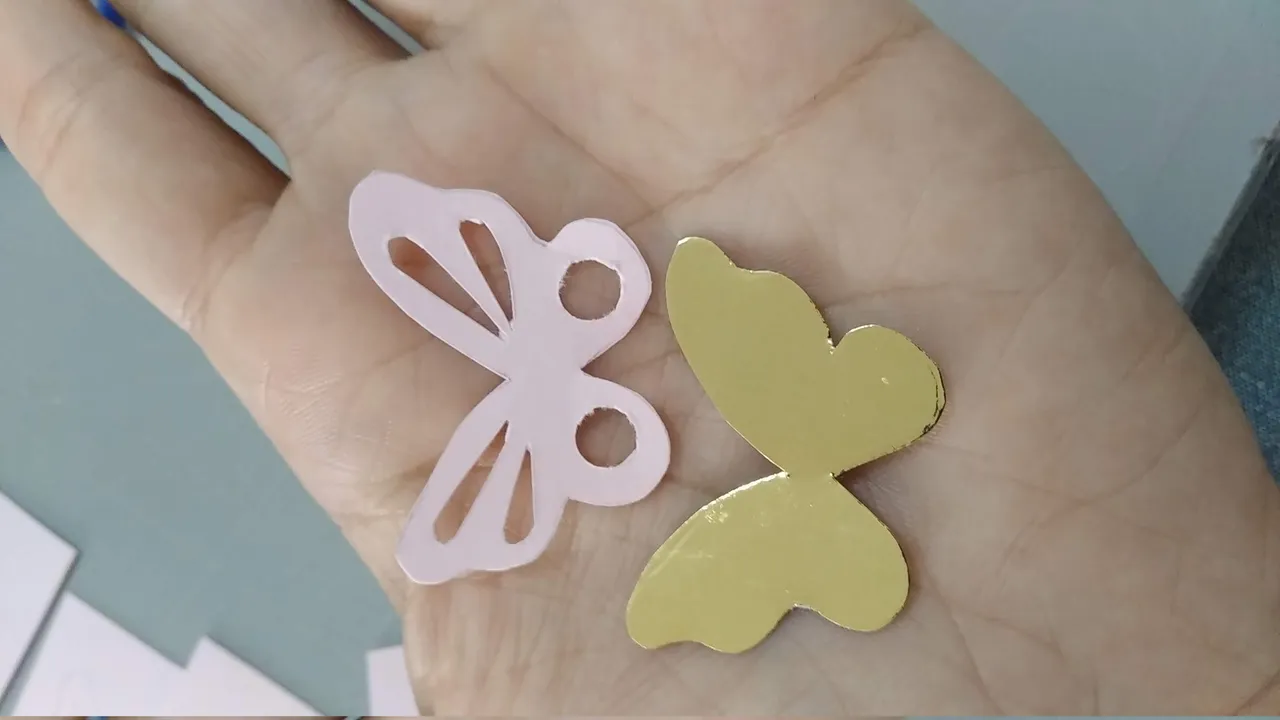
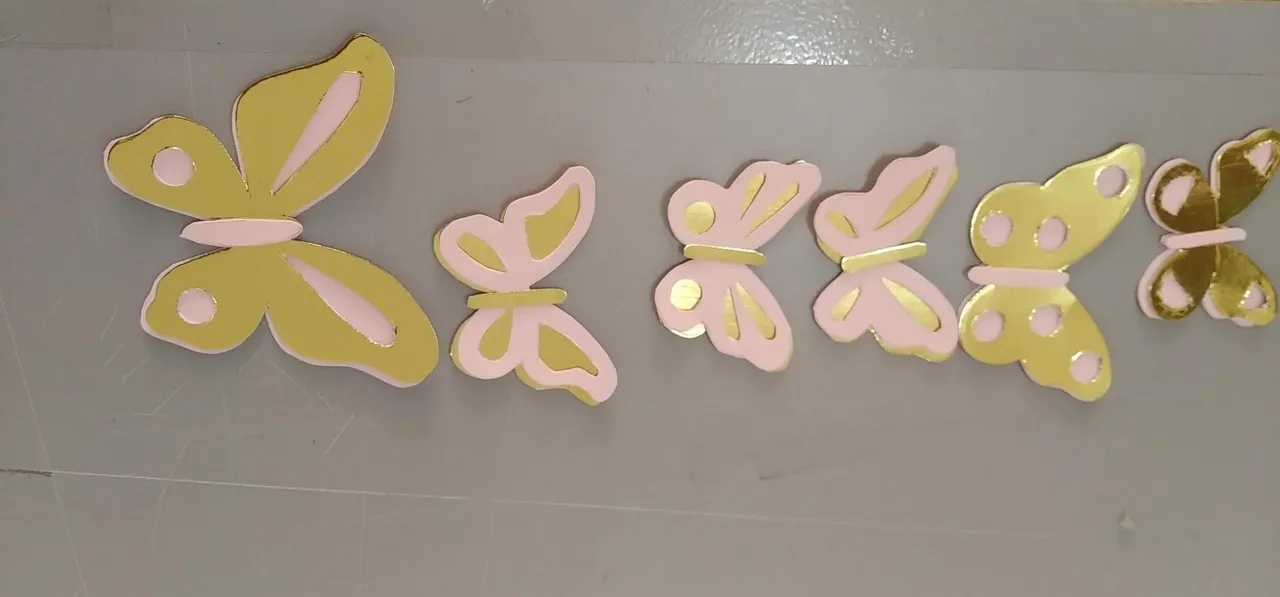
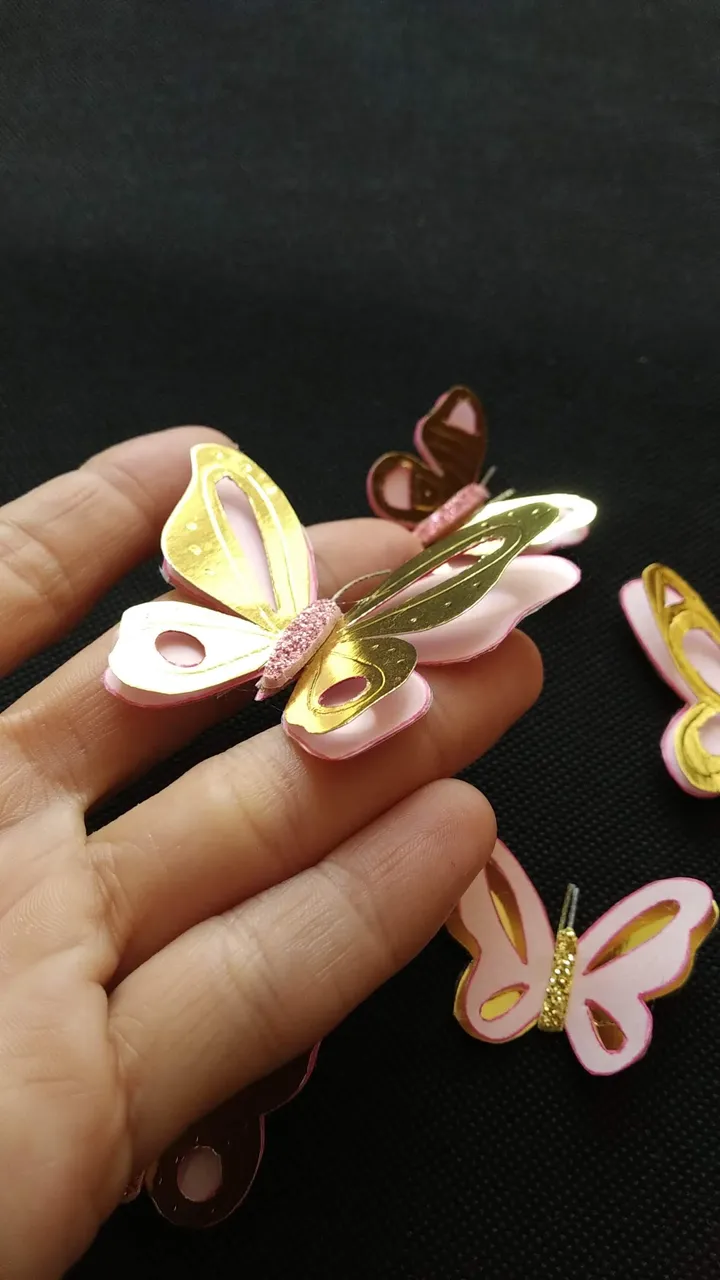
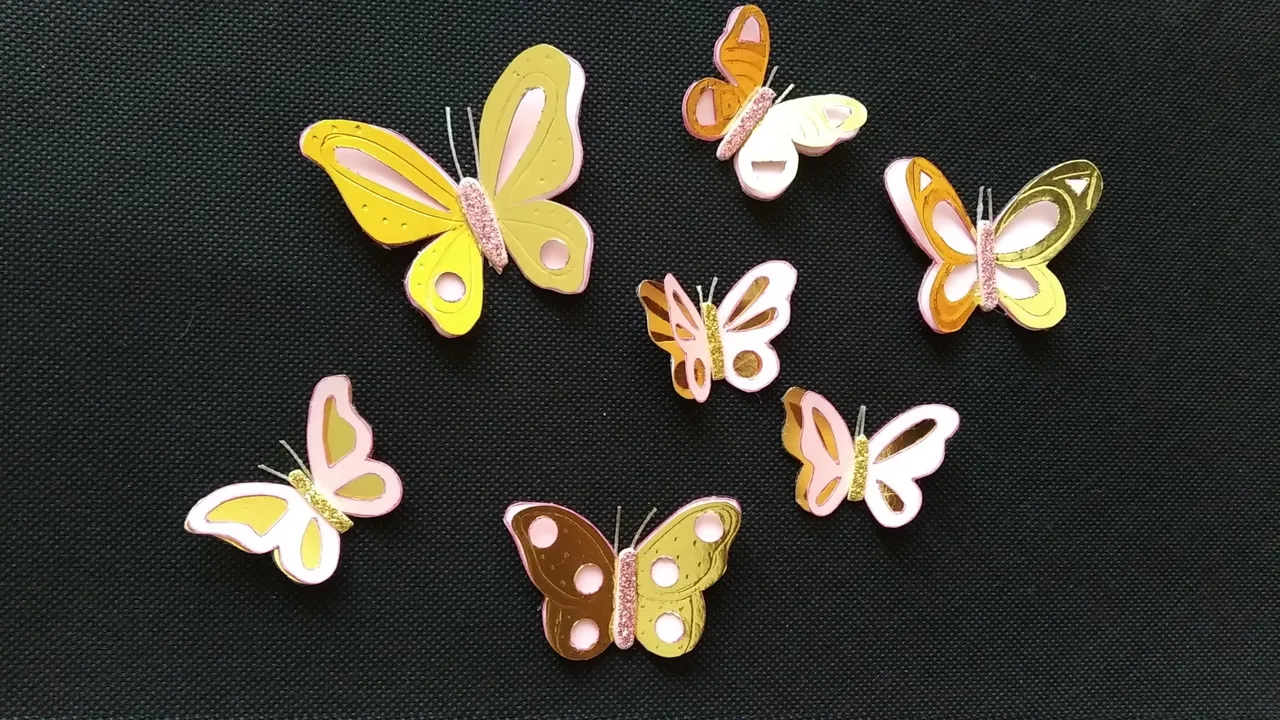
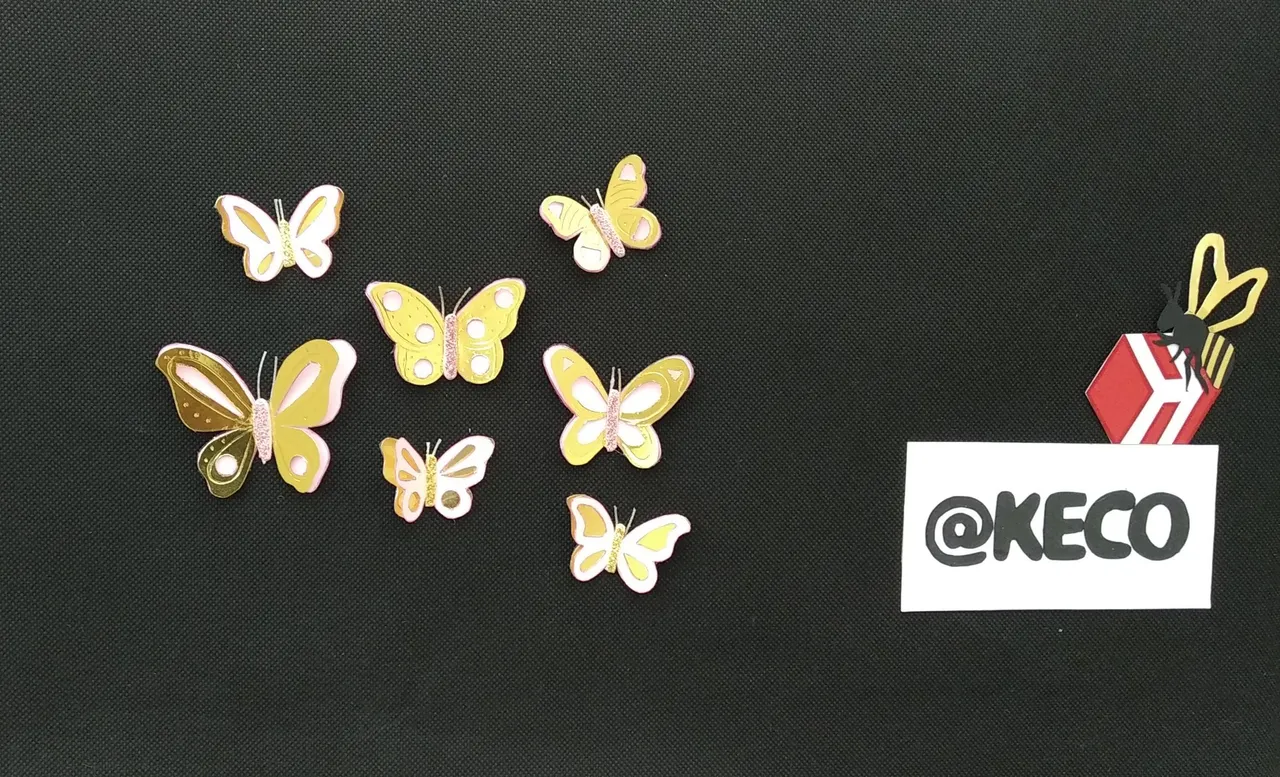
- Definir y diseñar en papel blanco el modelo de las mariposas a utilizar (plantilla). Se hicieron para este topper un total de 7 mariposas, todas de diseños y medidas distintas.
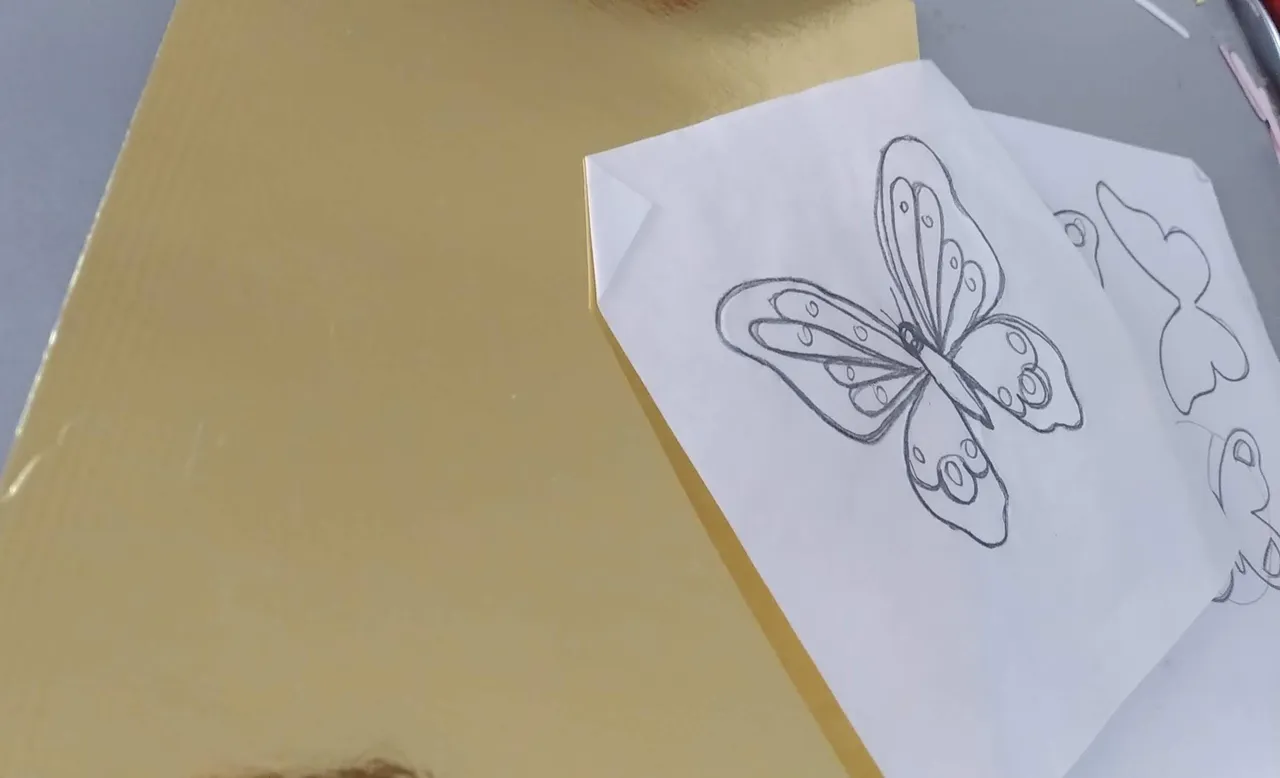
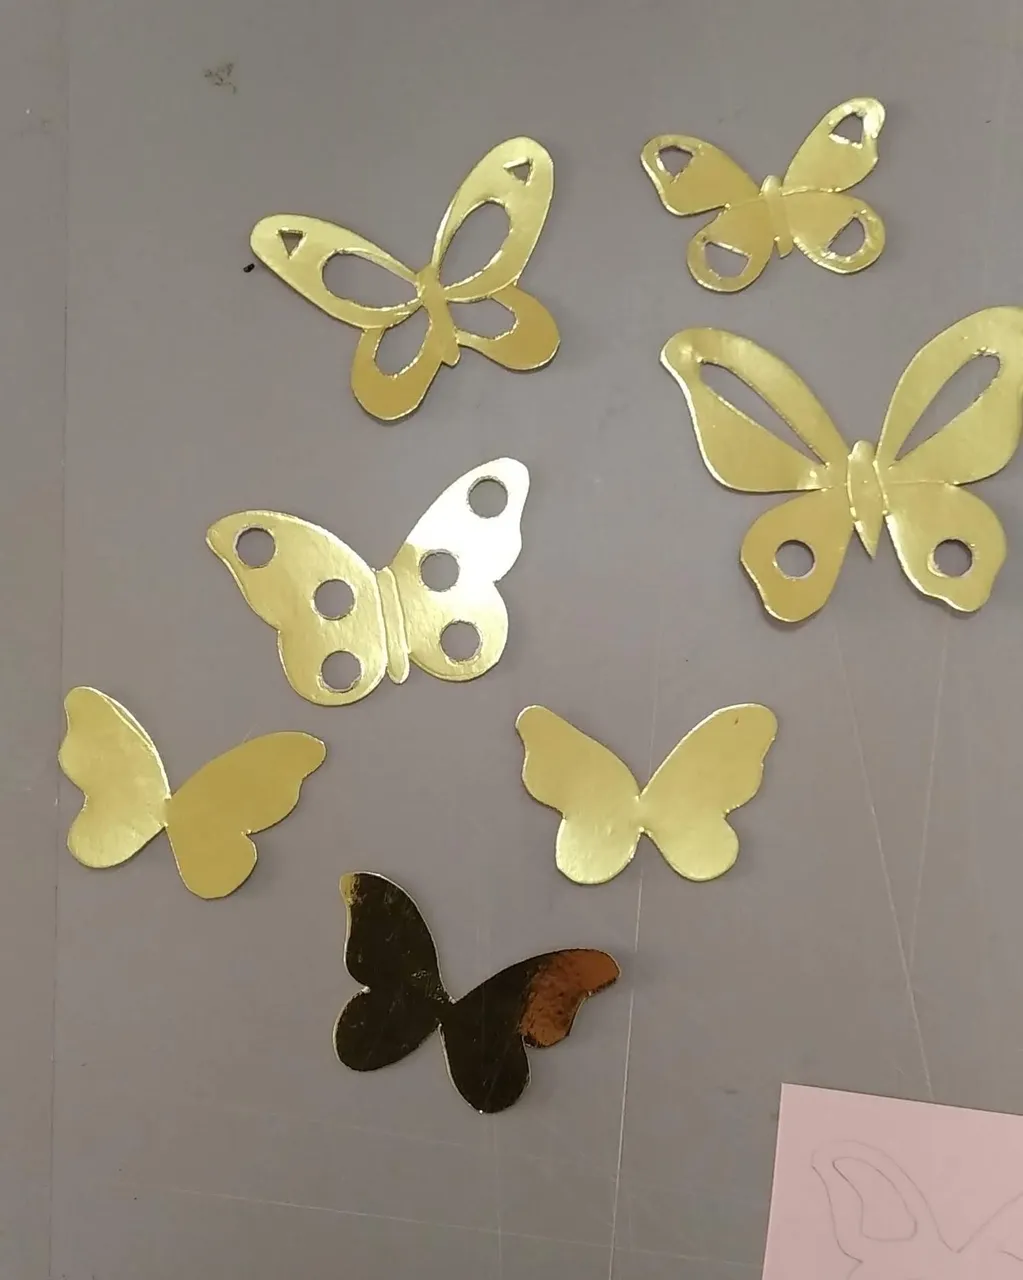
- Haciendo uso de las plantillas , marcar las mariposas en cartulina rosada y dorada. Como cada mariposa será a doble capa se deberá recortar 14 siluetas, siete (7) en dorado y siete (7) en rosado (trabajaremos a dos capas, para un mejor efecto de las mariposas).
- De las siete mariposas se deberá calar 4 doradas y 3 no. Las que se calen tendrán de base el color rosado y las que no tendrán la capa superior rosada calada.
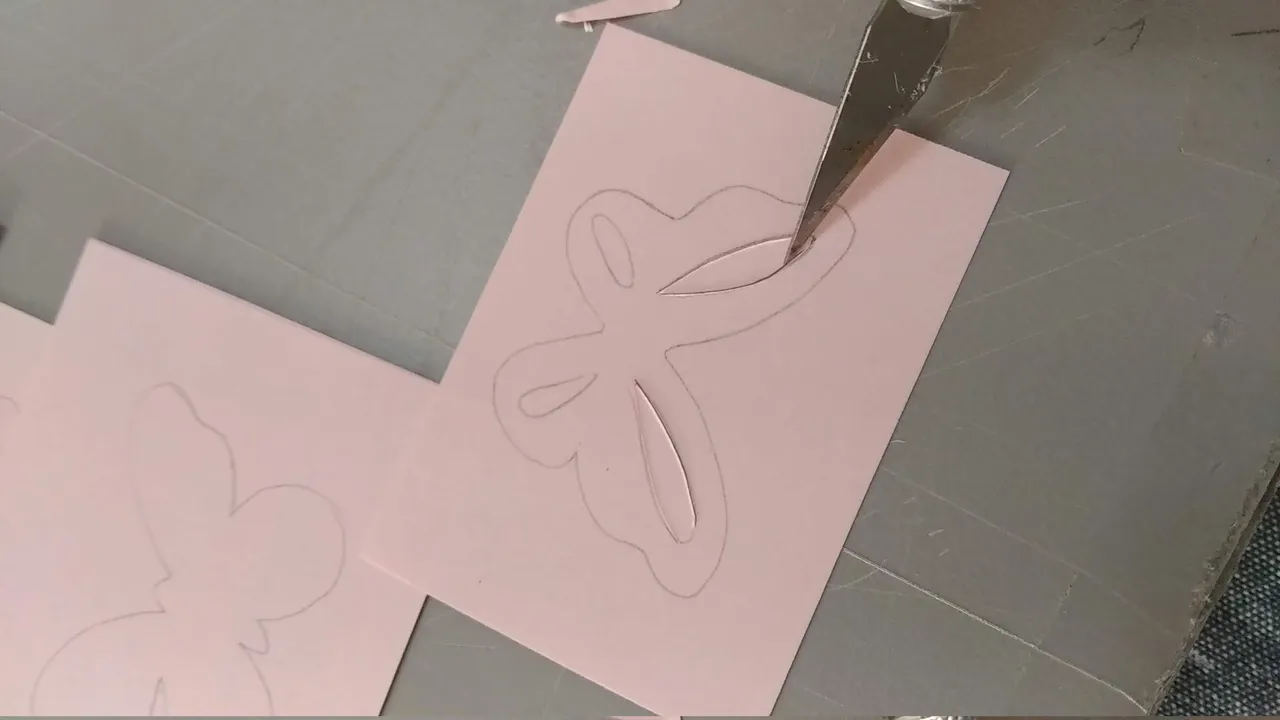
- Calar las mariposas que irán en la parte superior de acuerdo al diseño original. Para hacer el calado utilizar el cutter con suficiente filo.
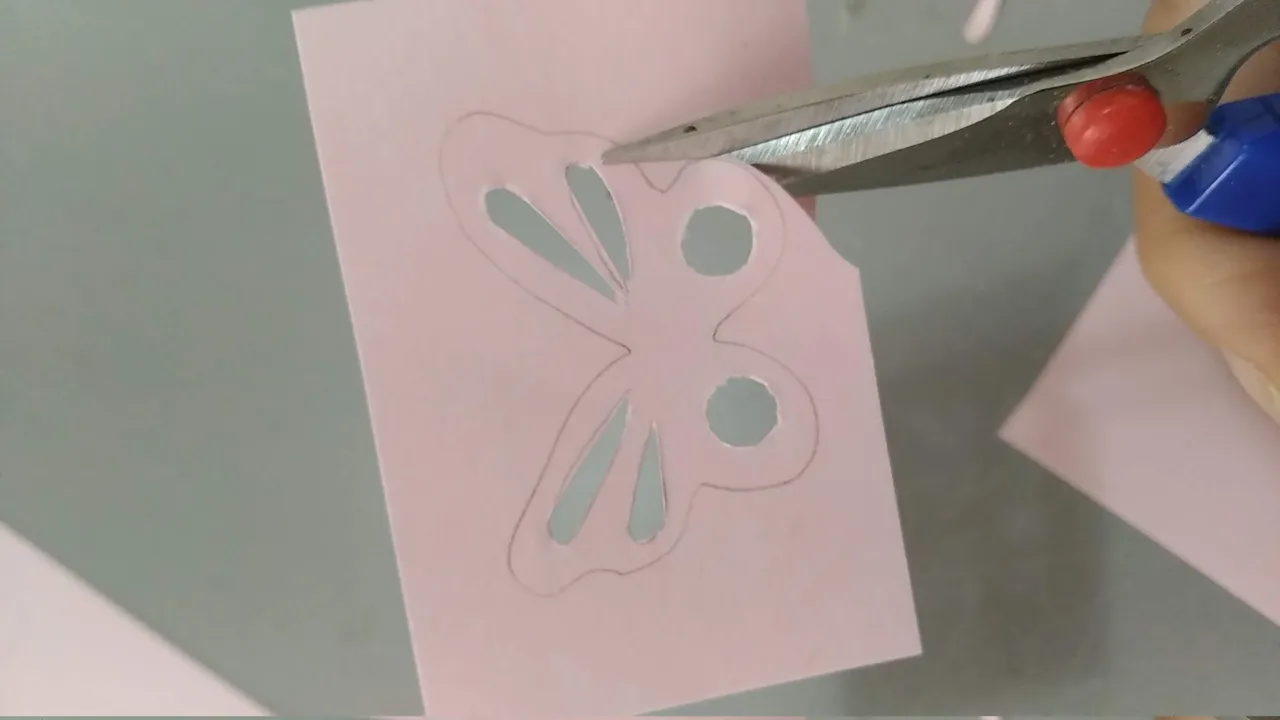
- Recortar las mariposas por toda la silueta.
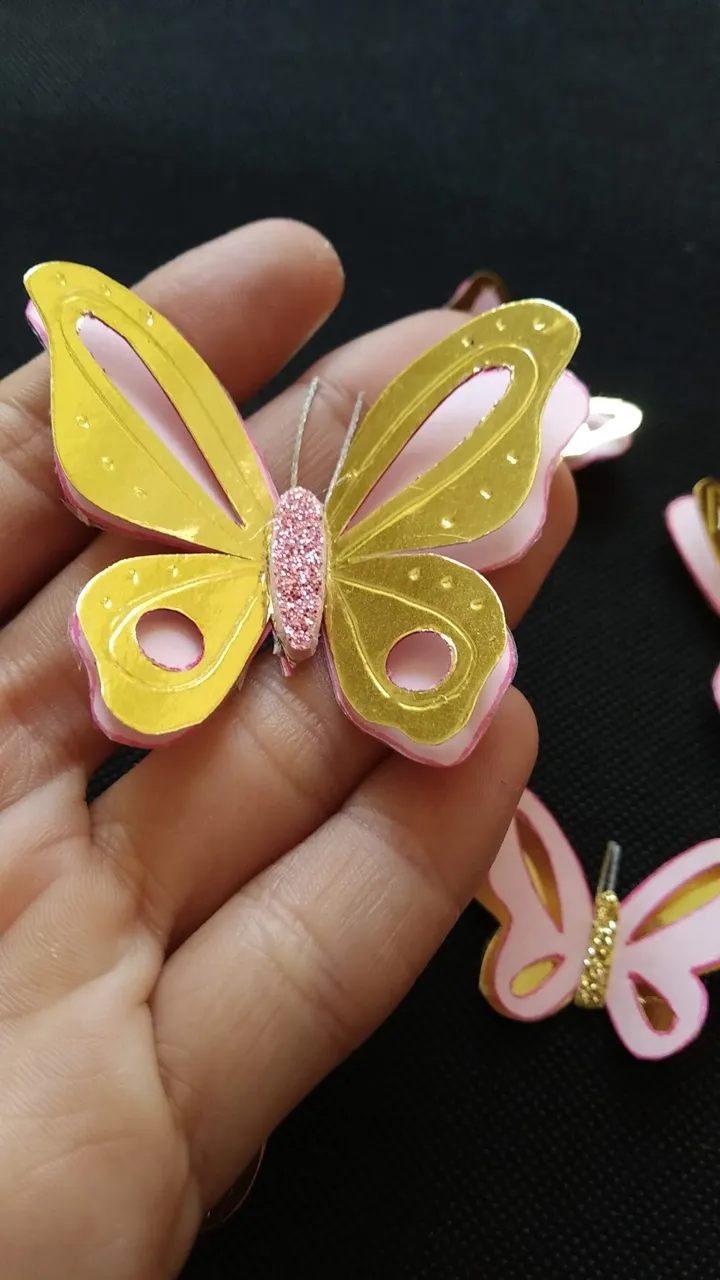
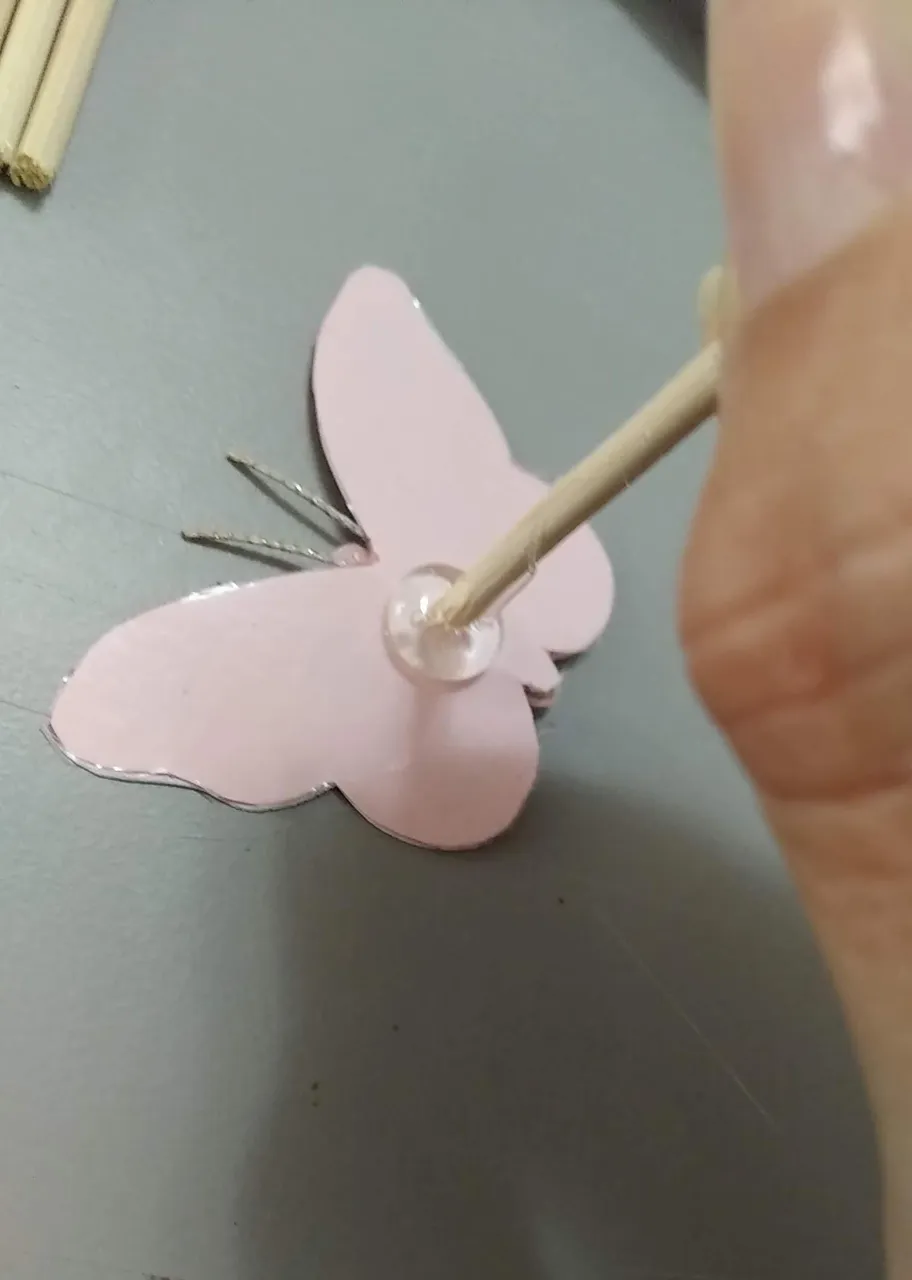
- Una vez caladas y cortadas todas las piezas, pegar con silicón frio la pieza que irá en la parte superior, aplicando el silicón SOLO en la parte central de la mariposa. Decorar la parte central de la mariposa con foami escarchado, pero antes de pegarle colocar dos pedazos de hilo grueso que simulen las antenas.
- A fin de evitar la humedad de la torta dañe las mariposas, forrar la parte inferior de la mariposa con cinta adhesiva transparente (gruesa) y recortar los excesos (Igual la repostera adiciona papel o acetato antes de fijar al pastel).
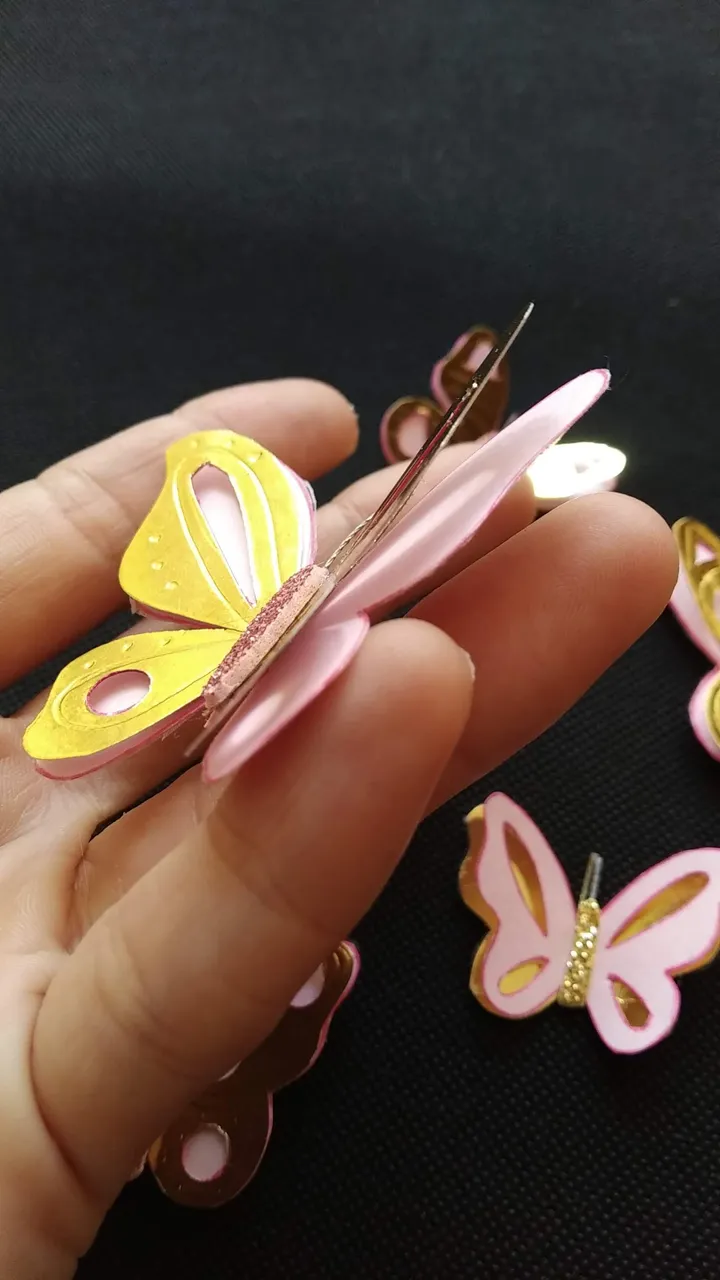
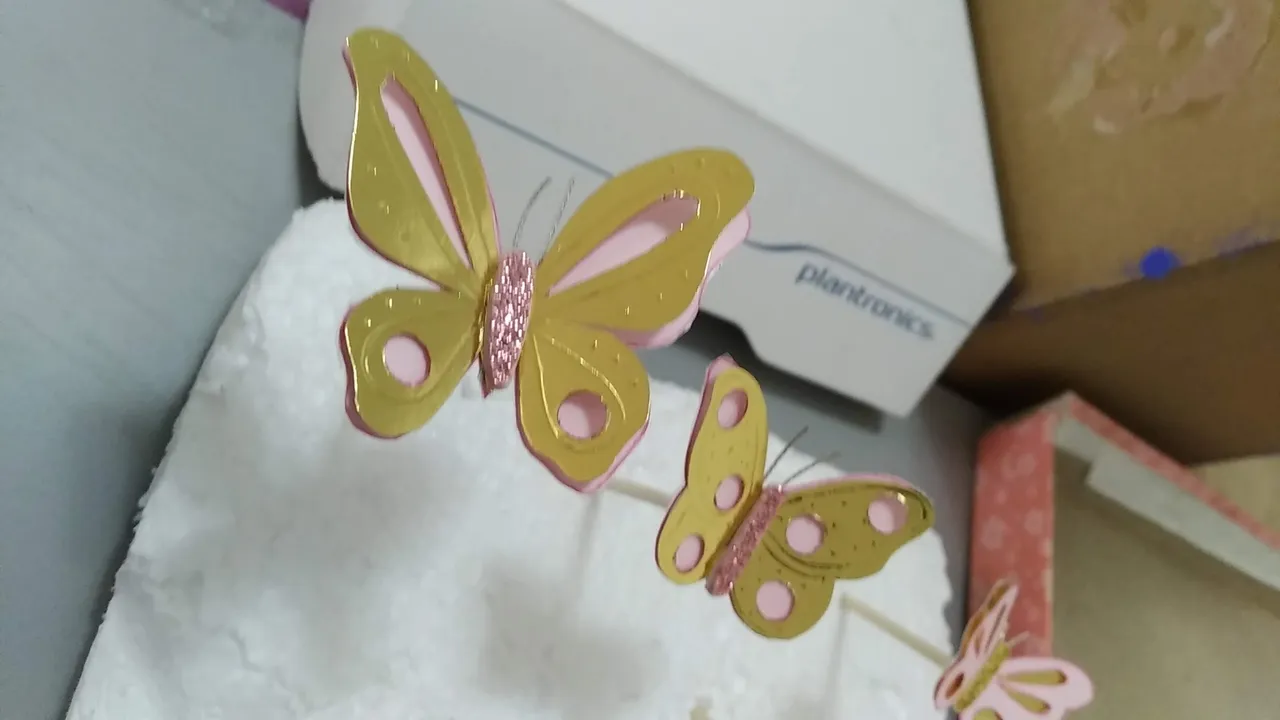
- Recortar palitos de madera de aproximadamente 7 cm de alto y pegar con silicón caliente en la parte trasera de cada mariposa.
- Listo a disfrutar de la magia.
English
Hello my dear readers, nice to greet you again.
The cake decoration that I want to show you today, and encourage you to make, is super easy and looks great on any cake.
This topper was made with a lot of love for a girl who loves butterflies and since birthdays are magical days, she was given this surprise cake decorated with her favorite animals. This was undoubtedly another great cake from my favorite super cake maker Mayda who always takes me into account to make very special and personalized decorations.
Without further ado and hoping you enjoy the work done with love, I leave you the materials used, the process and the images of the work.
- Light pink cardboard
- Gold cardboard.
- Light pink frosted foami.
- Thick and resistant thread.
- Wooden sticks.
- Transparent adhesive tape.
- Cold silicone.
- Hot glue.
- Cutter.
- Scissors.
- Pencil.
- Define and design on white paper the model of the butterflies to be used (template). A total of 7 butterflies were made for this topper, all of different designs and sizes.
- Using the templates, mark the butterflies on pink and gold cardboard. As each butterfly will be a double layer, 14 silhouettes should be cut out, seven (7) in gold and seven (7) in pink (we will work in two layers, for a better effect of the butterflies).
- Of the seven butterflies, 4 should be gold and 3 not. The ones that are openworked will have pink as the base color and the ones that are not will have the upper layer in pink openwork.
- Openwork the butterflies that will go on top according to the original design. To make the openwork use the cutter with enough edge.
- Cut out the butterflies all over the silhouette.
- Once all the pieces have been cut and cut out, glue with cold silicone the piece that will go on top, applying the silicone ONLY on the central part of the butterfly. Decorate the central part of the butterfly with frosted foami, but before gluing, place two pieces of thick thread to simulate the antennae.
- In order to prevent the humidity of the cake from damaging the butterflies, line the lower part of the butterfly with transparent tape (thick) and trim the excess (the baker may add paper or acetate before attaching to the cake).
- Cut out wooden sticks approximately 7 cm high and glue with hot silicone on the back of each butterfly.
- Ready to enjoy the magic.
Translated with www.DeepL.com/Translator (free version)
IMÁGENES / IMAGES

SALUDOS / REGARDS
Todas las Fotos fueron tomadas con mi teléfono Redmi 7A.
Contenido original de @keco (fotos y texto) - Todos los derechos reservados Publicado en HIVE así como en mi instagram : http://instagram.com/carton_pintura_algo_mas
All Photos were taken with my Redmi 7A phone.
Original content from @keco (photos and text) - All rights reserved Posted on HIVE as well as on my instagram: http://instagram.com/carton_pintura_algo_mas