Español
Hola mis estimados lectores, gusto saludarles.
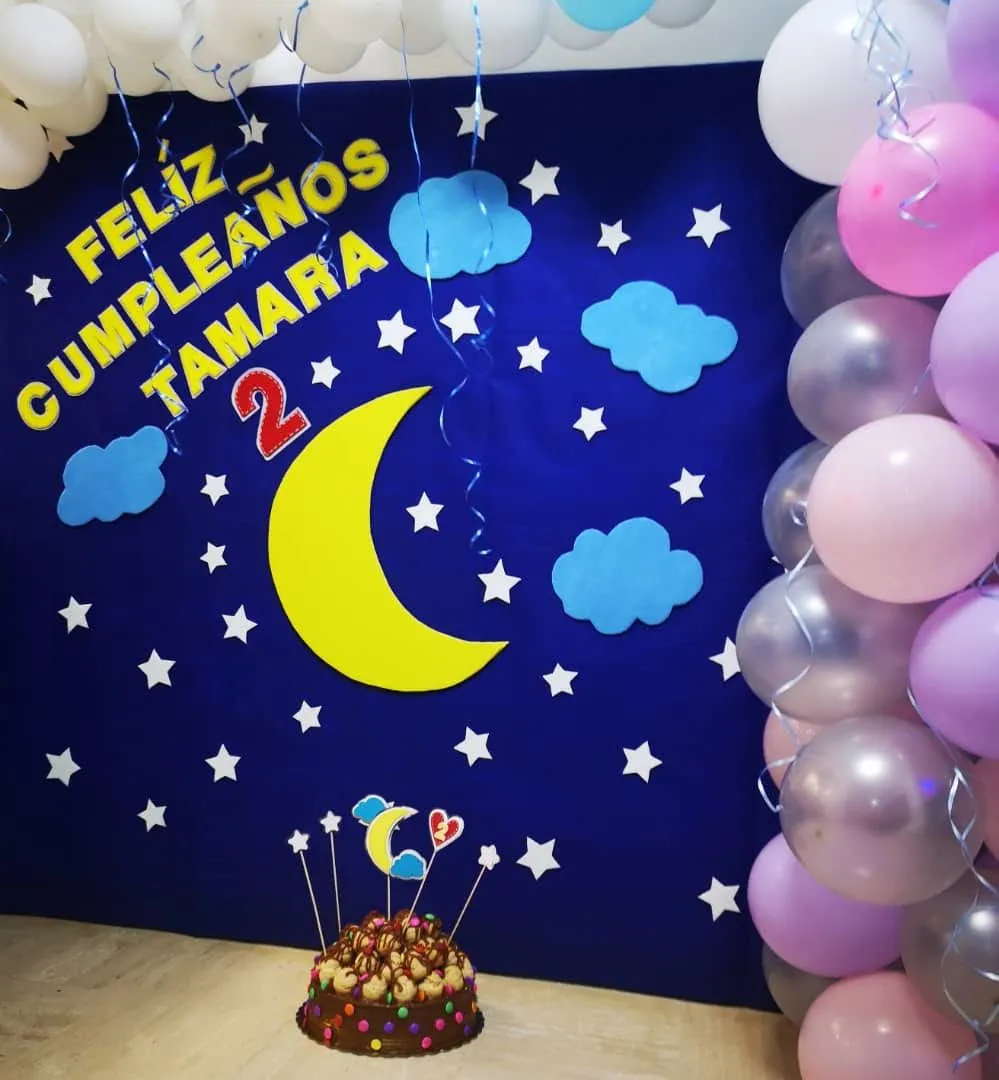
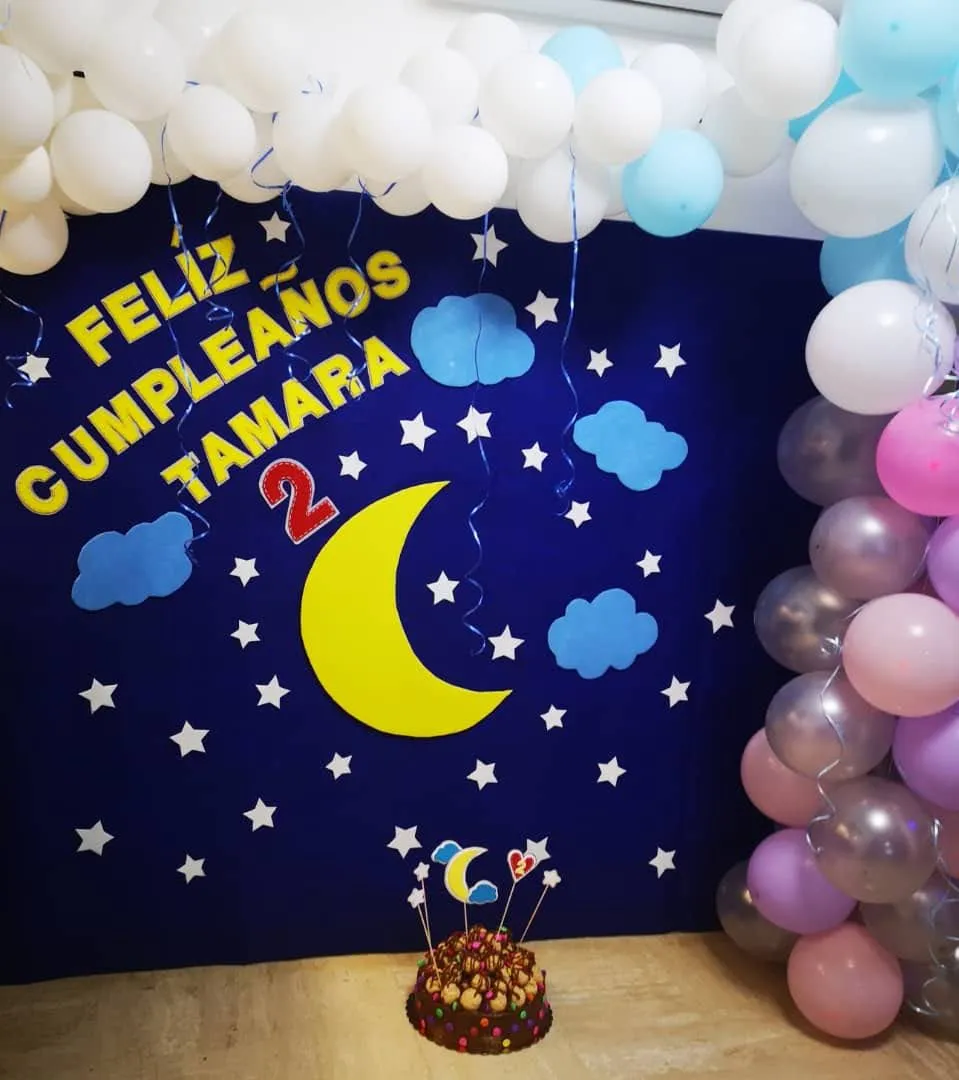
En este maravilloso viernes, con esta publicación quiero lograr dos cosas, primero mostrarles como lograr una decoración para cumpleaños no convencional ni comercial; y segundo participar en el concurso promovido por @hivediy sobre Tercera dimensión centrado en exhibir manualidades que desde cualquier angulo se vean bien; creo este trabajo puede participar, así que acá estoy nuevamente formando parte de los participantes.
Tamara es una dulce niña que recientemente cumplió dos (2) años y ama un video infantil llamado “LUNA – Hora de dormir”, ella lo adora y pide diariamente se lo pongan muchas veces al día. Su mami Laura decidió que la celebración de su cumpleaños debía estar inspirado en el video ya que así podría disfrutarlo al máximo.
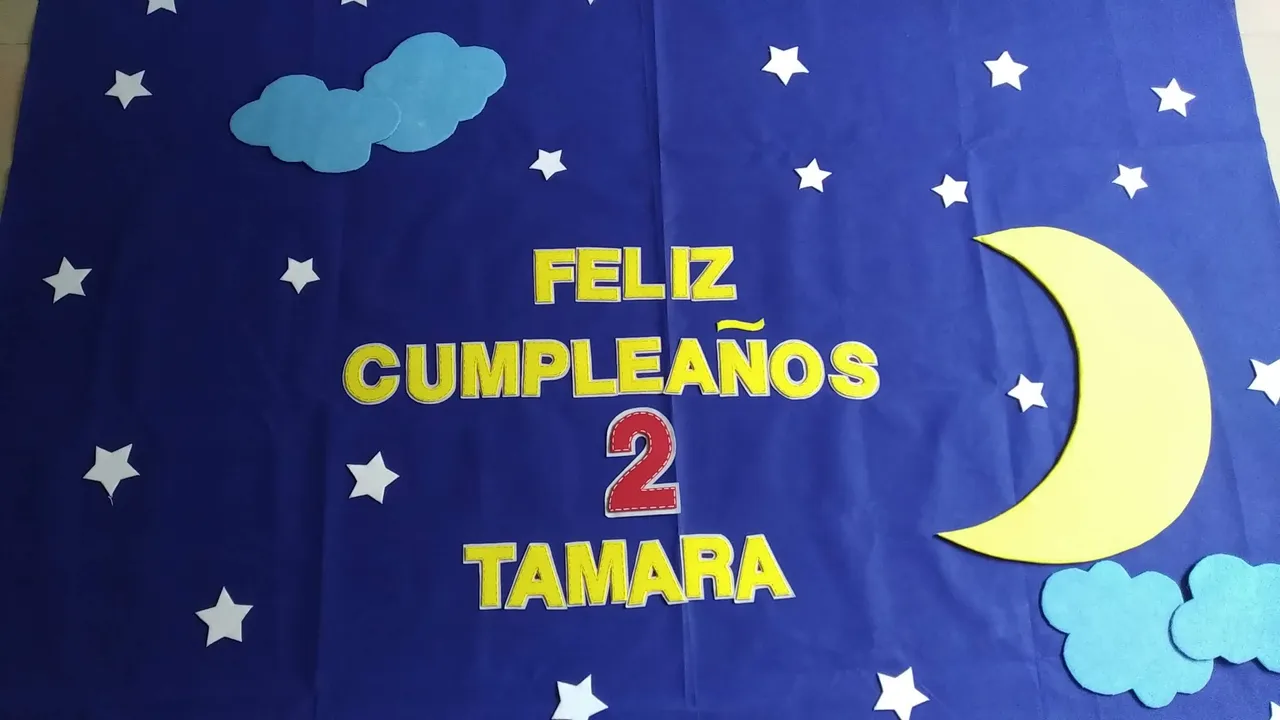
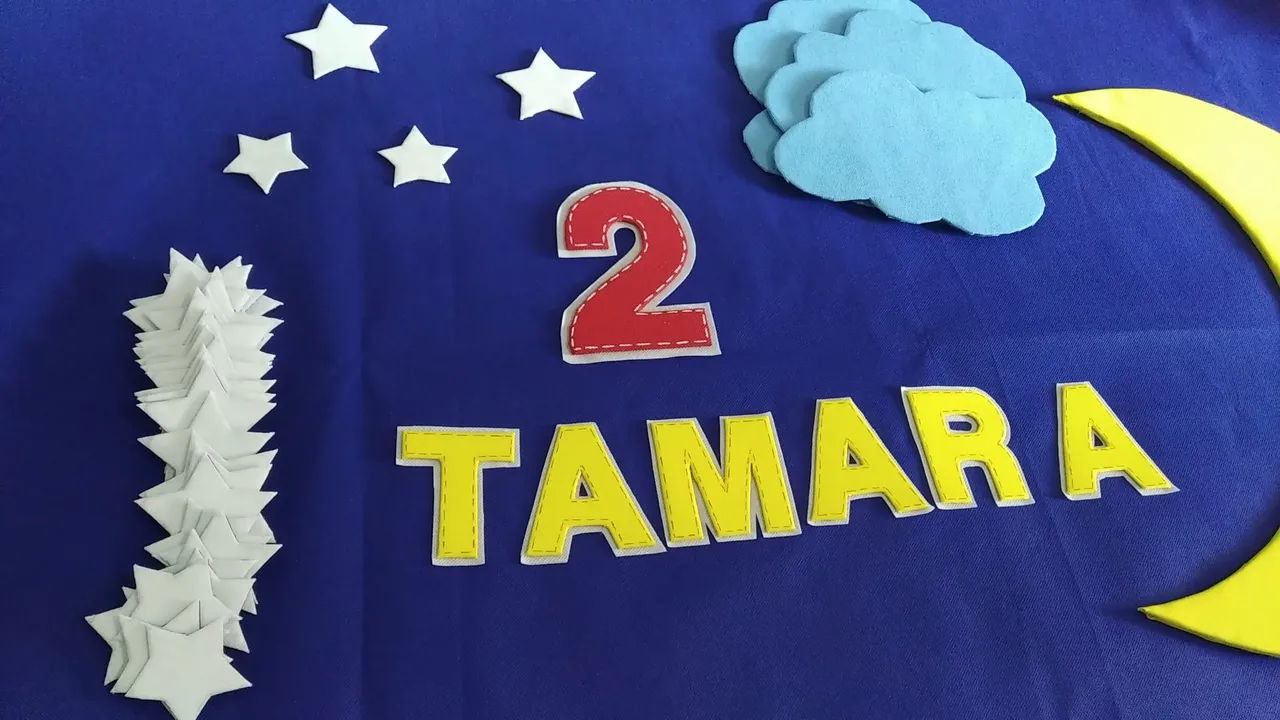
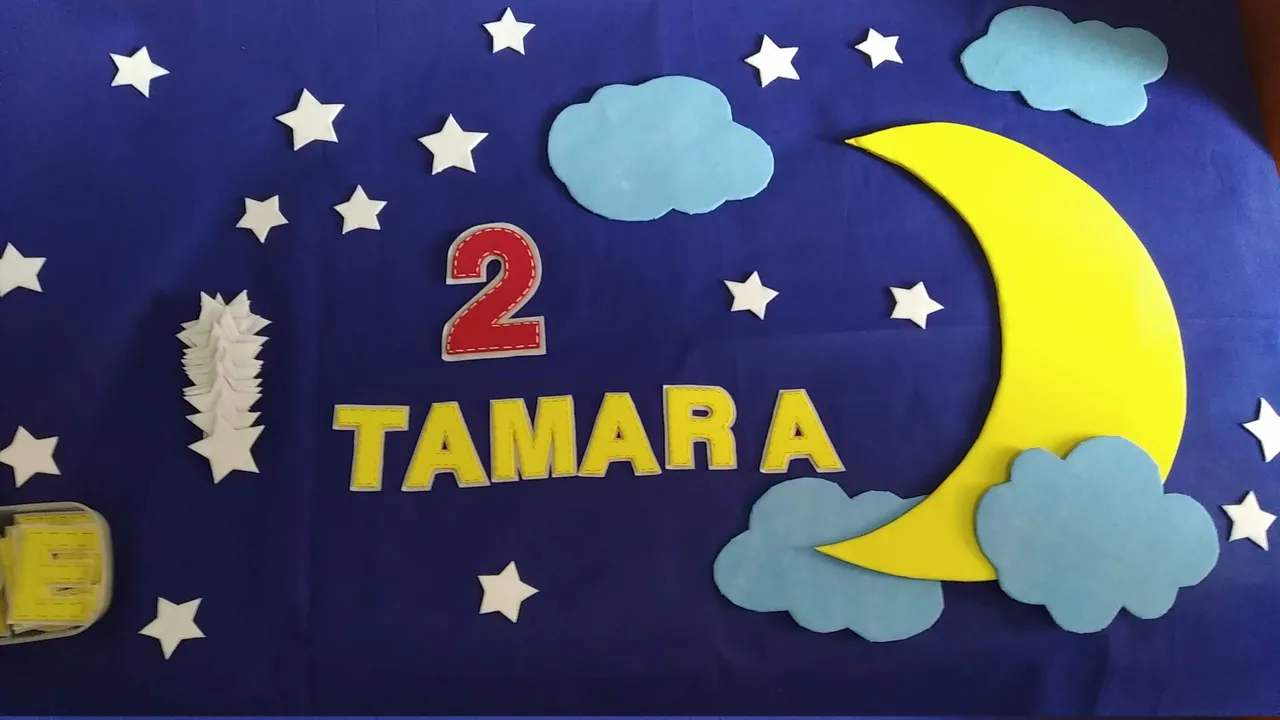
Asumí el reto de apoyar a mi amiga y le hice elementos del video para decorar la pared central. Utilizando cartón re-utilizable y tela realicé las nubes, la luna, las estrellas y respetando la fuente original hice la edad y las 21 letras que conforman el nombre y el feliz cumpleaños.
Es importante destacar que la decoración de la tela abarcó una medida de 2 metros de alto por 2 metros de ancho, y todas las piezas se ajustaron a esa medida, es decir es fueron piezas grandes.
Lo divertido y útil de esta decoración, es que posterior a la celebración los elementos como nube y luna sirve de decoración para el cuarto, y las letras le sirven para iniciar el proceso de alfabetización en el reconocimiento de las letras.
Sin más y esperando disfruten del trabajo realizado, les dejo los materiales utilizados, el proceso y las imágenes del trabajo.
- Cartón re-utilizable (gueso para luna y cartón fino para las letras)
- Hojas re-utilizables
- Tela LONETA amarilla
- Tela POP azul marino (esta midió 2x2mts)
- Tela POP blanca
- Tela POP azul claro
- Tela POP rojo
- Marcador de color rojo.
- Pintura blanca al frio.
- Pega en barra.
- Silicón caliente.
- Cutter.
- Tijera.
- Lápiz.
Letras y número:
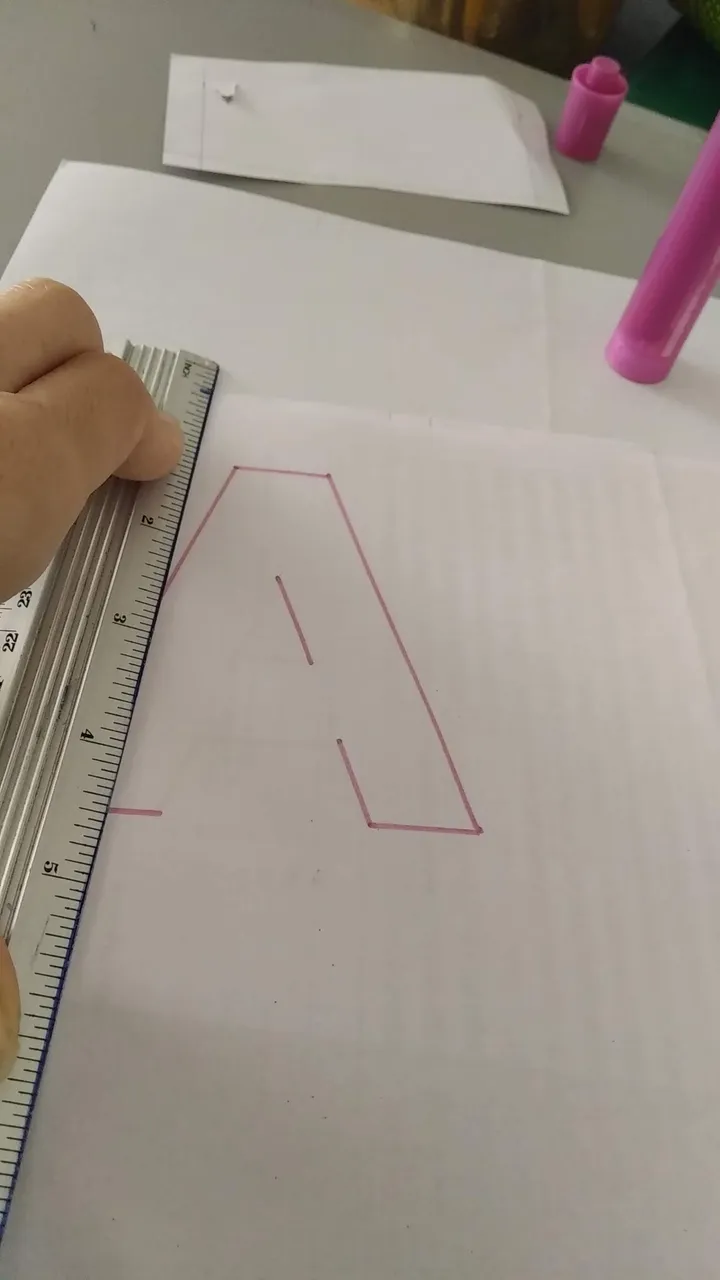
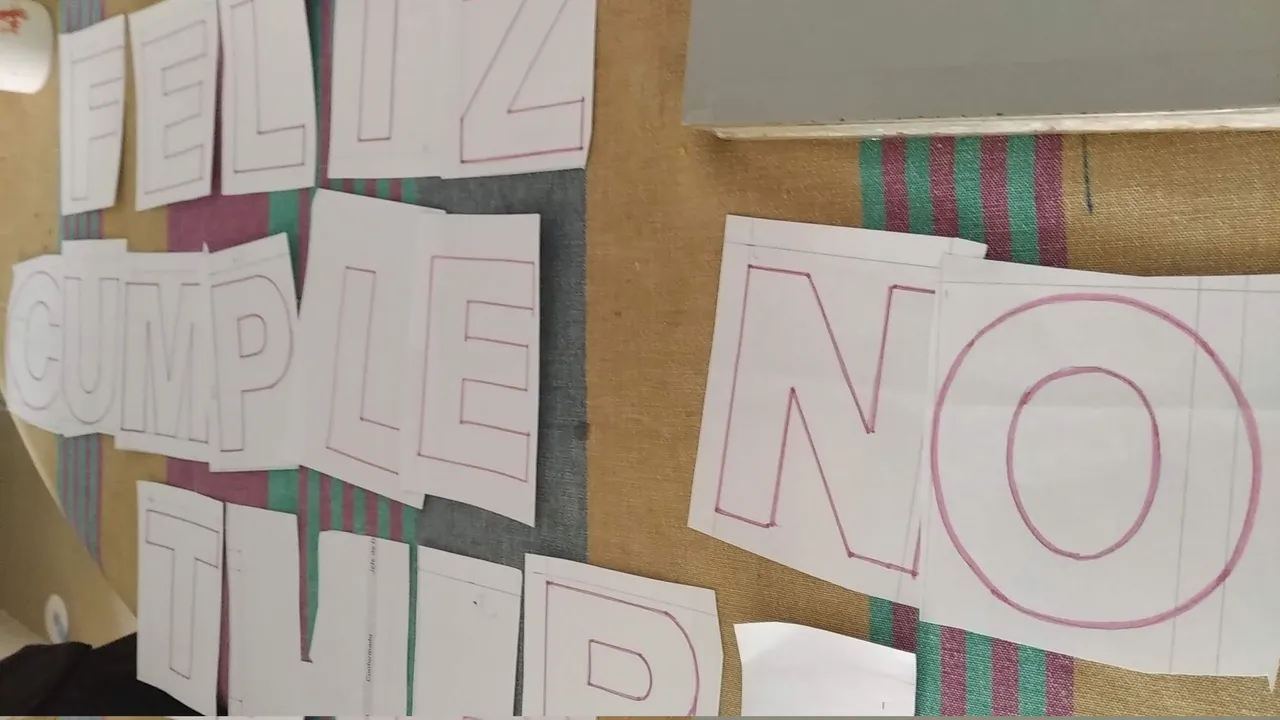
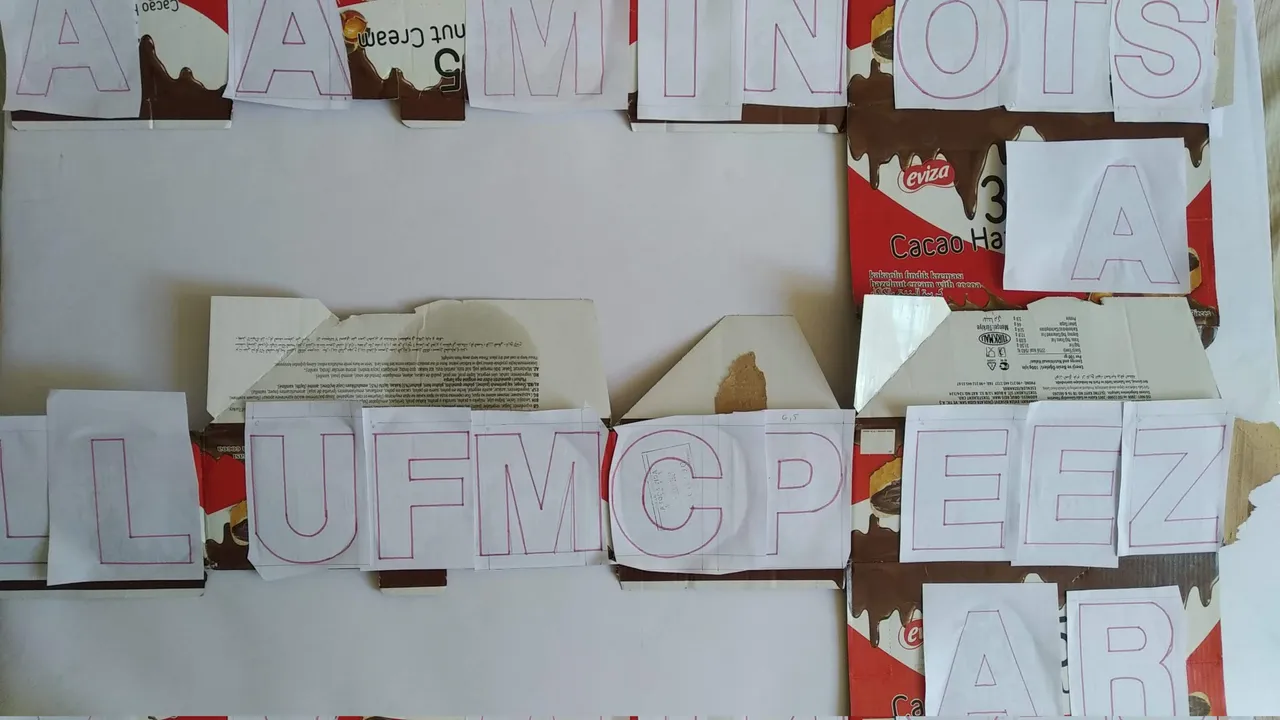
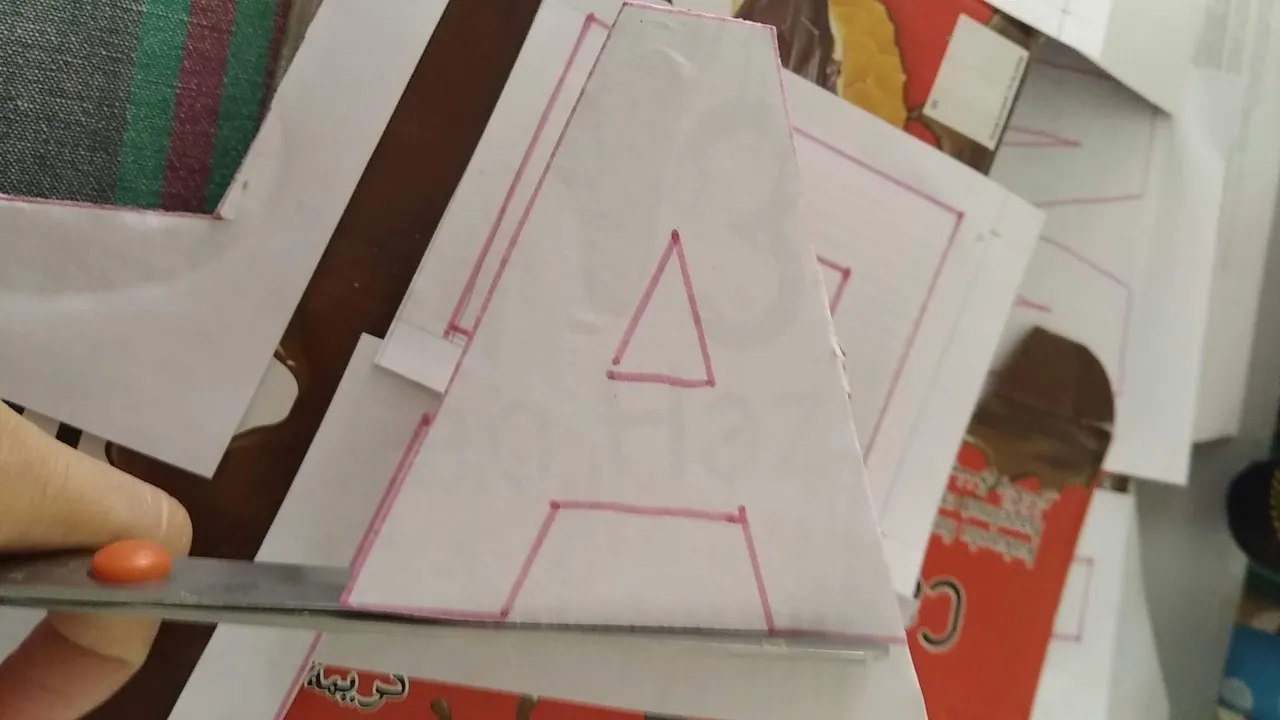
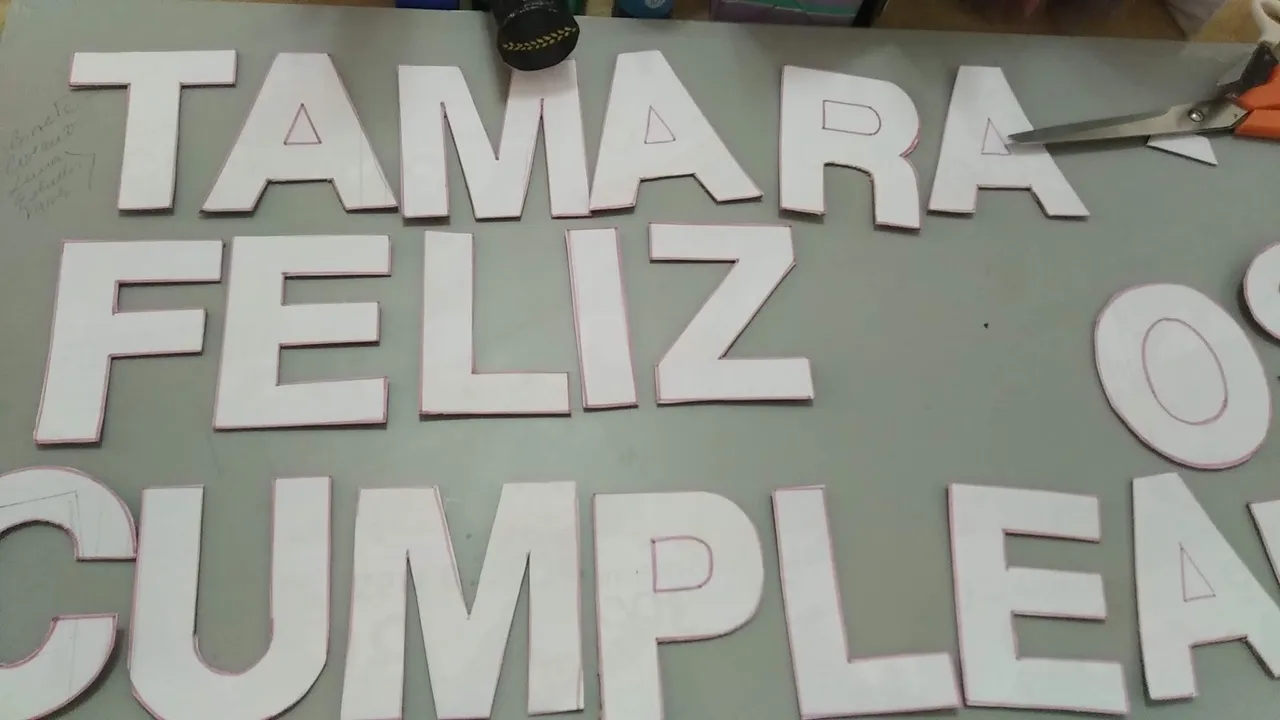
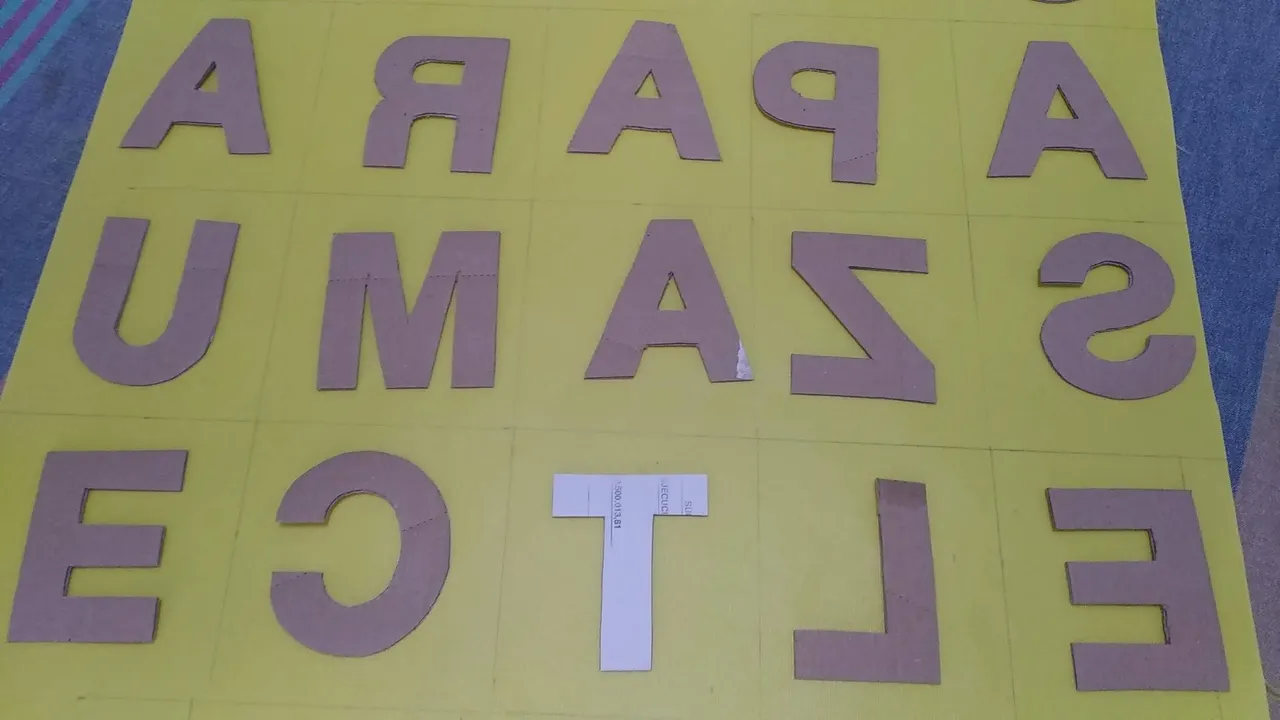
- En las hojas blancas marcar las letras de las palabras a crear. Para esta decoración se creo el “feliz cumpleaños Tamara” y cada letra tiene una medida de 10 centímetros de alto por 8 centímetros de ancho.
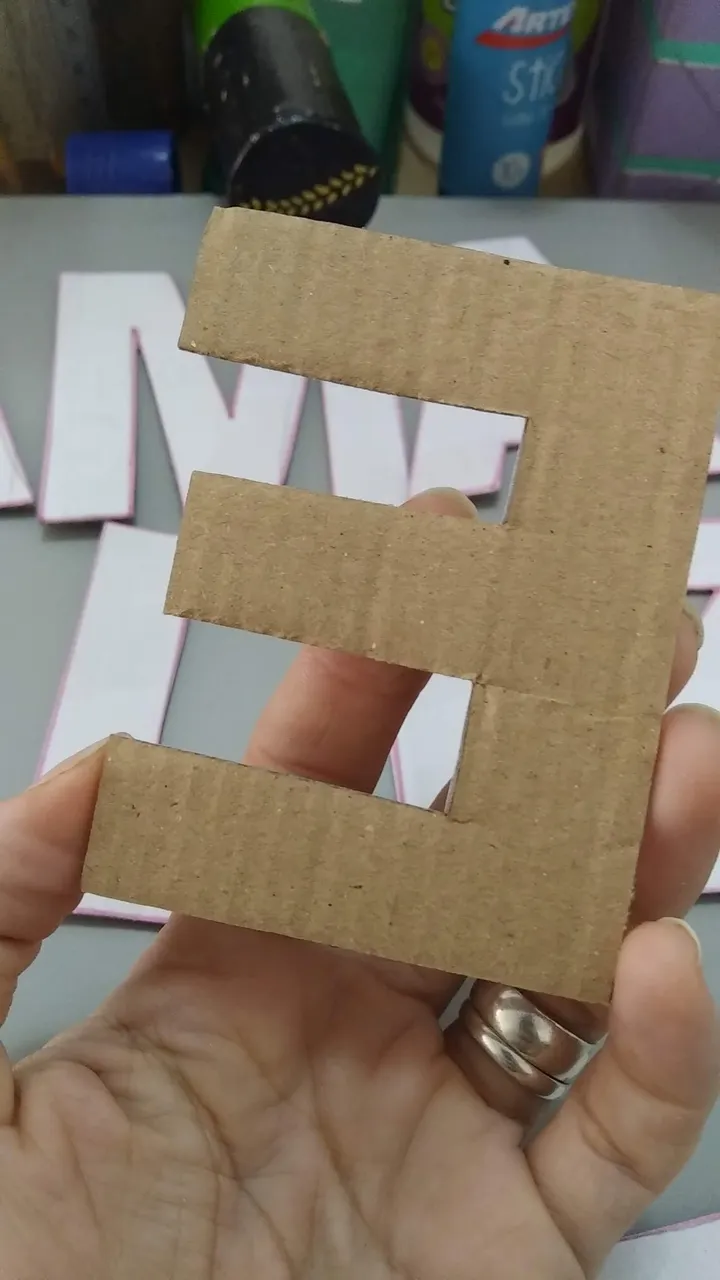
- Pegar las letras sobre el cartón con pega en barra y luego recortar siguiendo el patrón de cada letra.
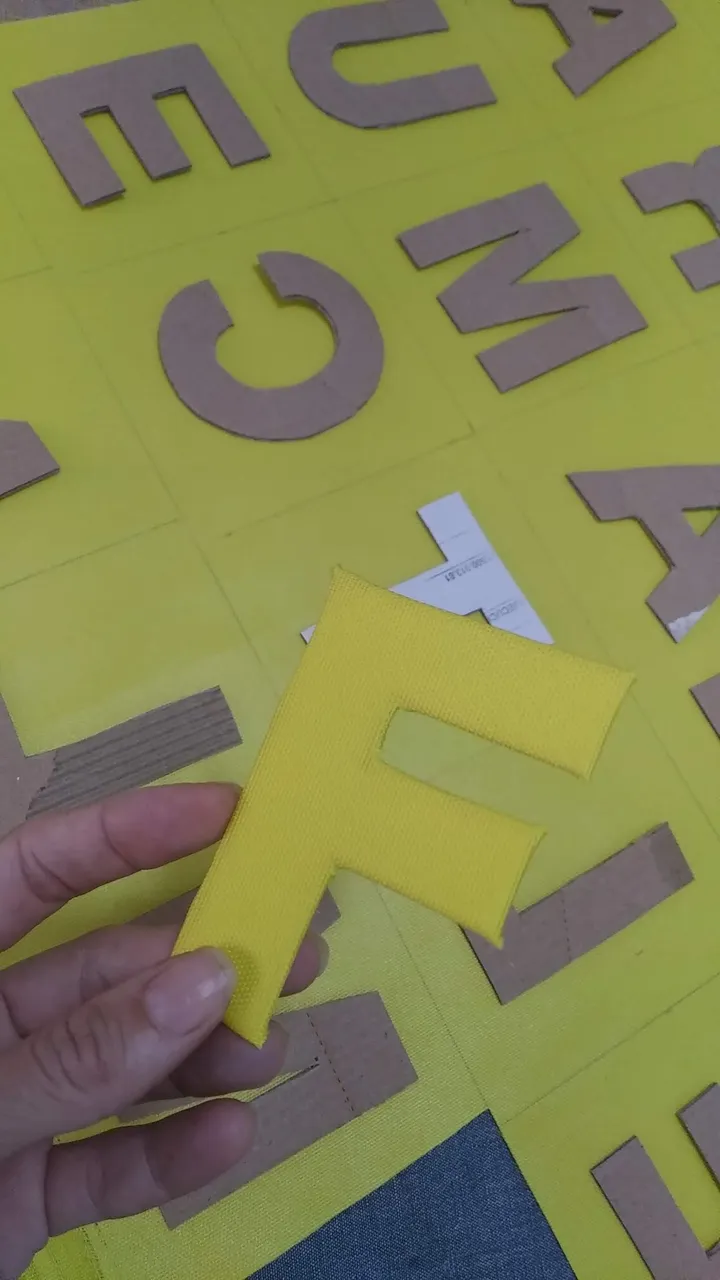
- Al tener todas las letras recortadas, pegarlas a la tela LONETA. Para esto, se deberá poner la tela sobre una superficie plana y por el lado interior de la loneta pegar las letras por el lado blanco de las mismas.
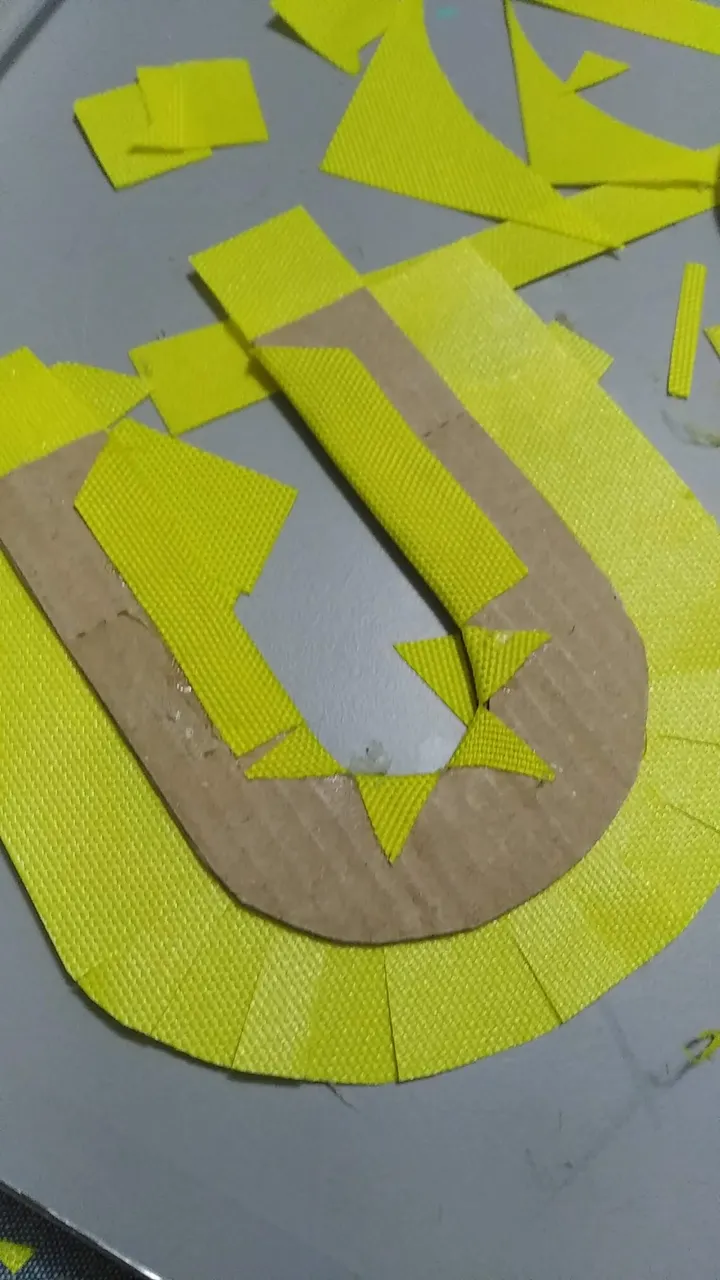
- Una vez pegadas las letras con una distancia mas o menos igual entre todas, marcar y recortar con la tijera. El silicón caliente debe aplicarse por todo el borde de la letra y luego pegar a la loneta ejerciendo presión.
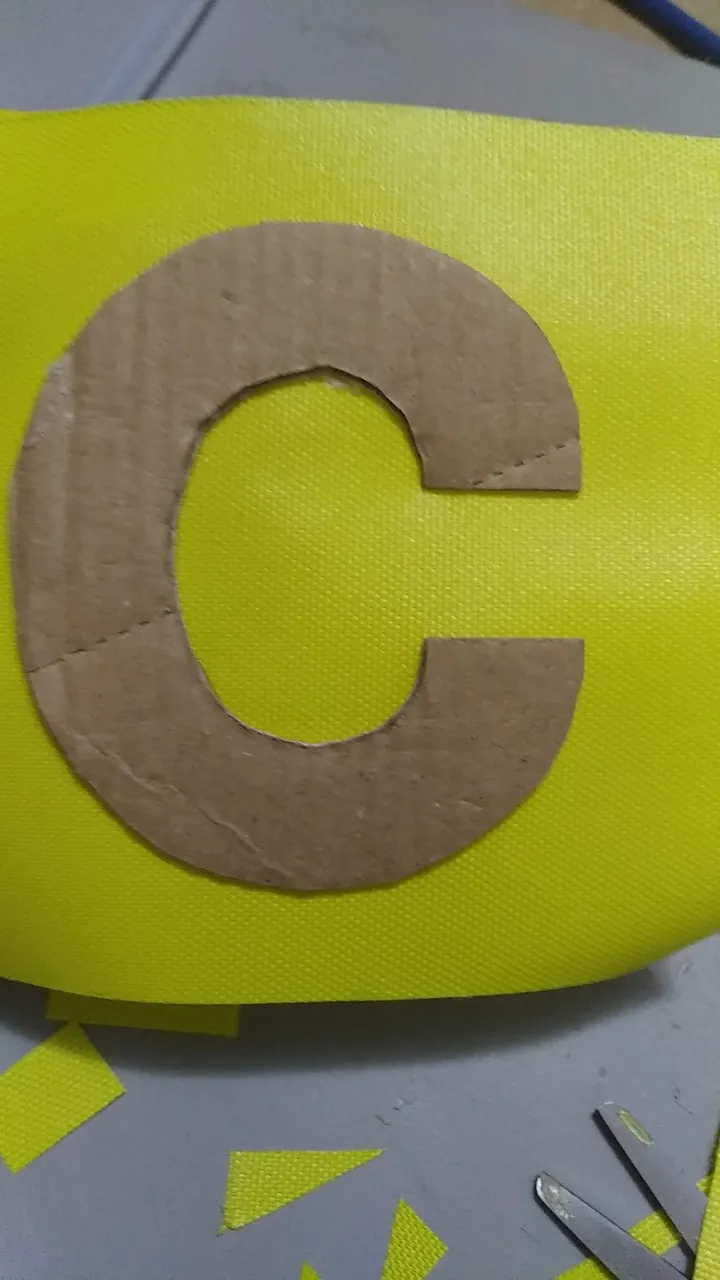
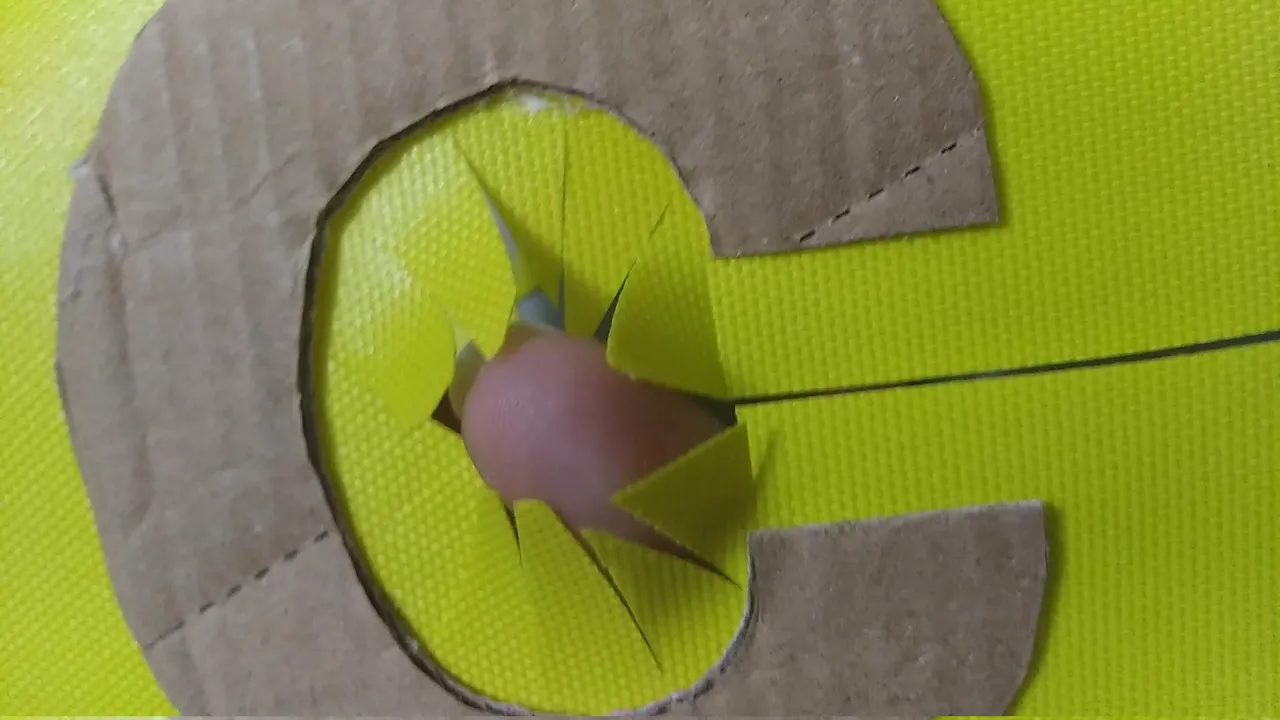
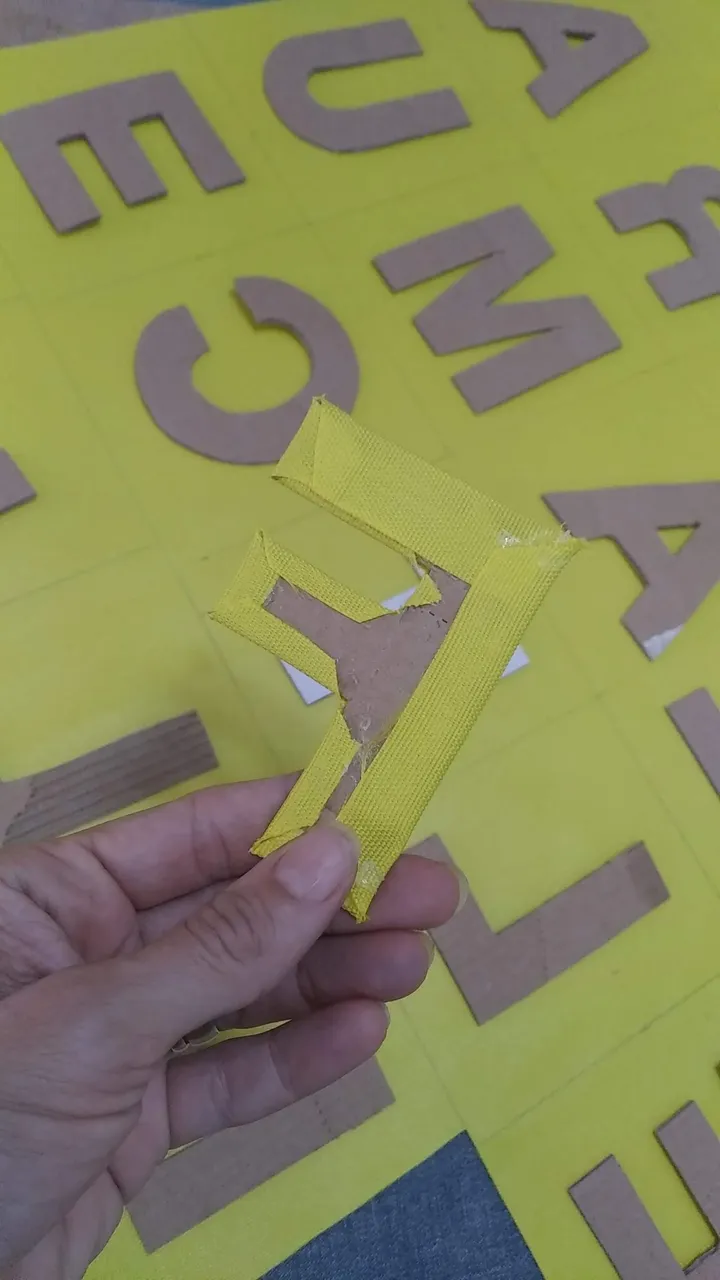
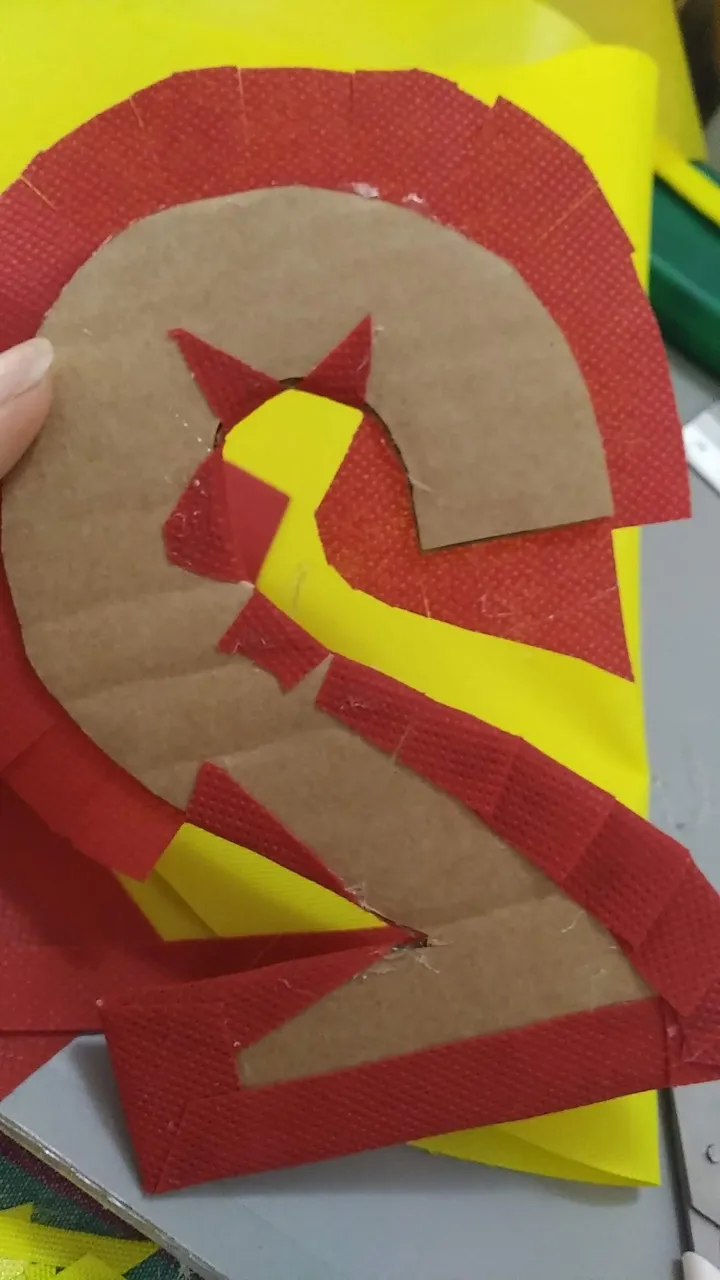
- Para cubrir la letra de forma perfecta, hacer pequeños cortes por todos los bordes y siguiendo el patrón de la letra, ir pegando pestaña a pestaña con silicón caliente. Al momento de pegar, estirar bien para evitar bultos y/o burbujas.
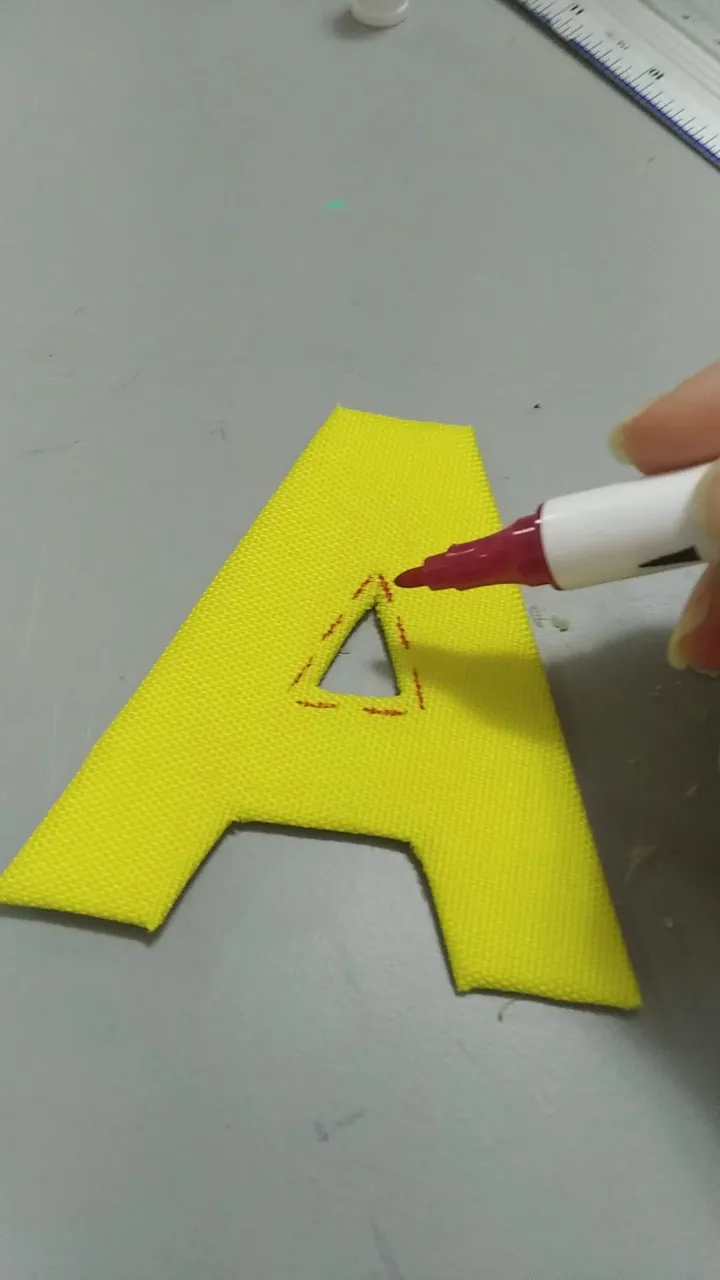
- Una vez se tengan todas las letras forradas con la tela loneta, hacer pequeños marcas que simulen una costura roja con marcador permanente de color rojo.
- Pegar las letras amarillas sobre tela POP blanca y recortar dejando un pequeño borde que sobresalga.
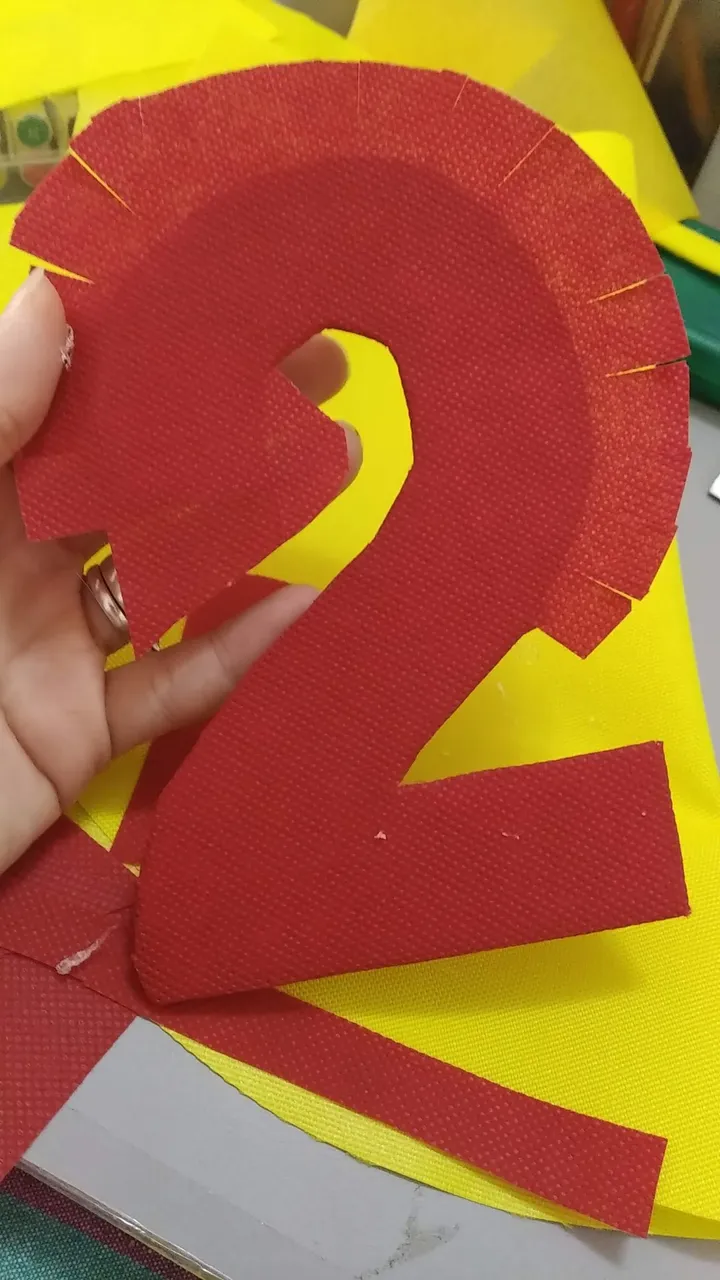
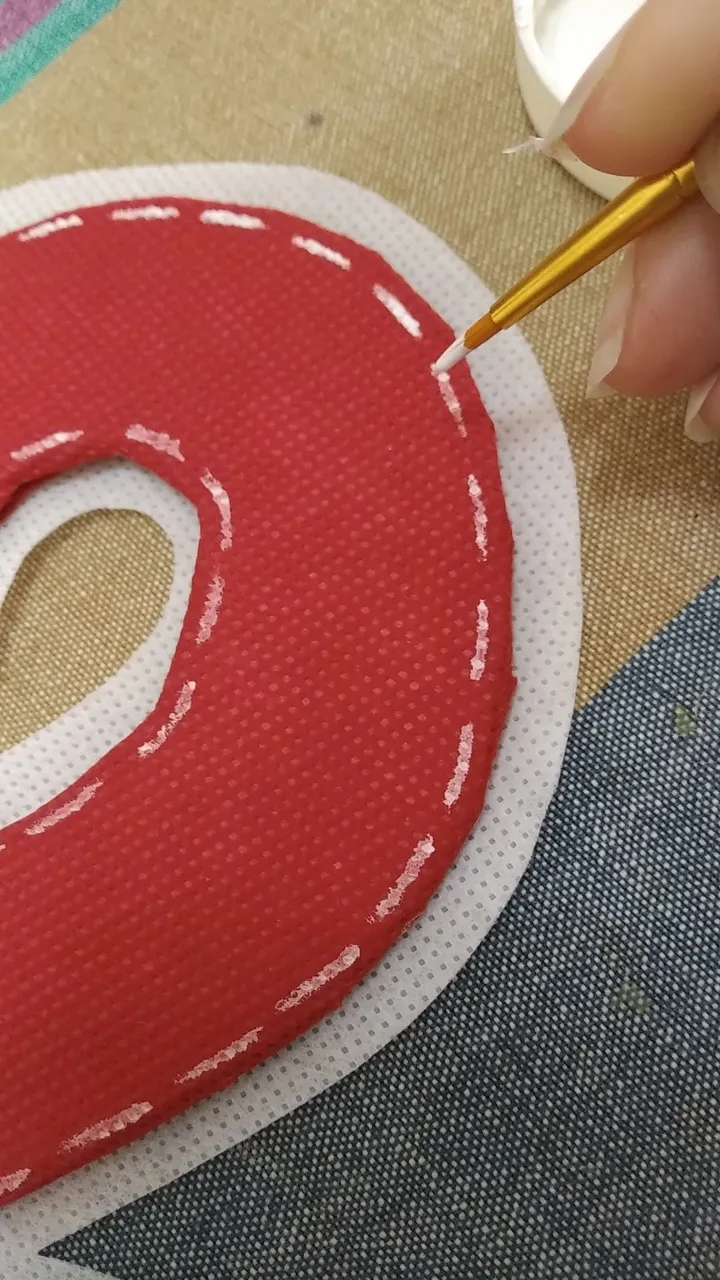
- Para hacer el numero dos, seguir los pasos anteriores solo que se sustituye el color amarillo por el rojo y las marcas a simular una costura se hará con la pintura al frio blanca.
Estrellas:
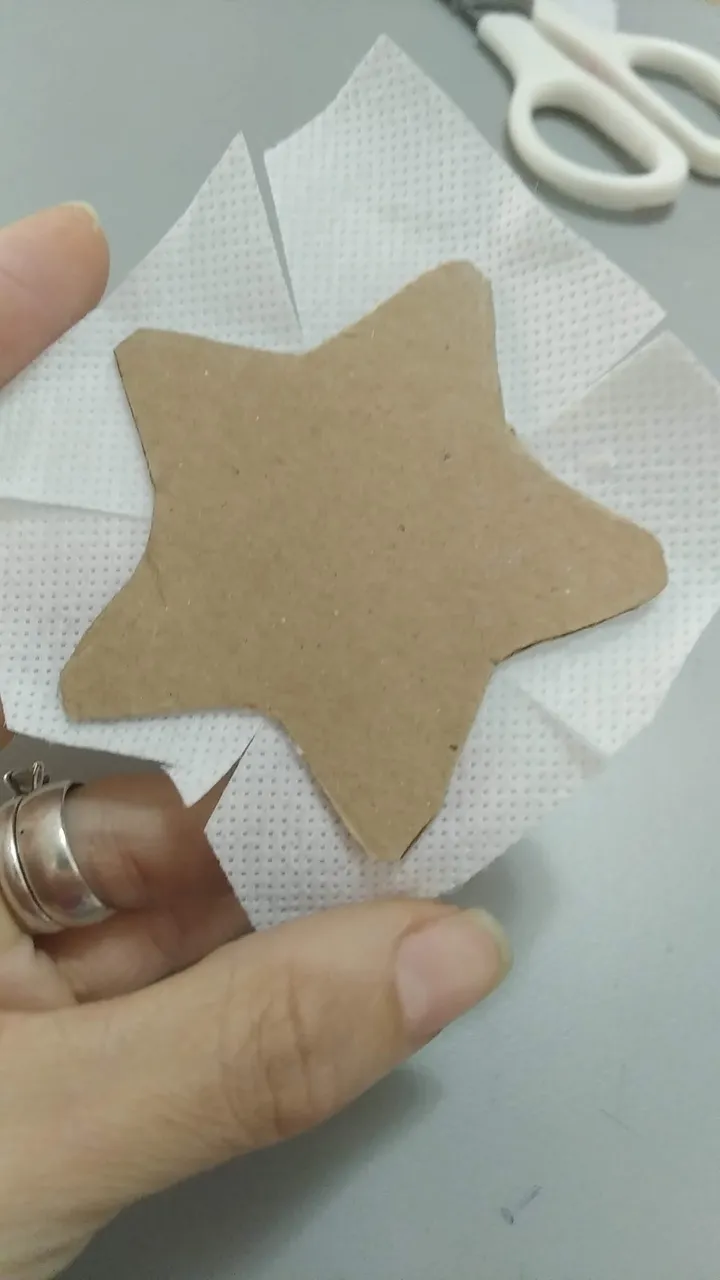
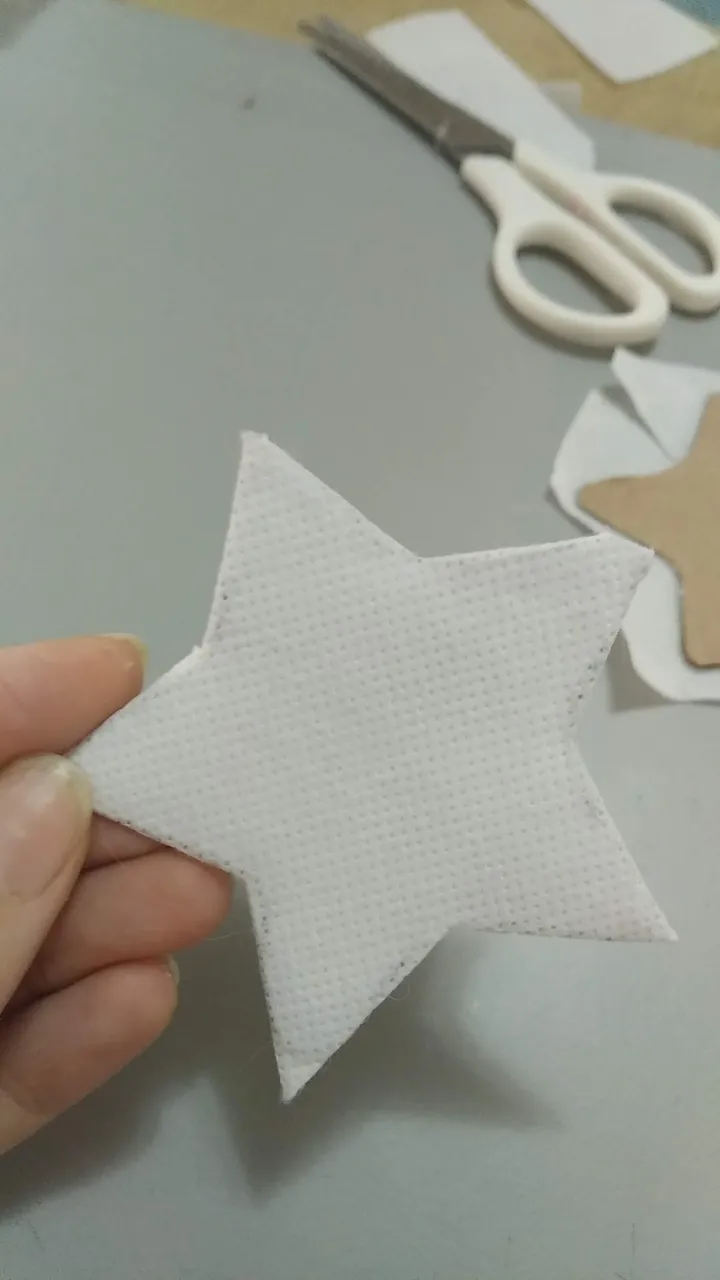
- Marcar y cortar las estrellas en las hojas. Se hicieron 30 estrellas de 5 centimetros c/u.
- Pegar sobre cartón re-utilizable y recortar.
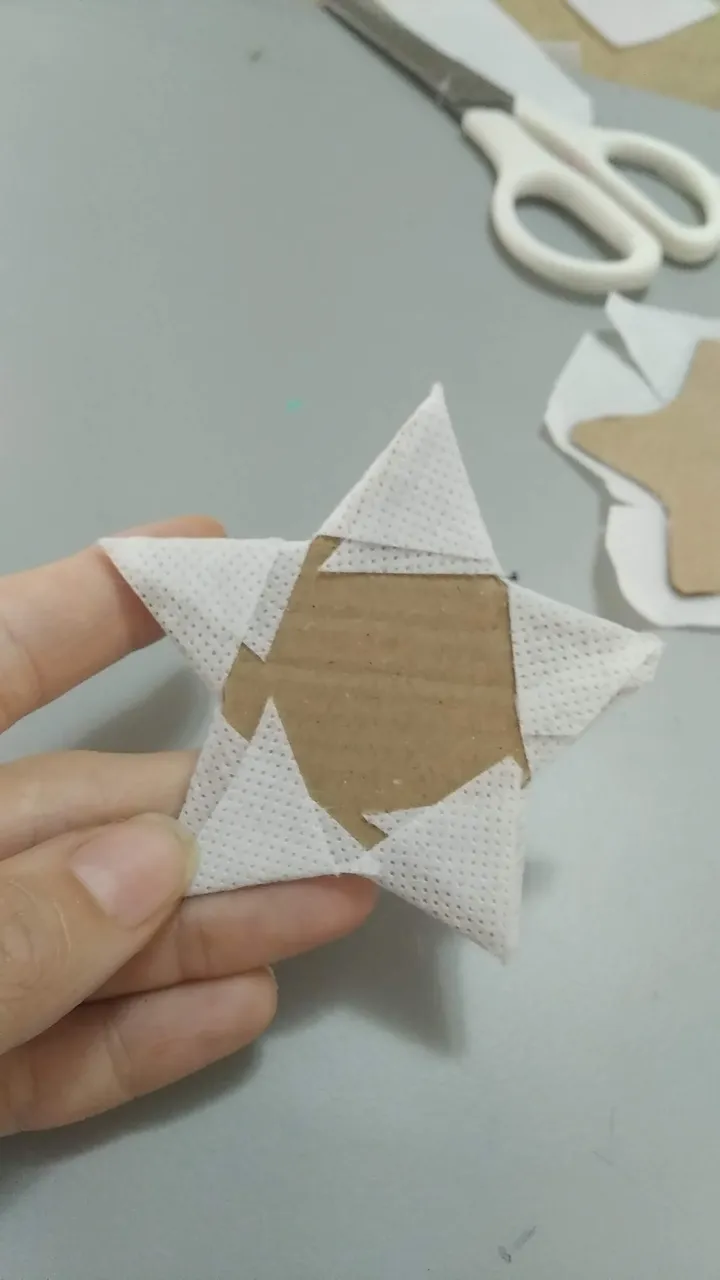
- Pegar con silicón caliente sobre la tela POP blanca
- Hacer pequeños cortes y forrar dando la forma a cada estrella.
- Pegar sobre tela azul pop y recortar al ras de cada estrella. Este paso con la tela azul busca tapar el cartón.
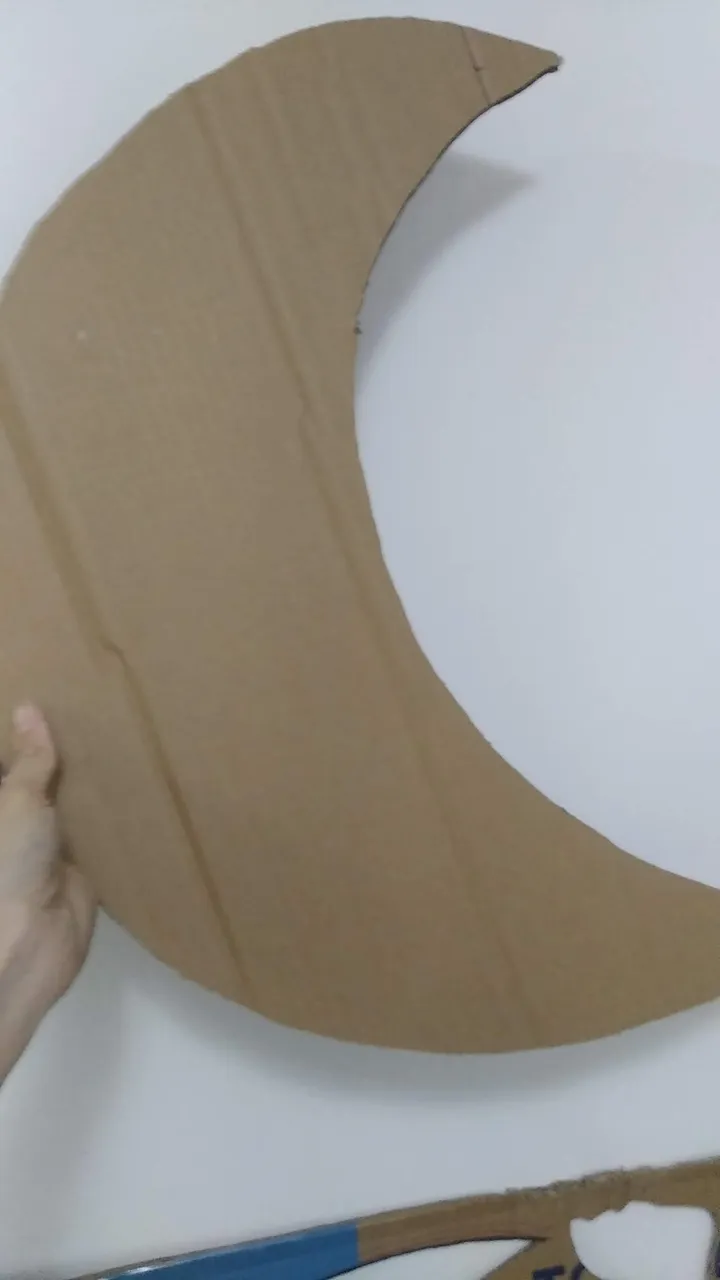
Luna:
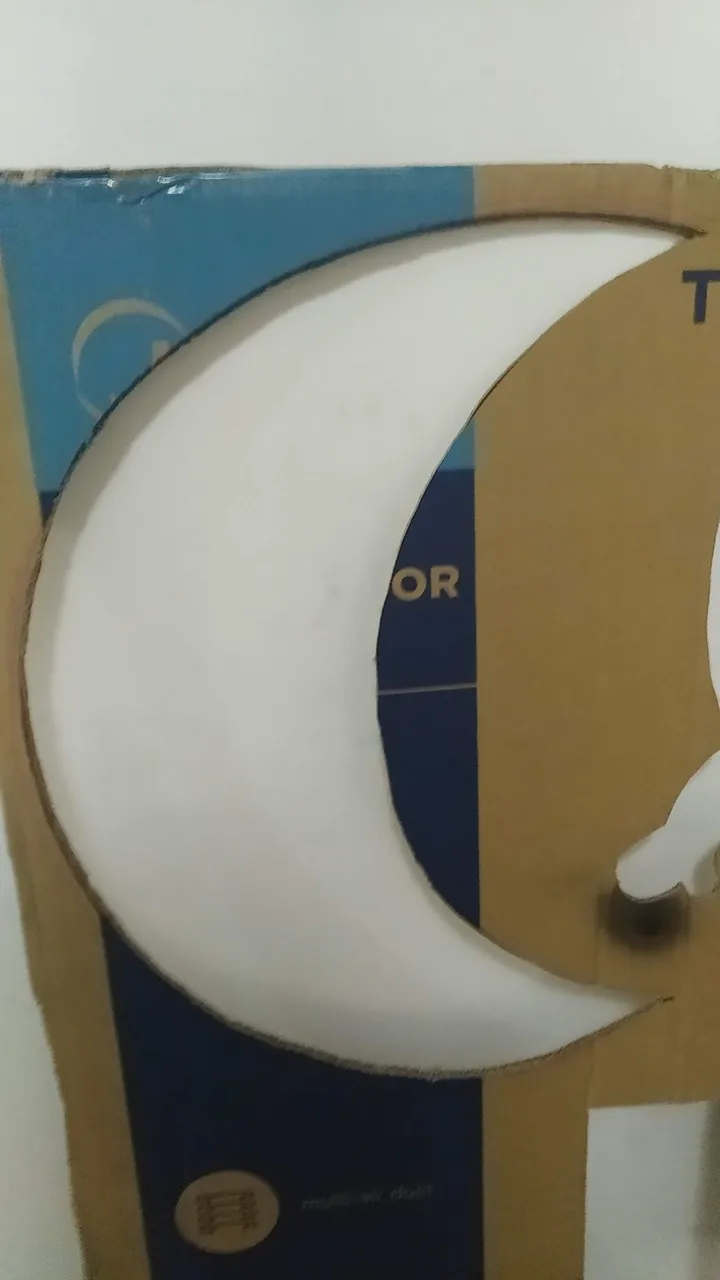
- Cortar el cartón en forma de estrella, ésta luna midió 60 centímetros de alto por 35 centímetros de ancho por su parte mas gruesa.
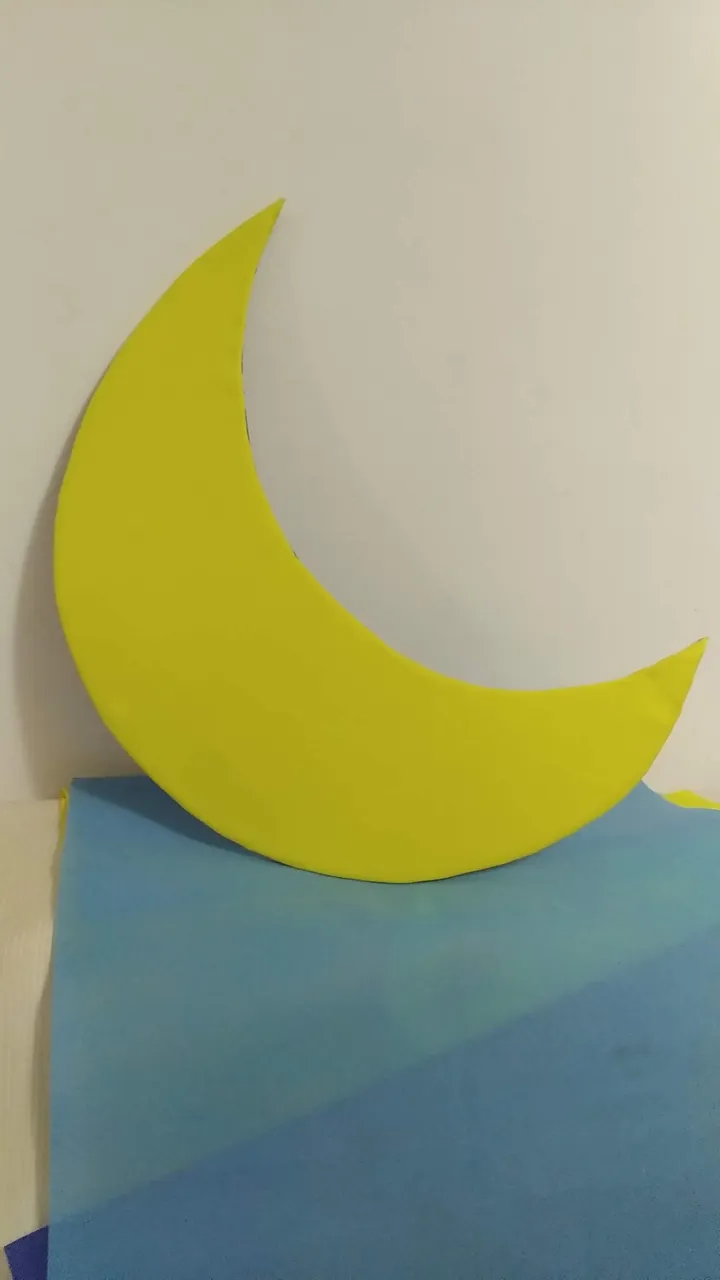
- Colocar la luna en la tela LONETA por su parte interior y pegar con silicón caliente.
- Recortar la tela siguiendo el patrón y dejando una separación considerable para hacer las pestañas y pegar hacia atrás.
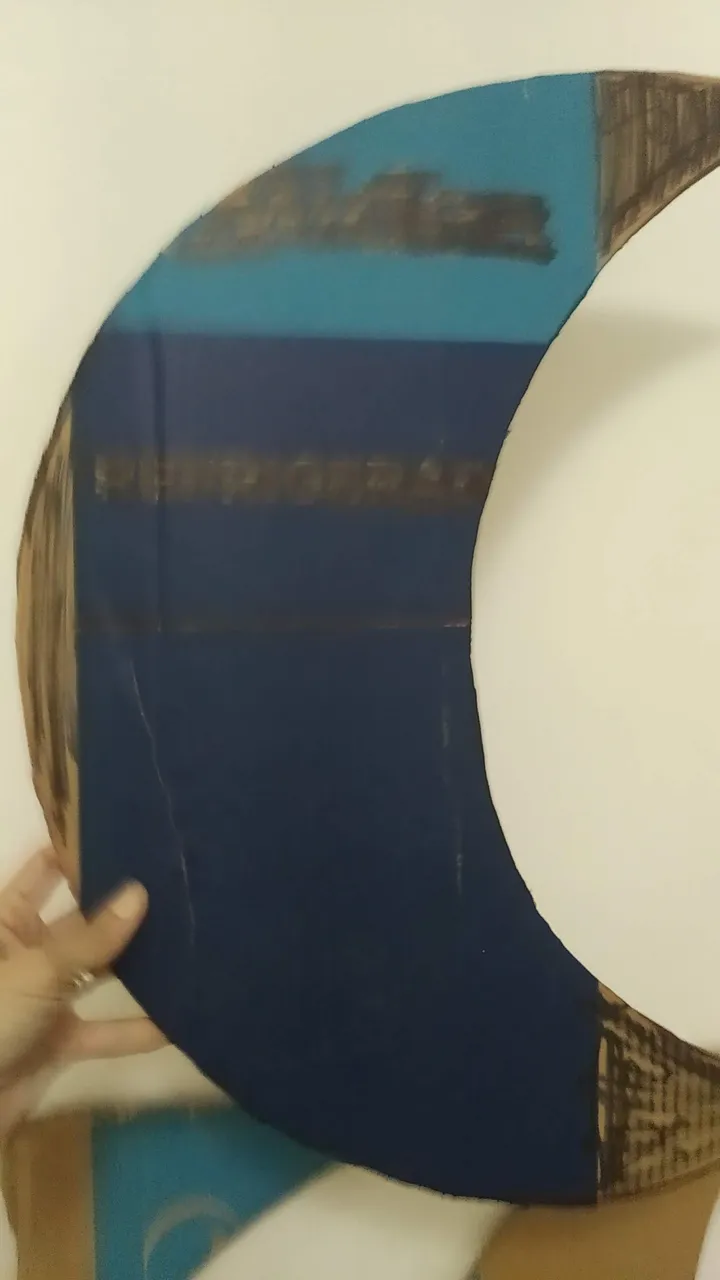
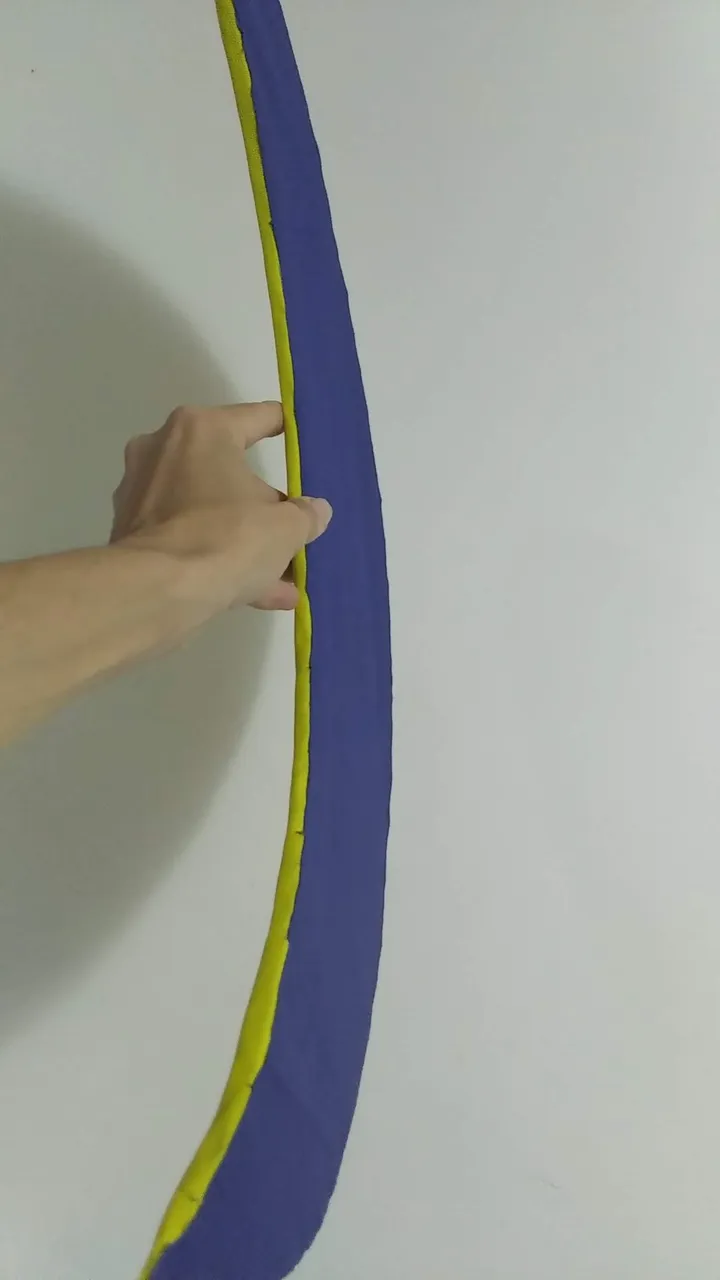
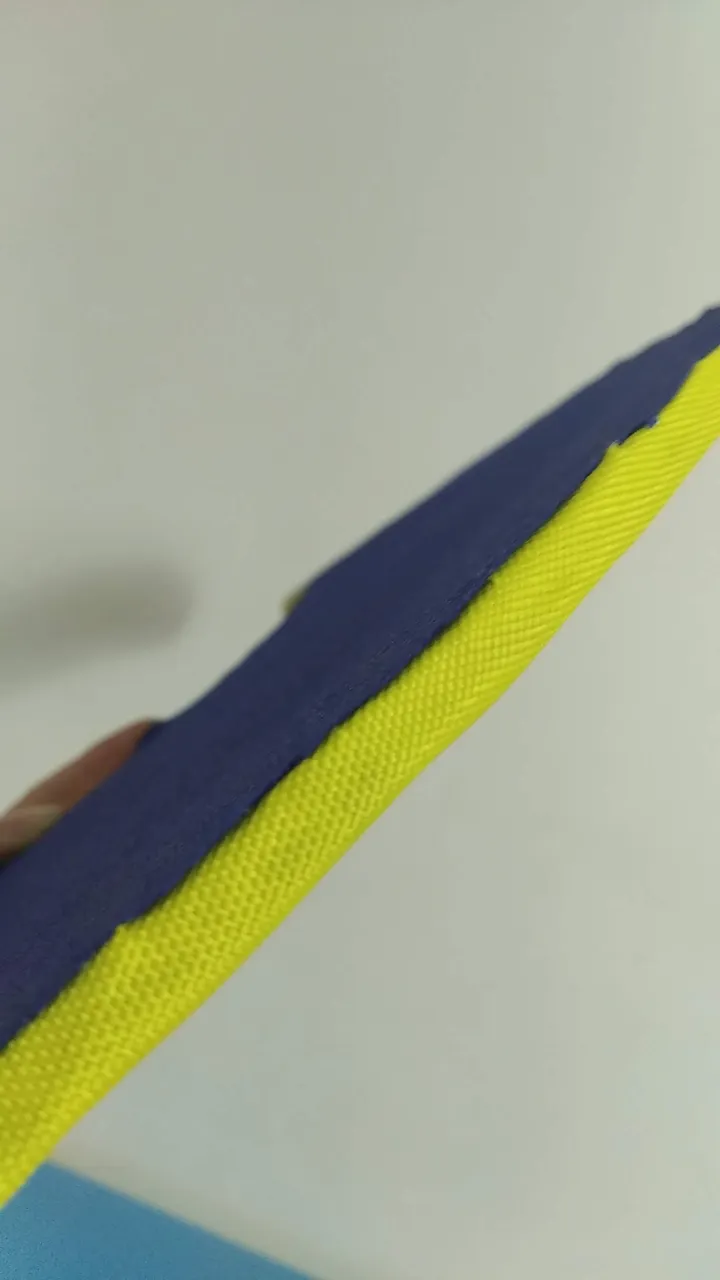
- Pegar sobre tela pop azul marino y recortar al ras de la luna en la parte posterior.
Nubes:
- Marcar y cortar las nubes en hoja blanca. Se hicieron 4 lunas en total
- Pegar sobre cartón re-utilizable y recortar.
- Pegar con silicón caliente sobre la tela POP azul claro dejando un borde amplio de separación.
- Hacer pequeños cortes al borde y forrar dando la forma a cada nube.
- Pegar sobre tela pop azul marino y recortar al ras de cada nube.
Aprovecho la oportunidad para invitar a participar @elmundodebetty ya que realiza trabajos maravillosos y con gran nivel de detalle y sobre todo invito a todos los lectores a unirse a estas divertidas dinámicas semanales que @hivediy propone.
English
Hello my dear readers, nice to greet you.
On this wonderful Friday, with this publication I want to achieve two things, first to show you how to achieve a non-conventional and non-commercial birthday decoration; and second to participate in the contest promoted by @hivediy on Third dimension focused on exhibiting crafts that from any angle look good; I think this work can participate, so here I am again being part of the participants.
Tamara is a sweet little girl who recently turned two (2) years old and loves a children's video called "LUNA - Bedtime", she adores it and asks daily for it to be played many times a day. Her mommy Laura decided that her birthday celebration should be inspired by the video so she could enjoy it to the fullest.
I took on the challenge to support my friend and made her elements from the video to decorate the center wall. Using reusable cardboard and fabric I made the clouds, the moon, the stars and respecting the original font I made the age and the 21 letters that make up the name and the happy birthday.
It is important to note that the fabric decoration covered a measure of 2 meters high by 2 meters wide, and all the pieces were adjusted to that measure, that is, they were large pieces.
The fun and useful thing about this decoration is that after the celebration the elements such as cloud and moon serve as decoration for the room, and the letters serve to start the literacy process in the recognition of letters.
Without further ado and hoping you enjoy the work done, I leave the materials used, the process and images of the work.
- Re-usable cardboard (cardboard for the moon and thin cardboard for the letters).
- Re-usable sheets
- Yellow LONETA fabric
- Navy blue POP fabric (this one measured 2x2mts)
- White POP cloth
- Light blue POP cloth
- POP cloth red
- Red marker.
- White cold paint.
- Glue stick.
- Hot glue.
- Cutter.
- Scissors.
- Pencil.
Letters and number:.
- On the white sheets mark the letters of the words to be created. For this decoration "happy birthday Tamara" was created and each letter measures 10 centimeters high by 8 centimeters wide.
- Glue the letters on the cardboard with glue stick and then cut out following the pattern of each letter.
- Once all the letters have been cut out, glue them to the LONETA fabric. To do this, put the fabric on a flat surface and glue the letters on the inside of the canvas on the white side of the letters.
- Once the letters are glued with a more or less equal distance between them, mark and cut them out with the scissors. The hot silicone should be applied all around the edge of the letter and then glued to the canvas with pressure.
- To cover the letter perfectly, make small cuts all around the edges and following the pattern of the letter, glue tab by tab with hot silicone. When gluing, stretch well to avoid lumps and/or bubbles.
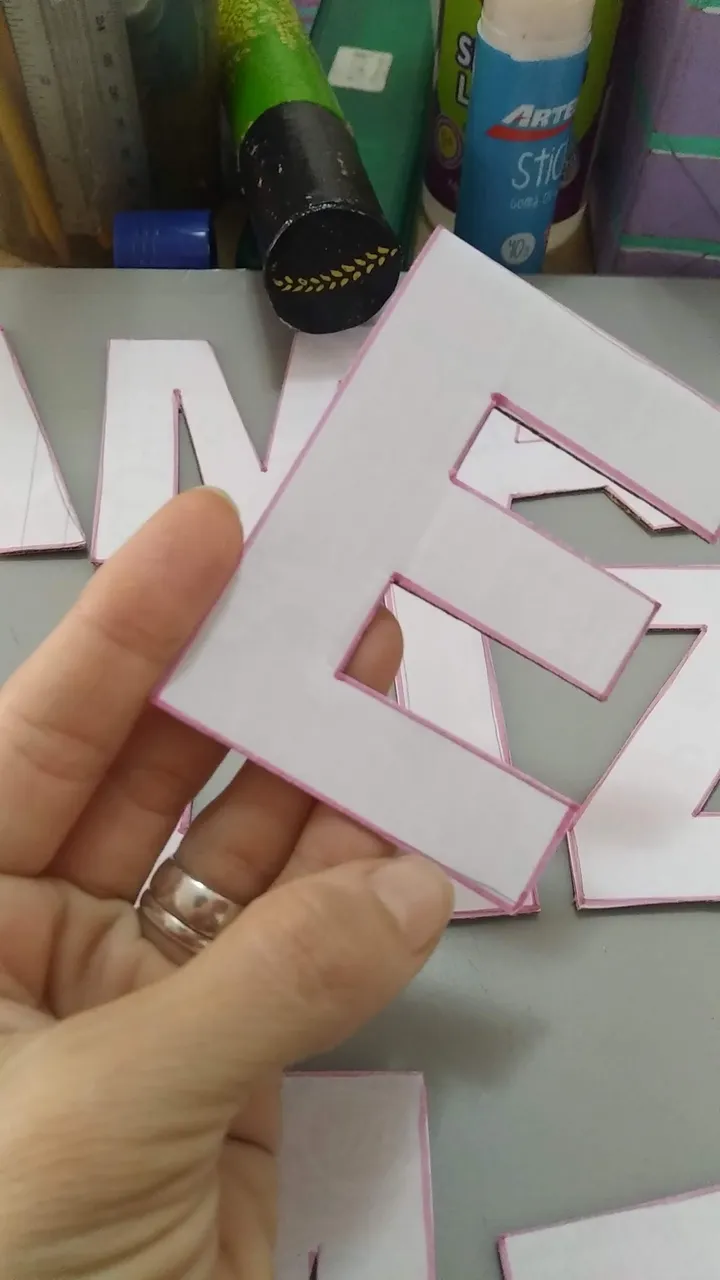
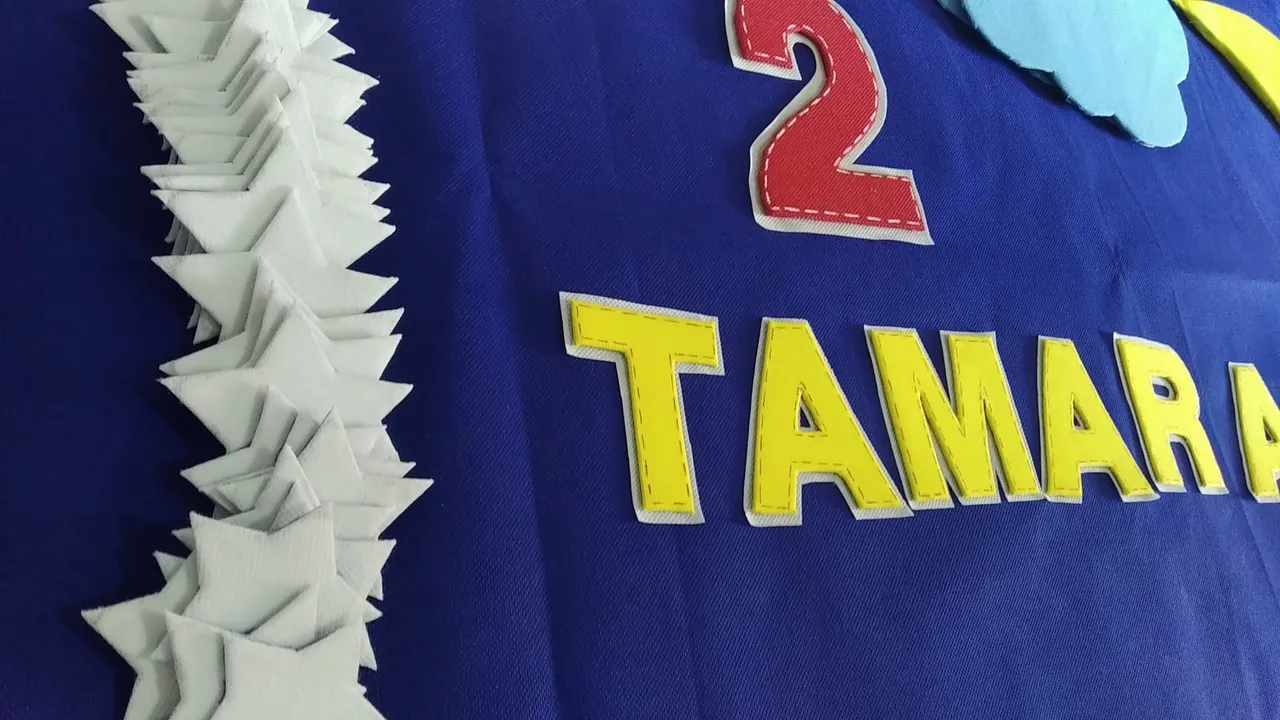
- Once all the letters are lined with the canvas fabric, make small marks that simulate a red seam with red permanent marker.
- Glue the yellow letters on the white POP fabric and cut out leaving a small border that sticks out.
- To make the number two, follow the previous steps only that the yellow color is replaced by red and the marks to simulate a seam will be made with the white cold paint.
Stars:
- Mark and cut the stars on the leaves. We made 30 stars of 5 centimeters each.
- Glue on reusable cardboard and cut out.
- Glue with hot silicone on the white POP fabric.
- Make small cuts and line each star shape.
- Glue on the blue pop fabric and cut out each star. This step with the blue fabric is to cover the cardboard.
Moon:
- Cut the cardboard in the shape of a star, this moon measured 60 centimeters high by 35 centimeters wide at its thickest part.
- Place the moon on the inside of the LONETA fabric and glue with hot silicone.
- Cut the fabric following the pattern and leaving a considerable separation to make the tabs and glue backwards.
- Glue on navy blue pop fabric and trim flush with the moon on the back.
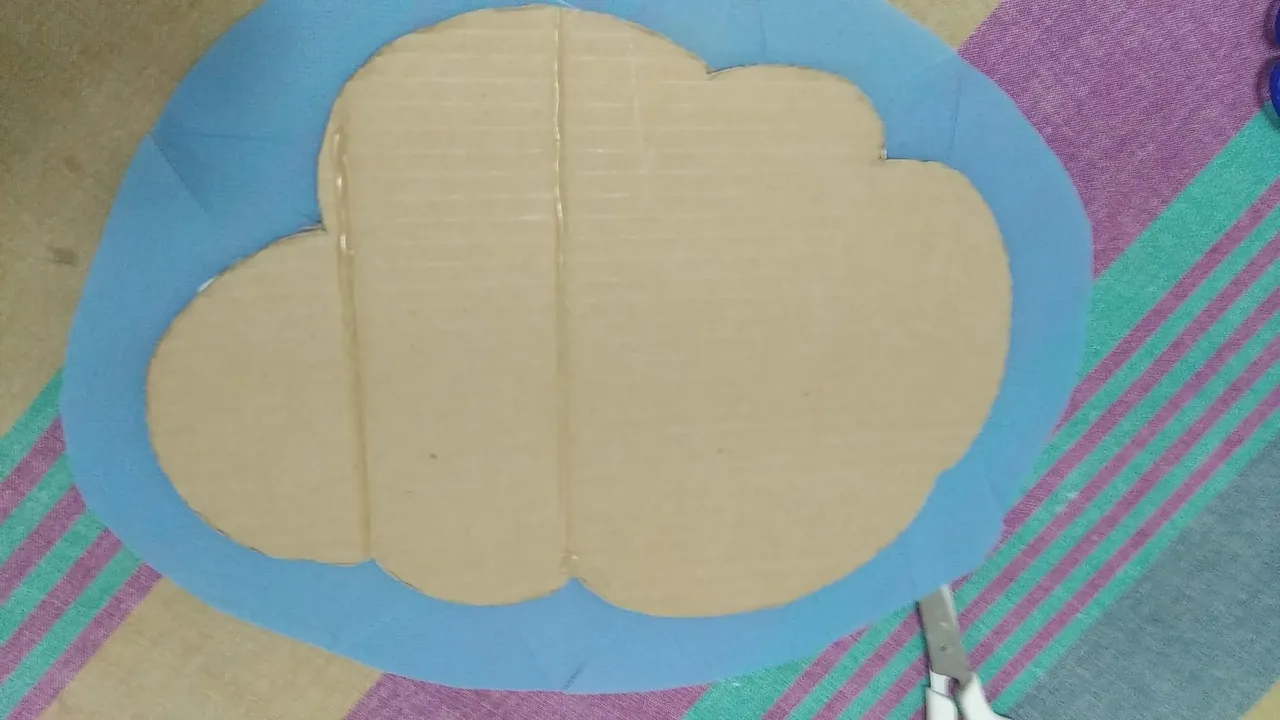
Clouds:
- Mark and cut out clouds on white sheet. A total of 4 moons were made.
- Glue on reusable cardboard and cut out.
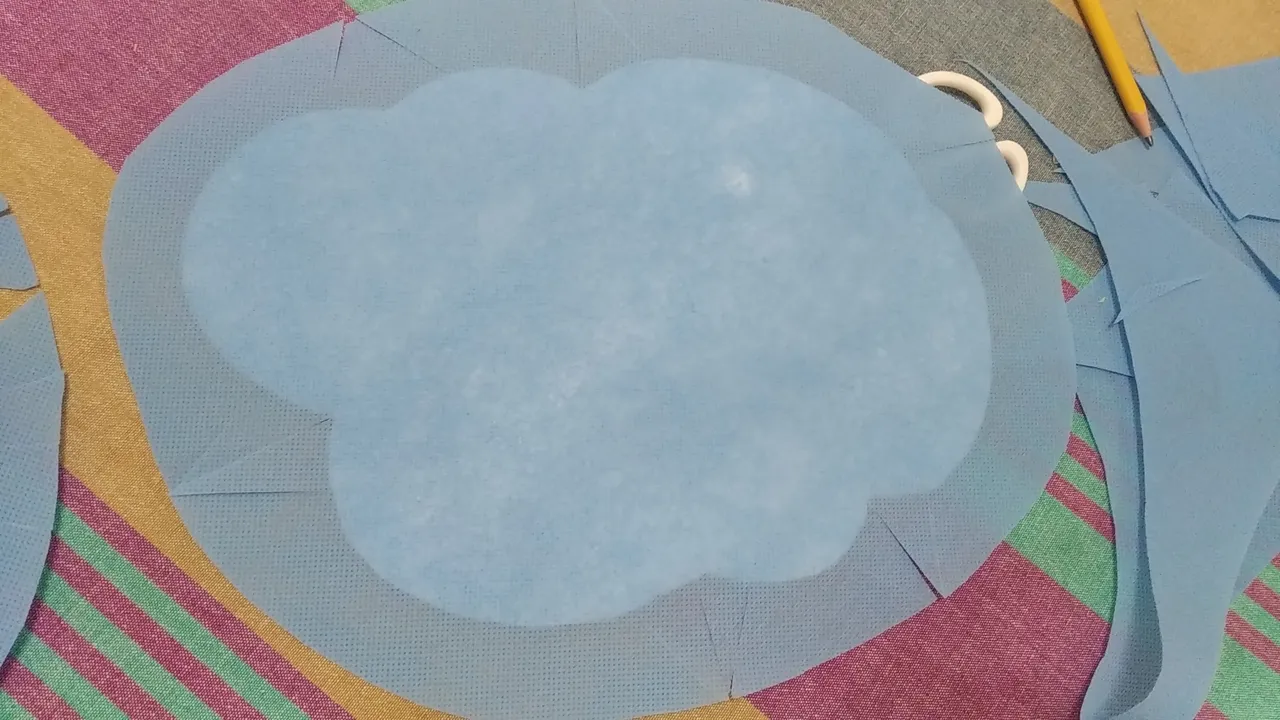
- Glue with hot silicone on the light blue POP fabric leaving a wide separation border.
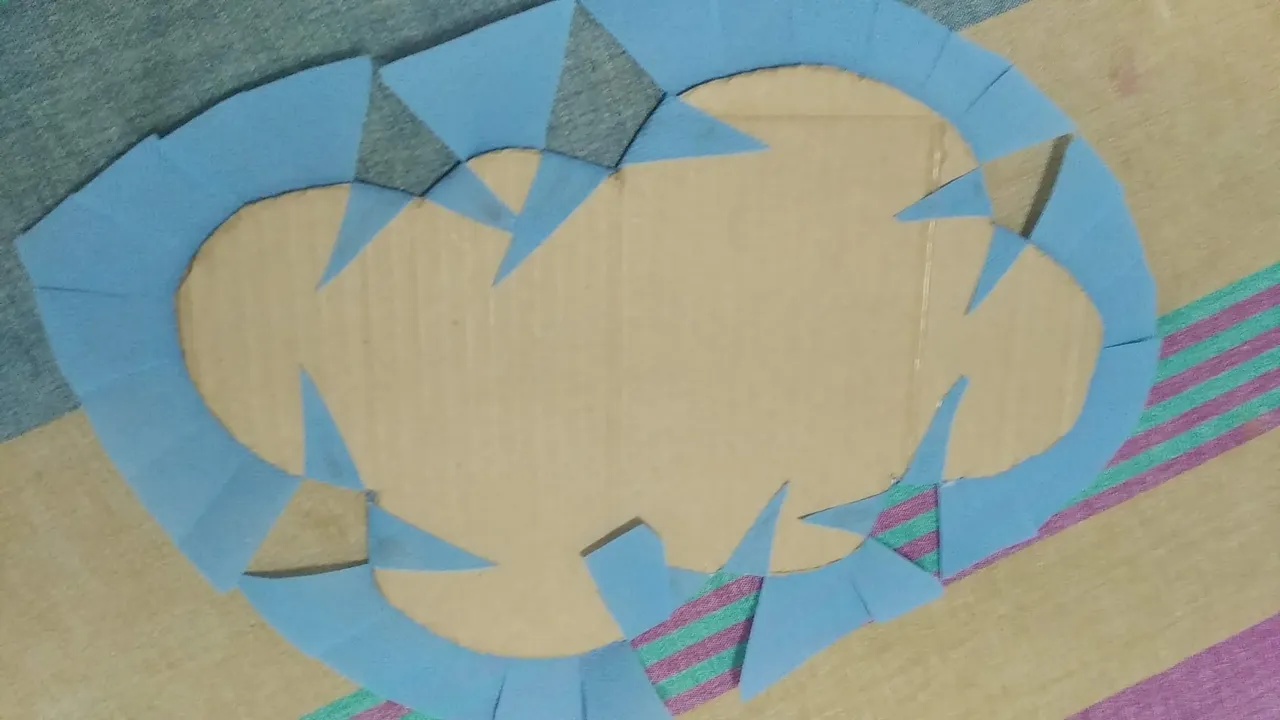
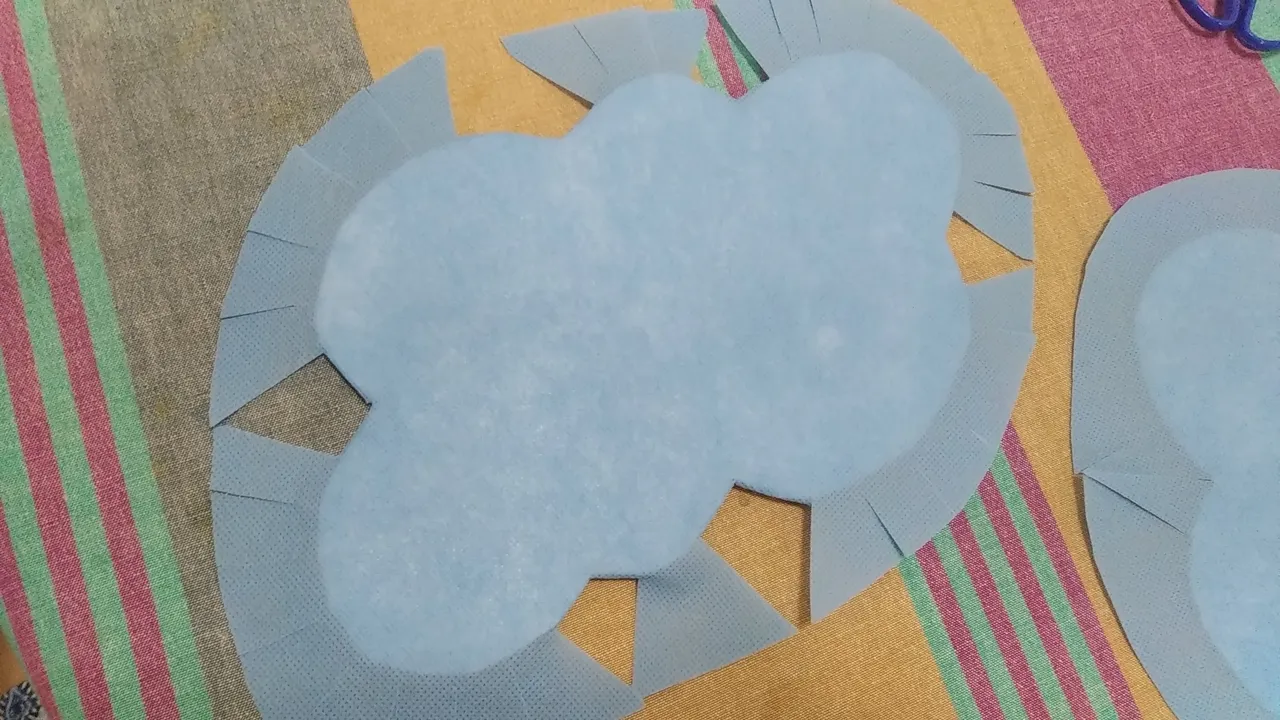
- Make small cuts on the edge and line the edge giving the shape to each cloud.
- Glue on navy blue pop fabric and cut out flush with each cloud.
I take this opportunity to invite @elmundodebetty to participate since she makes wonderful works and with great level of detail and above all I invite all readers to join these fun weekly dynamics that @hivediy proposes.
Translated with www.DeepL.com/Translator (free version)
IMÁGENES / IMAGES

SALUDOS / REGARDS
Todas las Fotos fueron tomadas con mi teléfono Redmi 7A.
Contenido original de @keco (fotos y texto) - Todos los derechos reservados Publicado en HIVE así como en mi instagram : http://instagram.com/carton_pintura_algo_mas
All Photos were taken with my Redmi 7A phone.
Original content from @keco (photos and text) - All rights reserved Posted on HIVE as well as on my instagram: http://instagram.com/carton_pintura_algo_mas