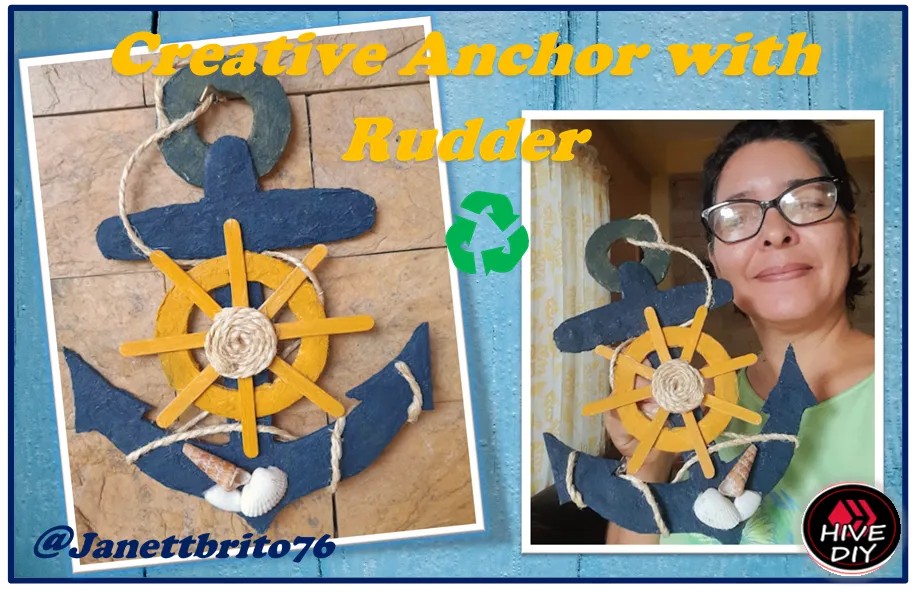

Hola queridos amigos artesanos de esta hermosa comunidad de #HiveDiy, espero estén pasando una bonita noche en compañía de sus seres queridos y hayan tenido un productivo día. Una vez mas bienvenidos a mi blog. En esta noche les quiero compartir como realice un hermoso detalle para decorar la pecera de mi hogar, el cual consta de un hermoso ancla elaborado con material de reciclaje, les cuento que esta idea viene porque vamos a reactivar nuestra pecera, entonces vi la ocasión para decorarla un poco por fuera y como siempre me ha llamado la atención los anclas porque personalmente los asocio con los piratas incluso dentro de la pecera tenemos un barco pirata que era de mi hijo mayor que a él también le encanta los barcos piratas. Para realizar el ancla utilice mecatillo, cartón, paletas, papel mache y algunos detallitos para decorarla. Amigos esta manualidad también la puedes realizar para decorar la habitación de un niño, para una fiesta en piscina o simplemente para decorar cualquier rincón de tu hogar. Estoy segura que les va a encantar esta estupenda idea, ademas si tienes niños puedes incorporarlos a esta actividad que es bastante fácil y económica de hacer. Entonces no te pierdas el paso a paso para hacer hacer este hermoso ancla. Vamos manos a la obra !!

Hello dear artisan friends from this beautiful #HiveDiy community, I hope you are having a nice night in the company of your loved ones and have had a productive day. Once again welcome to my blog. Tonight I want to share with you how I made a beautiful detail to decorate the fish tank in my home, which consists of a beautiful anchor made with recycled material, I tell you that this idea comes because we are going to reactivate our fish tank, so I saw the opportunity to decorate it a bit on the outside and as always the anchors have caught my attention because I personally associate them with pirates even inside the fish tank we have a pirate ship that belonged to my eldest son who also loves pirate ships. To make the anchor, use string, cardboard, palettes, papier-mache and some little details to decorate it. Friends, this craft can also be done to decorate a child's room, for a pool party or simply to decorate any corner of your home. I am sure that they are going to love this great idea, also if you have children you can incorporate them into this activity that is quite easy and cheap to do. Then do not miss the step by step to make this beautiful anchor. Let's get to work!!

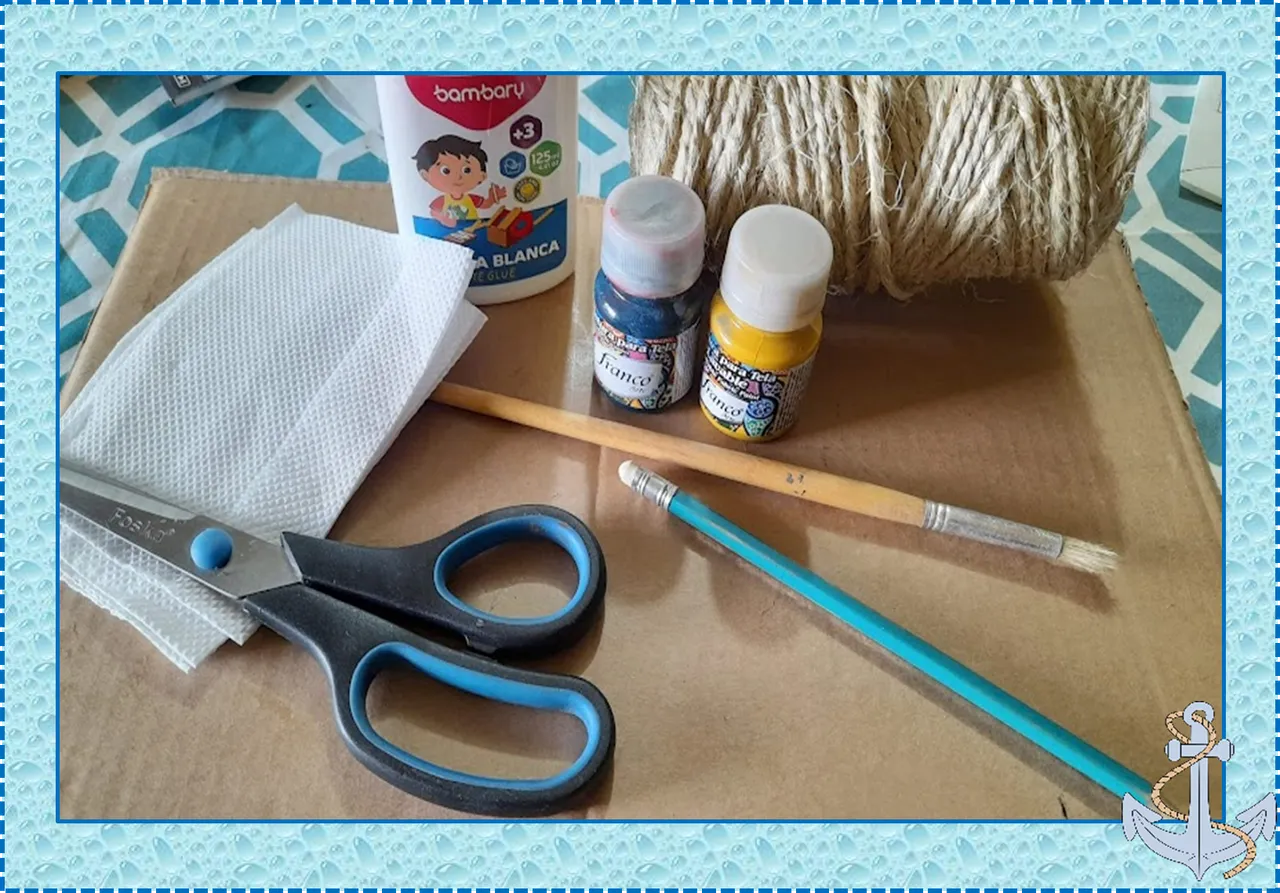
- Cartón
- Silicon
- Mecatillo
- Servilletas
- Paletas
- Pega blanca
- Pinturas(azul noche y amarillo ocre)
- Pincel
- Conchas marinas
- Paperboard
- Silicon
- mecatillo
- Napkins
- Palettes
- white glue
- Paints (night blue and ocher yellow)
- Brush
- sea shells

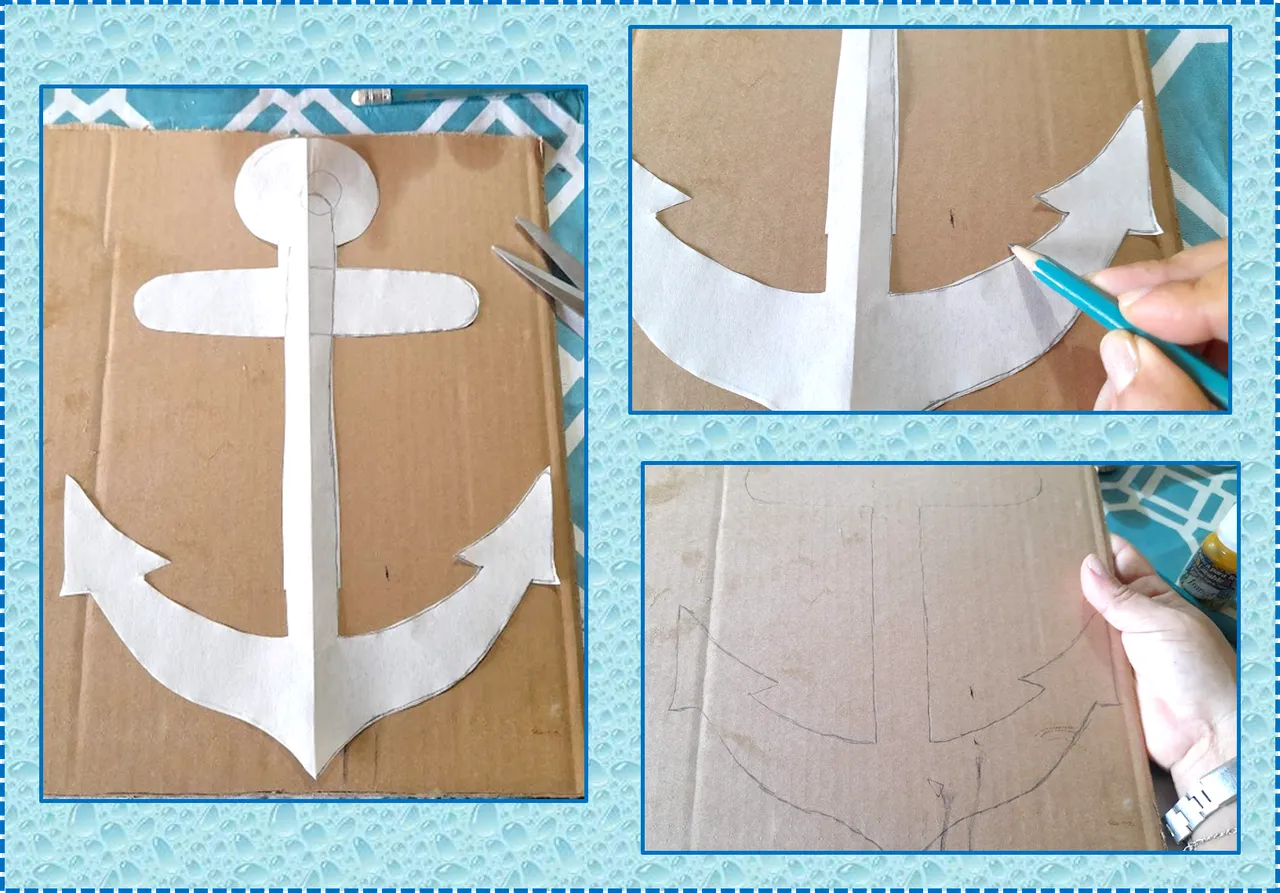
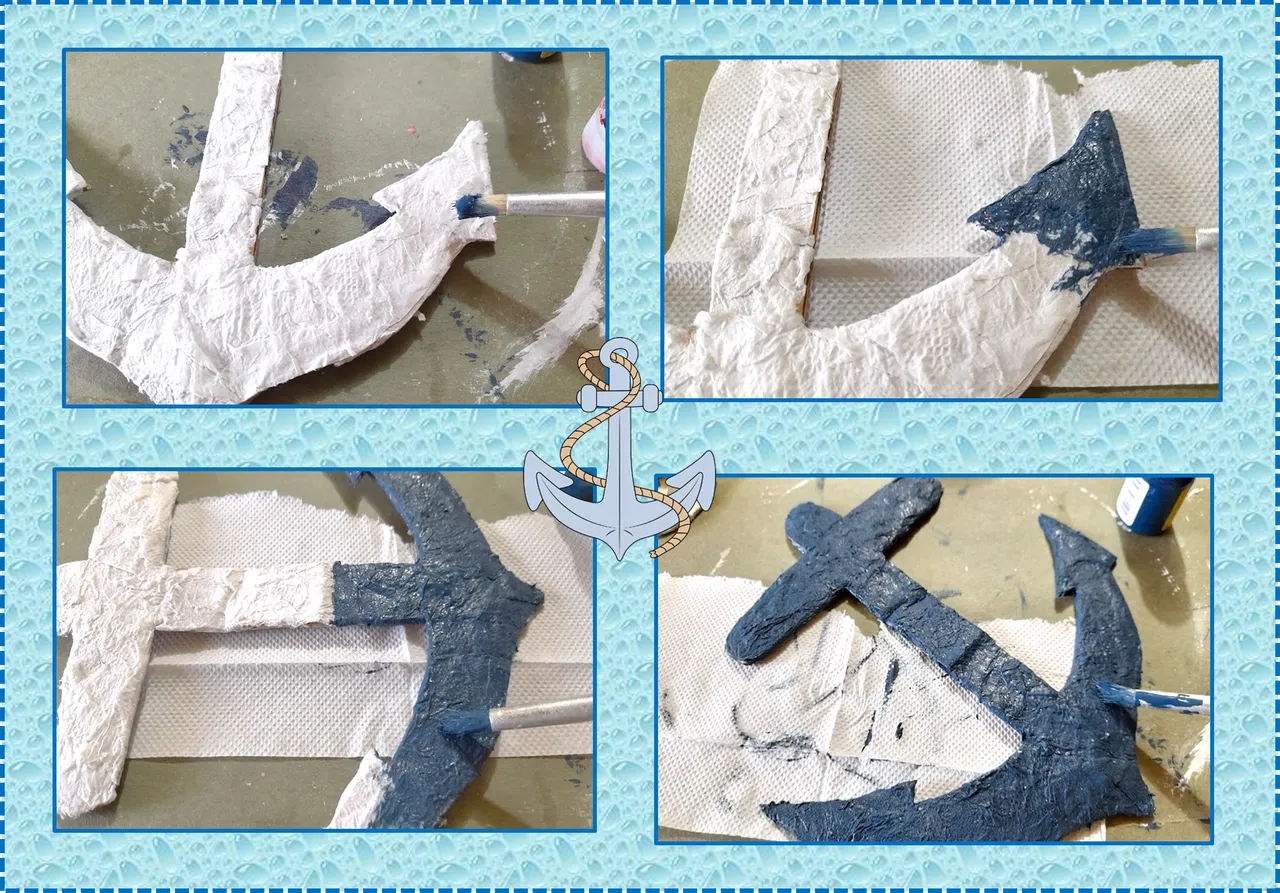
⚓: Tomamos una hoja y la doblamos a la mitad y dibujamos la mitad de un ancla, luego recortamos quedándonos todo del mismo tamaño.
⚓:We take a sheet and fold it in half and draw half an anchor, then cut it out keeping everything the same size.
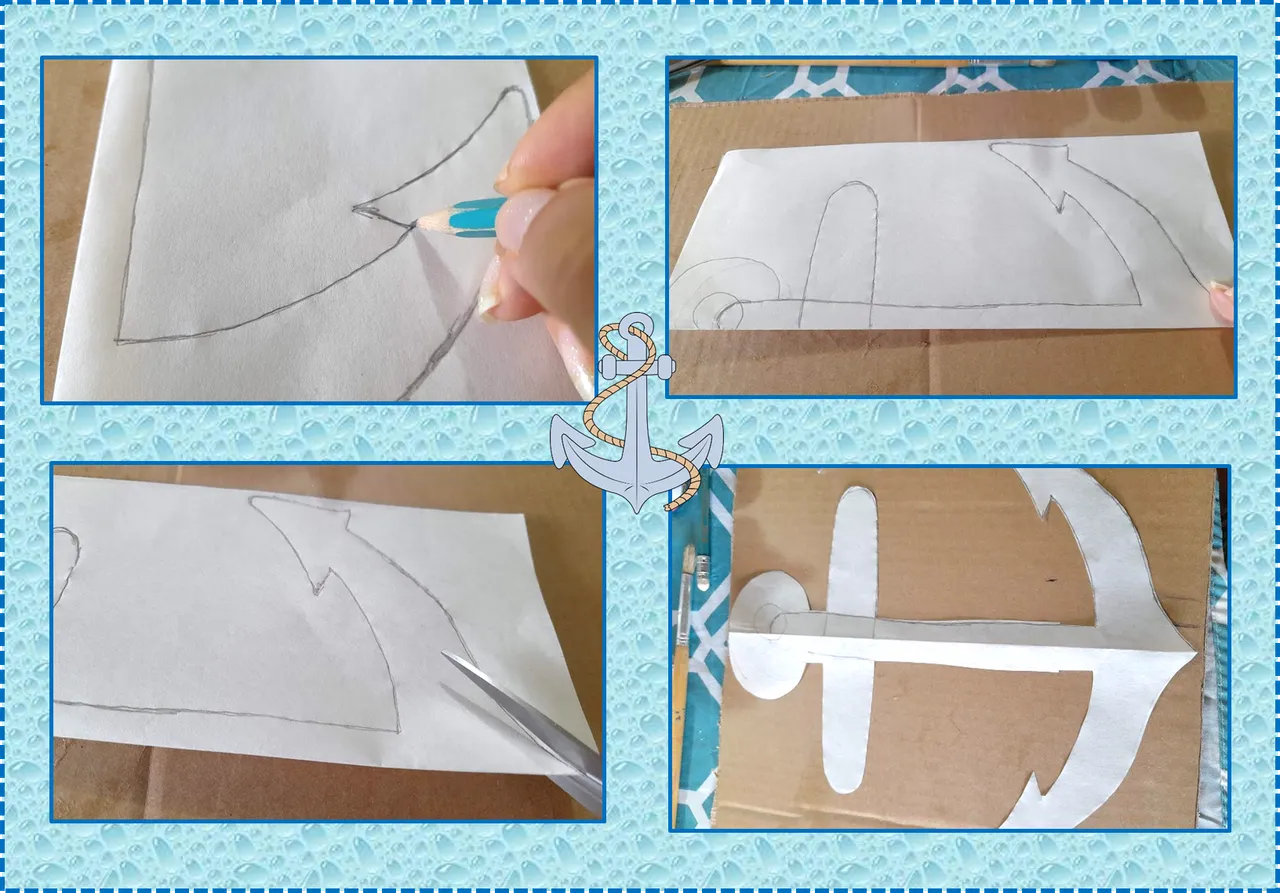
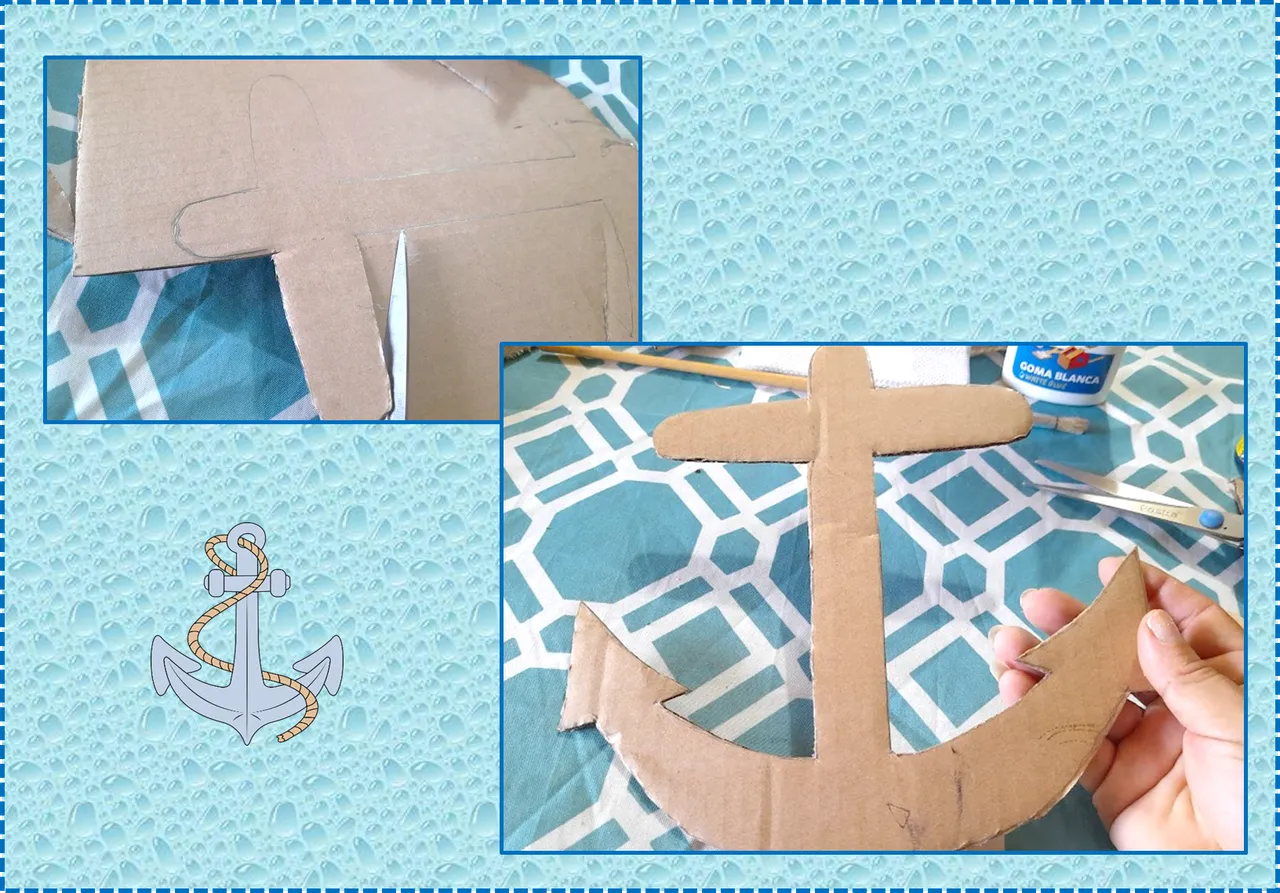
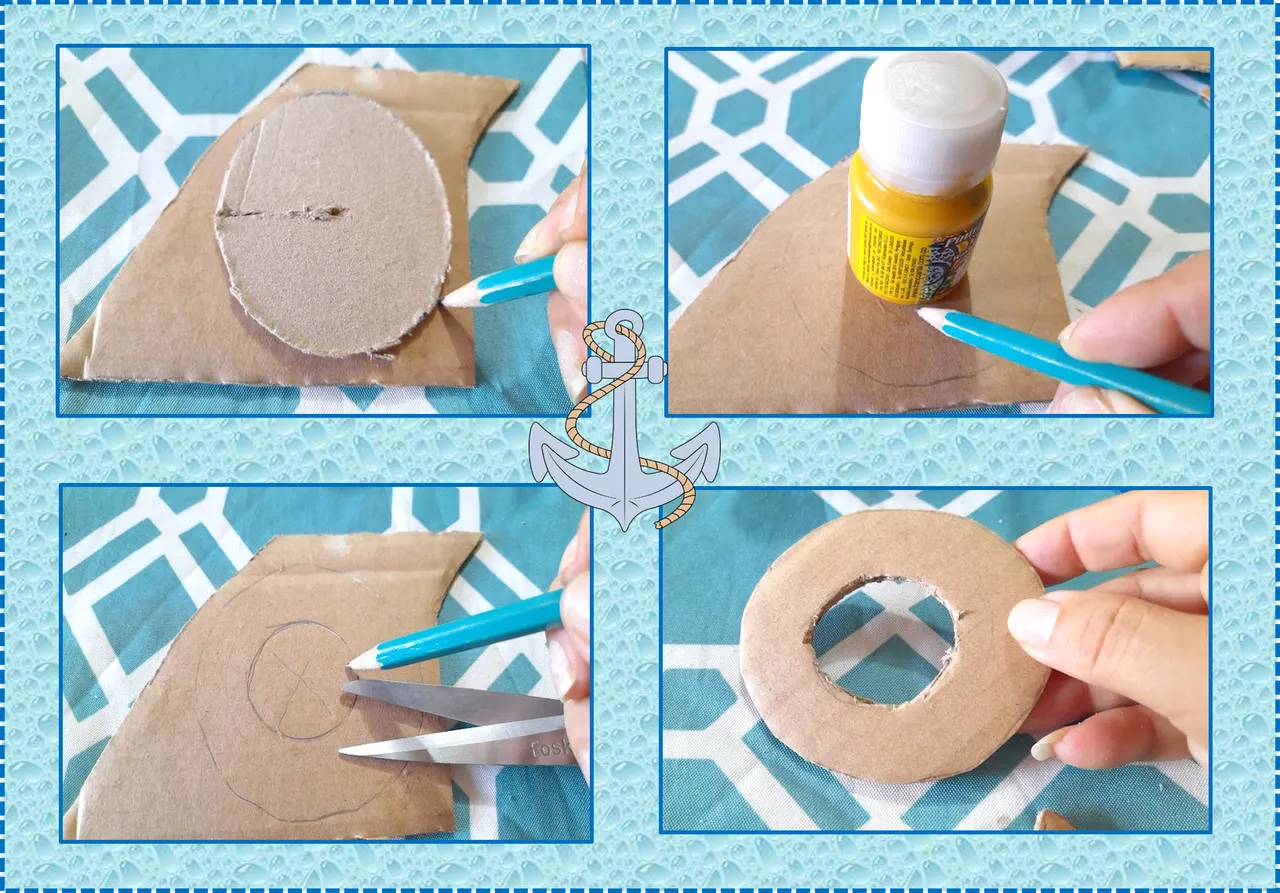
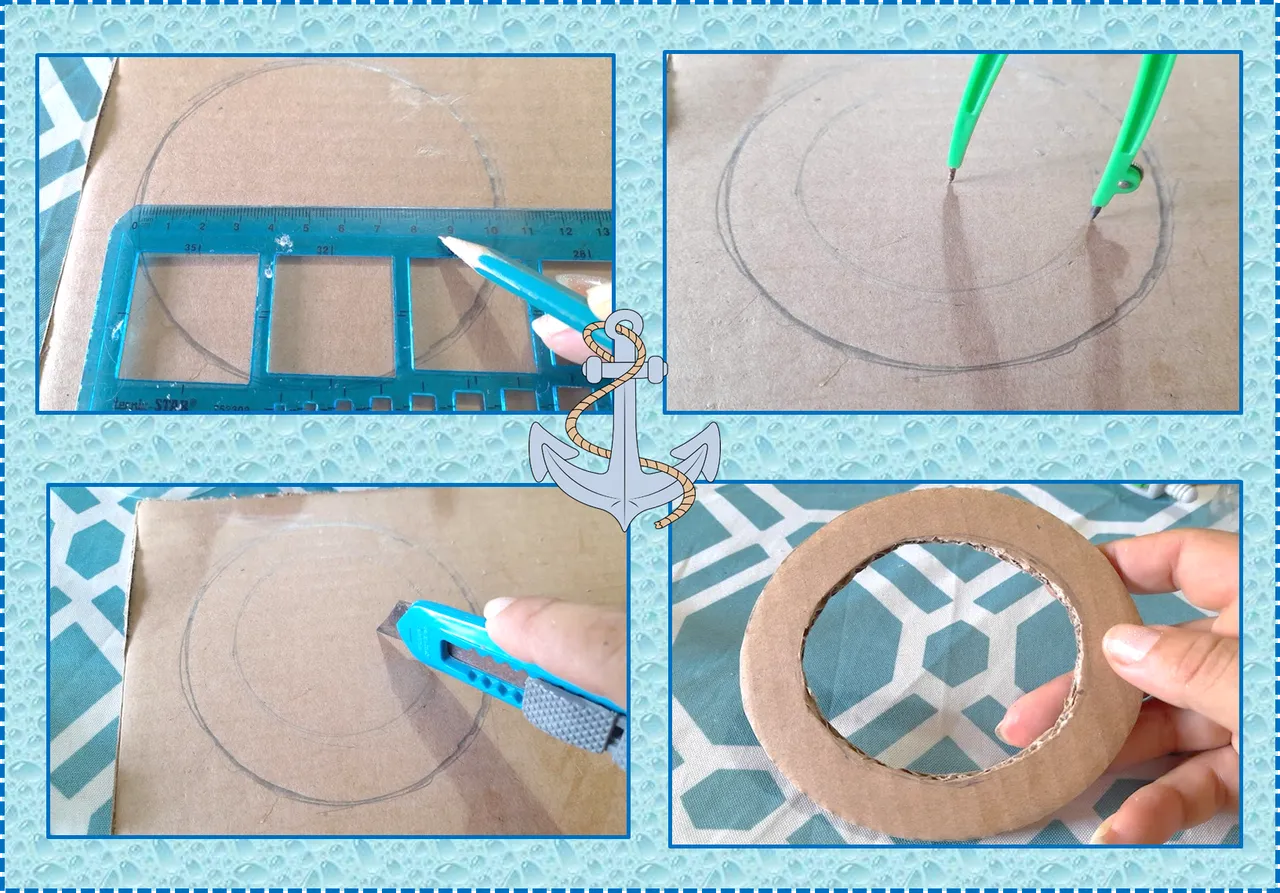
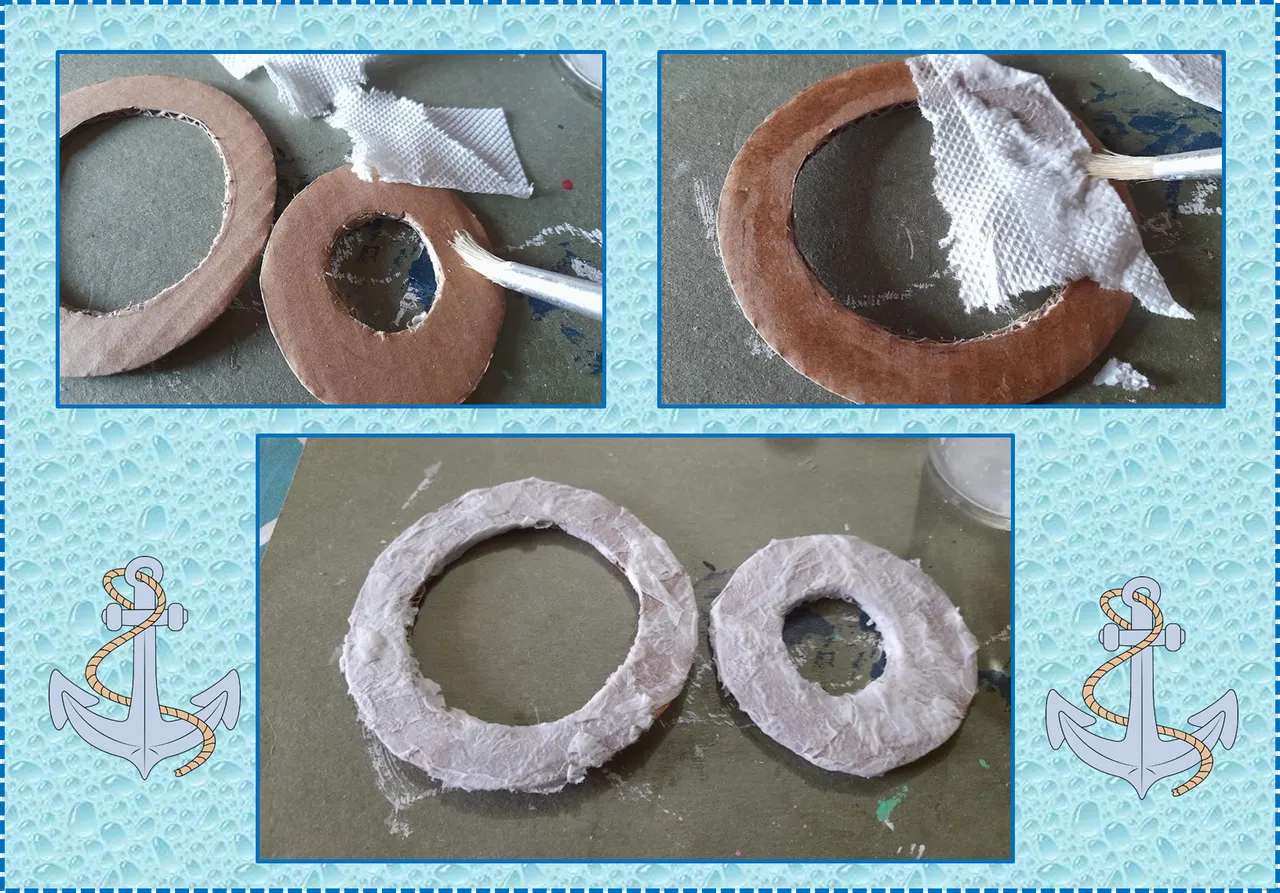
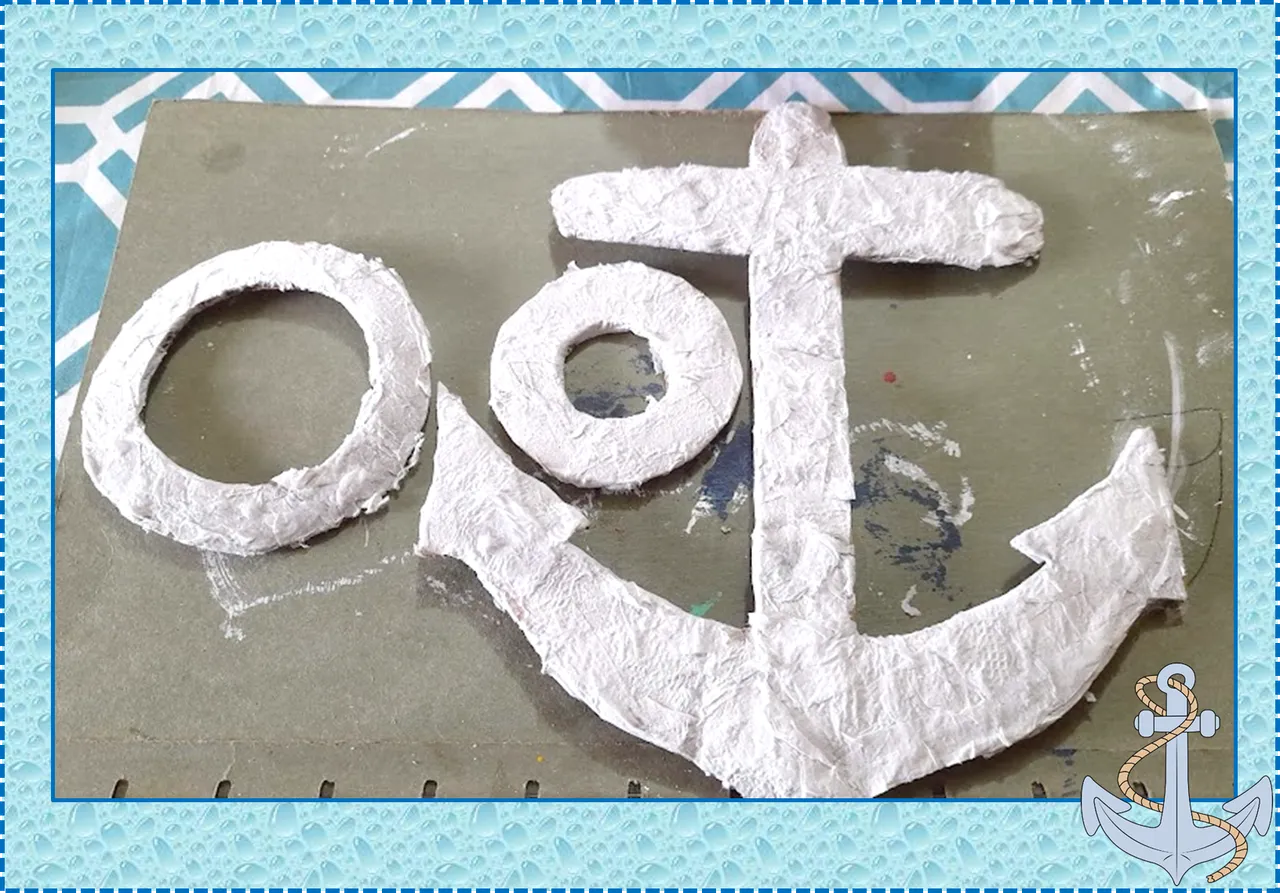
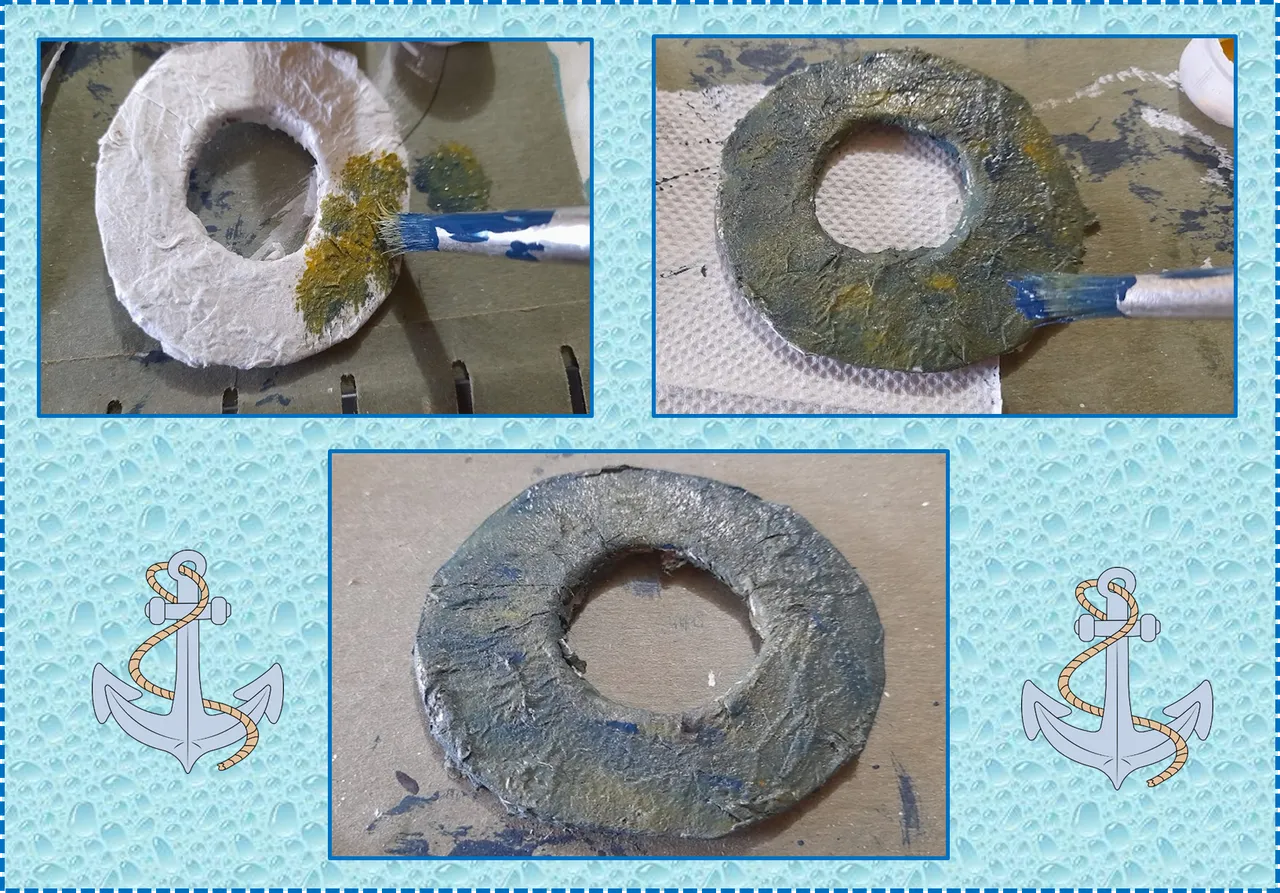
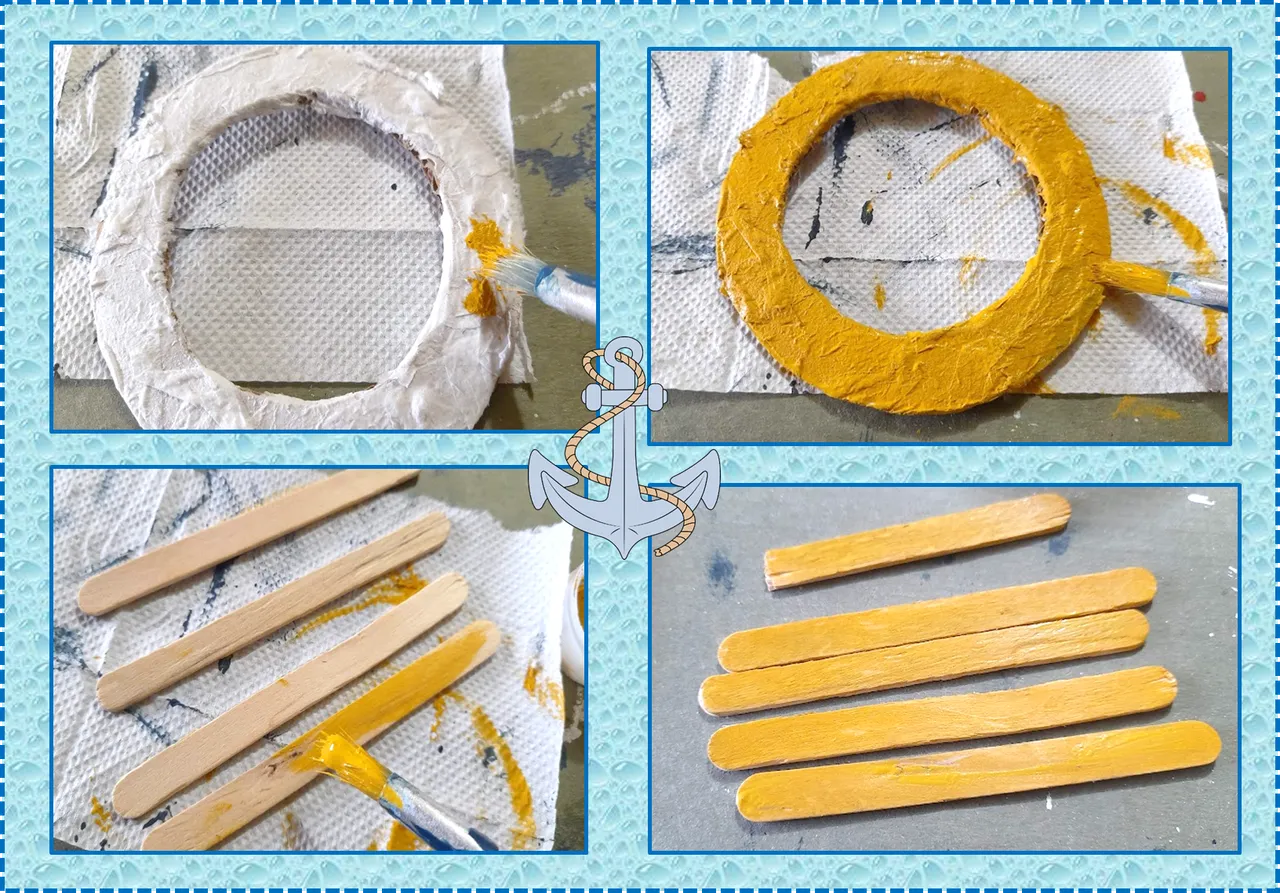
⚓: Luego marcamos en el cartón el ancla que recortamos en el paso anterior, seguidamente recortamos. Después para realizar una argolla para colgar el ancla realizamos un circulo de 7cm en el cartón y le recortamos un poco el centro, luego para realizar el timón dibujamos en el cartón un circulo de 10 cm luego marcamos otro circulo dentro de el y recortamos el centro, como pueden ver en las imágenes.
⚓:Then we mark the anchor on the cardboard that we cut out in the previous step, then we cut it out. Then, to make a ring to hang the anchor, we make a 7cm circle on the cardboard and cut out the center a little, then to make the rudder we draw a 10cm circle on the cardboard, then we mark another circle inside it and cut out the center , as you can see in the images.
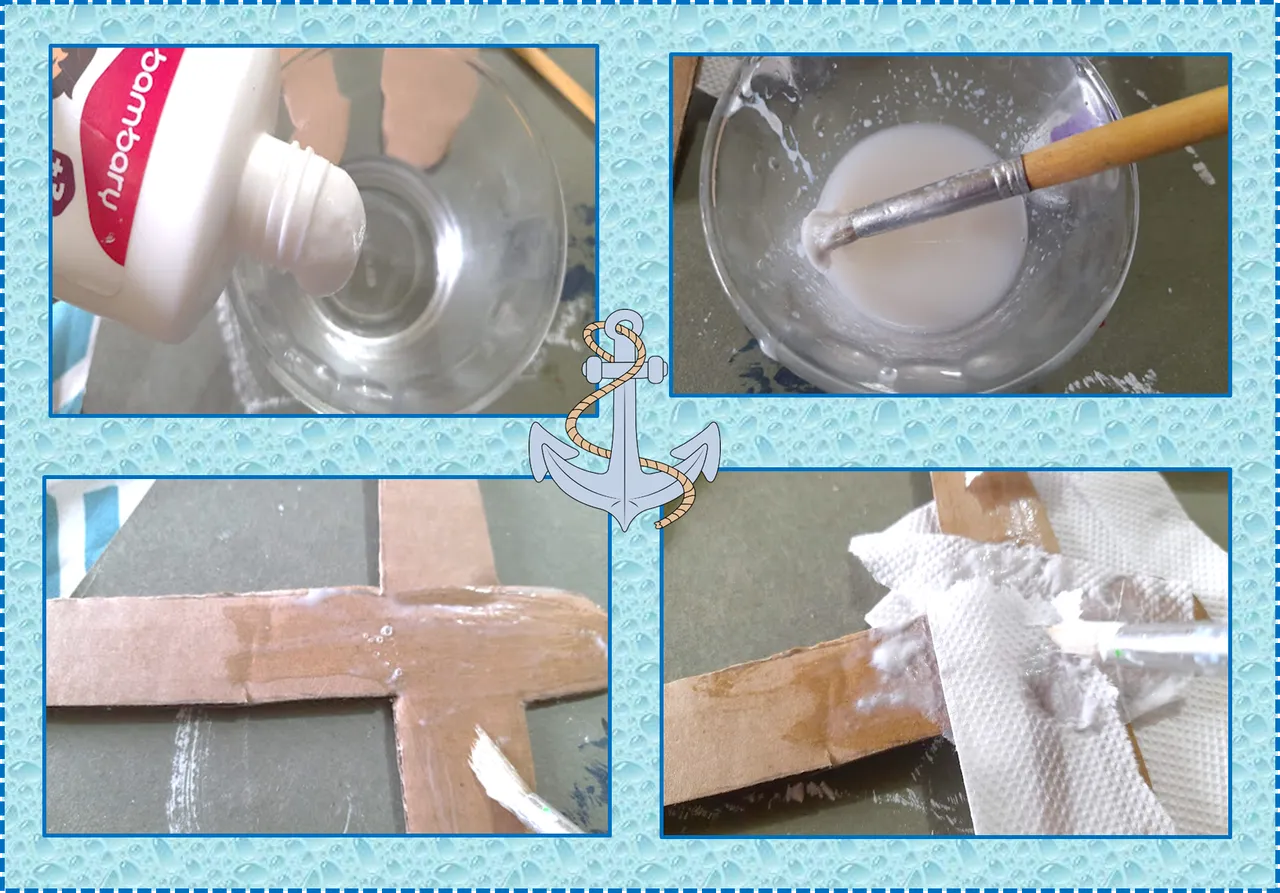
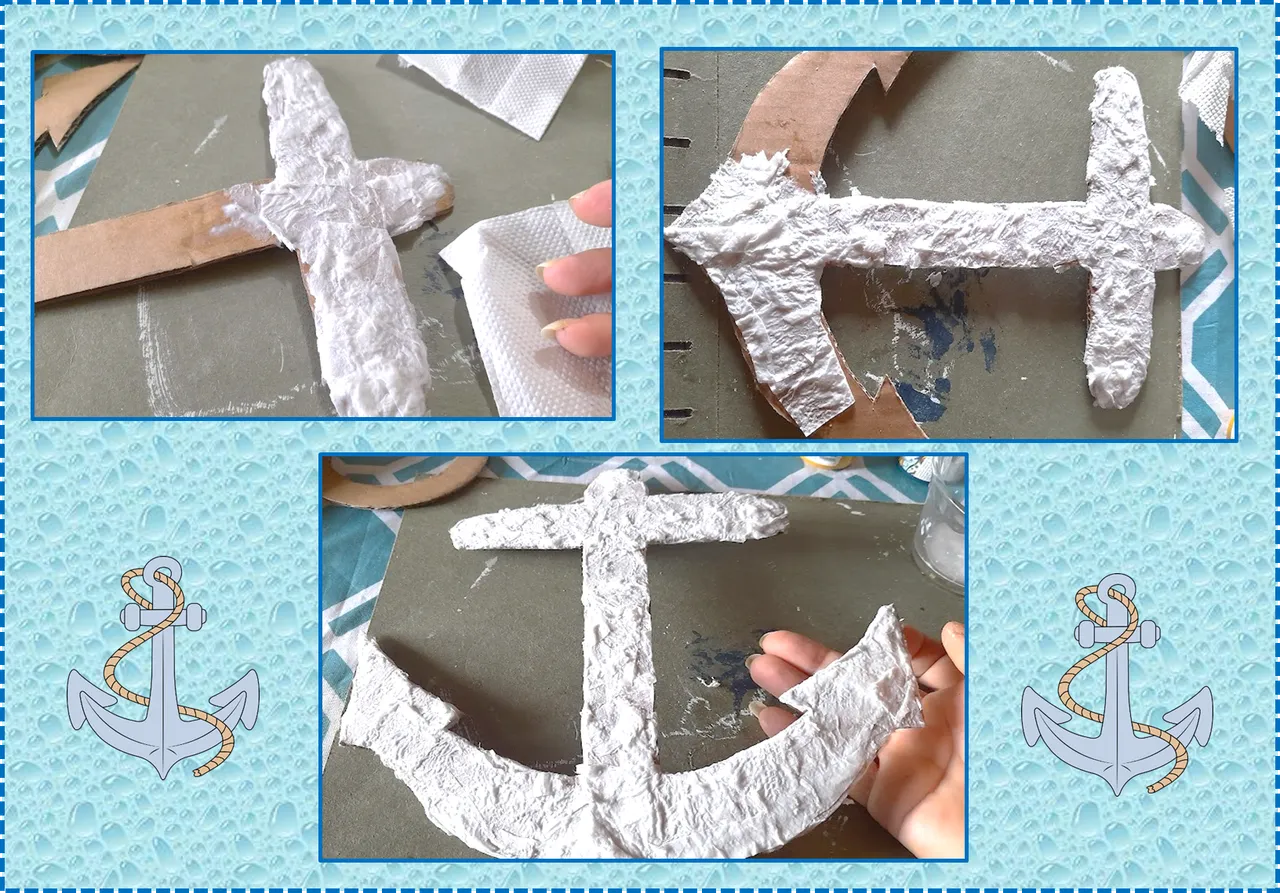
⚓: Ahora procedemos a preparar agua con pega, luego mojamos un poco la base del ancla y poco a poco vamos pegando la servilletas hasta pegarla por toda la base buscando que nos quede una capa un poco gruesa, luego realizamos el mismo procedimiento con la argolla y la base para el timón, dejamos secar por media hora o también puedes secarlo con un secador de cabello.
⚓: Now we proceed to prepare water with glue, then we wet the base of the anchor a little and little by little we stick the napkins until we stick it all over the base looking for a slightly thick layer, then we do the same procedure with the ring and the base for the rudder, let it dry for half an hour or you can also dry it with a hair dryer.
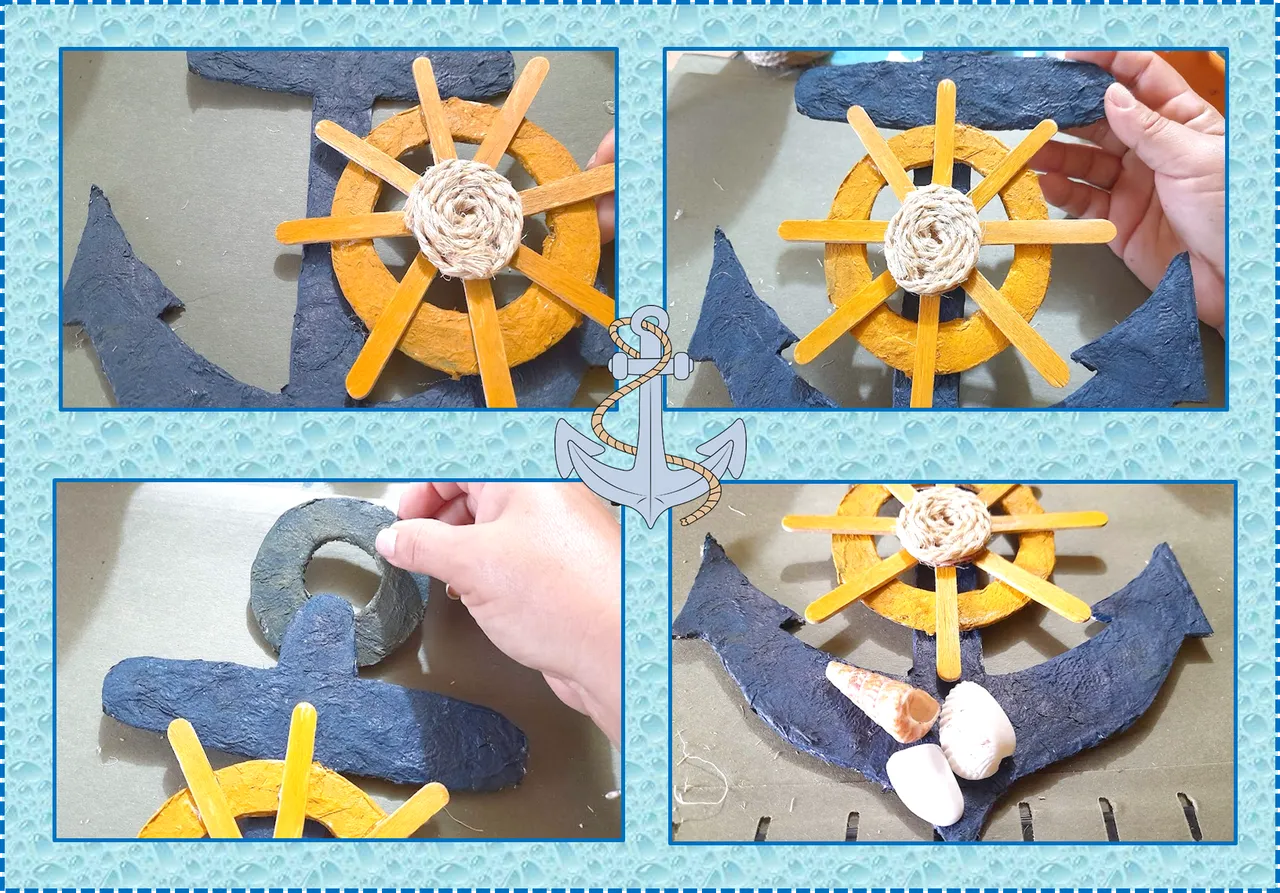
⚓: Procedemos a pintar con la pintura azul noche la base del ancla, luego para la argolla combinamos un poco de pintura azul con el amarillo ocre para que nos de un color como de oxido pintamos y dejamos secar.
⚓: We proceed to paint the base of the anchor with the night blue paint, then for the ring we combine a little blue paint with the ocher yellow to give us a color like rust, we paint and let it dry.
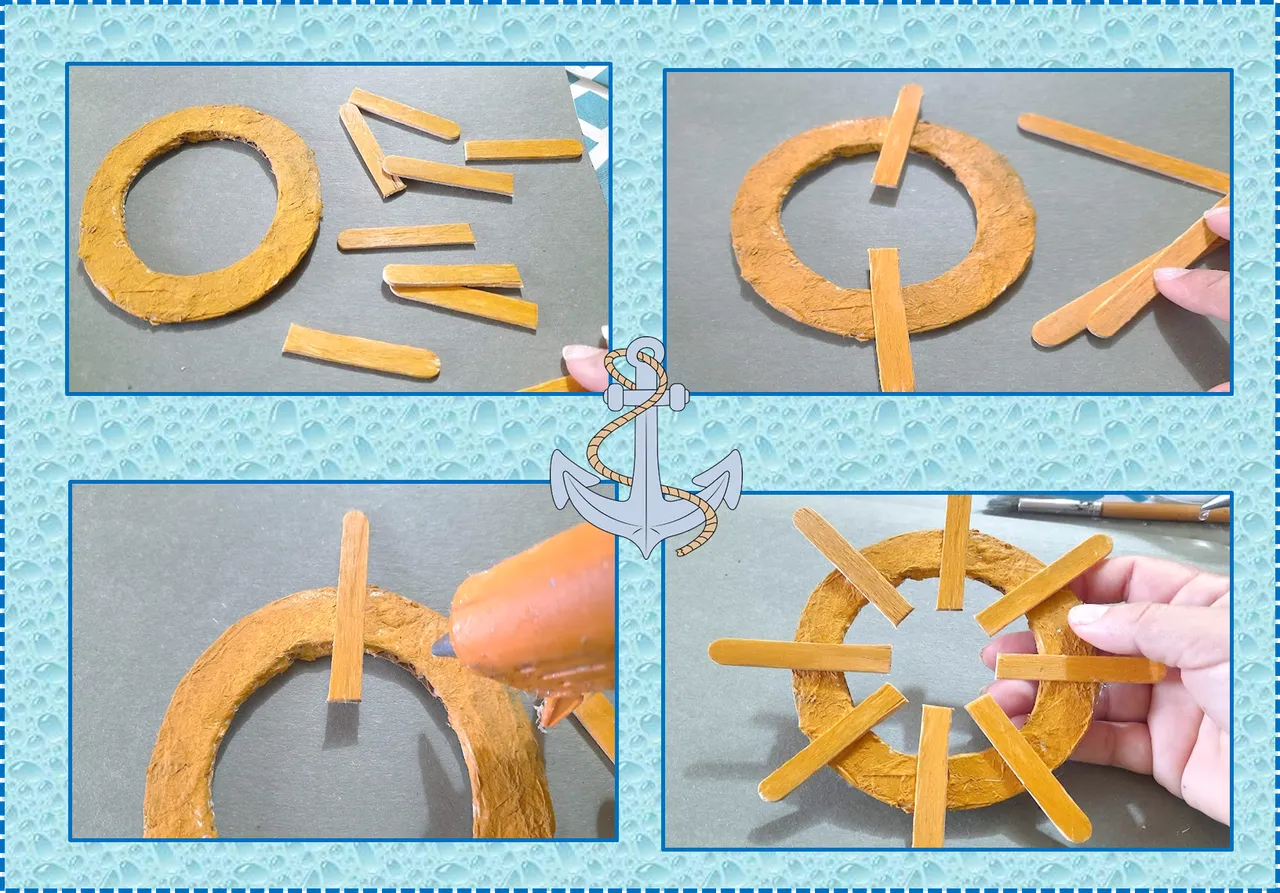
⚓: Luego tomamos la base para el timón y la pintamos de amarillo ocre, después pintamos las paletas de amarillo dejamos secar, seguidamente la cortamos a la mitad y luego procedemos a pegarlas a la base, para el centro del timón recortamos un pequeño circulo de cartón y lo forramos de mecatillo y lo pegamos en el centro del timón.
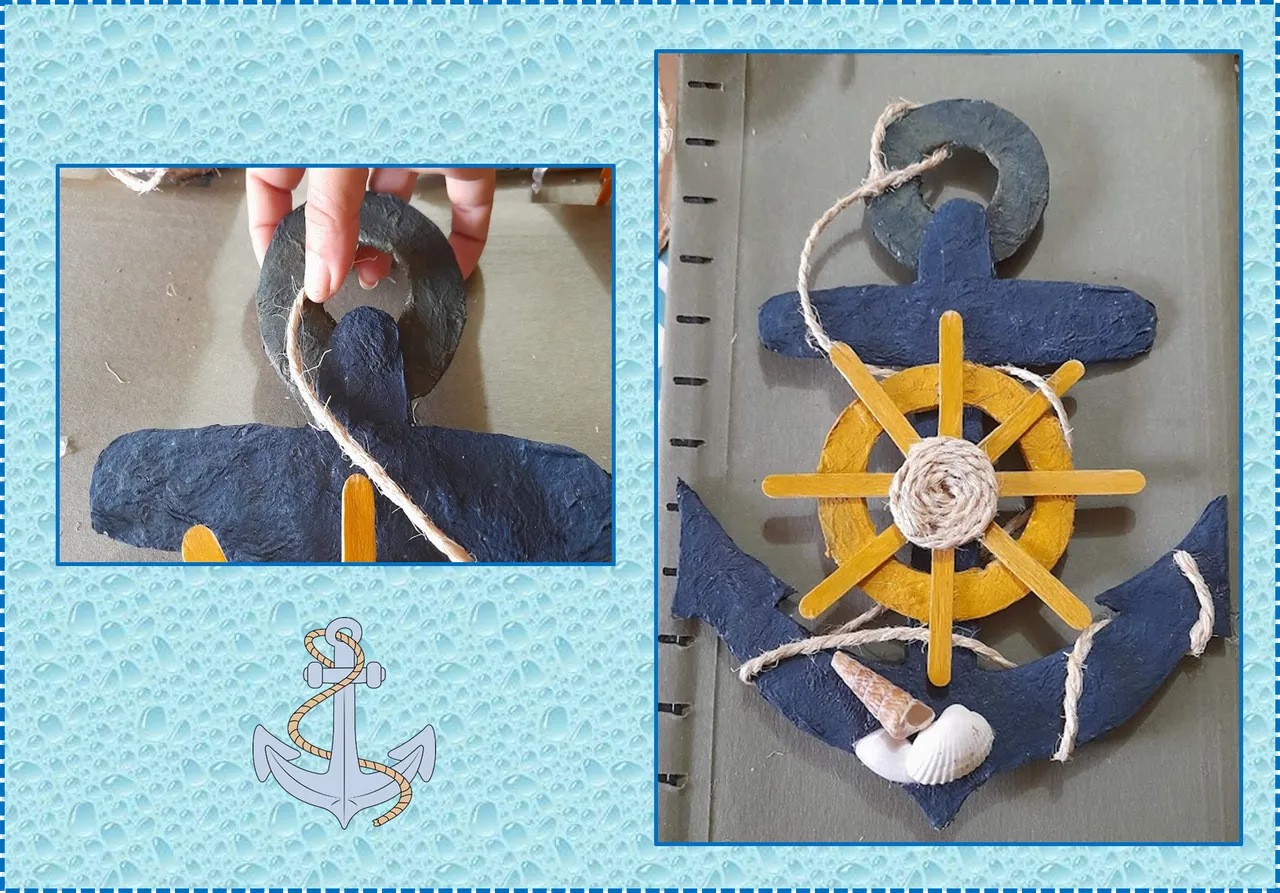
Después procedemos a pegar el timón en el centro de nuestro ancla, luego pegamos unas conchas de mar en el parte superior del ancla y decoramos con el mecatillo.
⚓: Then we take the base for the rudder and paint it ocher yellow, then we paint the paddles yellow, let them dry, then cut them in half and then proceed to glue them to the base, for the center of the rudder we cut out a small cardboard circle and we covered it with mecatillo and glued it in the center of the rudder.
Then we proceed to glue the rudder in the center of our anchor, then we glue some sea shells to the top of the anchor and decorate with the mecatillo.

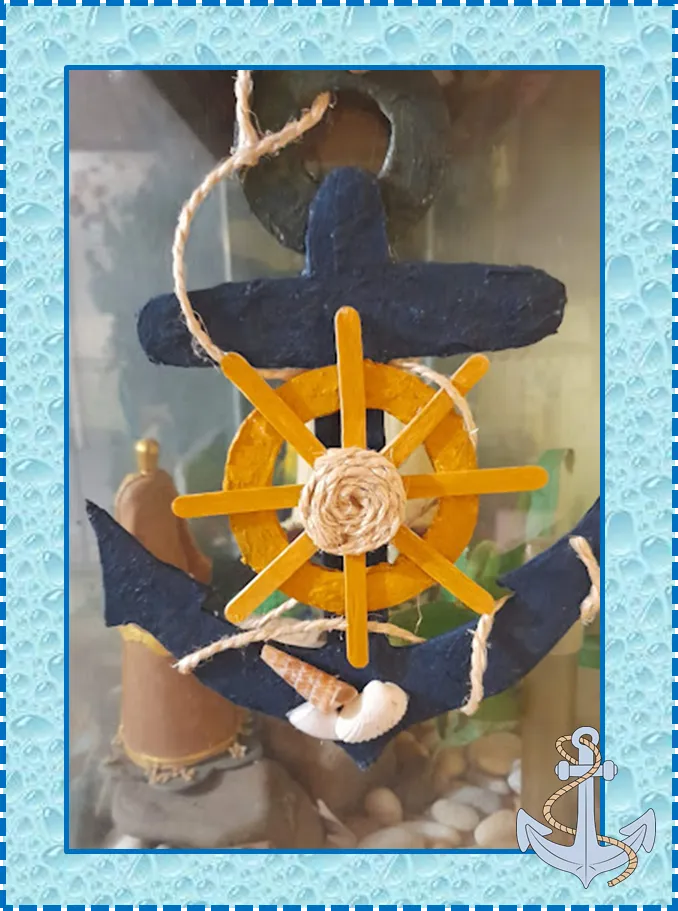
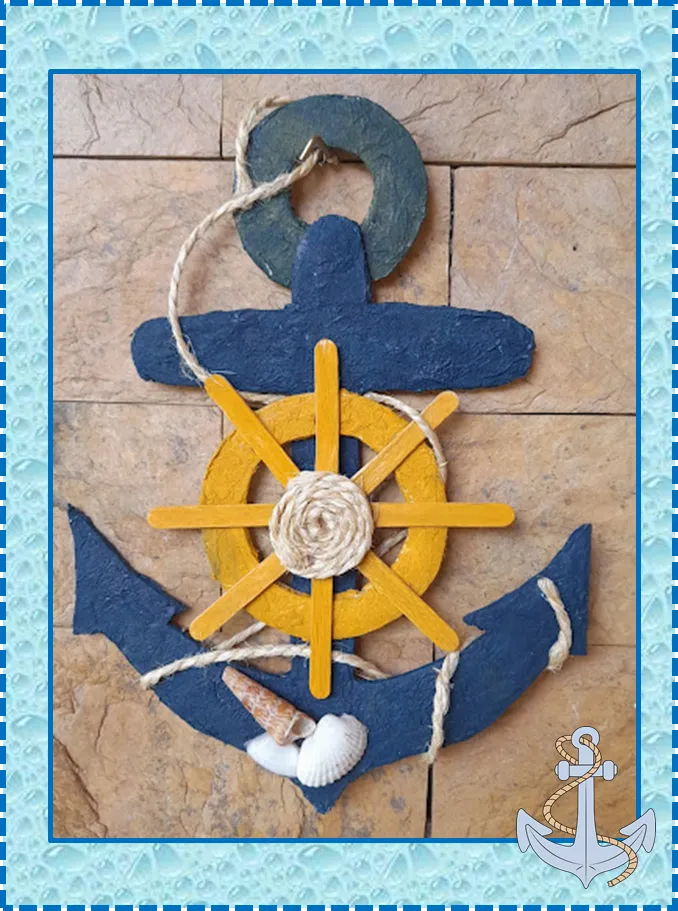
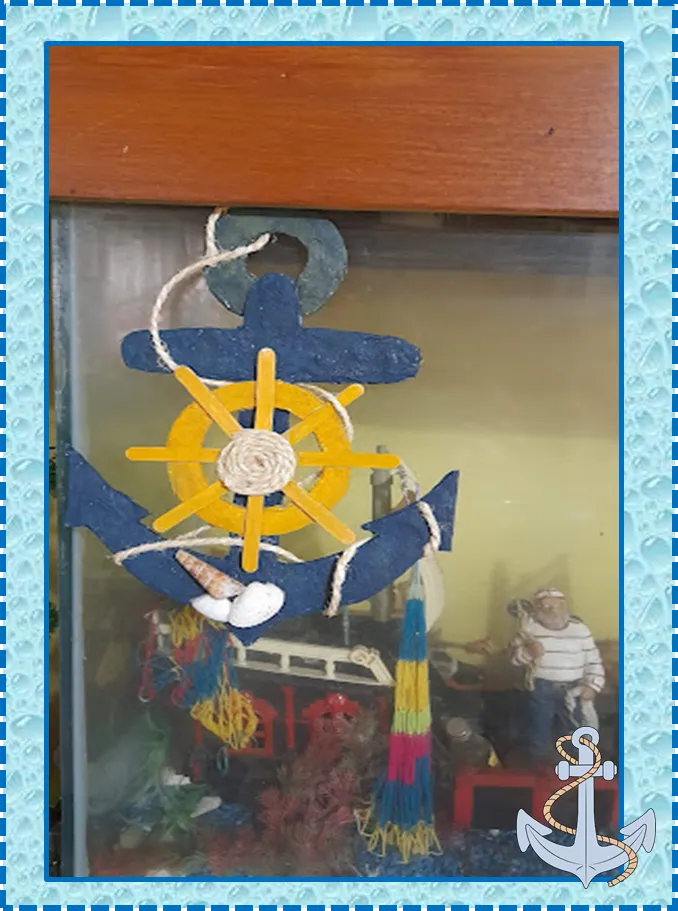
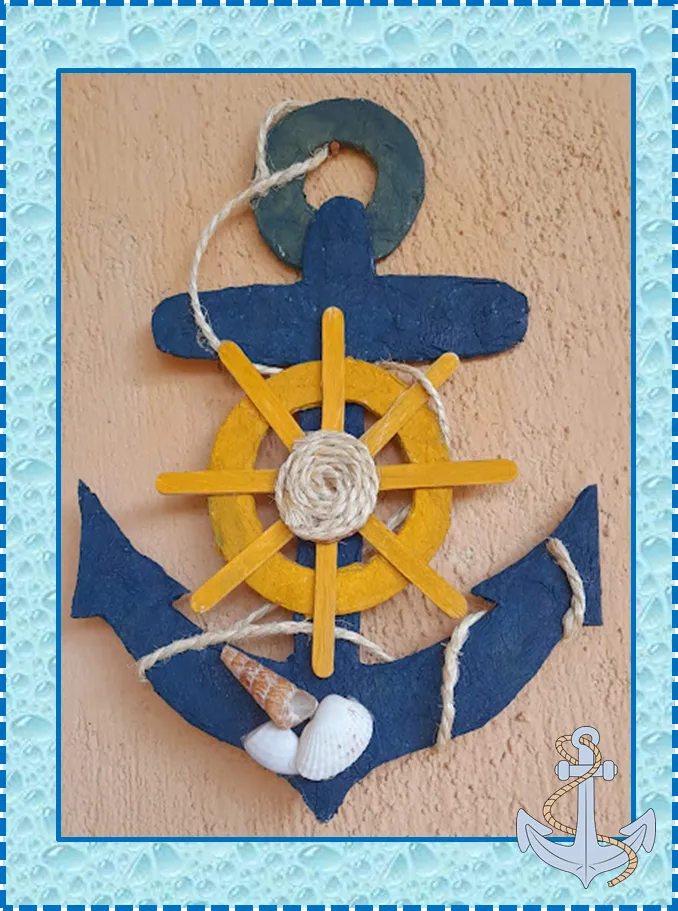
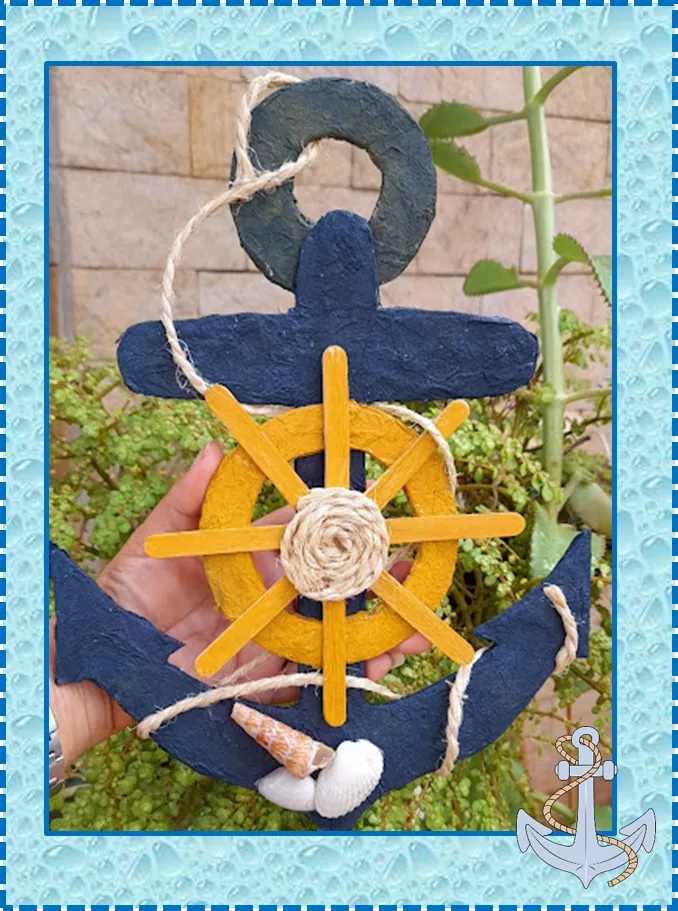
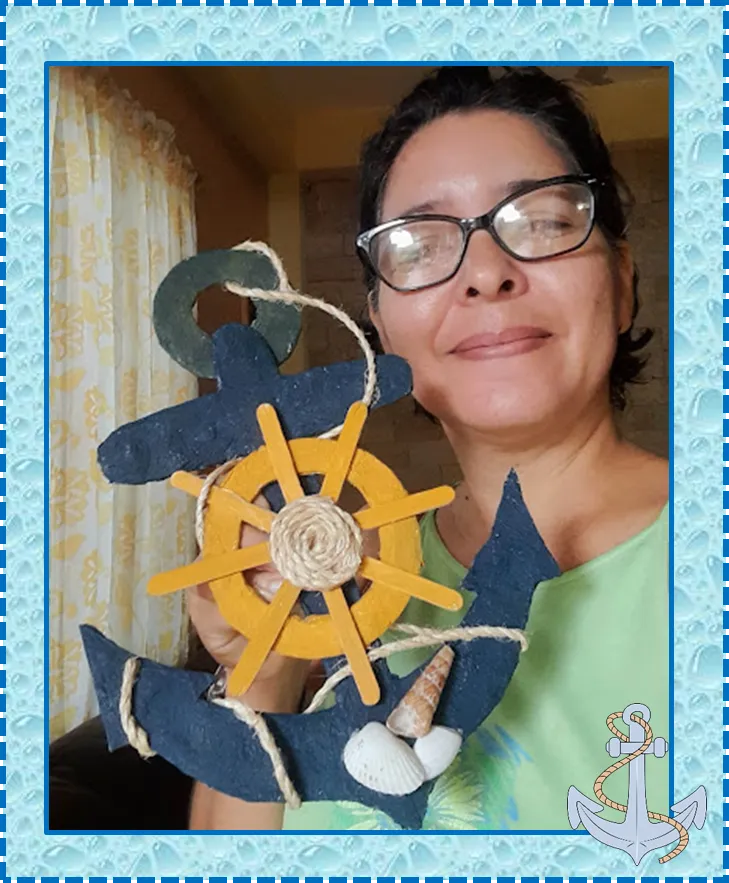
Listo, este es el resultado final de mi creativo ancla con timón para decorar la pecera de mi hogar. ¡Espero se animen a realizarla son lindas para decorar cualquier lugar y espero les haya gustado mi proyecto del día de hoy!!
¡Hasta una próxima publicación amigos!
Done, this is the final result of my creative anchor with rudder to decorate the fish tank in my home. I hope you are encouraged to do it, they are beautiful to decorate any place and I hope you liked my project today!!
Until a next publication friends!
Fuente portada
Fuente Separador
Imagen referencial


Las fotografías fueron tomadas con un teléfono inteligente Samsung A12, el texto fue traducido al ingles con el traductor de Google. link
El banner fue diseñado en canvas link
The photographs were taken with a Samsung A12 smartphone, the text was translated into English with the Google translator.
The banner was designed on canvas