It's been a while since I last did a "Learn with Gabo". The last thing I shared with you from this series was a nice figure of Bomberman, a famous video game character.
You can see that tutorial and all the others, sorted by level, by following these links:
#1 Eggplant:
@gaboamc2393/learn-with-gabo-1-aprende-con-gabo-1-engesp
#2 Teddy bears:
@gaboamc2393/learn-with-gabo-2-aprende-con-gabo-2-engesp
#3 Kirby:
@gaboamc2393/learn-with-gabo-3-aprende-con-gabo-3-engesp
#4 Bomberman:
@gaboamc2393/learn-with-gabo-4-aprende-con-gabo-4-espeng
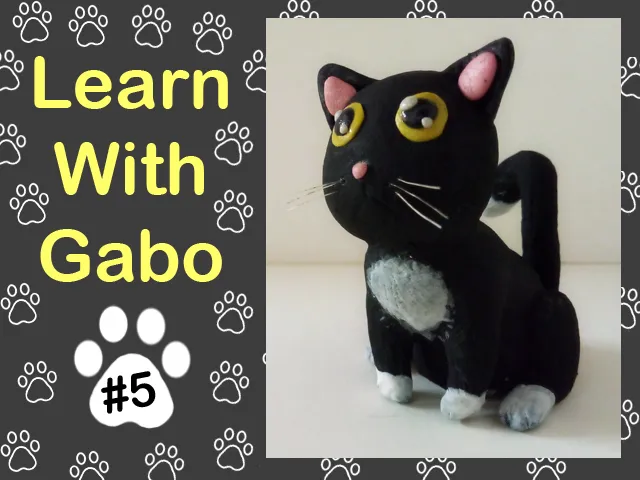
For this Learn with Gabo #5 I bring you another novelty, a cat figurine, but not just any cat figurine. Instead of using the colored plasticine needed for the figure, I used one color plasticine to make the figure and then painted it. I had not shown you figures made this way, so in this installment #5 I will show you how to make it. Having said all that, let's get started.
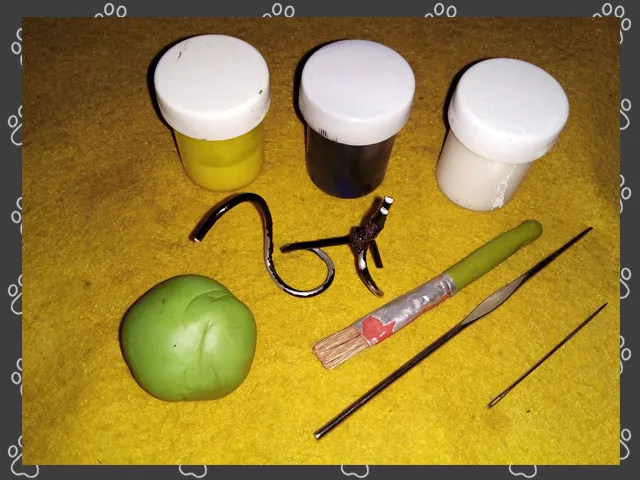
The materials I used for this figure are very similar to those I used in previous figures: plasticine, wire, knitting needle and sewing needle. In addition to these materials, I also used paints and a paintbrush.
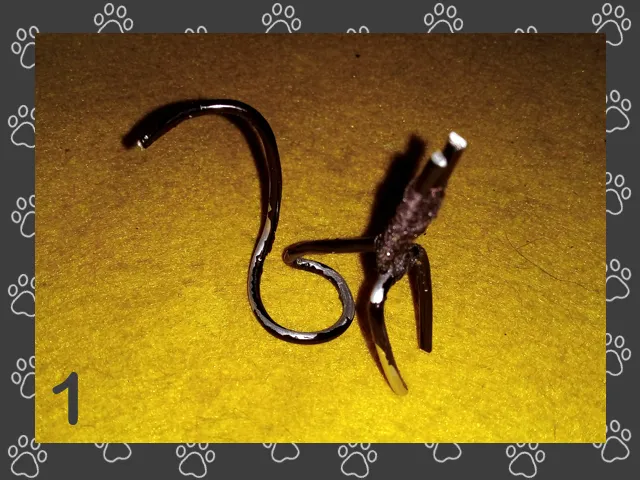
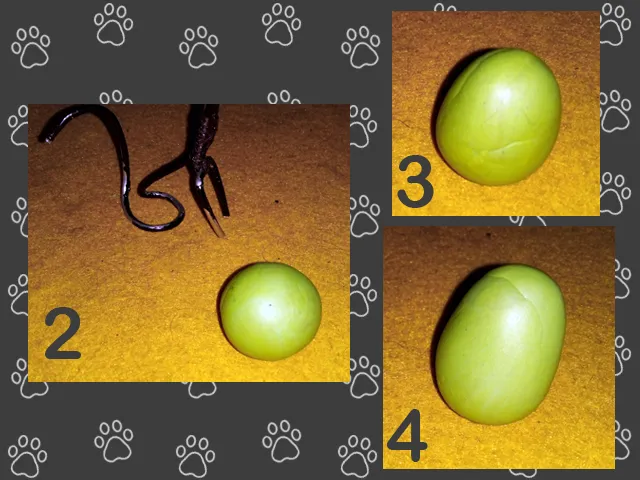
The first thing I did, as usual, was the skeleton of the figure. As I showed you in installment number 4, where I showed you how to make a wire skeleton for the bomberman figure, I first made a plan of the skeleton and then molded the wire following the drawn pattern.
Although this figure can be made without a skeleton, as it is a small figure, I decided to make the skeleton so that it does not lose its shape over time. It is not necessary to make a skeleton in small figures if you do not plan to keep them, but in my case I plan to keep this kitten and put it as an ornament somewhere, so I made its wire skeleton.
Once the skeleton is done, it is time to cover it with plasticine. In this case I will use only one color plasticine, since we will paint it later.
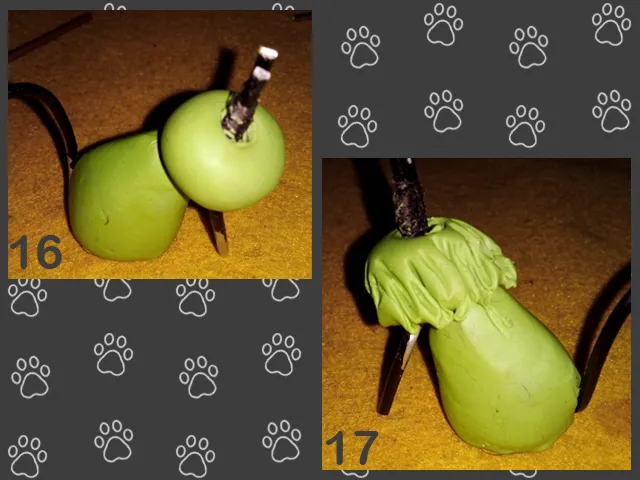
The first thing to do is to make a sphere (2), then we stretch it progressively (3) until it has a more elongated shape, similar to a pear (4).
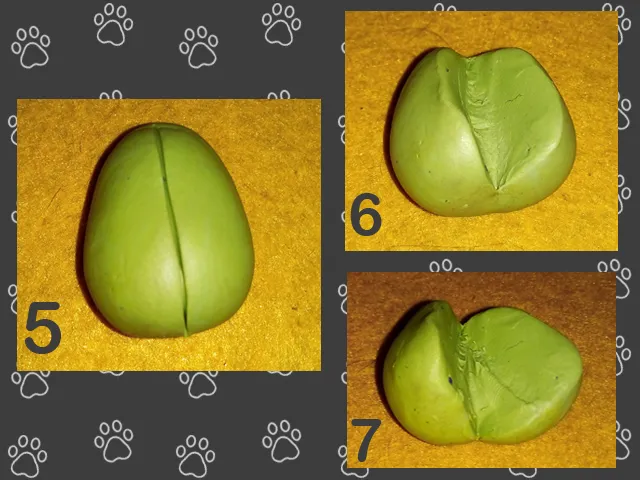
With the help of the sharp end of the sewing needle, we make a cut in the middle of the shape we just made (5). We continue cutting and opening the plasticine (6) until we almost reach the other side, but without cutting it completely in half (7). So that you understand me, it is as if you were opening a hotdog bun in half to fill it; you just open it, but without cutting it completely.
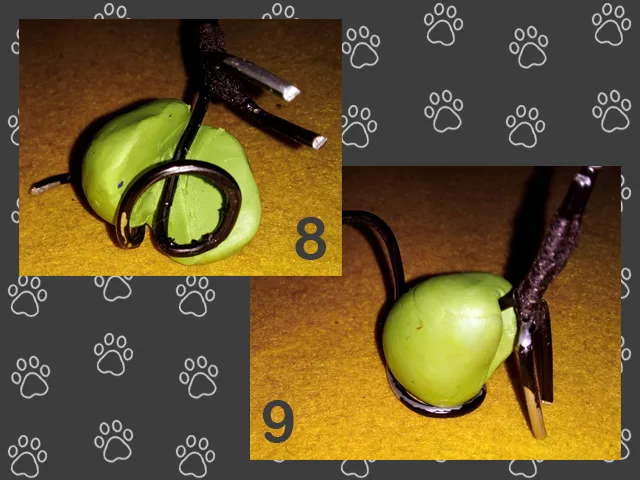
Once the shape we made is already open, we place it on the wire skeleton (8). then we close it (9).
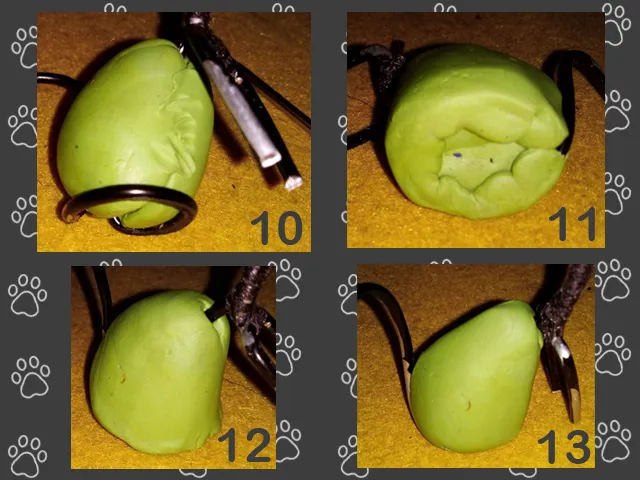
We can help us with a toothpick to seal well the cut we made before (10). We must also cover the bottom of the skeleton with plasticine (11), then we stretch down the plasticine, as if we wanted to make something similar to the ghosts of pacman (12). The last thing is to round the bottom part and we will have a shape much more similar to a pear (13).
The next step is to make another sphere, which we will flatten just a little, emphasis on a little (14). Then, we make a hole in the middle, as if it were a donut (15).

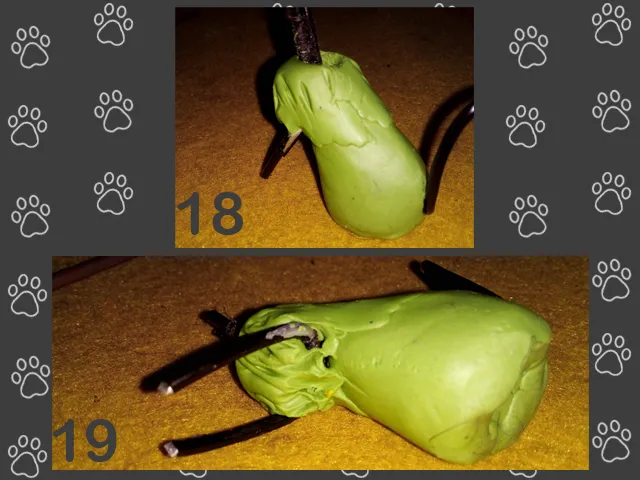
As shown in the image below (16), the hole we made is to wedge it into the wire skeleton. Once this is done, with a toothpick we flatten the plasticine downwards (17).
Then, with our fingers, we can try to give the plasticine a smooth surface (18). With the same toothpick, we try to push the plasticine so that it covers all the wires, even the ones below (19).
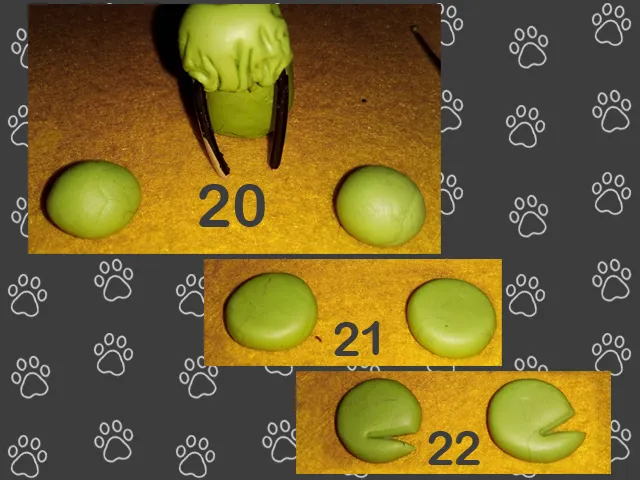
The next step is to make the cat's paws. To do this we make two spheres(20) and flatten them, as if they were tortillas(21). With the help of a scissors, we make a cut on the bottom, so that it looks like a pacman (22).
We must bend down a little the piece of plasticine we cut before, then we place each shape on each side. It will look like this:
Once the back legs are ready, we continue with the front legs. We make two plasticine sticks (24), mold them in the shape of an elongated cone (25) and nail them to the two wires that were left to be covered, the ones that would serve as support for these front legs (26).
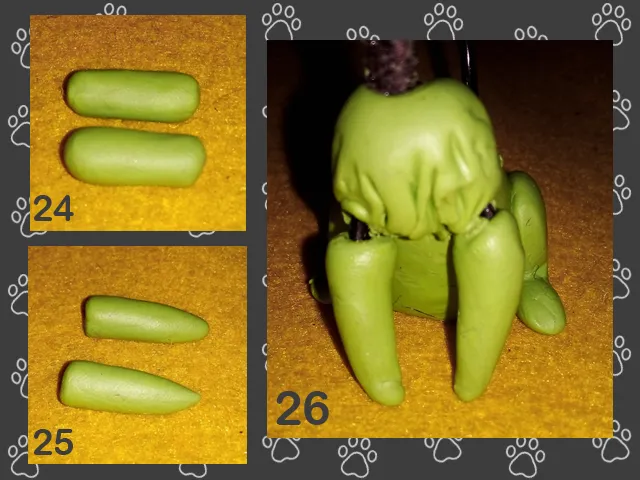
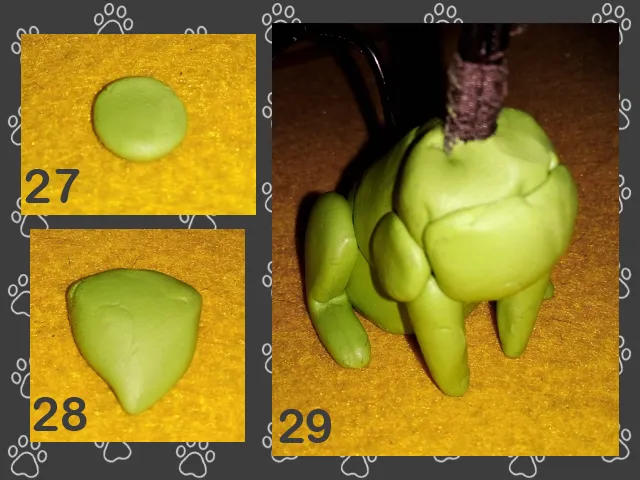
Once all the above is done, we will make the shape of the cat fatter. We make two plasticine tortillas and glue them on each side of the arms (27). Then we make a triangle and glue it on what would be the chest of the cat. Below we can see each piece in its place (29).
Then we must smooth all the seams so that the separations are not visible. You can help yourself with a toothpick, I helped myself with a knitting needle.

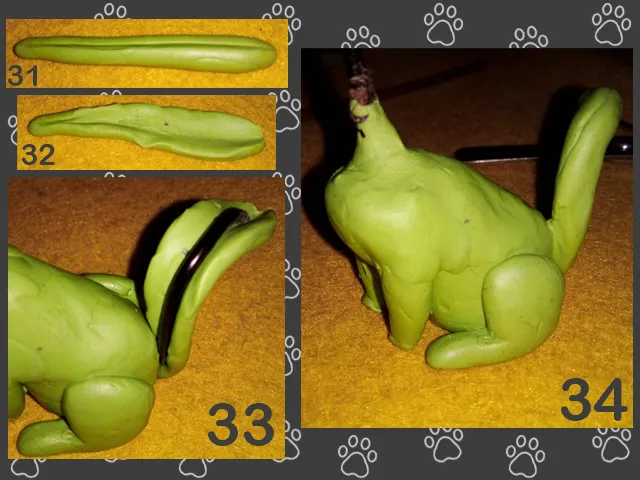
The last thing that has to do with the torso of the figure is the tail. To make the tail you have to mold the plasticine until you get a shape similar to a club (31). Cut it in the center and open it, as if it were a loaf of bread (32). With this open club we cover the tail of the figure (33) and close it (34).
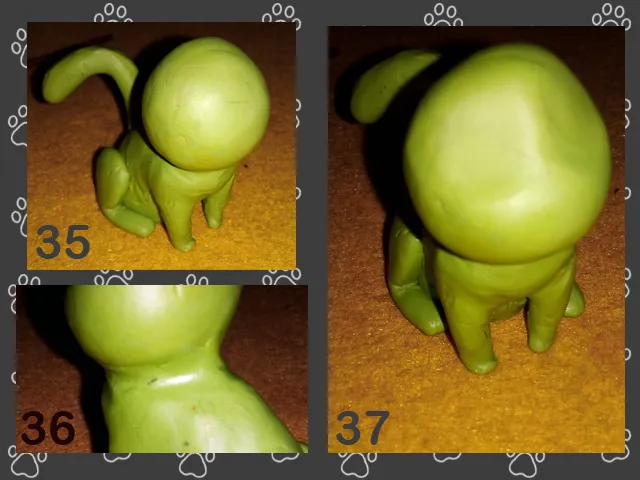
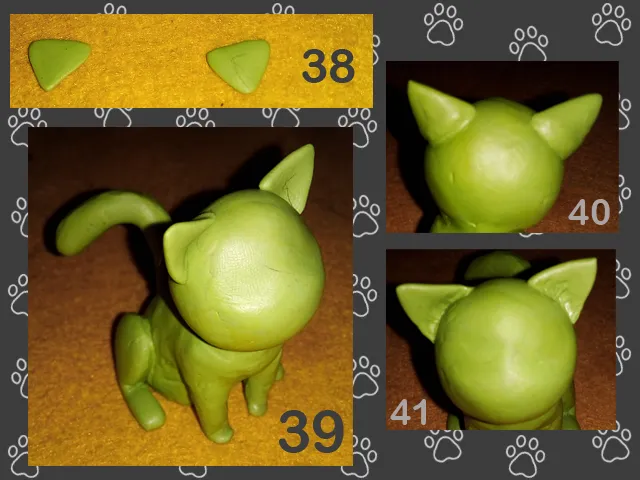
Time to make the cat's head. To do this we simply make a large sphere and nail it to the wire of the skeleton (35). We smooth the joints so that no gaps are visible (36) and finally we press with our thumbs the place where the eyes should be (37).
For the ears we make two triangles (38) and put them in place (39). Smooth the joints so that the separations are not visible, both at the back (40) and at the front (41).
This is optional. With the help of a needle you can make lines all along the cat's body to simulate fur. I say it is optional because the figurine looks good if this is not done. Below is an animation of this process:
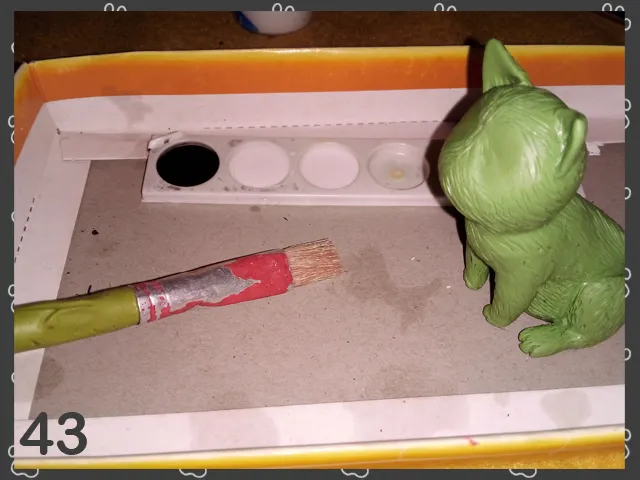
Now it's time to paint. You can use a soft bristle brush or a hard bristle brush, like mine. The latter is better because it makes much more lines on the clay, creating a better fur effect.
To start painting, first you have to paint with a white background, this will allow the colors that will be applied later will not look bad because of the color of the plasticine underneath.
I painted first with white, then applied two coats of black.
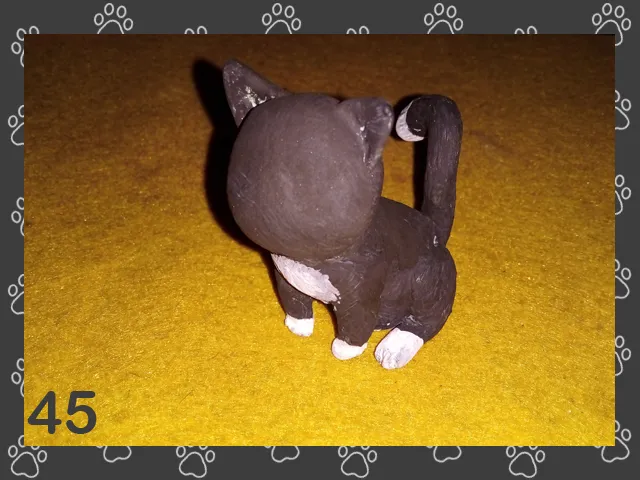
Once dry, I painted the chest of the kitten with white color, the paws and the tip of the tail also with white color.
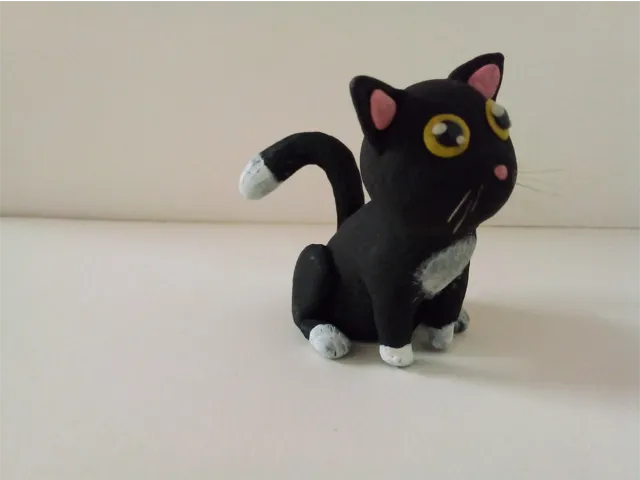
And that's it for the painting. The next thing was to make the eyes. I made two yellow plasticine tortillas and glued them in place (46). I say I glued them in place because I had to use glue, as the play dough does not stick by itself to the painted surface.
Next I placed the black pupils and a couple of white dots to simulate glitter (47).
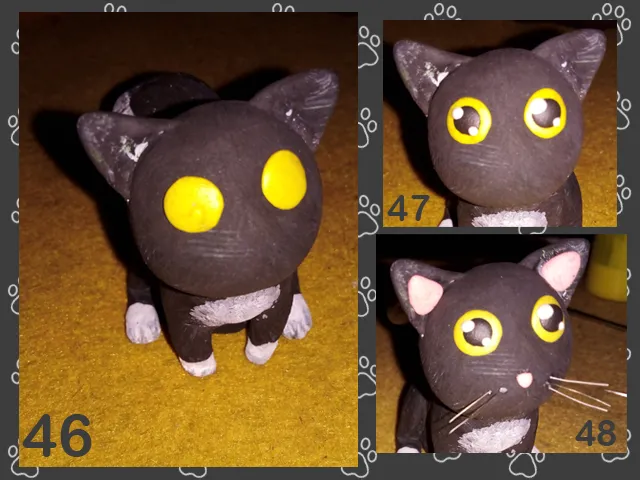
Finally I used pink plasticine to make three triangles. Two big ones for the ears and a very small one for the nose. In addition, I glued a few white bristles from the paintbrush to make the whiskers.
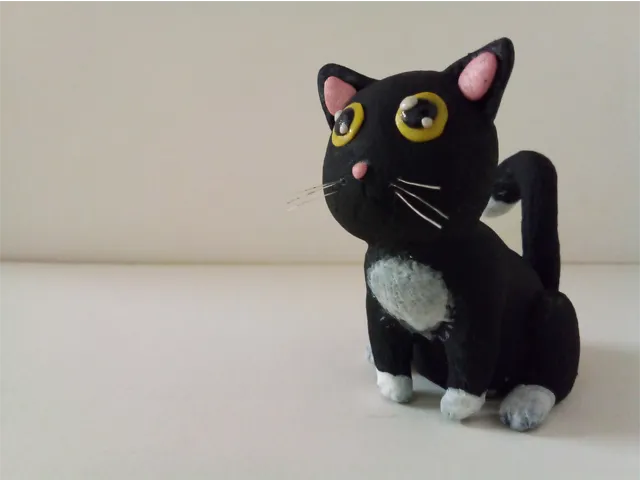
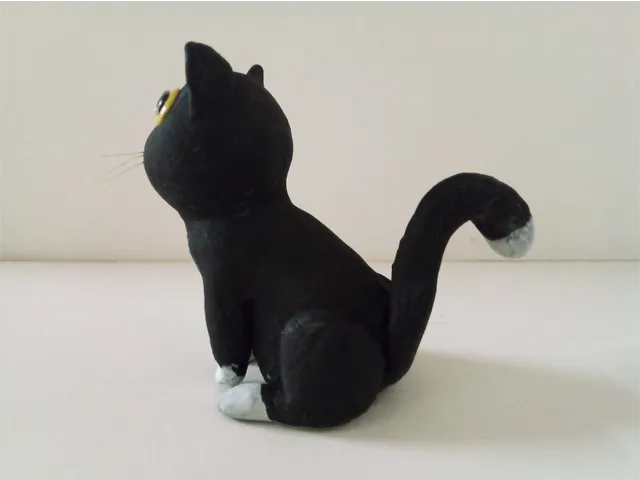
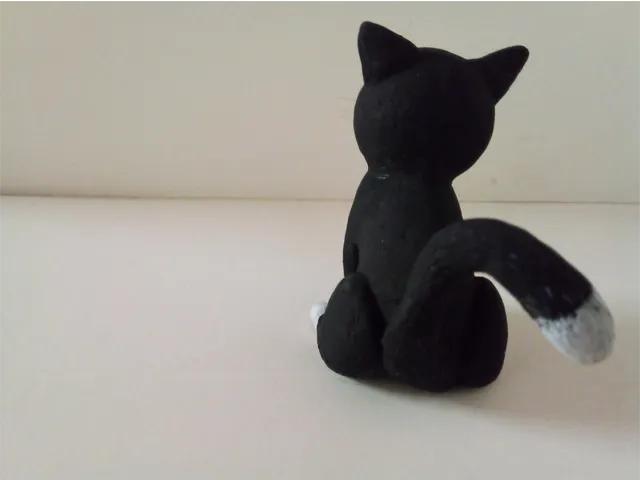
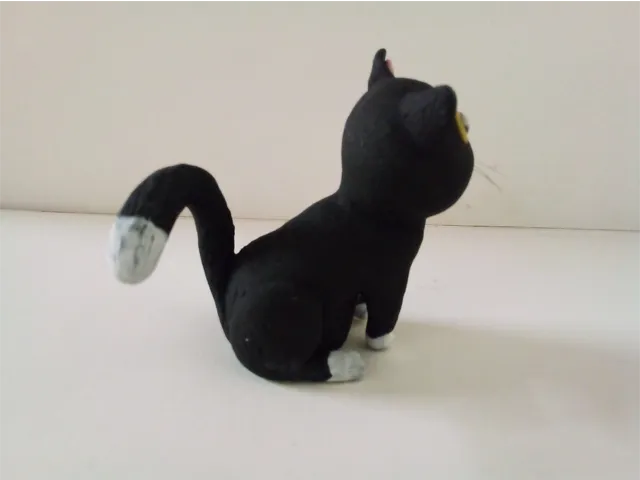
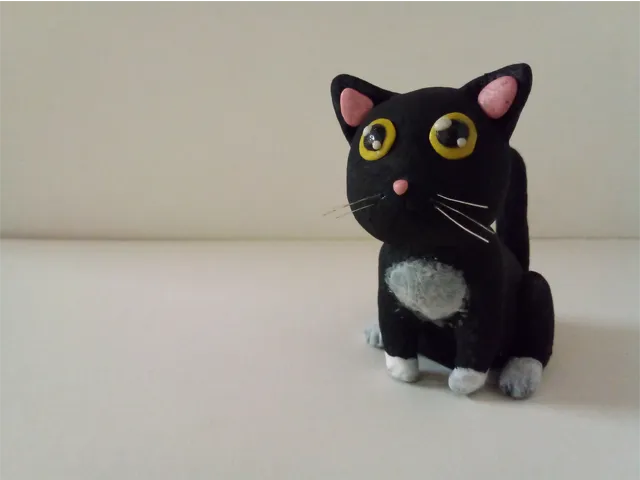
And this is how the cat figurine was finished.
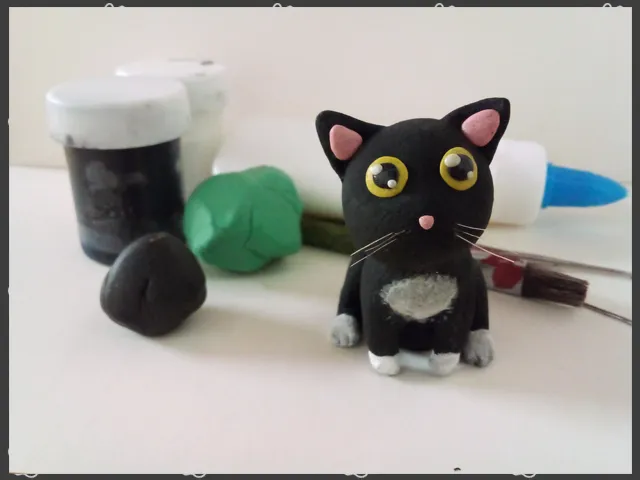
Here are a few pictures of the final result.
I really enjoyed making this figurine. In my opinion it is quite simple to make and if you have already mastered everything I have explained in the previous tutorials of learn with Gabo, it will be easier to make this figurine.
I hope you are encouraged to make it, since I try to be as explicit as possible in these publications so that each step is understood. If you have any doubts, ask and if you get to make any figure, do not hesitate to show it to me.
I take this opportunity to send greetings to my friend Cristina (actioncats), who helped me to shape this wonderful idea of making a figurine inspired by one of my cats. I hope you like it, my friend, a hug.
Well, that's all for now. I hope you enjoyed the publication or, at least, that it served to distract your mind a little. If you like to leave your opinions, you can do it below in the comments, I'll be happy to read them. With nothing more to add, I'll say goodbye then....
See you next time!
Versión en español
Ha pasado bastante tiempo desde la última vez que hice un "Aprende con Gabo". Lo último que compartí con ustedes de esta serie fue una bonita figura de Bomberman, un famoso personaje de videojuegos.
Pueden ver ese tutorial y todos los demás, ordenados por nivel, siguiendo estos enlaces:
#1 Berenjena:
@gaboamc2393/learn-with-gabo-1-aprende-con-gabo-1-engesp
#2 Ositos:
@gaboamc2393/learn-with-gabo-2-aprende-con-gabo-2-engesp
#3 Kirby:
@gaboamc2393/learn-with-gabo-3-aprende-con-gabo-3-engesp
#4 Bomberman:
@gaboamc2393/learn-with-gabo-4-aprende-con-gabo-4-espeng
Para este Aprende con Gabo #5 les traigo otra novedad, una figurita de un gato, pero no cualquier figurita de un gato, no. En lugar de usar las plastilinas de colores necesarias para la figura, usé plastilina de un solo color para hacer la figura y luego la pinté. No les había mostrado figuras hechas de esta manera, así que en esta entrega #5 les enseñaré cómo hacerla. Dicho todo esto, comencemos.
Los materiales que utilicé para esta figura son muy similares a los que usé en figuras anteriores: plastilina, alambre, aguja de tejer y aguja de coser. Adicional a estos materiales, también usé pinturas y un respectivo pincel.
Lo primero que hice, como siempre, fue el esqueleto de la figura. Como les mostré en la entrega número 4, donde les enseñé a hacer un esqueleto de alambre para la figura de bomberman, primero hice un plano del esqueleto y luego moldeé el alambre siguiendo el patrón dibujado.
Aunque esta figura se puede hacer sin esqueleto, pues es una figura pequeña, decidí hacerle el esqueleto para que no pierda su forma con el tiempo. No es necesario hacer un esqueleto en figuras pequeñas si no planeas conservarlas, pero en mi caso yo planeo conservar este gatito y ponerlo como adorno en algún lugar, así que le hice su esqueleto de alambre.
Una vez hecho el esqueleto, es tiempo de cubrirlo con plastilina. En este caso usaré plastilina de un solo color, ya que después la pintaremos.
Lo primero es hacer una esfera (2), luego vamos estirándola de manera progresiva (3) hasta que tenga una forma más alargada, similar a la de una pera (4).
Con ayuda de la punta afilada de la aguja de coser, hacemos un corte a la mitad de la forma que acabamos de hacer (5). Seguimos cortando y abriendo la plastilina (6) hasta que casi llegamos al otro lado, pero sin cortarla por completo a la mitad (7). Para que me entiendan, es como si estuviesen abriendo un pan de hotdog a la mitad para rellenarlo; simplemente lo abren, pero sin cortarlo por completo.
Una vez que la forma que hicimos ya está abierta, la colocamos sobre el esqueleto de alambre (8). luego lo cerramos (9).
Nos podemos ayudar con un palillo para sellar bien el corte que hicimos antes (10). Debemos cubrir también con plastilina la parte de abajo del esqueleto (11), luego estiramos hacia abajo la plastilina, como si quisiéramos hacer algo parecido a los fantasmas de pacman (12). Lo último es redondear la parte de abajo y nos quedará con una forma mucho más parecida a una pera (13).
El paso siguiente es hacer otra esfera, la cual aplastaremos solo un poco, énfasis en un poco (14). Luego, hacemos un agujero en el medio, como si fuese una dona (15).
Como se observa en la imagen de abajo (16), el agujero que hicimos es para calzarlo en el esqueleto de alambre. Una vez hecho esto, con un palillo vamos aplastando la plastilina hacia abajo (17).
Luego, con nuestros dedos, podemos intentar darle una superficie lisa a la plastilina (18). Con un mismo palillo, tratamos de empujar la plastilina para que esta cubra todos los alambres, incluso los que están abajo (19)
Lo siguiente es hacer las patas del gato. Para ello hacemos dos esferas(20) y las aplastamos, como si fuesen tortillas(21). Con ayuda de una tijera, hacemos un corte en la parte de abajo, para que nos quede como algo parecido a un pacman (22).
Debemos doblar un poco hacia abaj el trozo de plastilina que cortamos antes, luego colocamos cada forma a cada lado. Nos quedará de la siguiente manera:
Una vez listas las patas traseras, seguimos con las patas delanteras. Se hacen dos bastones de plastilina (24), los moldeamos con forma de cono alargado (25) y los clavamos en los dos alambres que faltaba cubrir, los que servirían de soporte para estas patas delanteras (26).
Hecho todo lo anterior, daremos mayor gordura a la forma del gato. Hacemos dos tortillas de plastilina y las pegamos a cada lado de los brazos (27). Luego hacemos un triángulo y lo pegamos en lo que sería el pecho del gato. Abajo se observa cada pieza colocada en su lugar (29).
Luego debemos alisar todas las uniones para que no se vean las separaciones. Pueden ayudarse con un palillo, yo me ayudé con una aguja de tejer.
Lo último que tiene que ver con el torso de la figura, es la cola. Para hacer la cola hay que moldear la plastilina hasta obtener una forma similar a la de un garrote (31). Hay que cortarlo en el centro y abrirlo, como si fuese un pan (32). Con ese garrote abierto cubrimos la cola de la figura (33) y la cerramos (34).
Hora de hacer la cabeza del gato. Para ello simplemente hacemos una esfera grande y la clavamos en el alambre del esqueleto (35). Alisamos las uniones para que no se vean s eparaciones (36) y por último apretamos con los pulgares el lugar en donde deberían ir los ojos (37).
Para las orejas hacemos dos triángulos (38) y los colocamos en su lugar (39). Hay que alisar las uniones para que no se vean las separaciones, tanto atrás (40) como adelante (41).
Esto es opcional. Con ayuda de una aguja pueden hacer líneas a lo largo de todo el cuerpo del gato para simular el pelaje. Digo que es opcional porque la figurita queda bien si esto no se hace. A continuación una animación de este proceso:
Ahora sí que llegó la hora de pintar. Pueden usar un pincel de cerdas suaves o uno de cerdas duras, como el mio. Este último es mejor porque hace muchas más líneas a la plastilina, creando un mejor efecto de pelaje.
Para comenzar a pintar, primero hay que pintar con un fondo blanco, esto permitirá que los colores que se aplicarán posteriormente no se vean mal por el color de la plastilina que hay debajo.
Pinté primero con blanco, luego apliqué dos capas de negro.
Una vez seco, pinté el pecho del gatito con color blanco, las patitas y la punta de la cola también de color blanco.
Ý esto es todo en cuanto al pintado. Lo siguiente fue hacer los ojos. Hice dos tortillas de plastilina amarilla y las peque en su lugar (46). Digo que las pegué porque tuve que usar pegamento, ya que la plastilina no se pega por si misma a la superficie pintada.
Lo siguiente fue colocar las pupilasnegras y un par de puntitos blancos para simular brillo (47)
Por último usé plastilina rosada para hacer tres triángulos. Dos grandes para las orejas y uno muy chiquito para la nariz. Además, le pegué unas cuantas cerdas blancas del pincel para hacer los bigotes.
Y de esta manera quedó terminada la figurita del gato.
A continuación les dejaré unas cuantas fotografías del resultado final.
Disfruté mucho haciendo esta figurita. En mi opinión es bastante sencilla de hacer y si ya dominan todo lo que he explicado en los tutoriales anteriores de aprende con Gabo, les será más fácil de hacer esta figurita.
Espero que se animen a hacerla. ya que trato de ser los más explicito posible en estas publicaciones para que cada paso se entienda. Si tienes dudas, pregunten y si llegan a hacer alguna figura, no duden en mostrármela.
Aprovecho de enviar saludos a mi amiga Cristina (actioncats), quien me ayudó a dar forma a esta maravillosa idea de hacer una figurita inspirada en una de mis gatas. Espero te guste amiga, un abrazo.
Bien, esto ha sido todo por ahora. Espero que hayan disfrutado la publicación o, cuando menos, que haya servido para distraer un poco la mente. Si gustan dejar sus opiniones, pueden hacerlo abajo en los comentarios, estaré encantado de leerlos. Sin más que agregar, me despido entonces...
¡Hasta la próxima!

Imagenes editadas con Photoshop
Traducido con DeepL
Photos edited with Photoshop
Translated with DeepL
Cheese and sausage rolls
Gabo Play Megaman x4 #4
Memorias de un atardecer