English version
I always been a fan of spiderman, a comic book character that is quite popular among people, whether or not they are followers of marvel comics or movies. The spiderman universe is very wide, with a great amount of characters and villains, being these last ones some of the most emblematic of the comics.
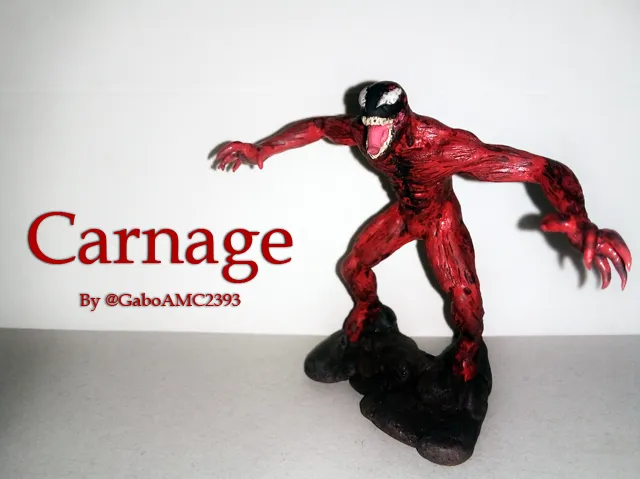
One of these villains is the protagonist of this publication, Carnage. In fact, he is a character much talked about now that he will be released in the cinema as the antagonist of the Venom 2 movie. That is why I would like to present you this sculpture of which I am quite proud of the result, my Carnage sculpture.
The materials I used for this sculpture were the following:
*Plastiline
*Wire
*Paint
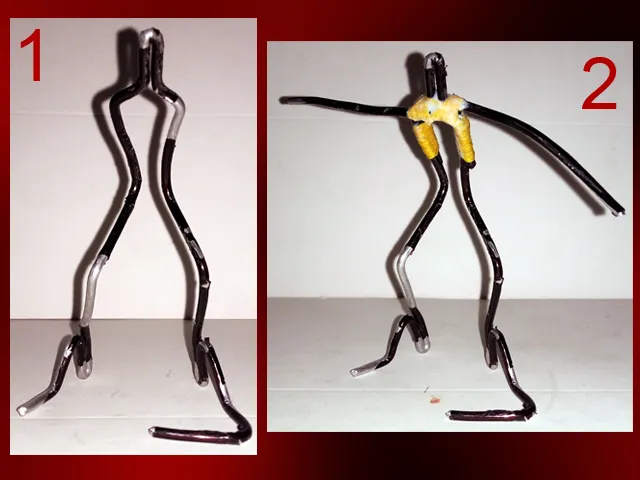
This sculpture is a bit bigger than the others I have made, so I had to make a good frame for its size and to keep its shape over time. Below you can see how I started to make the frame, or skeleton, (1) and how it turned out at the end (2):
I wanted to start with the base of the figure to get it ready and mold the legs later. I simply piled up pieces of plasticine randomly to cover the wires, until they looked like a pile of rubble:
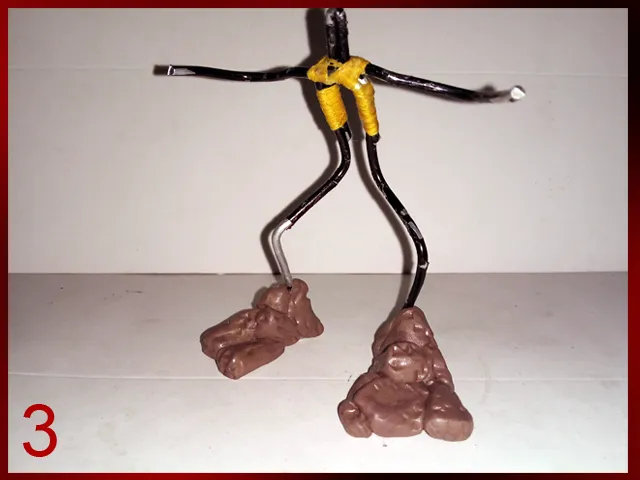
It is evident that realistic rocks cannot be made simply with plasticine, so I resorted to the aforementioned paints to paint them with the dry painting technique, which allowed me to create the effect of rocks or debris, as seen in the image below:

Once the base was made, I began to cover the wire skeleton with plasticine. I didn't follow any order as with other figures, as the character is completely red, so I could work freely.
Once all the framework was covered, I began to mold the physiognomy of the character, trying to detail the muscles as much as possible, as it is something that will stand out in this figure.
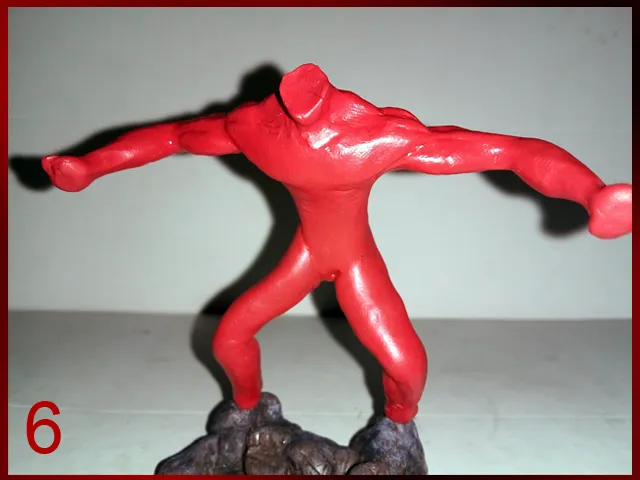
First I worked with the torso, as shown in the image above, then I continued with the legs, as shown in the image below:
For both cases, I helped myself with a knitting needle and a sewing needle to mold the smallest details of the muscles.
Below is a picture of how the figure is shaping up to this point:
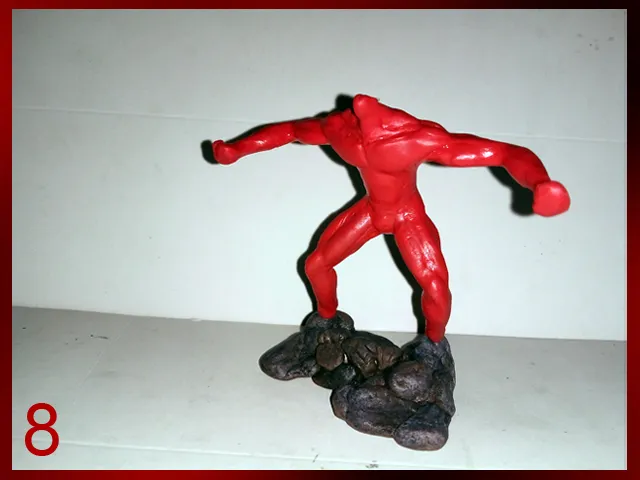
It should be noted that Carnage's body is not a sculptural body, on the contrary; his body stands out for looking like flesh muscles, without skin and with a quite characteristic texture. With this in mind, I couldn't leave the figure with a smooth texture, so I started to give these features to the whole body of the sculpture, using a sharp sewing needle for this case.
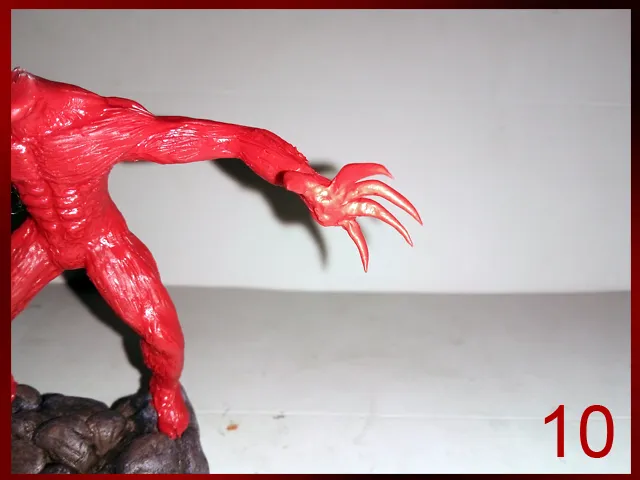
Next were the hands. The hands of this character are quite sharp, as if they were the claws of Freddy Freddy Krueger. For this reason I made them as if his fingers were long knives. Here I had to arm myself with patience because it was not easy, considering the size of the fingers.
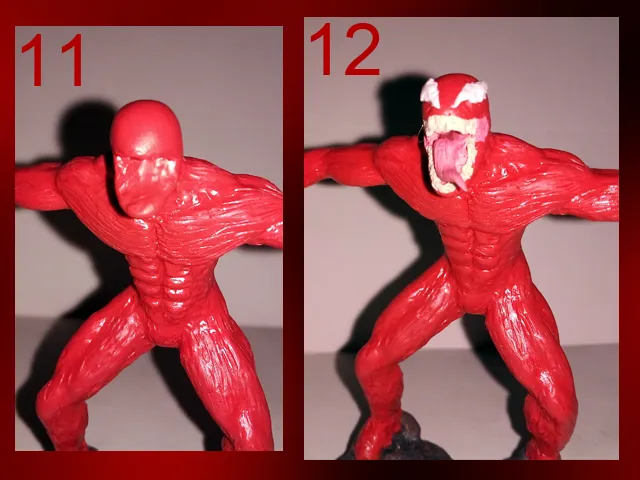
Once the whole body is ready, comes what gives life to the figure, the head. It is very simple, round and with a very large mouth (11), but it also has eyes similar to those of Spiderman and sharp teeth, as well as a long and grotesque tongue (12).
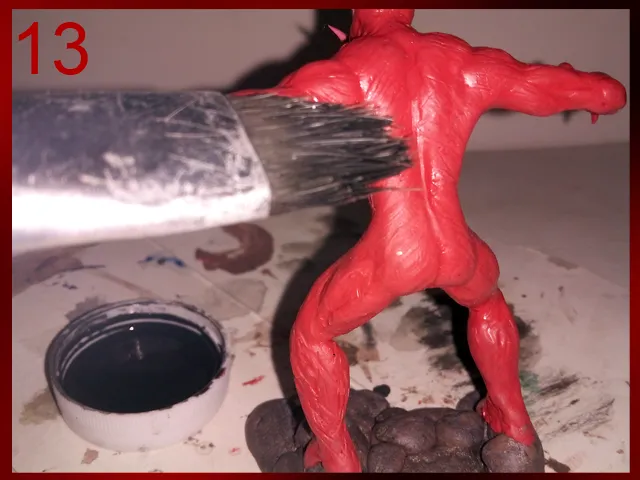
Up to this point we could say that it is ready, but no; the sculpture is completely red and Carnage has black tonalities that, being honest, would be quite difficult to achieve with plasticine, so again I turned to paint.
In this case, I took some paint and added water to it, then with a wet paintbrush I ran this black water all over the figure. The paint diluted with water would enter the grooves that I made before with the needle, which are all over the body of the sculpture.
I also used a very fine brush to paint the face and other specific details of the figure, such as the chest.
With this last step the figure was ready, with all its tonalities and a well marked muscular texture thanks to the painting.
Here are a few pictures of the final result, taken from different angles:
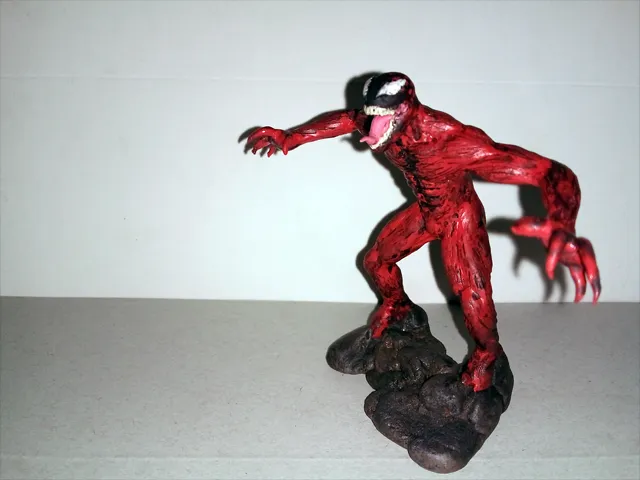
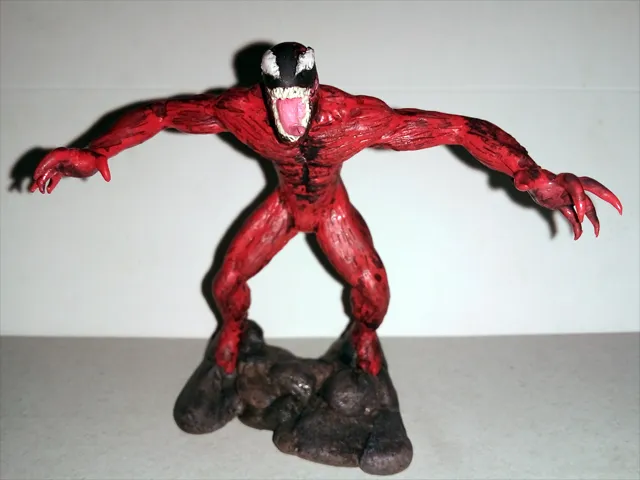
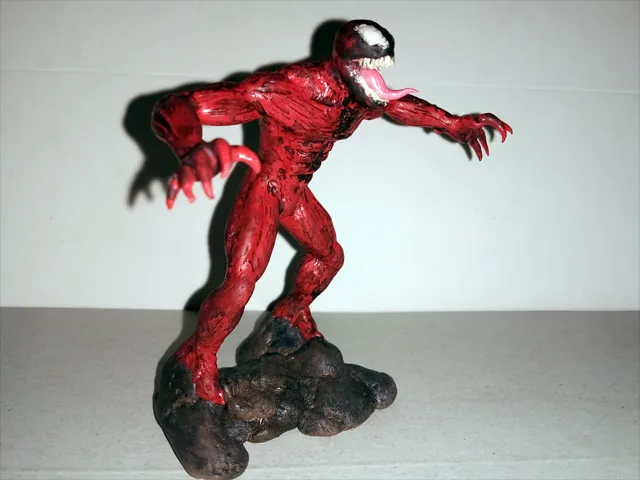
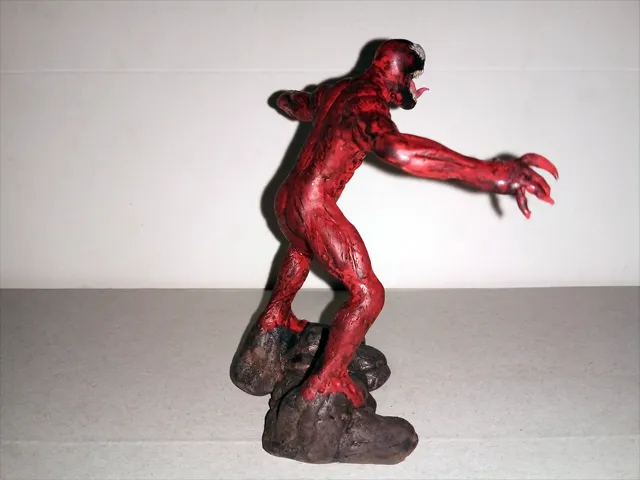
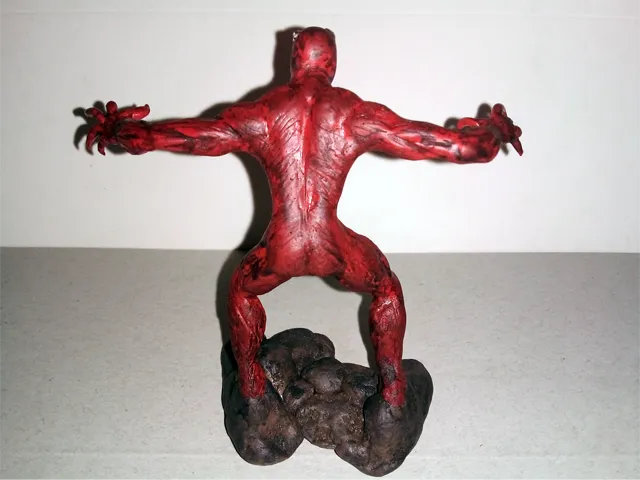

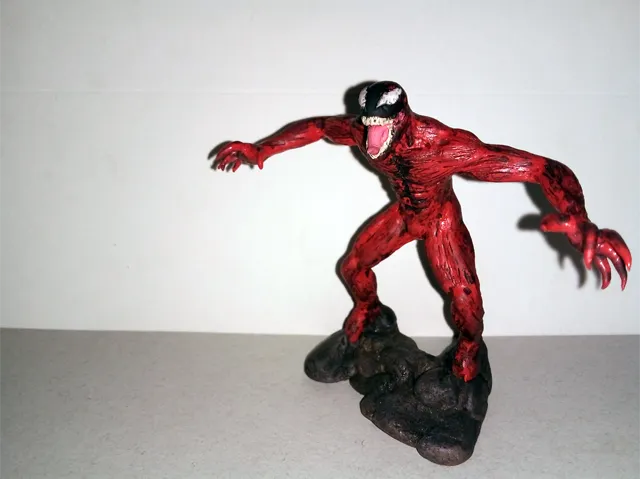
I loved the result. As I mentioned at the beginning, I was quite proud of this, as it was something that took me quite a few hours to complete.
What did you think of it? Your opinion is very important, so I encourage you to leave it below in the comments, I will always be happy to read it. If you like to see my other works, you can take a look at my blog, where I have shared more similar figures. This has been all for now, with nothing more to add I'll say goodbye then....
See you next time!
Versión en español
Siempre he sido un fan de spiderman, un personaje de comics que es bastante popular entre las personas, sean o no seguidores de los comics o películas de marvel. El universo de spiderman es muy amplio, con gran cantidad de personajes y villanos, siendo estos últimos algunos de´los más emblemáticos de los comics.
Uno de estos villanos es el protagonista de esta publicación, Carnage. De hecho, es un personaje muy sonado ahora que se estrenará en el cine como antagonista de la película de Venom 2. Es por ello que me gustaría presentarles esta escultura de la que me siento bastante orgulloso por el resultado, mi escultura de Carnage.
Los materiales que usé para esta escultura fueron los siguientes:
*Plastilina
*Alambre
*Pintura
Esta escultura es un poco más grandes que las otras que he hecho, así que tuve que hacer un buen armazón para su tamaño y para que mantuviese la forma con el pasar del tiempo. A continuación pueden ver cómo comencé a hacer el armazón, o esqueleto, (1) y cómo quedó al final (2):
Quise comenzar por la base de la figura para tenerla lista y moldear las piernas después. Simplemente apilé trozos de plastilina de manera aleatoria para cubrir los alambres, hasta que pareciesen un montón de escombros:
Es evidente que no se pueden hacer rocas realistas simplemente con plastilina, así que recurrí a las pinturas antes mencionadas para pintarlas con la técnica de pintado en seco, lo que permitió crear el efecto de rocas o escombros, tal como se observa en la imagen a continuación:
Una vez hecha la base, comencé a cubrir el esqueleto de alambre con plastilina. No seguí ningún orden como con otras figuras, pues el personaje es completamente rojo, así que pude trabajar libremente.
Una vez cubierto todo el armazón, comencé a moldear la fisionomía del personaje, procurando detallar lo más posible los músculos, pues es algo que destacará en esta figura.
Primero trabajé con el torso, como se observa en la imagen de arriba, luego continué con las piernas, como se observa en la imagen de abajo:
Para ambos casos, me ayudé con una aguja de tejer y una aguja de coser para lograr moldear los más minimos detalles de los músculos.
A continuación una fotografía de cómo va quedando la figura hasta este punto:
Cabe destacar, que el cuerpo de Carnage no es un cuerpo escultural, todo lo contrario; su cuerpo destaca por parecer músculos a carne viva, sin piel y con una textura bastante característica. Teniendo esto en mente, no podía dejar a la figura con una textura lisa, así que comencé a darle estos rasgos a todo el cuerpo de la escultura, usando para este caso una afilada aguja de coser.
Lo siguiente fueron las manos. Las manos de este personaje son bastante filosas, como si fuesen las garras de freddy freddy krueger. Por este motivo las hice como si sus dedos fuesen largos cuchillos. Aquí tuve que armarme de paciencia pues no fue fácil, considerando el tamaño de los dedos.
Una vez listo todo el cuerpo, viene lo que da vida a la figura, la cabeza. Es muy simple, redonda y con una boca muy grande (11), pero además tiene ojos similares a los del spiderman y dientes afilados, además de una lengua larga y grotesca (12).
Hasta este punto podríamos decir que ya está lista, pero no; la escultura está complemente de color rojo y Carnage tiene tonalidades negras que, siendo honesto, serían bastante difíciles de lograr con plastilina, así que nuevamente recorrí a la pintura.
En este caso, tomé un poco de pintura y le agregué agua, luego con un pincél húmedo pasé esta agua de color negro por toda la figura. La pintura diluida con agua entraría en las ranuras que antes hice con la aguja, las cuales estan por todo el cuerpo de la escultura.
También usé un pincel muy fino para pintar la cara y otros detalles específicos de la figura, como el pecho.
Con este último paso quedó lista la figura, con todas sus tonalidades y una textura muscular bien marcada gracias al pintado.
A continuación les muestro unas cuantas fotografías del resultado final, tomadas desde distintos ángulos:
A mi me encantó el resultado. Como comenté al comienzo, me sentí bastante orgulloso de esto, pues fue algo que me tomó bastantes horas en completar.
¿A ustedes qué les pareció? Su opinión es muy importante, así que los animo a dejarla abajo en los comentarios, yo siempre estaré encantado de leerlos. Si gustas ver mis otros trabajos, puedes echarle un vistazo a mi blog, donde he compartido más figuras similares. Esto ha sido todo por ahora, sin más que agregar me despido entonces...
¡Hasta la próxima!

Traducido con DeepL
Translated with DeepL
Cooking beef tongue
Gabo Play - Alto's Odyssey Gameplay
Gabo Play Megaman x4 #6


