Bienvenidos Queridos Amantes de la Artes Manuales
Welcome Dear Manual Arts Lovers
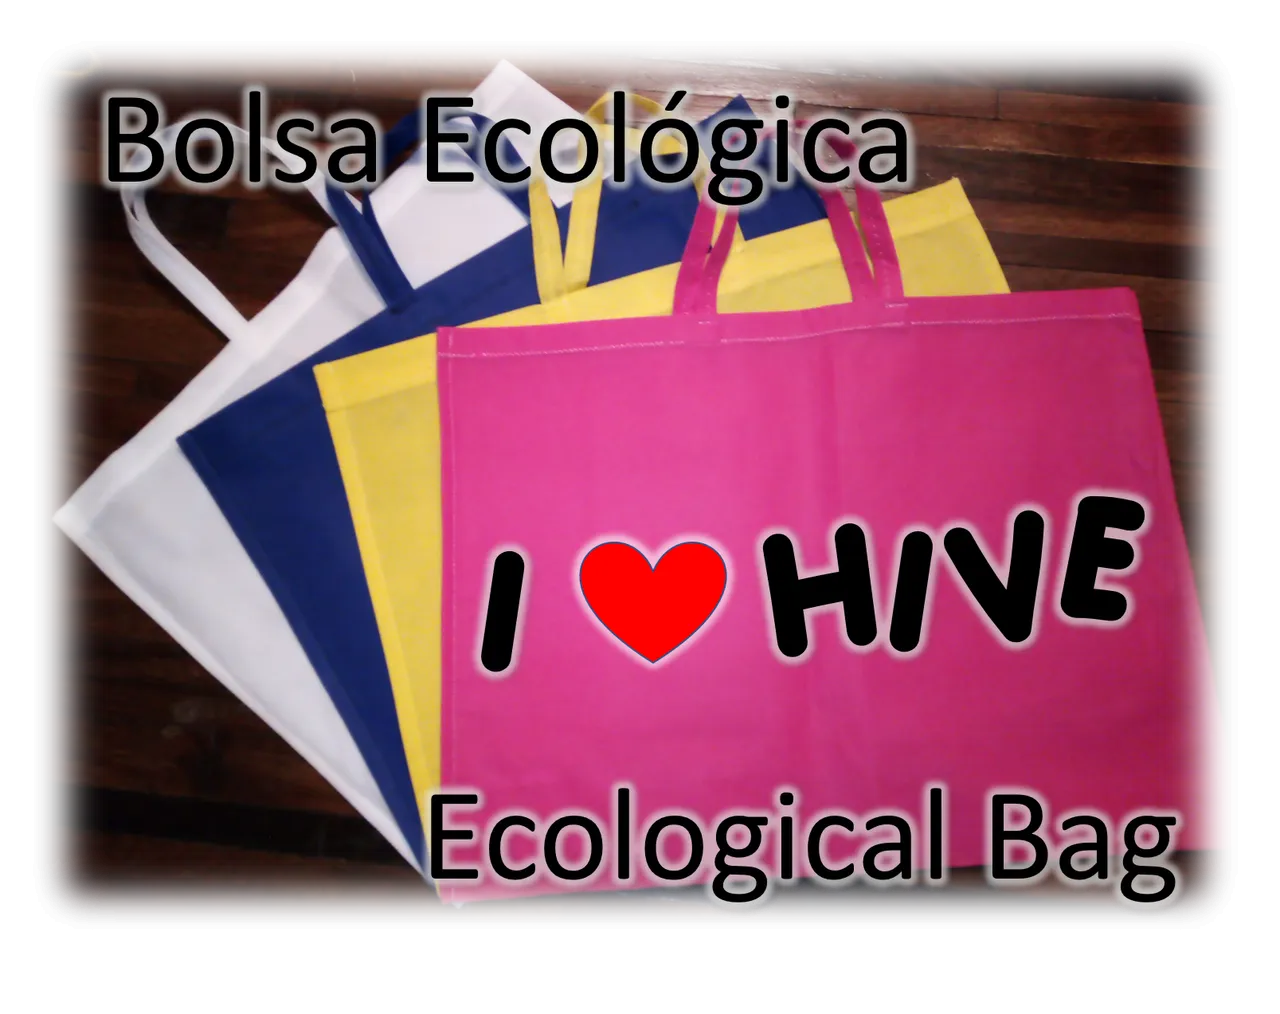
Que gusto saludarlos queridos lectores, amantes de las manualidades, tenia un tiempito sin reportarle, pero ya estoy de nuevo aquí para traerles un proyecto muy sencillo. Y si lo ponen en práctica, de seguro nuestro querido el planeta se los agradecerá, ya que hoy les enseñaré a elaborar un bolso de mercado ecológica. Bueno, en realidad sus usos no se limitan solo a eso, de hecho, si varían las medidas también pueden usarlo para bolsitos de cotillones para las fiestas de cumpleaños de sus hijos.
What a pleasure to greet you dear readers, craft lovers, I haven't reported for a while, but I'm here again to bring you a very simple project. And if you put it into practice, for sure our beloved planet will thank you, because today I will show you how to make an eco-friendly market bag. Well, actually its uses are not limited to just that, in fact, if you vary the measurements you can also use it for cotillion bags for your children's birthday parties.

En el caso de los que estoy elaborando, se trata de una ayuda para la maestra de mi hija menor Nadiah, quien está en preescolar. Es un trabajo, que está pendiente, desde hace algún tiempo, ya que como muchas cosas quedo paralizado por la pandemia. Pero, en estos días conversando con la maestra decidimos retomar el proyecto, para así, darles a los niños un lindo obsequio. Mi labor se limita a la elaboración de los bolsitos, luego ella se encargará de decorarlos, por lo que les mostraré es un lienzo en blanco para su creatividad. Una vez que aprendan a realizarlos, ustedes podrán hacerle las decoraciones y combinaciones que ustedes quieran o necesiten.
In the case of the ones I am working on, it is a help for the teacher of my youngest daughter Nadiah, who is in preschool. It is a work that has been pending for some time, since, like many things, it was paralyzed by the pandemic. But, these days talking with the teacher we decided to resume the project, to give the children a nice gift. My work is limited to the elaboration of the bags, then she will be in charge of decorating them, so I will show them a blank canvas for their creativity. Once you learn how to make them, you will be able to make the decorations and combinations that you want or need.
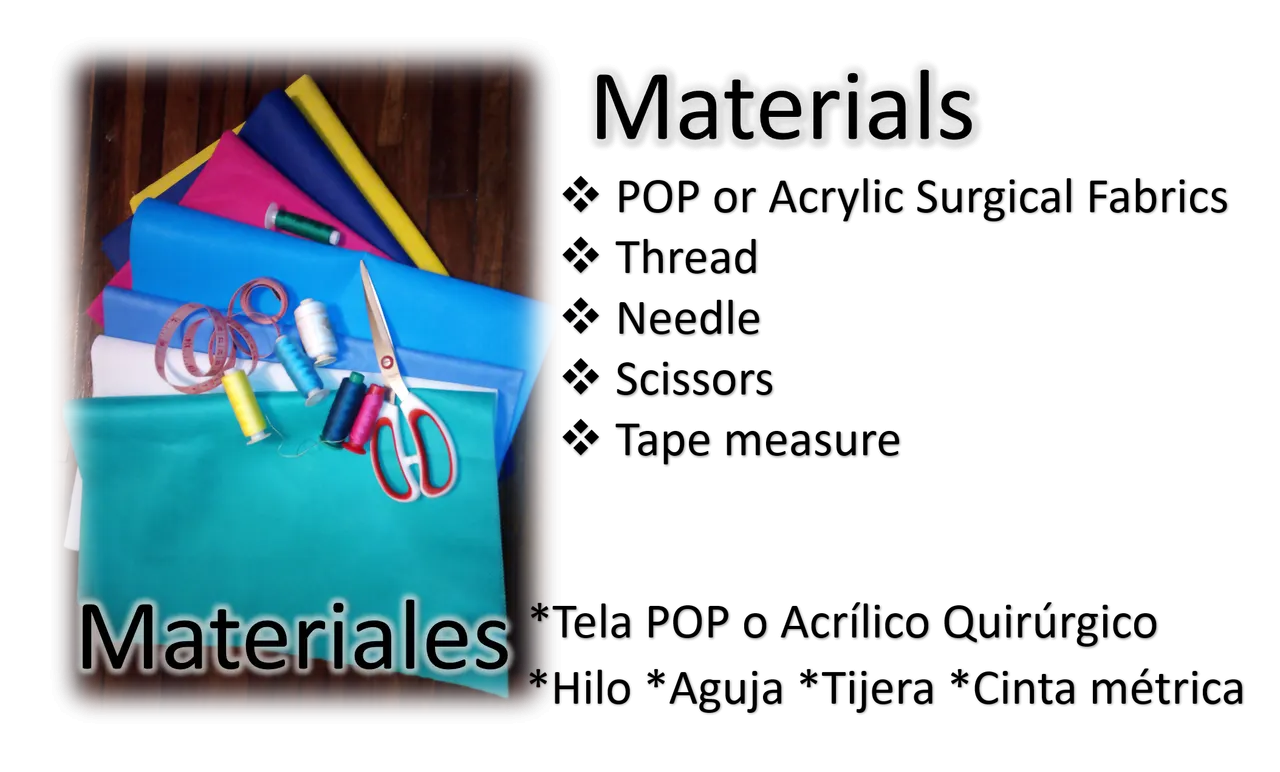
Los materiales son pocos, solo necesitan tela POP, o tela quirúrgica, esa que usan para elaborar los tapa bocas, algo a lo que a nuestro pesar, últimamente estamos bastante acostumbrados. Lo otro que necesitamos, es hilo y aguja para coser, yo usaré mi maquina de coser para elaborarlos, pero sino tienen no se preocupen, con una buena costura a mano también queda perfecto. La cantidad exacta de tela que utilizaremos para cada bolso la pueden ver más específicamente en las siguientes imágenes.
The materials are few, you only need POP fabric, or surgical fabric, the one they use to make the mouth covers, something that in spite of us, lately we are quite used to. The other thing we need is thread and needle for sewing, I will use my sewing machine to make them, but if you don't have one, don't worry, with a good hand sewing it will also be perfect. The exact amount of fabric we will use for each bag can be seen more specifically in the following images.
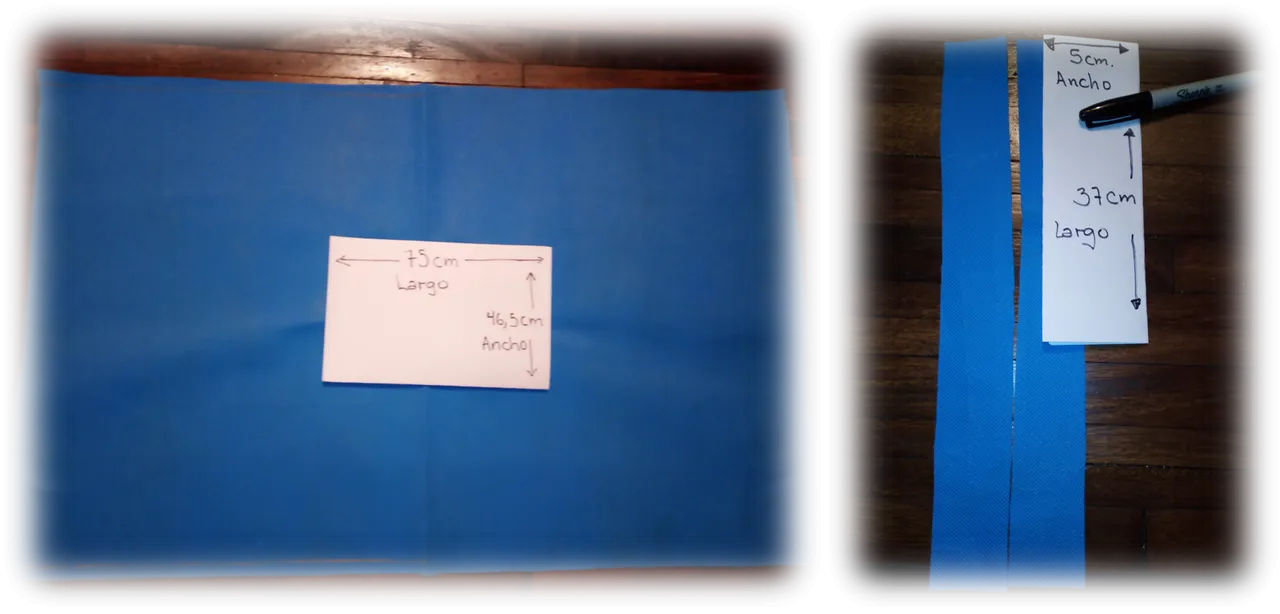
Como pueden ver en las imágenes, lo que necesitaremos inicialmente es cortar tres rectángulos, el primero será de 75 cm de largo por 46,5 cm de ancho, ese es el que corresponderá a la bolsa en sí. Además, necesitaremos dos tiras para las asas o agarraderas de la bolsa y sus medidas son, 5cm de ancho por 37 cm de largo.
As you can see in the images, what we will need initially is to cut three rectangles, the first one will be 75 cm long by 46.5 cm wide, that is the one that will correspond to the bag itself. In addition, we will need two strips for the handles or handles of the bag and its measures are 5 cm wide by 37 cm long.
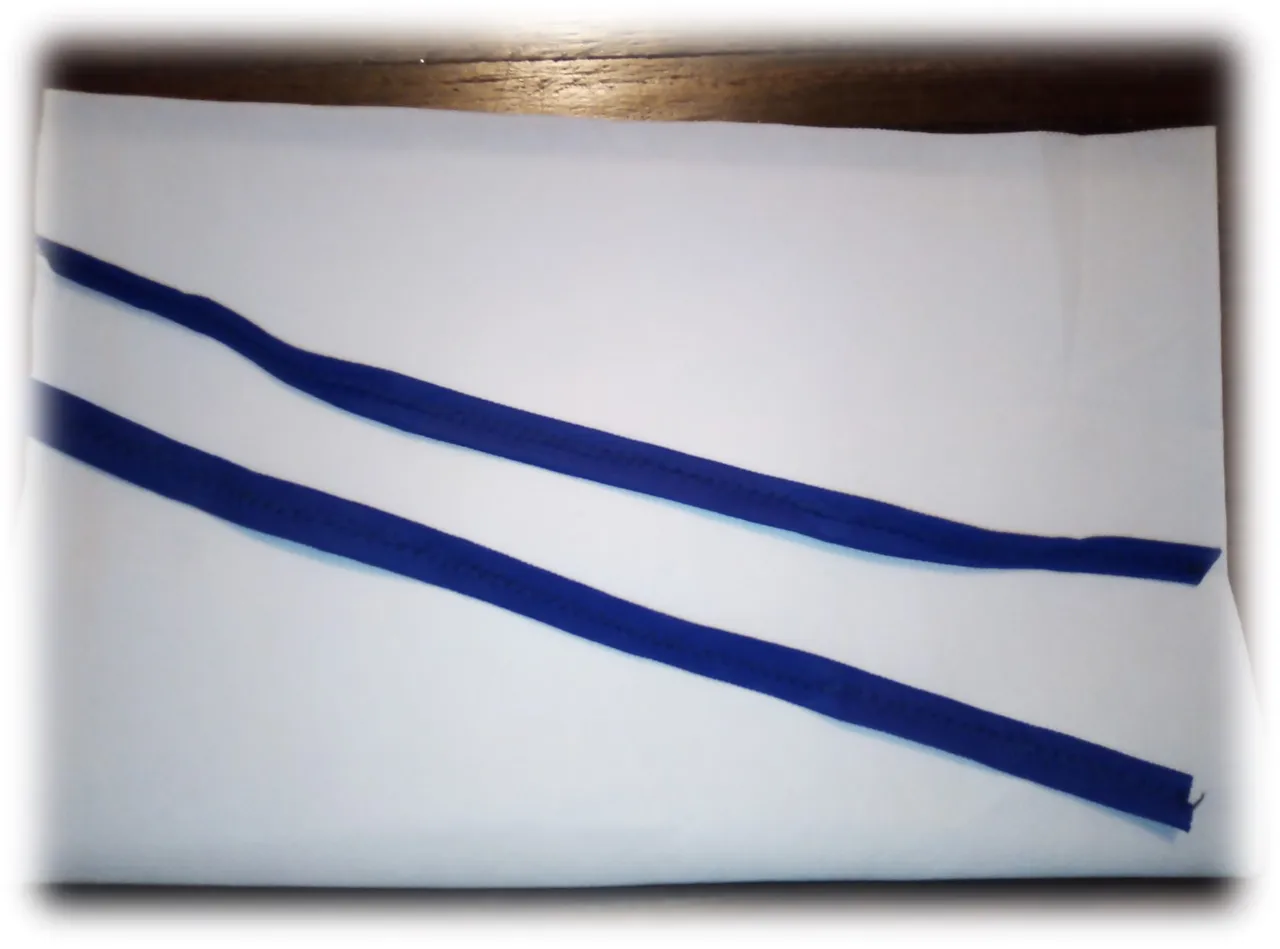
Ahora, armaremos las agarraderas para ello simplemente doblaremos haremos dobladillos en nuestra tira y realizaremos una costura para hacer más fuerte las asas y reservaremos para cuando las necesitemos.
Now, we will assemble the handles for this we will simply hem our strip and make a seam to make the handles stronger and reserve them for when we need them.
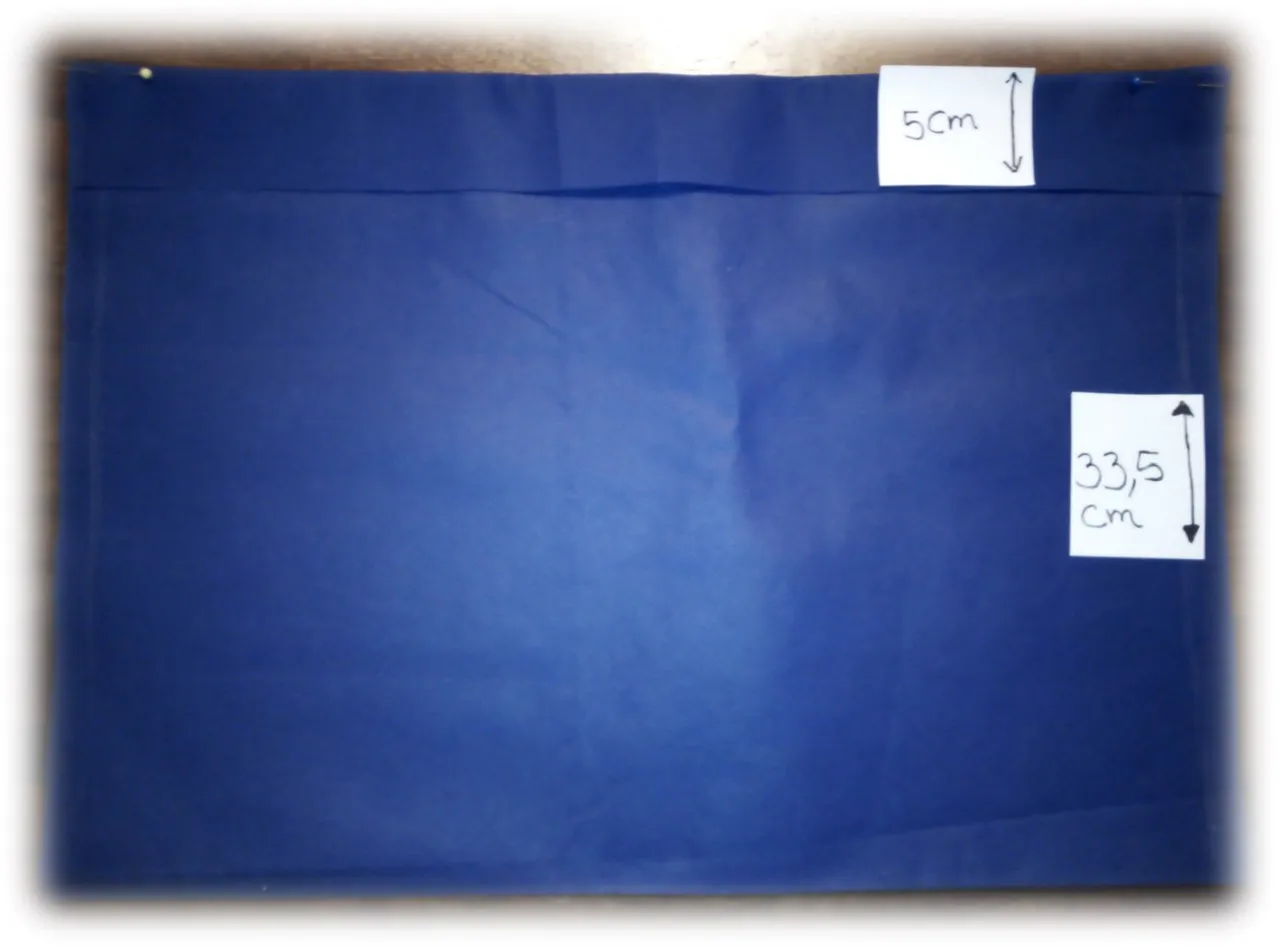
Seguidamente, tomaremos nuestro rectángulo grande en los extremos del lado más largo y haremos dobleces de 5 cm aproximadamente. Al hacer el dobladillo, nos quedará un nuevo largo de 65 cm, lo doblaremos la tela por la mitad, nos quedaran dos mitades de 33,5 cm cada una.
Next, we will take our large rectangle at the ends of the longer side and make folds of approximately 5 cm. When we make the hem, we will have a new length of 65 cm, we will fold the fabric in half, we will have two halves of 33.5 cm each.
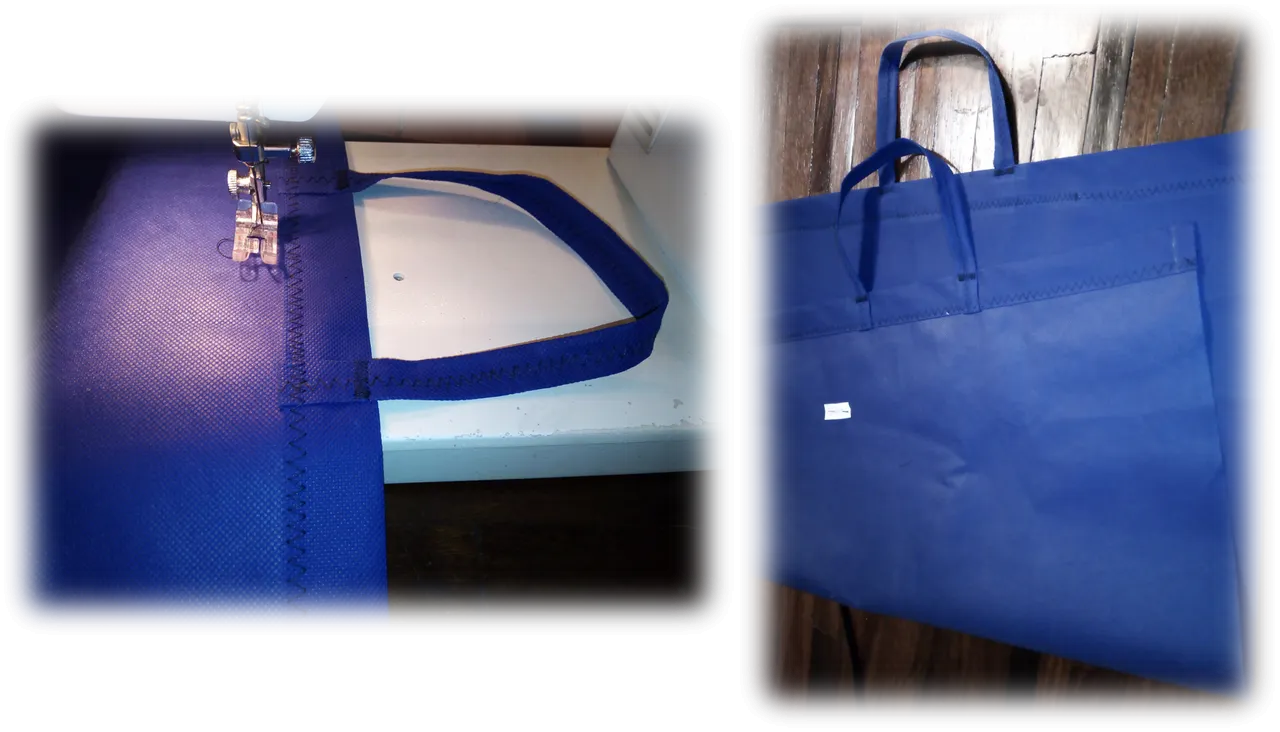
En este punto, toca ubicar las asas, para ello buscamos el punto medio en la zona donde realizamos los dobladillos de 5 cm, y fijamos con alfileres las puntas de nuestras tiras de forma equidistante. No olviden, antes de pasar las costuras para fijar el dobladillo y las asas, verificar que queden ubicadas de forma pareja, para que coincidan perfectamente.
At this point, it is time to place the handles, for this we look for the middle point in the area where we made the 5 cm hems, and we pin the ends of our strips equidistantly. Do not forget, before sewing the seams to fix the hem and the handles, make sure that they are evenly placed, so that they match perfectly.
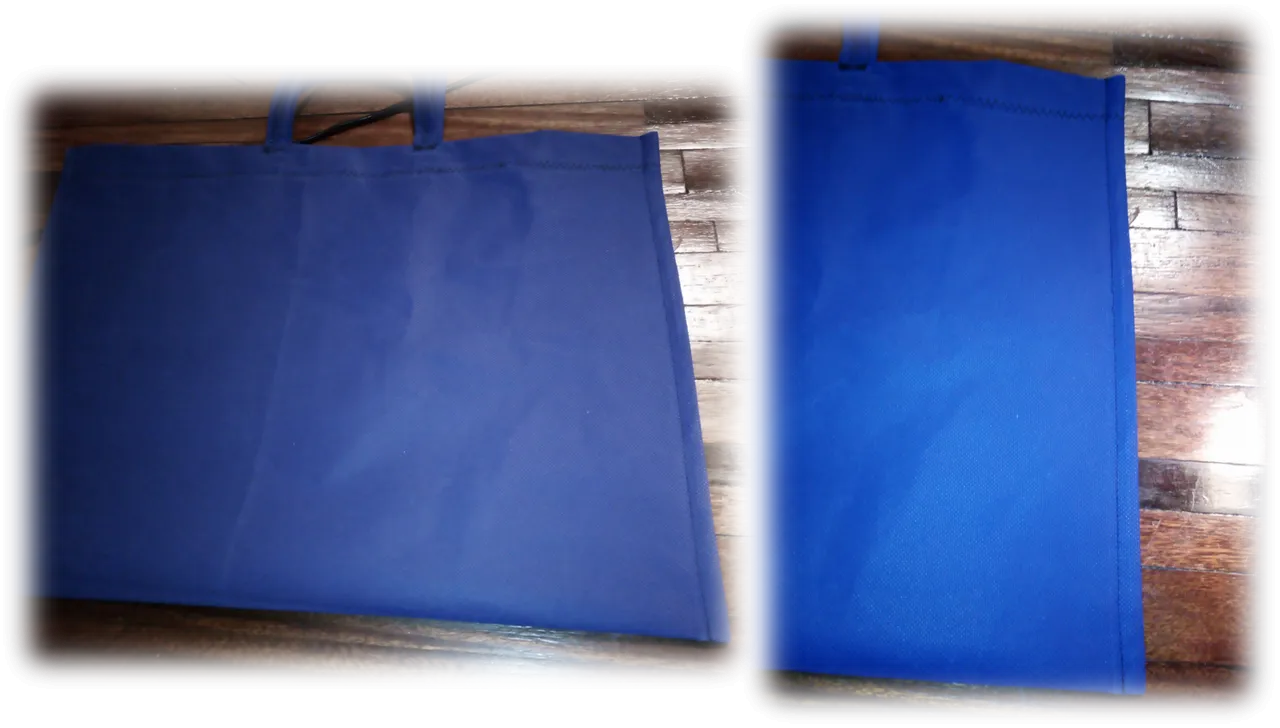
Ya con el dobladillo terminado y las asas fijadas en su lugar, toca cerrar los lados de la bolsa, para ello pasaremos la costura a cada lado a un centímetro del borde, aproximadamente. Luego le daremos la vuelta a la bolsa, ya que hasta ahora hemos estado trabajando por la parte interna de la bolsa. Estiraremos bien las costuras y guiándonos por la tela que nos quedó sobrando después de pasar la costura interna, pasaremos una nueva costura. Con ello, ocultaremos este borde y le daremos más fortaleza a las costuras laterales de nuestra bolsa.
Once the hem is finished and the handles are in place, it's time to close the sides of the bag, for this we will sew the seam on each side about one centimeter from the edge. Then we will turn the bag inside out, since so far, we have been working on the inside of the bag. We will stretch the seams well and using the fabric that we have left over after sewing the internal seam, we will sew a new seam. With this, we will hide this edge and give more strength to the side seams of our bag.
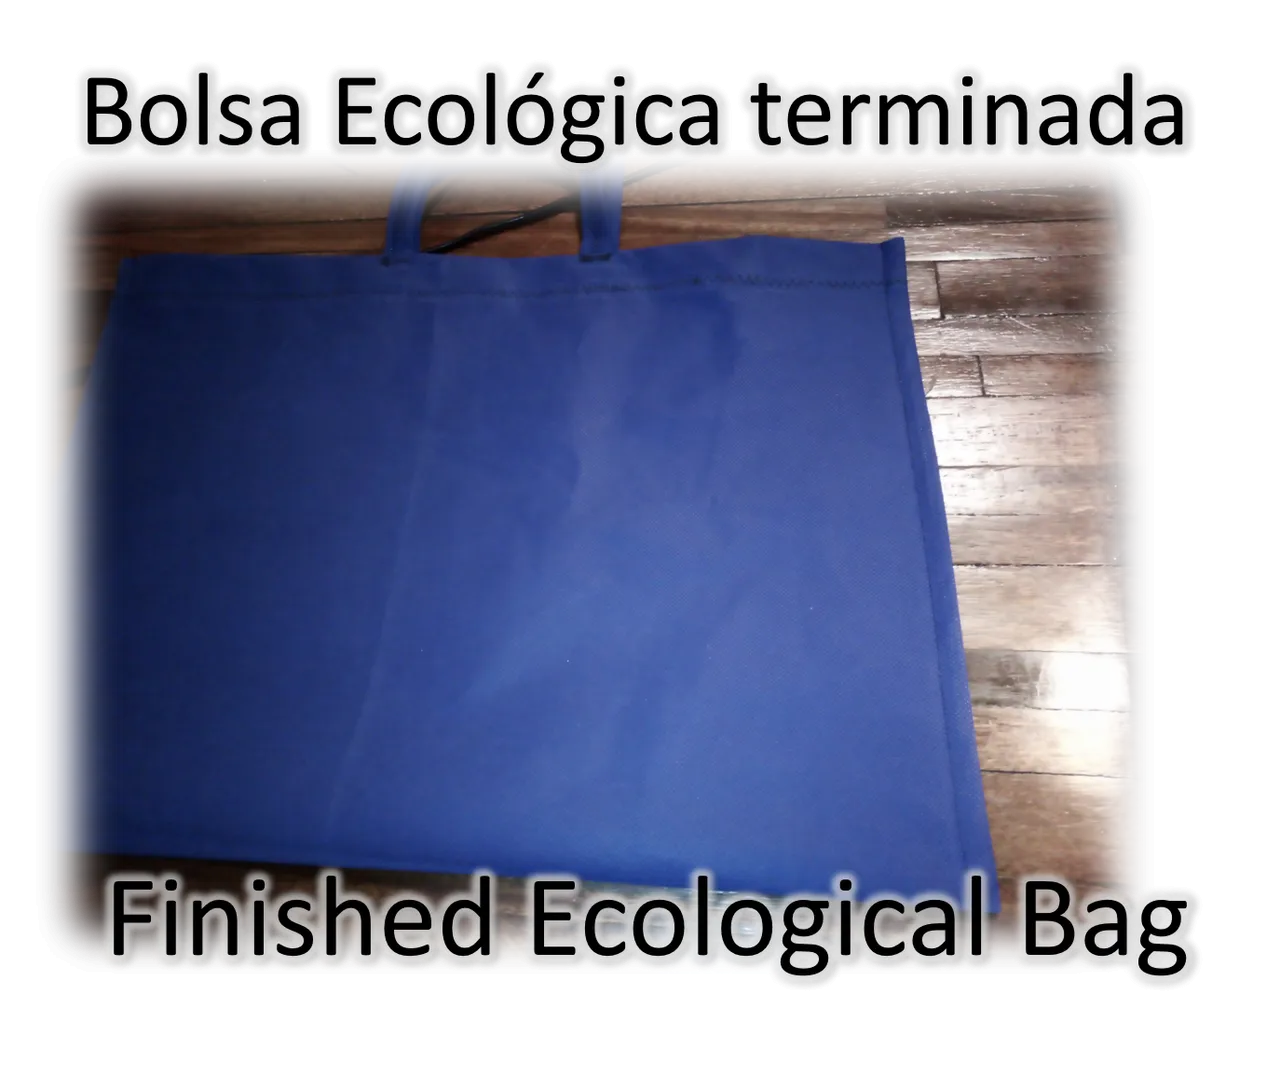
Bueno, hasta aquí llega el trabajo correspondiente a la elaboración de la bolsa, en adelante, ya es parte de ustedes como decidan decorarla, pueden usarla, así como esta, si la usarán solo para llevarla al mercado. O si le darán un uso más creativo, pueden bordarle un lindo motivo, también pegarle una linda calcomanía o aplicación, en fin, tienen muchas opciones. Como les dije inicialmente, los que les traje en esta oportunidad en un lienzo en blanco, donde ustedes pueden dar rienda suelta a su creatividad. Por ahora, me despido esperando que les gustara este nuevo proyecto que les traje.
Well, this is the end of the work corresponding to the elaboration of the bag, from now on, it is up to you how you decide to decorate it, you can use it, just as it is, if you will use it only to take it to the market. Or if you will give it a more creative use, you can embroider it with a nice motif, also stick a nice sticker or application, in short, you have many options. As I said initially, what I brought you this time is a blank canvas, where you can give free rein to your creativity. For now, I say goodbye hoping you liked this new project I brought you.
Contenido y fotografías de mi propiedad intelectual
Información Técnica
| Cámara | Pentax * istDL |
|---|---|
| Lente | * Pentax 18-55 |
| Iluminación | Luz Natural |
| Locación | Barcelona, Estado Anzoátegui, Venezuela |
Content and photographs of my intellectual property
Technical information
| Camera | Pentax * istDL |
|---|---|
| Lens | * Pentax 18-55 |
| Lighting | Natural Light |
| Location | Barcelona, Anzoátegui State, Venezuela |