How to make an elegant personalized cross stitch label | Cómo elaborar una elegante etiqueta personalizada en punto de cruz


image.png
Fuente del fondo

ENGLISH / ESPAÑOL

Hello, friends of this great Hive platform, as well as the HiveDIY community, through which I have the pleasure of bringing to you another delicate handmade work that will give a personalized touch to your gifts or as an accompaniment to the services or products you offer, something like a commercial label for your business.

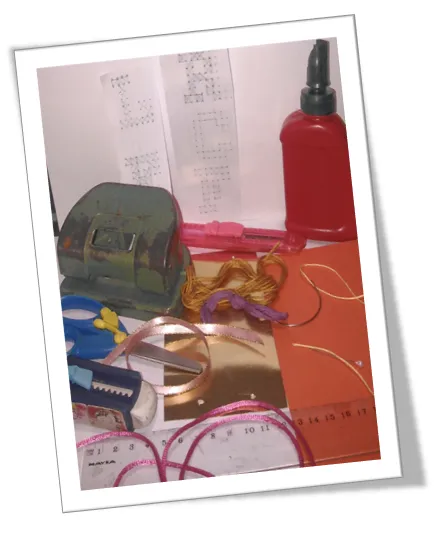
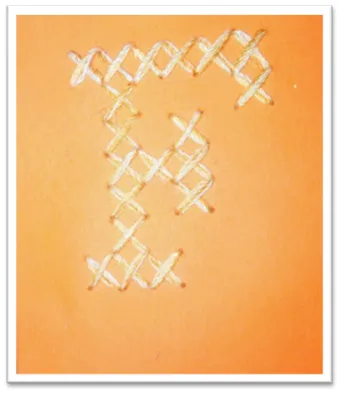
This is a delicate label signed with the initial of your name, hand embroidered in cross stitch!

As a promise is a promise, the realization of this work will allow an initial approach to cross stitch, for those who have not yet put hands to the needle and embroidery threads.

Hola, amigos de esta gran plataforma de Hive, al igual que a la comunidad HiveDIY, a través de la cual tengo el agrado de llevar hasta ustedes otra delicada obra manual que dará un toque personalizado a tus obsequios, o también como acompañamiento a los servicios o productos que ofrezcas, algo así como una etiqueta comercial de tu negocio.

Se trata de una delicada etiqueta firmada con la inicial de tu nombre, bordada a mano en punto de cruz!

Como lo prometido es deuda, la realización de esta obra permitirá un acercamiento inicial al punto de cruz, para los que aún no se puesto manos a la aguja e hilos de bordar.
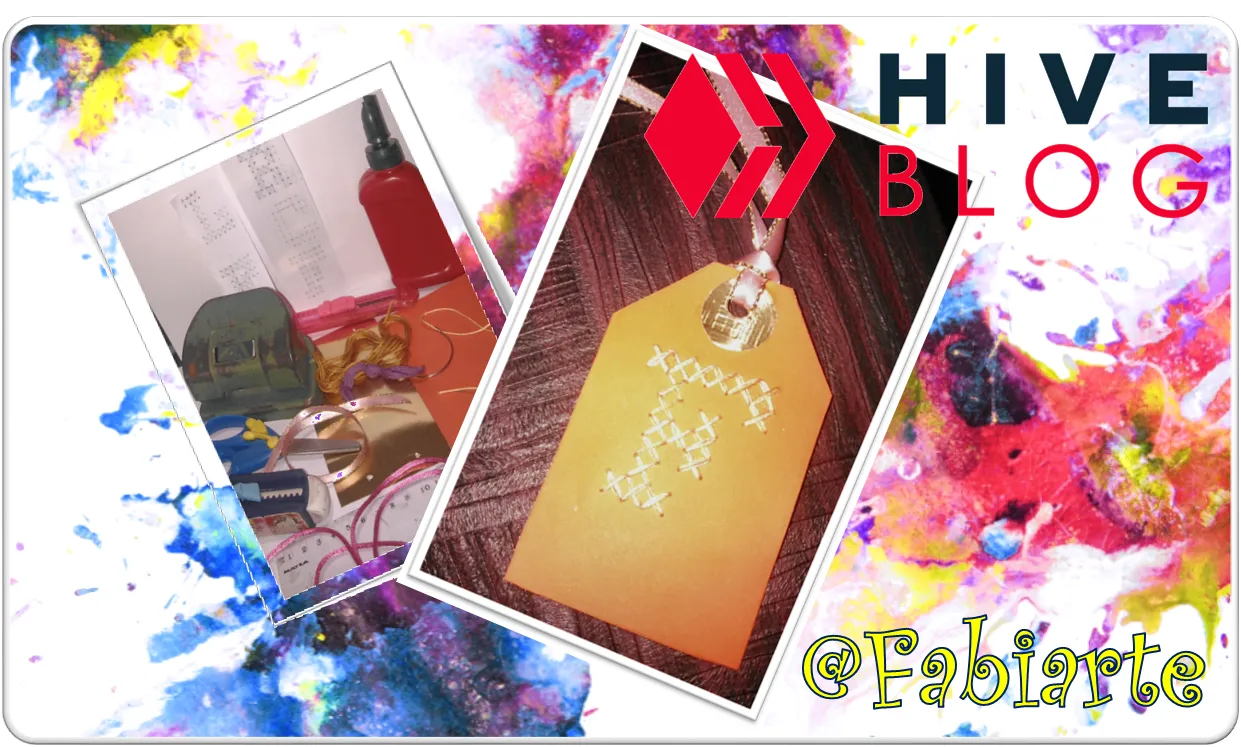

MATERIALS / MATERIALES

image.png

  • Cardboard,
  • Paper,
  • Glue,
  • needle,
  • Threads,
  • Scissors,
  • Ruler,
  • Pencil,
  • hole punch.
  • Cartulina,
  • Papel,
  • Pega,
  • Aguja,
  • Hilos,
  • Tijera,
  • Regla,
  • Lápiz,
  • Perforador.

ELABORATION / ELABORACIÓN

image.png

1. The first step is to make the pattern. You can print it, or draw on a piece of paper the letter we choose for our project, I chose the F of my name, marking well the points where the needle must pass.
1. El primer paso a realizar es el patrón. Pueden imprimirlo, o dibujar en un papel la letra que escogimos para nuestro proyecto, yo escogí la F de mi nombre, marcando bien los puntos por donde debe pasar la aguja.

image.png

2. Tape the pattern of the letter to the cardboard already cut to the chosen size. Pierce the pattern and the cardboard together with a needle or pin through all the points of the letter.
2. Fijar con la cinta adhesiva el patrón de la letra a la cartulina ya recortada con el tamaño elegido. Atravesar el patrón y la cartulina juntos con aguja o alfiler por todos los puntos de la letra.

3. Peel the pattern off the cardboard already pierced. Thread the needle with the thread (I used double thread with the help of a threader). Tie a knot at the end of the thread.
3. Despegar el patrón de la cartulina ya agujerada. Enhebrar la aguja con el hilo (yo usé hilo doble con la ayuda de un enhebrador) Atar un nudo al cabo del hilo.

image.png

4. Start embroidering, inserting the needle through the back of the letter, from its base, into the first hole on the top line of the base.
4. Comenzar a bordar, introduciendo la aguja por la parte trasera de la letra, desde su base, en el primer agujero de la línea superior de la base.

image.png

5. Then, insert the needle again through the front, in the second hole of the lower line.
5. Luego, introducir nuevamente la aguja por el frente, en el segundo agujero de la línea inferior.

image.png

6. Repeat this same stitch two more times until the end.
6. Repetir esta misma puntada dos veces más hasta el final.

image.png

7. At this point, perform the same procedure but on the opposite side 3 times, reaching the starting point, and creating 3 crosses,
7. Llegados a este punto, realizar el mismo procedimiento, pero al lado contrario 3 veces, llegando al punto de inicio, creando 3 cruces,

image.png

8. At the beginning of the stitch, we bring the needle up through the back three holes, and pull it out through the front, and repeat the stitch only once. Forming a single cross.
8. Estando en el inicio, por el reves subimos la aguja tres agujeros arriba, y la sacamos por el frente, y repetimos la puntada una sola vez. Formando una sola cruz.

image.png

9. We go back up the needle three holes, and we find that it is not a single cross, but two, leaving a space in between. So we are going to pull the needle out leaving one hole free. At the end of this line you will notice on the back of the label a cross in the middle of vertical lines.
9. Volvemos a subir la aguja tres agujeros, y encontramos que no es una sola cruz, sino dos, dejando un espacio de por medio. Asi que vamos a sacar la aguja dejando un agujero libre. Al terminar esta línea se notará en el reverso de la etiqueta una cruz en medio de líneas verticales.y seguimos siguiendo la forma de la letra hasta terminarla.


image.png

image.png

image.png

When the embroidery is finished, we cut out the top edges in the shape of your choice. You can put a small circle of cardboard of a different color in the place where our label will be punched. Cover the back of the embroidery with another cardboard of the same color and glue it with white glue. It is advisable to let it dry well before punching. I stepped on it with some books so that it would be completely flat. After the drying time has passed, we perforate the holes and apply the ribbon we have chosen for our label.

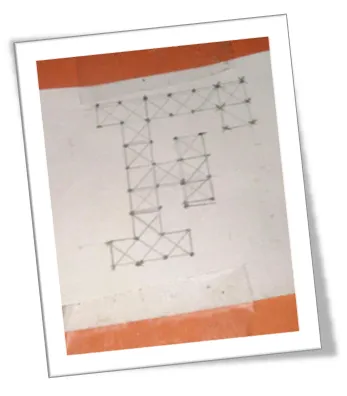
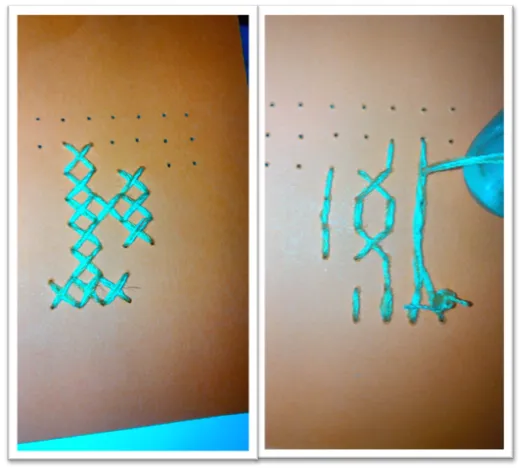
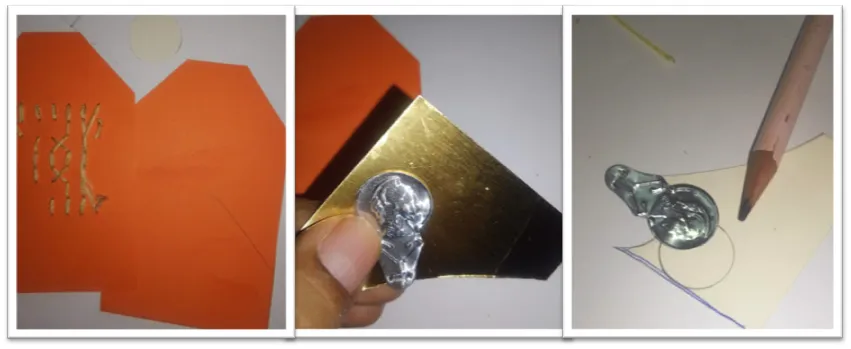
Al terminar el bordado, recortamos los bordes superiores en la forma que elijas. Puedes poner un circulo pequeño de cartulina de otro color en el lugar donde va a perforarse nuestra etiqueta.
Cubrimos el reves del bordado con otra cartulina del mismo color y la pegamos con pega blanca.
Es aconsejable dejar secar bien antes de perforar. Yo la pisé con unos libros para que quedara completamente plana. Pasado el tiempo de secado, perforamos y pasamos la cinta que elejimos para nuestra etiqueta.

image.png

In the end, choose anything that will give the appearance of die-cutting on the gilt edge. I chose to go over the gilt circle with the edge of a thick lid, which had some engraved shapes that looked like gears.

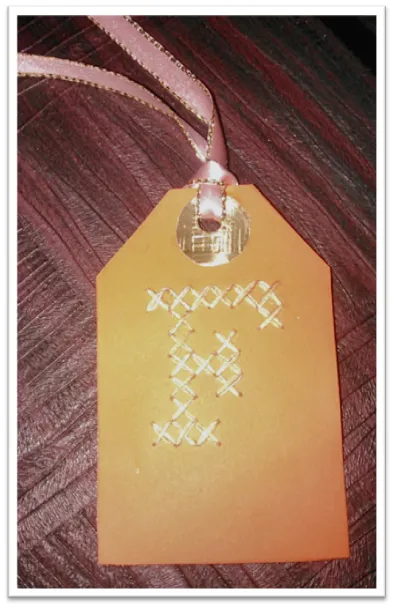
And that's it, a beautiful tag with your initial, with many uses and for all occasions! I hope it can be an inspiration for you!

Until next stitch!

Al final, escoger cualquier cosa que sirva para darle aspecto de troquelado al borde dorado. Yo elefí pasar sobre el círculo dorado, el borde de una tapa gruesa que tenía grabadas unas formas que parecían engranajes.

Y listo!, una linda etiqueta que con tu inicial, con muchos usos y para toda ocasión! Espero pueda servirles de inspiración!

¡Hasta una próxima puntada!


Las fotos son de mi autoría.
Traducido con https://www.deepl.com/translator

H2
H3
H4
3 columns
2 columns
1 column
2 Comments
Ecency