
Buenas noches queridos amigos, como están?
Para este paso a paso necesitas los siguientes materiales:
| Círculo de cartón reciclado | Cartulinas negra blanca y naranja |
|---|---|
| Tubo de papel sanitario | Pinturas y pinceles |
| Rama seca de arbol | Tijera |
| Lápiz y moldes de papel | Regla |
| Silicón líquido | Lija |
| Cuchilla | Icopor |
| Palitos de madera |

Continuamos con el procedimiento:
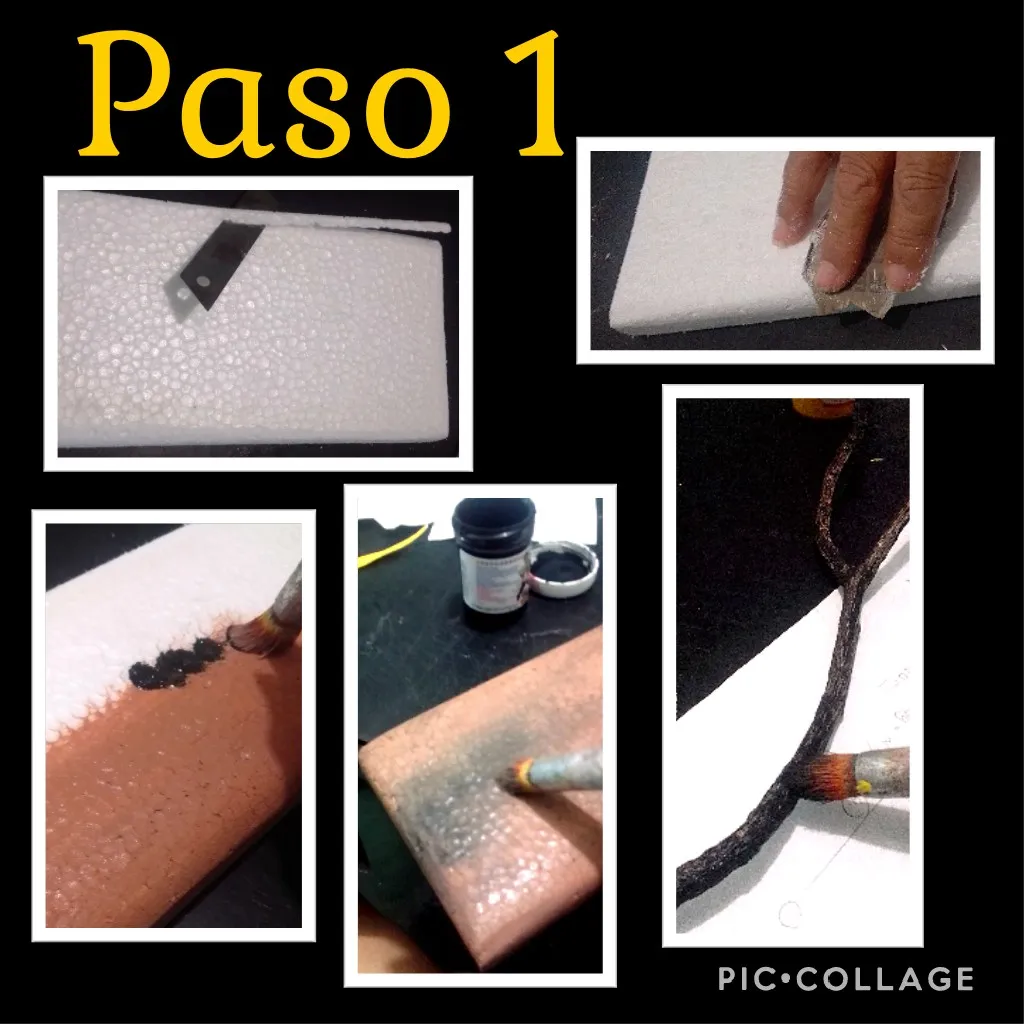
- En este primer paso, recorta un rectángulo en icopor y con la cuchilla recorta el filo de la orilla, lija y pinta en marrón y para oscurecer con la pintura aún húmeda, aplica un poco de pintura en negro y une, esto es para darle tonos a la base y después pinta la rama seca con pintura negra y deja secar.
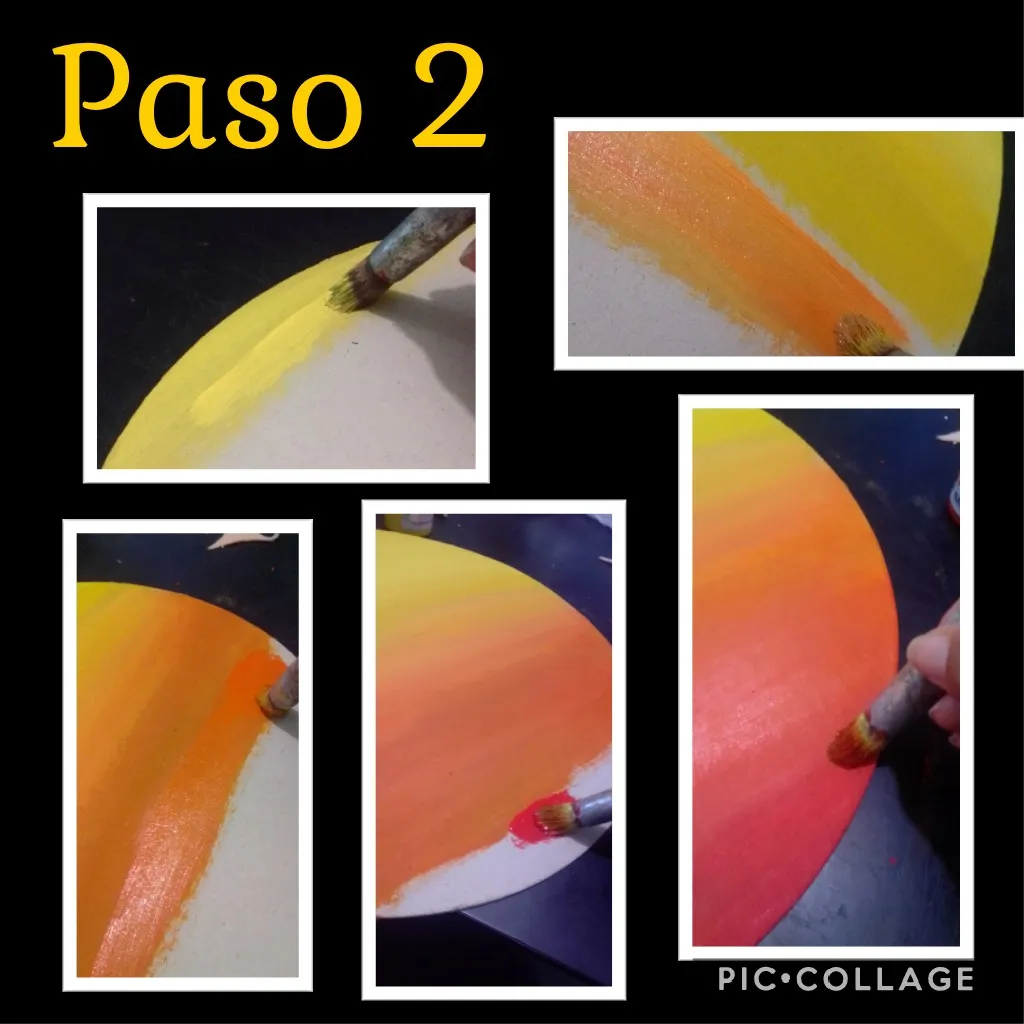
- Ahora con color amarillo, empieza a pintar en la parte superior del círculo de un extremo a otro hasta llegar a la mitad, luego con pintura amarilla más intensa comienza a aplicar tratando de unir con la amarilla y por último aplica rojo, tratando de unir siempre un color con otro, esto es para formar nuestro atardecer tenebroso y deja secar bien.
Ahora viene lo más fácil!..

- Coloca los moldes sobre las cartulina correspondientes y empieza
a recortar cada una de las imágenes que te gusten, también puedes colorear. - Ahora pega detrás del círculo un palito de madera.

- Aquí introduce el círculo de cartón con un poco de silicón en el palito y pega al icopor, después pega dos palitos de madera al castillo de cartulina y clava en todo el frente del círculo.
- Ahora con la punta de un palito de madera has un orificio a un lado del castillo para meter y pegar la rama seca, de verdad que esto es muy fácil.
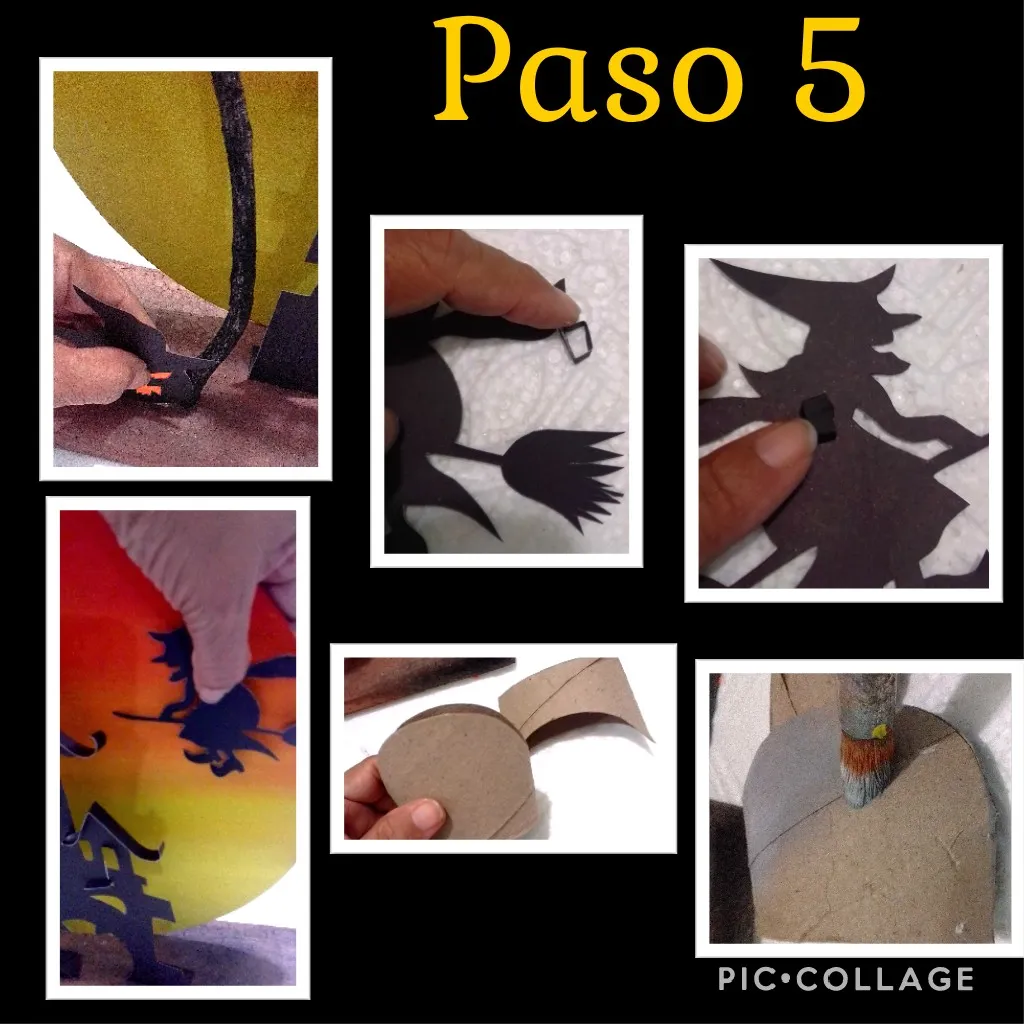
- Para dar altura o relieve, recorta una tira y dobla en cuatro para formar un cuadrado y pegarlo a la bruja, para luego pegarlo al círculo.
- Aparte dobla por la mitad un tubo de papel sanitario, y recorta en forma redondeada la parte superior y pinta en gris.

- Después de pintar deja secar bien, dibuja grietas e iniciales y recorta una cruz en negro y pega a la tumba, aparte recorta un fantasmita en cartulina blanca, colorea y pega a la tumba y sigue decorando, pega murciélagos en la rama y todas las figuras que gustes.
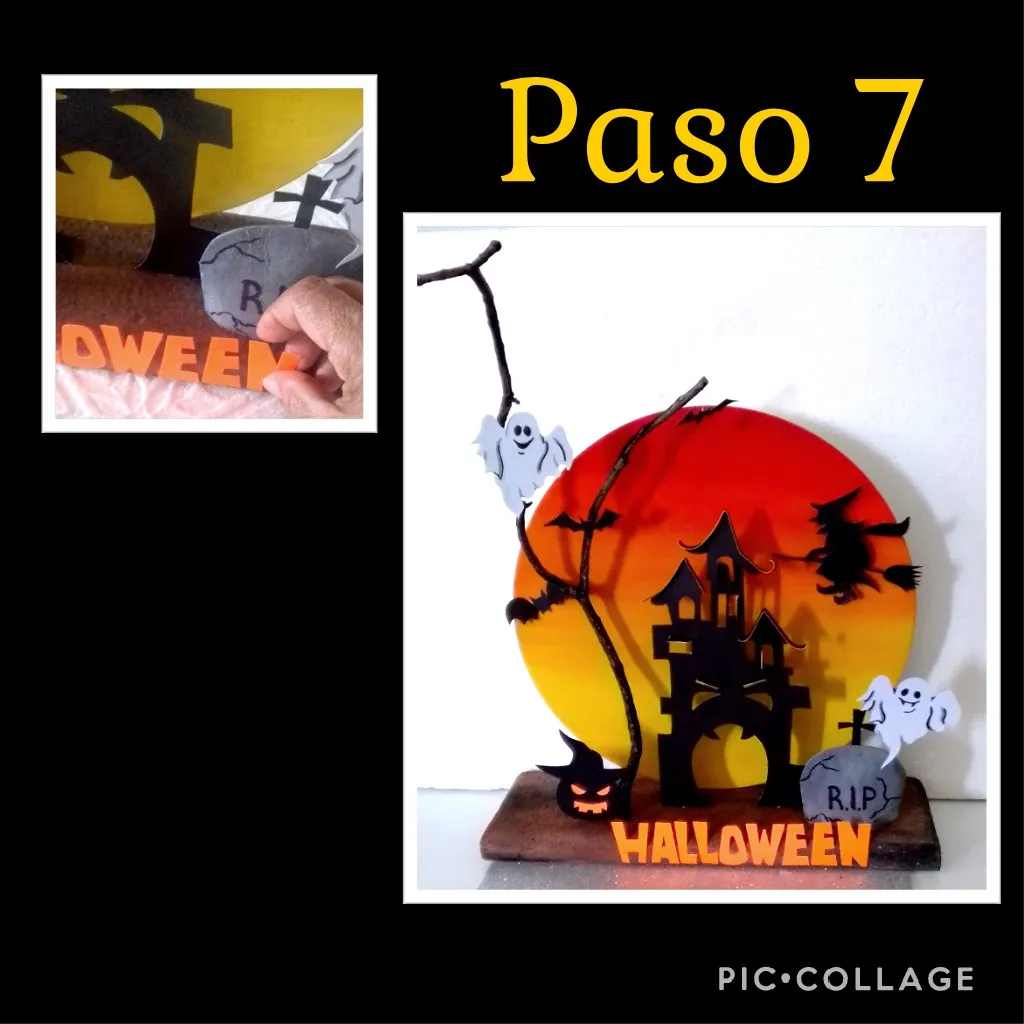
- Por último recorta la palabra Halloween en cartulina y pega para decorar.
Espero tu comentario y ojalá te guste, es un trabajo que puedes realizar en menos de 1 hora y no necesitas ser experto para lograrlo.
Mira el resultado
fuente: https://es.123rf.com/photo_10569755_castillo-de-halloween-negro-y-la-luna-ilustraci%C3%B3n-animada-de-vector-.html
Mi publicación esta traducida por DeepL, editada con Etiquetas HTML y fotos de mi propiedad, capturadas con mi Blu G5.
Ahora si me despido felíz de compartir con ustedes,
muchas gracias por tu visita.
English:
Good evening dear friends, how are you?
For this step-by-step you will need the following materials:
| recycled cardboard Circle | black, white and orange cardboard |
|---|---|
| Tubed toilet paper | Paints and paintbrushes |
| Dry tree branch | Scissors |
| paper Molds | Ruler Pencil |
| Liquid silicone | Sandpaper |
| Icopor | Knife |
| Wooden sticks |
Continue with the procedure:
- In this first step, cut out a rectangle in styrofoam and with the knife cut the edge of the border, sand and paint with brown and to darken with the paint still wet, apply a little black paint and join, this is to give tones to the base and then paint the dry branch with black paint and let it dry.
- Now with yellow color, start painting on the top of the circle from one end to the other until you reach the middle, then with more intense yellow paint start applying trying to unite with the yellow and finally apply red, always trying to unite one color with the other, this is to form our dark sunset and let it dry well.
Now comes the easiest part!
- Place the molds on the corresponding cardboard and start cutting out each one of the
cut out each of the images you like, you can also color them. - Now glue a wooden stick behind the circle.
- Here insert the cardboard circle with a bit of silicone on the stick and glue it to the cardboard, then glue two wooden sticks to the cardboard castle and glue all around the front of the circle.
- Now with the tip of a wooden stick make a hole on one side of the castle to put and glue the dry branch, this is really easy.
- To give height or relief, cut a strip and fold it in four to form a square and glue it to the witch, then glue it to the circle.
- Apart fold in half a toilet paper tube, and cut in a rounded shape the top and paint in gray.
- After painting, let dry well, draw cracks and initials and cut out a cross in black and glue it to the tomb, then cut out a little ghost in white cardboard, color and glue it to the tomb and continue decorating, glue bats on the branch and all the figures you like.
- Finally cut out the word Halloween on cardboard and glue to decorate.
I hope you like it, it's a job that you can do in less than 1 hour and you don't need to be an expert to do it.
Look at the result.
source: https://es.123rf.com/photo_10569755_castillo-de-halloween-negro-y-la-luna-ilustraci%C3%B3n-animada-de-vector-.html
My publication is translated by DeepL, edited with HTML tags and photos of my property, captured with my Blu G5.
Now I am happy to say goodbye and share with you,
thank you very much for your visit.