Happy Monday to all my appreciated panitas of Hive on this occasion I want to bring you my participation in the contest the world of cardboard that is promoting the community of #hivediy and I bring you a tutorial on how to elaborate a mini elevator I hope you like the idea.
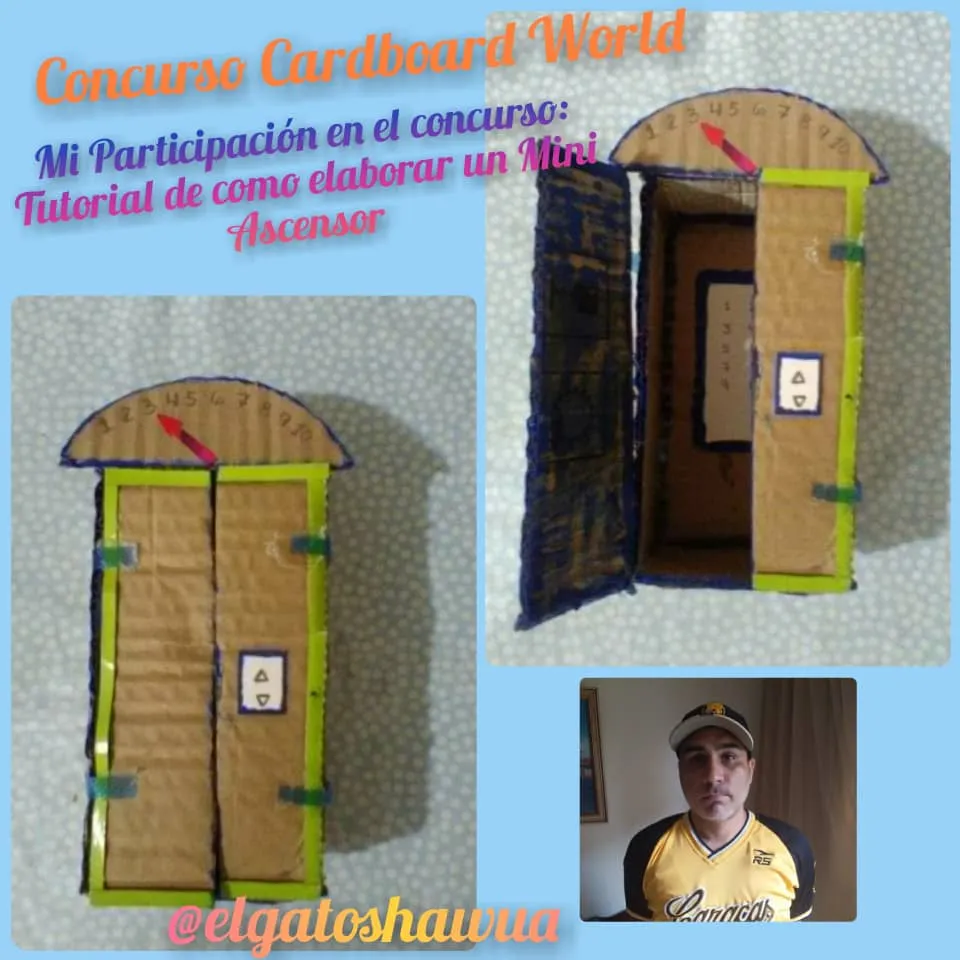
Feliz lunes para todos mis apreciados panitas de Hive en esta ocasión quiero traerle mi participación en el concurso el mundo del cartón que está promocionando la comunidad de #hivediy y yo les traigo un tutorial de cómo elaborar un mini ascensor espero que les guste la idea.
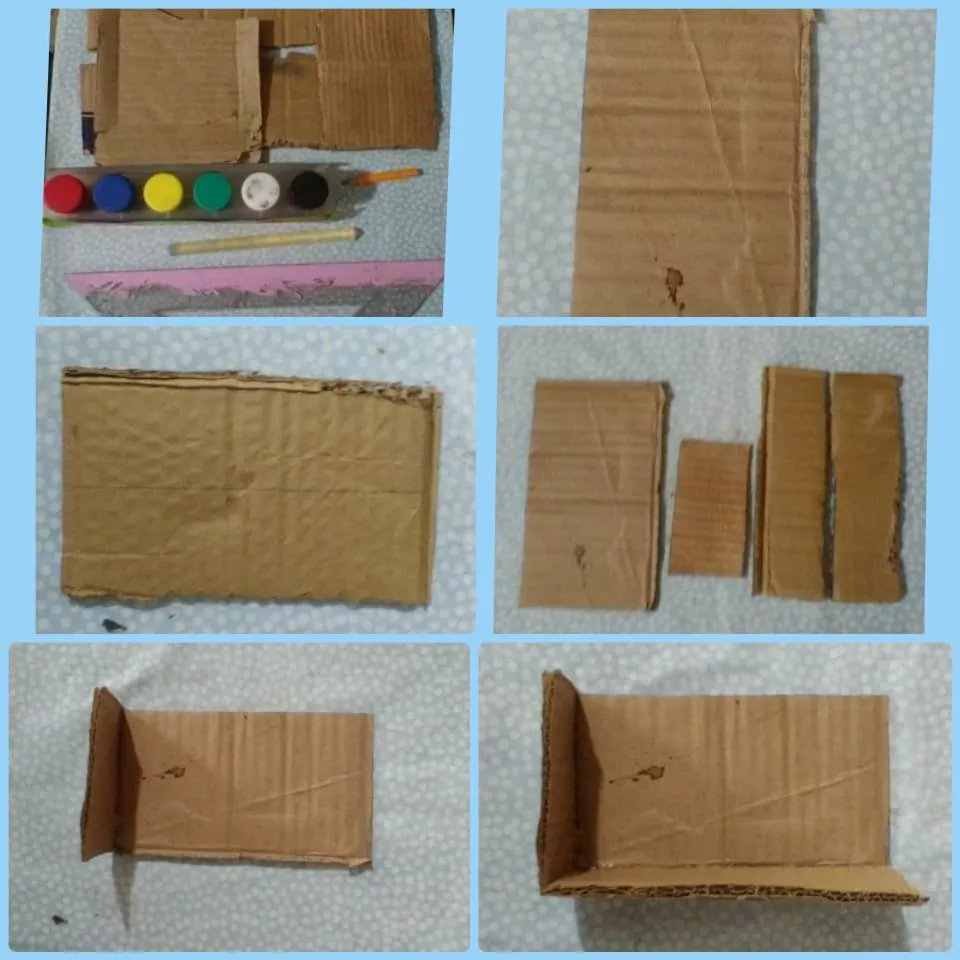
Materials:
Box cardboard, scissors, silicone, paintbrush, tempera, green cardboard, blue plastic cardboard cutout, white sheet.
Materiales:
Cartón de caja, tijera, silicón, pincel, témpera, cartulina verde, recorte de cartulina de plástico azul, hoja blanca.
Step by step tutorial to make the mini elevator.
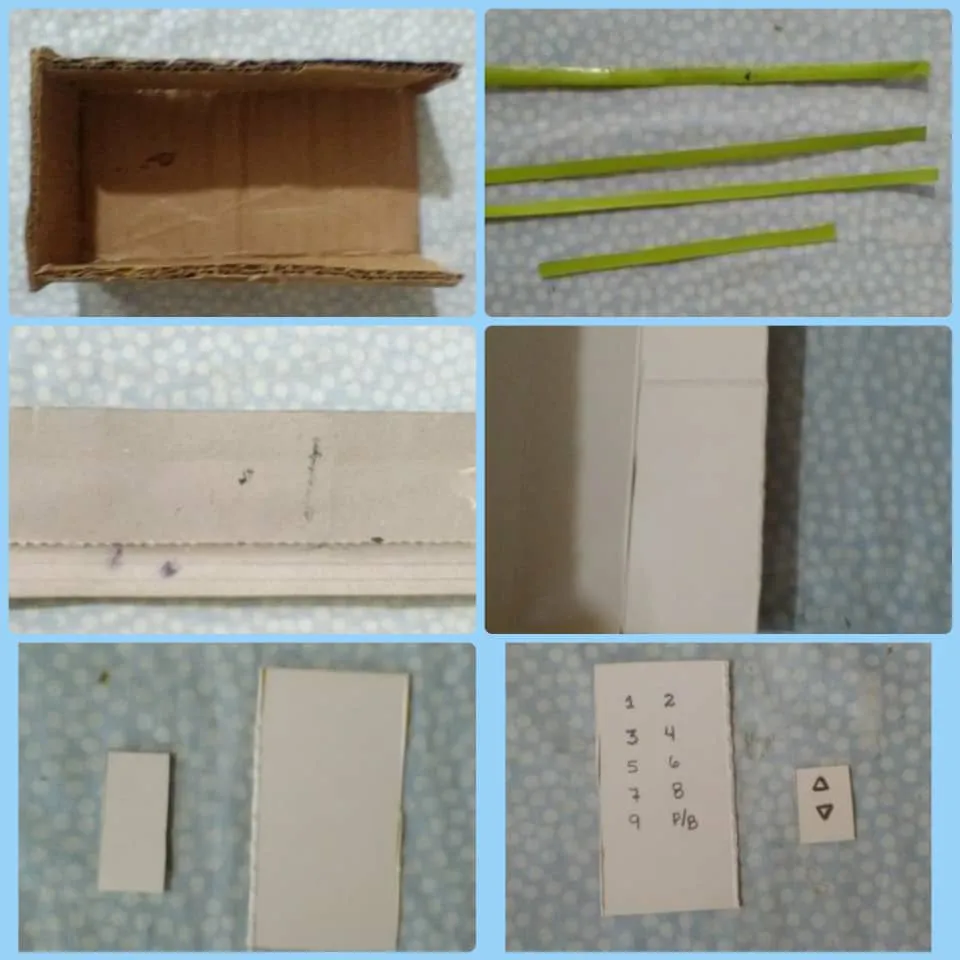
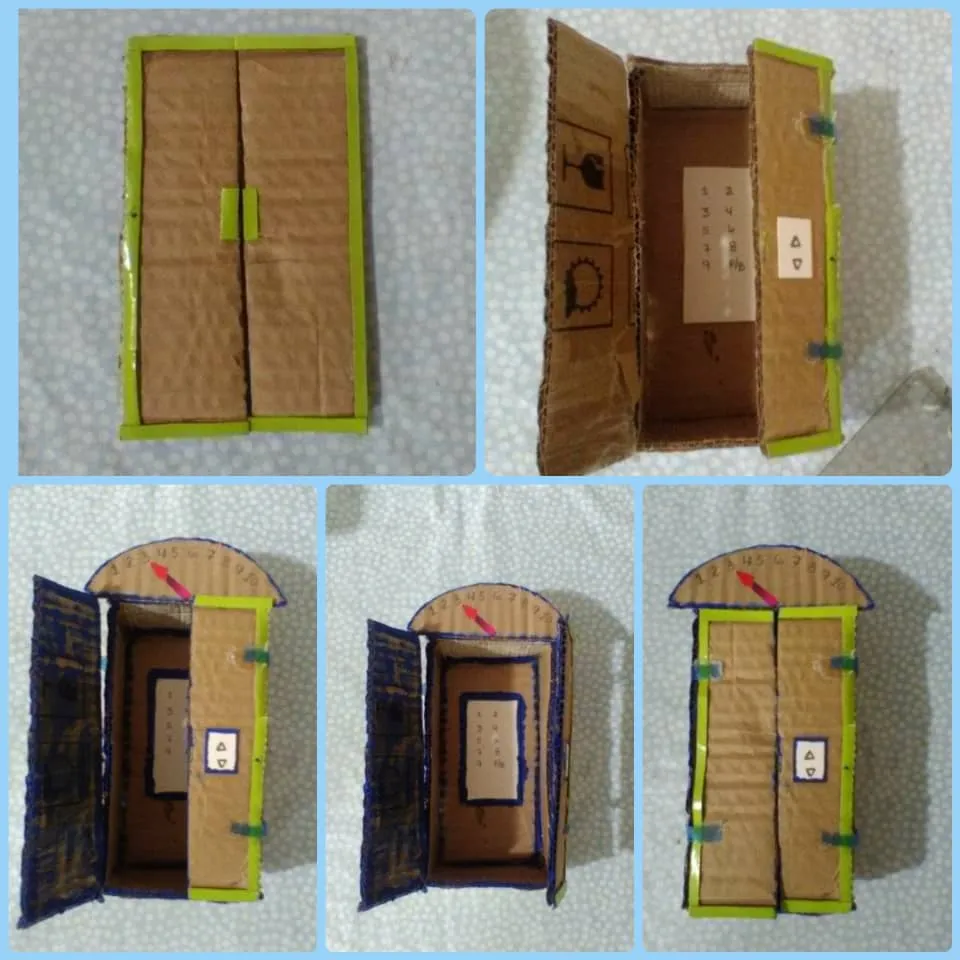
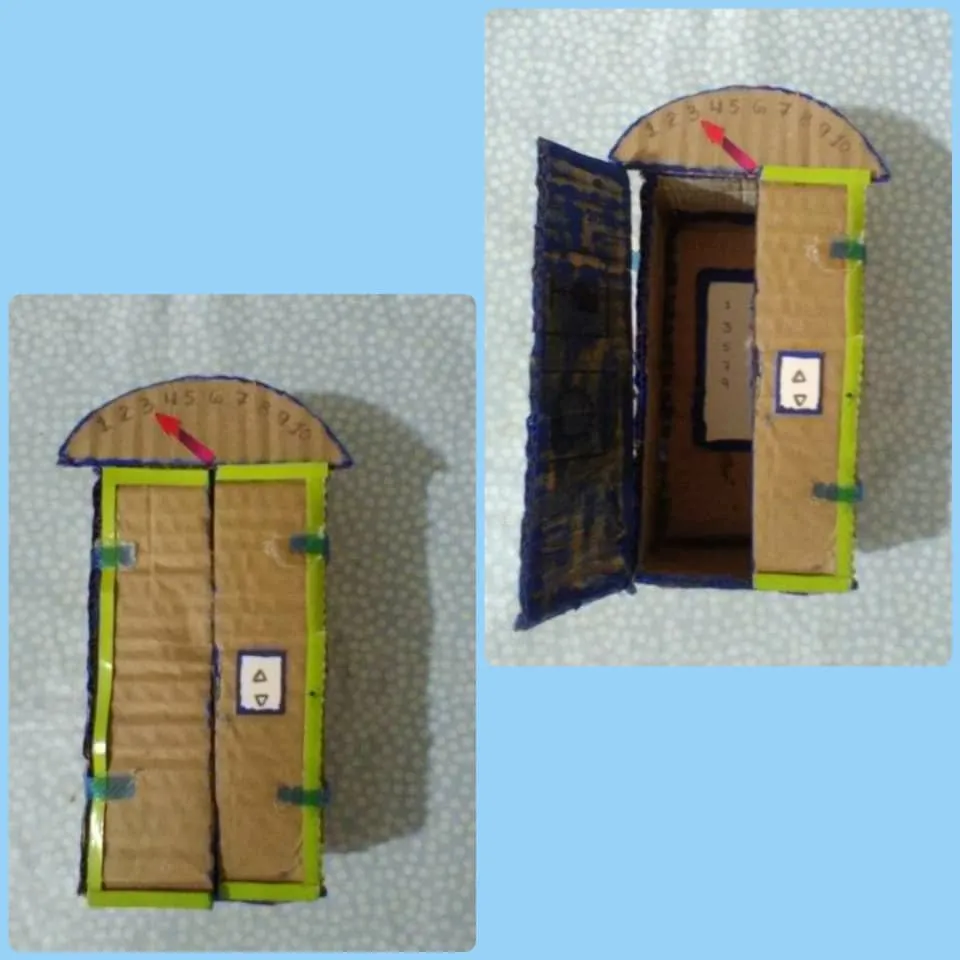
In a box we are going to draw a rectangle of 15 x 8 cm also two strips of 15 x 4 cm also 2 rectangle of 8 x 5 cm when we have all these pieces proceed to glue to assemble the box in turn we will cut in the cardboard another rectangle of 15 x 8 cm and we will divide in two to create the doors of the elevator then with the cardboard we are going to make the doors of the elevator. then with the green cardboard we are going to cut out some strips and glue them on each of the edges of the door, also with the white cardboard we are going to cut out a rectangle and draw the numbers of the different floors, we are going to glue them on the inside of the elevator and we are going to draw the numbers that represent going up and down. and we will draw what they represent to go up and down then in the cardboard we are going to cut a semicircle that we were going to paste in the part of above where we are going to write the numbers that are going to represent the floors of the elevator and we cut an arrow that is going to be pasted and to give him a better appearance the elevator we proceed to paint of blue color giving him different shades in the doors and in the internal part then we are going to cut four small strips the blue plastic cardboard we were going to paste in the doors to join with the created box of the same one being thus as they show the photos.
Paso a paso del tutorial para elaborar el mini ascensor.
En una caja vamos a dibujar un rectángulo de 15 x 8 cm también dos listones de 15x 4 cm igualmente 2 rectángulo de 8 x 5 cm al tener todas estas piezas procedemos a pegar para armar la caja a su vez vamos a recortar en el cartón otro rectángulo de 15 x 8 cm y nos vamos a dividir en dos para crear las puertas del ascensor luego con la cartulina verde vamos a recortar unos listones y lo pegamos en cada uno de los bordes de la puarta igualmente con la cartulina Blanca a recortar un rectángulo y a dibujar los números de los diferentes pisos vamos a pegar en el interior del ascensor y dibujaremos que representan subir y bajar después en el cartón vamos a recortar un semicírculo que íbamos a pegar en la parte de arriba donde vamos a escribir los números que van a representar los pisos del ascensor y recortamos una flecha que va a ser pegada y para darle una mejor apariencia el ascensor procedemos a pintar de color azul dándole diferentes matices en las puertas y en la parte interna luego vamos a recortar cuatro pequeños listones la cartulina plastico azul íbamos a pegar en las puertas para unir con la caja creada del mismo quedando así como muestran las fotos
Thank you for reading me and your valuable support, I'll see you another time.
Fotos de mi autoría @elgatoshawua.
Photos by me @elgatoshawua.
Translated with www.DeepL.com/Translator (free versión)