Hello, Friends!
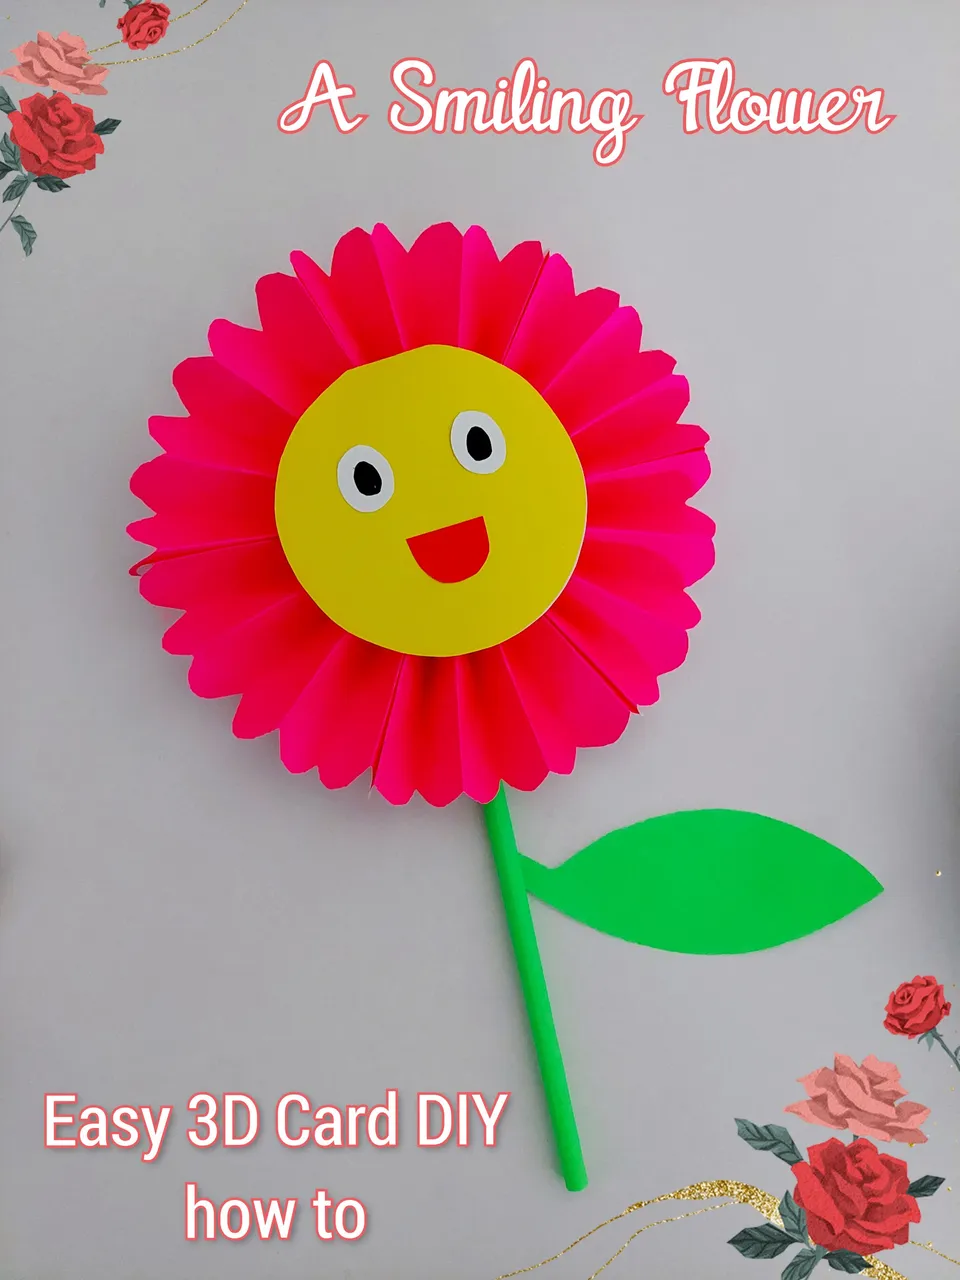
I just made this 3D flower card, really cute and mom really likes it :) so i think to share how i made it with you all... it was easy and fun to make.
THE MATERIALS & THINGS NEEDED:
- 15x15 cm origami papers, i chose the highlight colour in pink, yellow, green, then i also used black and red.
- plastic straw
- scissors
- pencil
- a circle shaped thing
- double sided tape
- glue
THE STEPS:
1st
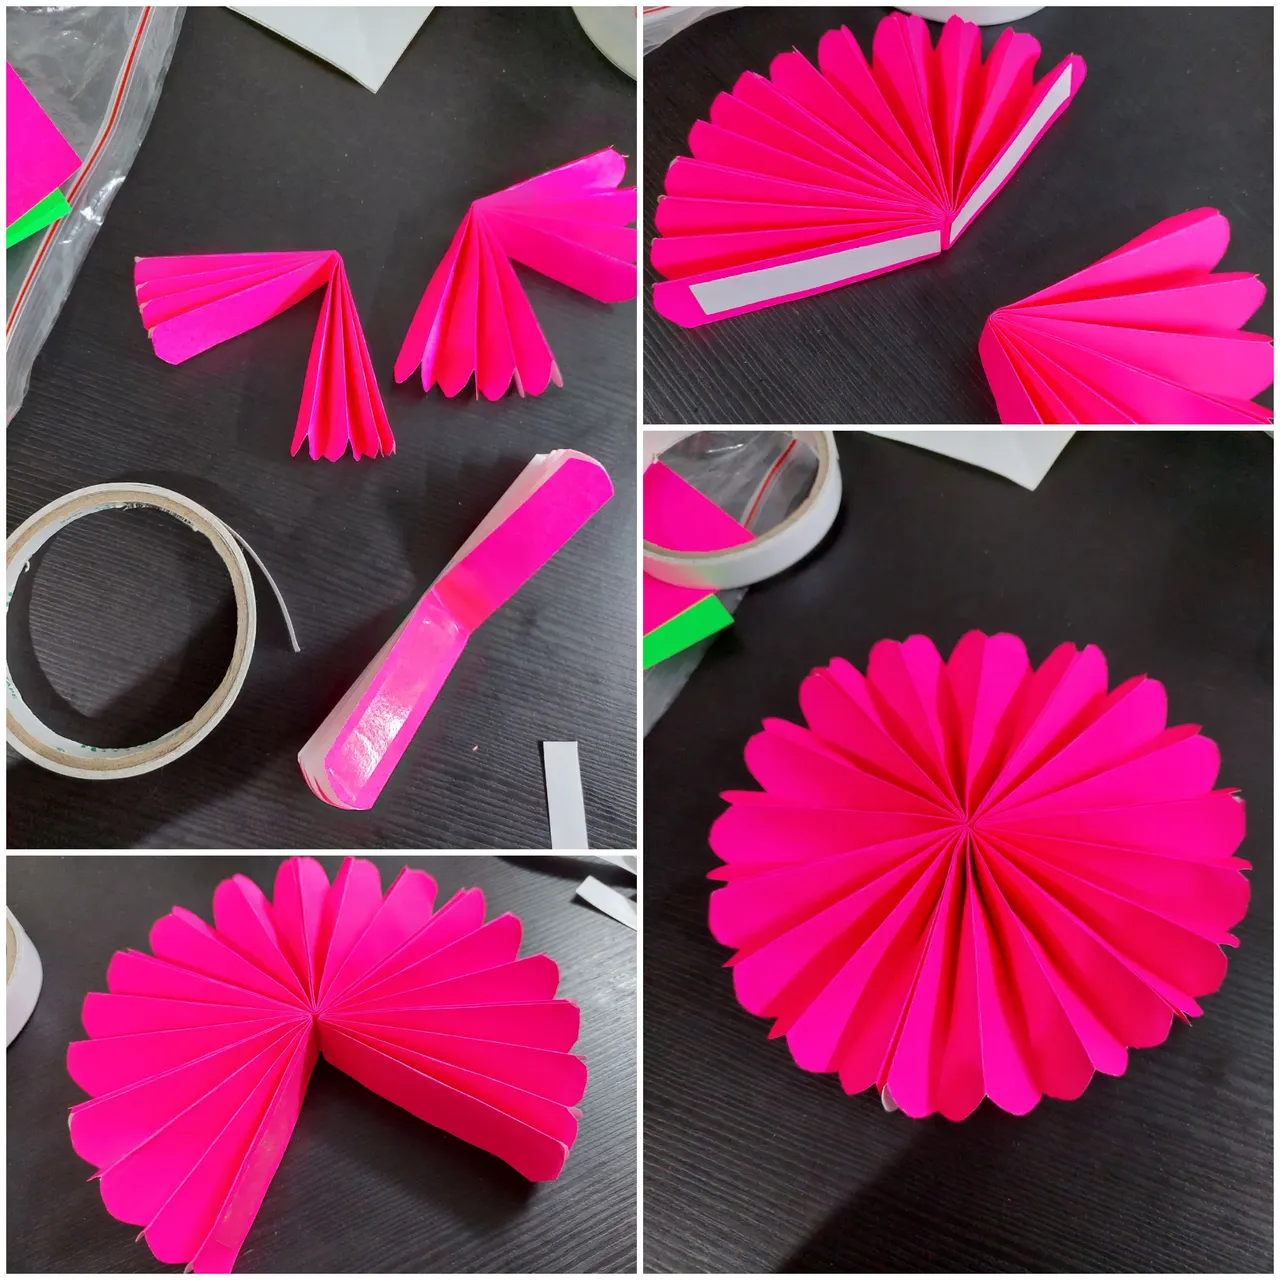
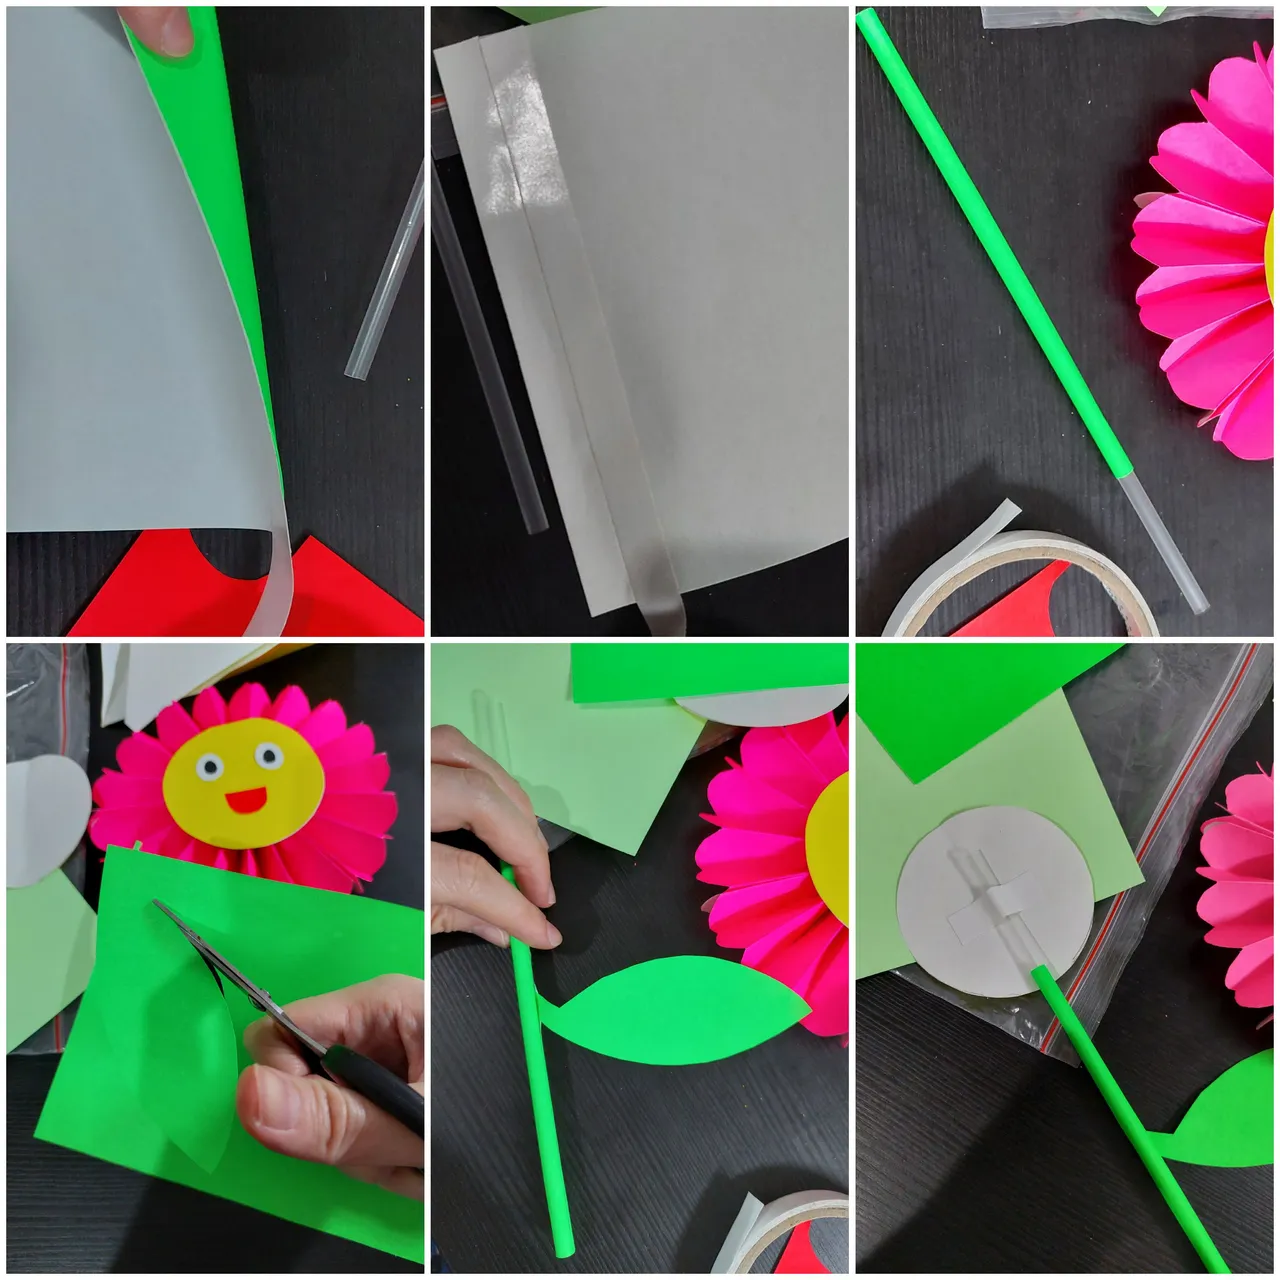
Fold the pink paper to 8 equal small rectangles like below. Fold them in the center to divide them into 2 equal parts on left and right. Do the same for other 2 pink papers then trim them on the sides.

2nd
Paste the double sided tape on each side of the pink paper to join them together. The result would the beautiful pink flower.
3rd
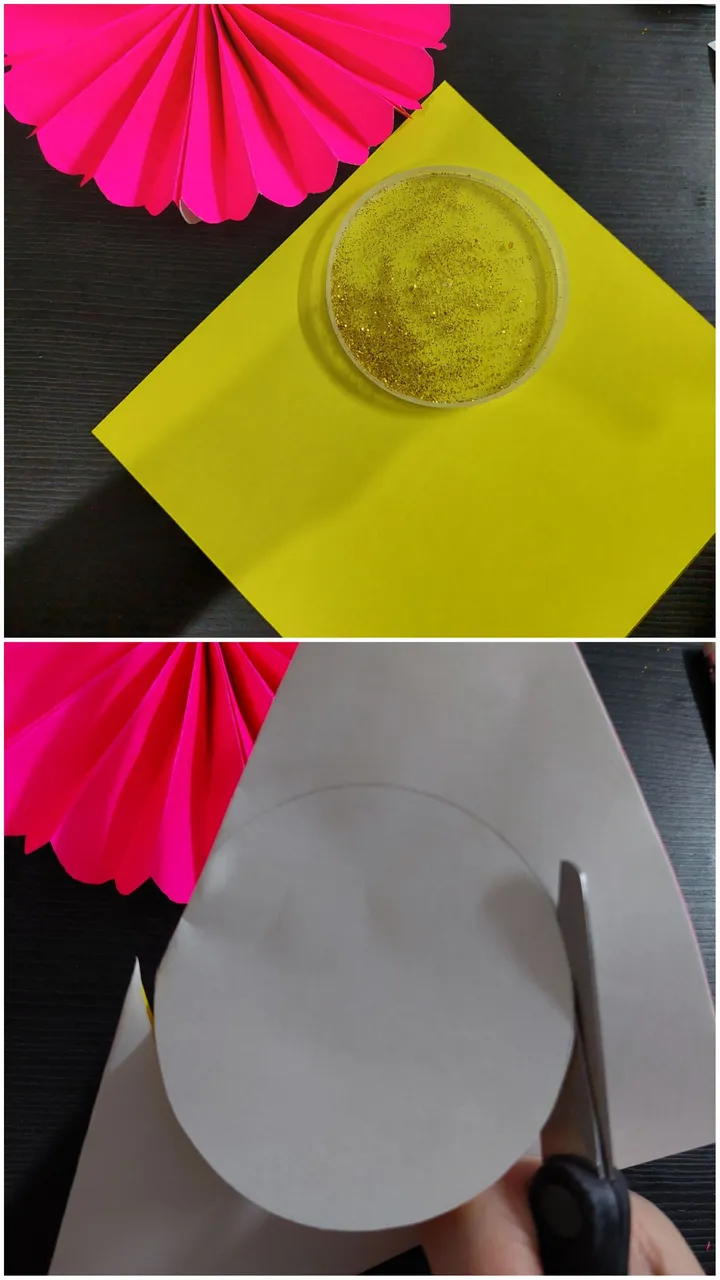
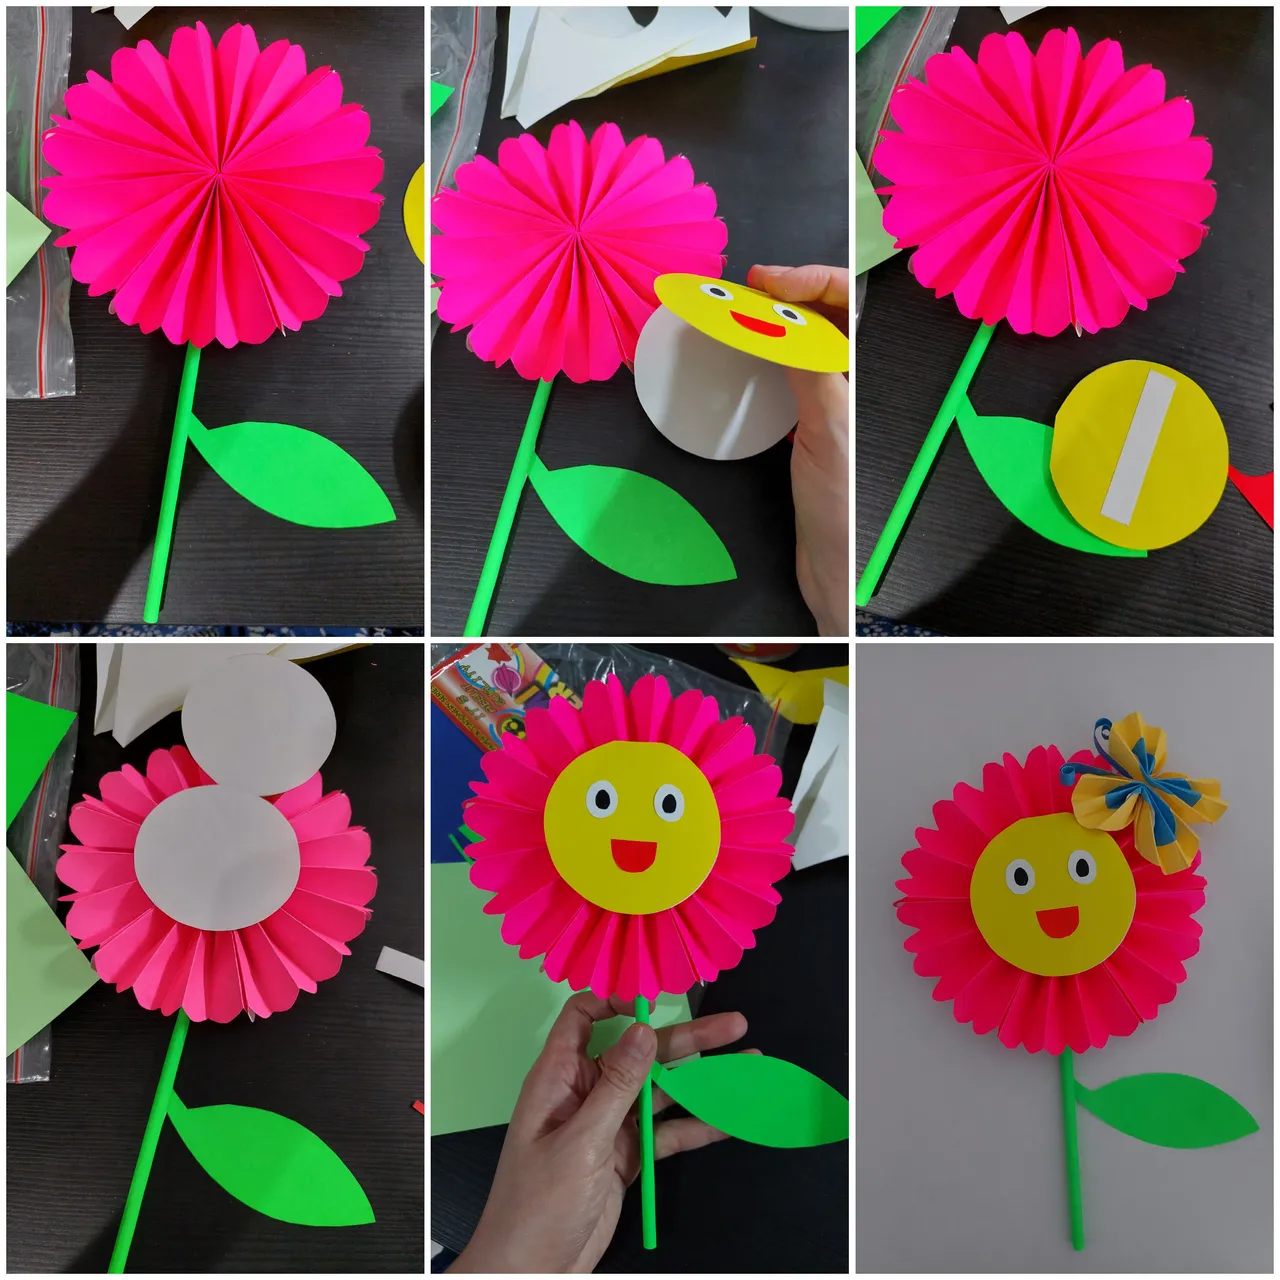
Next i made the circle on the yellow paper then cut. Make another but first i fold the paper first to make it could be opened in the middle.
4th
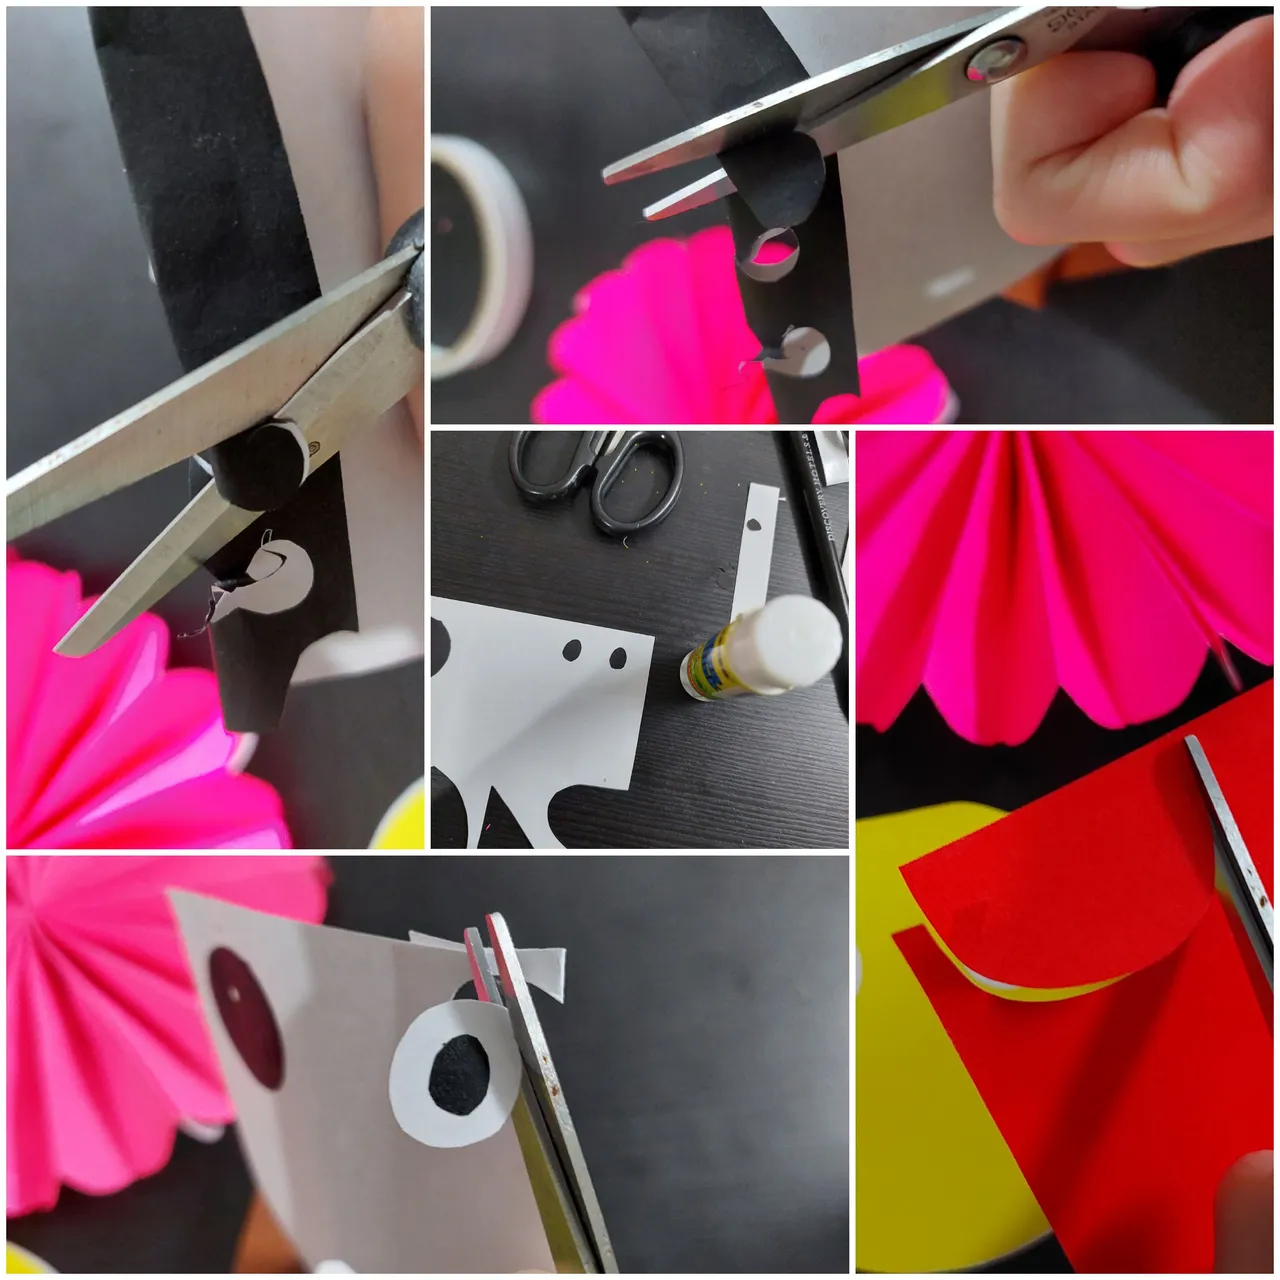
Next i prepared the two eyes by cutting black origami then paste it on white paper or you could use the back of your origami (the white part). Also cut it, a bit larger than the black ones. Then cut the red paper for the smiling mouth. Paste them all.
5th
Paste the double sided tape on the green paper. I used 1.2 cm width of the tape then paste two on the paper, cut it then paste to cover the straw for the flower stem. Also i cut the same green to make the leave, i put the leave's on the stem too. I continued by pasting the yellow circle on the back of the straw stem.
6th
Last, paste the stem to the flower then it is finished. The 3D smiling flower card is ready to use now.
Hope you like it. Happy Thursday and have a nice day!