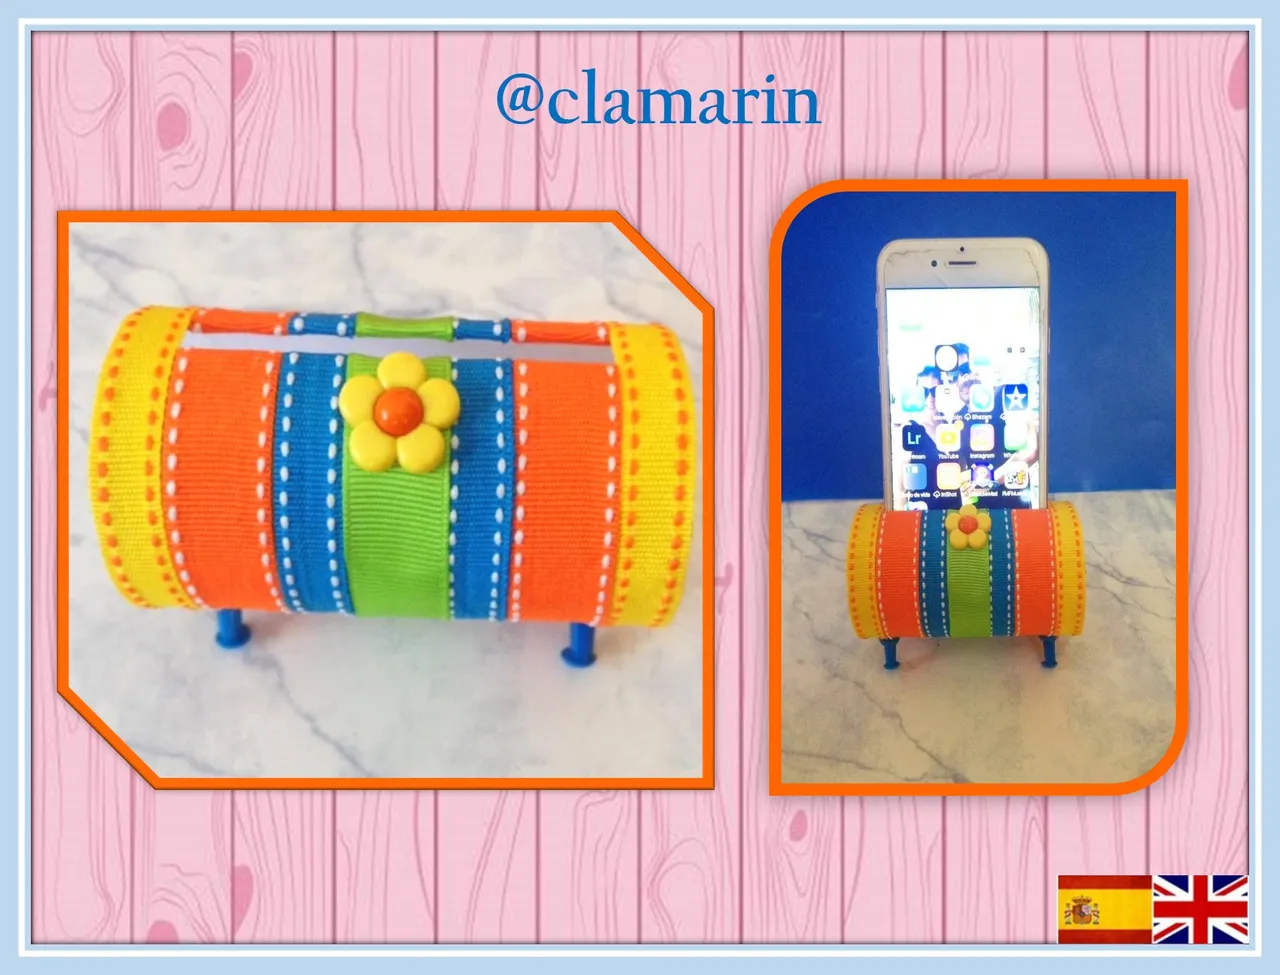
¡Hola amigos de esta hermosa comunidad! Hoy, les traigo un paso a paso de un Soporte casero para celular; lo mejor de esta idea, es el uso de materiales que son súper fáciles de conseguir y que seguramente tienes guardado en casa. Además, es super creativo ¡Comencemos!
Hello friends of this beautiful community! Today, I bring you a step by step of a Homemade cell phone holder; The best thing about this idea is the use of materials that are super easy to get and that you surely have stored at home. Plus, it's super creative. Let's get started!
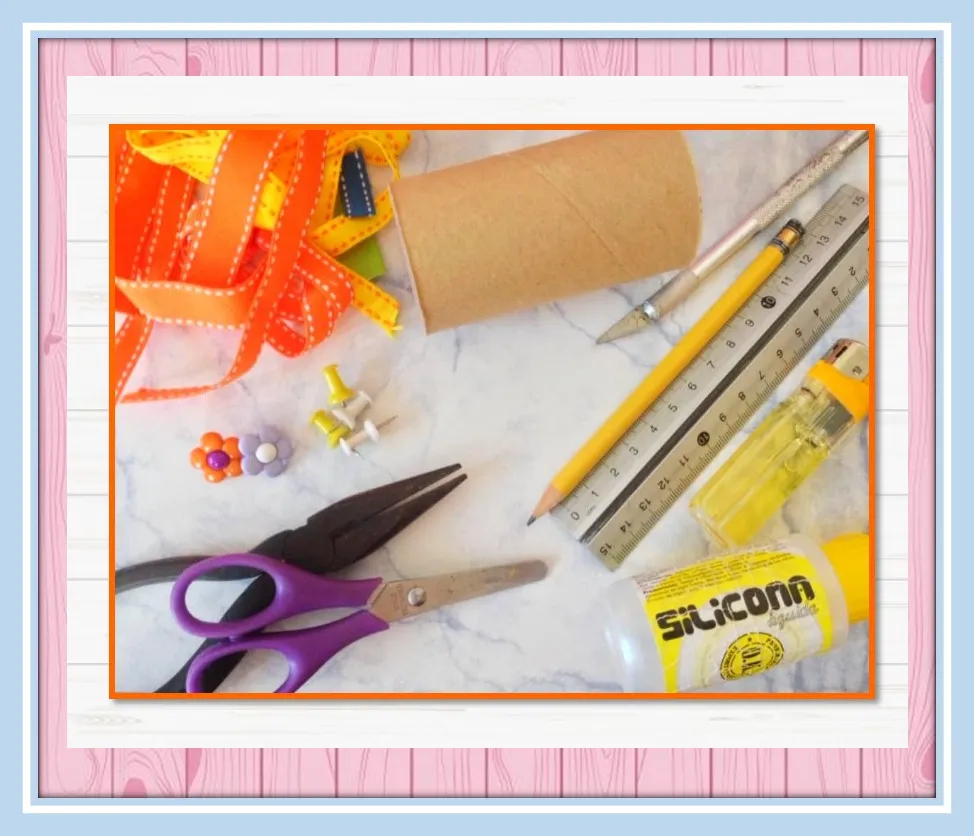
Materiales a utilizar:
• Cintas de gro variadas
• Rollo de papel de baño
• Silicon
• Cúter
• Lápiz
• Regla
• Chinches
• Aplique de flor
• Encendedor
• Pinza
Materials to use:
• Grosgrain Ribbons (1,5 cm wide)
• 1 toilet paper roll
• Silicon
• Cutter
• Pencil
• Rule
• 4 Thumbtack
• Flower applique
• Lighter
• Small plier
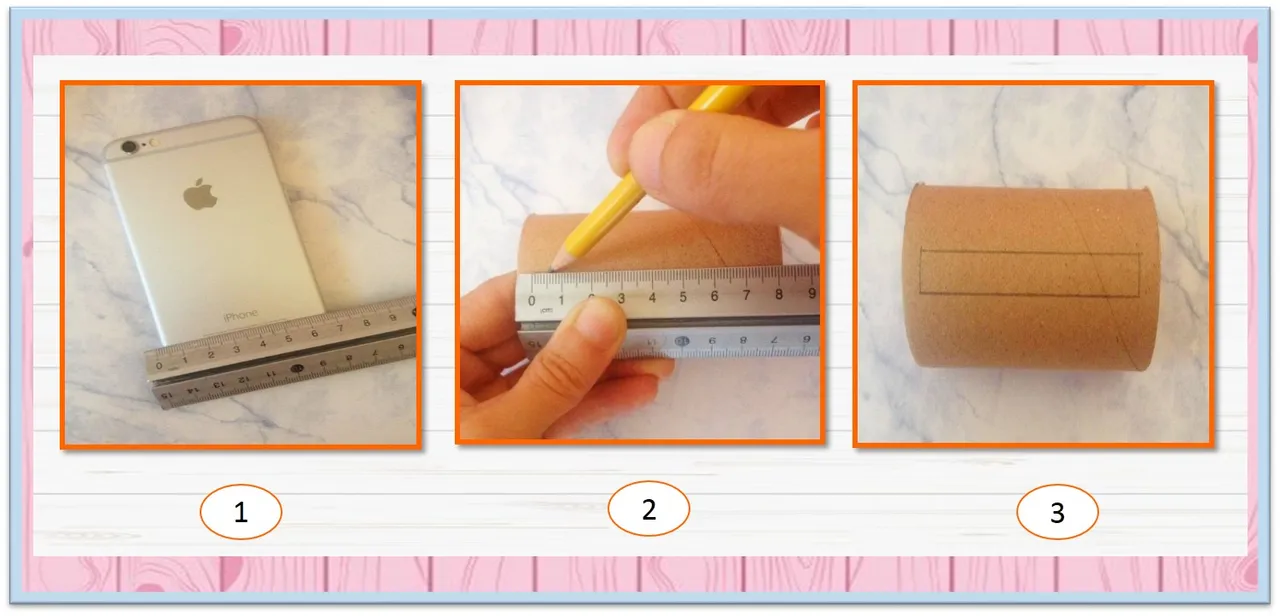
Paso 1:
Medimos el ancho del teléfono, al cual vamos a realizar el soporte. A esa medida, le agregamos 1 cm y trazamos en el rollo de papel de baño, dejando un 1 cm de largo. En este caso, el ancho trazado fue de 7 cm x 1 cm de largo.
Step 1
We measure the width of the phone, to which we are going to make the support. To that measurement, we add 1 cm and trace on the toilet paper roll, leaving a 1 cm long. In this case, the plotted width was 7 cm x 1 cm long.
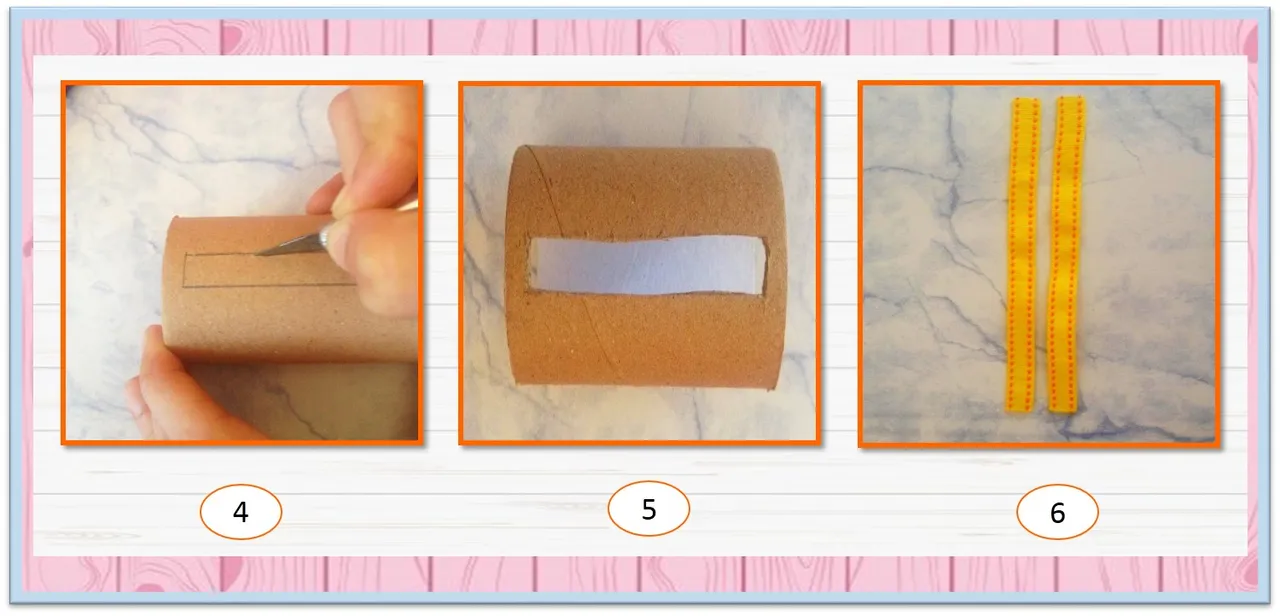
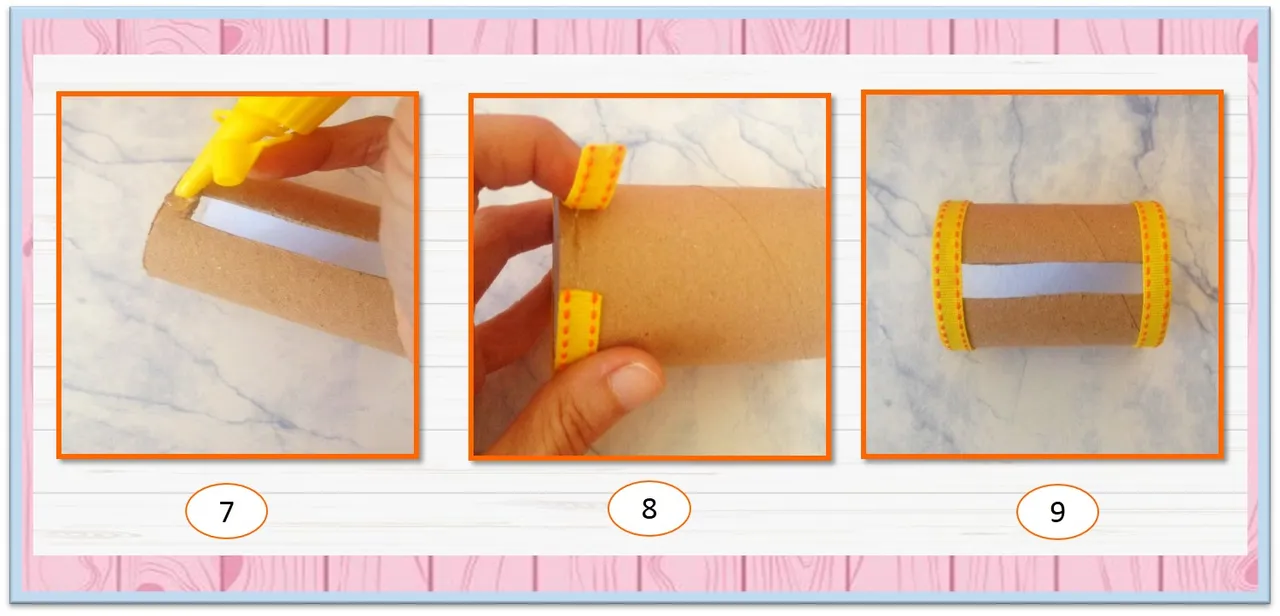
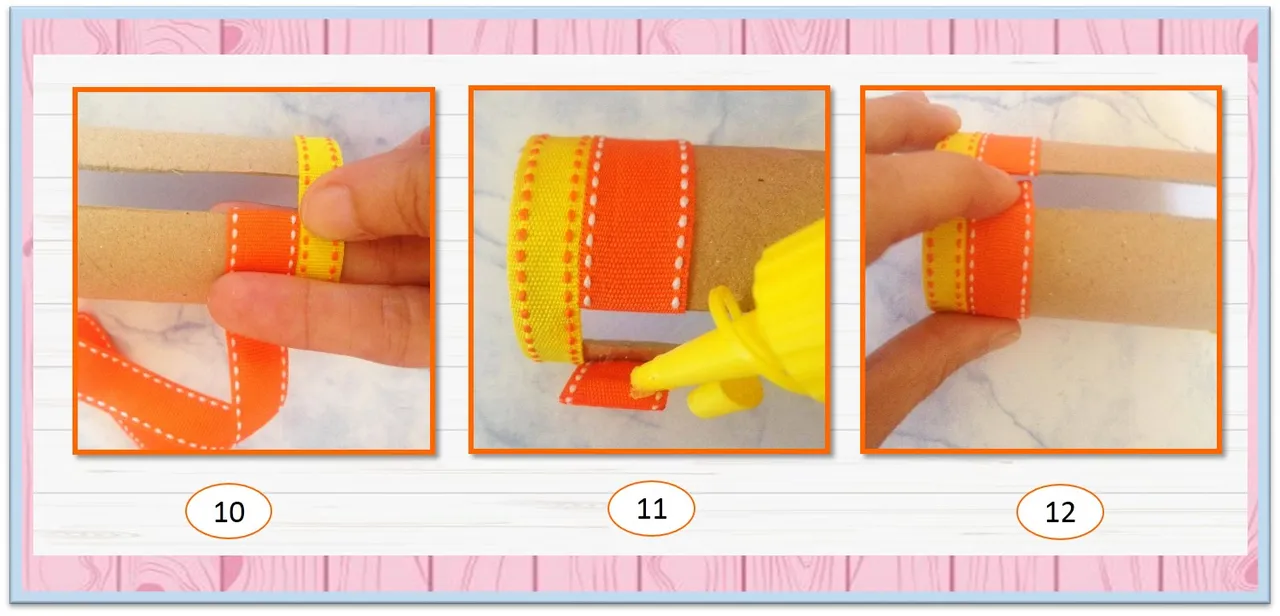
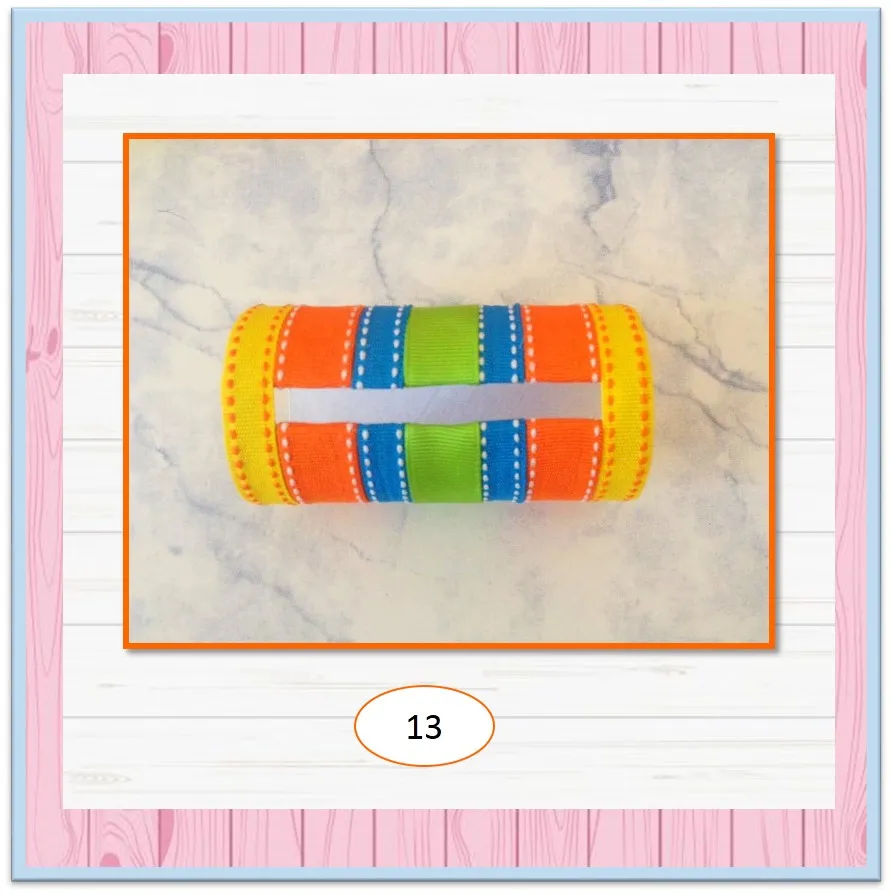
Paso 2:
Cortamos con la ayuda de un cúter, la medida trazada. Cortamos las cintas que van en los extremos (20 cm) y pegamos. Para el resto de las cintas, colocamos silicon en la punta, introducimos por el orificio y doblamos; y así, sucesivamente con el resto hasta llenar el rollo de papel. Es importante, que los extremos de las cintas las pasen por el encendedor, para evitar que se deshilachen.
Step 2:
We cut with the help of a cutter. We cut the end of the grosgrain ribbons (20 cm) and glue them. For the rest of the ribbons, we put silicone on the tip, we introduce it through the hole and we fold; and so on, successively with the rest until the paper roll is filled. It is important that the ends of the ribbons pass through the lighter, to avoid fraying.
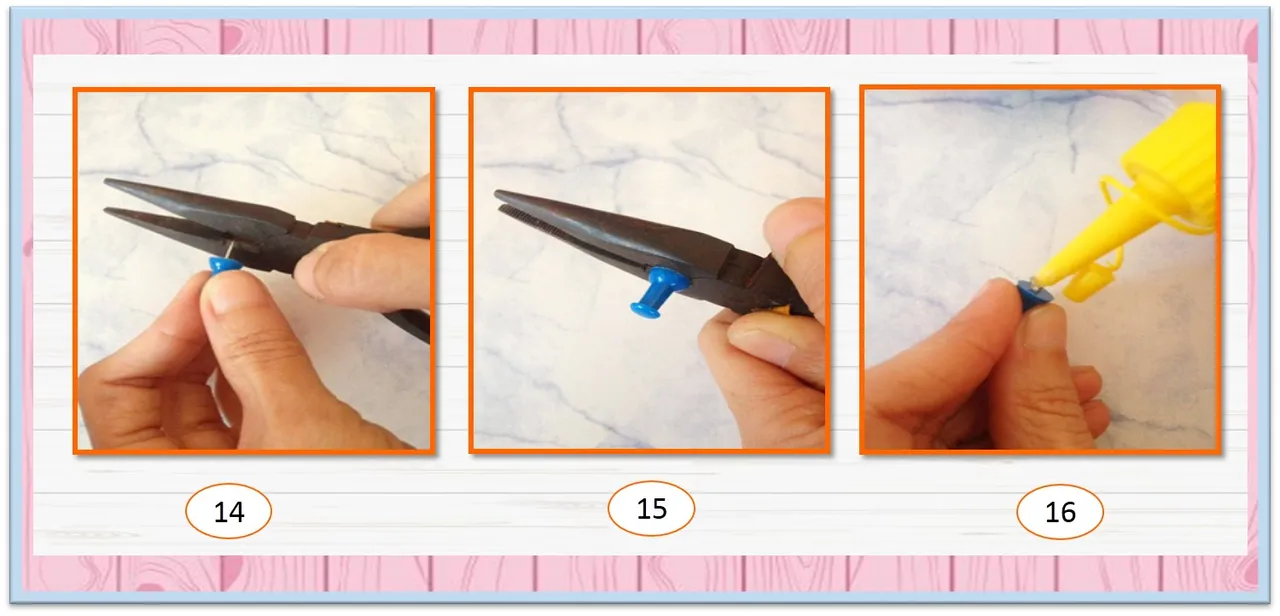
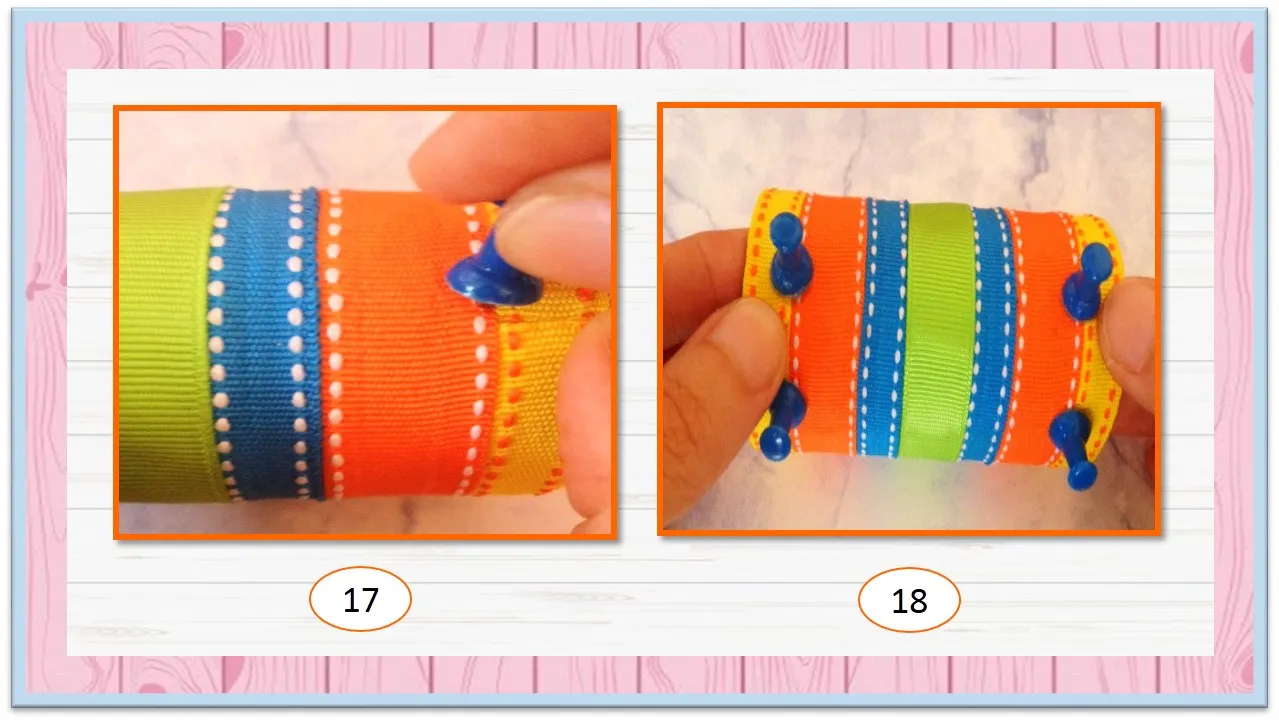
Paso 3:
Tomamos los chinches, y con la ayuda de una pinza cortamos la punta filosa. Luego, los pegamos en la parte inferior del rollo de papel, a manera de patitas. Finalmente, decoramos con un aplique.
Step 3:
We take the Thumbtacks, and with the help of a Small plier we cut the sharp tip. Then, we glue them to the bottom of the paper roll, like paws. Finally, we decorate with a flower applique.
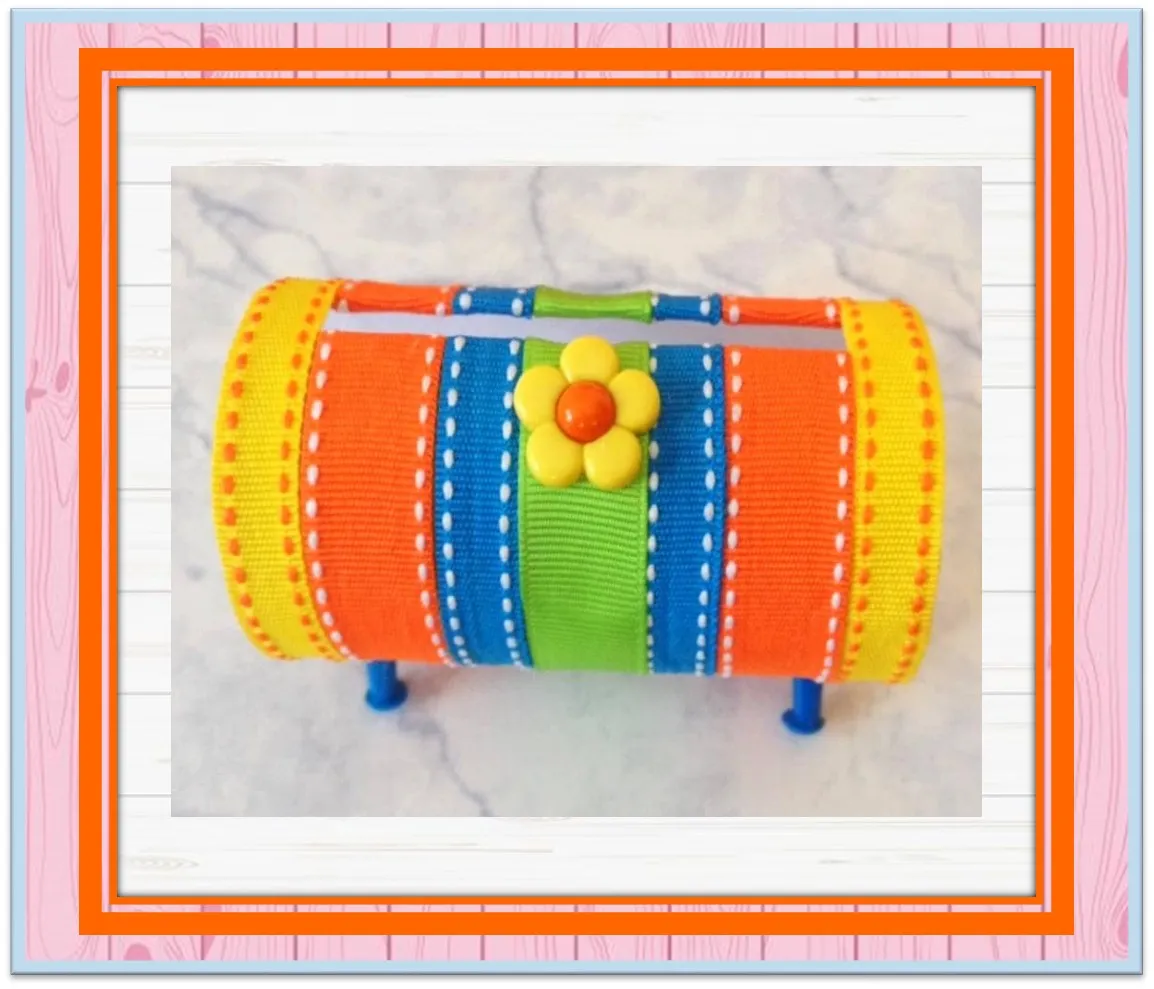
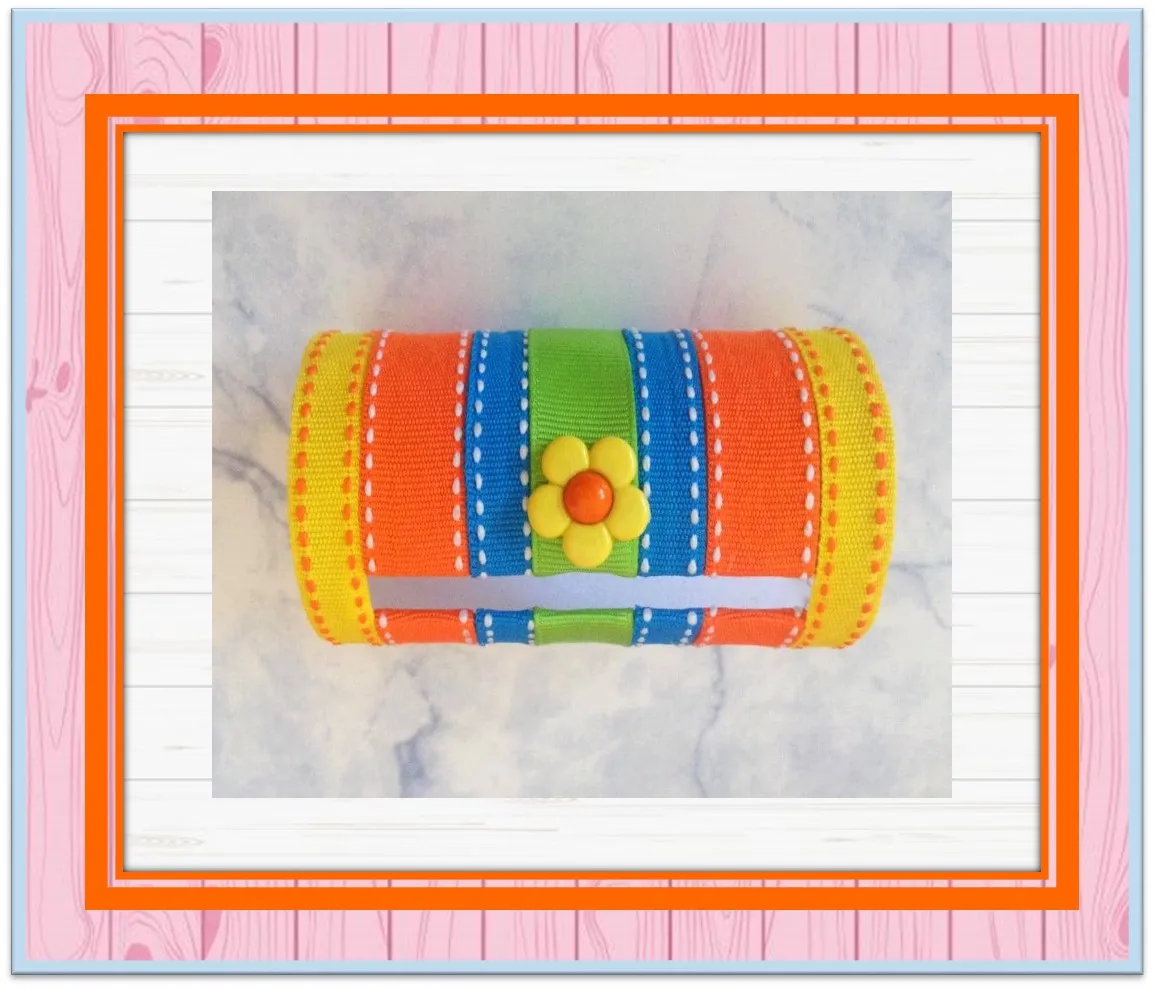
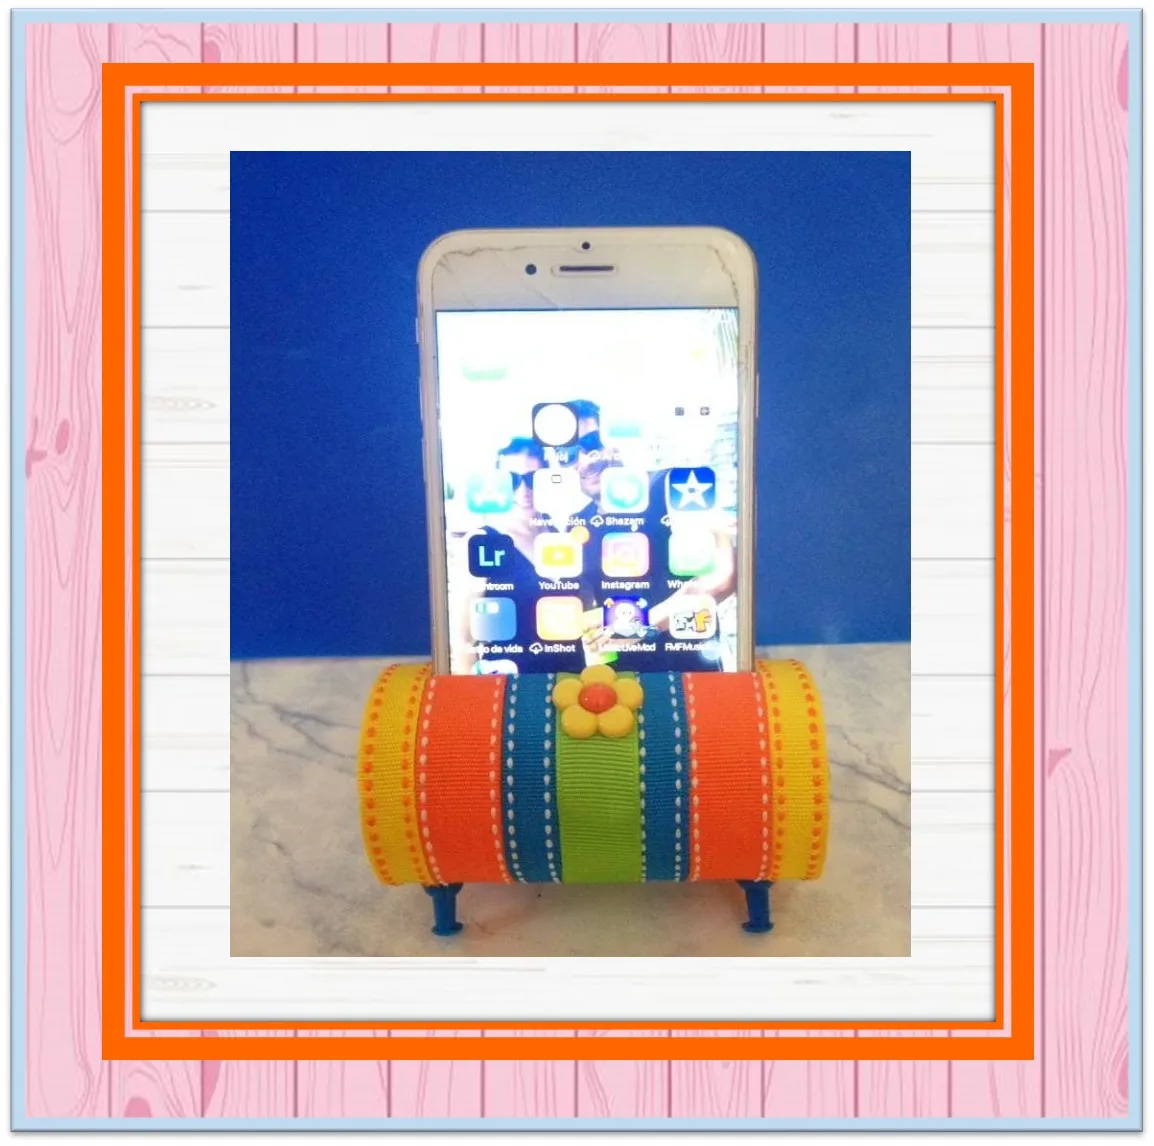
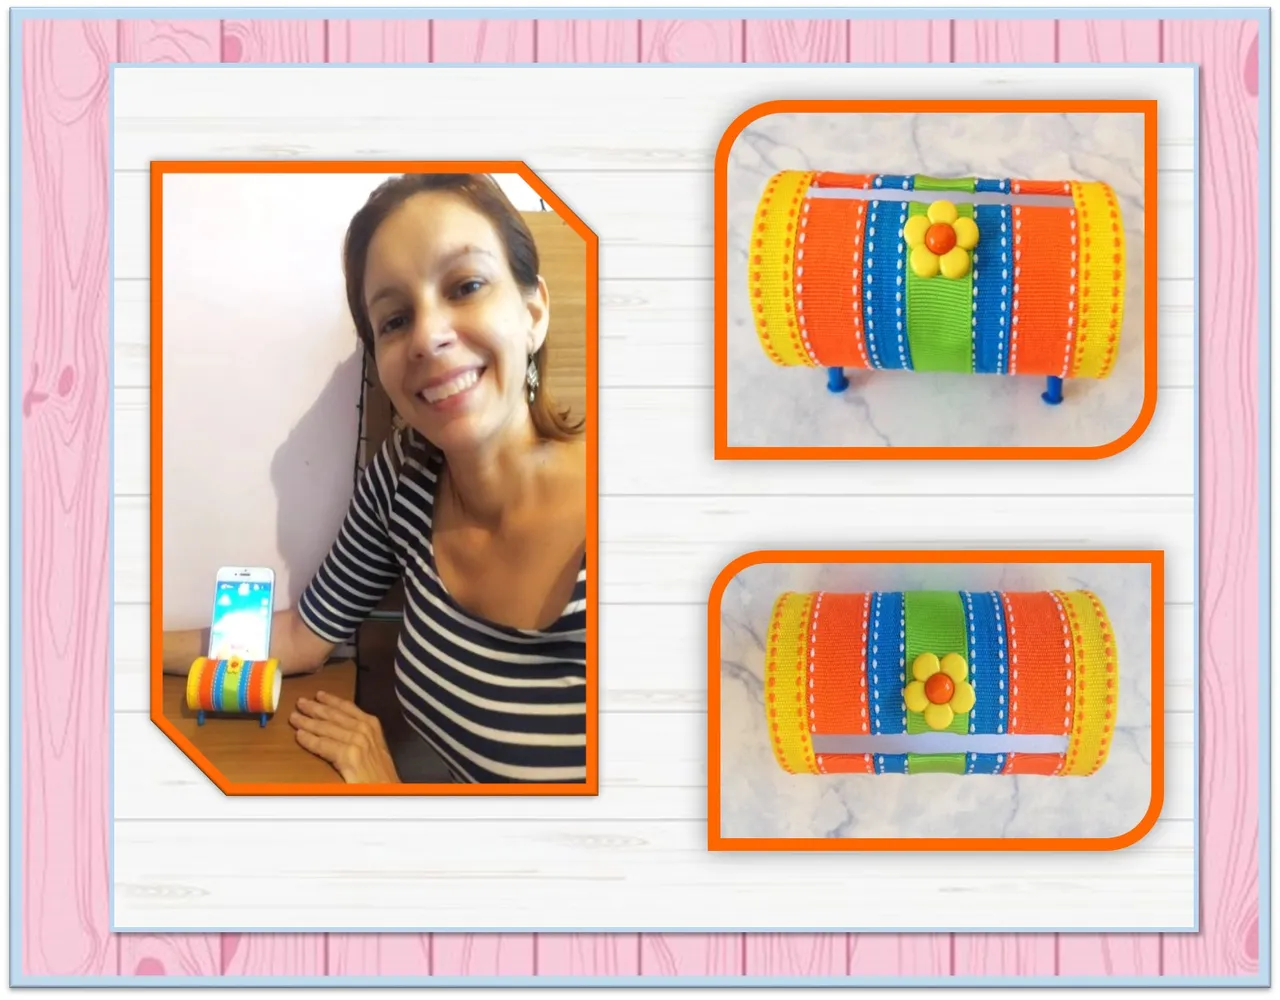
Como pueden observar, este soporte casero para celular, es muy fácil y súper útil para tener en la oficina o en casa. Los invito a realizarlo.
As you can see, this homemade cell phone holder is very easy and super useful to have in the office or at home. I invite you to do it! See you soon!
