¡Saludos! Hoy quiero mostrarles una bolsa muy linda que hice hace algunas semanas en el trabajo, el proceso de esta bolsa es un poco lento pues lleva muchas capas de pintura, pero el resultado es muy bonito, Les mostrare un poco el proceso de realización espero que les guste.
Greetings! Today I want to show you a very nice bag that I made a few weeks ago at work, the process of this bag is a little slow because it takes many layers of paint, but the result is very nice, I will show you a little of the process of realization I hope you like it.

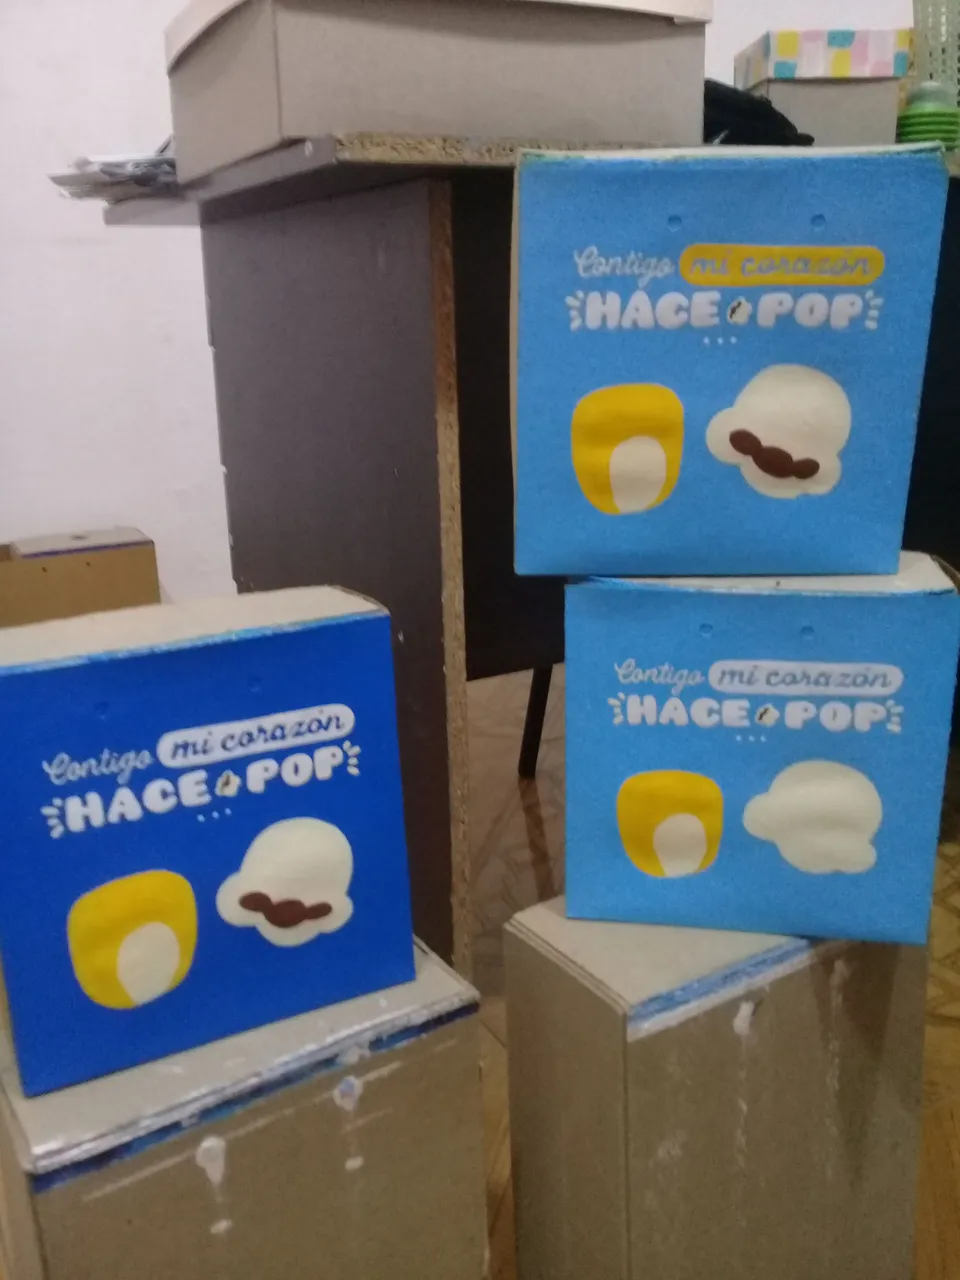
Imagen de referencia

Materials
- Gift bag or stand
- Paints
White
Black
Blue
Yellow
Brown
Pink - Brushes
Large flat
Small angled
Line brush.
Materiales
- Bolsa de regalo o soporte
- Pinturas
Blanca
Negro
Azul
Amarillo
Marrón
Rosado - Pinceles
Plano grande
Angular pequeño
Pincel para líneas.

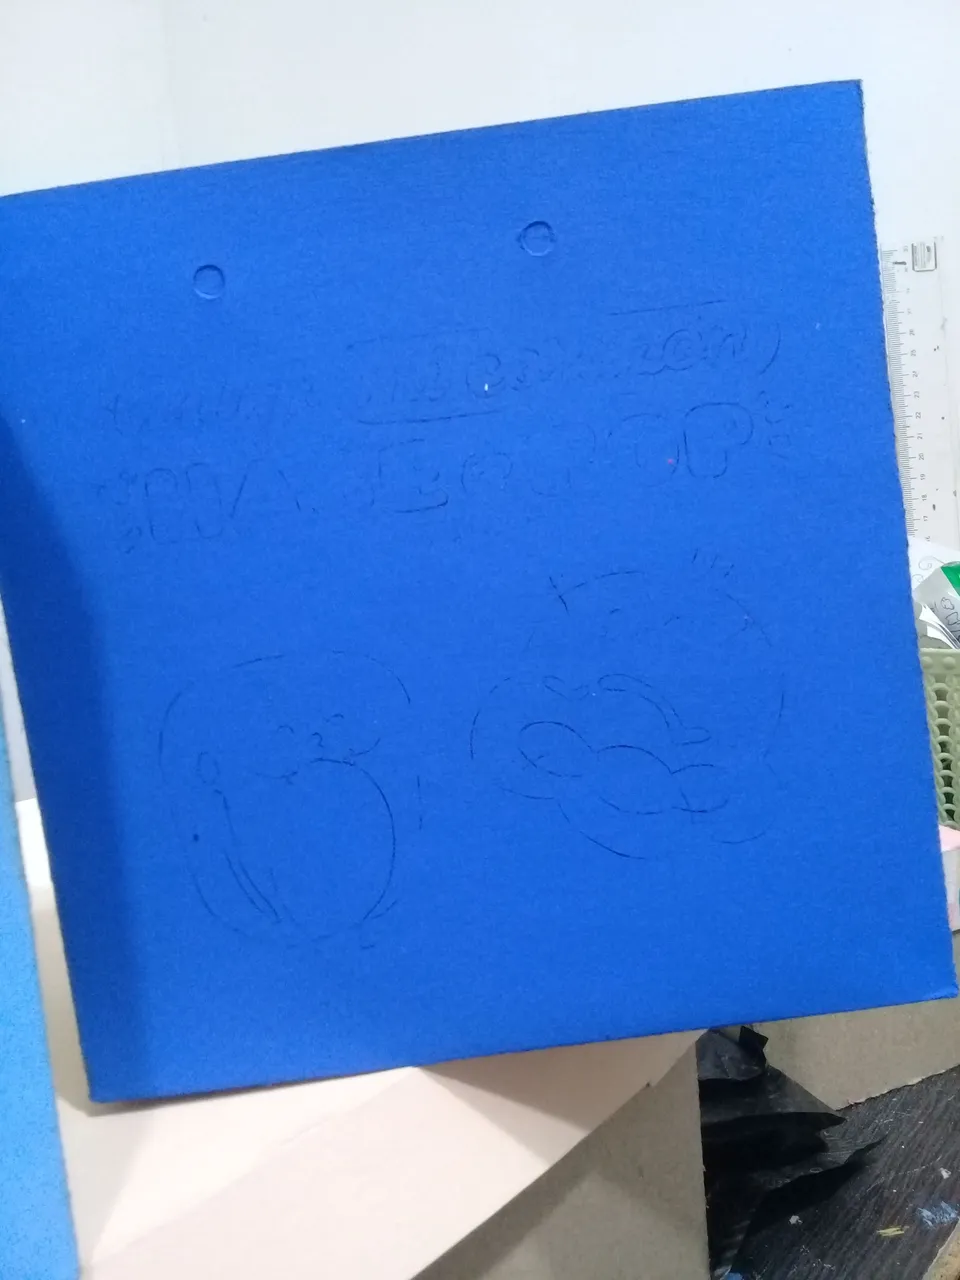
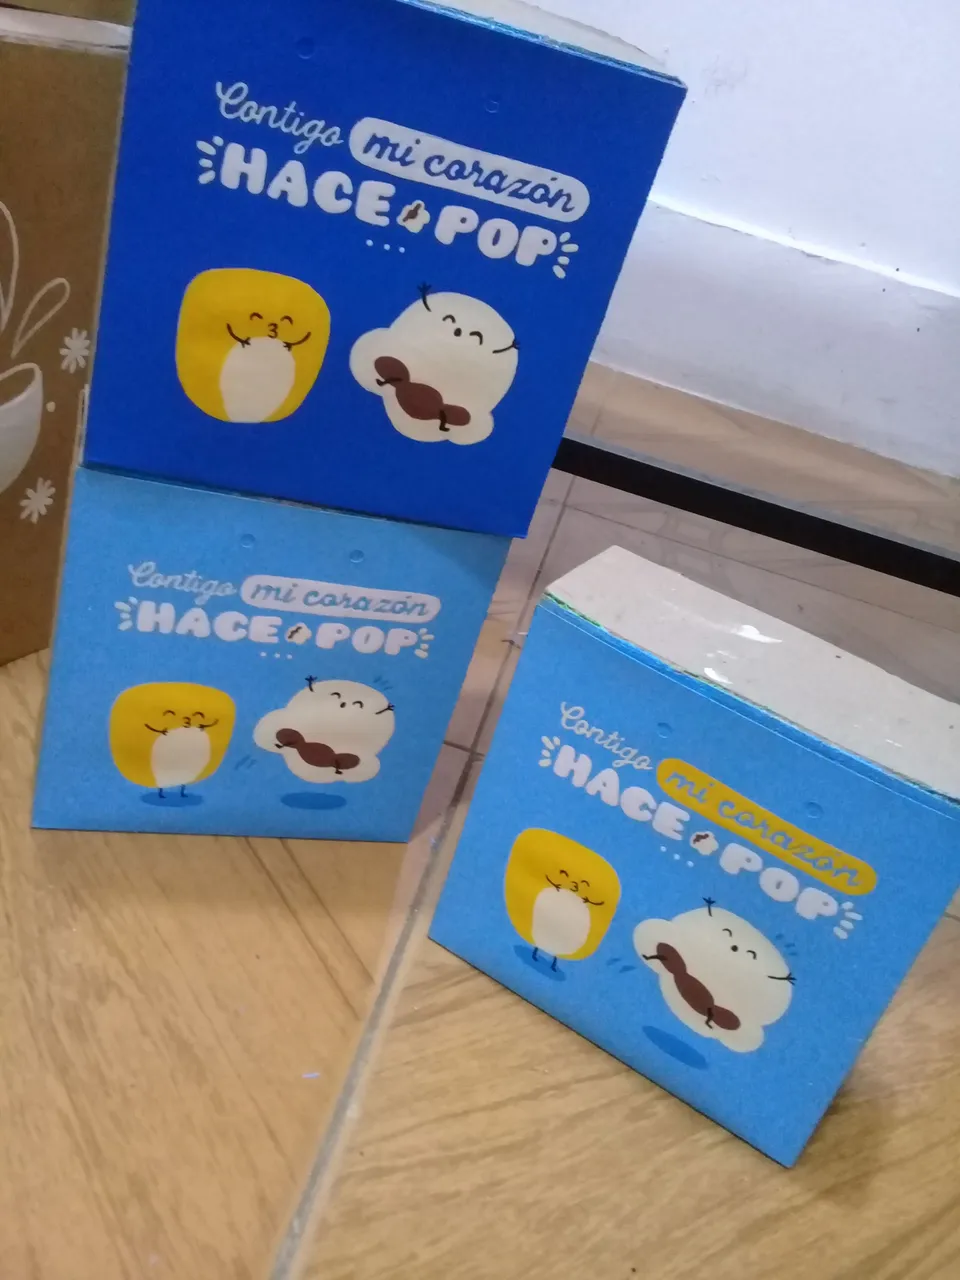
El primer paso para la elaboración de esta bolsa es preparar el fondo, para ello lo pintaremos con un color azul, yo he hecho dos variaciones una de un tono claro y una de un azul mucho más intenso, es recomendable usar al menos dos capas de pintura al fondo o hasta que se considere este bien cubierto, una vez seco el fondo procedí a copiar el diseño sobre el soporte para ello he empleado una página de papel carbón.
The first step for the elaboration of this bag is to prepare the background, for this we will paint it with a blue color, I have made two variations one of a light tone and one of a much more intense blue, it is advisable to use at least two coats of paint to the background or until it is considered well covered, once the background is dry I proceeded to copy the design on the support for this I have used a page of carbon paper.
Lo siguiente fue comenzar a colorear todas las areas color blanco o que requiriese una capa de fondo como el amarillo, para ello he empleado el pincel de líneas y el pincel angular.
The next step was to start coloring all the areas white or requiring a background layer such as yellow, for this I used the line brush and the angled brush.
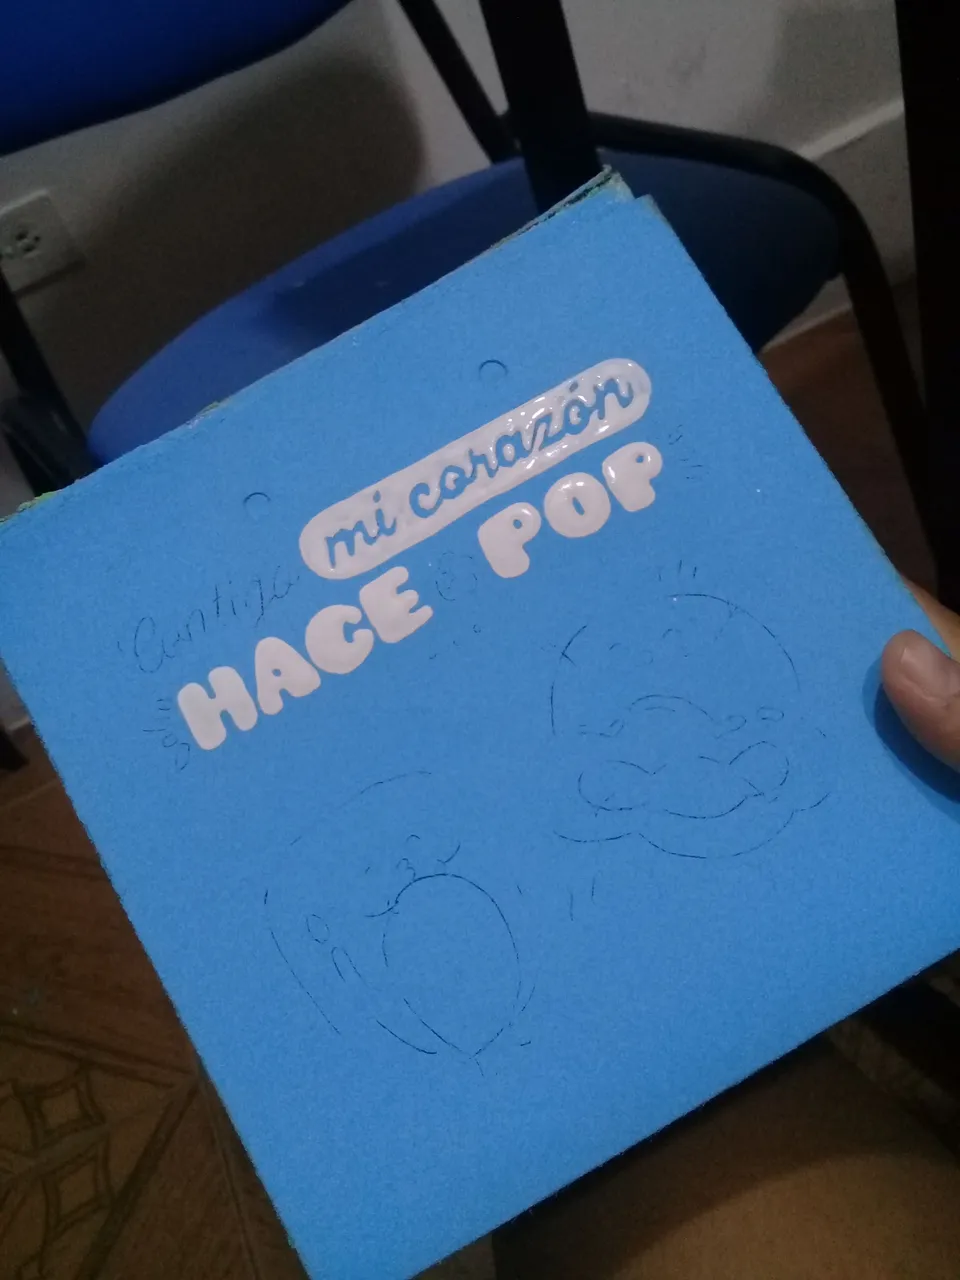
Para la palabra contigo al inicio de la frase y los personajes he realizado una mezcla de amarillo y blanco hasta crear un tono hueso, con esta mezcla he pintado también la palomita de maíz entre “hace pop” de este coloque las capas suficientes para cubrir suficientemente bien el color del fondo.
For the word with you at the beginning of the sentence and the characters I have made a mixture of yellow and white to create a bone tone, with this mixture I have also painted the popcorn between "hace pop" of this place enough layers to cover well enough the background color.
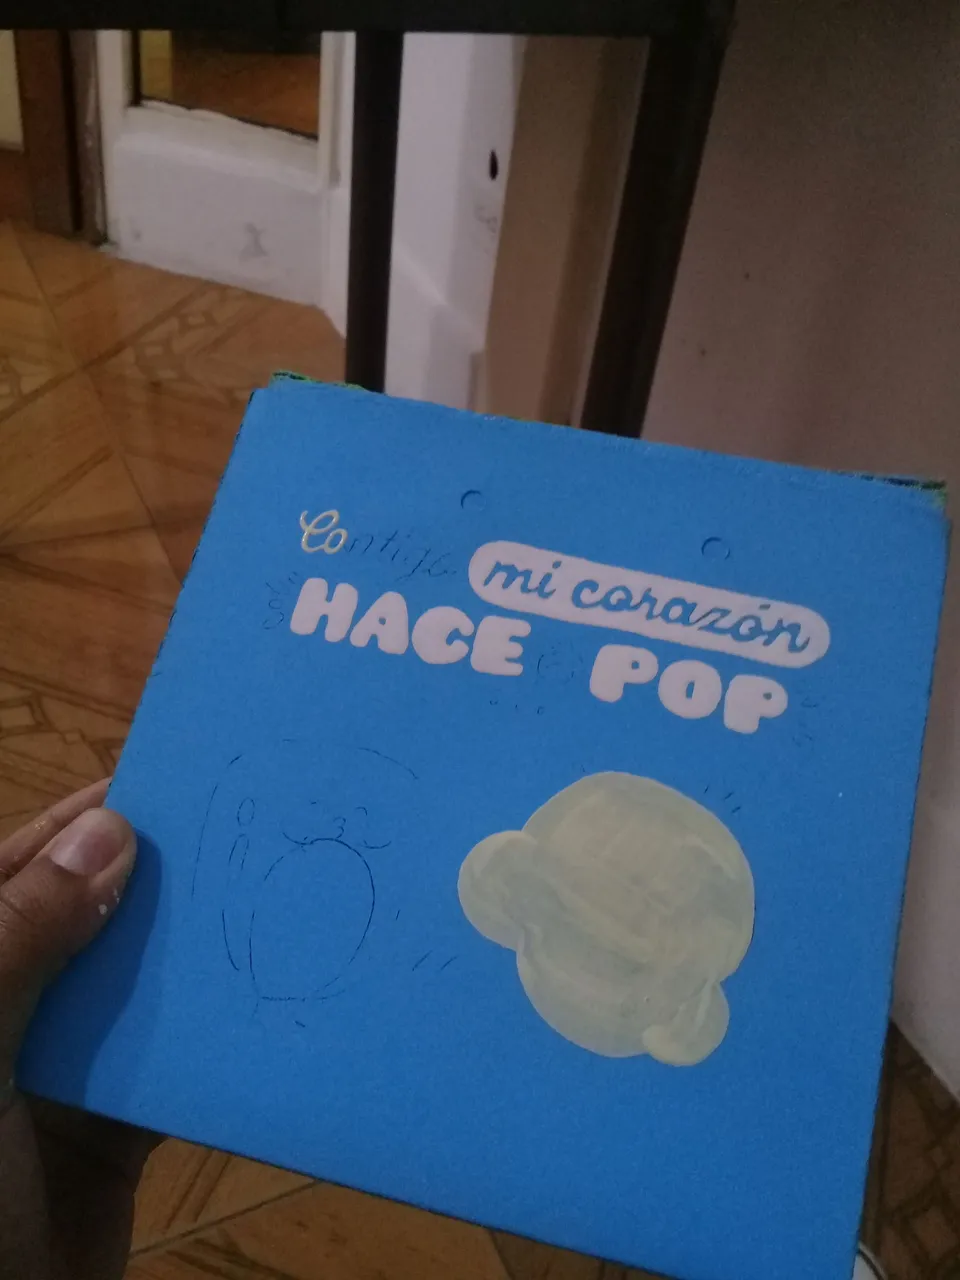
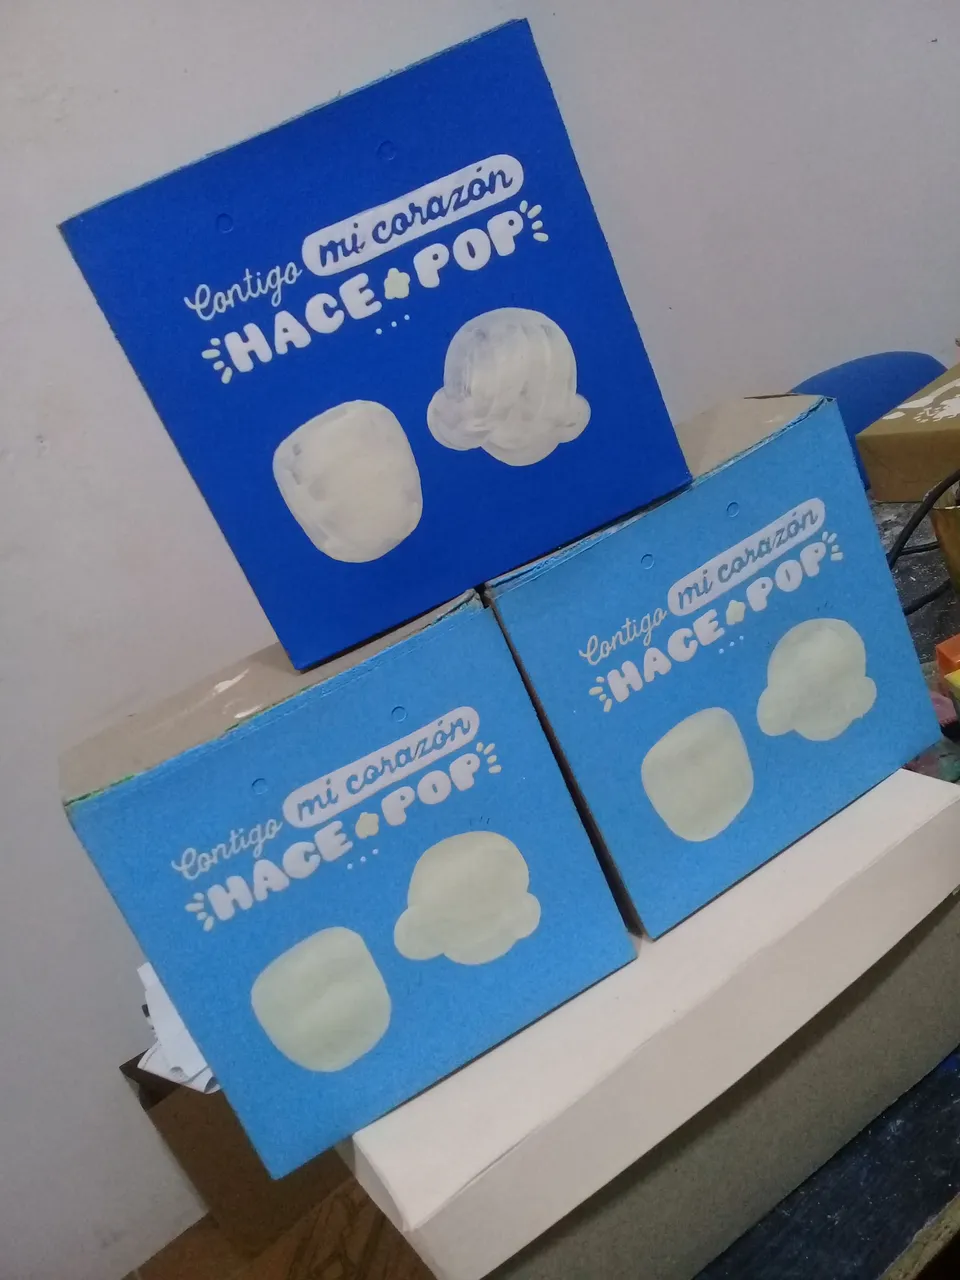
Los siguientes colores que añadí fueron el amarillo para la barrita en la frase y el grano de maíz y el marrón para la parte interna de la palomita de maíz
The next colors I added were yellow for the stick in the phrase and the corn kernel and brown for the inside of the popcorn.
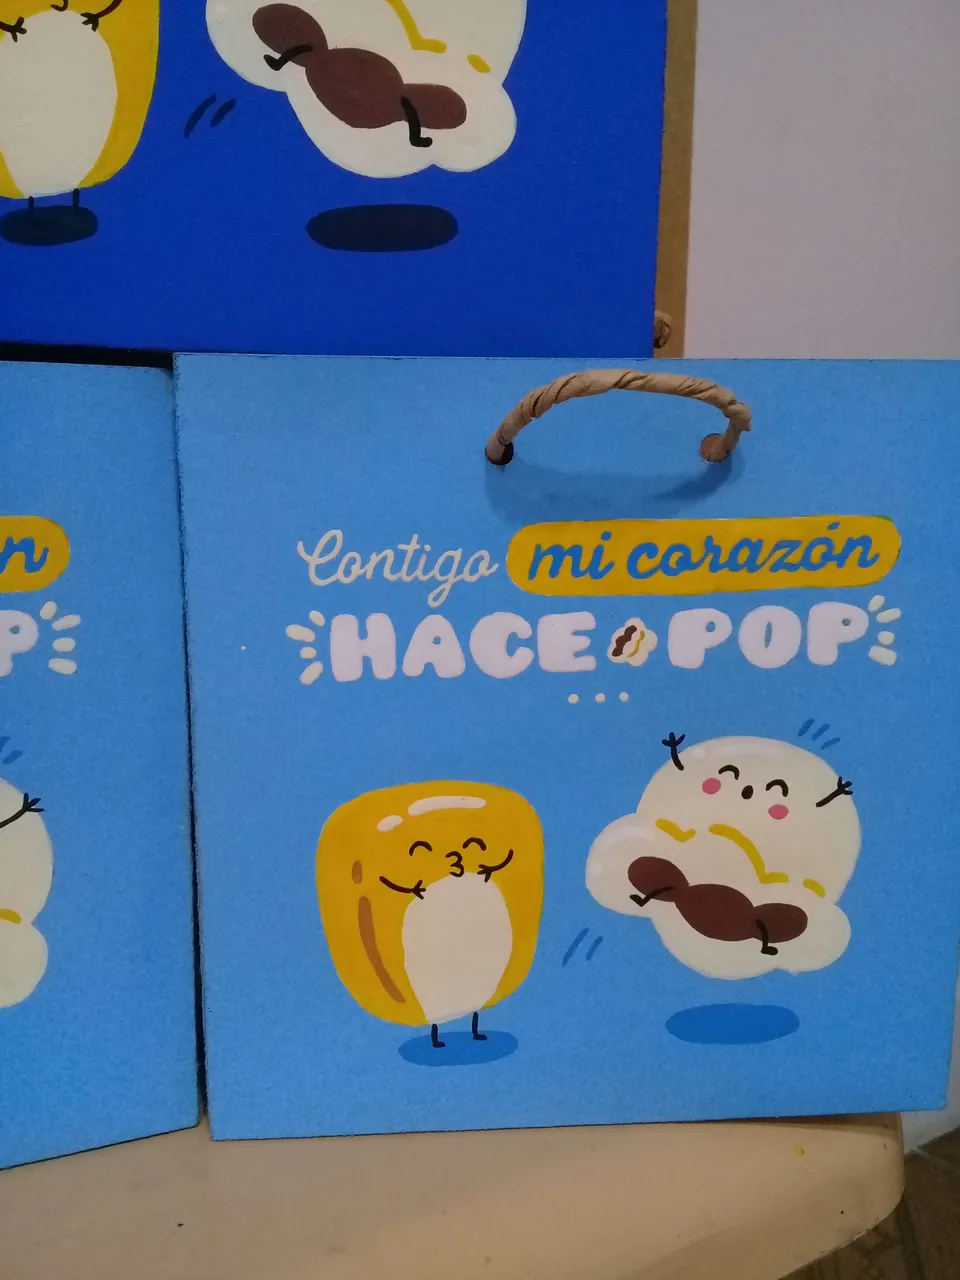
Luego con pintura negra y pincel para líneas he dibujado la carita y extremidades de ambos personajes, con pintura rosada he pintado sus mejillas , también en esta parte he pintado una sombra debajo de cada uno de ellos.
Then with black paint and line brush I have drawn the face and extremities of both charactersthen I painted her cheeks with pink paint, also in this part I have painted a shadow under each one of them.
Por ultimo con blanco y amarillo he pintado algunos brillitos en los personajes y para finalizar he colocado una capa de brillo al agua sobre la frase y ambos personajes, realizar este tipo de bolsas requiere ser muy ordenado e ir pintando por capas y esperar que cada una seque para no arruinar el trabajo anterior, creo que esto es lo mejor que he aprendido de esto.
Finally with white and yellow I have painted some glitter on the characters and finally I have placed a layer of water gloss on the phrase and both characters, making this type of bags requires to be very tidy and go painting in layers and wait for each one to dry so as not to ruin the previous work, I think this is the best thing I have learned from this.
¡Espero que les haya gustado esta publicación!
¡Muchas gracias por leer, hasta la próxima!
Hoping you liked this post!
Thank you very much for reading, see you next time!