[Eng-Esp] Making a nice cosmetic holder. --Haciendo un lindo porta cosméticos.

Making a nice cosmetic holder.

Haciendo un lindo porta cosméticos.


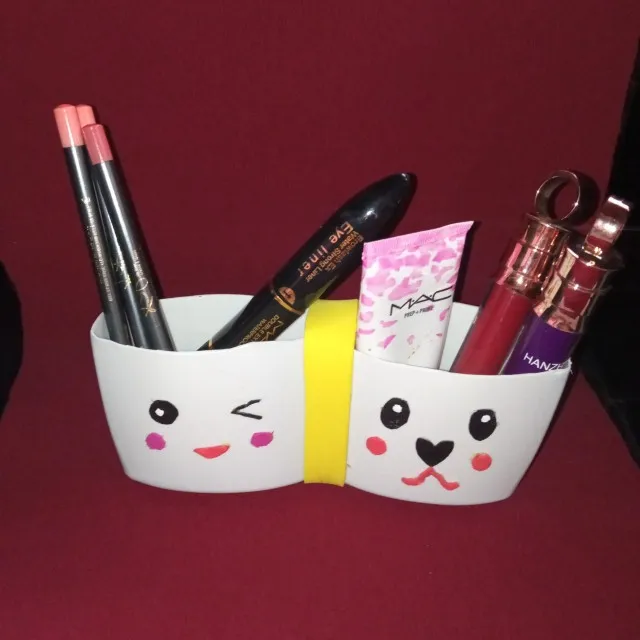
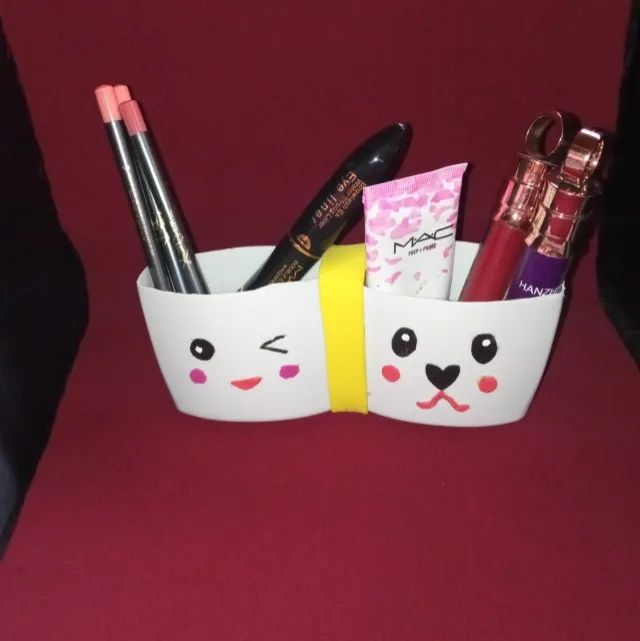
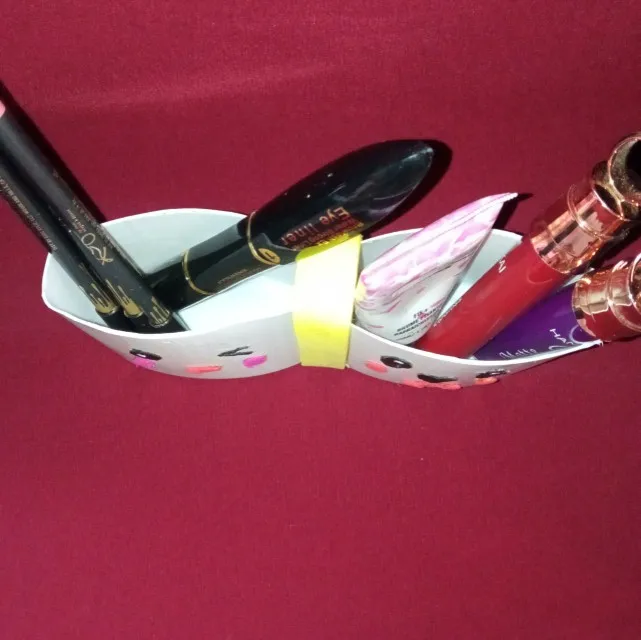
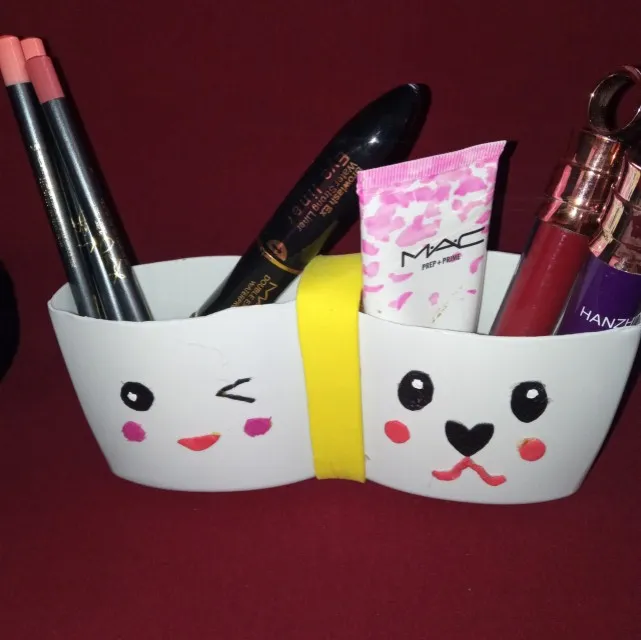
Hello reader friends, today I will be showing you a nice cosmetic holder, it is very simple to make and the materials are quite inexpensive. I love how it turned out, I invite you to stay with me until the end of the post and enjoy the wonderful craft that will be left from a few simple shampoo containers.

Hola amigos lectores el día de hoy les estaré mostrando un lindo porta cosméticos, es muy simple de hacer y los materiales son bastante económicos. Me ha encantado como ha quedado, los invito a quedarse conmigo hasta el final del post y disfrutar de la maravillosa manualidad que quedará de unos simples envases de shampoo.

portada.jpg


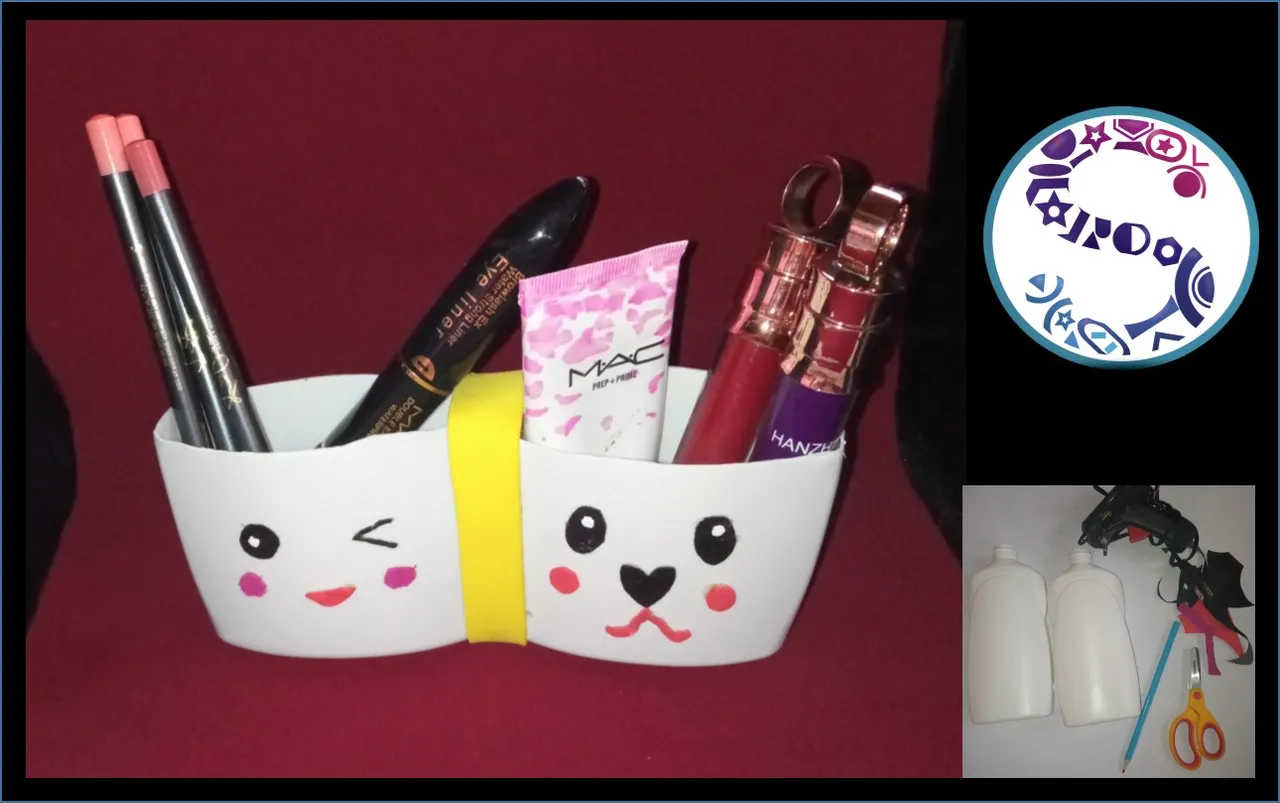
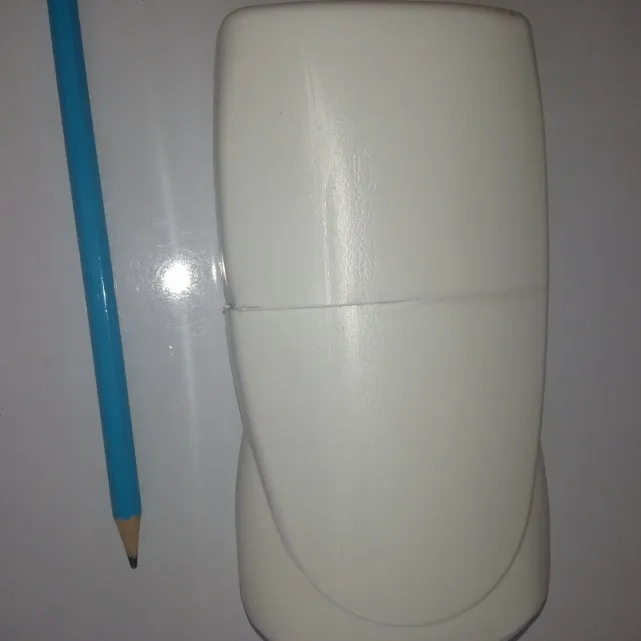
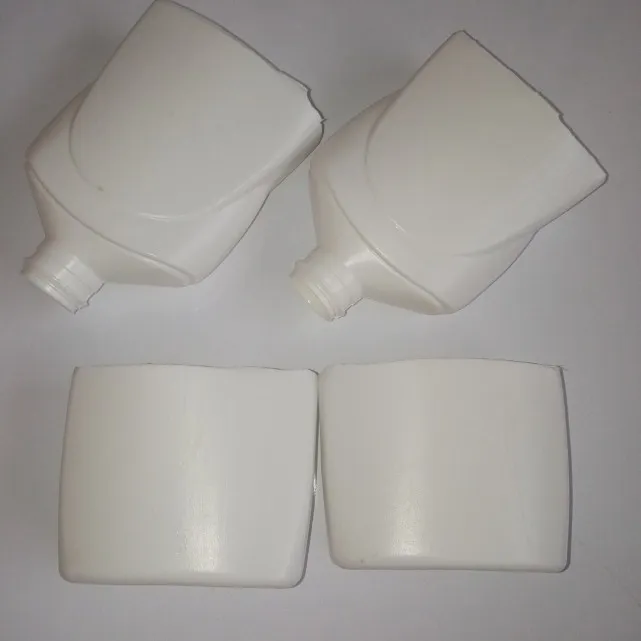
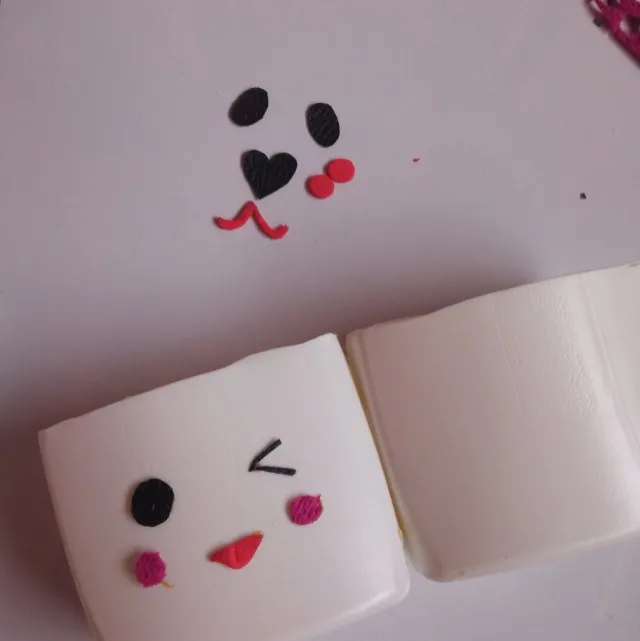
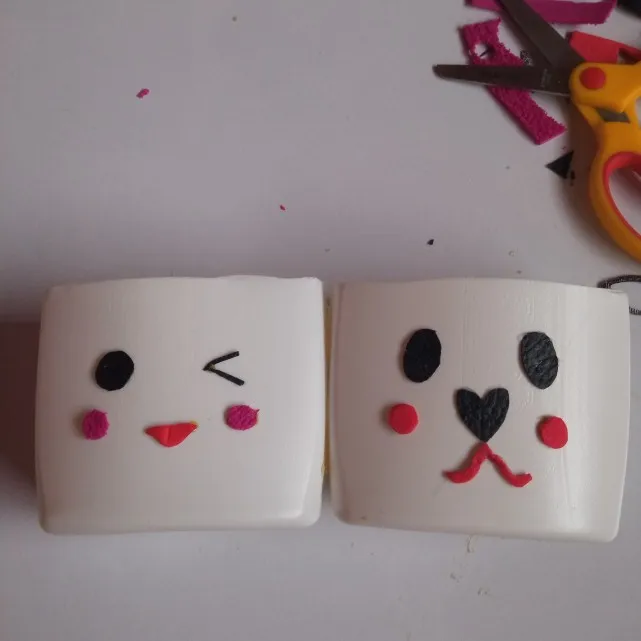
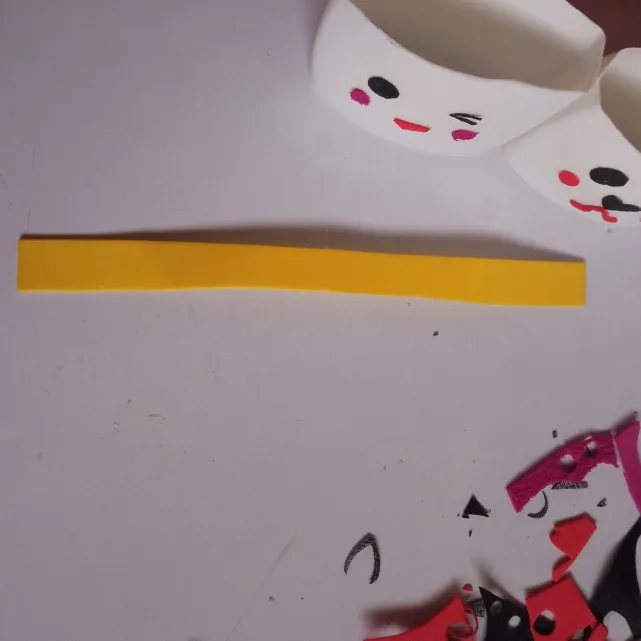
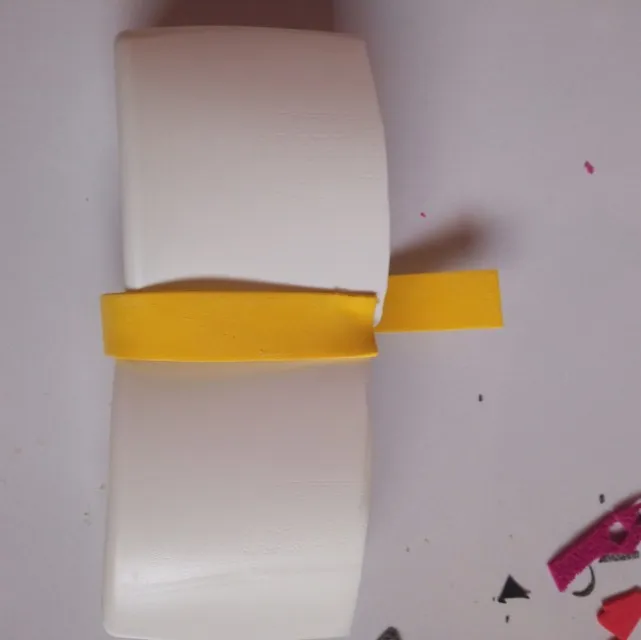
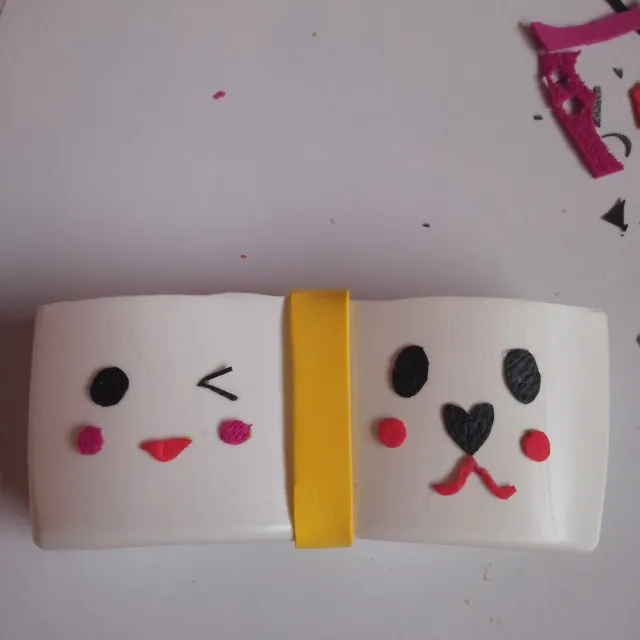
As you know and those who have had the pleasure of visiting me will realize that I love to recycle and make of useless things, some very useful, today I found these shampoo containers and I did not want to throw them away and I thought something good will come out of it and so here I will leave you a step by step of how the cosmetic holder evolves.

Cómo saben y los que han tenido el placer de visitarme se darán cuenta que me encanta reciclar y hacer de cosas inservibles, unas de mucha utilidad, hoy encontré estos envases de shampoo y no quise tirarlos a la basura y pensé algo bueno saldrá de ello y pues aquí les dejaré un paso a paso de cómo evoluciona el porta cosméticos.


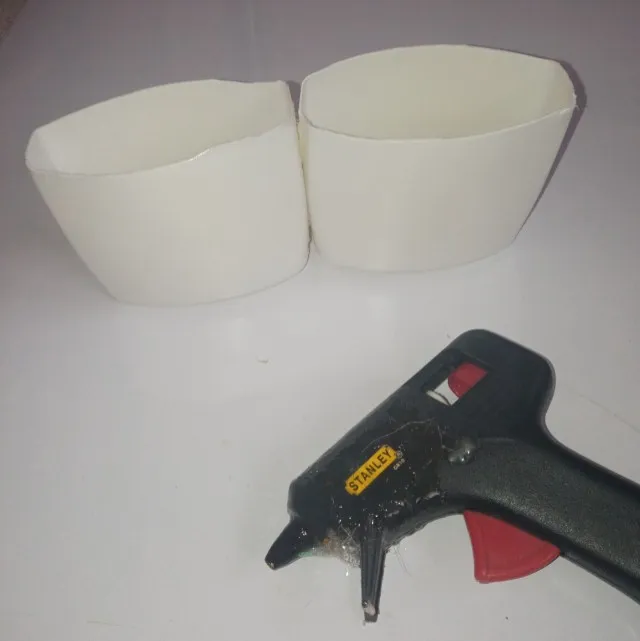
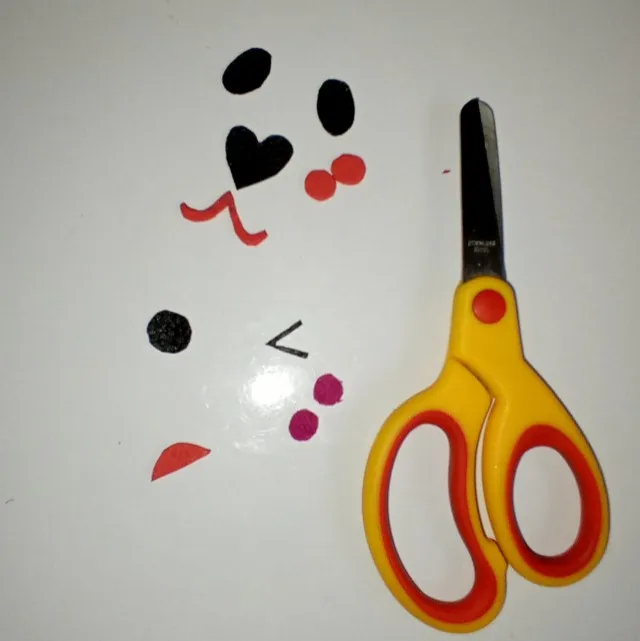
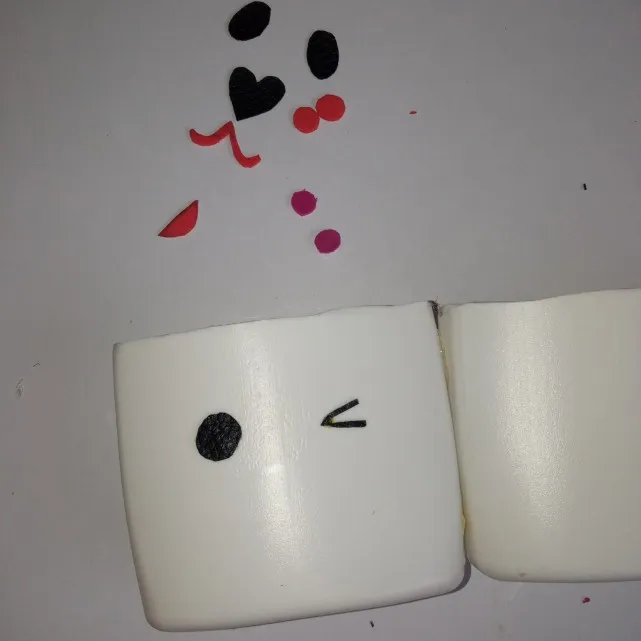
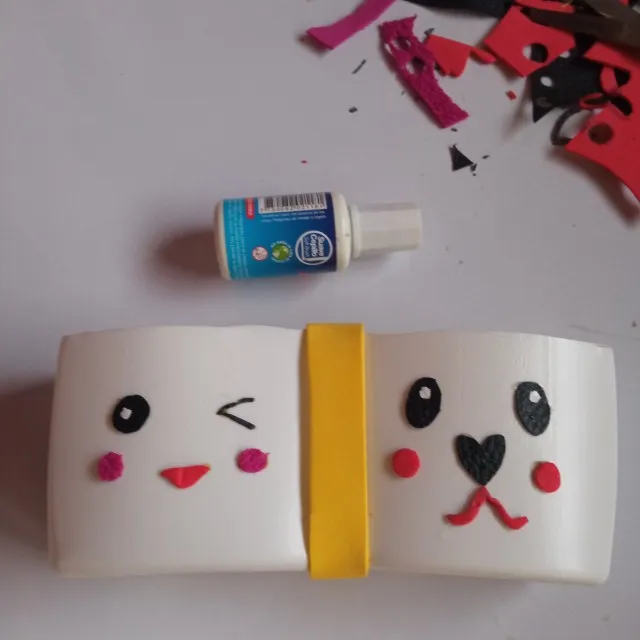
The materials I used were the following: silicone stick, leather, eva rubber, empty shampoo bottles, scissors, pencil, a razor blade and a concealer.

Los materiales que utilice fueron los siguientes, silicón en barra, cuerina, goma eva, envases de shampoo vacío, tijera, lápiz, una cuchilla y un corrector.

Imagen1.jpg


The first thing to do is to take the shampoo bottles and mark where we are going to cut with the blade, as it is a very strong material, and as you can see, the bottles will be already cut.
Lo primero que se debe hacer es agarrar los envases de shampoo y marcar por dónde vamos a recortar con la cuchilla ya que es un material bastante fuerte, así como podrán observar quedarán los envase ya recortados.

Imagen2.jpg

Imagen3.jpg


In this image you can see the containers ready in the desired size and next to it the silicone gun to put a little silicone on the sides and then glue the containers.
En esta imagen podrán apreciar los envases listo del tamaño deseado y al lado la pistola de silicón para colocarle a los lados un poco y luego pegar los envases.

Imagen4.jpg


Proceeding with the craft you take the eva rubber and take out the eyes and part of the face that you want in my case I wanted to make a pair of Kawai face.
Procediendo con la manualidad se agarra la goma eva y se sacan los ojos y parte del rostro que deseamos en mi caso quise hacer una par de carita Kawai.

Imagen5.jpg

Imagen6.jpg

Imagen7.jpg


Here I start gluing the pieces of the face on the containers with silicone stick.
Acá comienzo a pegar las piezas del rostro en los envases con silicón en barra.


Imagen8.jpg

Imagen9.jpg

Imagen10.jpg


With yellow eva rubber I make a 3cm wide strip and proceed to glue with silicone stick all around the middle of the shampoo bottles to give more view to the cosmetic holder.
Con goma eva amarilla saco una tira de 3cm de ancho y procedo a pegar con silicón en barra en todo el medio de los envases de shampoo para dar más vista al porta cosméticos.

Imagen11.jpg

Imagen12.jpg

Imagen13.jpg


With the concealer I proceed to make some white dots on the eyes to give a little brightness.
Con el corrector procedo hacerle unos puntos blancos en los ojos para dar un poco de brillo.

Imagen14.jpg


As always I leave you with some pictures of the final result of the cosmetic holder, enjoy how lovely the handicraft turned out.
Como siempre les dejo unas imágenes del resultado final del porta cosméticos, disfruten de lo encantador que quedó la manualidad.

Imagen15.jpg

Imagen16.jpg

Imagen17.jpg

Imagen18.jpg


Without more to say and hoping that this craft post is to the liking of each reader I say goodbye with a big hug, loves you @shirahoshi. See you next time.

Sin más que decir y esperando que este post de manualidad sea del agrado de cada lector me despido con un gran abrazo, los quiere @shirahoshi. Nos vemos en una próxima oportunidad.

Logo sin sombra.gif


The photographs are my own and were taken by me with a Redmi 9 and were edited in powerpoint.

Las fotografías son de mi autoría y fueron tomadas por mí con un Redmi 9 y se editaron en powerpoint.


The Step by Step Gif was made by me in AdobePhotoshop CC2014.

El Gif de Paso a Paso fue realizado por mi en AdobePhotoshop CC2014.


The logo was designed by me in Adobe Illustrator CC 2015 and its animated version was made in After Effects CC 2017.

El logo fue diseñado por mí en Adobe Illustrator CC 2015 y su versión animada la realice en After Effects CC 2017.


Language corrector used Deepl.

Corrector de idioma utilizado Deepl.


Remember that you can purchase these beautiful pieces of art made and tokenized by me at Nftshowroom at an excellent price. Link to the gallery here

H2
H3
H4
3 columns
2 columns
1 column
Join the conversation now
Ecency