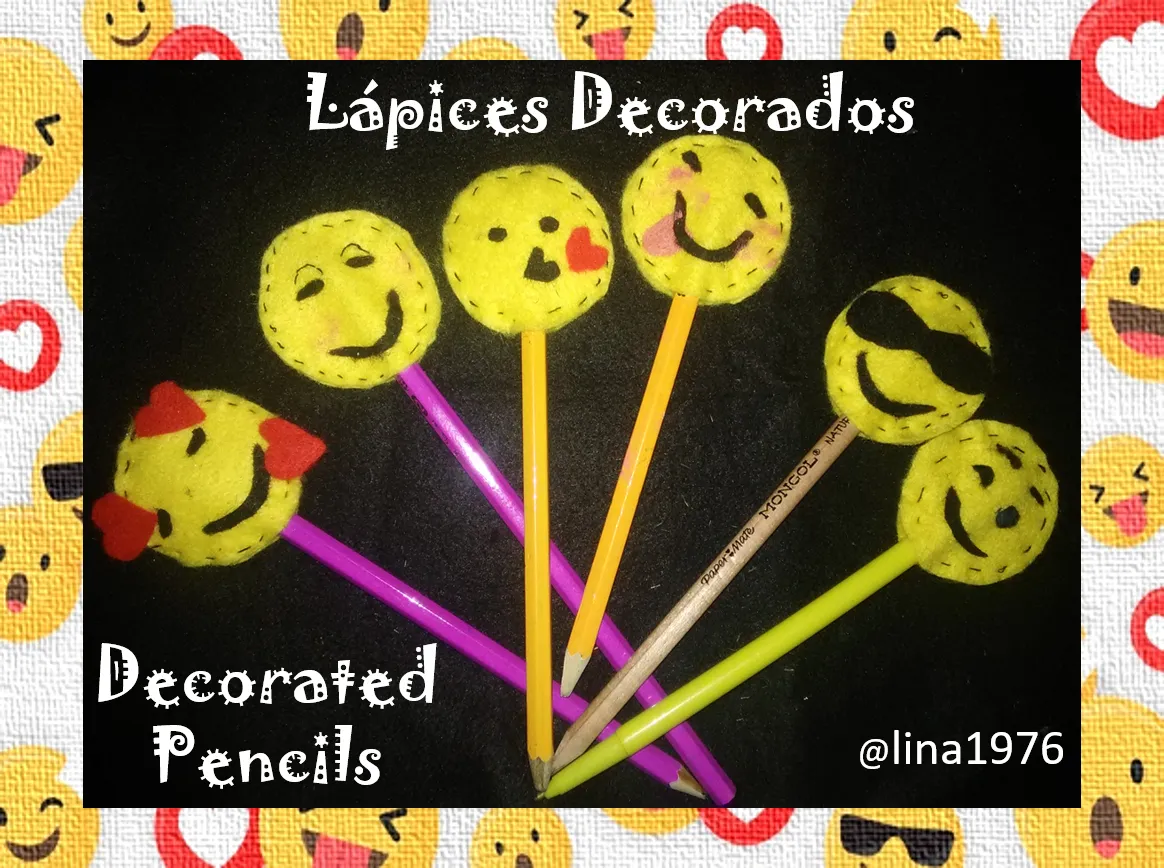
Hello friends of Hive.Blog, a pleasure to greet you, today my publication is a work that I did for my students on the first day of school, after a long time away from the classroom due to the Pandemic. They are pencils decorated with some nice emoticons that will surely make you smile.
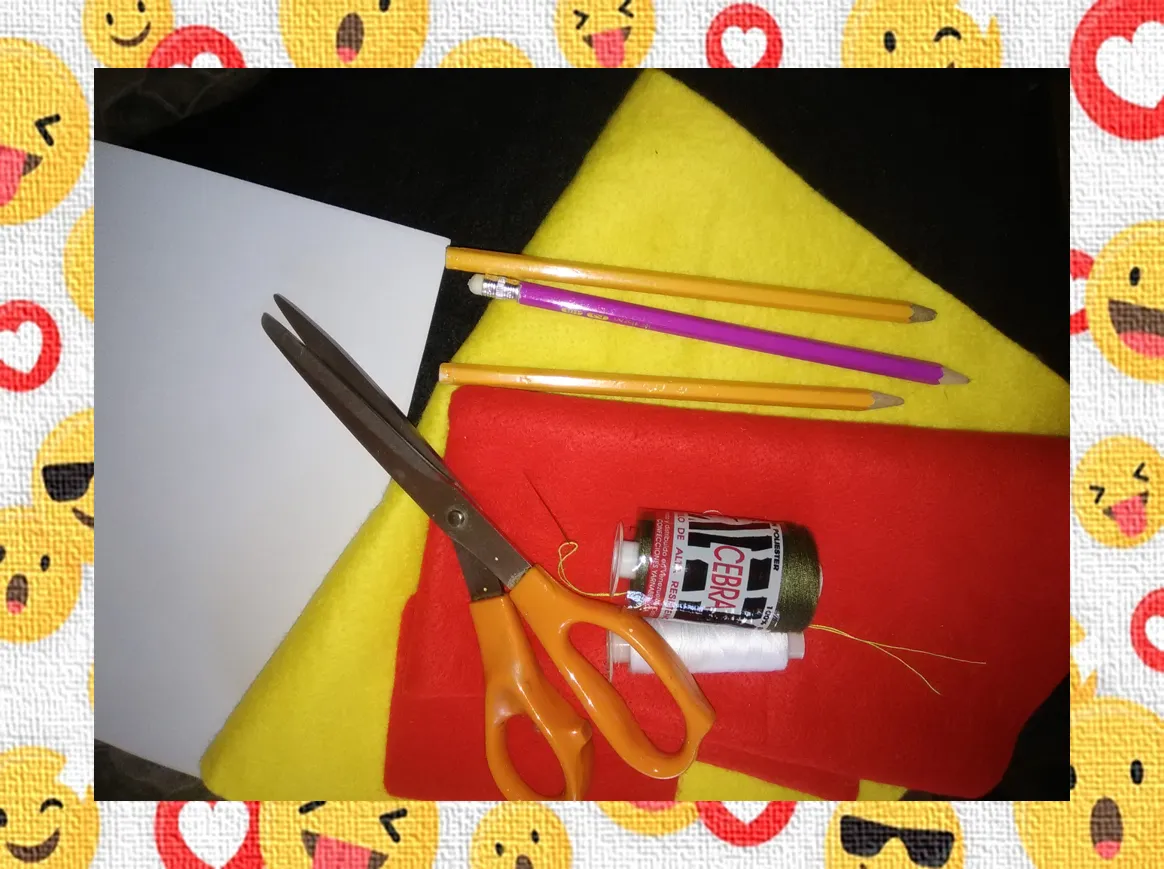
Los Materiales son:
- Fieltro
- Aguja
- Tijera
- Hilo
- Aguja
- Pega
- Lápices
Materials are:
- Felt
- Needle
- Scissor
- Thread
- Needle
- Job
- Pencils
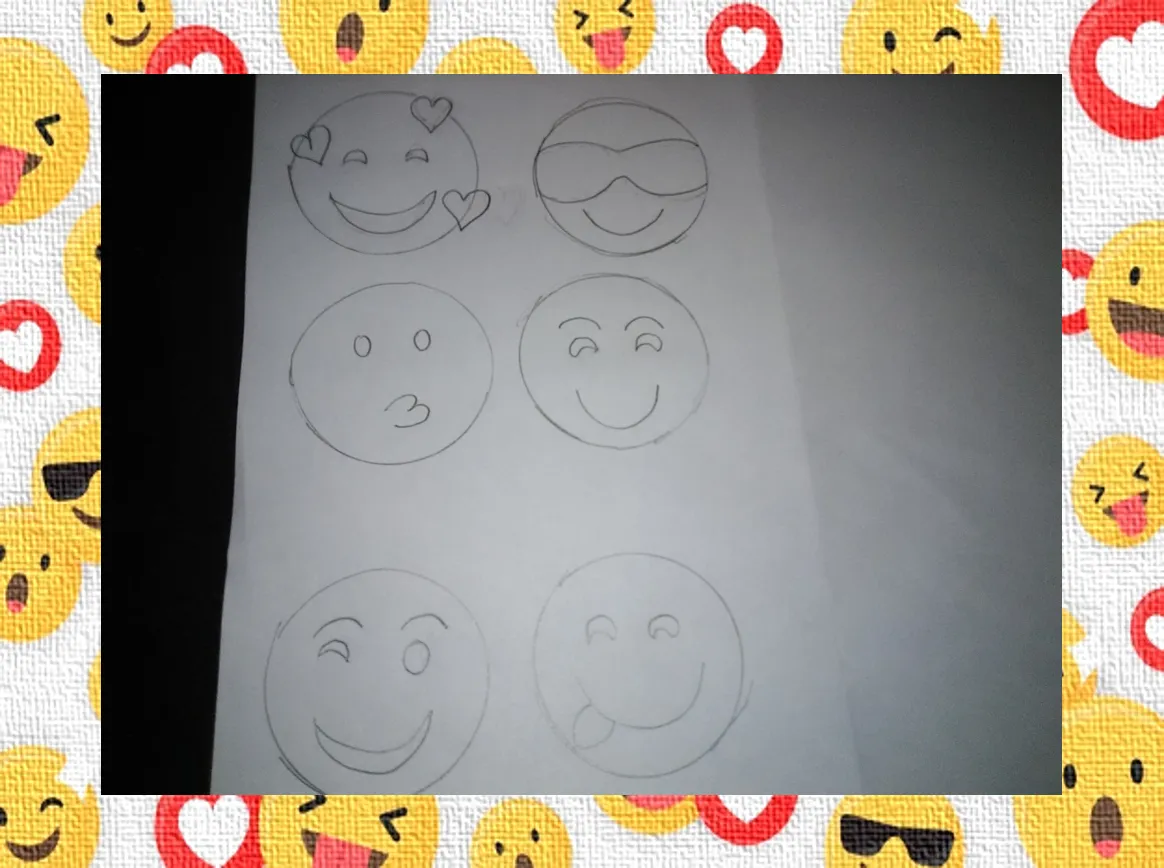
Comienzo dibujando en hoja los emoticones que realizare, para tener los moldes y pasarlos al fieltro.
I start by drawing the emoticons to make on the sheet, to have the molds and transfer them to the felt.
Remarco el circulo que lo hice con una tapa de pintura la frio, estos circulos amarillos serán las caritas, deben hacerse dobles y recortar.
I highlight the circle that I did with a cold paint lid, these yellow circles will be the faces, they must be doubled and cut.

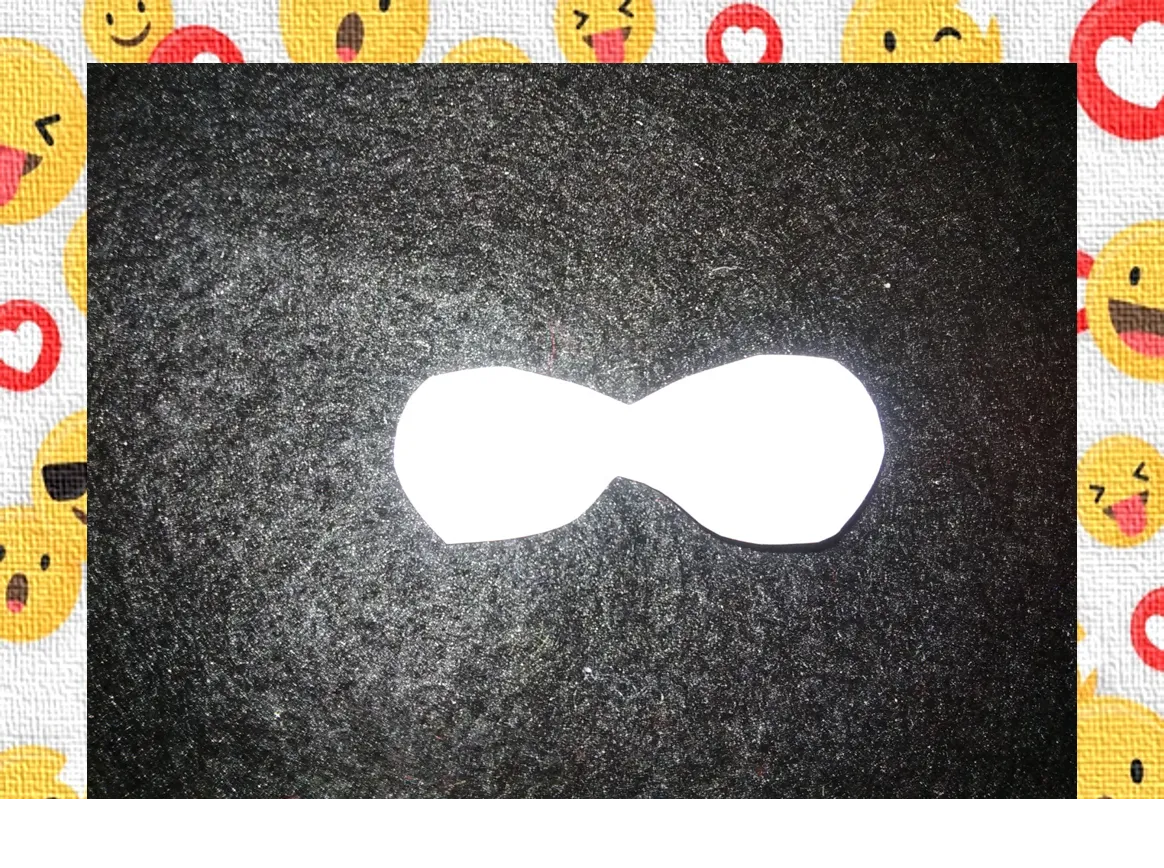
Por ejemplo el emoticón con lentes, se le saca el molde con en fieltro color negro.
For example, the emoticon with glasses, the mold is removed with black felt.
Armo cada carita con su característica y la pego con pega blanca o silicón liquido.
I assemble each face with its characteristic and glue it with white glue or liquid silicone.

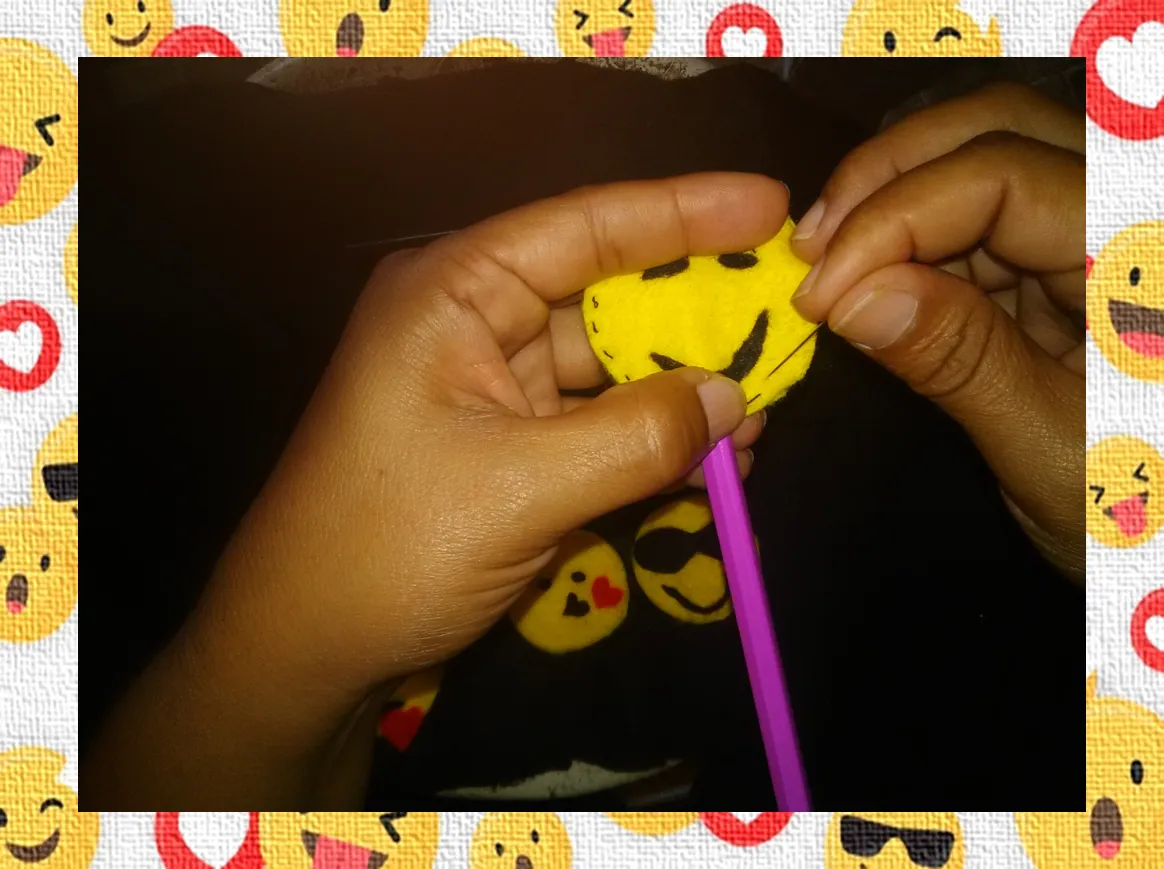
Luego que están pegadas las bocas y ojos, se procede a cocer por el borde con hilo negro y en puntadas rectas, Comenzando en la parte de abajo y terminando donde esta el lápiz.
After the mouths and eyes are glued, we proceed to cook on the edge with black thread and in straight stitches, starting at the bottom and ending where the pencil is.
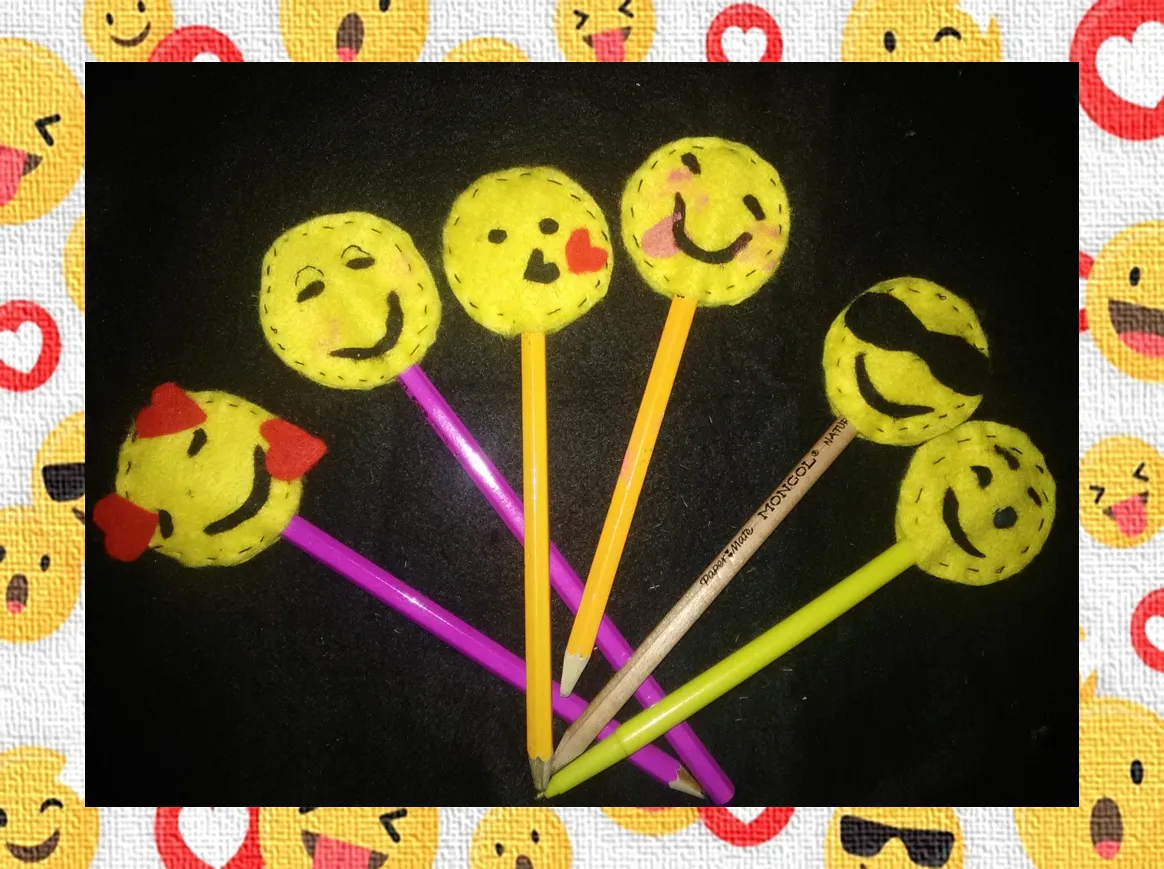
Después de coserlos todos y se le coloca el lápiz, así de super quedaron, espero y mis estudiantes se emocionen. Todas las fotos son propias editadas en Power Point.
After sewing all of them and putting the pencil on, that's how super they were, I hope and my students get excited. All photos are own edited in Power Point.
¡HASTA PRONTO!
SEE YOU SOON!