
Español
Hola Amigos en Hive… en especial a los miembros creadores de la comunidad @Build-It.
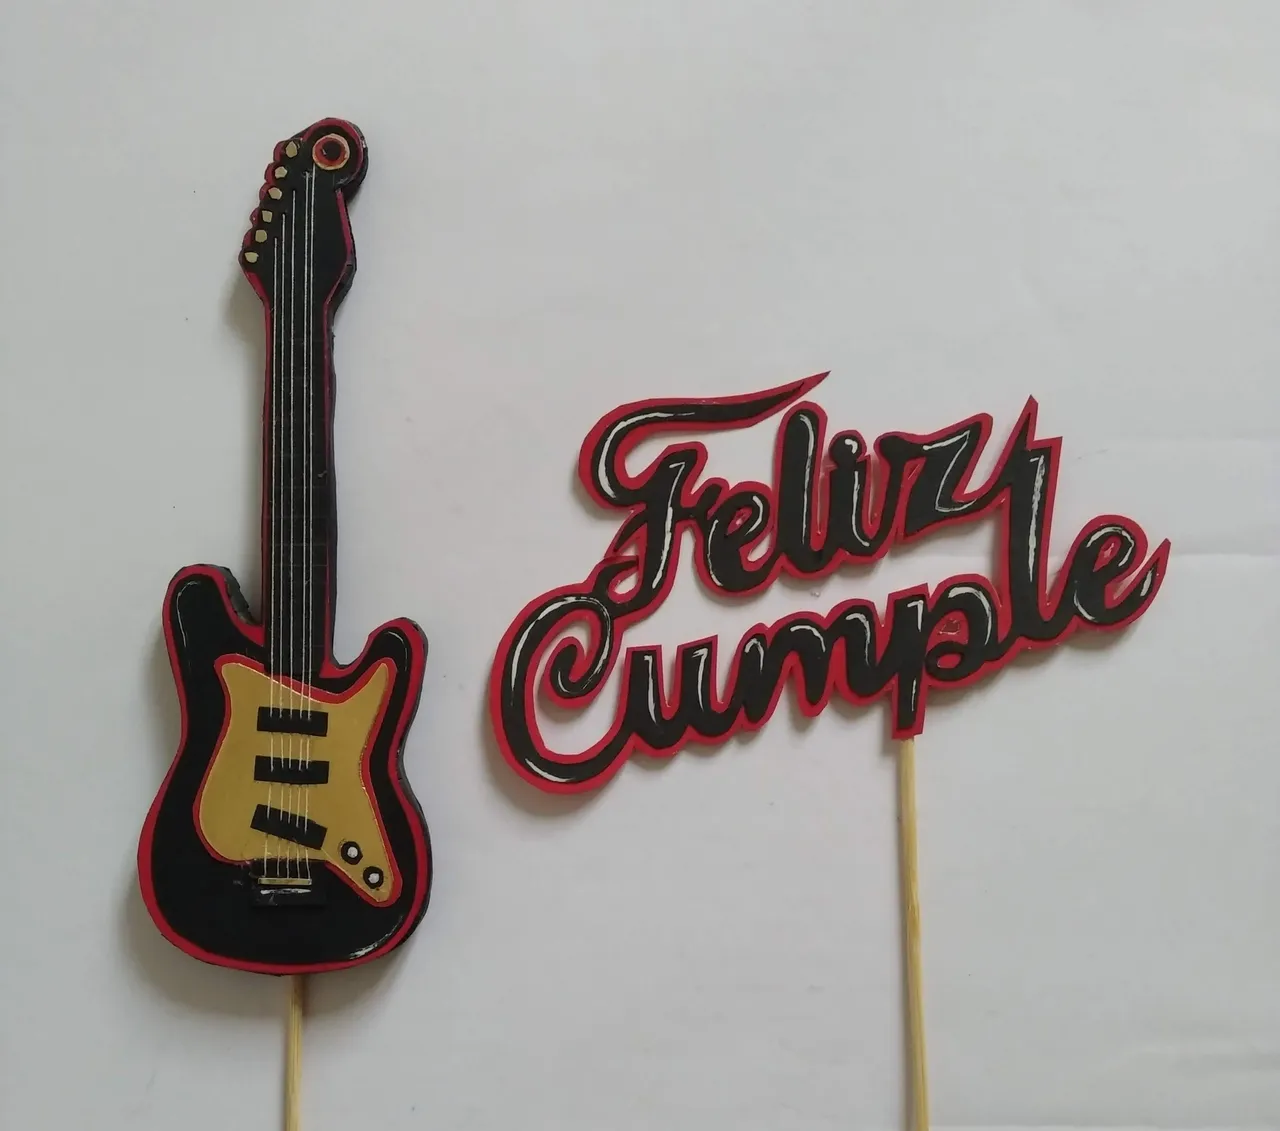
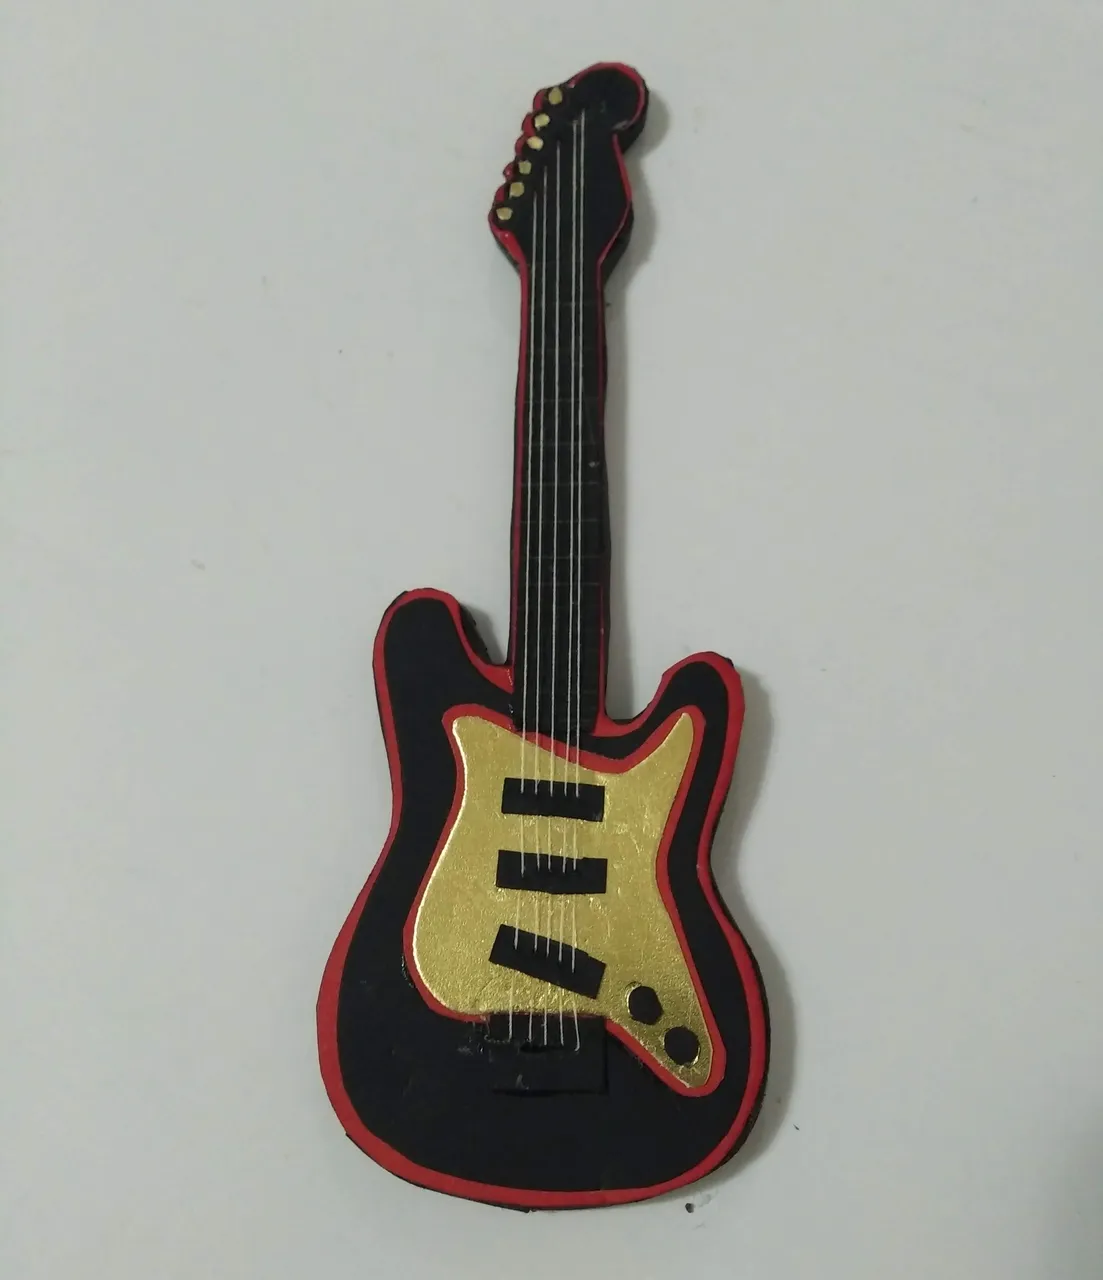
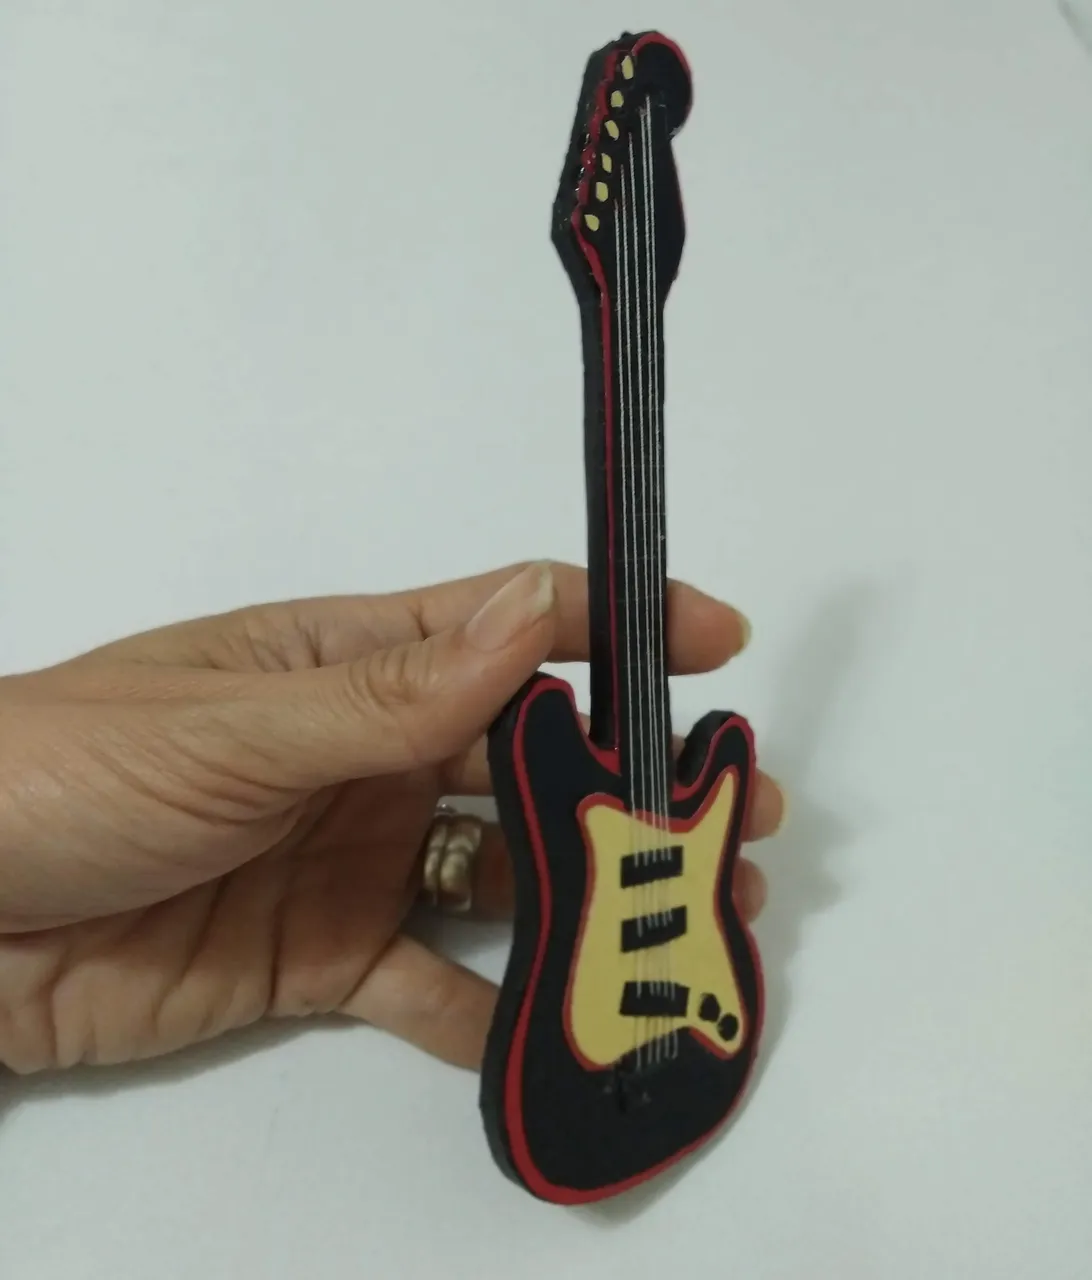
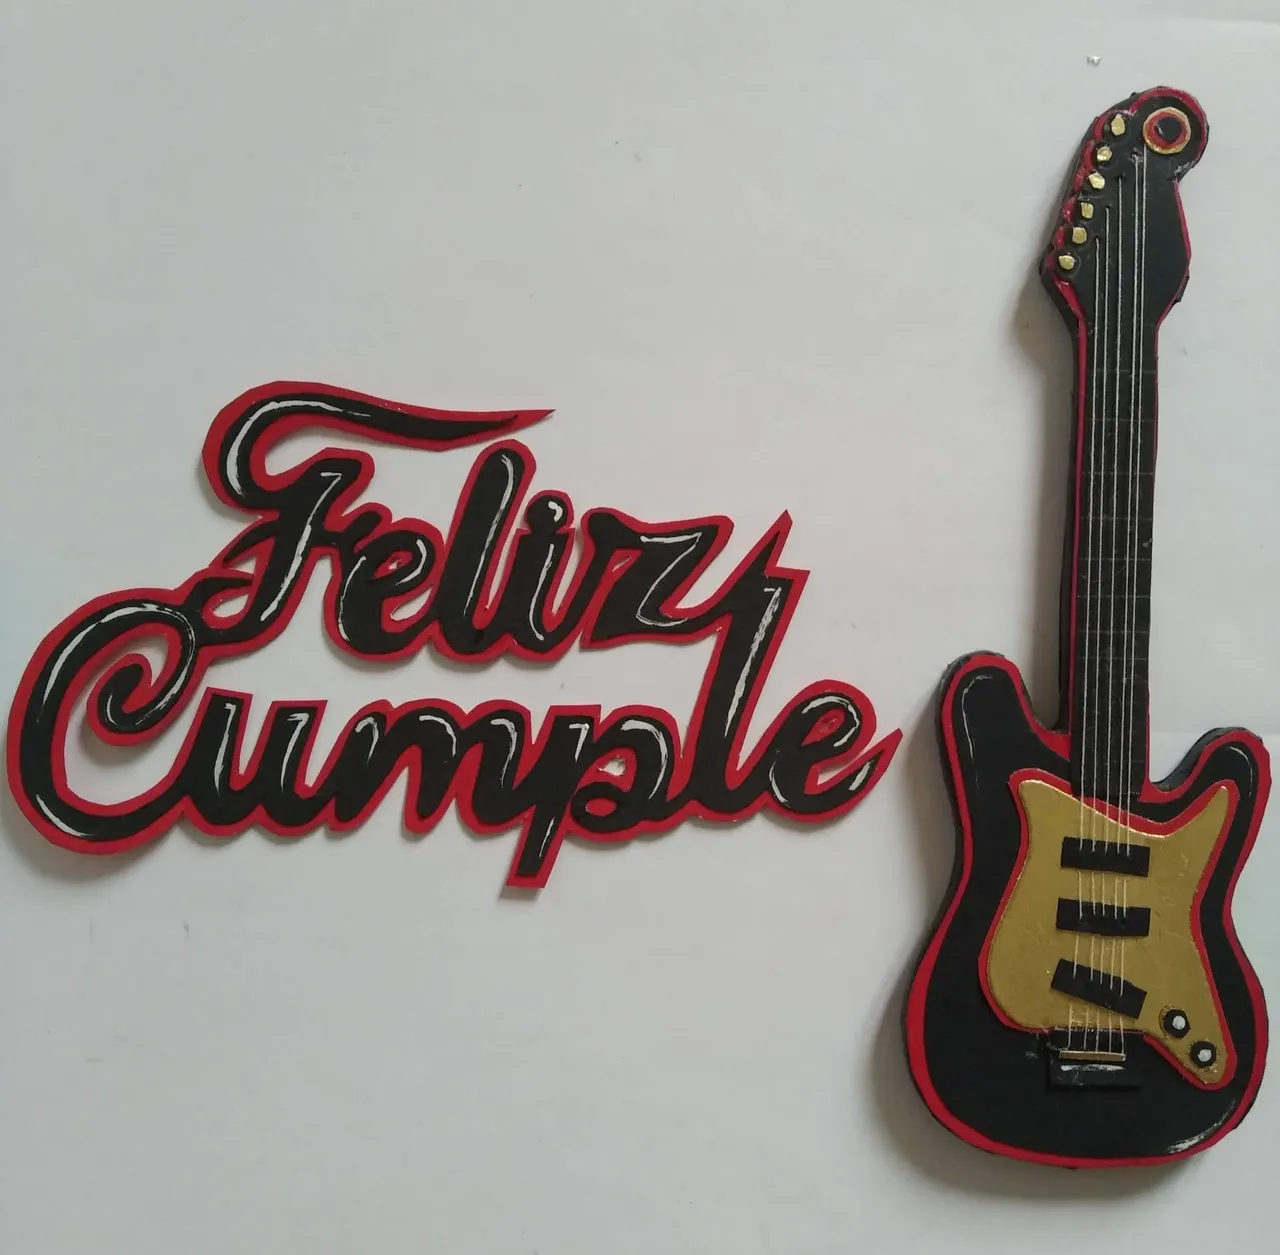
Para los amantes de la música, en especial para los aficionados de las guitarras eléctricas, hoy les muestro una linda decoración realizada para un fanático de éste instrumento musucial. Este amigo ama el rock, las guitarras y ama los “pasteles imperiales”, un rico pastel relleno de frutas y crema pastelera. Para homenajearlo por su cumpleaños, su familia decidió regalarle la fusión de ambos placeres y sorprenderlo para hacer de su cumpleaños algo especial.
Es un topper sencillo de elaborar, que requiere solo de un poco de tiempo y mucho amor para lograr quede hermosamente detallado.
Les invito a que se animen a crear ustedes mismos sus topper y ofrezcan a sus familiares y amigos detalles únicos hechos con amor.
¿te atreverías a hacerlo?…Comentame que tal te pareció.
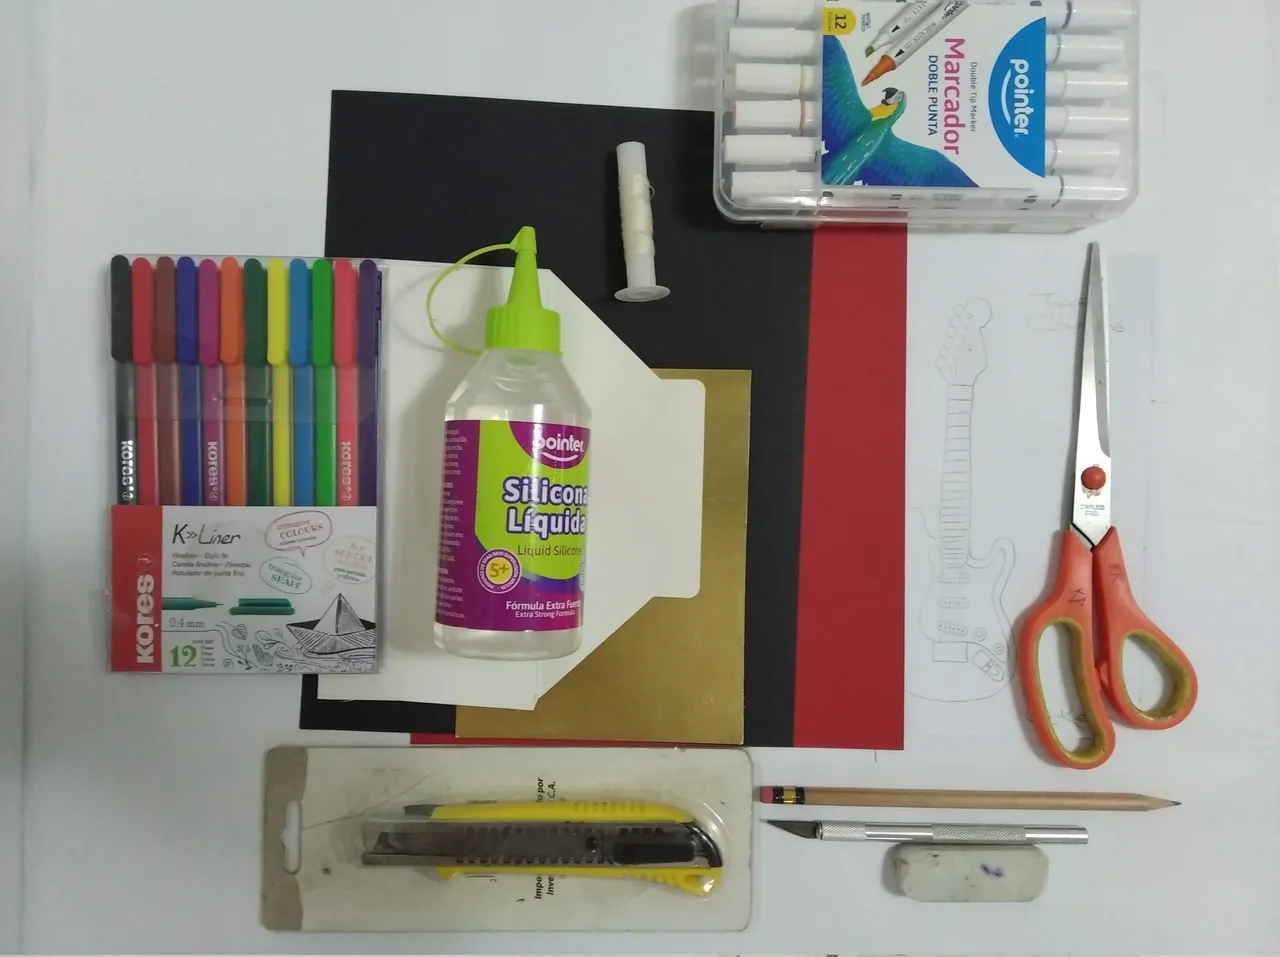
Acá les dejo los materiales utilizados, el proceso y las imágenes del trabajo.
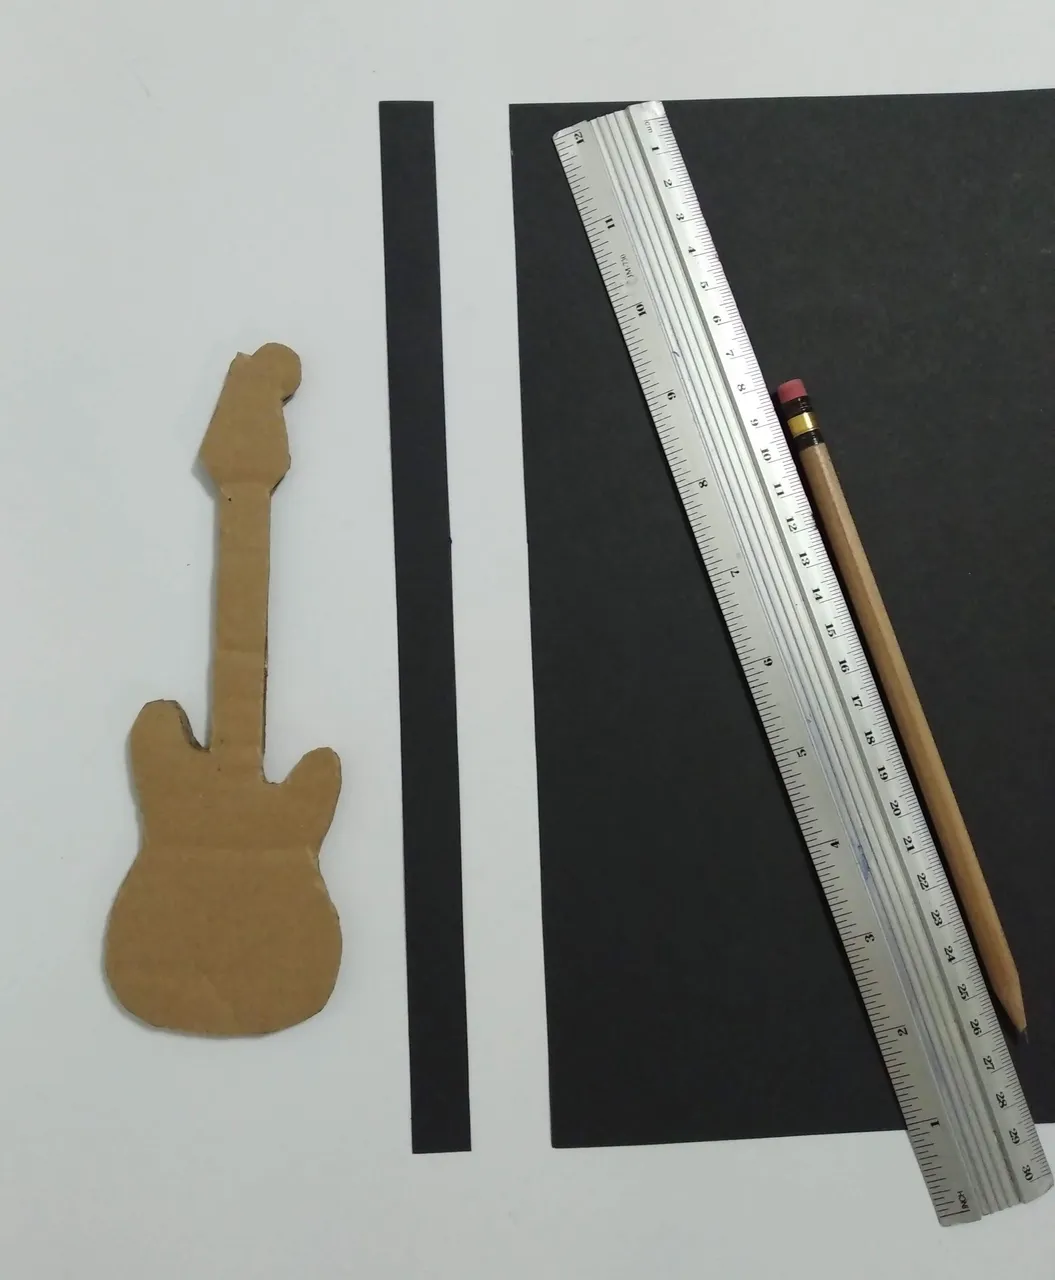
- Plantilla del diseño a utilizar (hoja reciclada)
- Cartulina Negra
- Cartulina Roja
- Cartulina Dorada
- Cartón fino
- Hilo de coser fino (para simular las cuerdas)
- Silicón Frio
- Silicón Caliente
- Tijera
- Lápiz
- Cutter
- Regla
- Palito de madera
- Pintura Blanca al frío
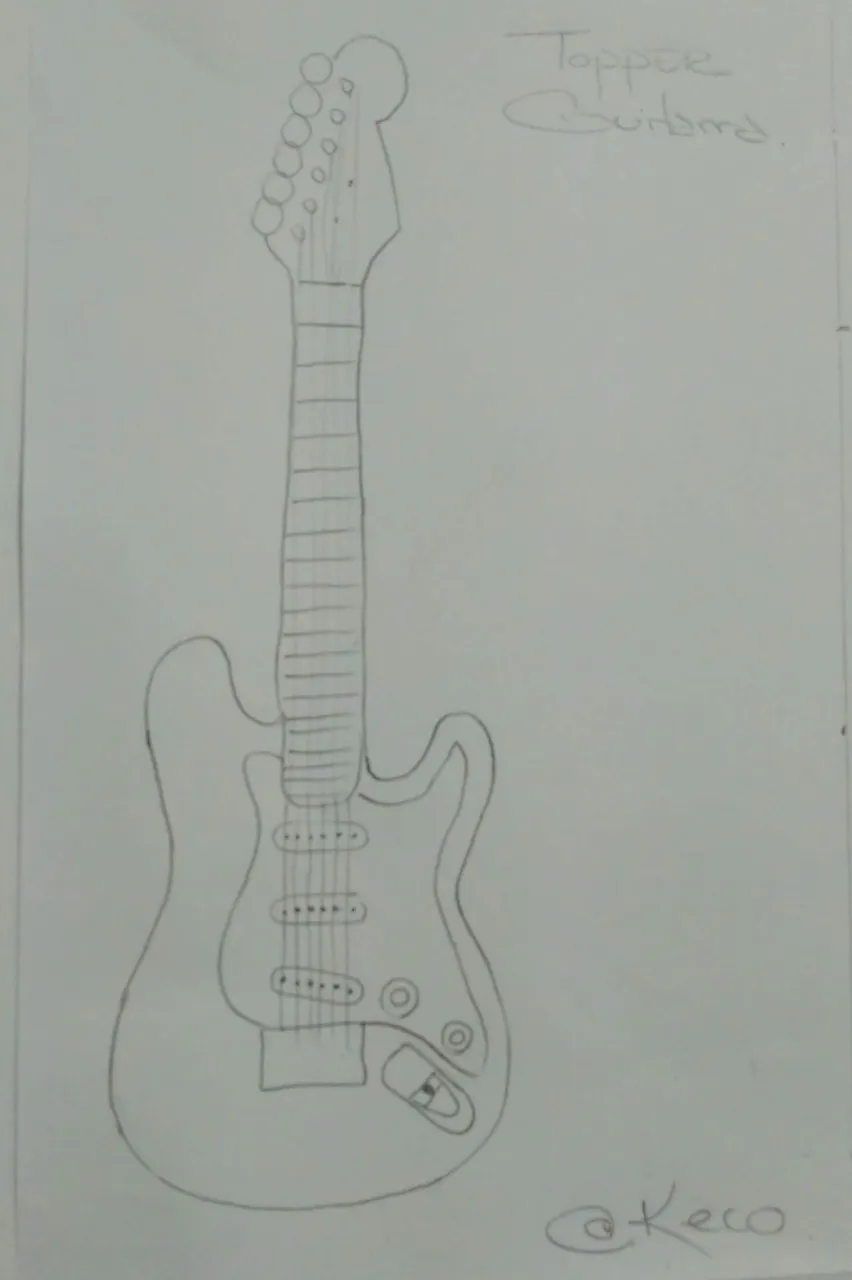
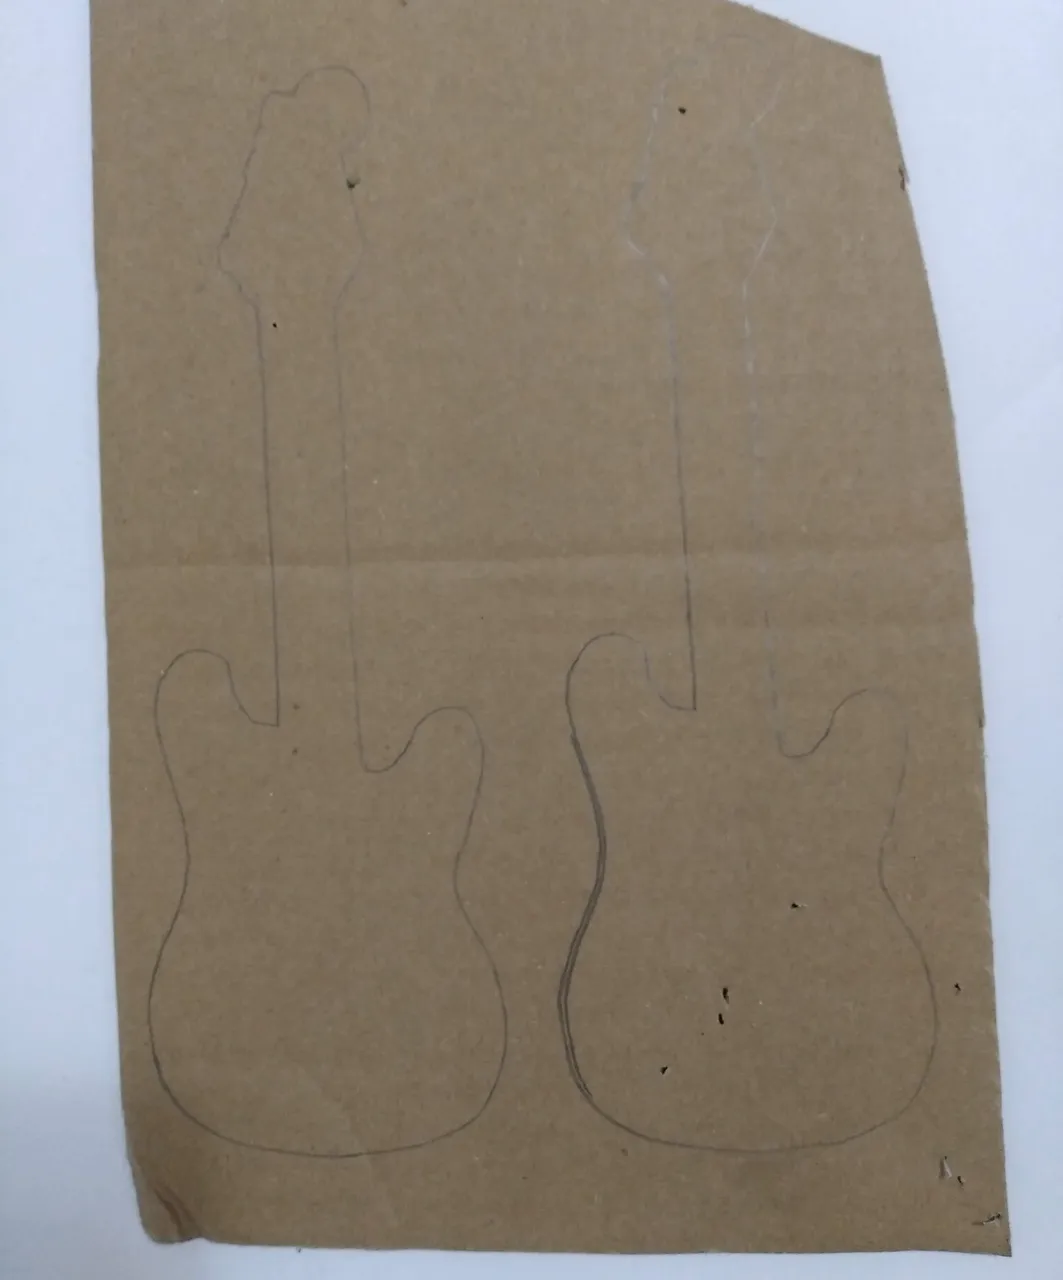
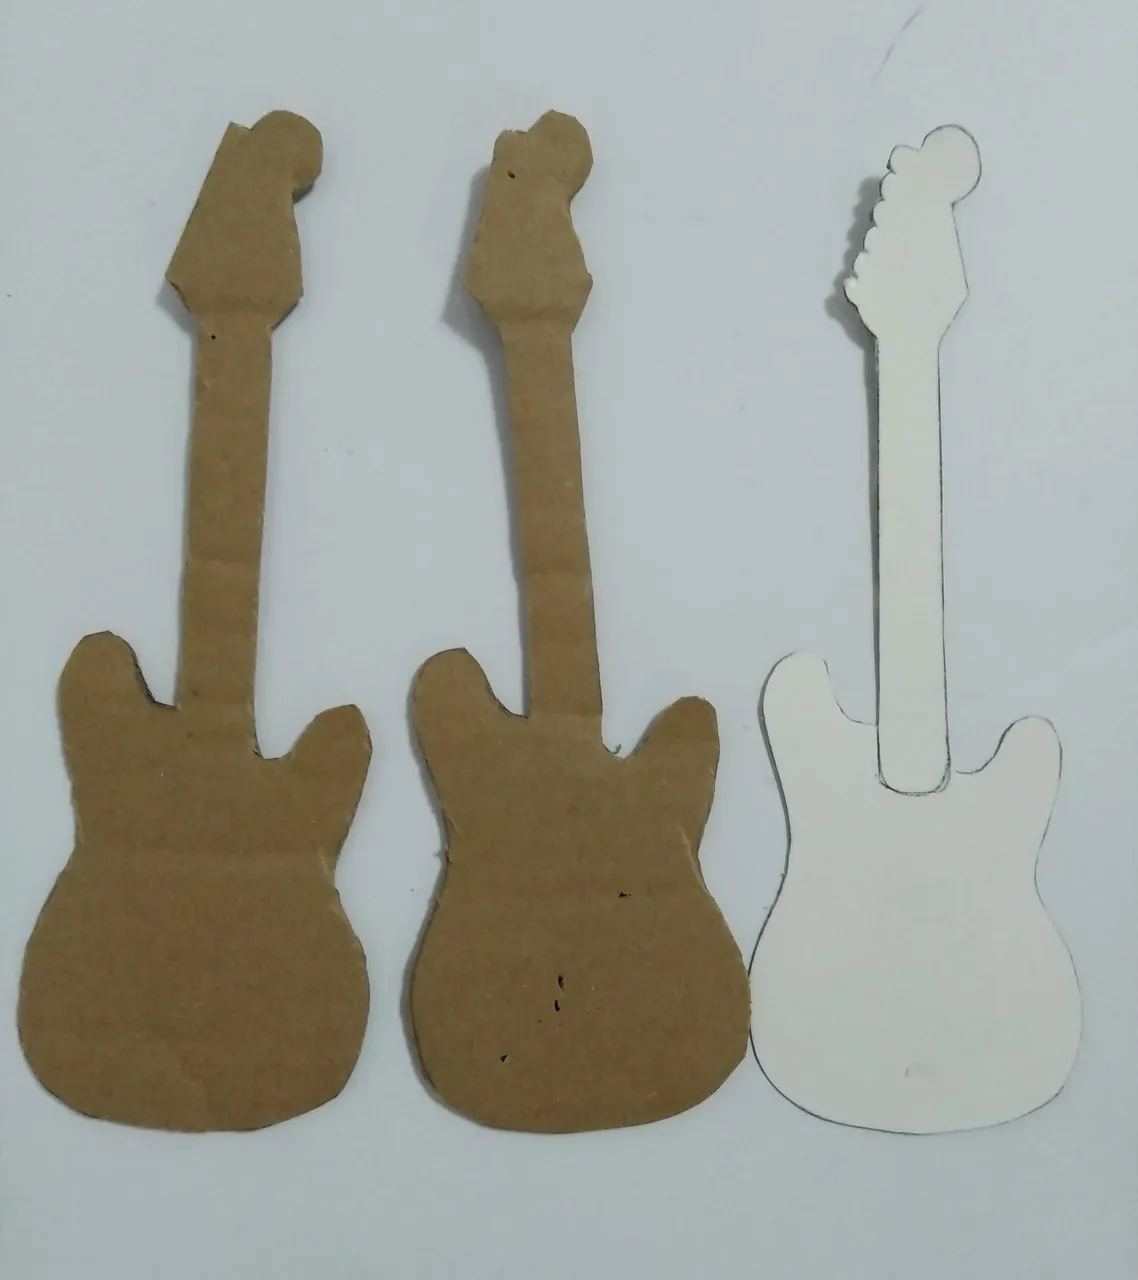
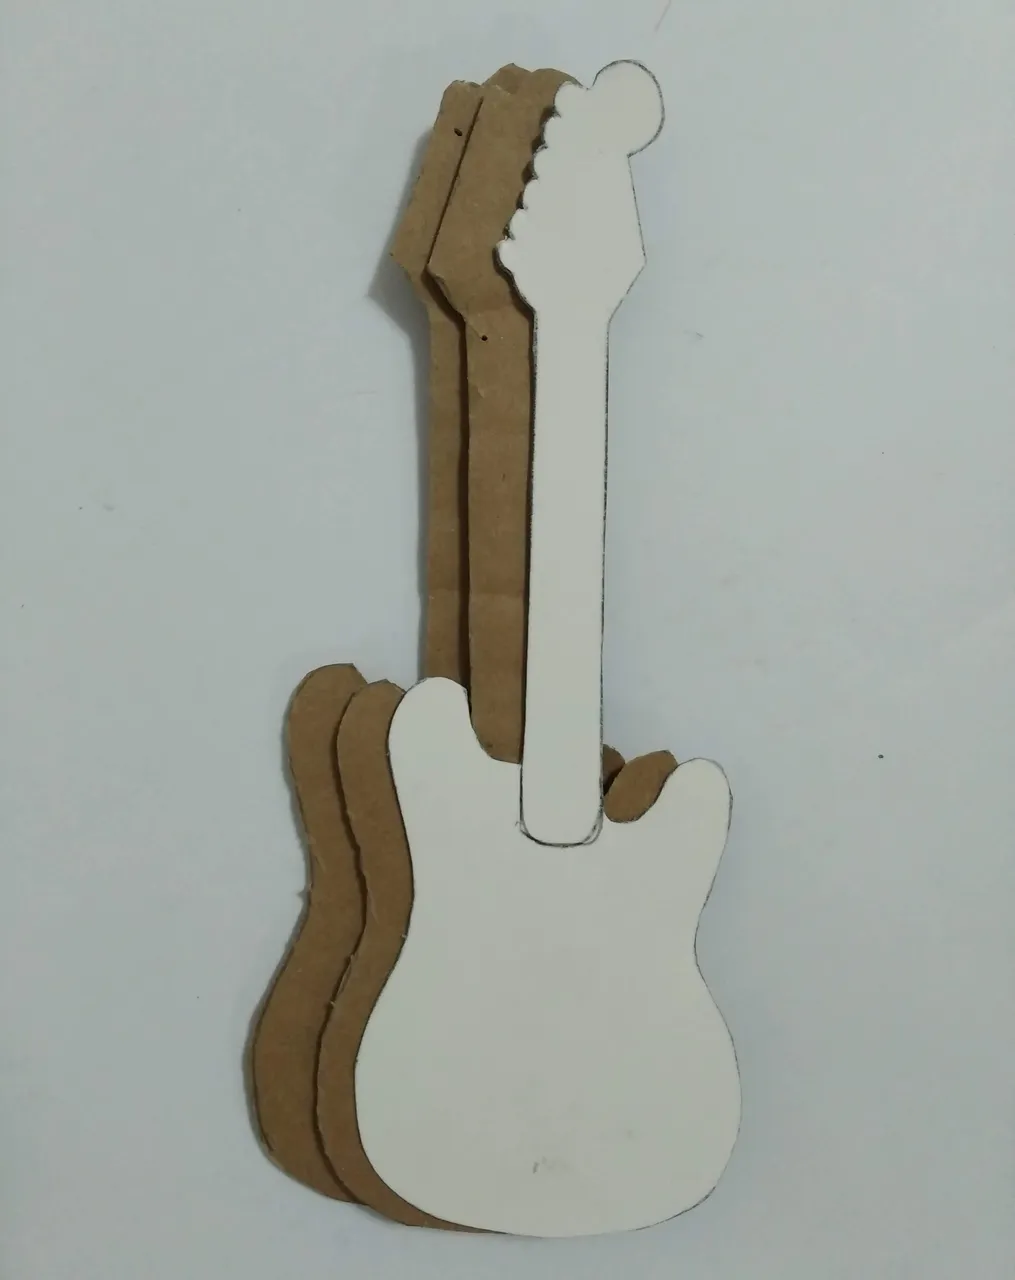
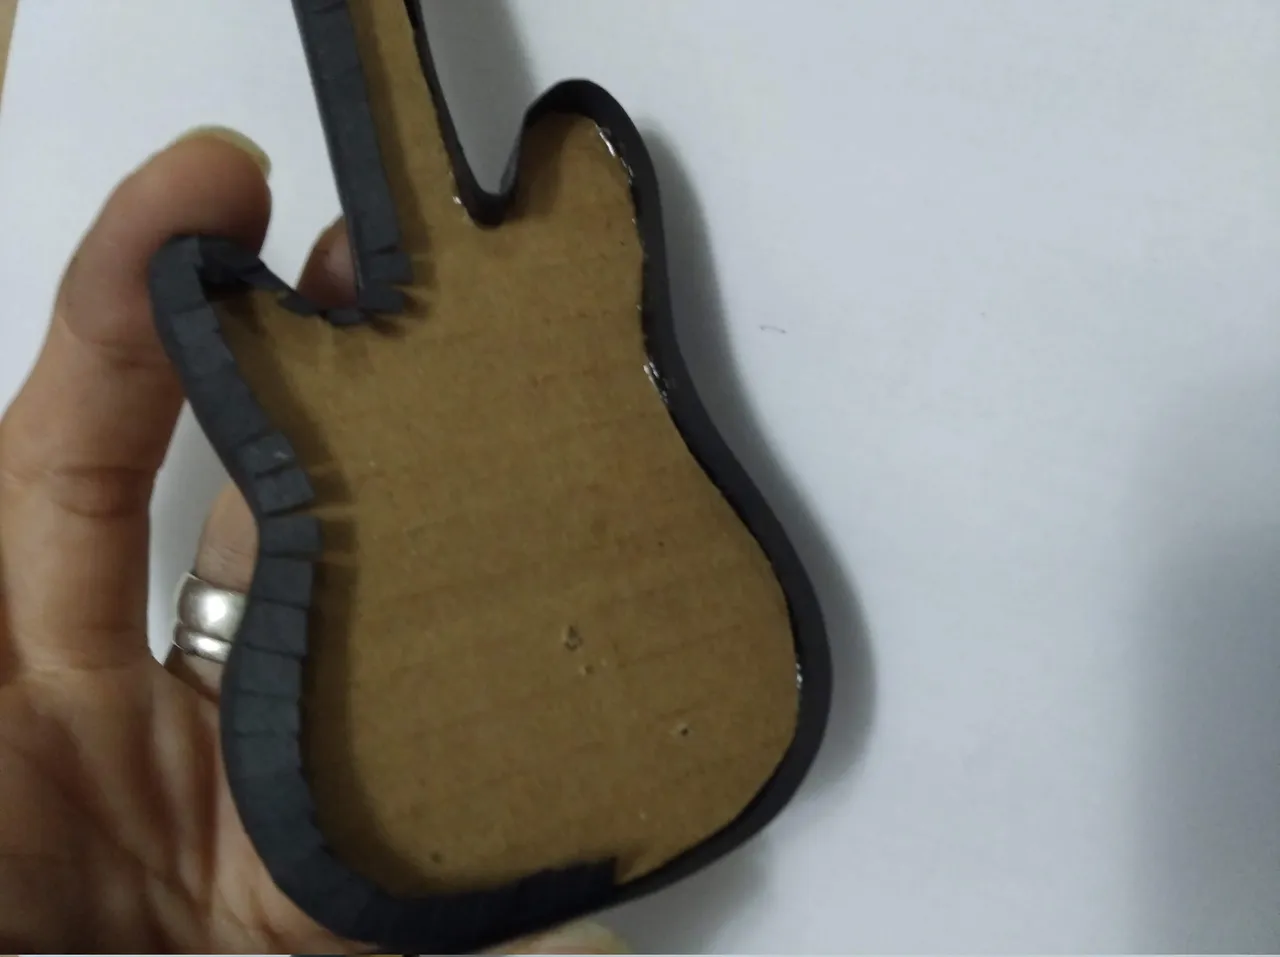
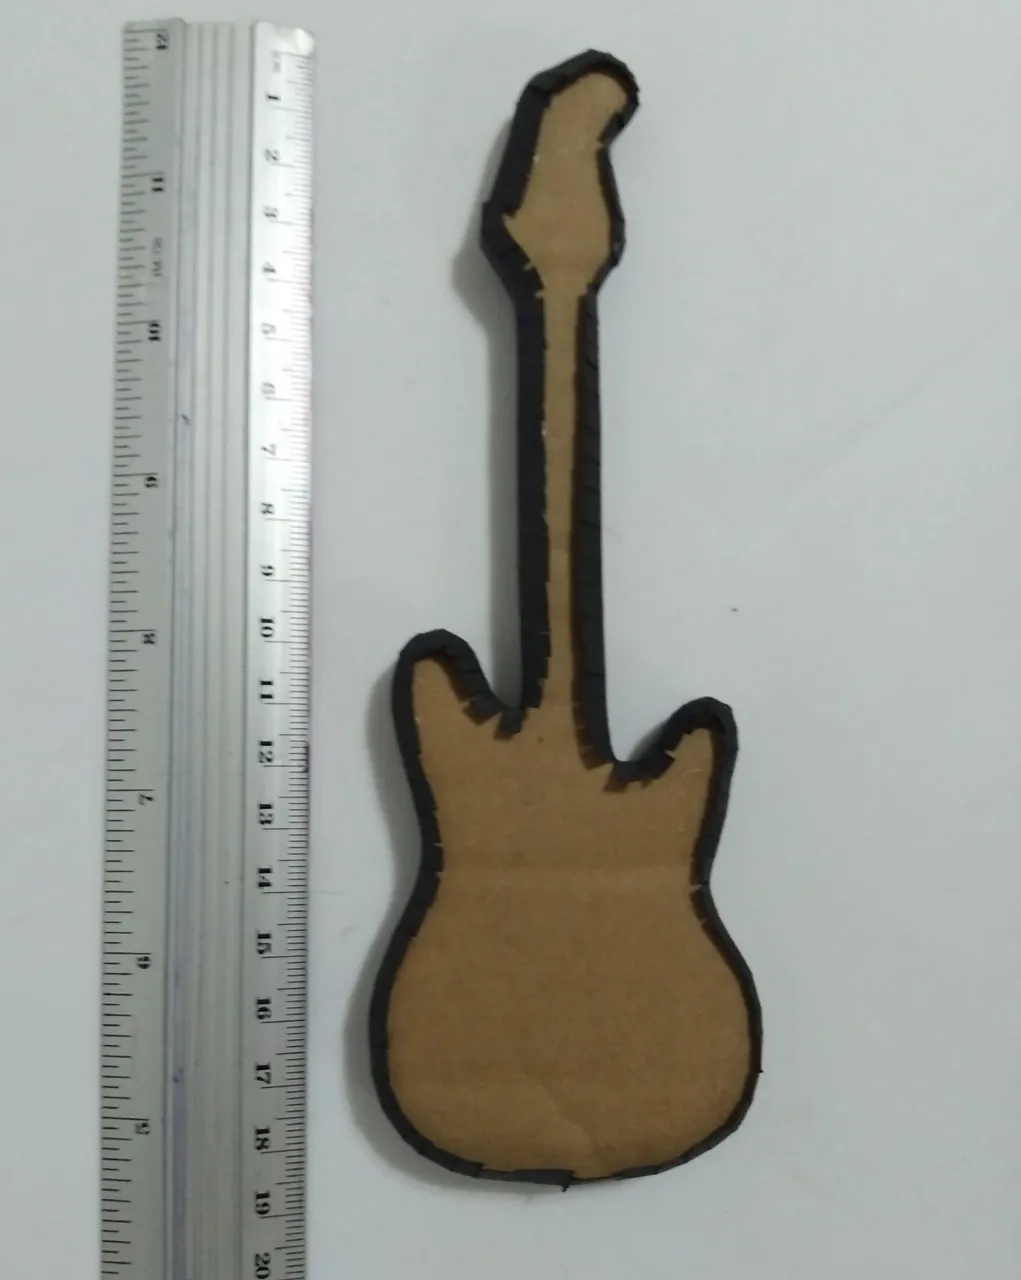
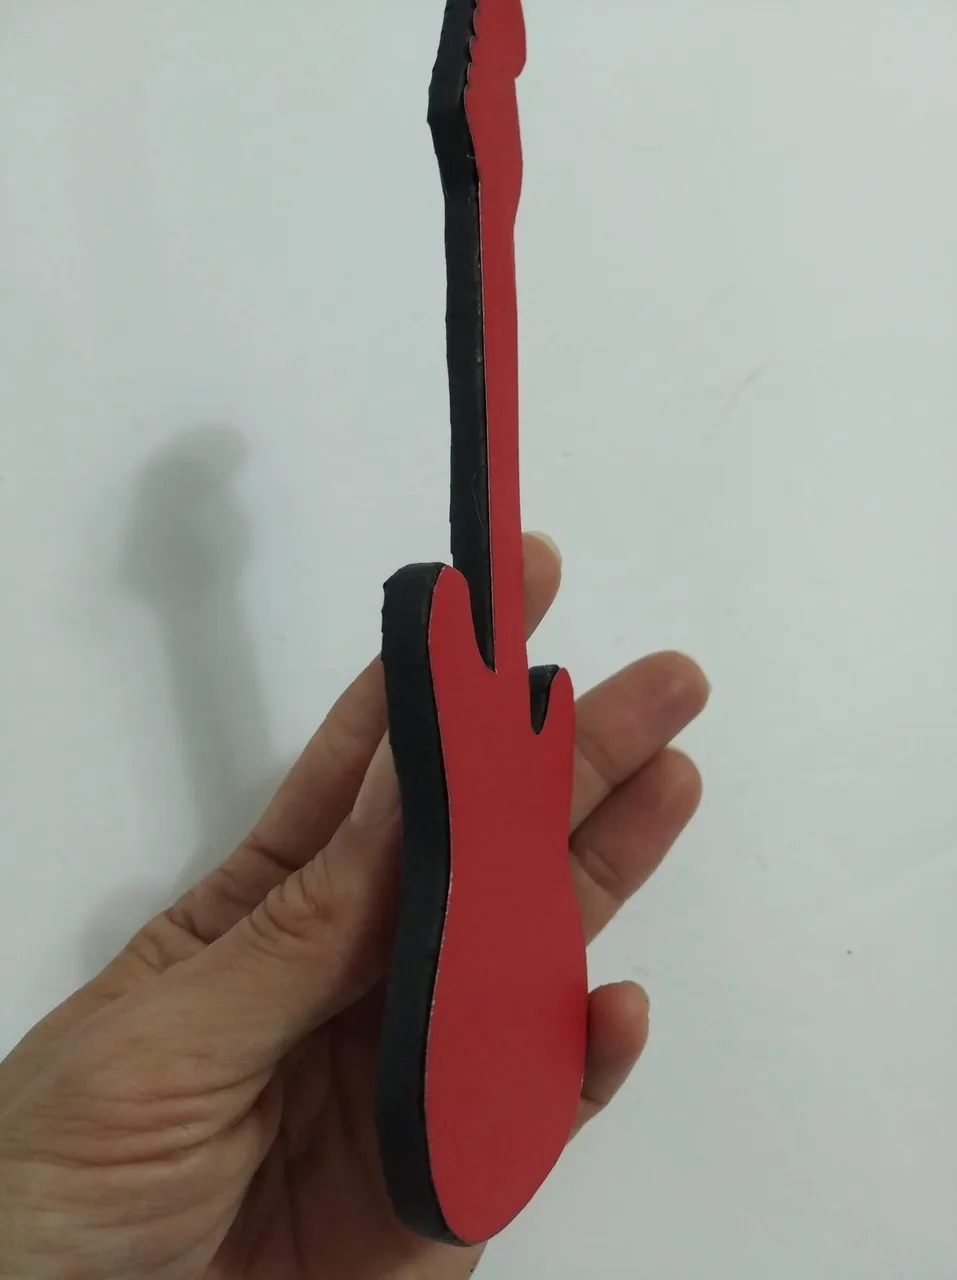
- Copiar el diseño a utilizar en el cartón fino y/o liviano y recortar dos piezas iguales
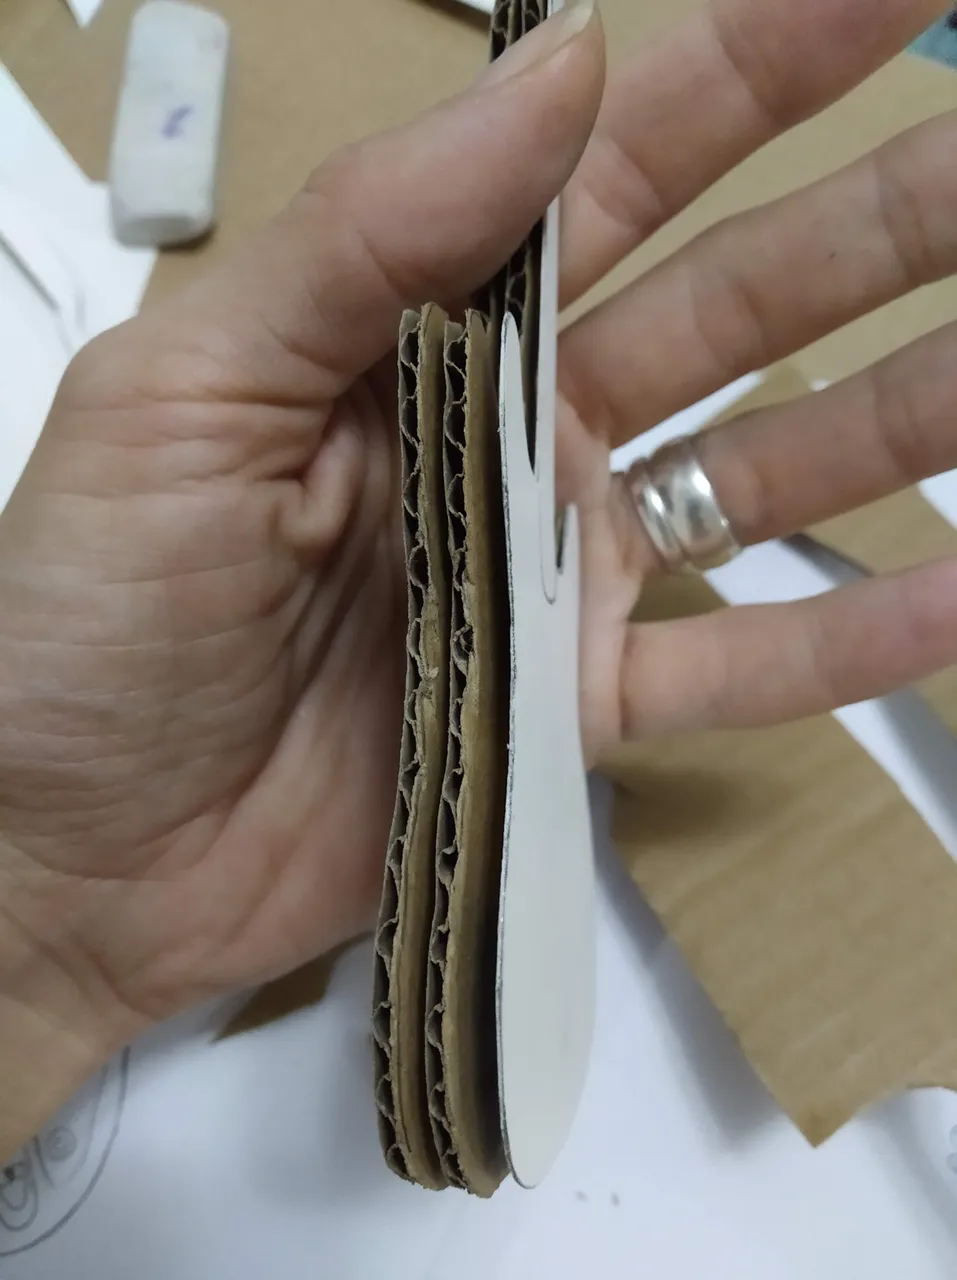
- Pegar ambas piezas con Silicón Frio y dejar secar bien.
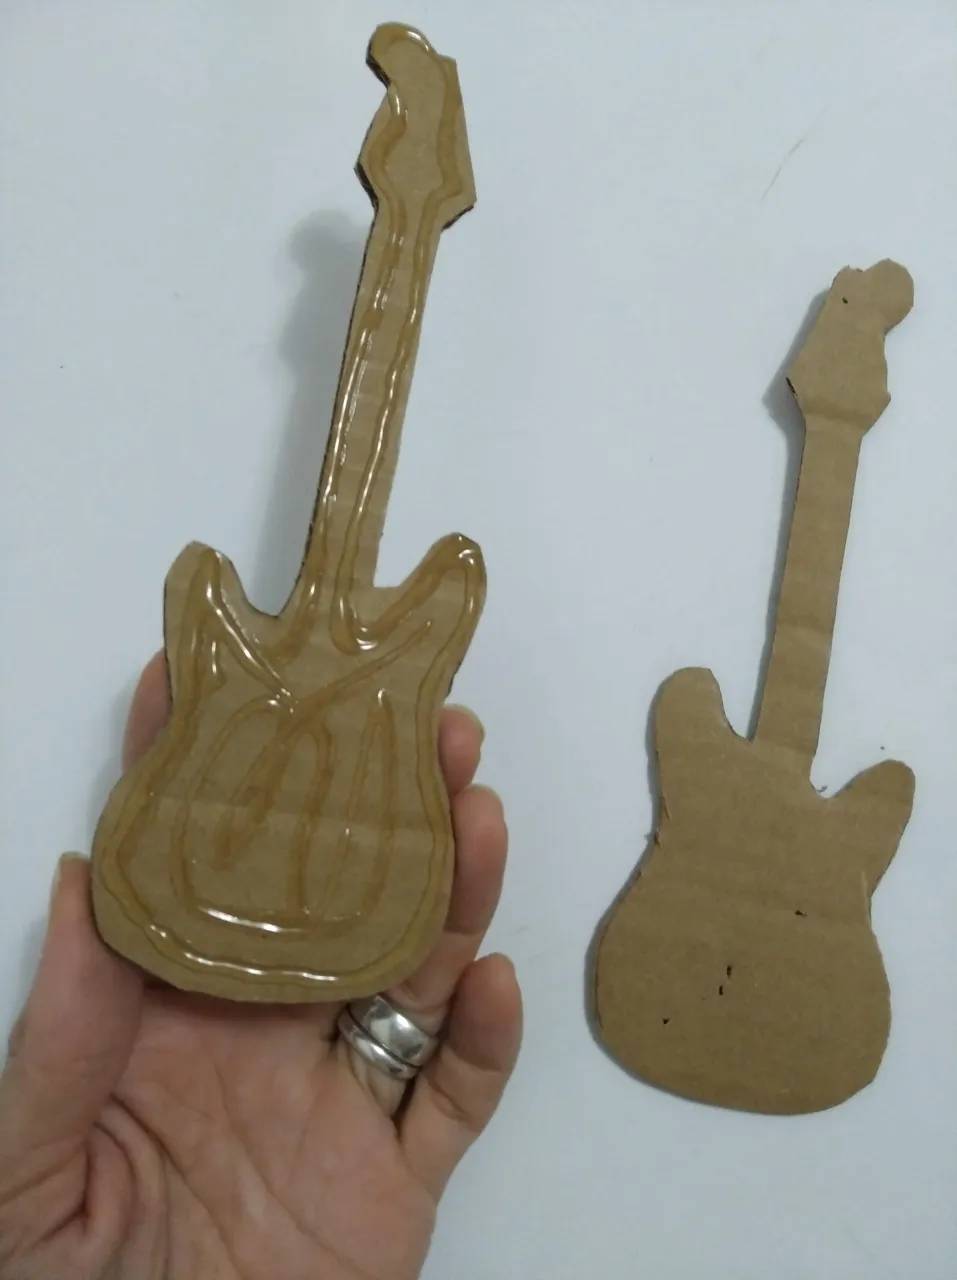
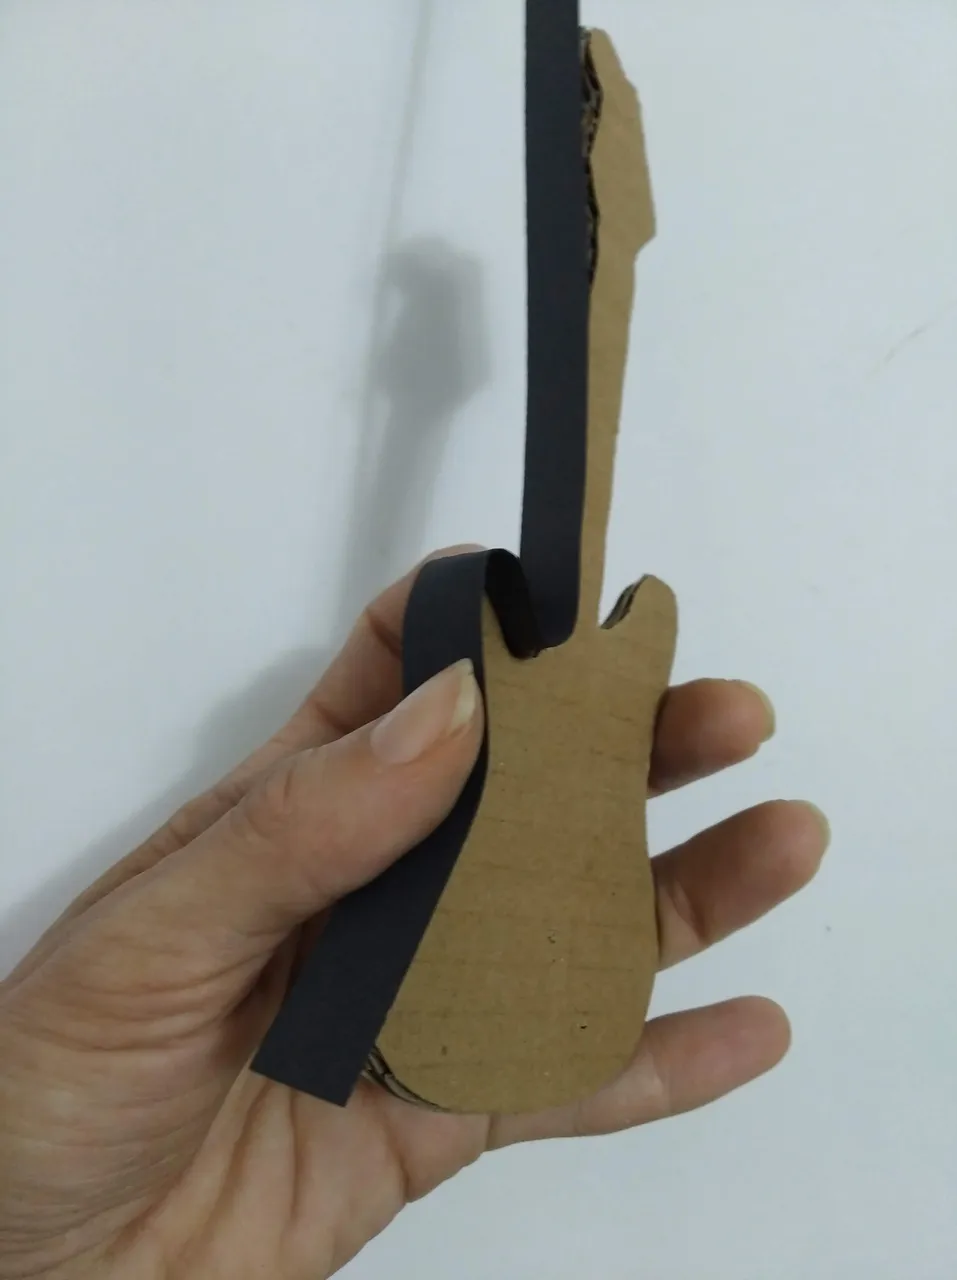
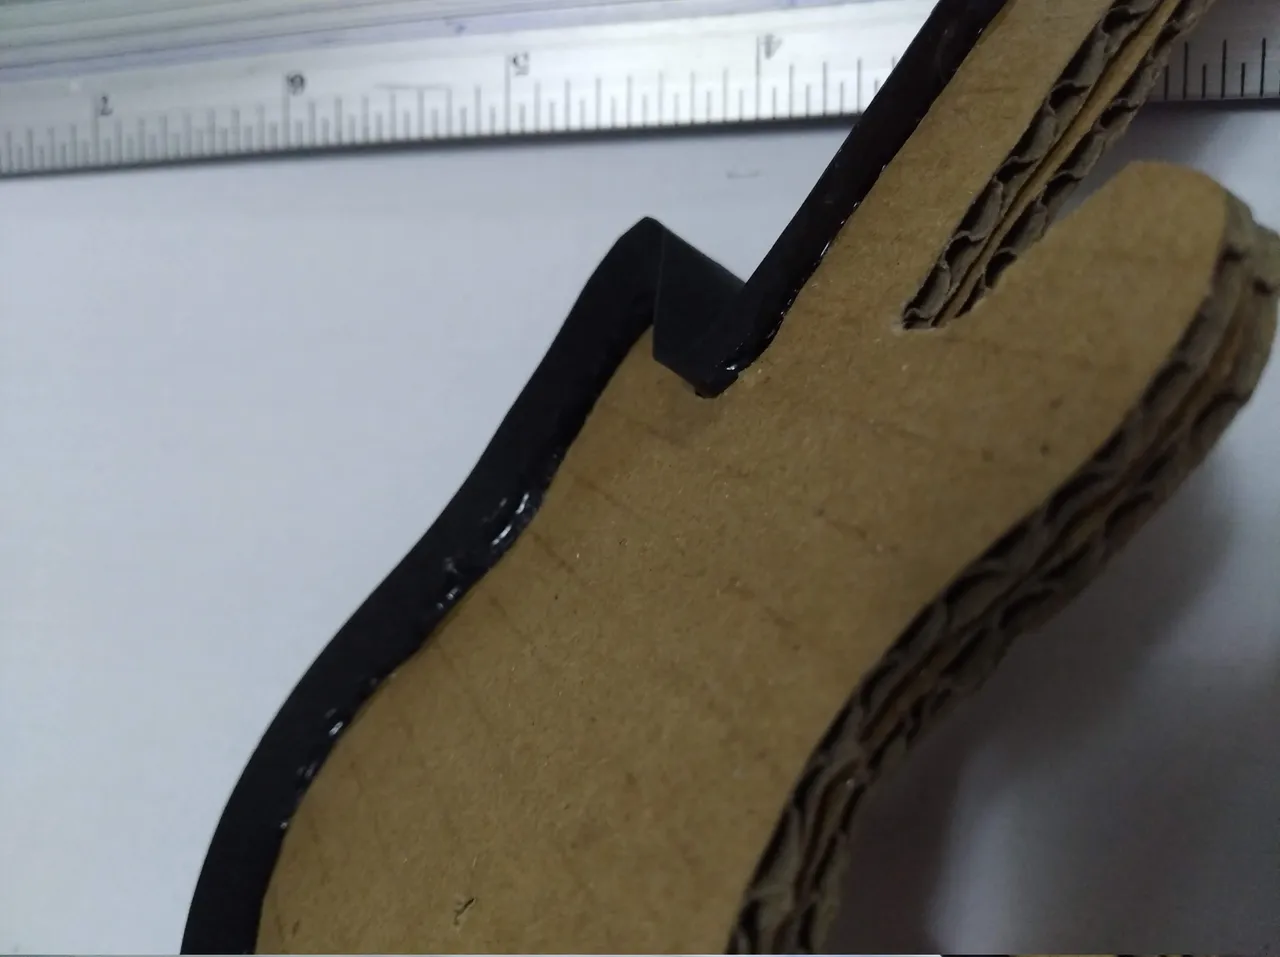
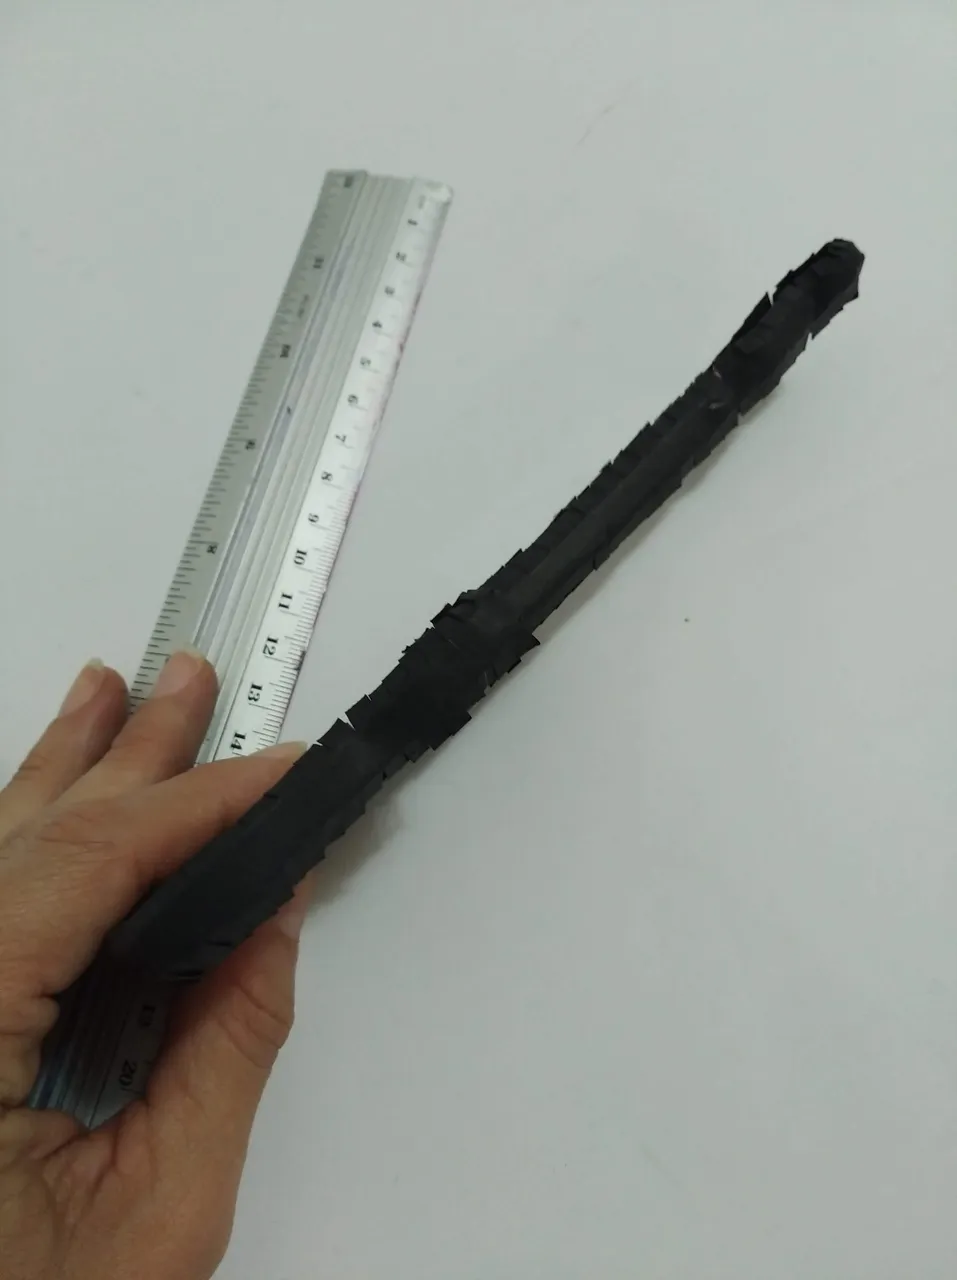
- Cortar tiras de cartulina negra y pegar en el borde del cartón con silicón frio, cuidando de mantener en ambas caras de la guitarra la misma distancia para que quede uniforme.
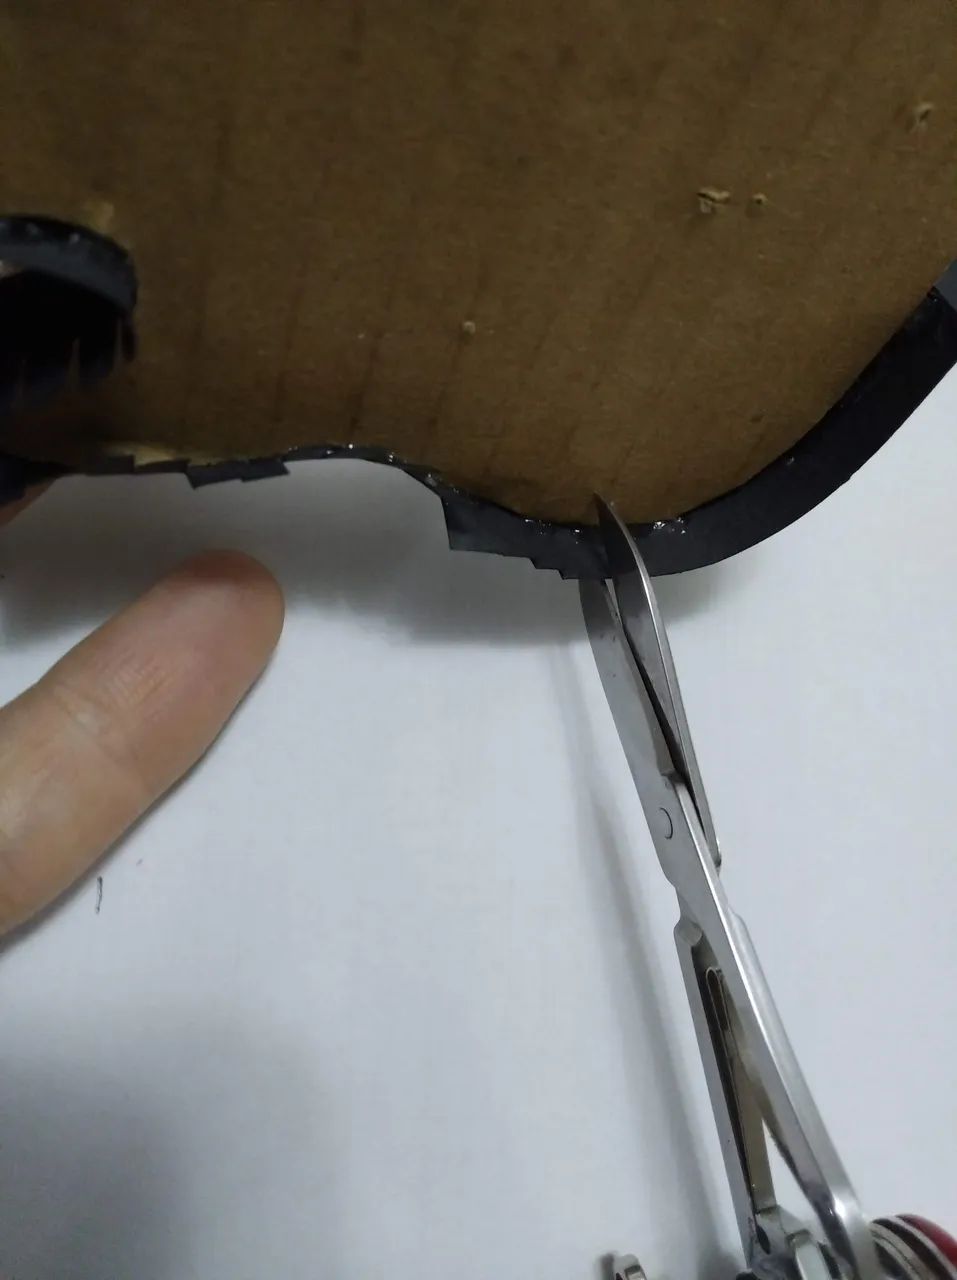
- Una vez seco el silicón, hacerle cortes a todo el borde para poder luego poder doblar y pegar las pestañas.
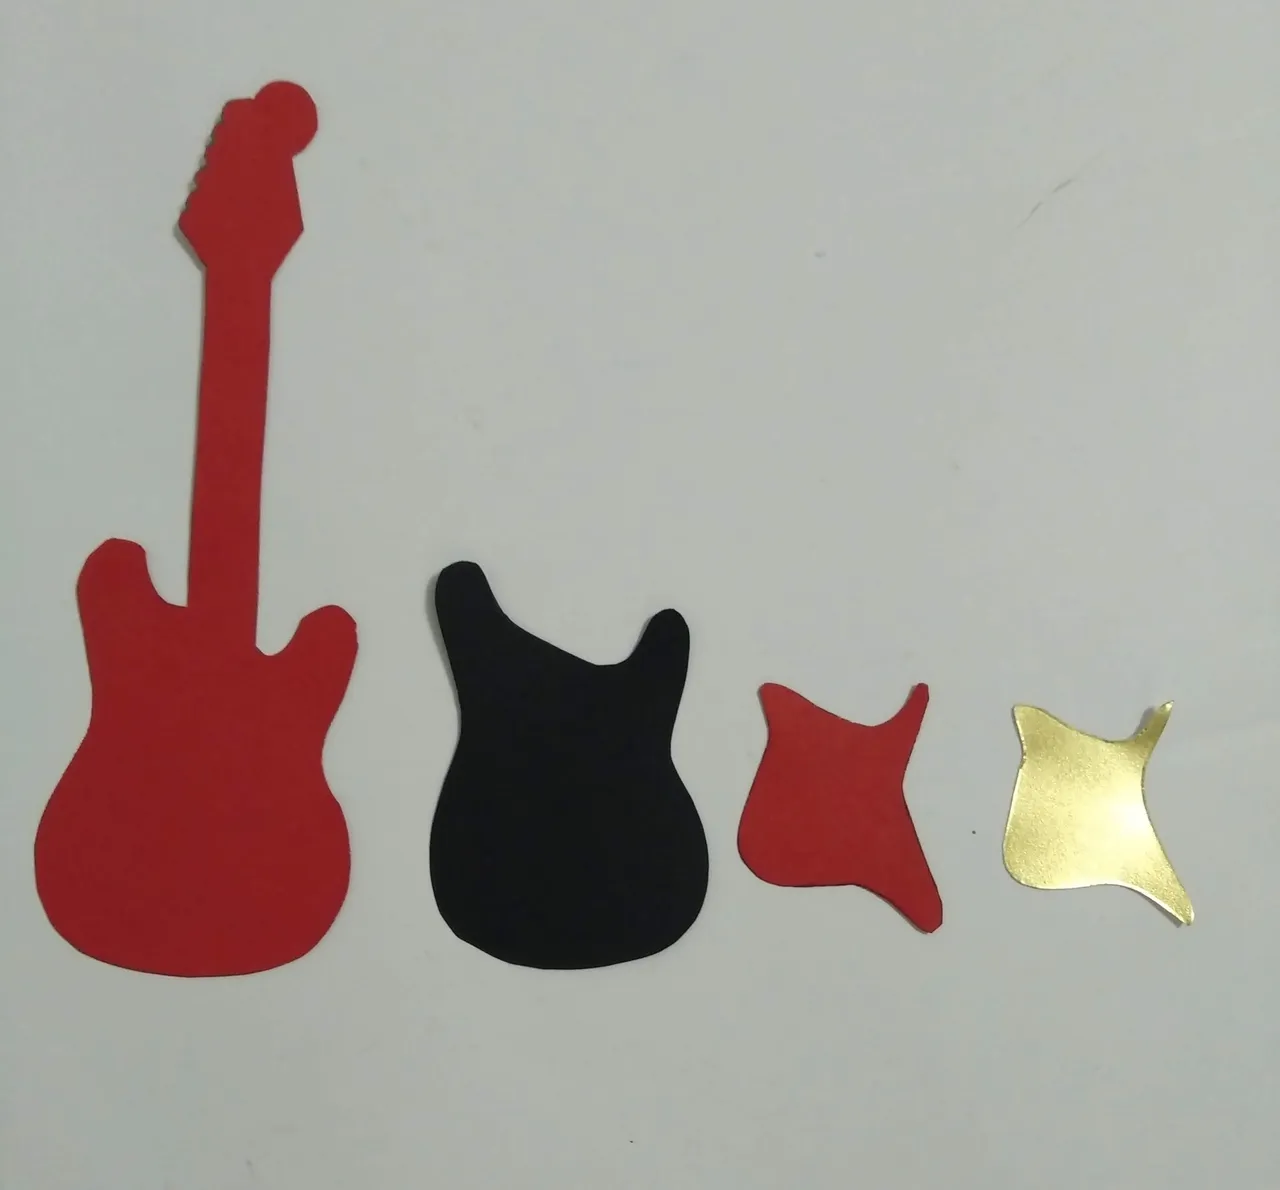
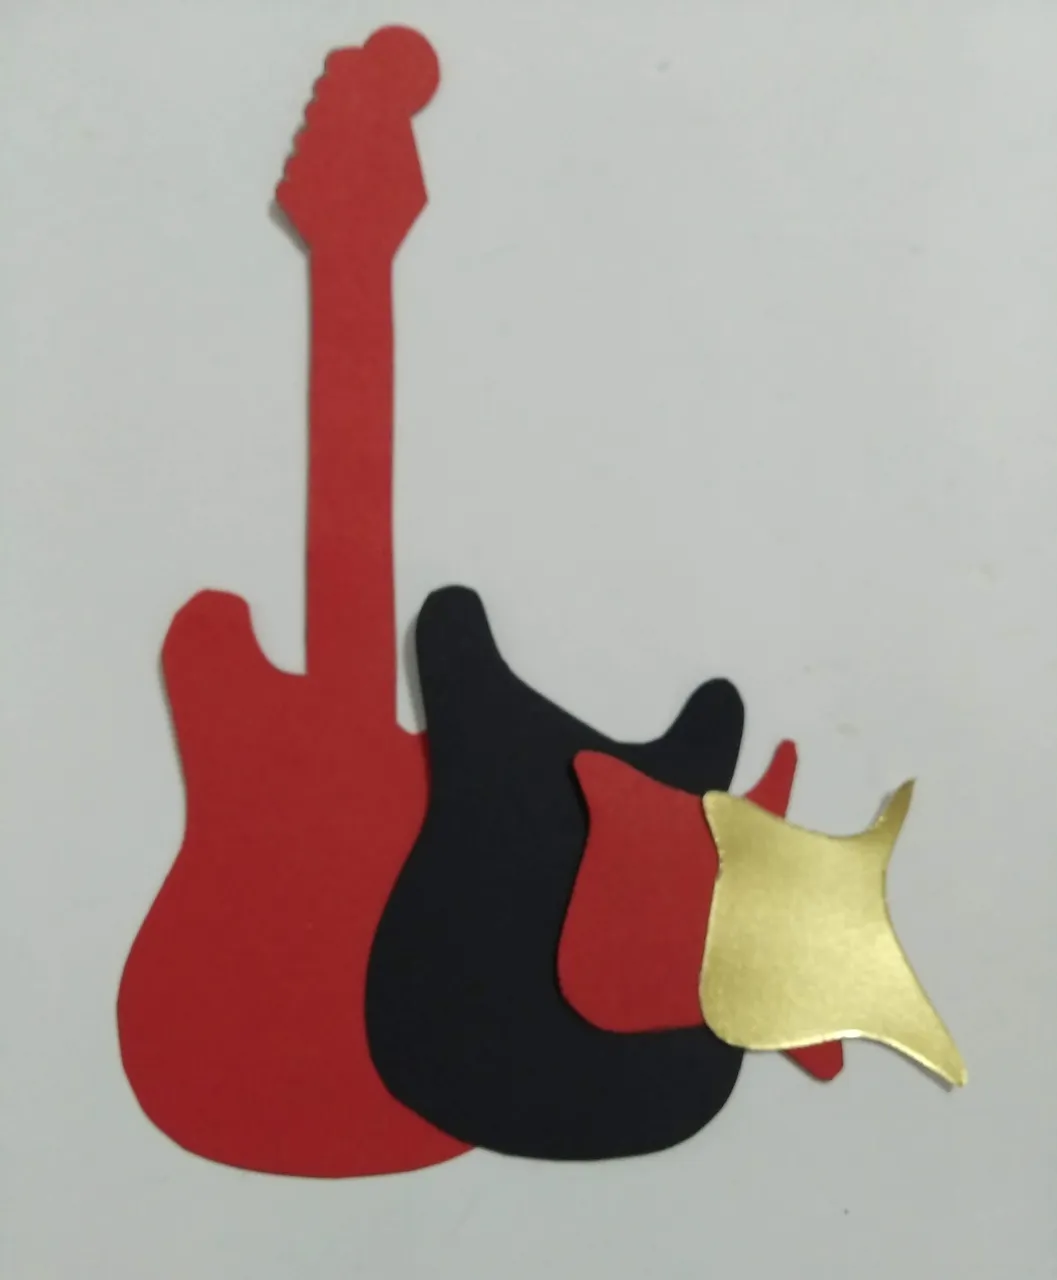
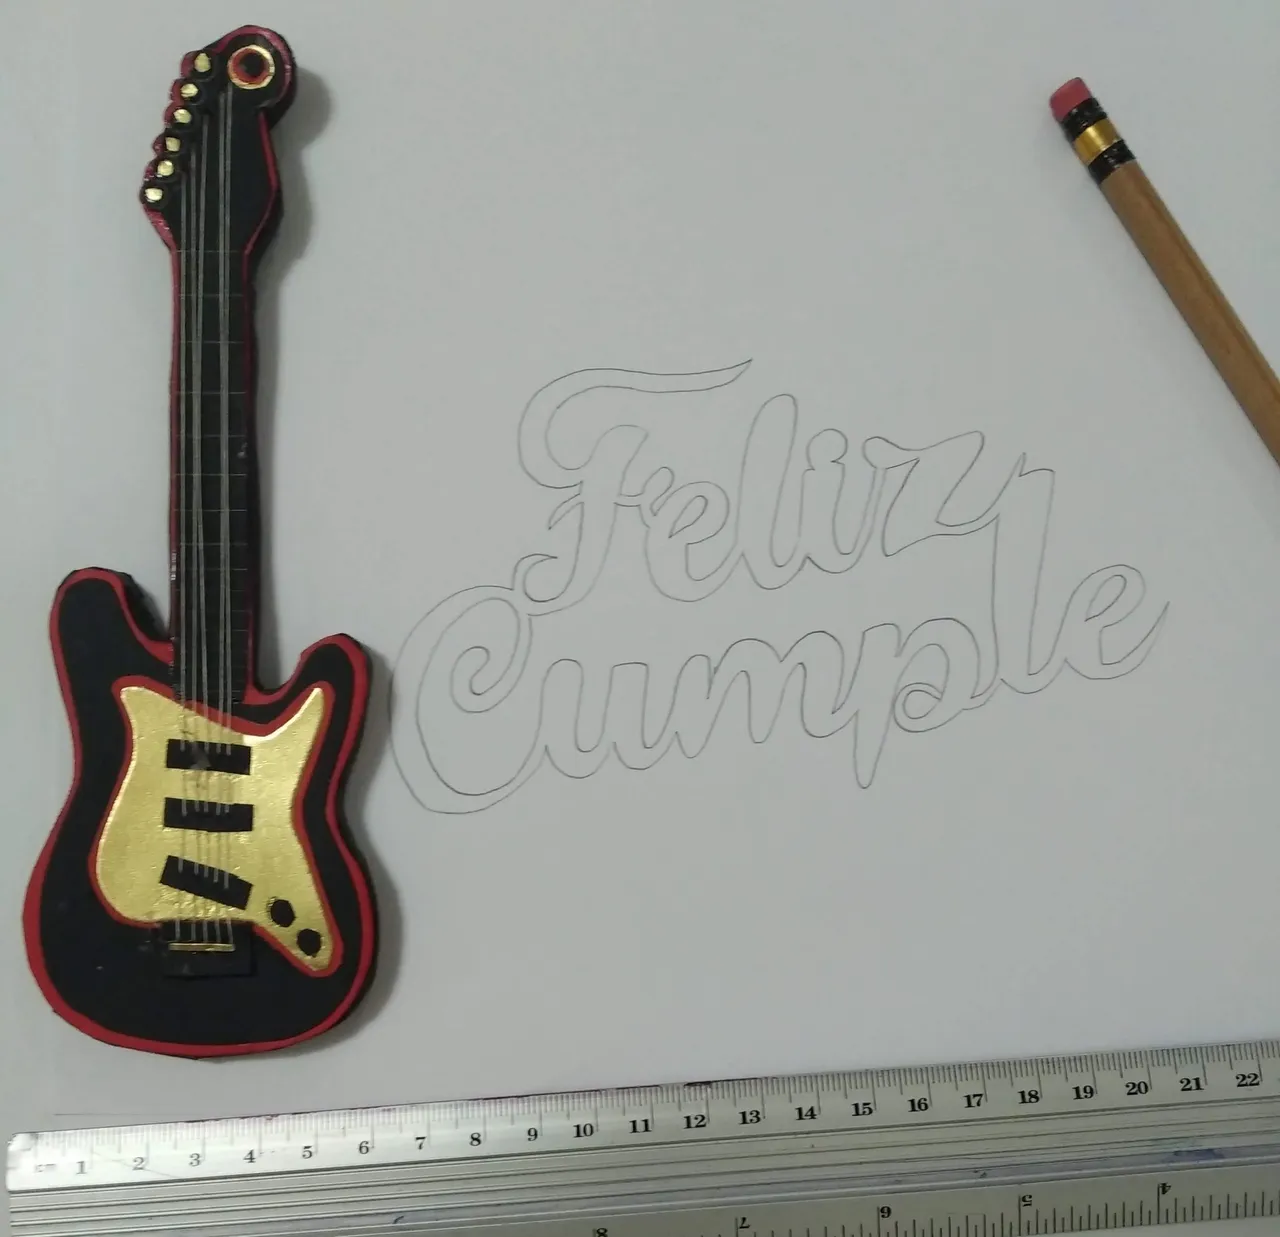
- De acuerdo al diseño, cortar el modelo de la guitarra en la cartulina negra, roja y dorada.
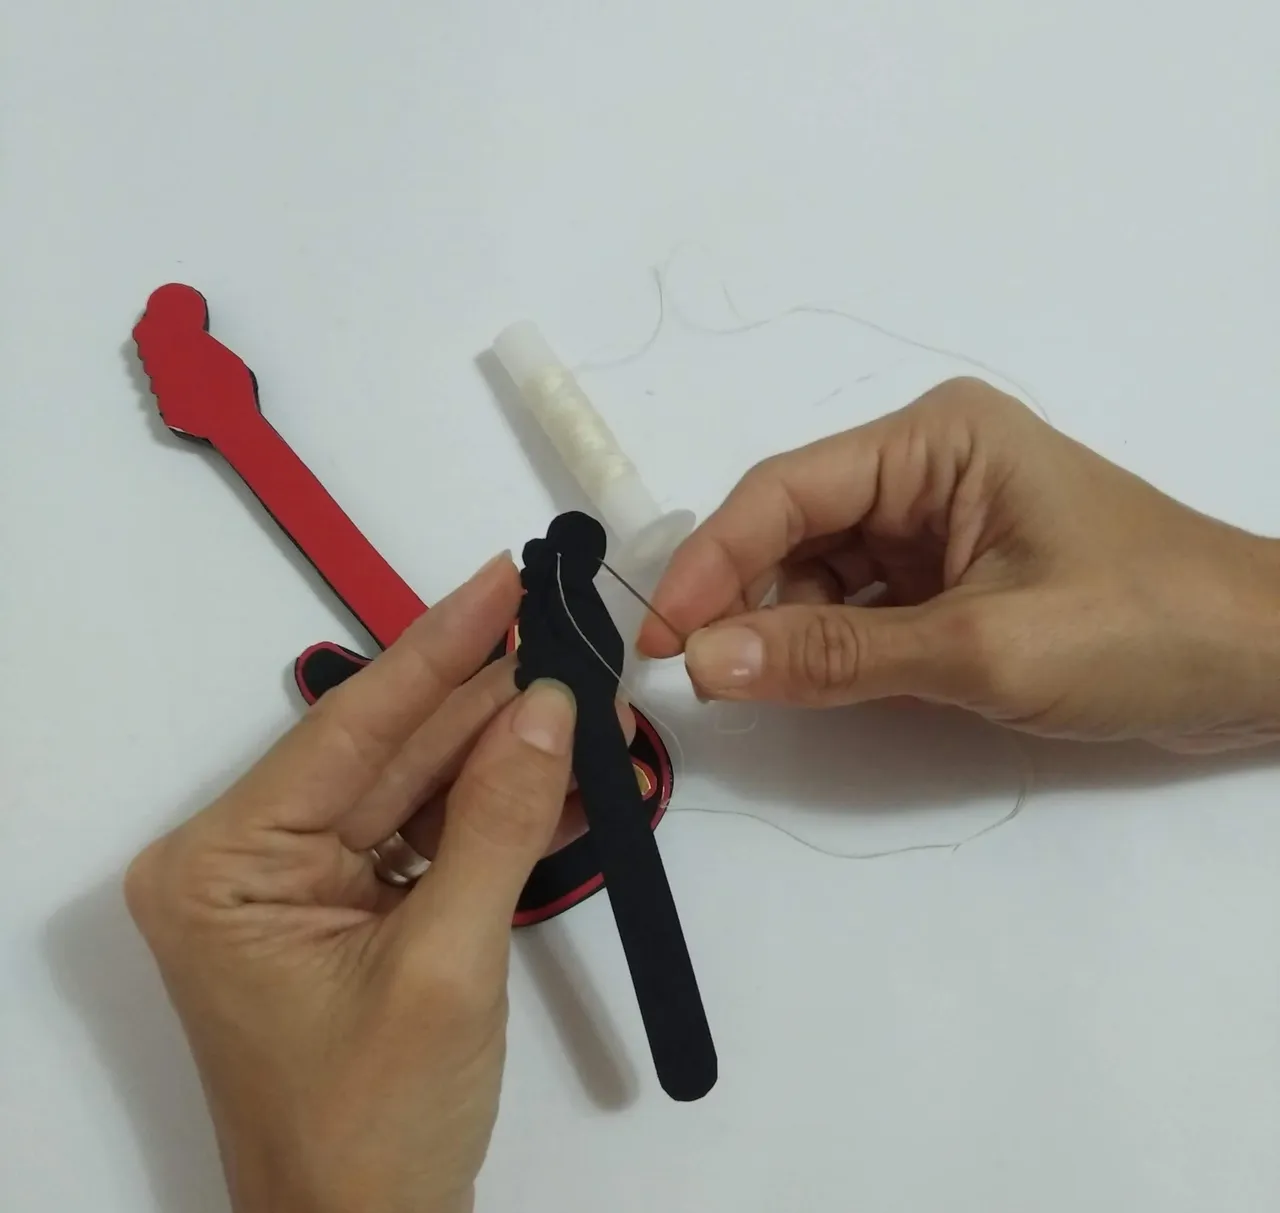
- Pegar la parte roja encima del cartón ya con el borde negro listo.
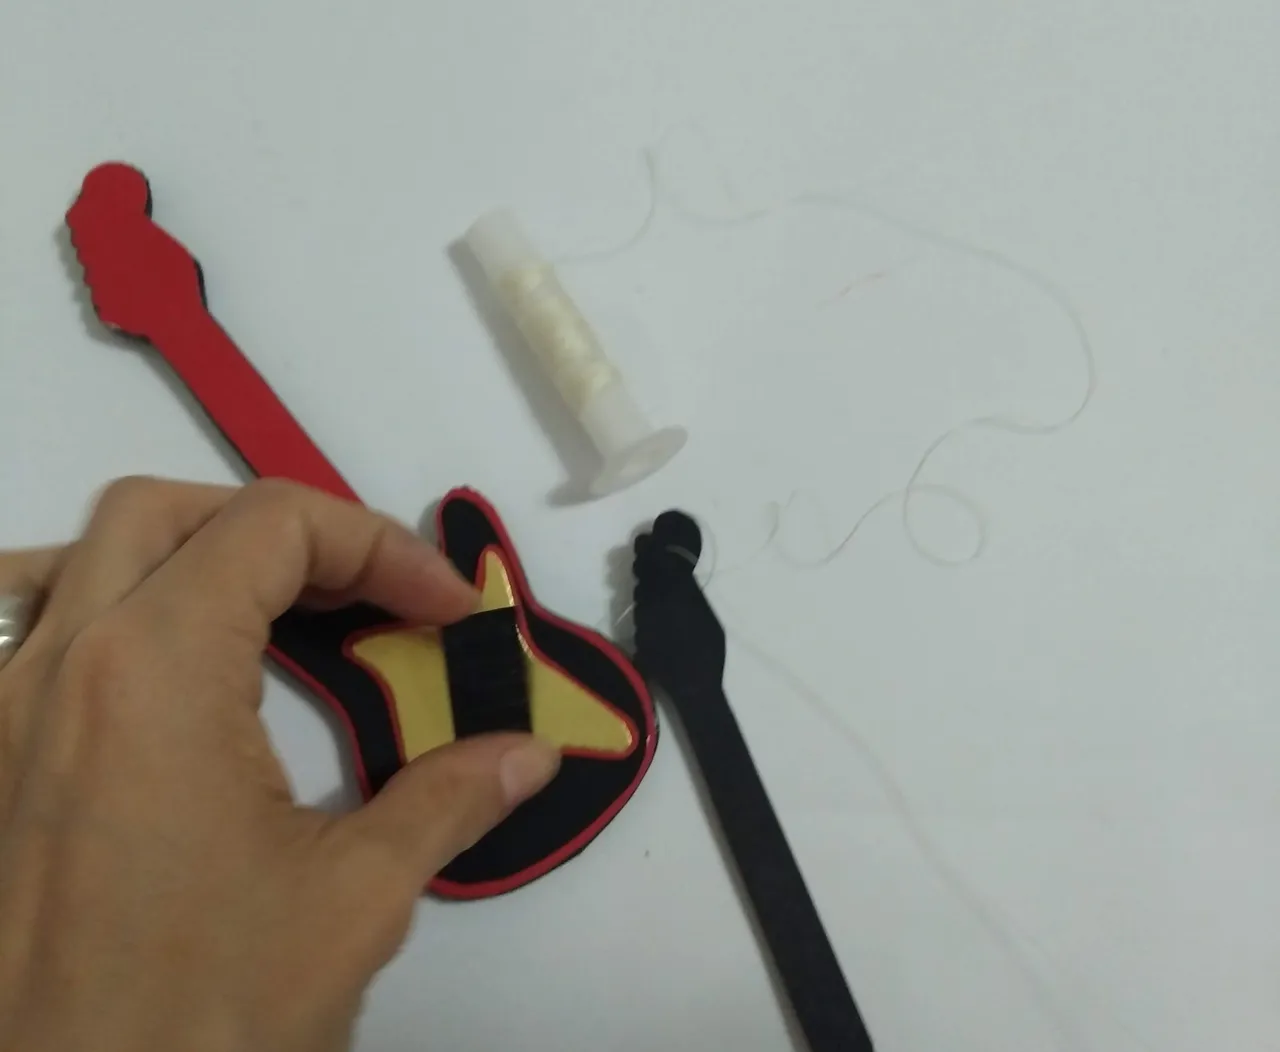
- La parte del agarre de la guitarra, colocarle previamente el hilo ante de pegar a la base roja.
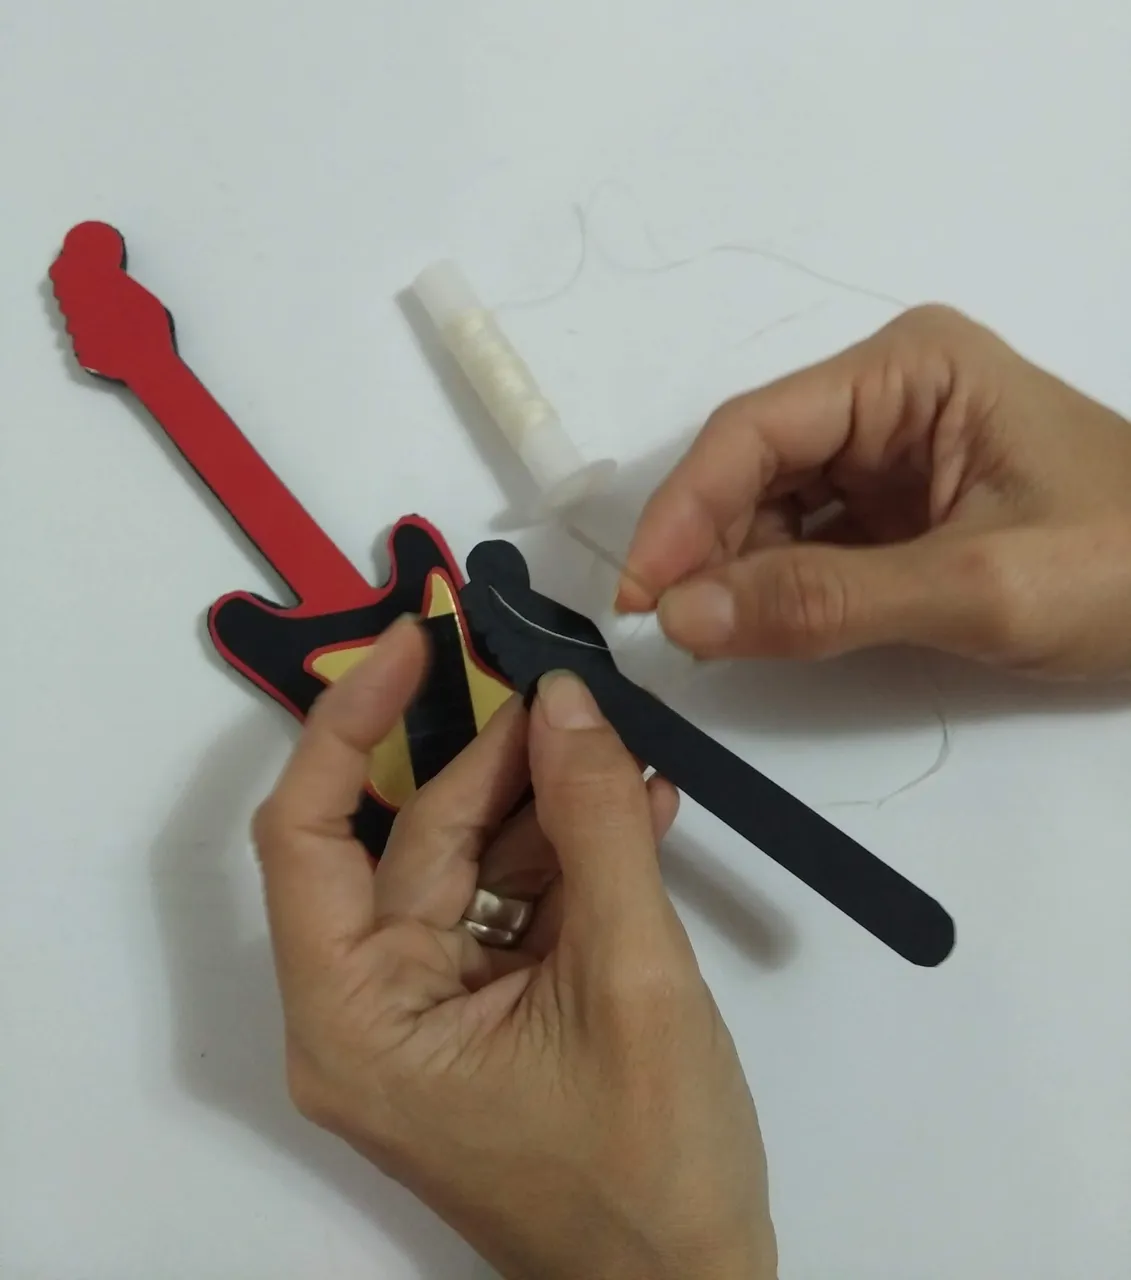
- Pegar el resto de las partes (negra , roja y dorada)
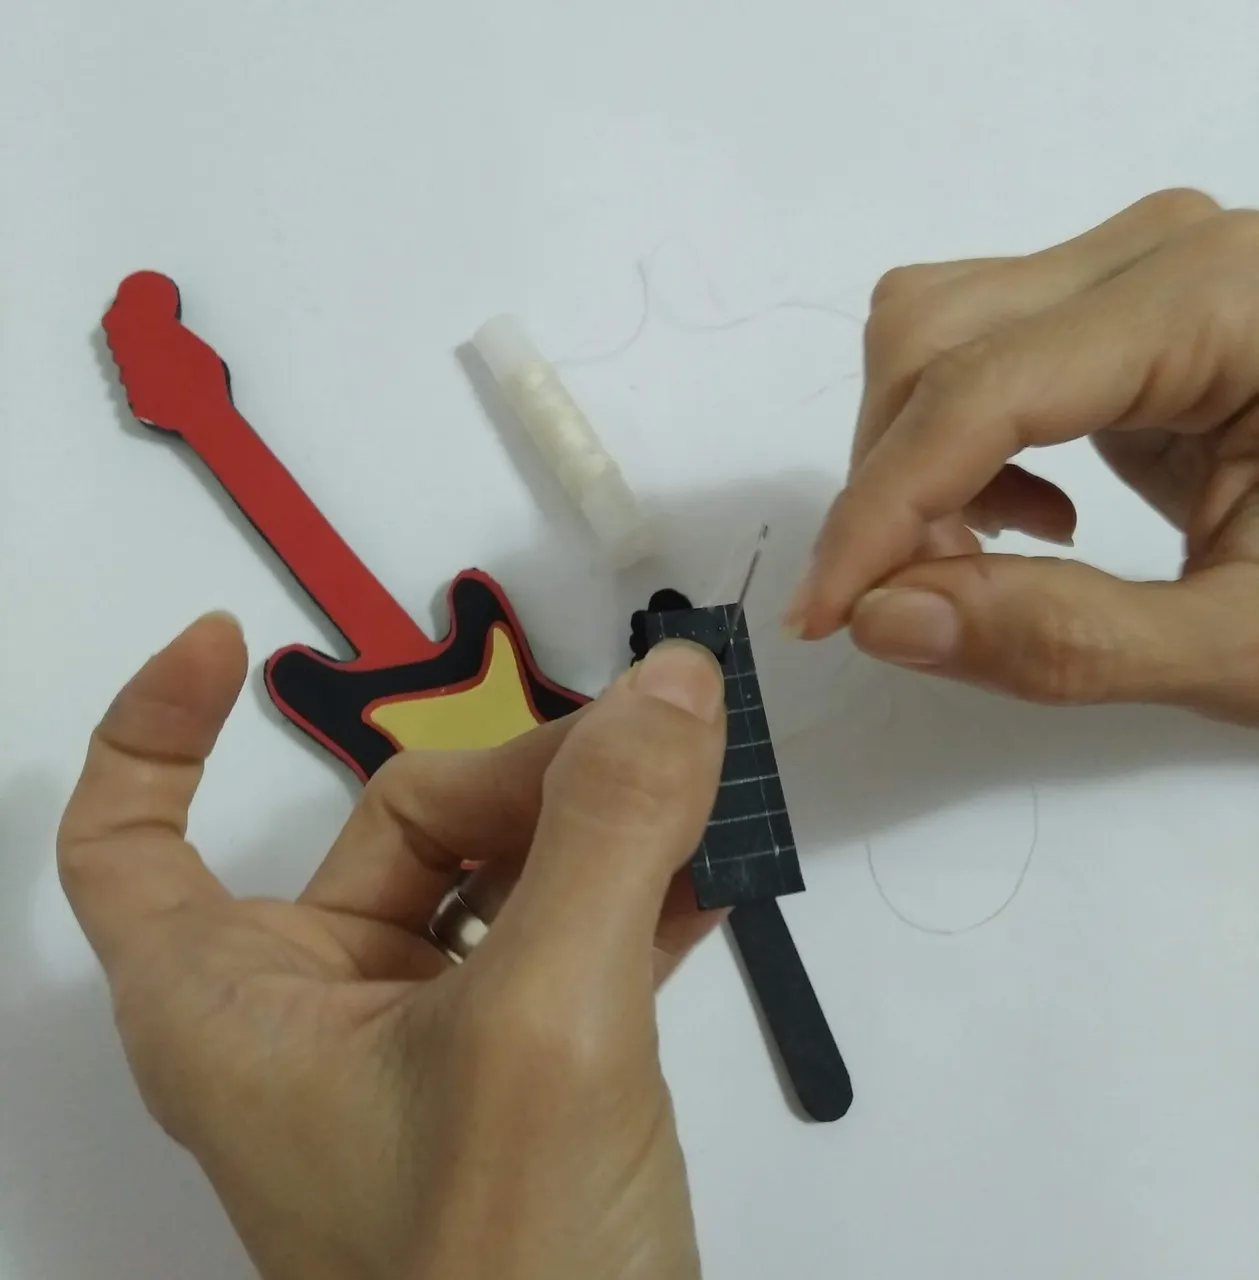
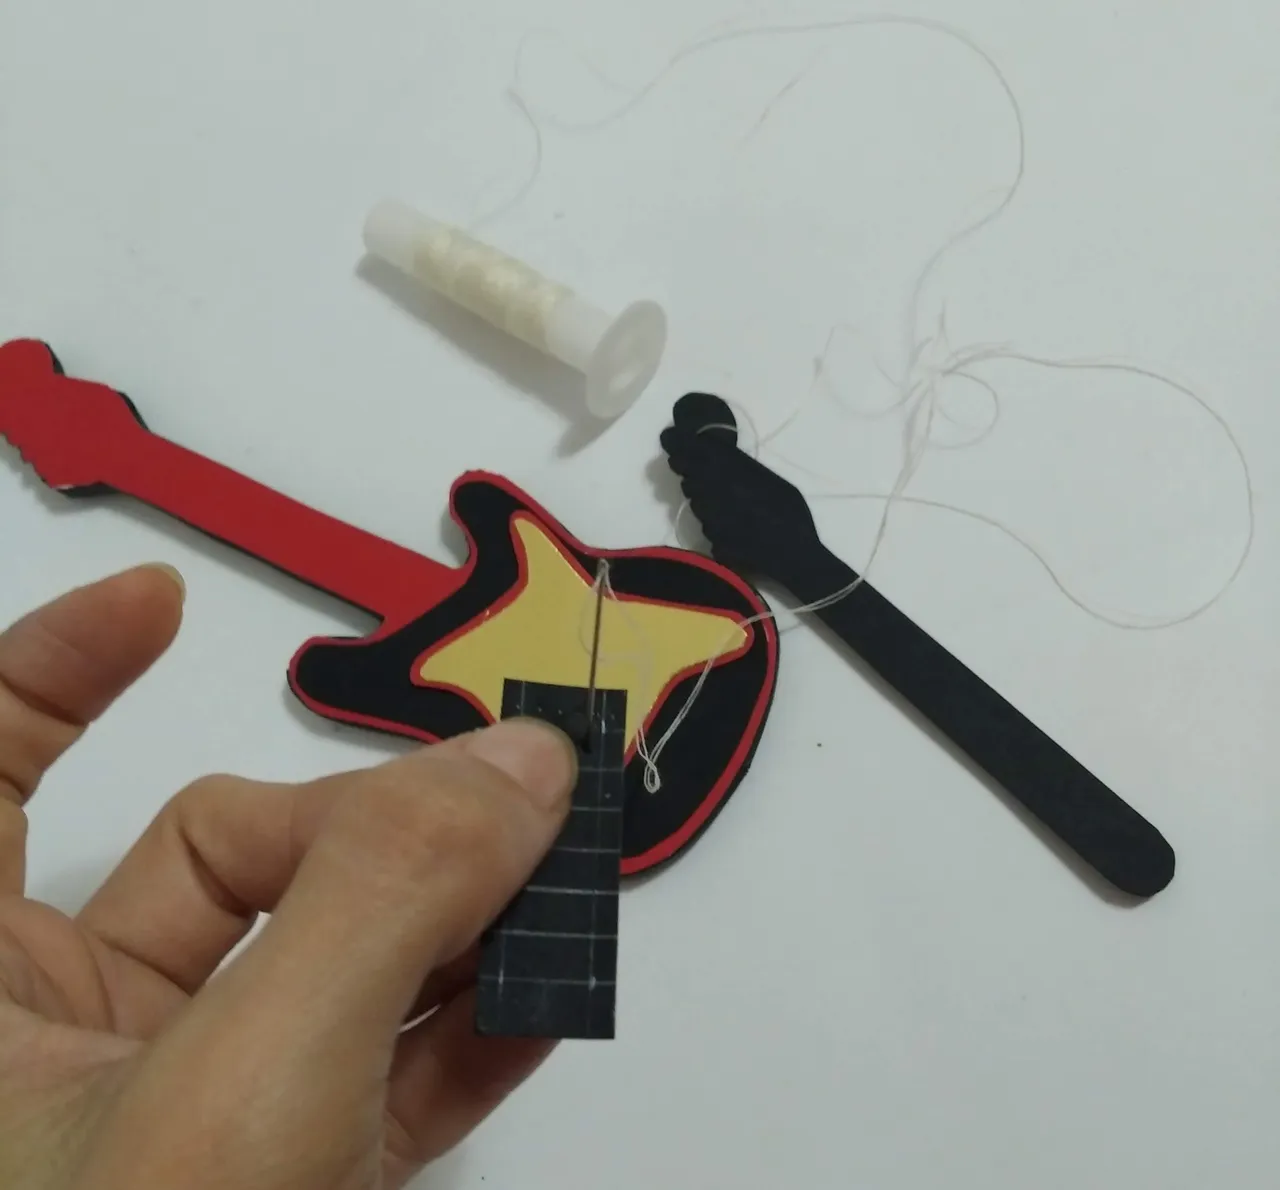
- Una vez tejido el hilo en todas las partes correspondientes, pegar a la base empezando de arriba a abajo, asegurarse el hilo quede bien templado(estirado)
- Decorar la parte superior con detalles en cartulina dorado para resaltar.
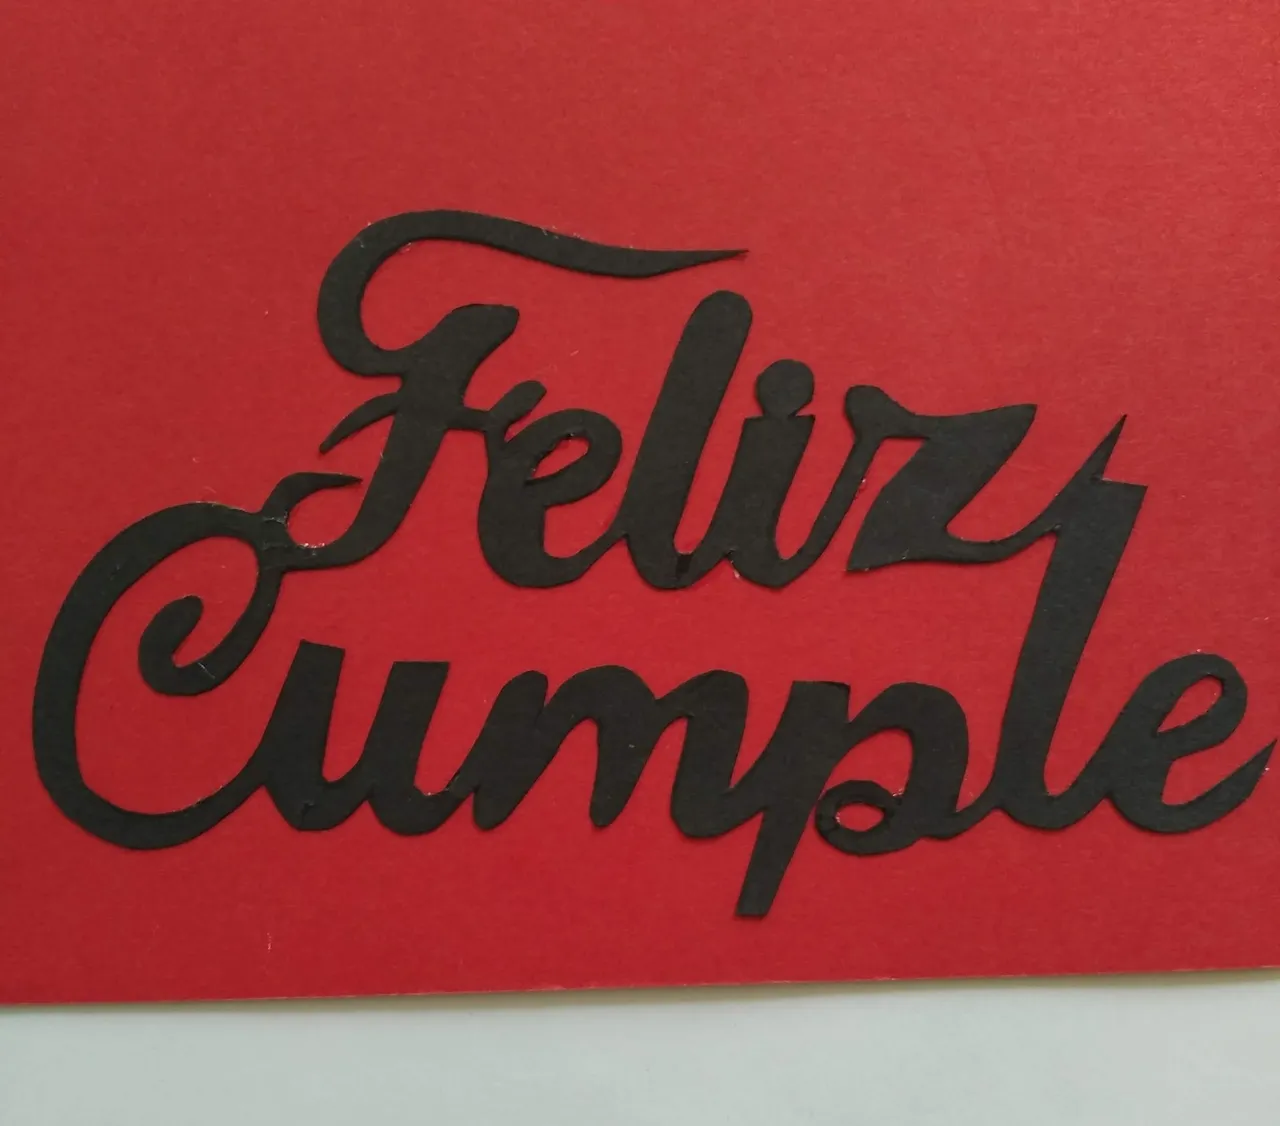
- Marcar y recortar en la cartulina negra la palabra “feliz cumpleaños” y luego pegar en la cartulina roja para darle un detalle de rojo.
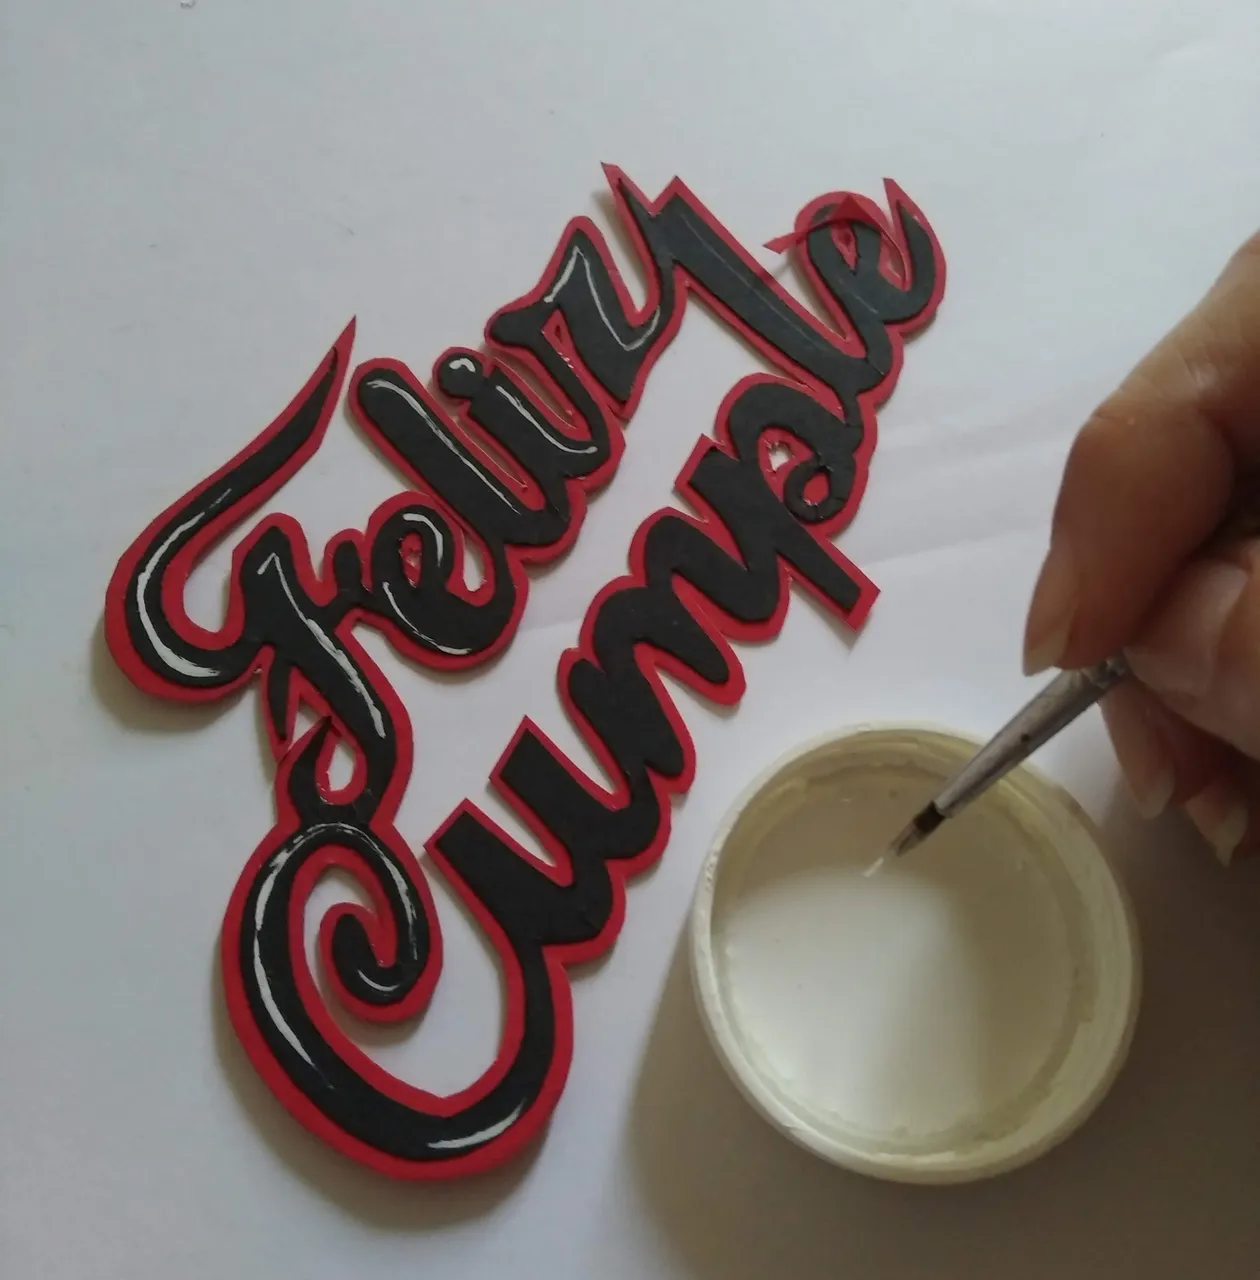
- Iluminar las letras con pintura blanca (OPCIONAL)
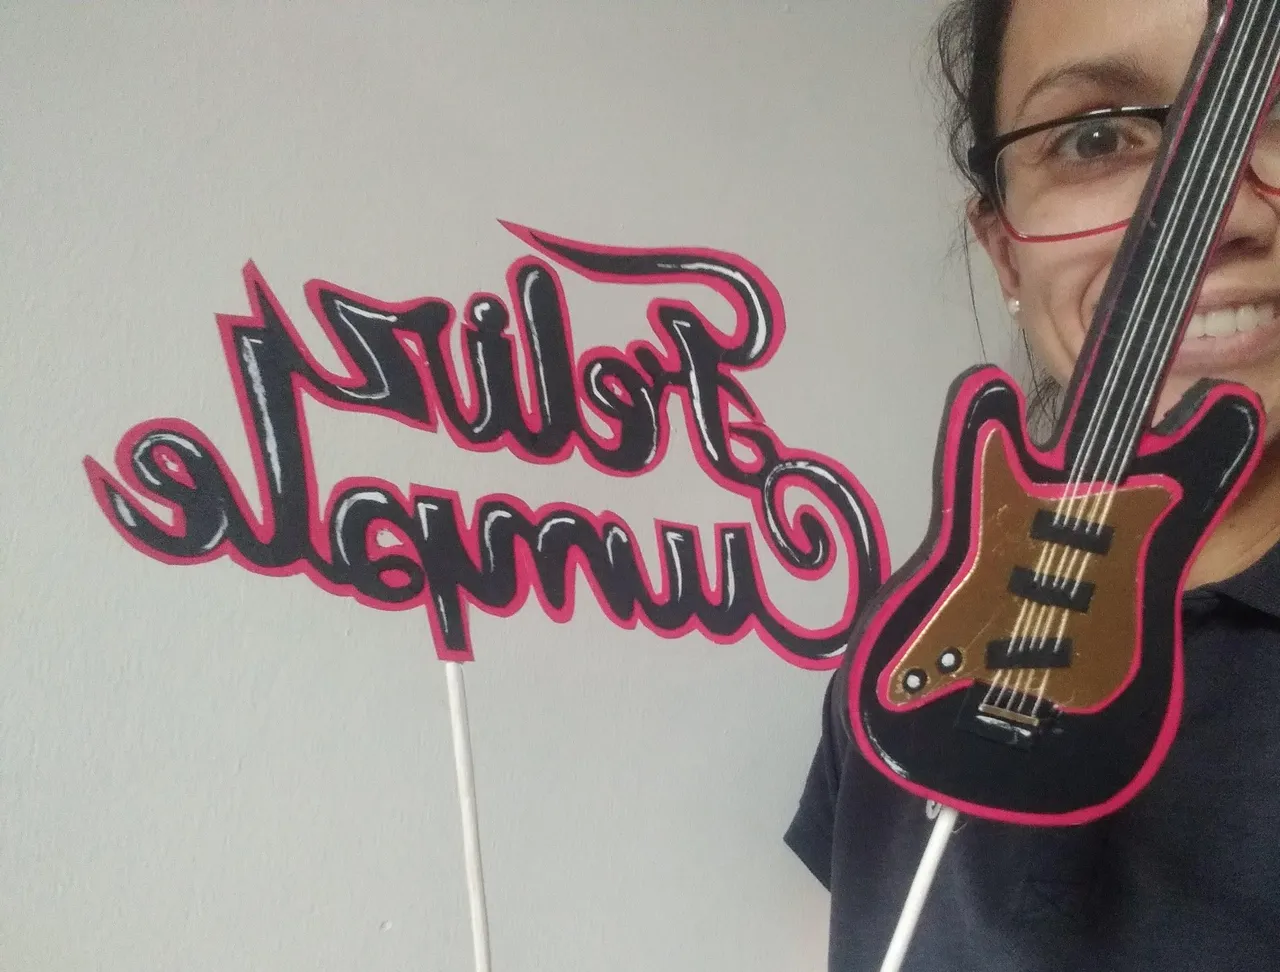
- Pegar ambas piezas a un palito de madera
- ¡Listo!, a disfrutar de la magia de crear.
Inglés
Hello Friends on Hive... especially to the members of the @Build-It community.
For music lovers, especially for fans of electric guitars, today I show you a nice decoration made for a fan of this musical instrument. This friend loves rock, guitars and loves "imperial cakes", a rich cake filled with fruit and custard. To honor him for his birthday, his family decided to give him the fusion of both pleasures and surprise him to make his birthday something special.
It is a simple topper to make, which requires only a little time and a lot of love to make it beautifully detailed.
I invite you to create your own topper and offer your family and friends unique details made with love.
Would you dare to do it?...Let me know what you think.
Here I leave you the materials used, the process and the images of the work.
- Template of the design to be used (recycled paper).
- Black cardboard
- Red cardboard
- Golden cardboard
- Thin cardboard
Thin sewing thread (to simulate the strings) * Cold glue - Cold Silicone
- Hot Silicone
- Scissors
- Pencil
- Cutter
- Ruler
- Wooden stick
- White cold paint
- Copy the design to be used on thin and/or light cardboard and cut out two equal pieces 2.
- Glue both pieces with Cold Silicone and let dry well.
- Cut strips of black cardboard and glue them to the edge of the cardboard with cold silicone, taking care to keep the same distance on both sides of the guitar so that it is uniform.
- Once the silicone is dry, make cuts all around the edge to be able to fold and glue the tabs.
- According to the design, cut the model of the guitar in the black, red and gold cardboard.
- Glue the red part on top of the cardboard with the black border ready.
- The part of the guitar's grip, place the thread before gluing it to the red base.
- Glue the rest of the parts (black, red and gold).
- Once the thread has been woven in all the corresponding parts, glue to the base starting from top to bottom, making sure the thread is well tempered (stretched).
- Decorate the upper part with golden cardboard details to highlight.
- Mark and cut out the word "happy birthday" on the black cardboard and then glue it on the red cardboard to give it a red detail.
- Light up the letters with white paint (OPTIONAL).
- Glue both pieces to a wooden stick.
- Ready, enjoy the magic of creating.
As my native language is Spanish, I used the Deepl translator for this publication.
IMÁGENES / IMAGES


SALUDOS / GREETINGS
Todas las Fotos fueron tomadas con mi teléfono Redmi 7A.
Contenido original de @keco (fotos y texto) - Todos los derechos reservados Publicado en HIVE así como en mi instagram : http://instagram.com/carton_pintura_algo_mas
All Photos were taken with my Redmi 7A phone.
Original content from @keco (photos and text) - All rights reserved Posted on HIVE as well as on my instagram: http://instagram.com/carton_pintura_algo_mas