Hola amigos, reciban un cordial saludo, feliz de compartir en esta hermosa comunidad.
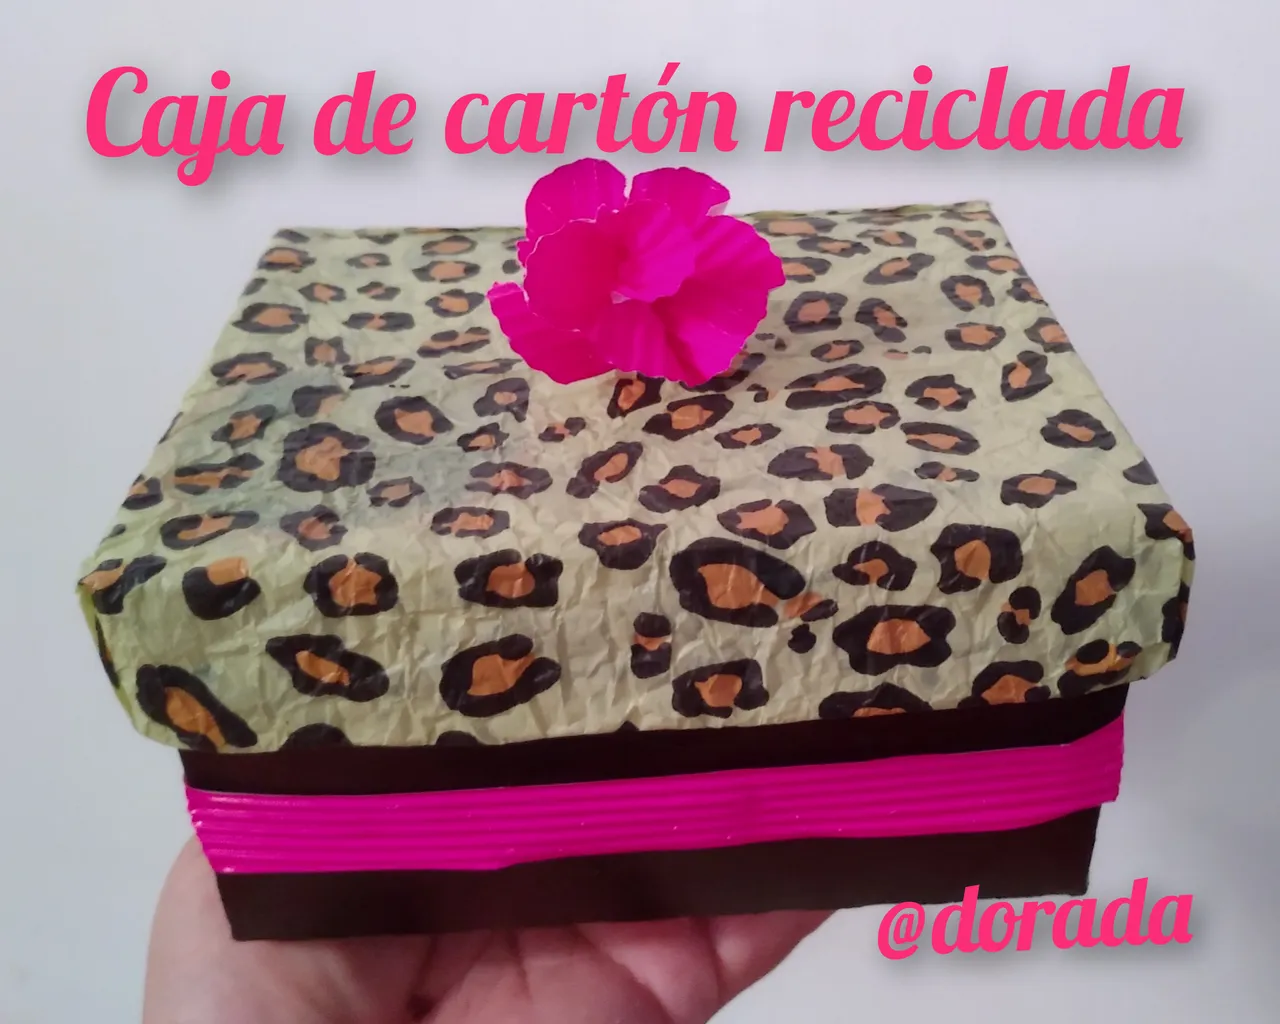
Continuo reciclando materiales, en esta ocasión comparto con ustedes una hermosa caja reciclada, ideal para guardar algunos en nuestro hogar, siempre es importante buscar opciones para darle otro uso a esos materiales que consideramos de desecho. Espero que les guste.
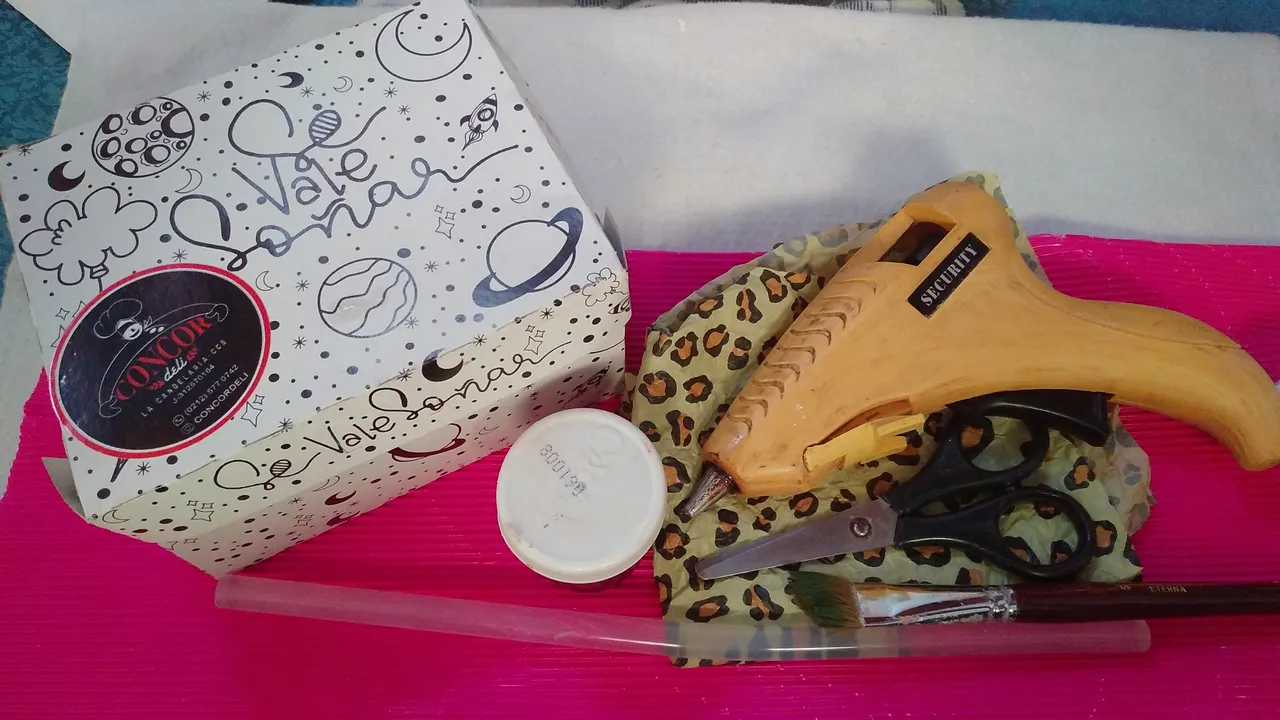
Materiales:
Una caja de pastelería
Papel de embalaje
Silicon
Pintura al frío
Pincel
Cartón micro ondulado color fucsia
Elaboración Paso a Paso.
Paso 1.
Comienzo colocando silicón en todas las pestañas de la caja para fijarla, ya que estas son unas cajas desarmables y se pueden abrir con facilidad.
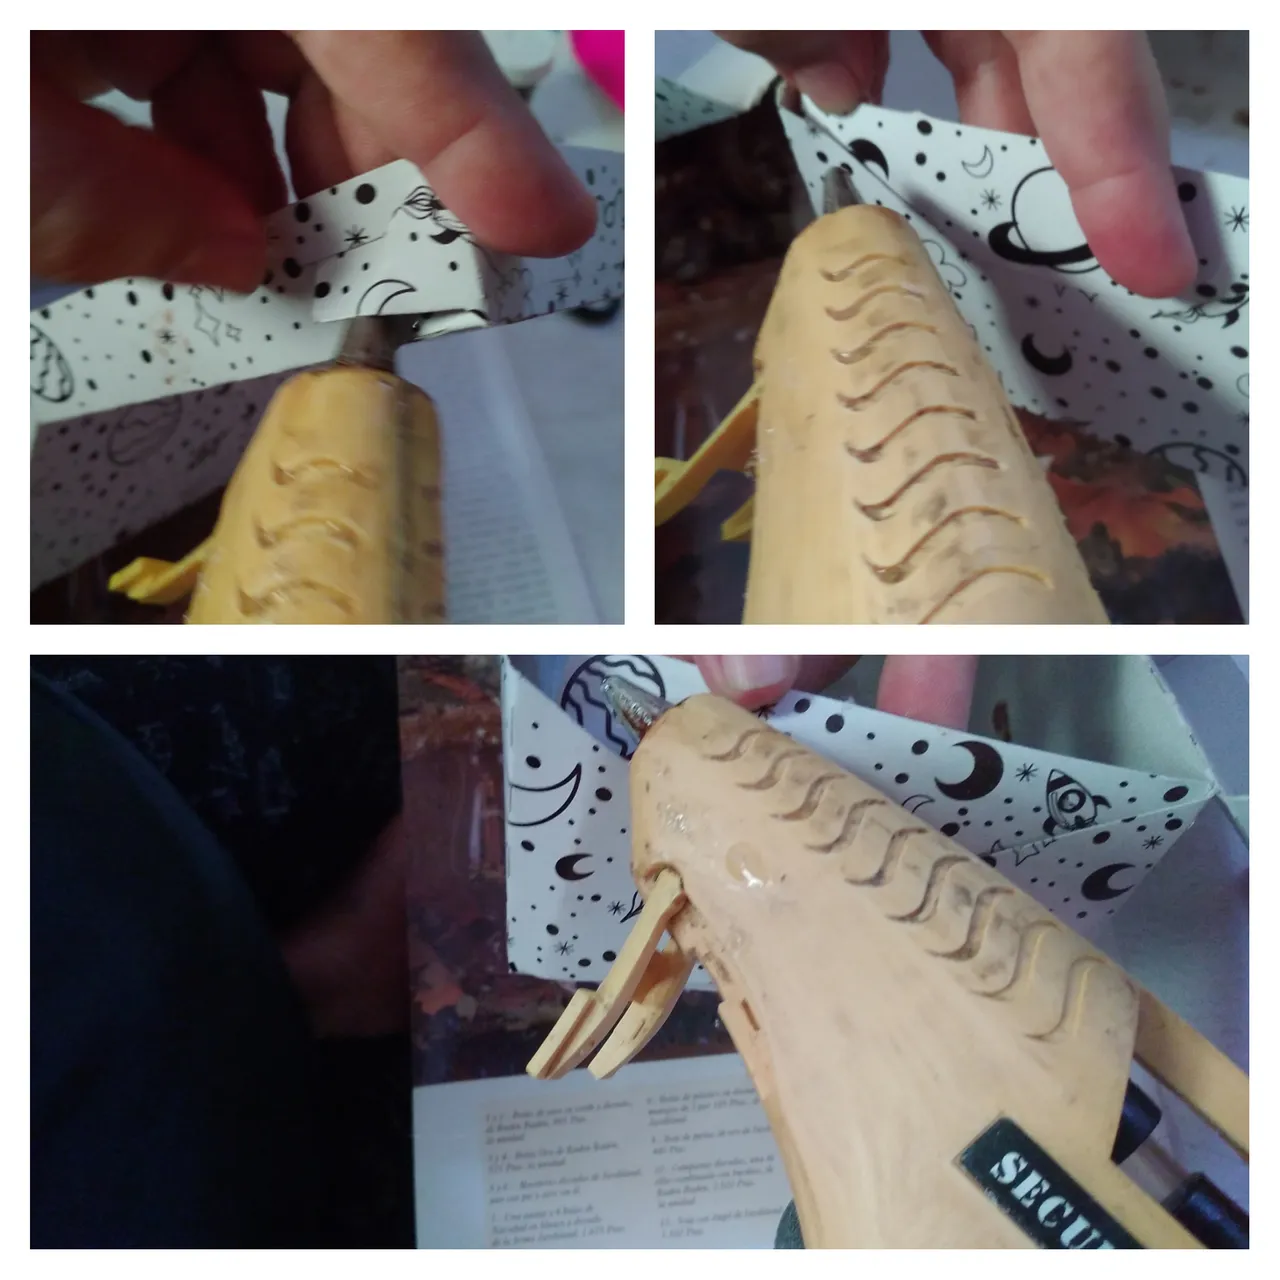
Paso 2.
Procedí a pintar la parte inferior de la caja, para tal fin utilicé pintura al frío color marrón, apliqué una primera capa, la dejé secar y luego coloqué una segunda capa.

Paso 3.
Utilicé el papel de embalaje, este papel es donde envuelven las prendas en las tiendas, me gustó por su diseño. Lo utilicé para forrar la tapa de la caja, primero le apliqué pegamento y fui pegando poco a poco hasta cubrir toda la superficie.
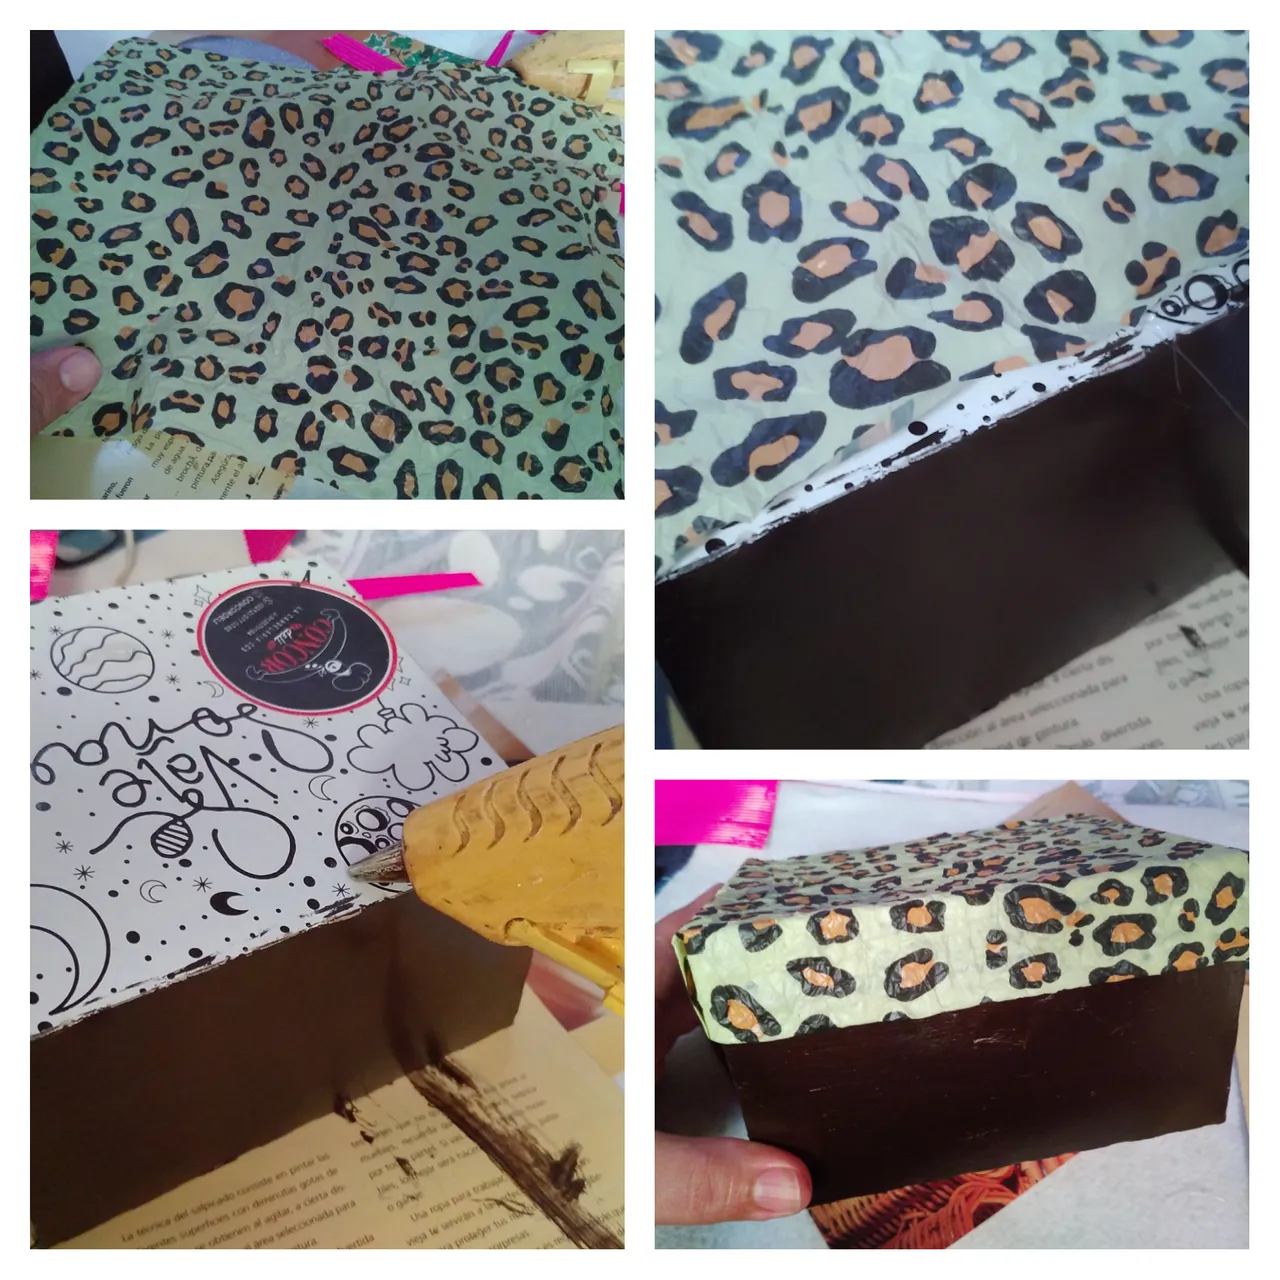
Paso 4.
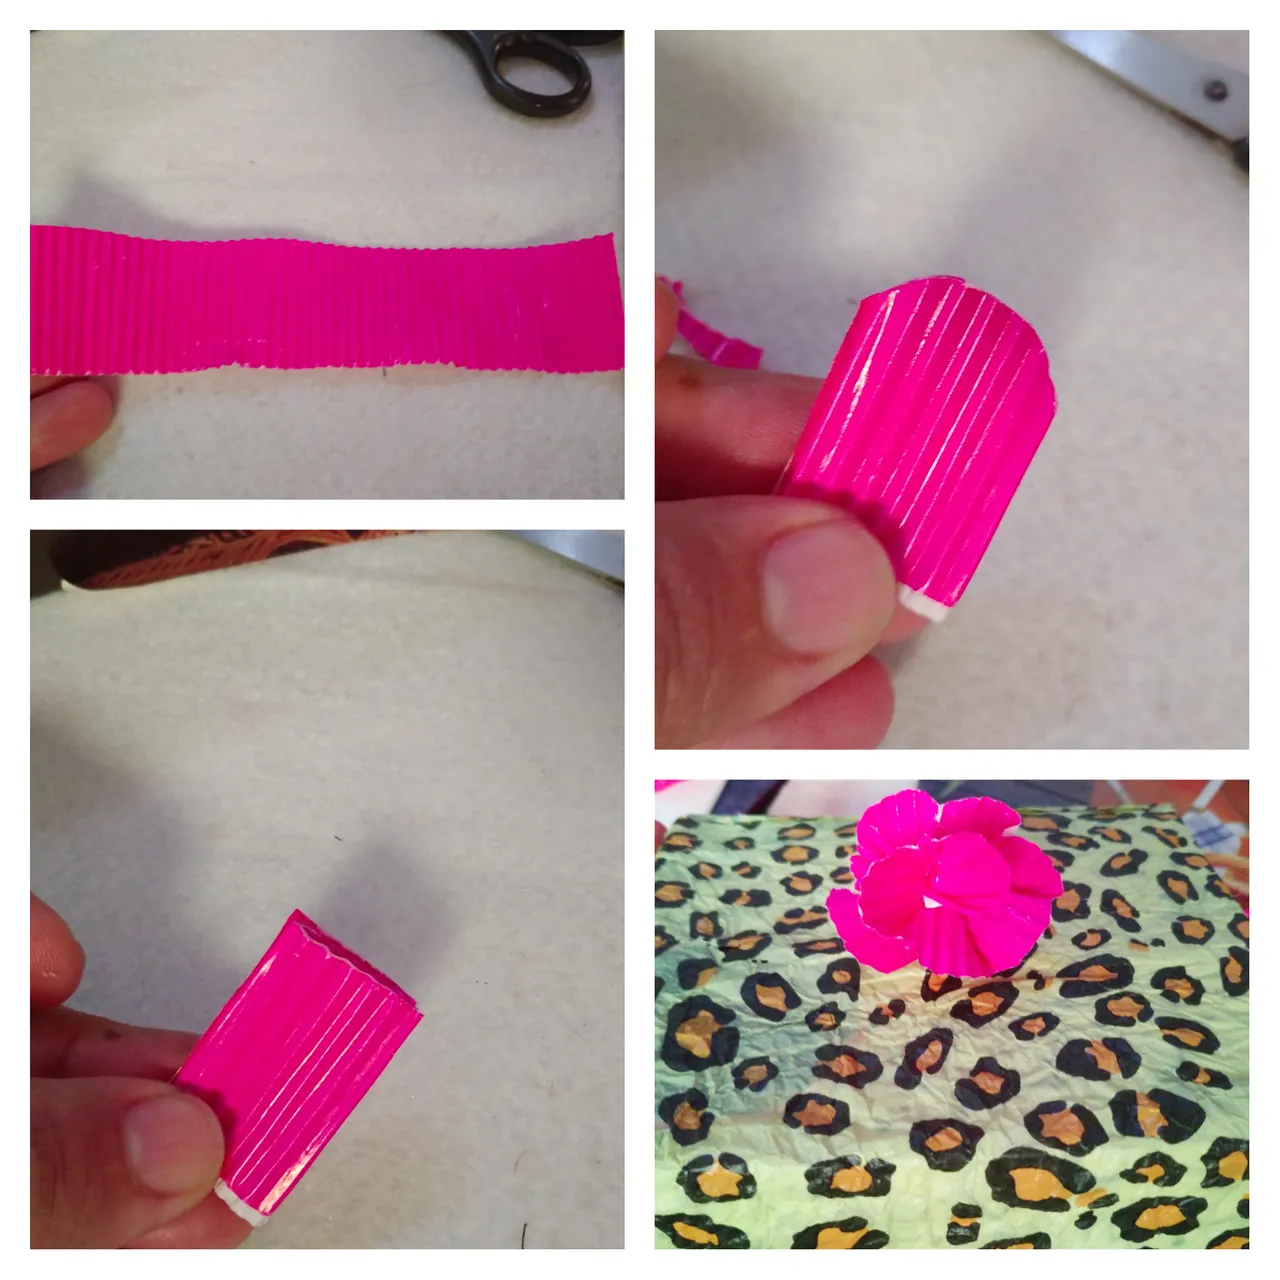
Tomé un rectángulo de cartón micro ondulado color fucsia, lo recorté en las puntas de manera redondeada y procedí a envolver para formar una flor, luego la pegué en el centro de la caja.
Paso 5.
Finalmente recorté una cinta de cartón mico ondulado y la pegué en la parte inferior de la caja.
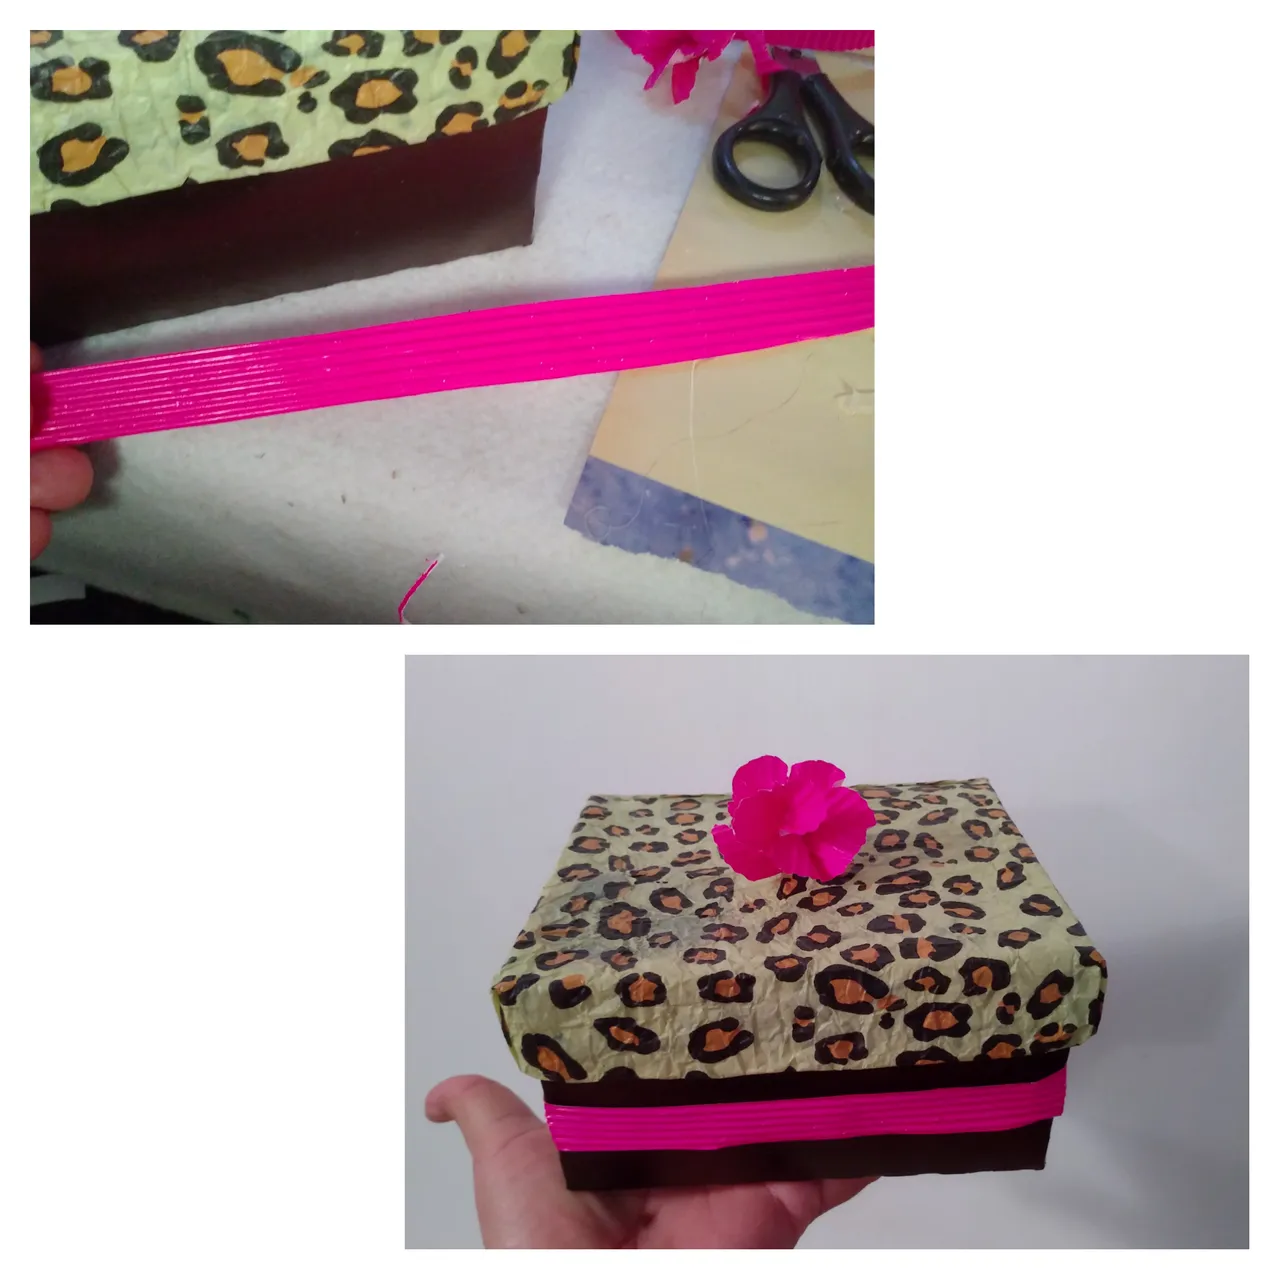
Está culminada mi hermosa caja reciclada.


La Vida es Arte...
Gracias por leerme! Nos encontraremos en el próximo Post @dorada.
Nota: fotos de mi autoría capturadas con dispositivo móvil Redmi 8.
English Versión
Hello friends, receive a warm greeting, happy to share in this beautiful community.
I continue recycling materials, this time I share with you a beautiful recycled box, ideal to keep some in our home, it is always important to look for options to give another use to those materials that we consider waste. I hope you like it.
Materials:
A pastry box
Wrapping paper
Silicon
Cold paint
Brush
Fuchsia colored micro corrugated cardboard
Elaboration Step by Step.
Step 1.
I start by placing silicone on all the tabs of the box to fix it, since these are disassembled boxes and can be opened easily.
Step 2.
I proceeded to paint the bottom of the box, for this purpose I used brown cold paint, applied a first coat, let it dry and then placed a second coat.
Step 3.
I used wrapping paper, this paper is where they wrap garments in stores, I liked it for its design. I used it to line the lid of the box, first I applied glue and gradually glued until the entire surface was covered.
Step 4.
I took a rectangle of fuchsia colored micro corrugated cardboard, trimmed it at the ends in a rounded fashion and proceeded to wrap to form a flower, then glued it in the center of the box.
Step 5.
Finally I cut out a ribbon from corrugated mico cardboard and glued it to the bottom of the box.
My beautiful recycled box is finished.
Life is Art...
Thanks for reading me! See you in the next Post @dorada.
Note: photos of my authorship captured with Redmi 8 mobile device.