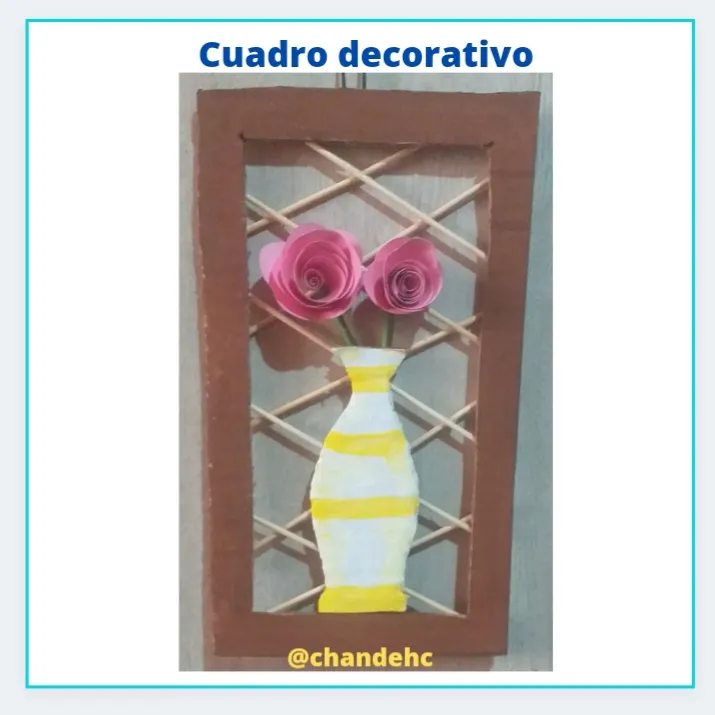
Hola bendecidos amigos de hive. Espero, que el día de ayer, hayan tendido un ameno y agradable día del padre. Me presento ante todos ustedes nuevamente, para mostrarles cómo realizar un lindo cuadro, fácil y económico de hacer, ideal para adornar tus espacios preferidos.
Hello blessed friends of hive. I hope you had a pleasant and enjoyable Father's Day yesterday. I present myself to all of you again, to show you how to make a nice picture, easy and inexpensive to make, ideal to decorate your favorite spaces.
Materiales a utilizar:
- Cartón
- Témperas de colores blanca,marrón y amarillo.
- Pincele.
- Palillos de altura.
- Regla.
- Cordón.
- Dos rosas.
- Cúter.
- Lápiz.
- Silocona líquida.
Materials to use:
- Cardboard
- White, brown and yellow colored tempera paints.
- Paintbrush.
- Sticks of height.
- Ruler.
- String.
- Two roses.
- Cutter.
- Pencil.
- Liquid silicone.

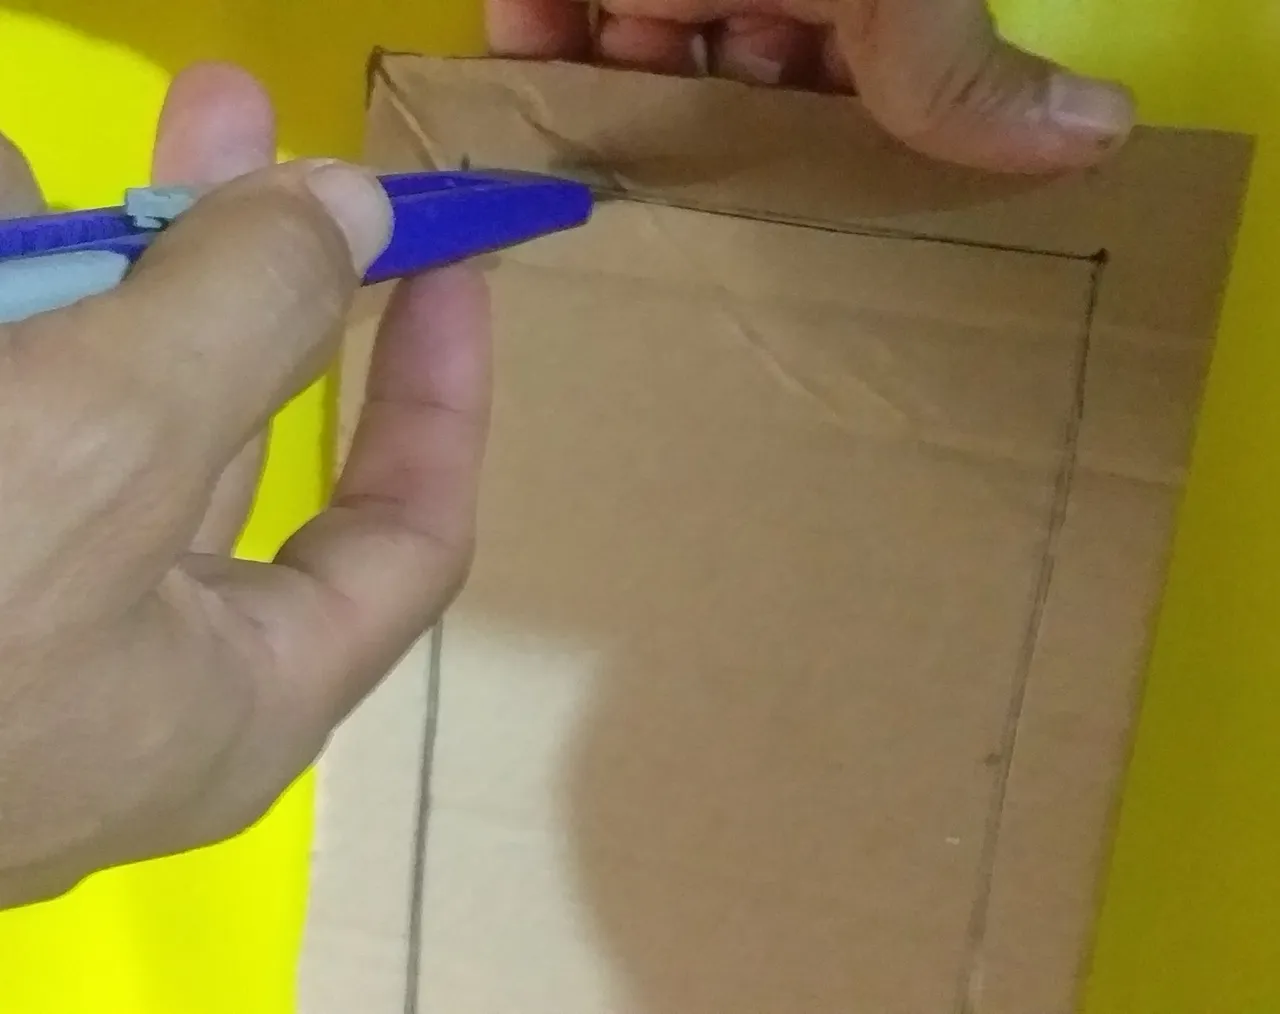
Paso 1
- Hacer un Marco con el cartón.
Step 1
- Make a frame with the cardboard.

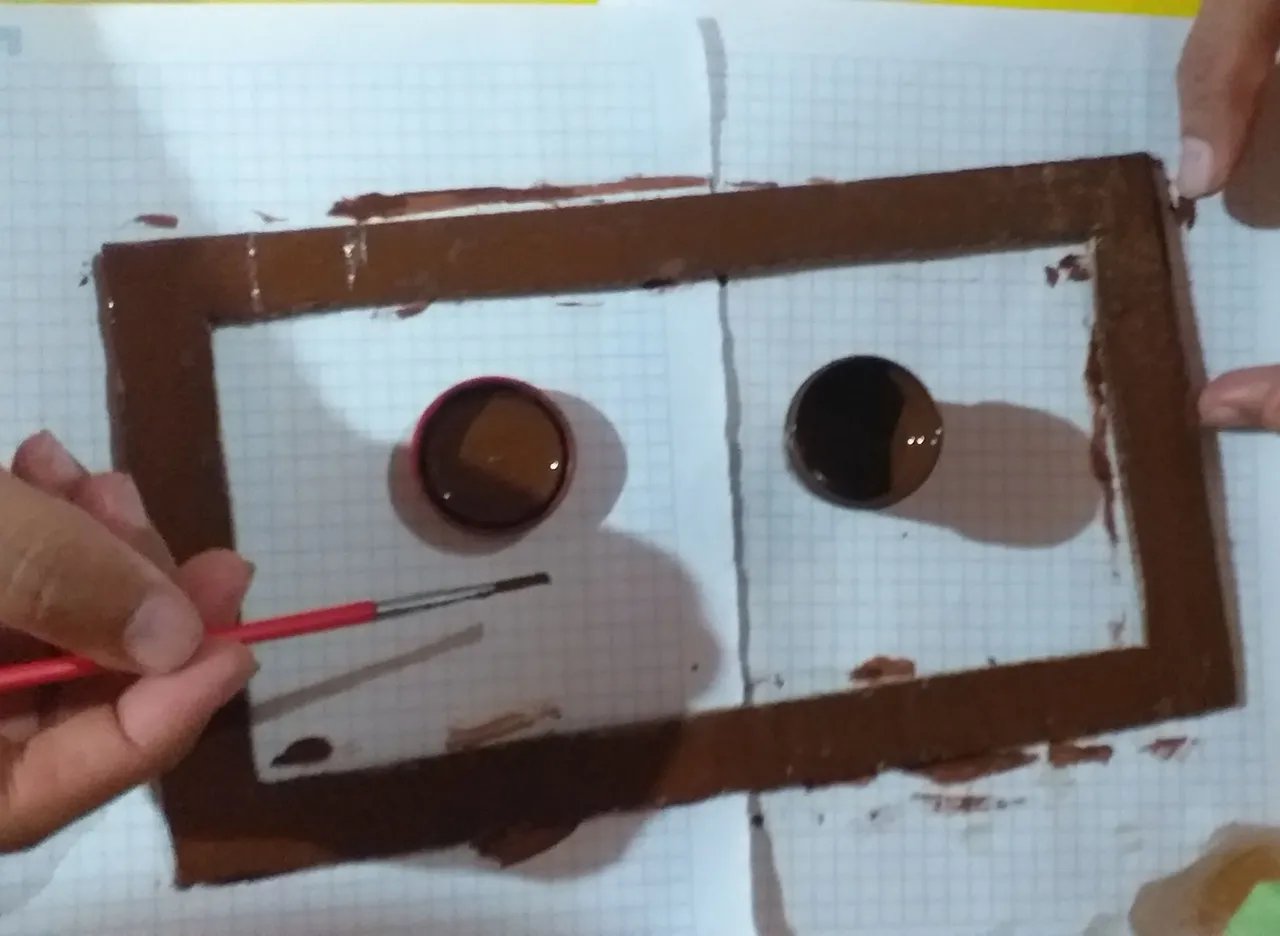
Pintamos el Marco con témpera de color marrón.
We paint the frame with brown tempera.
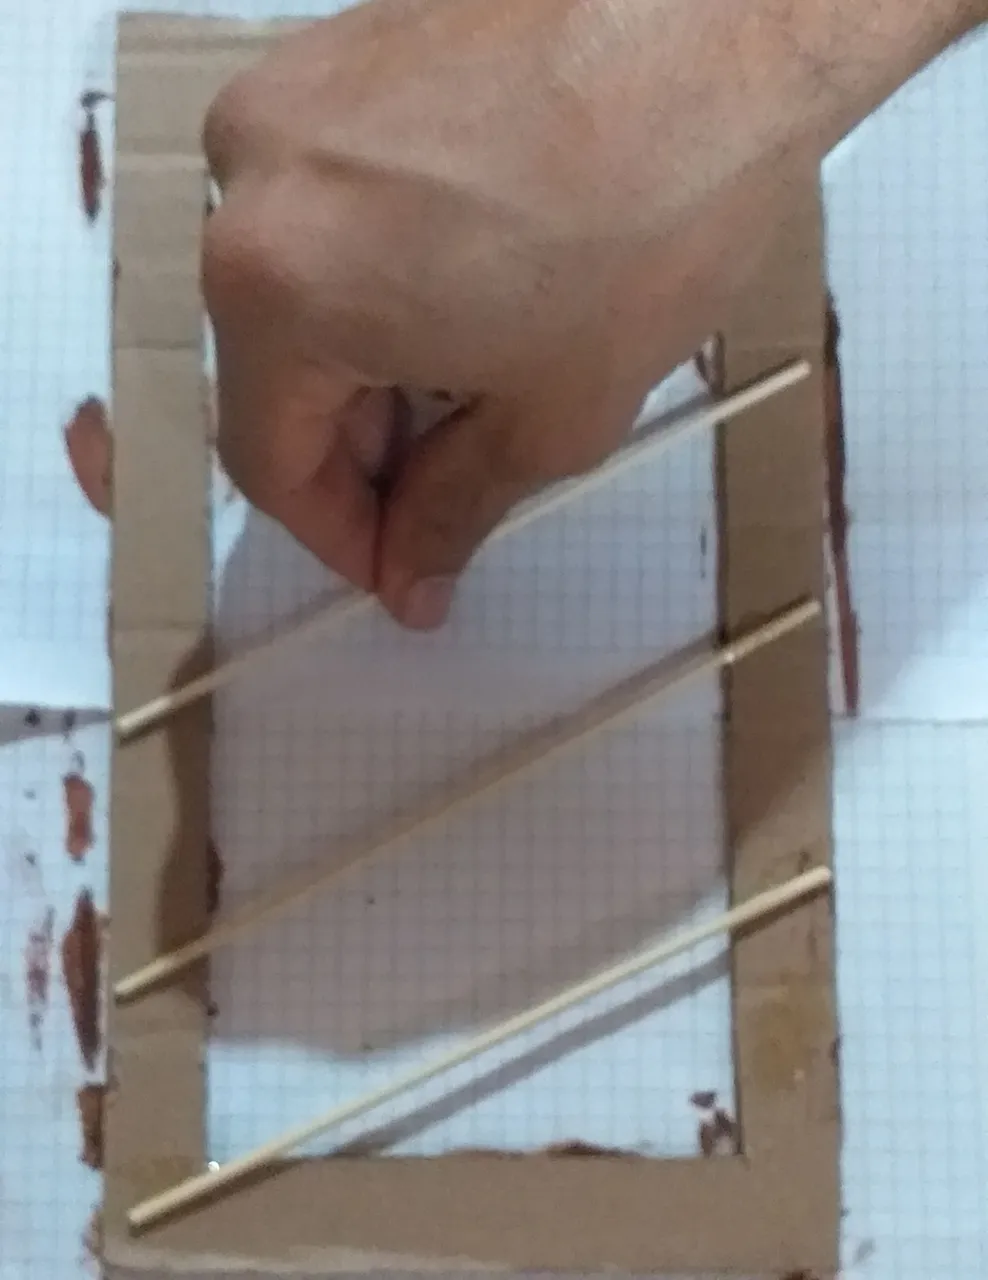
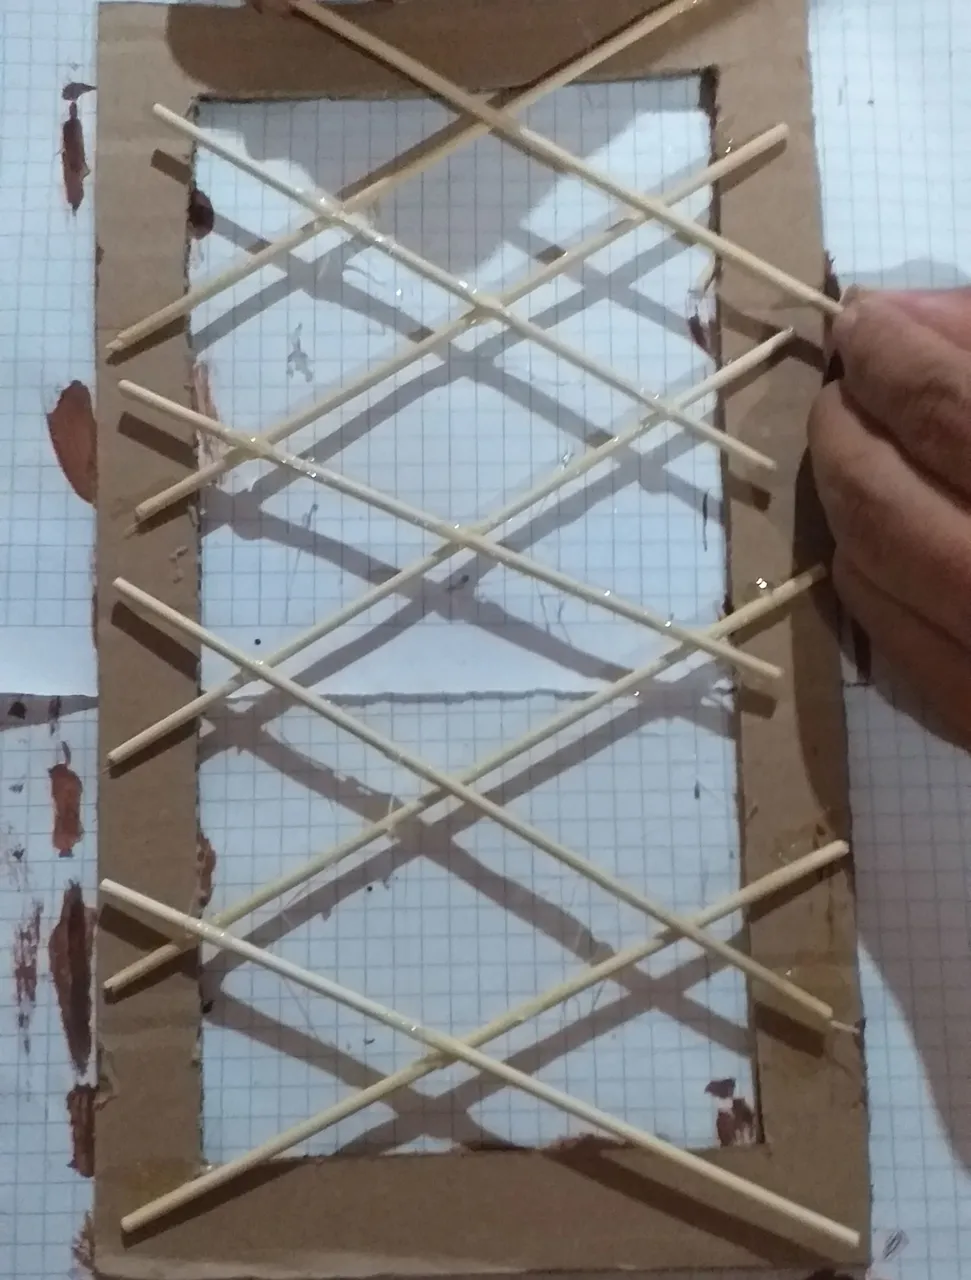
Ahora fijamos 5 palillos de altura, por la parte trasera del marco, con goma Eva, de forma diagonal, de abajo hacia arriba, y luego pegamos 5 palillos más sobre los anteriores, también de forma diagonal, pero de arriba hacia abajo.
Now we fix 5 sticks high, on the back of the frame, with Eva glue, diagonally from bottom to top, and then we glue 5 more sticks on top of the previous ones, also diagonally, but from top to bottom.
Paso 2
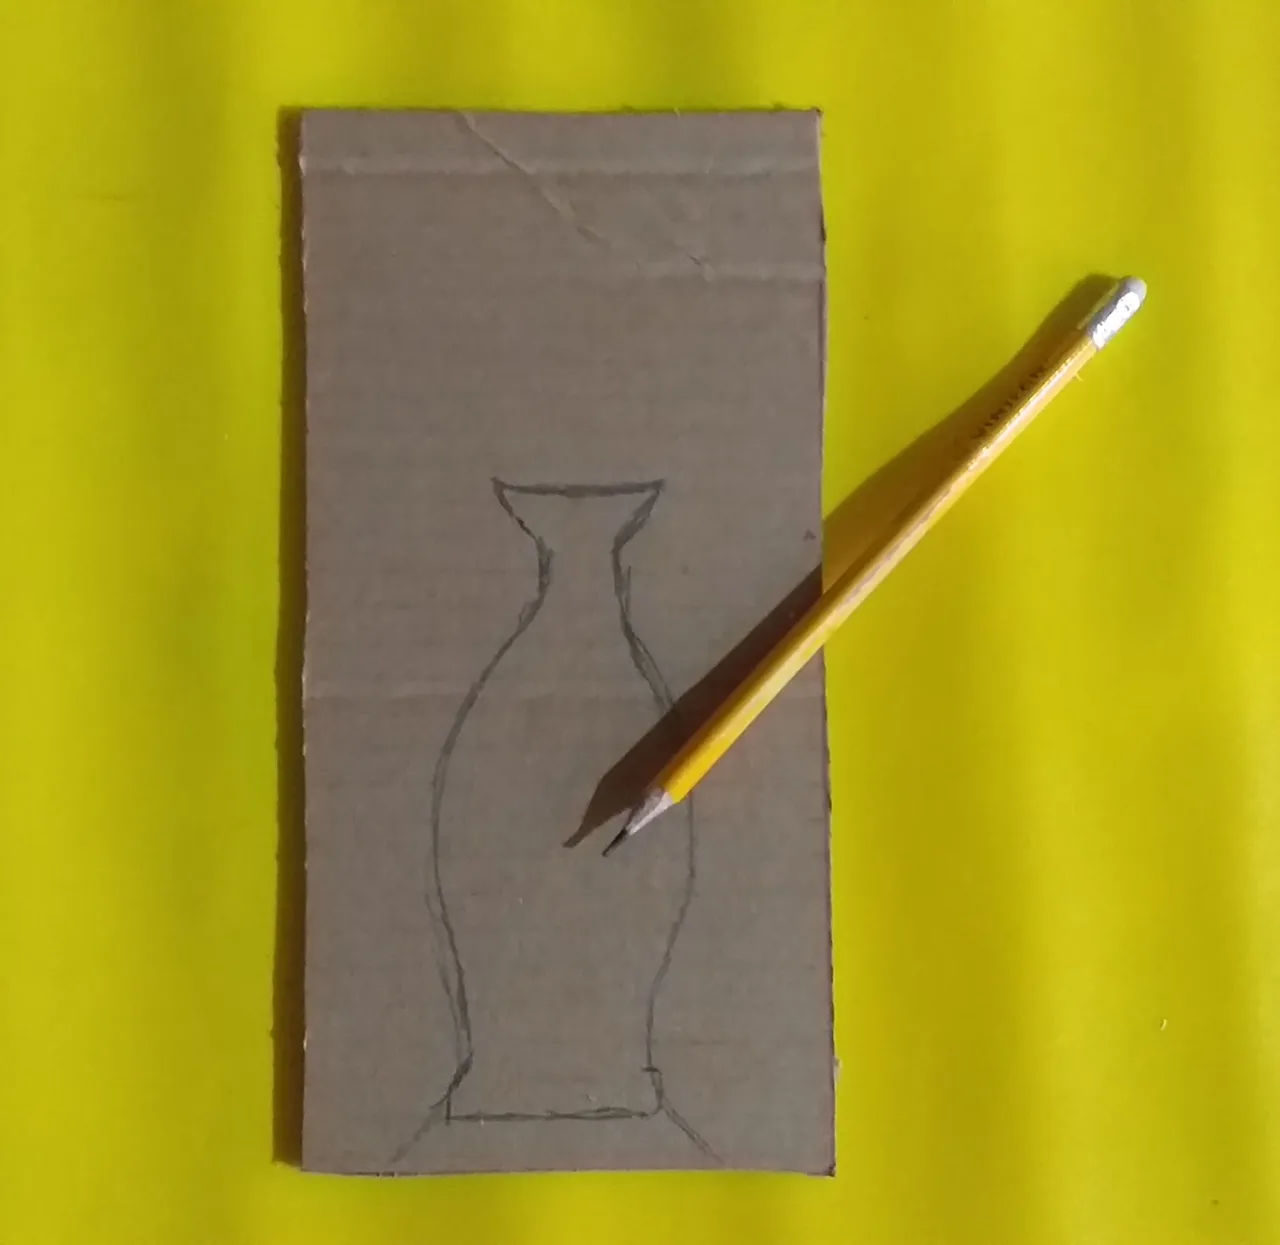
- Dibujamos un jarrón.
Step 2
- We draw a vase.
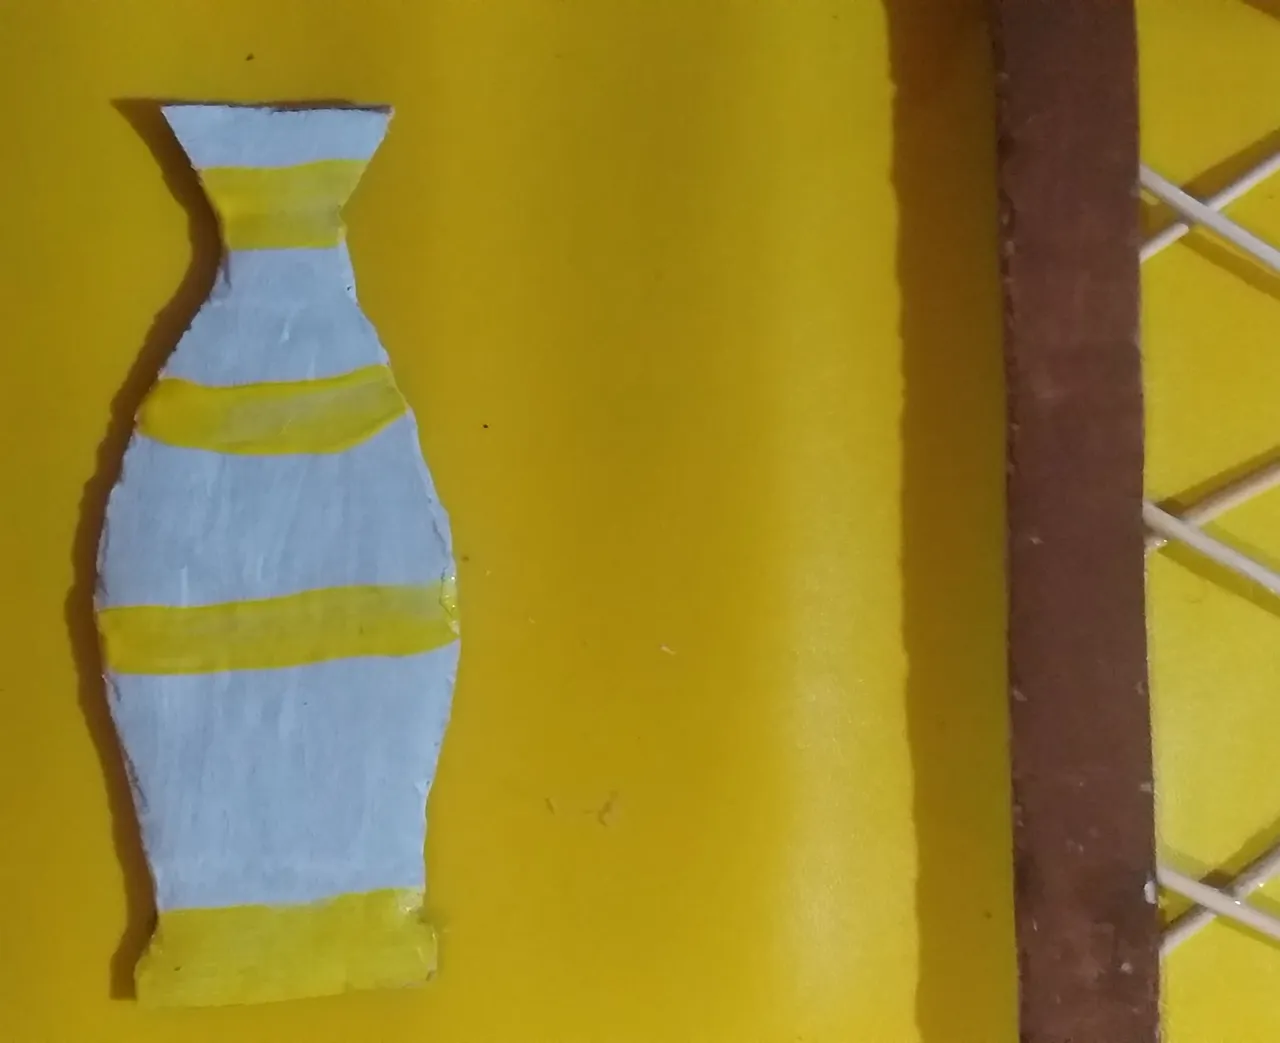
Luego pintamos con témpera de color blanco y amarillo.
Then we paint with white and yellow tempera.
Paso 3
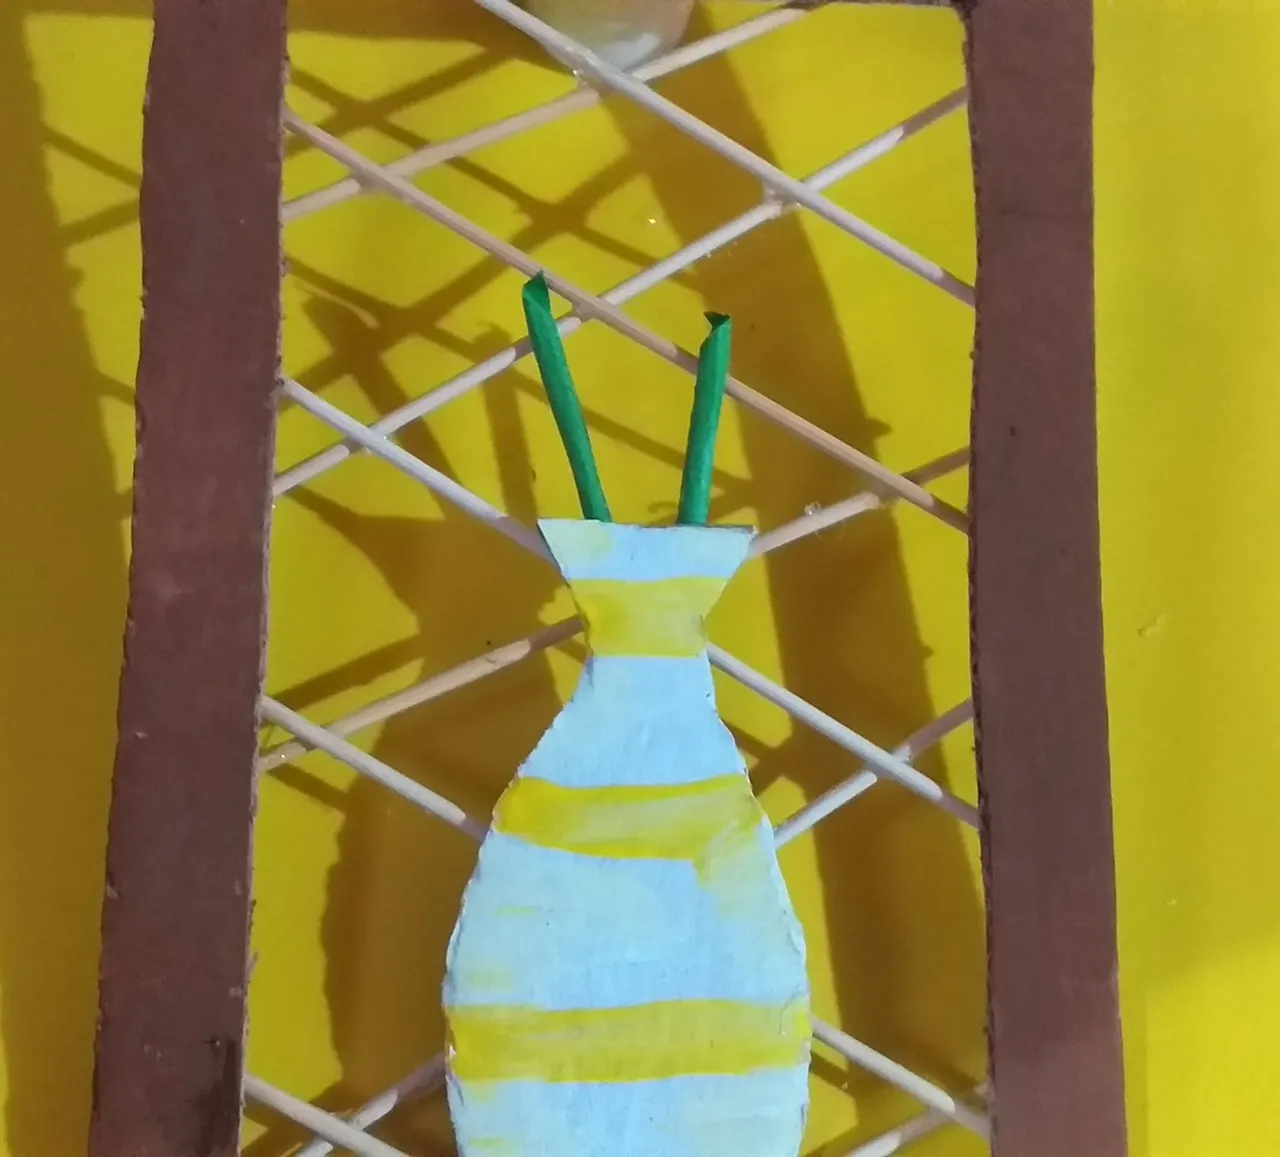
- Fijamos el jarrón sobre los palillos de altura.
Step 3
- We fix the vase on the height sticks.
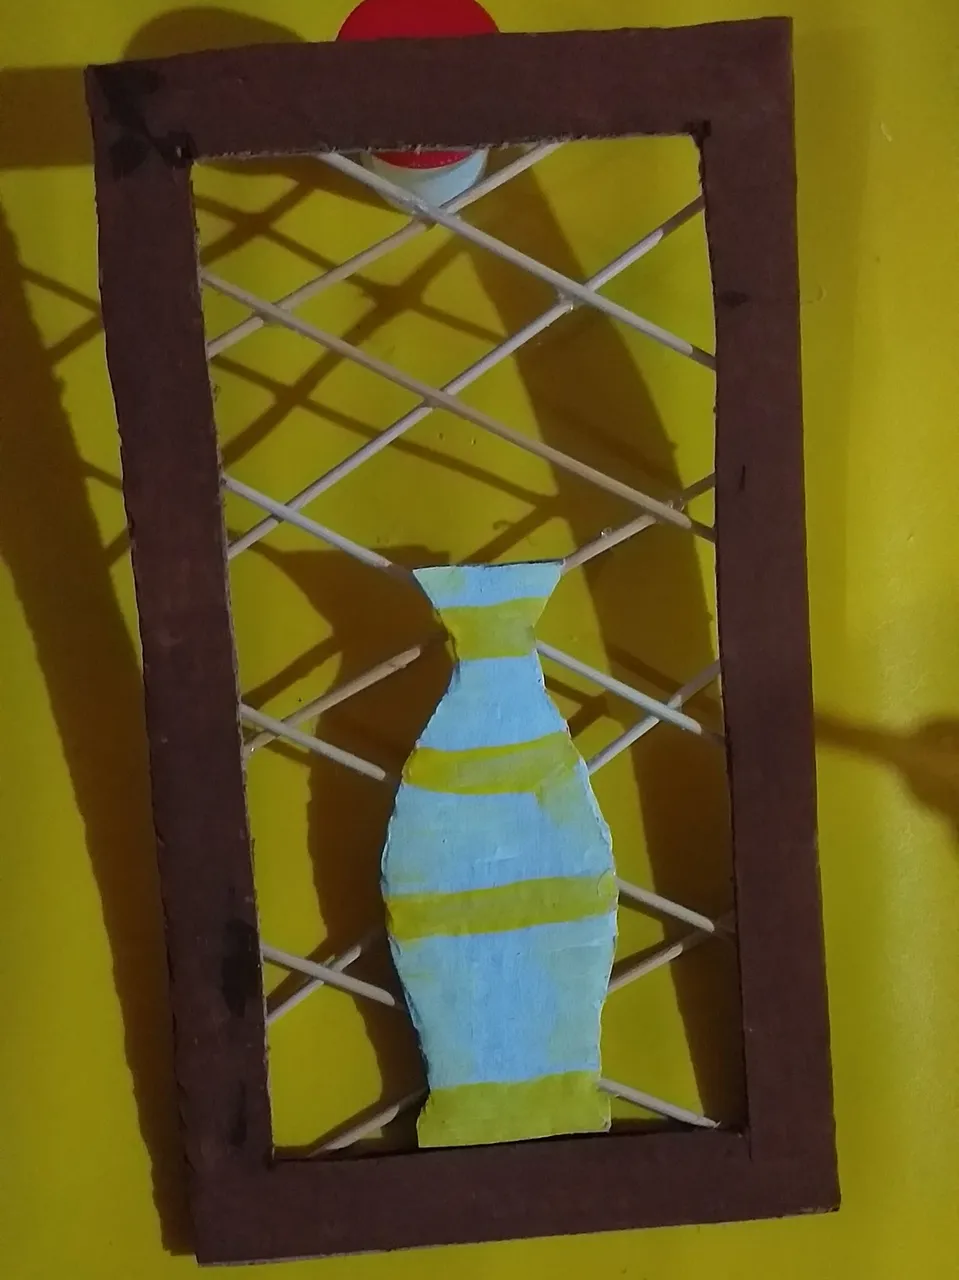
Luego pegamos las dos ramitas verdes.
Then we glue the two green twigs.
Después fijamos las flores.
Then we fix the flowers.
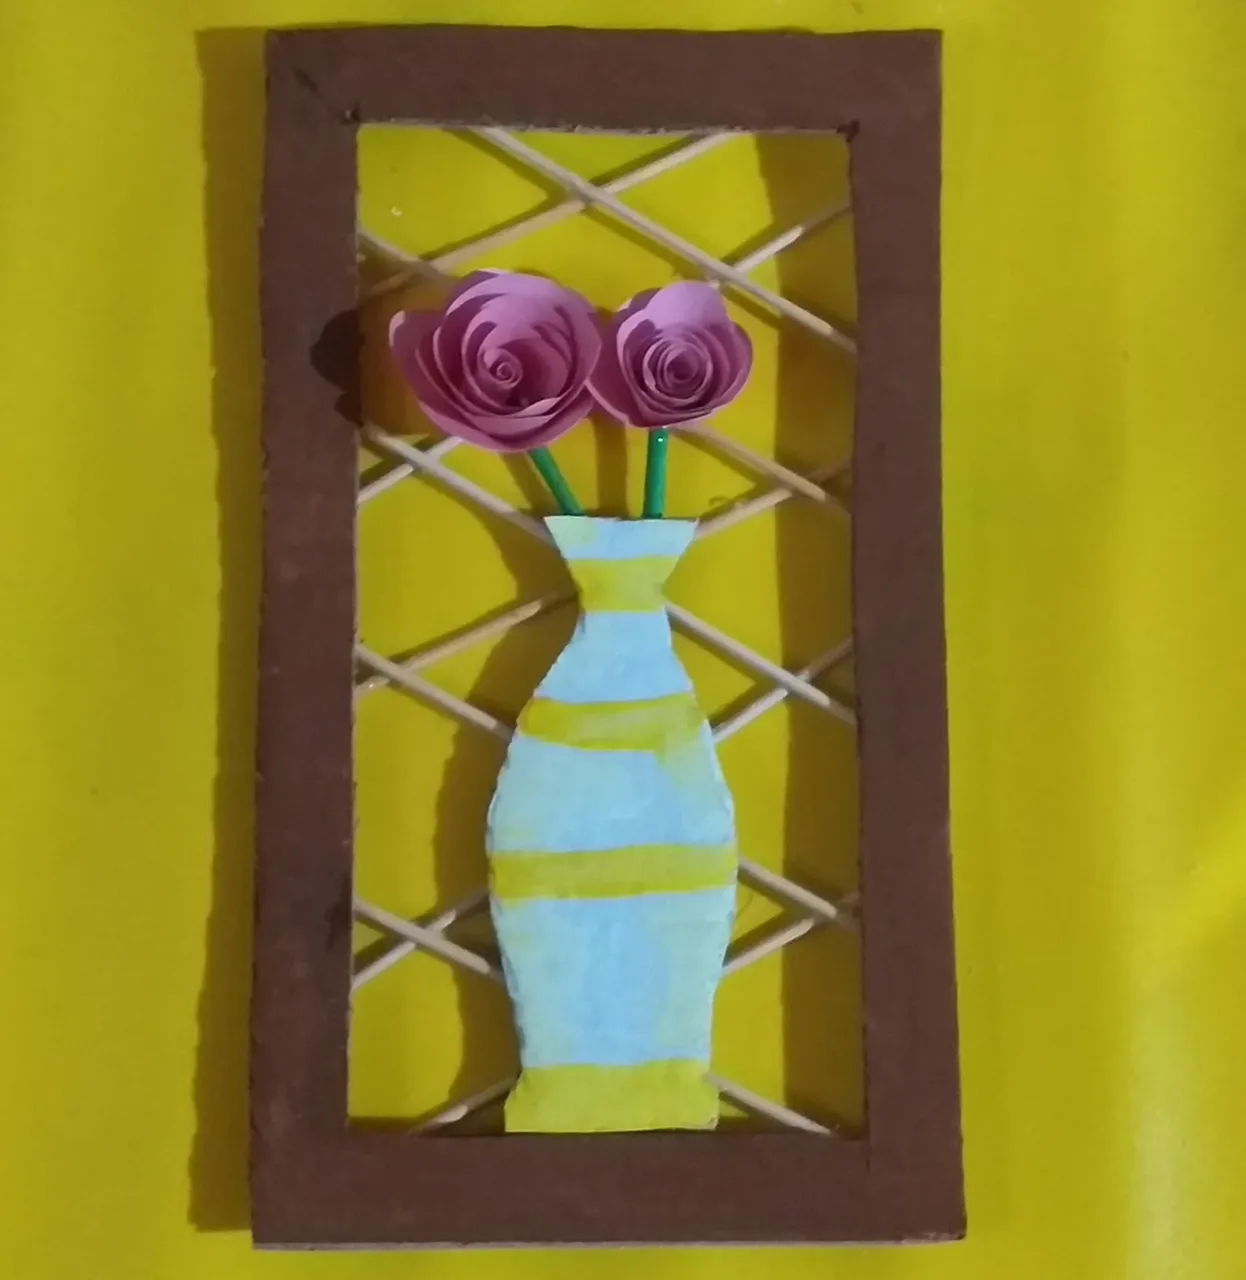
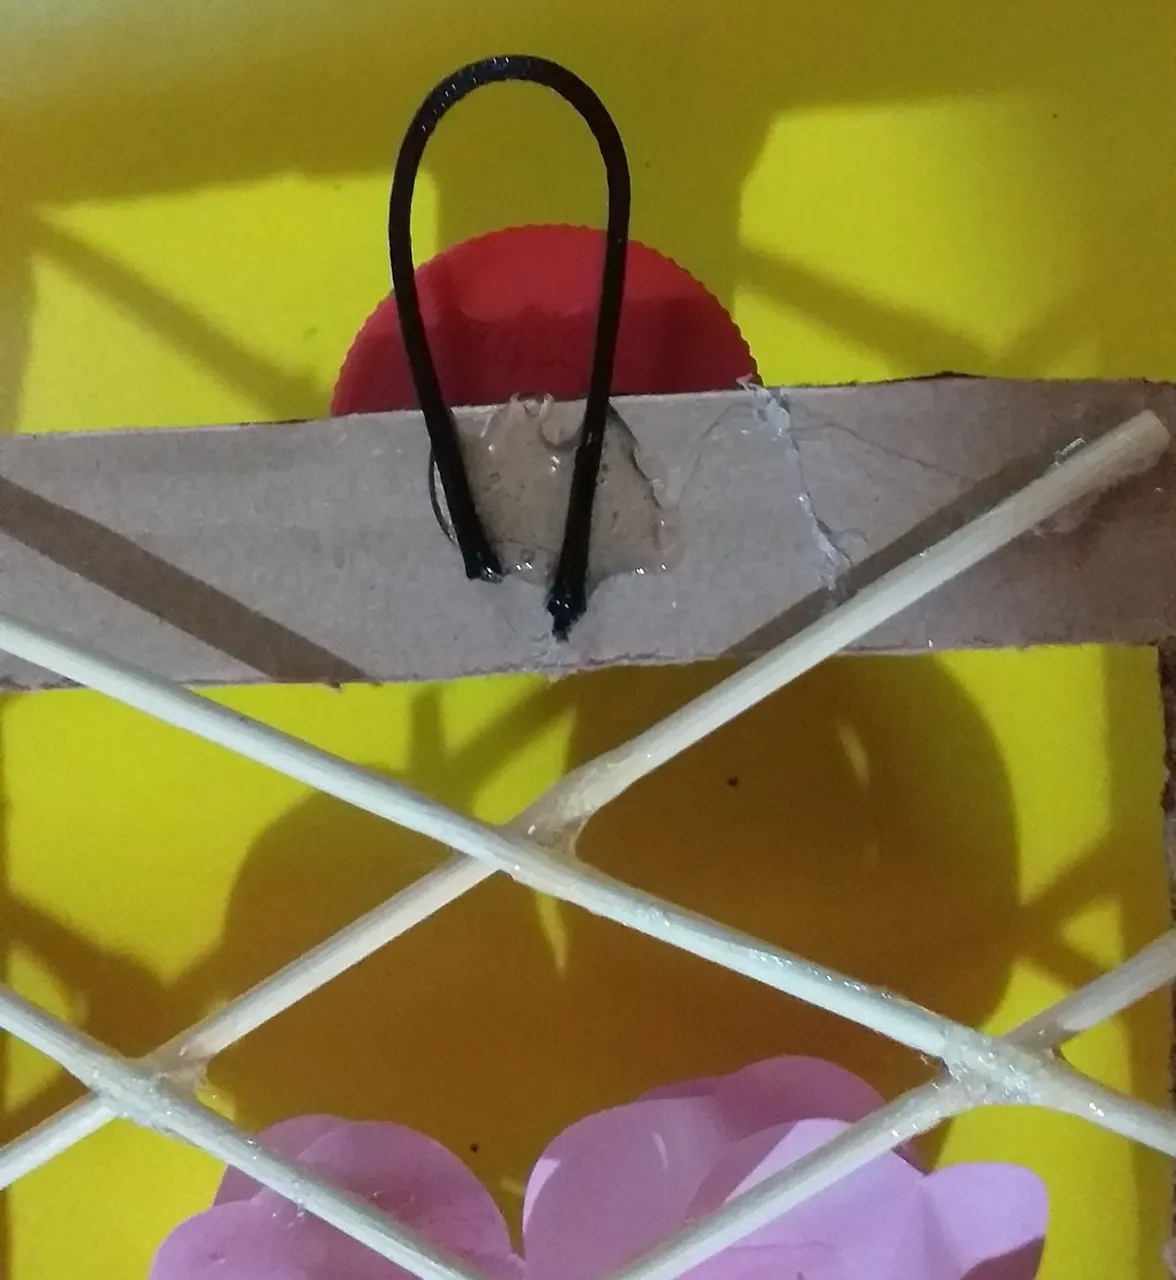
Por último pegamos el Cordón.
Finally we glue the cord.
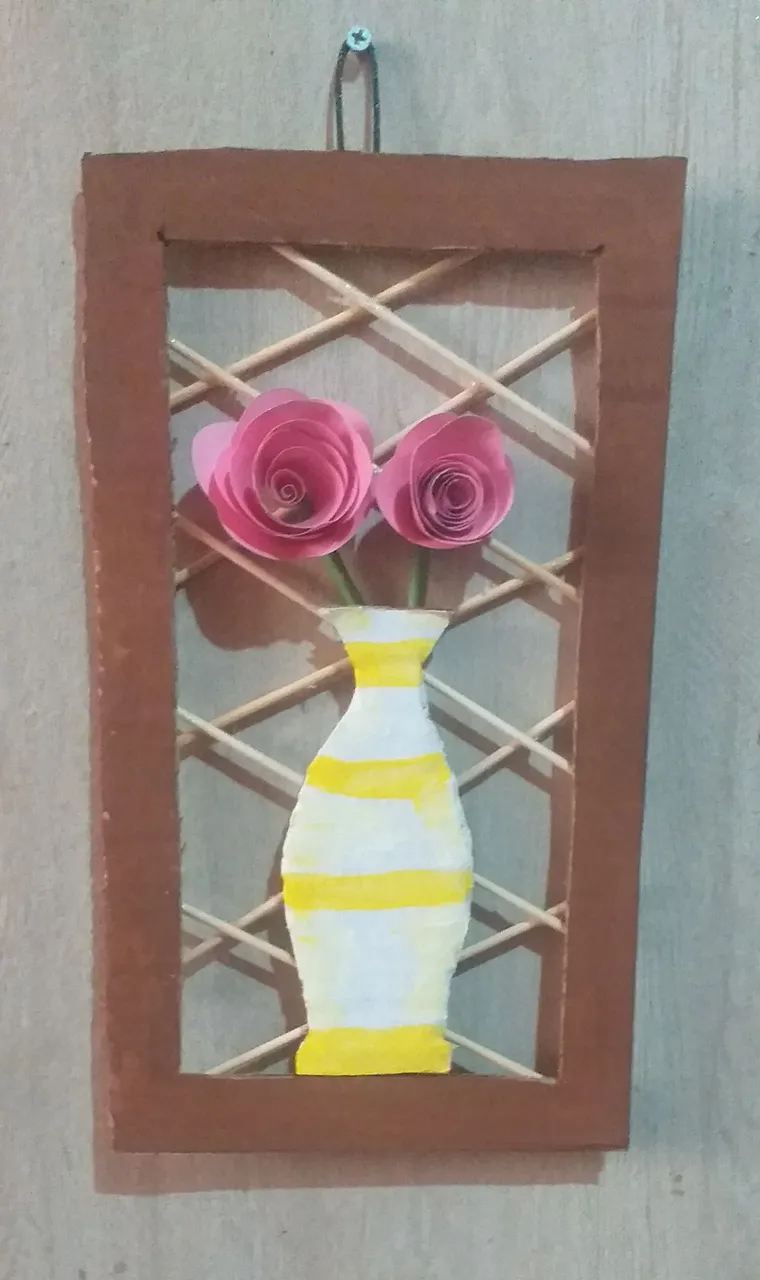
Espero que les haya, hasta otra nueva oportunidad. Dios les bendiga.
I hope there is, until another opportunity. God bless you.