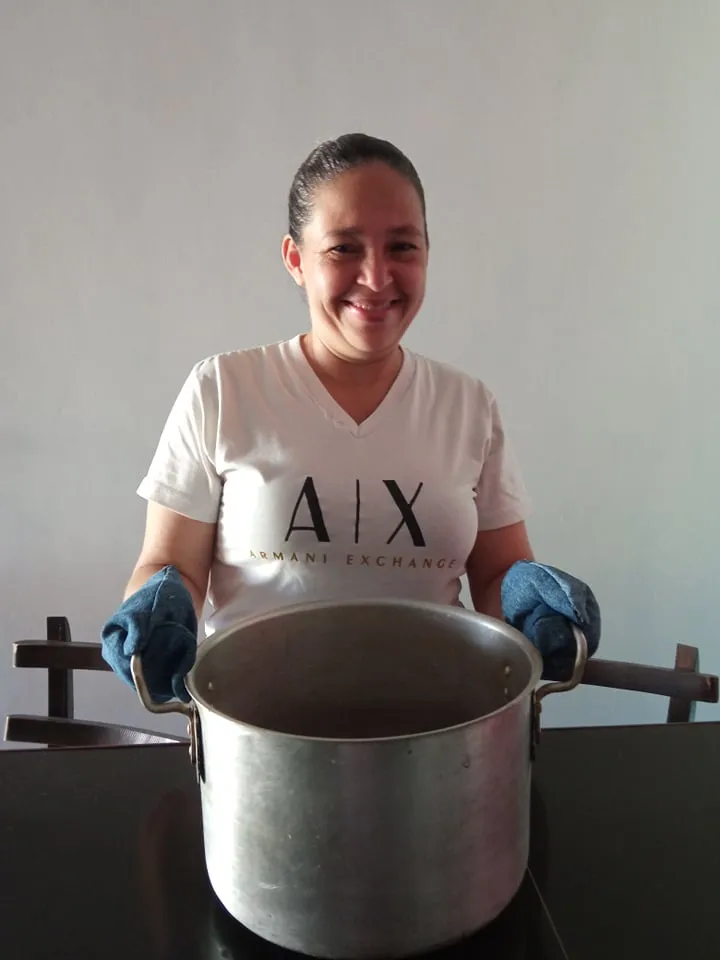
Espero que todos se encuentren muy bien, es un placer para mí volver a compartir con ustedes, tenía en casa un retazo de tela de jean de un panralón viejo que ya no usaba, y quise hacer unas lindas manoplas para utilizar en mi cocina a la hora de agarrar una olla o cualquier otro recipiente cuando sea necesario, así que veamos el paso a paso.
I hope you are all feeling well, it is a pleasure for me to share with you again, I had at home a piece of denim fabric from an old panralón that I no longer used, and I wanted to make some nice mittens to use in my kitchen when it is time to grab a pot or any other container when necessary, so let's see the step by step.

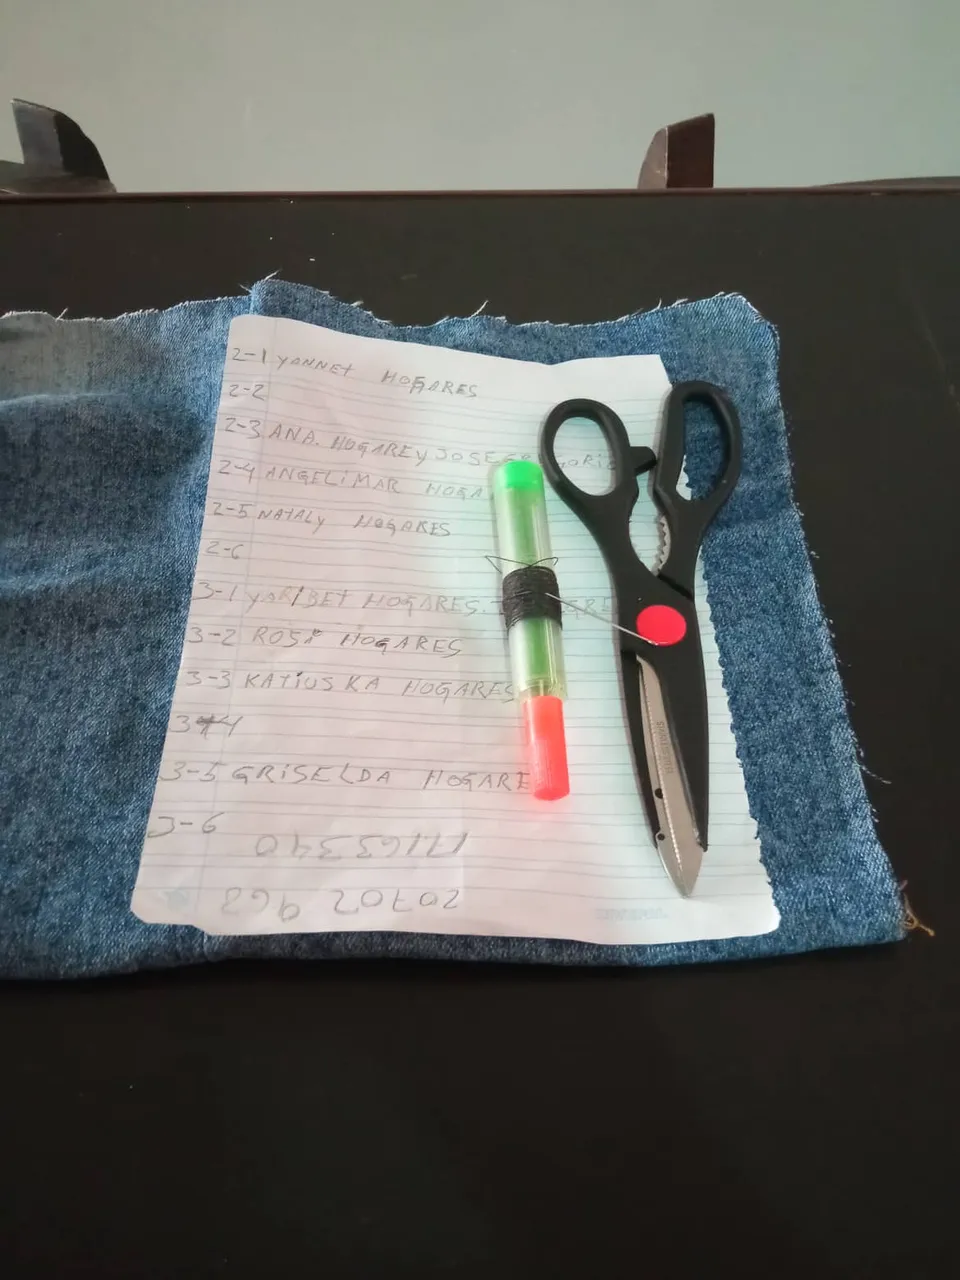
- Los materiales a utilizar son:
- Retazo de tela de jean.
- Tijera.
- Hilo de coser.
- Aguja de coser.
- Marcador.
- Hoja de reciclaje.
- The materials to be used are:
- Piece of jean fabric.
- Scissors.
- Sewing thread.
- Sewing needle.
- Marker.
- Recycling sheet.
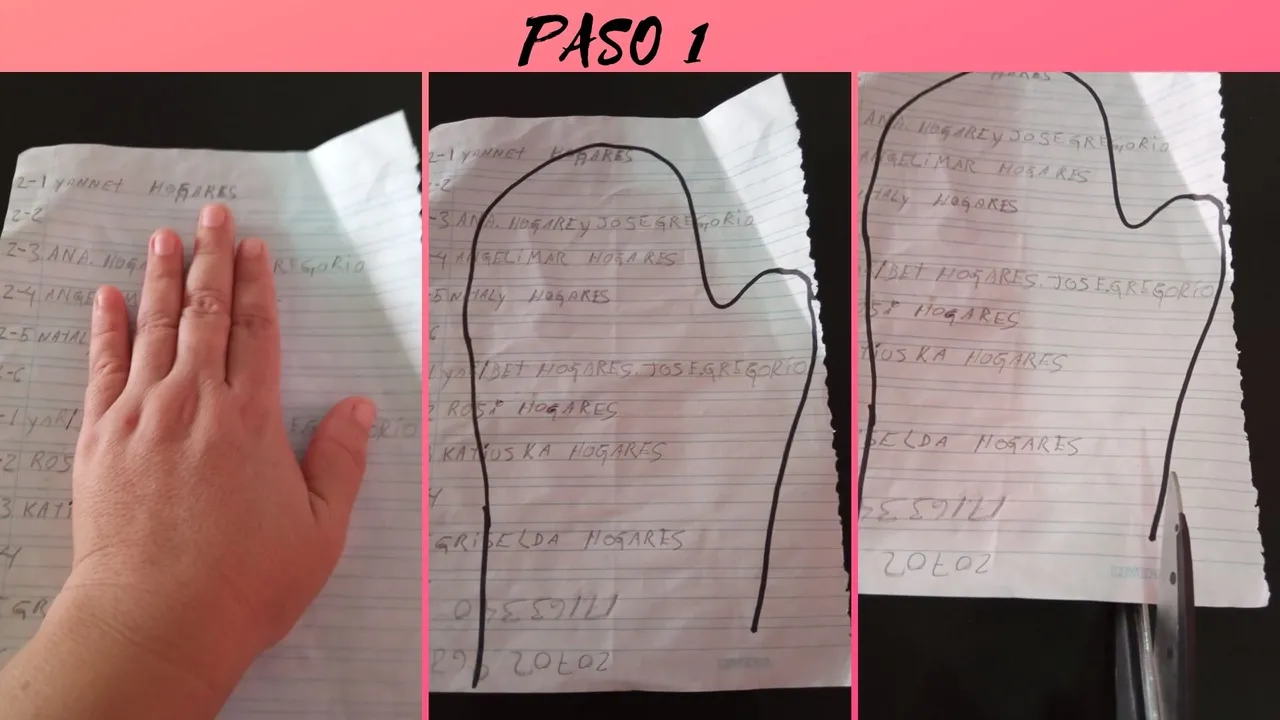
- Paso 1: Primeramente colocamos nuestra mano sobre la hoja de reciclaje para sacar el patrón de nuestras manoplas, luego comenzamos recortar hasta obtener el patrón deseado.
- Step 1: First we place our hand on the recycling sheet to draw the pattern of our mittens, then we start cutting until we get the desired pattern.
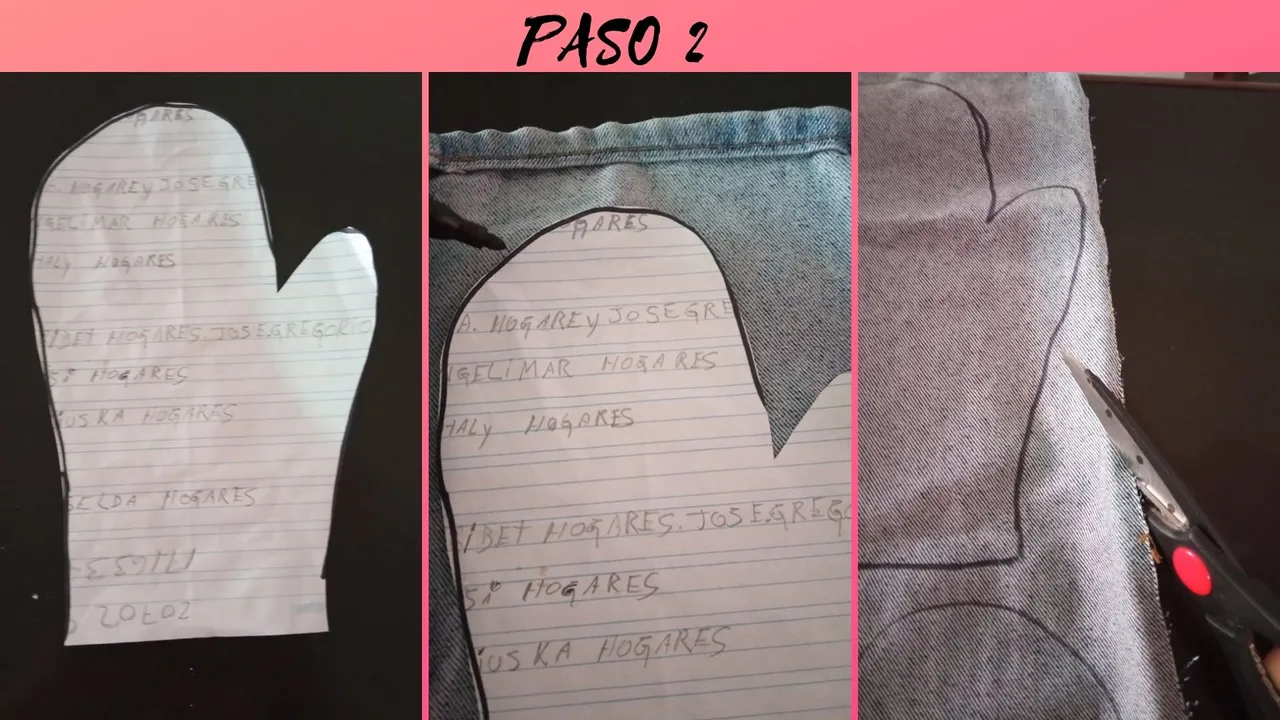
- Paso 2: Una vez que ya tenemos el patrón, lo colocamos sobre el retazo de tela, marcamos y luego recortamos, cabe destacar que se deben sacar 4 partes semejantes, con el patrón de ambas manos.
- Step 2: Once we have the pattern, we place it on the piece of fabric, mark it and then cut it out. It should be noted that 4 similar parts should be cut out, with the pattern of both hands.
- Paso 3: Luego de tener las 4 partes de nuestro retazo, colocamos un par derecho con derecho y comenzamos a coser por toda la orilla, posteriormente en la parte por donde se meterá la mano, doblamos 1 cm hacía adentro y cosemos.
- Step 3: After having the 4 parts of our patchwork, we place a pair right sides together and start sewing all along the edge, then in the part where the hand will be inserted, we fold 1 cm inwards and sew.
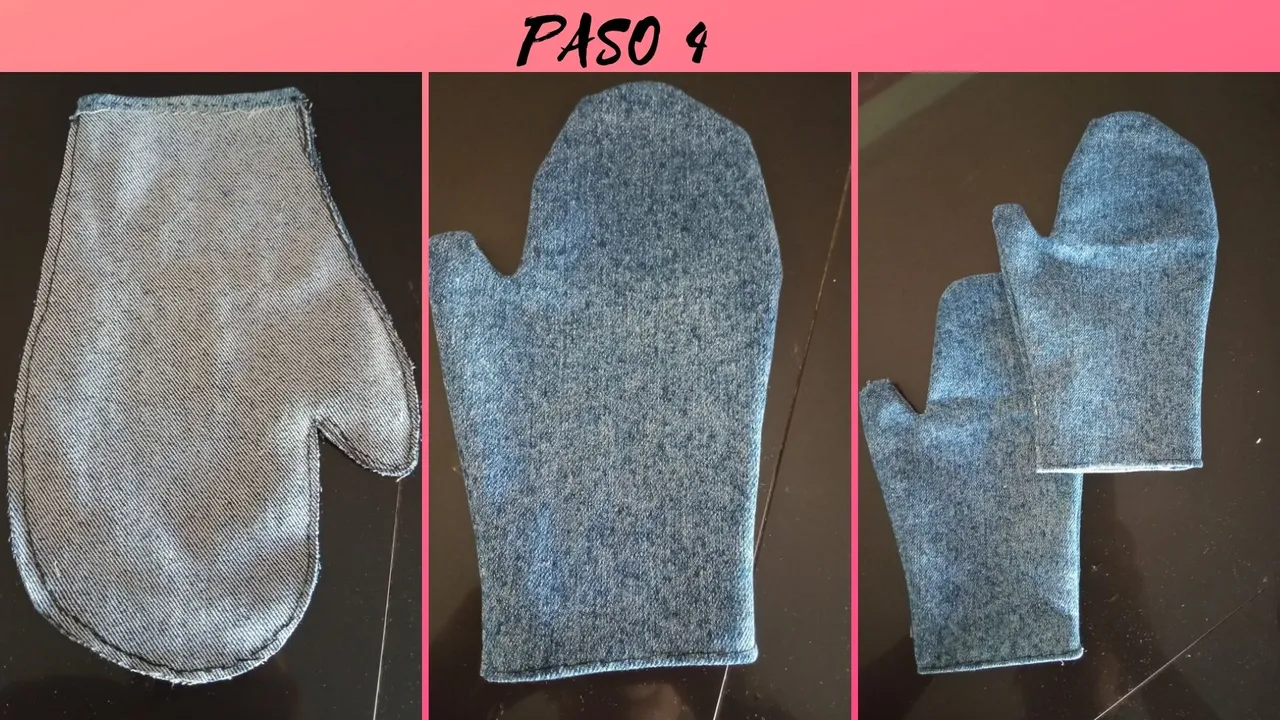
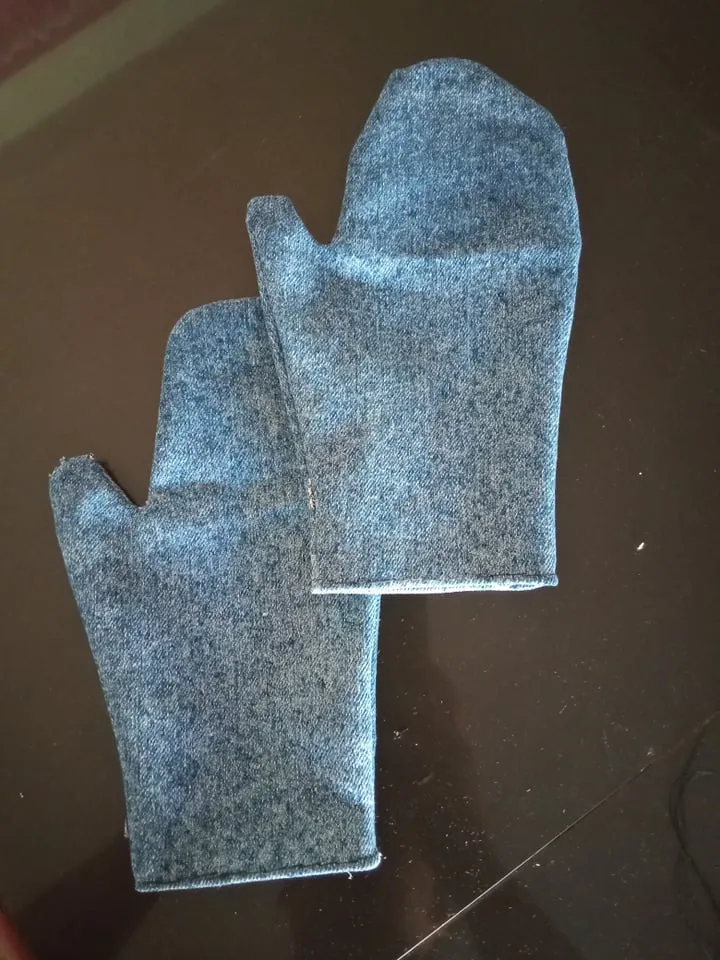
- Paso 4: Luego de haber cosido todas las orillas, deberá quedar como muestra la primera imágen, posteriormente volteamos nuestra pieza, cabe mencionar que este mismo procedimiento se debe hacer con los 2 pares de manoplas.
- Step 4: After having sewn all the edges, it should be as shown in the first image, then we turn our piece over, it is worth mentioning that this same procedure should be done with the 2 pairs of mittens.
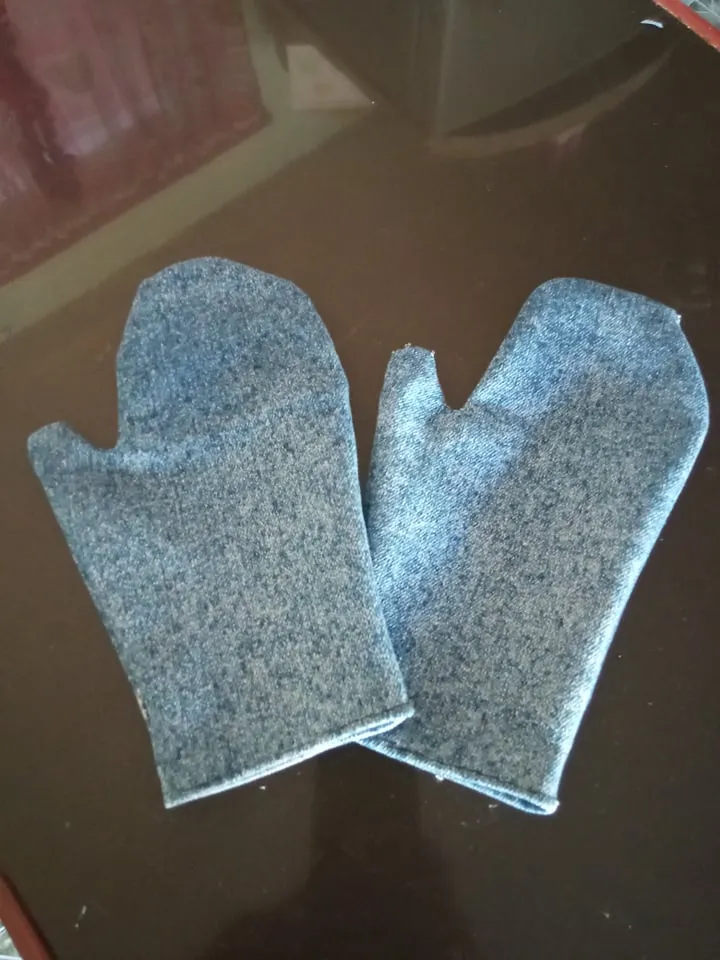
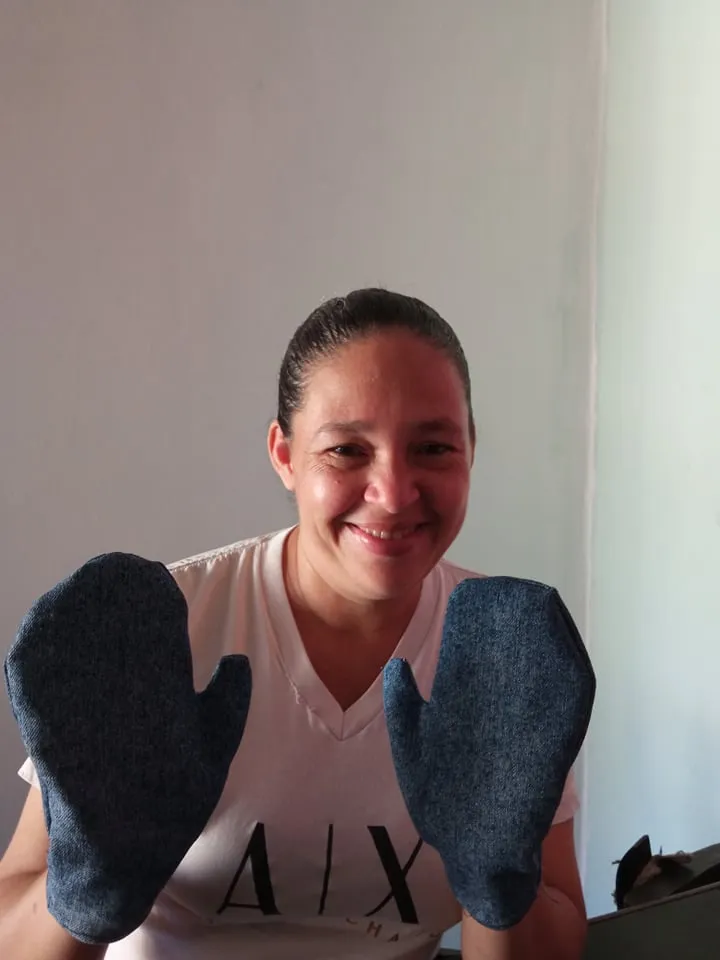
Aqui tenemos nuestro resultado final.
Here we have our final result.
 Todas las fotos son de mi autoría, y editadas desde canva.
All photos are of my authorship, and edited from canva.
Todas las fotos son de mi autoría, y editadas desde canva.
All photos are of my authorship, and edited from canva.