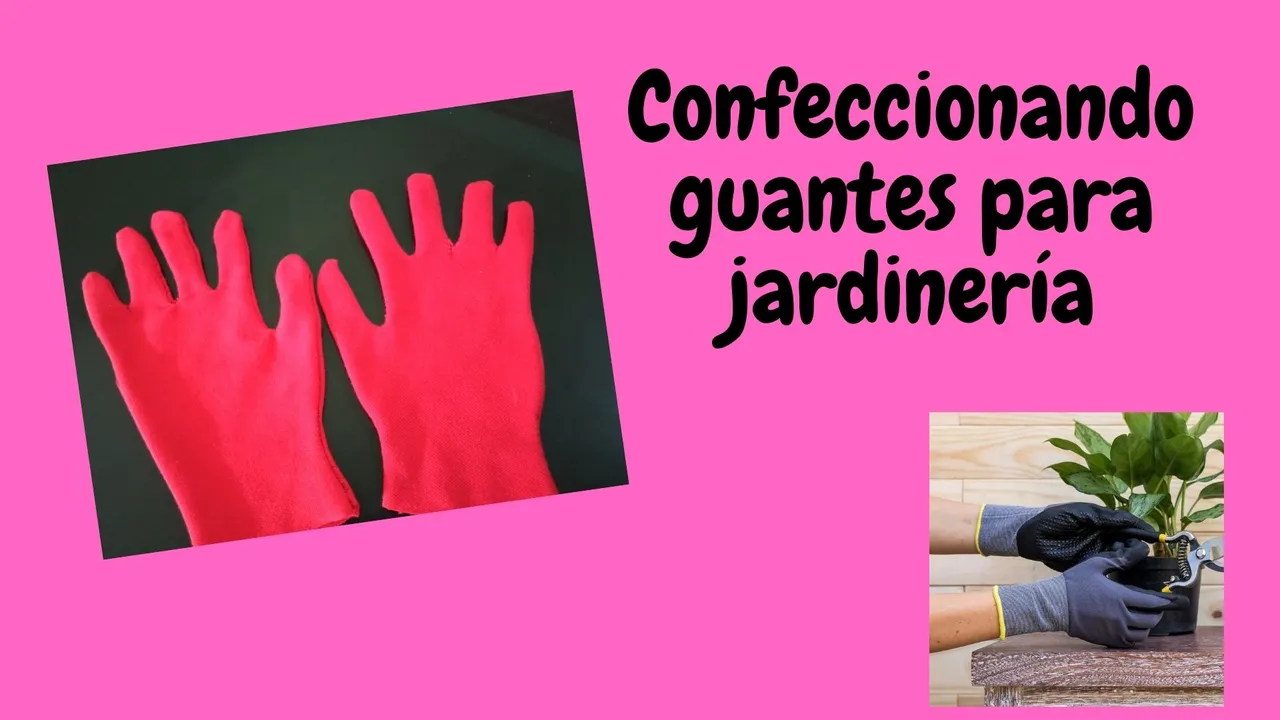
 Un gran saludo para todos, espero se encuentren muy bien, hoy les quiero mostrar unos sencillos guantes que hice para jardinería, siempre en casa estamos limpiando nuestras plantas bien sea las que tenemos en nuestro jardin o en el patio de la casa, siempre estamos limpiándolas alrededor, o bien sembrando plantas nuevas, y los guantes nos ayudan a proteger nuestras manos de toda suciedad, así que veamos el paso a paso, es muy sencillo de realizar.
A big greeting to everyone, I hope you are very well, today I want to show you some simple gloves that I made for gardening, always at home we are cleaning our plants either we have in our garden or in the yard of the house, we are always cleaning them around, or planting new plants, and the gloves help us to protect our hands from dirt, so let's see the step by step, it is very simple to perform.

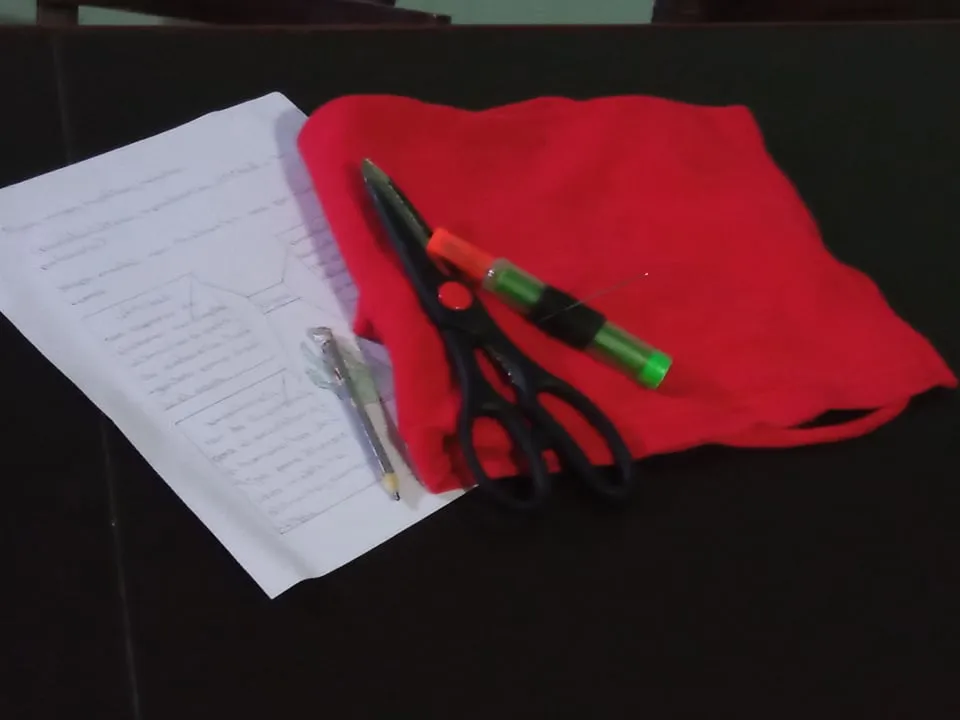
- Los materiales a utilizar son:
- Tela de cualquier color.
- Tijera.
- Hilo de coser.
- Aguja de coser.
- Lápiz.
- Marcador.
- Hoja de reciclaje.
- The materials to be used are:
- Fabric of any color.
- Scissors.
- Sewing thread.
- Sewing needle.
- Pencil.
- marker
- Recycling sheet.
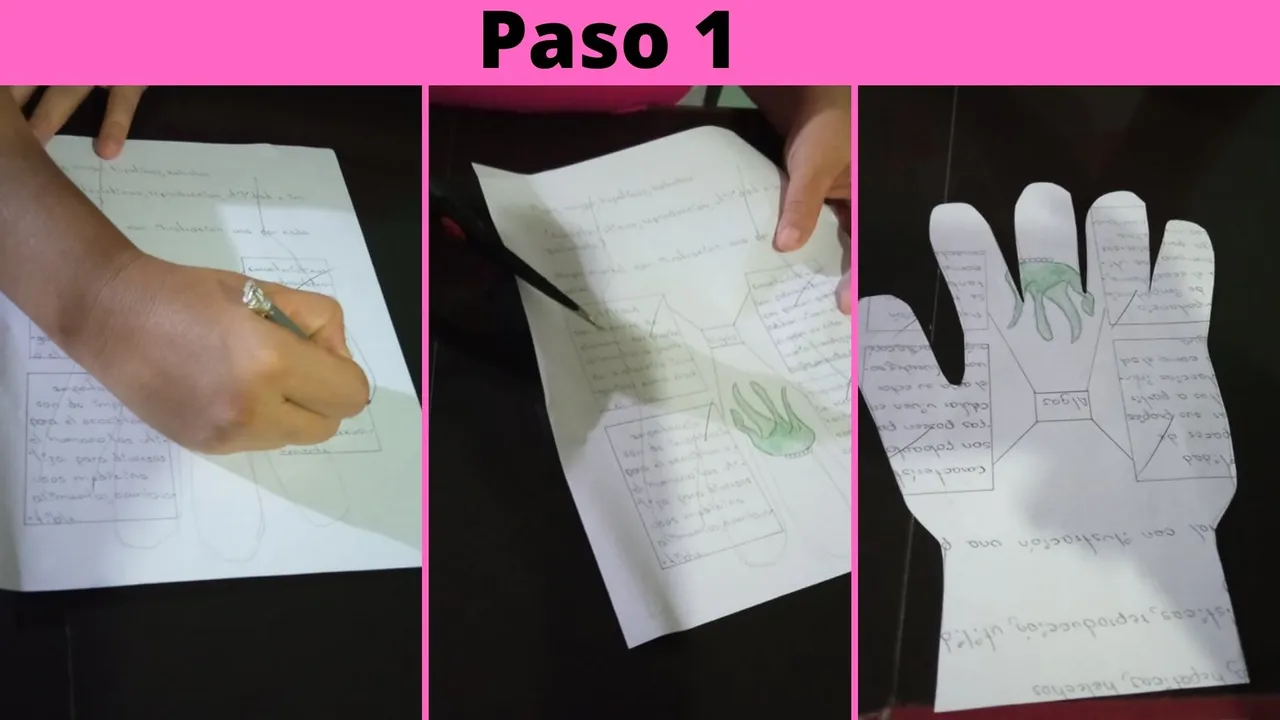
- Paso 1: Primeramente en la hoja de reciclaje procedemos a dibujar el patrón del guante, luego recortamos hasta obtener la forma del guante deseada.
- Step 1: First draw the pattern of the glove on the recycling sheet, then cut it out until the desired shape of the glove is obtained.
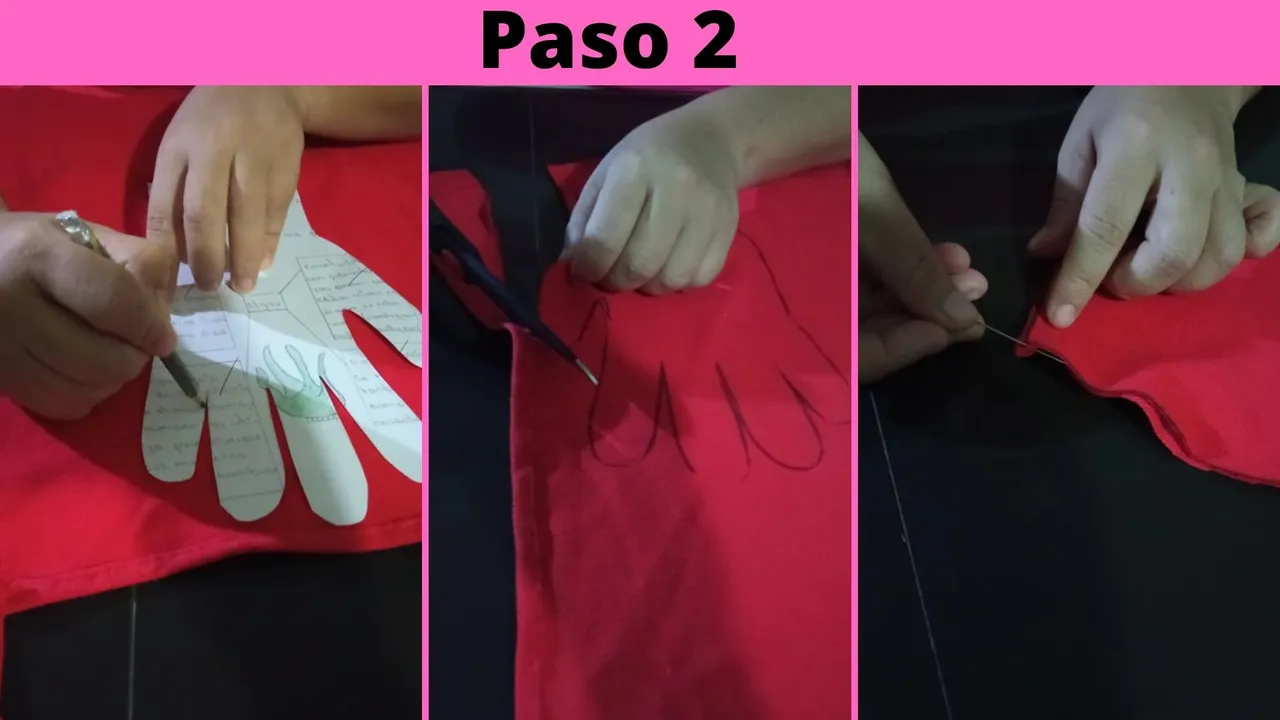
- Paso 2: Una vez que ya tenemos el patrón del guante, lo colocamos sobre la tela, y con un lápiz o marcador procedemos a dibujarlo , luego recortamos, cabe destacar que se deben sacar 4 partes iguales, se colocan las piezas derecho con derecho, y se procede a coser por toda la orilla, menos en la parte de abajo.
- Step 2: Once we have the pattern of the glove, we place it on the fabric, and with a pencil or marker we proceed to draw it, then we cut it out, it should be noted that 4 equal parts must be removed, the pieces are placed right side by right side, and we proceed to sew along the entire edge, except at the bottom.
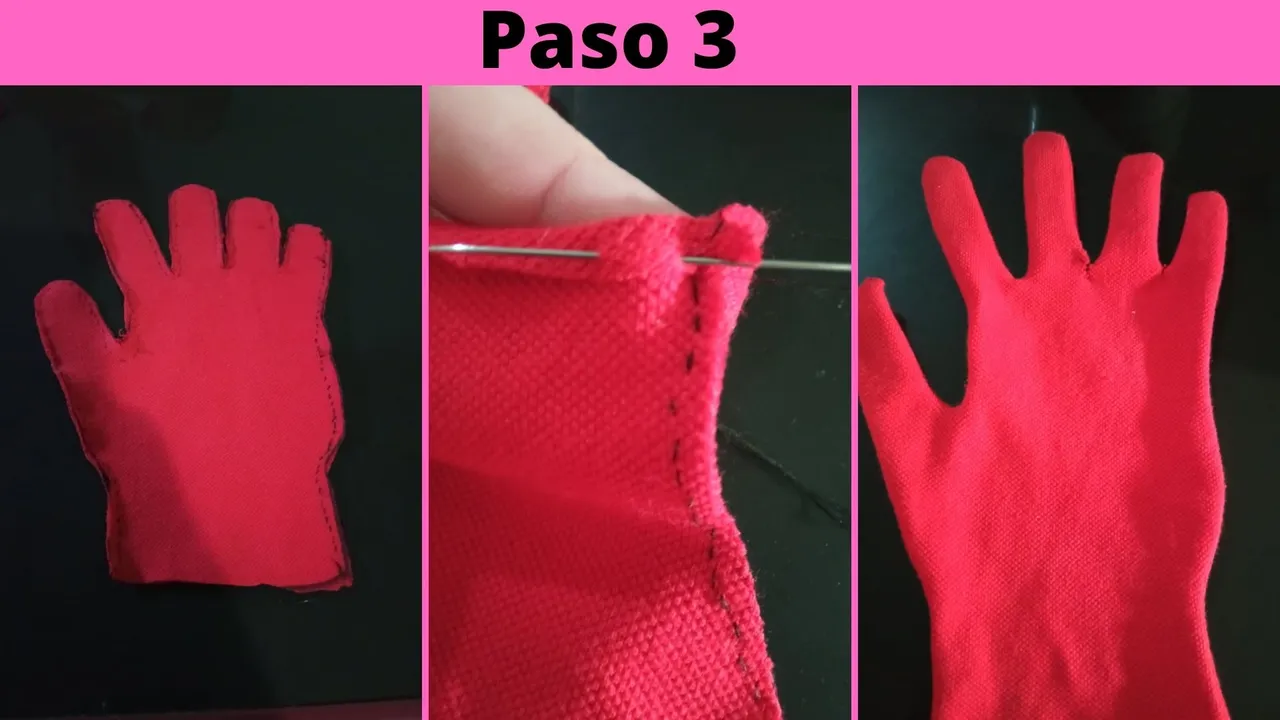
- Paso 3: Una vez cosida toda la orilla del guante, procedemos a doblar de la parte de abajo medio centrimetro hacía abajo y cosemos, luego volteamos del lado derecho, esto se debe hacer con las 4 partes que sacamos de la tela, se deben colocar de 2 en 2, una encima de la otra para sacar el par.
- Step 3: Once the entire edge of the glove is sewn, proceed to fold the bottom half a centimeter down and sew, then flip the right side, this should be done with the 4 parts that we took out of the fabric, they should be placed 2 by 2, one on top of the other to remove the pair.
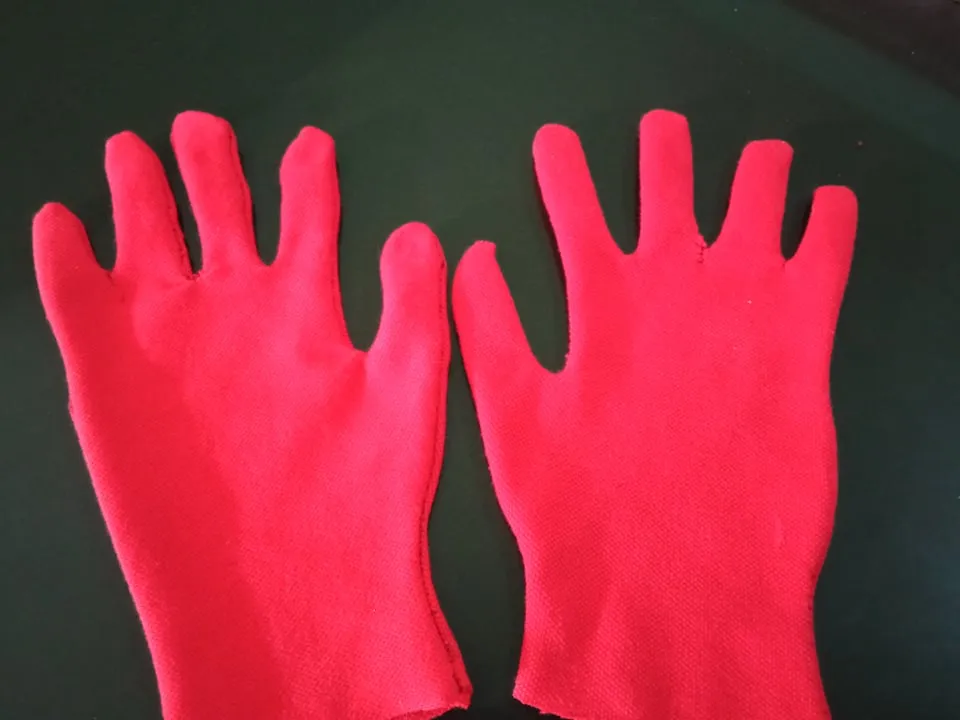
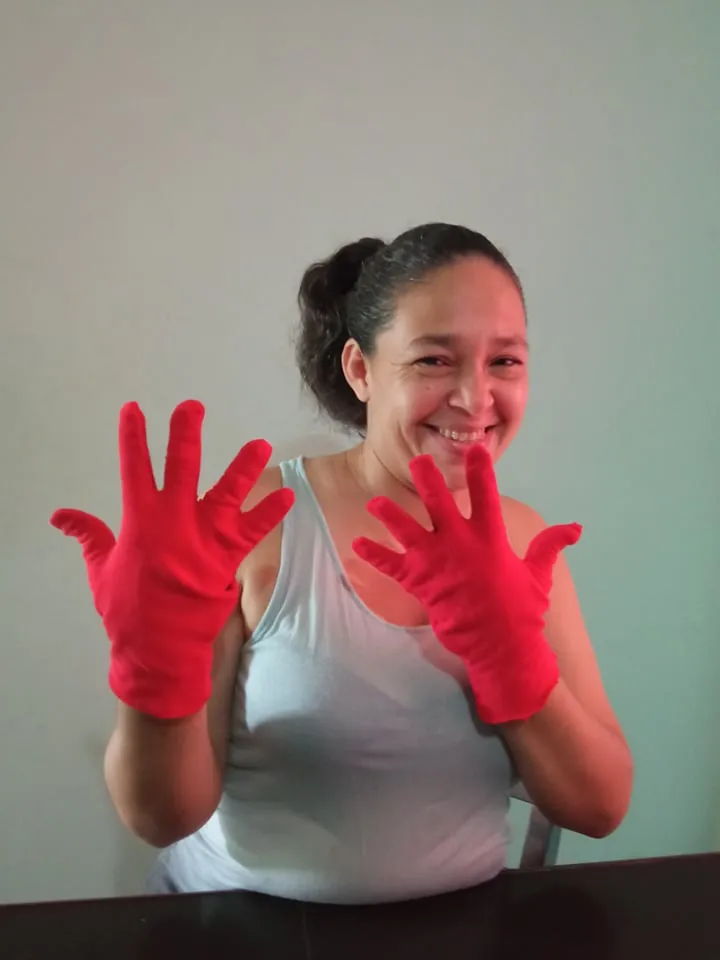
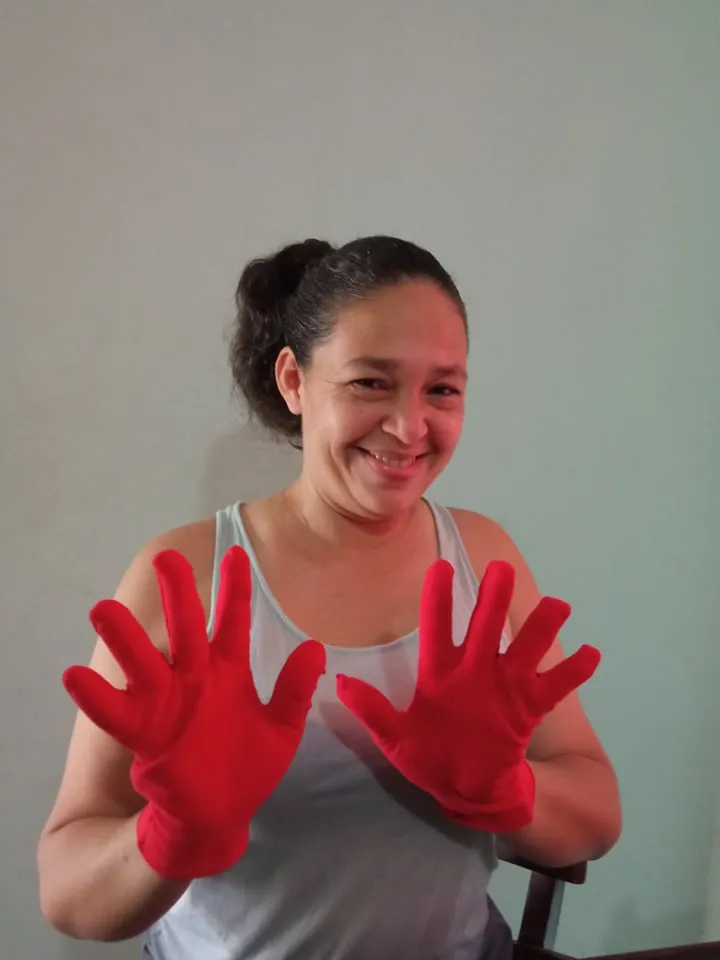
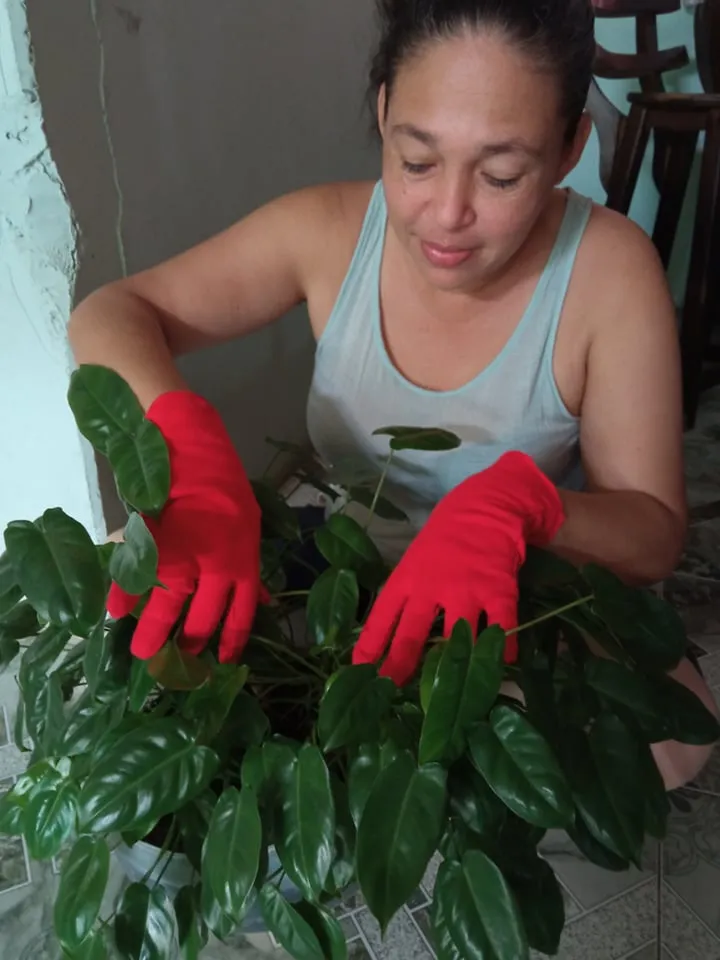
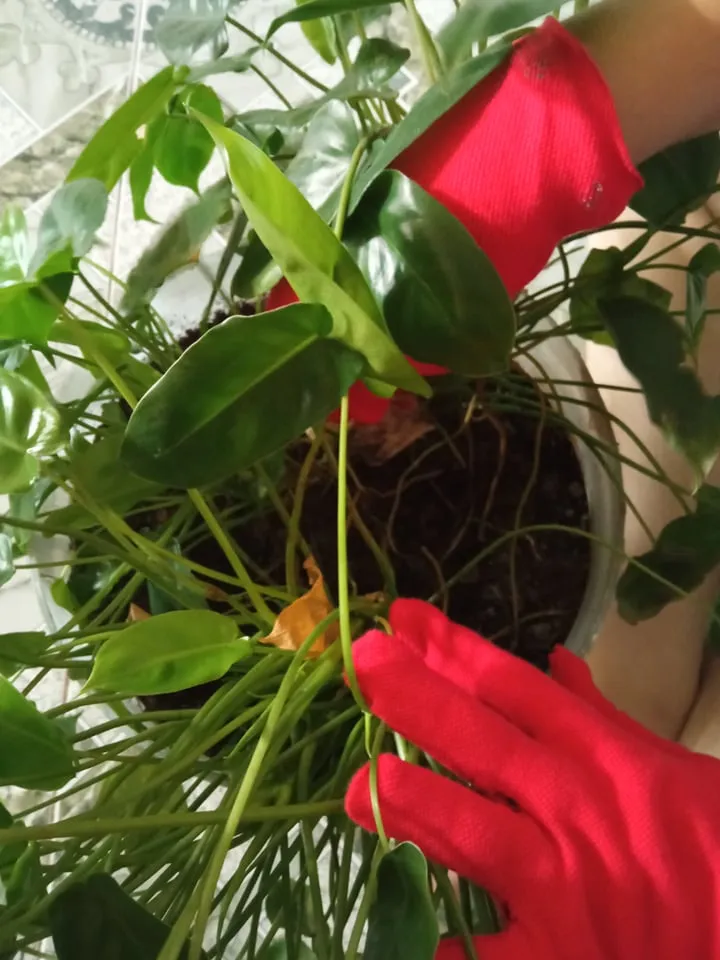
Aqui tenemos nuestro resultado final.
Here we have our final result.
 Todas las fotos son de mi autoría, y editadas desde canva.
All photos are of my authorship, and edited from canva.
Todas las fotos son de mi autoría, y editadas desde canva.
All photos are of my authorship, and edited from canva.