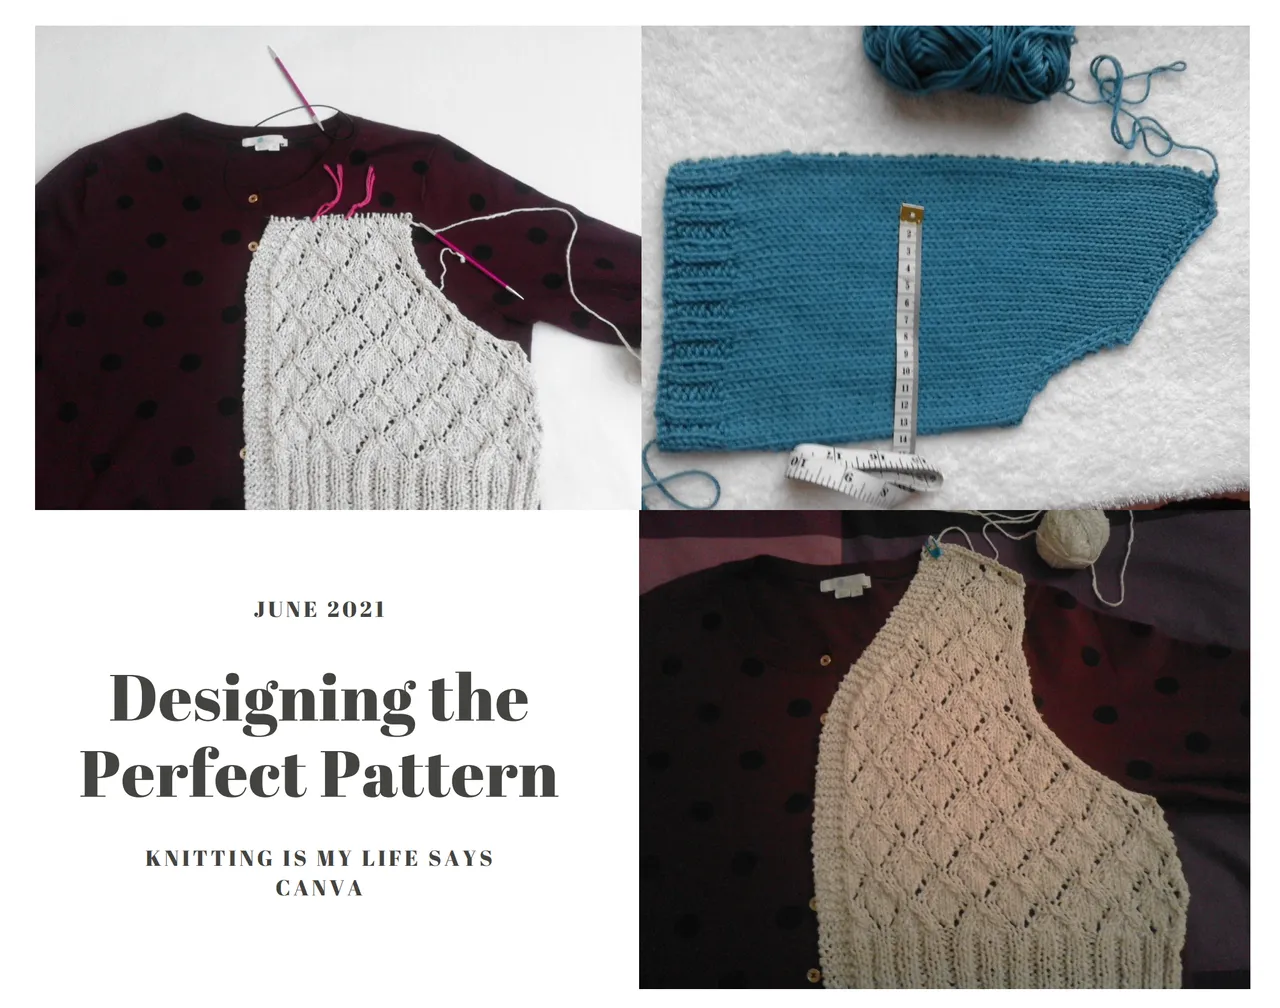
Last week, I started designing my perfect cardigan pattern by blending two different pattern sizes together to match my body measurements. This week, I'm selecting the sleeve size and modifying the sleeve top to fit the armscye I've created on the body.
The first task was checking my arm circumferences against the standard pattern sizes. Although these measurements are not usually given, you can extract them from the pattern. Size L matched well:
| Body measurement | cms | Size L |
|---|---|---|
| Forearm | 24cms | 49 stitches/18 stitches x 10cms = 27.2 cms |
| Bicep | 30cms | 73 stitches/18 stitches x 10cms = 40.5cms |
Size L
Tension: 18 stitches and 28 rows = 10 cms
From the pattern:
Cast on 49 stitches at cuff.
Increase to 73 stitches at widest part of sleeve.
The sleeve length is easier to adjust as you go along.
These measurements allowed appropriate ease at each place - tighter at the cuff and room for movement higher on the arm. Although knitted fabrics are more forgiving than woven fabrics because they are stretchy, the bicep measurement is one that can vary a lot. I have quite skinny arms to go with my small upper chest, but other women can be larger and this measurement is worth checking.
You may be wearing other garments underneath the cardigan which will give extra bulk. In addition, the texture of this pattern and the thickness of the yarn create more bulk.
The next thing was comparing the armscye length adjusted for my body measurements against the sleeve top edge length in the pattern.
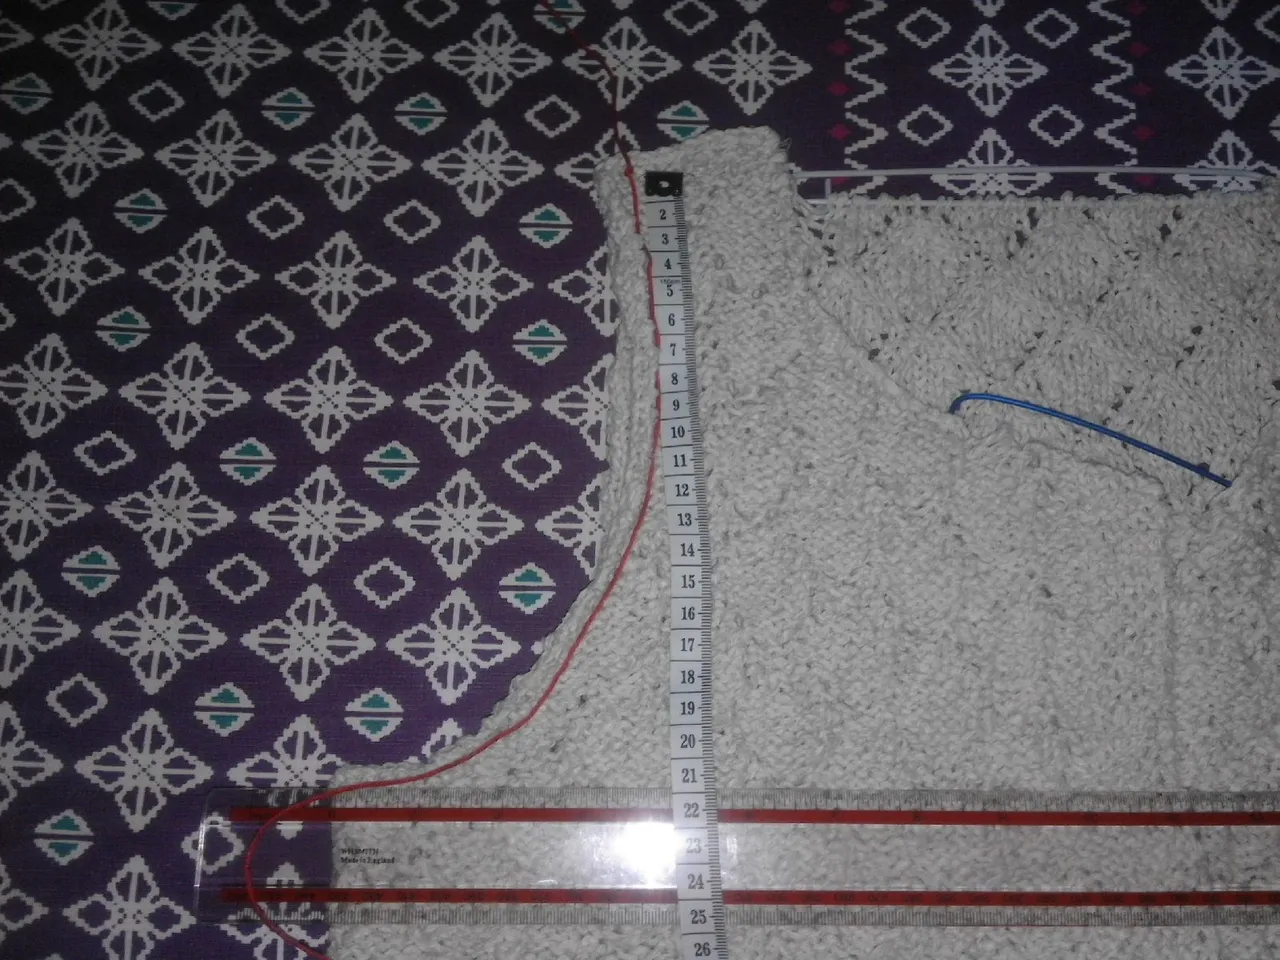
I knitted an armhole depth (from the shoulder to the underarm) of 21 cms. The armscye length, shown by the red thread, is longer to provide enough width for the fabric to go under the arms. My armscye is 26 cms.
The corresponding edge of the pattern sleeve top is 22 cms:
| Pattern | Rows | Stitches |
|---|---|---|
| Cast off 5 stitches x 2 rows | 2 | 10 |
| Dec 1 each end x 5 rows | 5 | 10 |
| Dec 1 each end alt rows x 3 | 6 | 6 |
| Dec 1 each end foll 4th row x 2 | 8 | 4 |
| Work 1 row | 1 | 0 |
| Dec 1 each end alt rows x 6 | 12 | 12 |
| Dec 1 each end x 7 rows | 7 | 14 |
| Cast off remaining stitches | - | 17 |
| Total rows and stitches | 41 | 73 |
| Total cast off (c/o) stitches/2 | - | 13.5 |
To calculate length of pattern sleeve top
41 rows/28 rows x 10 cms = 14.64 cms
13.5 c/o stitches/18 stitches x 10cms = 7.5 cms
Total length = 14.64 + 7.5 = 22.14 cms
There is a variation of about 4cms between the pattern measurements and my armscye measurements. Knitting is quite stretchy and you can leave differences of up to about 5cms: simply ease the larger piece to fit the smaller piece when you are making them up.
If I wanted the pieces to match exactly, I can calculate how many extra rows I would need and add them where it says work 1 row in the pattern:
28 rows/10 cms x 4cms = 11 rows. My tension tends to be a bit looser than the pattern, so I'm going to add 5 rows and see how it works out.
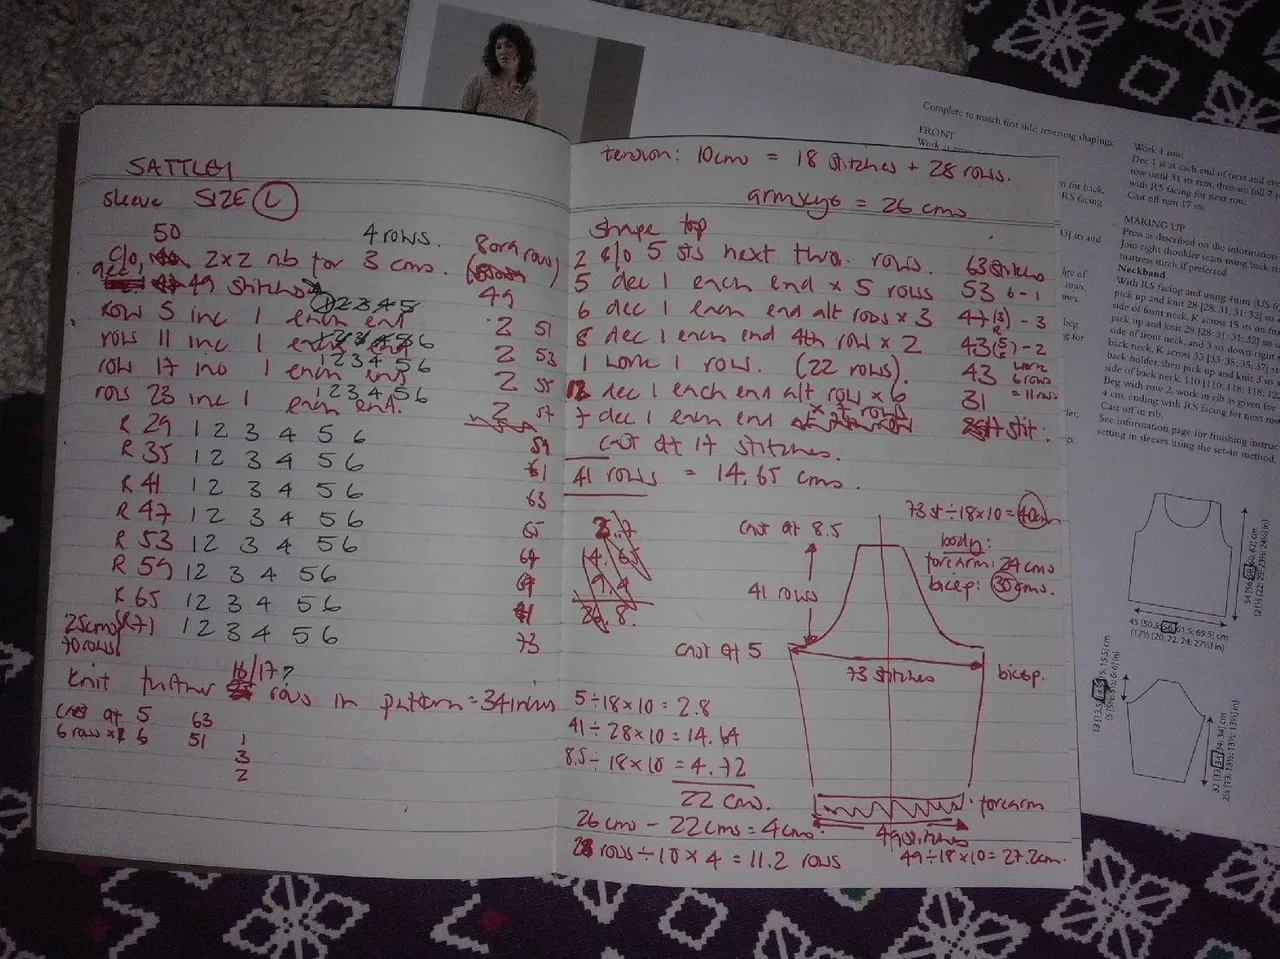
My calculations. The lefthand page has the rows set out for increasing the sleeve width from the cuff to under the arm - this is so I can keep check on both sleeves! As I complete each row, I cross the number with a forward slash for one sleeve and a backward slash for the second sleeve.
Before starting the sleeves, I did pin together the shoulder seams and try on the cardigan for fit. I was really pleased with it: it covers the full bust without straining 😵, and the shoulders and neckline sit snugly.
I have sewn together one shoulder seam with back stitch, but the second one will have to wait until I am in the right mood. In other garments, I have used the three needle cast off technique (two needles with each of the back or front shoulder stitches; and one needle for picking up the corresponding stitch from each needle and knitting together before casting off). I prefer this for a smoother seam (and less sewing up).
The sleeves shouldn't take too long to knit - they are fairly small pieces. Then there will just be inserting the sleeves into the cardigan : I prefer to do this in the round, so I would sew the underarm seam to create a tube and then set the tube into the armscye. Then finishing the neckline and adding the buttons! Yay!
Saturday Savers Club
I run a savings club every Saturday over on the @eddie-earner account. We're aiming to save £670 ($800) by the end of the year using the 365 day savings challenge. You can join any time of the year and set your own goals and plans (some people are saving Hive, others Bitcoin, some their local currency). We share savings tips and there's a free giveaway every week.
Three things newbies should do in their first week and, for most things, forever afterwards!