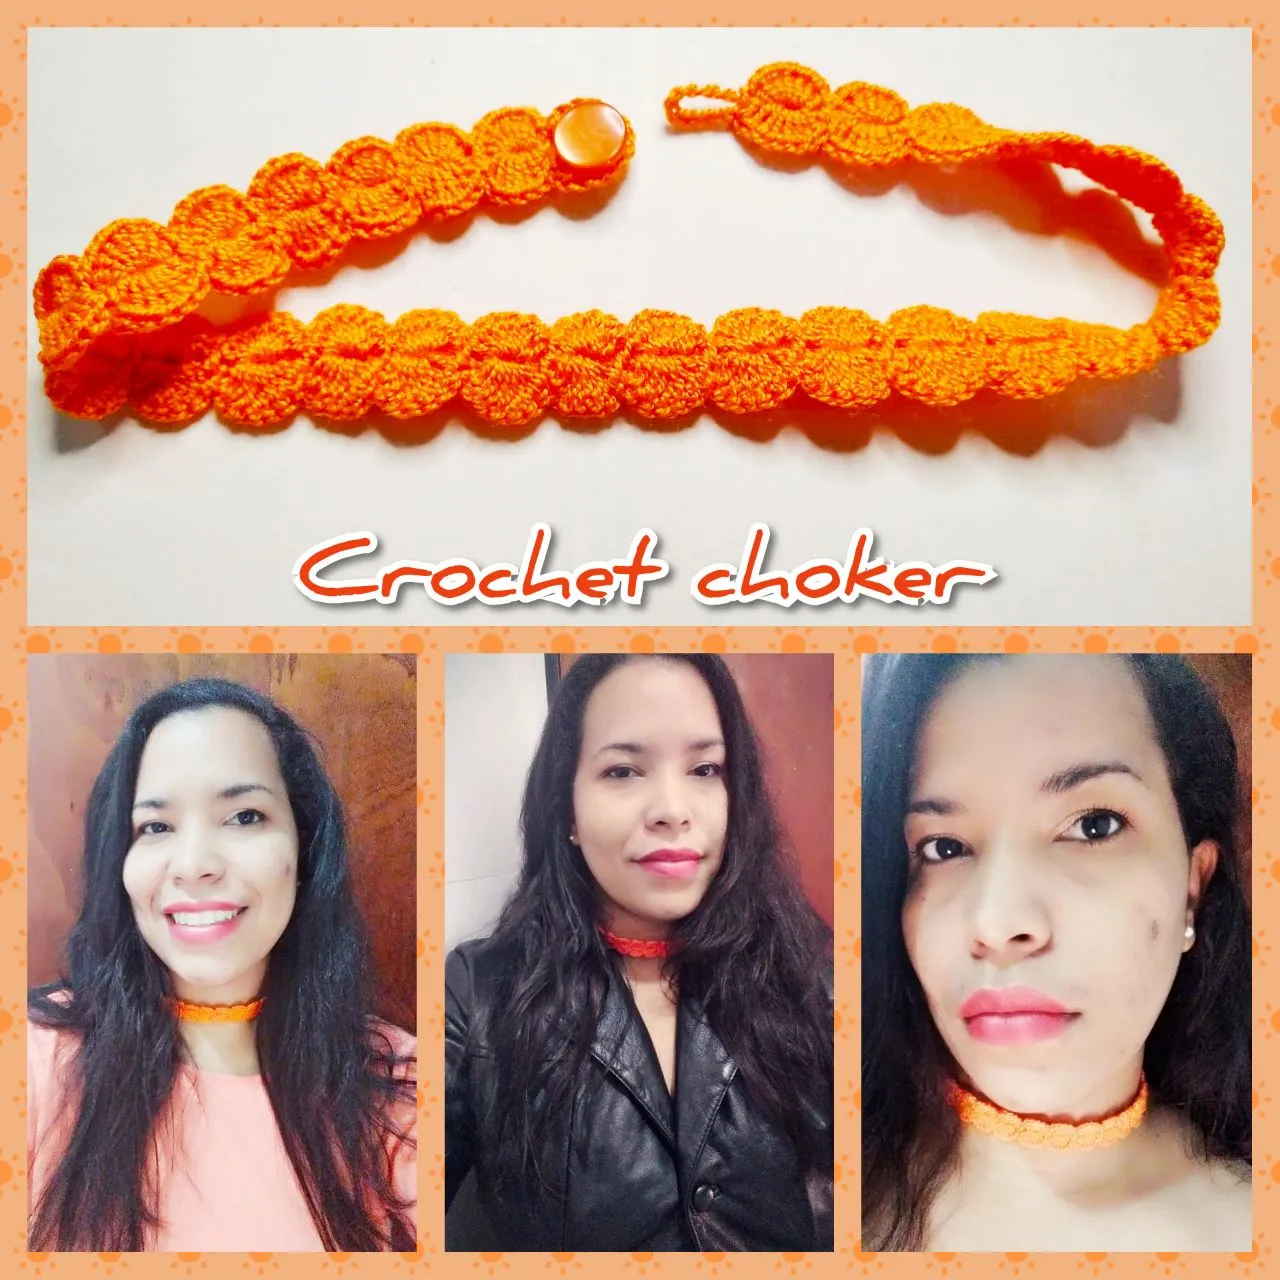
Feliz día amigos, amantes de los pequeños detalles en crochet, como siempre muy entusiasmada de compartir con ustedes mi amor por el crochet. El día de hoy les traigo la elaboración de una gargantilla o choker en crochet, muy fácil de hacer, ya que los puntos realizados son puntos muy básicos y aunque seas principiante en el mundo del crochet podrás realizarlo sin ninguna dificultad.
Happy day friends, lovers of small crochet details, as always very excited to share with you my love for crochet. Today I bring you the elaboration of a crochet choker, very easy to make, because the stitches are very basic and even if you are a beginner in the world of crochet you can make it without any difficulty.
Materiales.
Hilo de crochet.
Aguja de Crochet.
Un botón.
Hilo de coser.
Aguja de coser.
Materials.
Crochet thread.
Crochet needle.
A button.
Sewing thread.
Sewing needle.
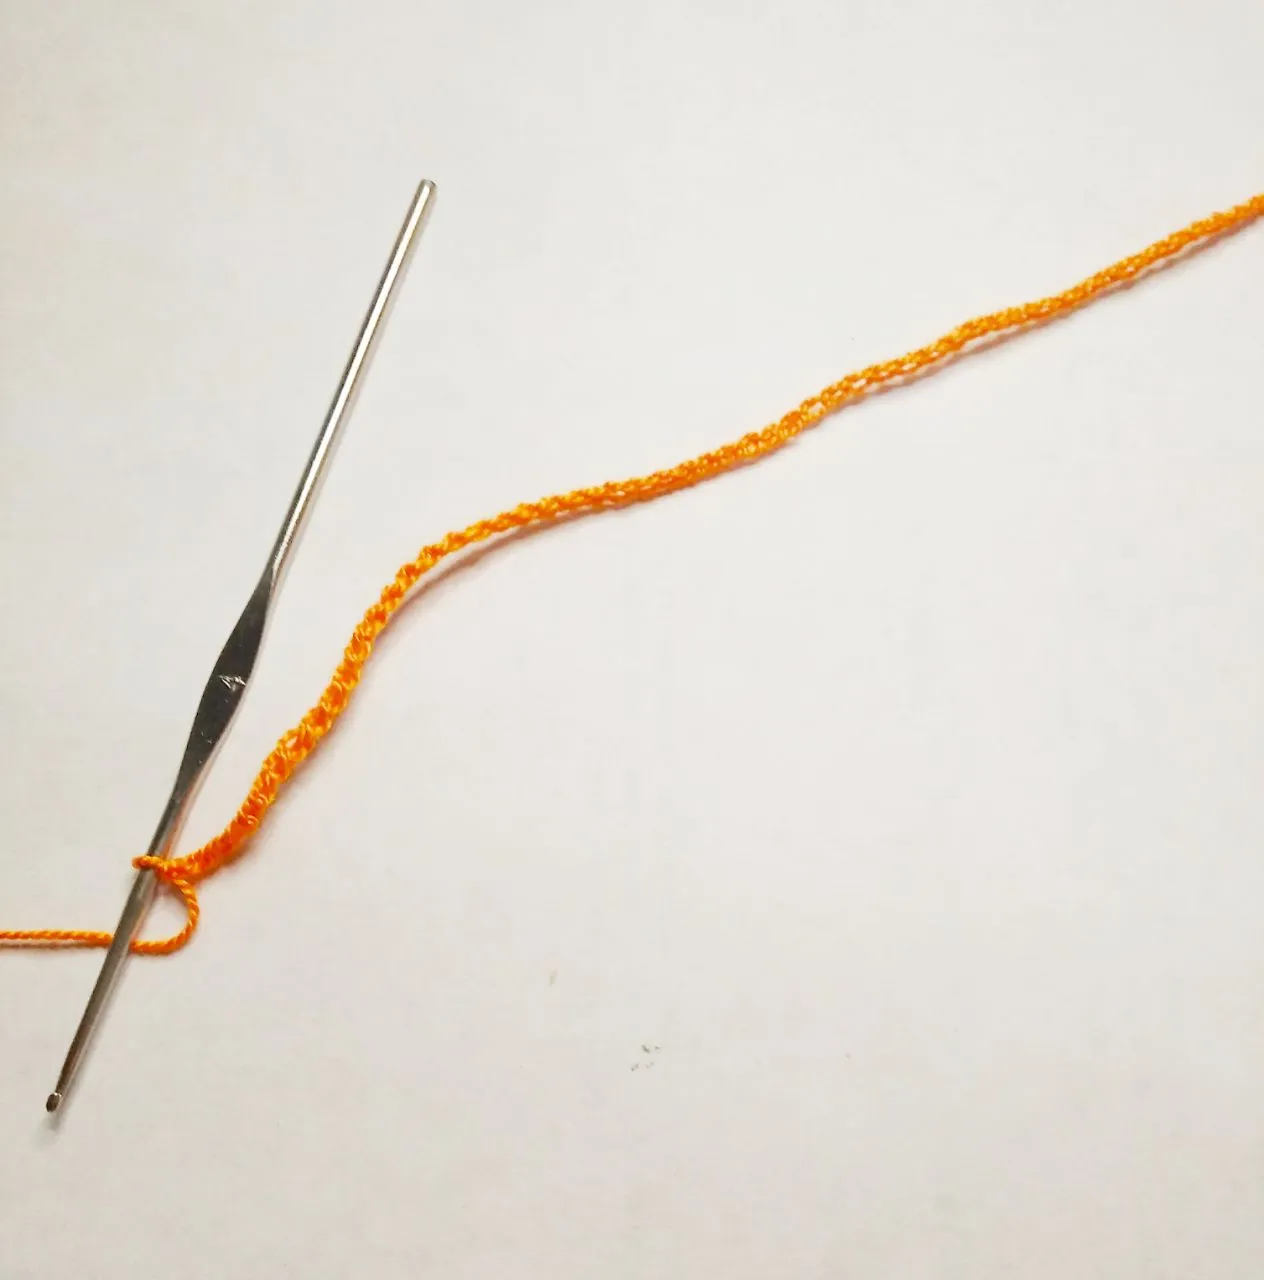
Comienzo tejiendo cadenetas hasta alcanzar unos de 35 cm.
de largo.
I start knitting chain stitches until I reach a length of 35 cm.
long.
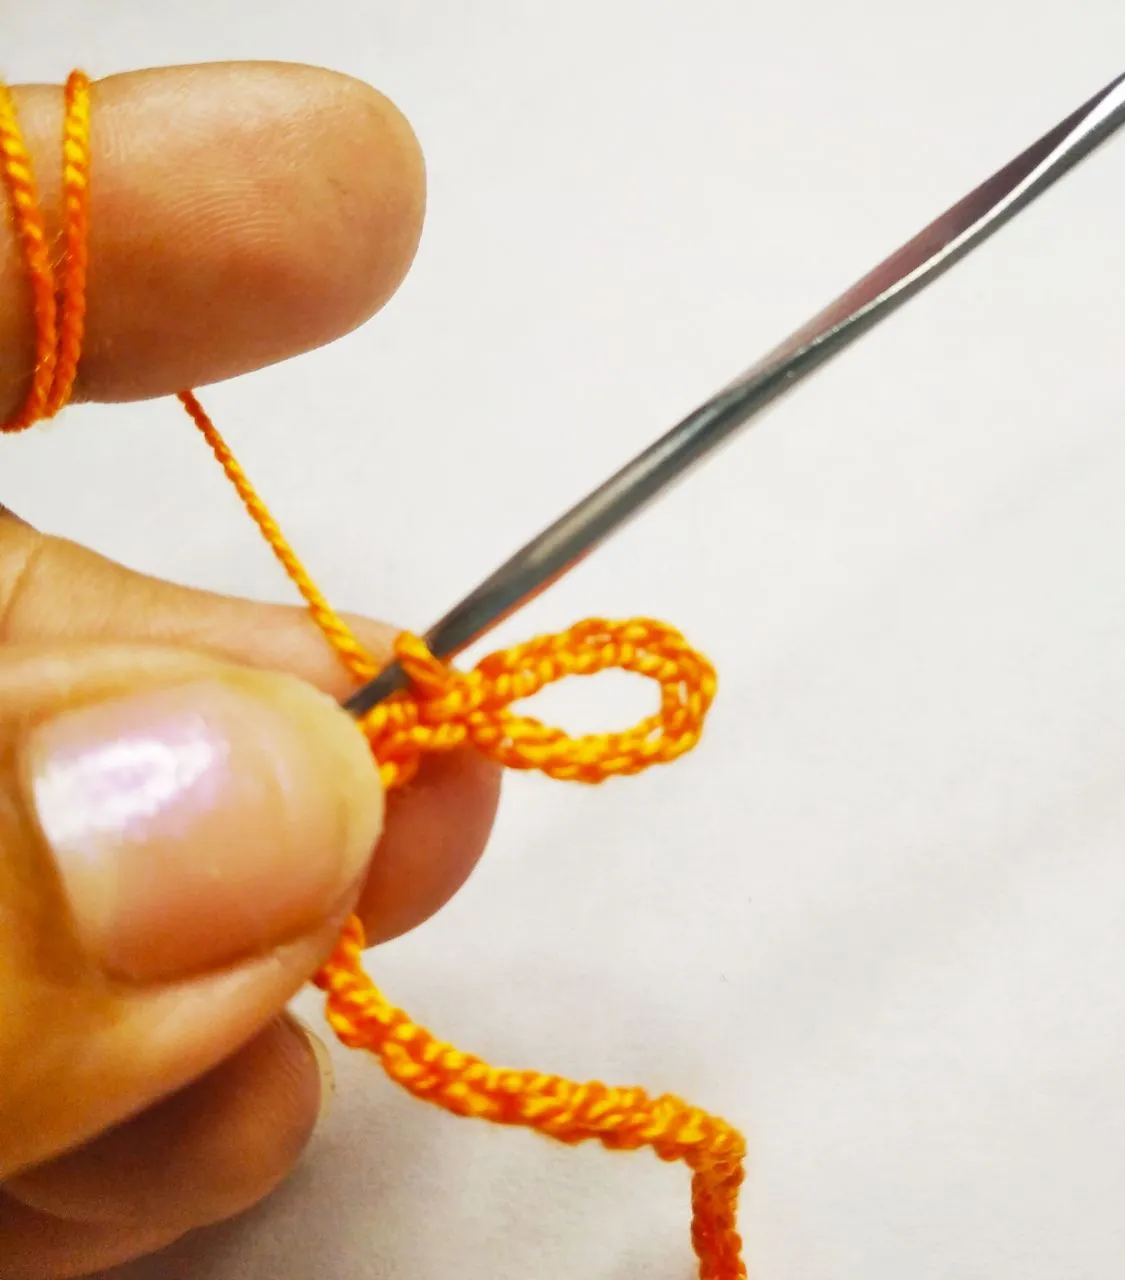
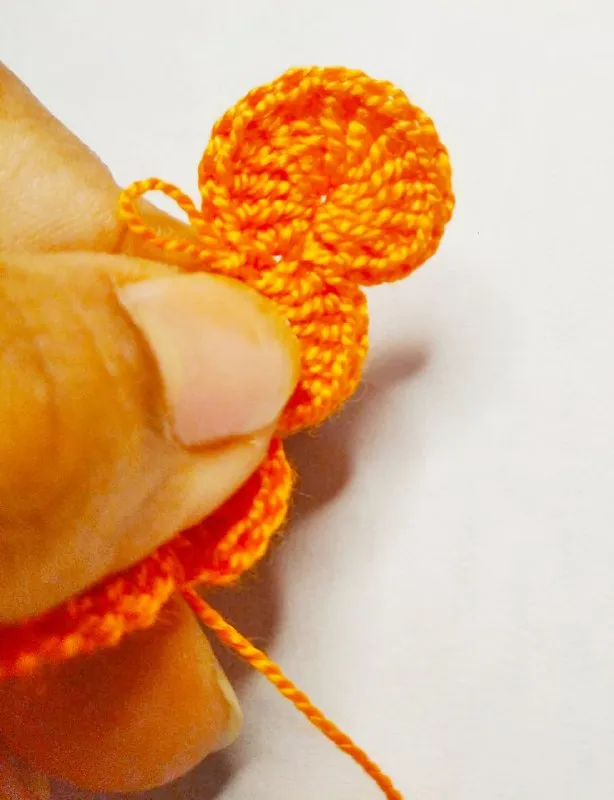
Realizo 10 cadenetas más y uno con un punto deslizado formando una especie de ojal para un botón, que al finalizar me servirá de broche.
I make 10 more chain stitches and one with a slipped stitch forming a kind of buttonhole for a button, which will serve as a brooch at the end.
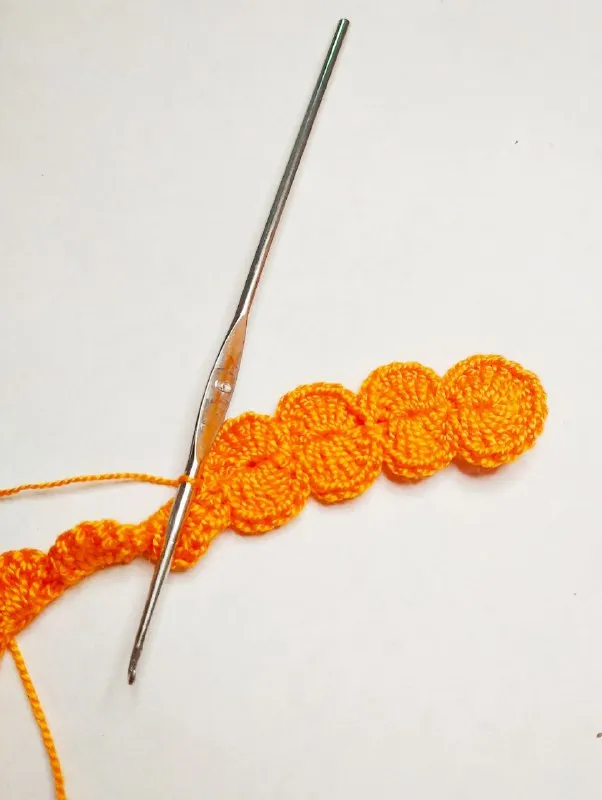
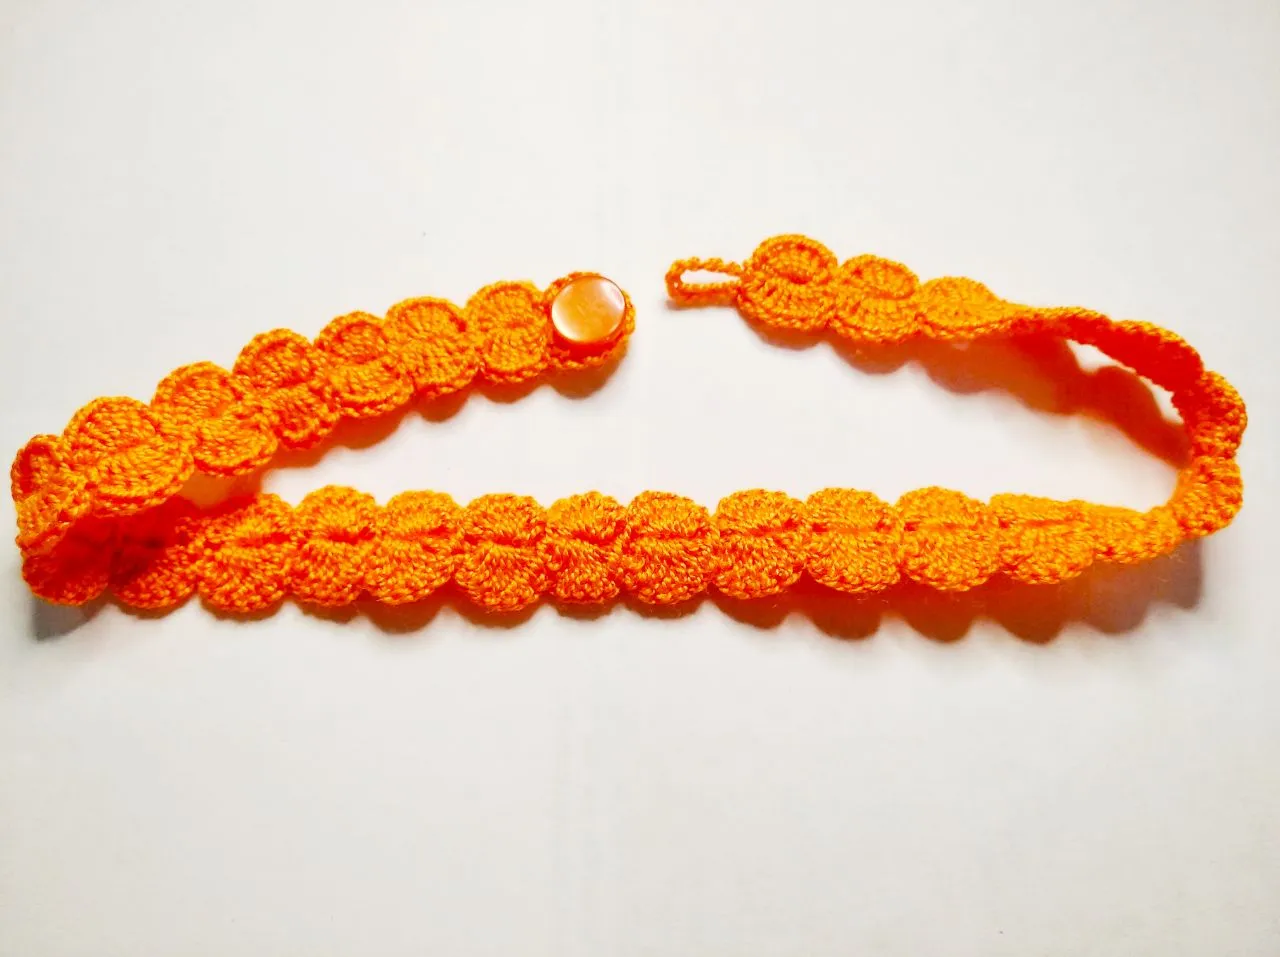
Luego del punto deslizado dejo un punto cadena libre y ensarto en el siguiente punto, 7 puntos altos formando un punto concha de 7 puntos altos, y dejo de separación un punto cadena, para que así el punto concha no se vea apretado y sigo con un punto deslizado y repito hasta terminar toda la cadeneta.
After the slip stitch, I leave a chain stitch free and thread on the next stitch, 7 double crochet stitches forming a shell stitch of 7 double crochet stitches, and I leave a chain stitch to separate it, so that the shell stitch does not look tight and I continue with a slip stitch and repeat until the whole chain stitch is finished.
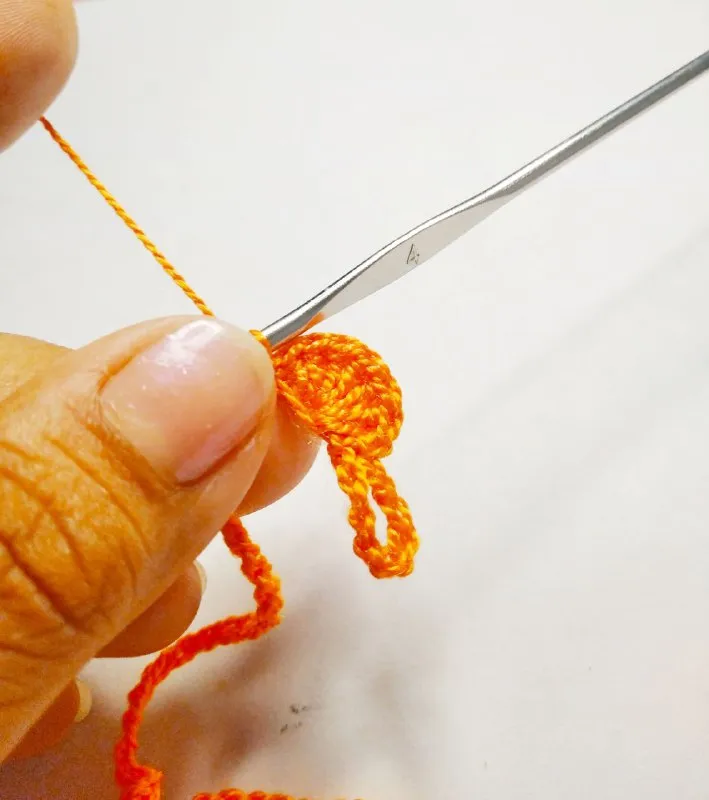
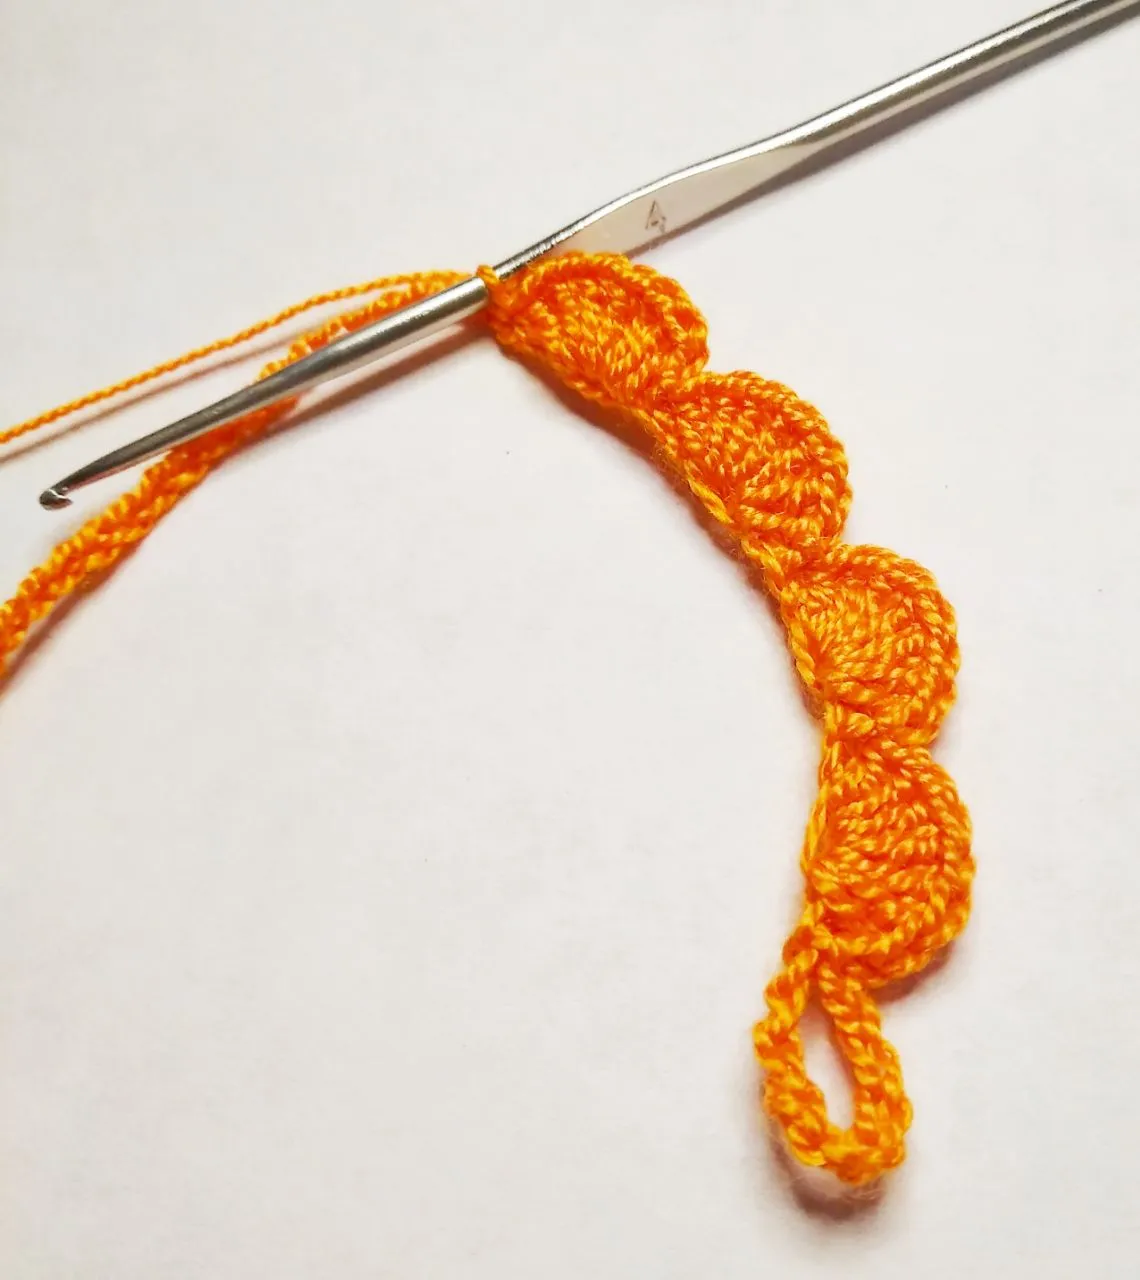
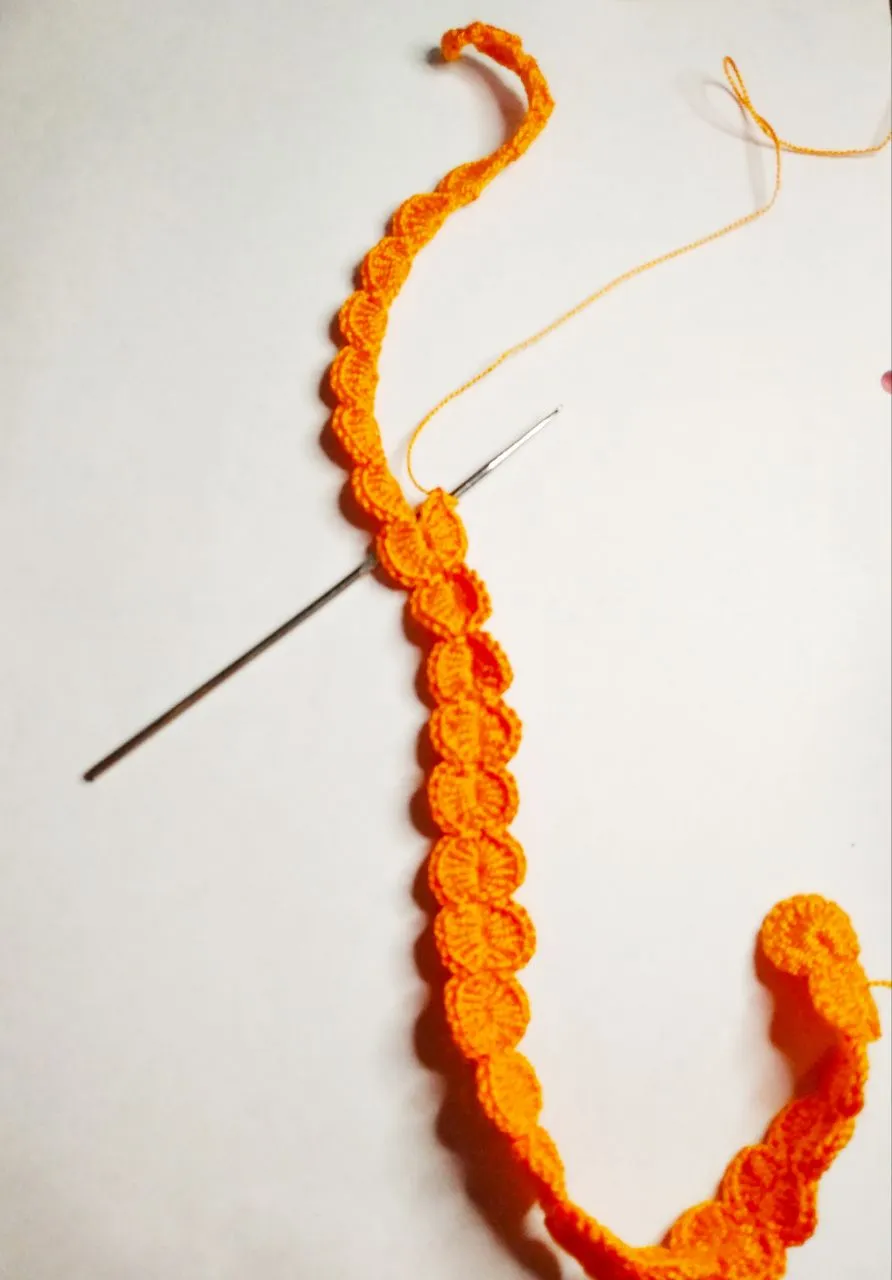
Al llegar al último punto cadena relleno con 14 puntos altos formando así una especie de circulo y luego realizo un punto deslizado coincidiendo con el punto deslizado anterior. y así logro darle la vuelta a mi base de cadenetas.
When I reach the last chain stitch, I fill with 14 double crochet stitches forming a kind of circle and then I make a slip stitch coinciding with the previous slip stitch, thus turning my chain stitch base.
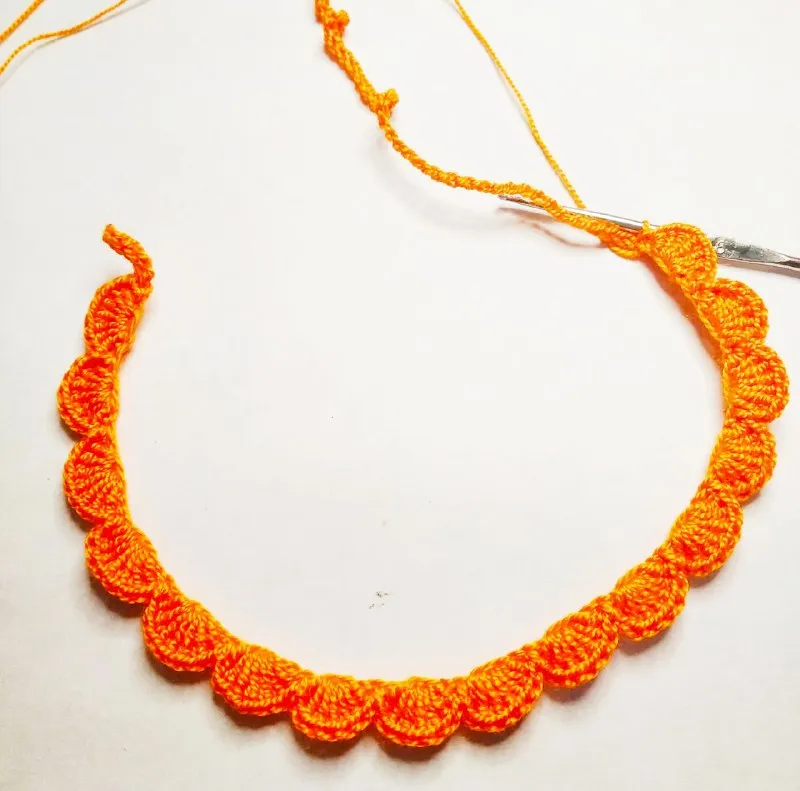
Sigo rellenado de 7 puntos altos cada cadeneta y realizo un punto deslizado, es decir repito los pasos anteriores.
I continue by filling in each chain with 7 double crochet stitches and then I make a slip stitch, i.e. I repeat the previous steps.
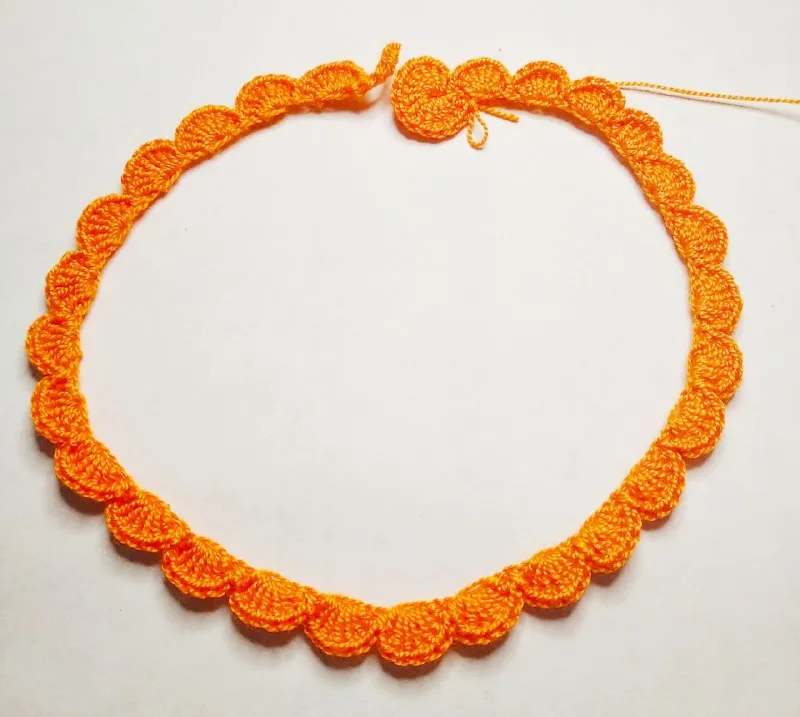
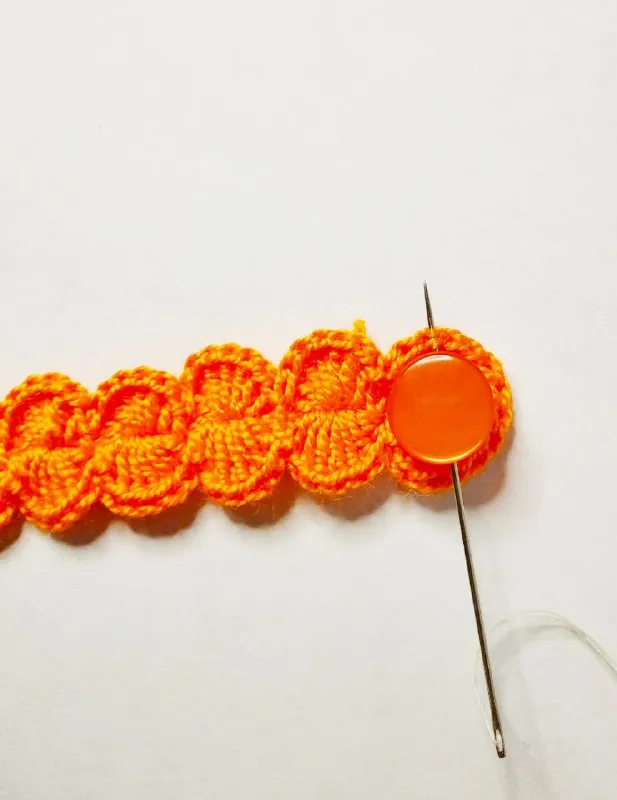
Al terminar la vuelta, con ayuda de una aguja de coser e hilo le pego un botón que nos servirá de broche. Y lista mi gargantilla ochoker en crochet.
At the end of the turn, with the help of a sewing needle and thread I attach a button that will serve as a brooch. And my crochet choker is ready.
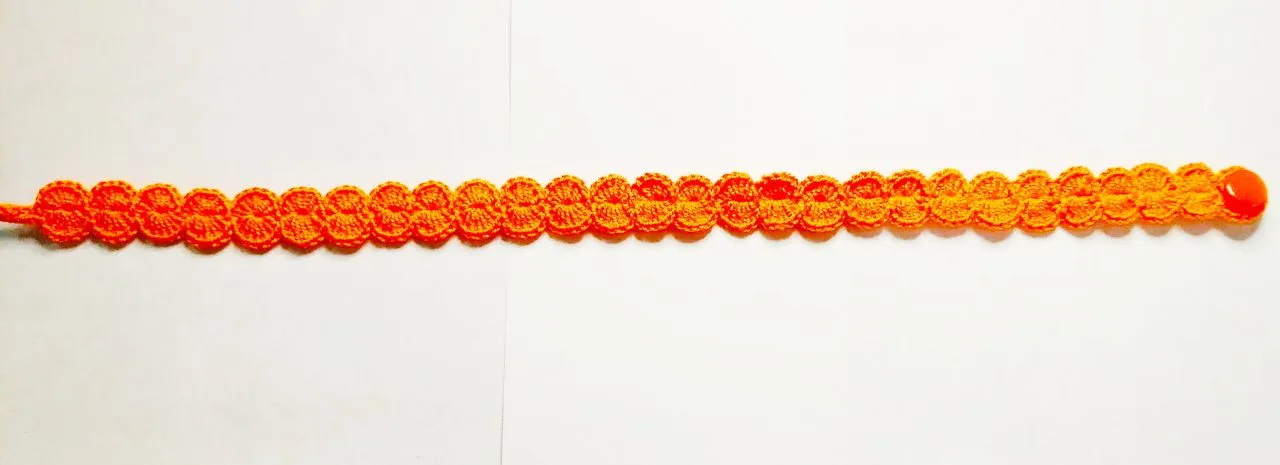
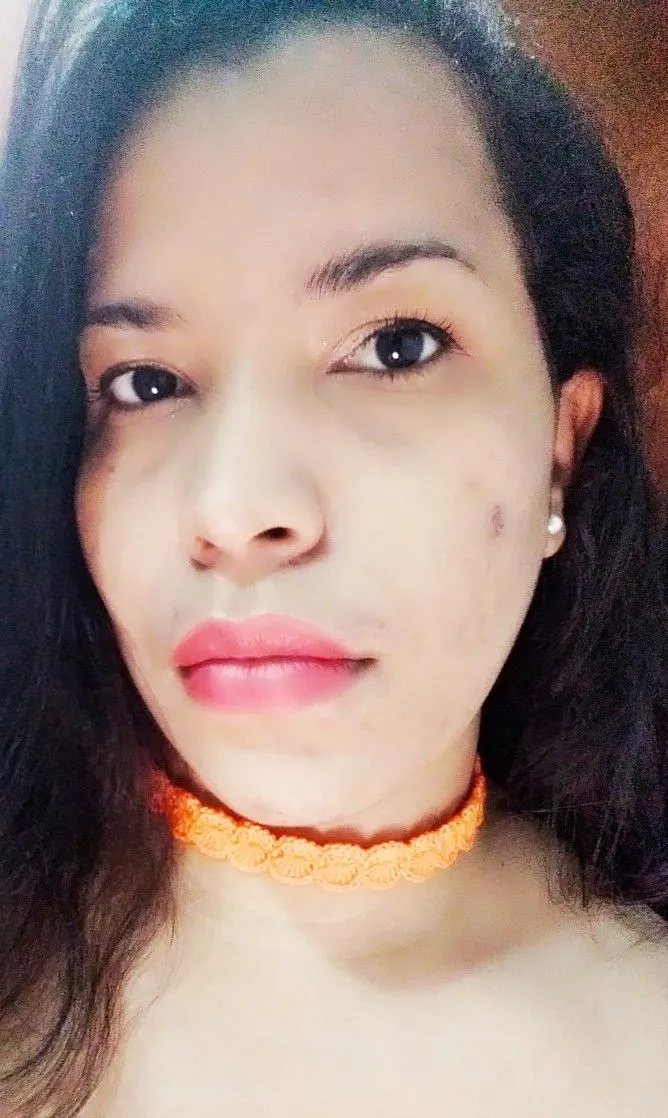
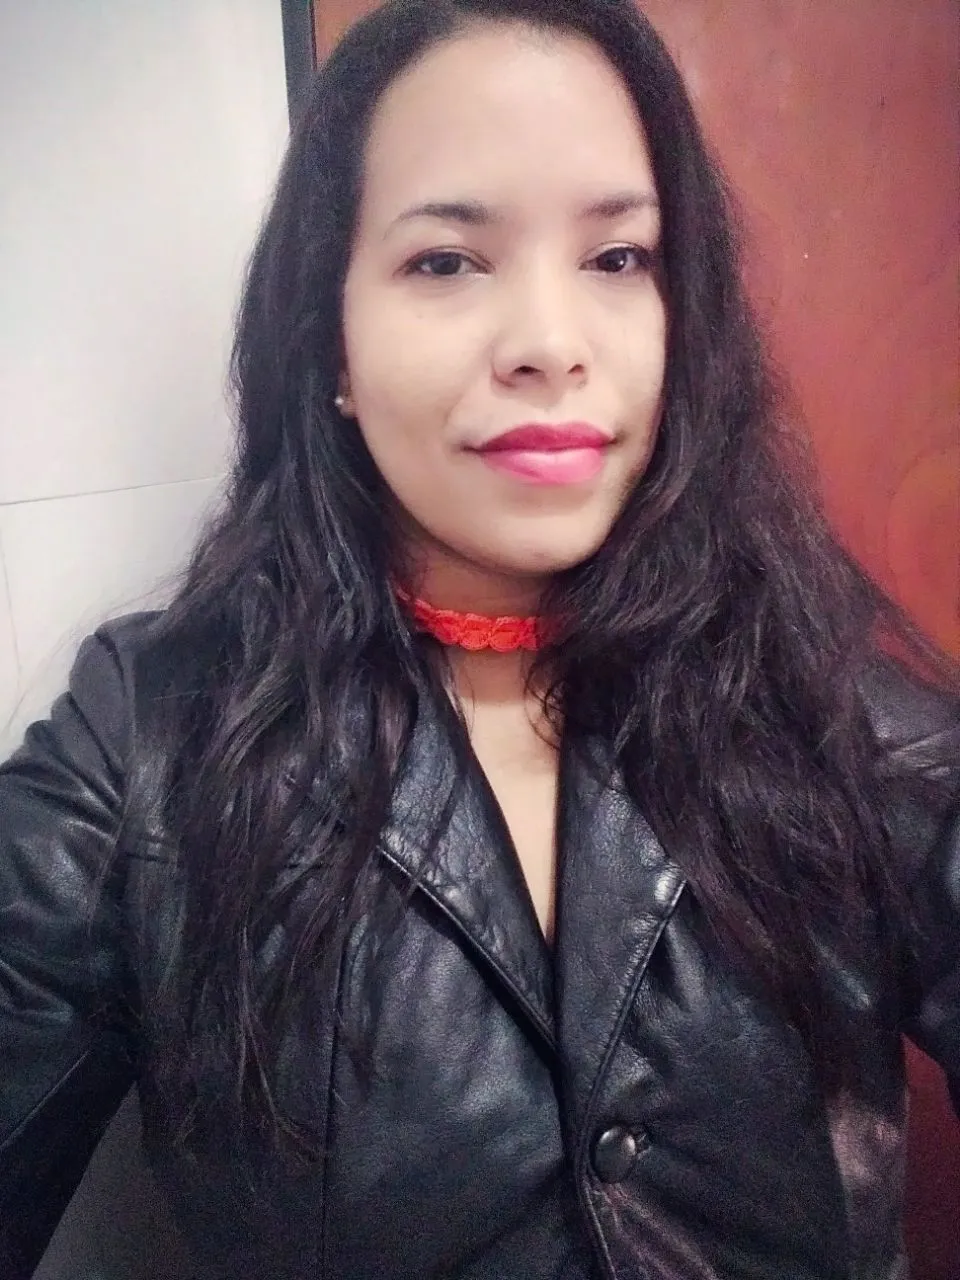
Perfecta para usarla con cualquier look.
Perfect to wear with any look.

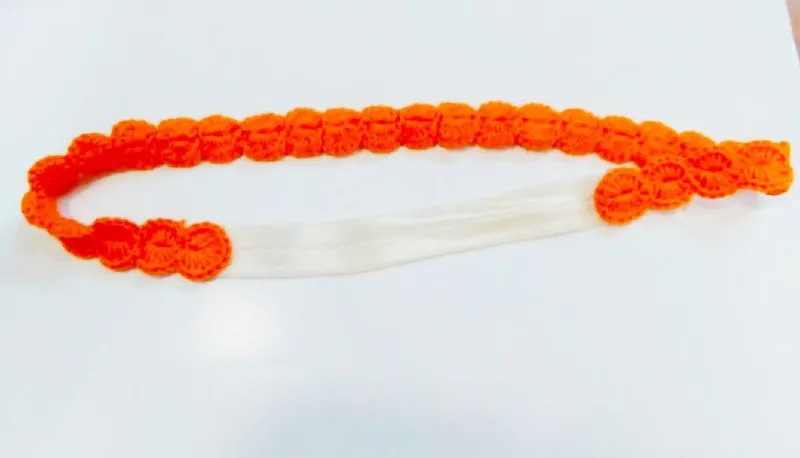
Esta pieza es muy fácil de hacer y también puedes darle otras utilidades como por ejemplo de pulsera o porque no de cintillo pegándole una cinta elástica quedara perfecta.
This piece is very easy to make and you can also use it as a bracelet or even as a headband by gluing an elastic band to it.
Espero les haya gustado.
Muchas gracias por leerme
I hope you liked it.
Thank you very much for reading